Better super late than never, right?
Starting late summer, I asked my boyfriend to start thinking about what he would like to be for Halloween. Call me crazy, but I love Halloween and the process of planning and making costumes, and these things take a lot of time, money and effort to get together.
He shared my excitement about the idea and thought that he would like to be something that went along with the whole Halloween theme: darkness, evil spirits, mystery, haunting, horror. Being a vampire was perfect! Plus, we wanted to do a couples themed costume, so I thought it would be perfect for me to have the opportunity to make an outfit for myself that depicted Victorian era vampires as in movies and TV such as Bram Stoker’s Dracula, Interview With a Vampire or one of our favorite TV series, Penny Dreadful.
So, I happily got to work planning our costumes. We thought about what outfits would be appropriate for the characters and what accessories and makeup that we would like to add.
Luckily, the big 4 sewing pattern companies bank on people like me who like to not only sew their own clothing and home decor, but also who like to create their own custom costumes and not succumb to the mass-produced, cheaply made store bought Halloween costumes out there. These pattern companies have done a great job building hundreds of choices for patterns for costumes for men, women, kids and even pets! All kids of characters to make ranging from TV and movie favorites, period costumes and accessories, superheros and classic Halloween favorites. I pick up these kinds of patterns when they are on sale for $0.99 or $1.99 at Joann’s just in case I think I will ever want to sew them for myself or someone else. They are actually quite exciting to read through, can be somewhat complicated, and I learn valuable sewing techniques from them (I know, call me a geek, I’m totally OK with that!).
I looked through the costume sewing patterns that I have on hand and collected over the years, or ones that I might need to buy, what fabrics that I had in my stash that would work for the costumes.
I chose to use these patterns for Count Dracula as the cape had a nice, wide collar and a lining, and the vest had nice options to look like the proper gentleman that he wanted to portray:
I decided that I was going to take the time to make this lovely Victorian Steam-Punk-esque ensemble consisting of a bolero jacket, a corset, over skirt and long walking skirt:

Plus, I wanted to make a hat or hair accessory to top it all off. I ran out of time before the Halloween event and party that we were going to to complete the hat, but it is so pretty and I know that I will wear with this costume or others in the future, so I will finish it eventually:
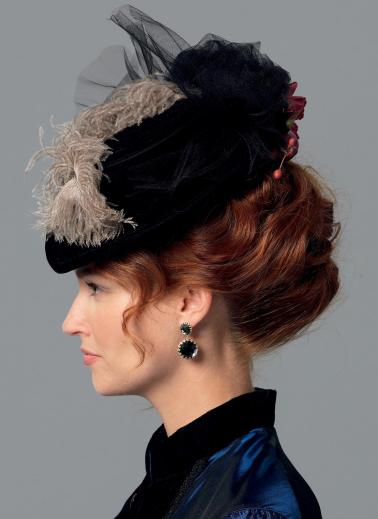
After we settled on the sewing patterns to use, I rummaged through my fabric stash to see if I had anything that I could use for these costumes. All I could find that I had enough of in my stash was enough fabric for linings and some interfacing. The rest of the yardage would have to be purchased new.
The Count’s Cape:
Tom’s costume was first in line. We headed out together to Fabric Depot with a 40% off coupon and the patterns in hand to look for fabrics. He chose a lovely black satin for the outside of the cape and a gorgeous deep burgundy for the lining. Also, we found a very nice silver paisley brocade for his vest. We waited on buying the velvet for the collar of the jacket as I had some velvet in mind for the collar of my little bolero that I had seen at Jo-Ann Fabrics.
For the cape, we weren’t wanting the pointy edges of the bottom as the pattern came, so I created a smoothly curved hem using my curved ruler.

Cape pattern as it was originally drafted. The hem is silly I think, or at least not appropriate for Dracula!
For the most part, I used my serger to sew together the long, straight seams of the cape. As many steps in sewing costumes, I tend to take short cuts and not spend the time doing couture finishes or do any hand sewing where the machines can do all the work. I figure why put in too much time if the costume is only going to be worn a few times and construction is not a priority.

Serging the cape together.
Here is the collar under way:

Dracula’s collar with stiff interfacing applied
and sewing the cape to the collar:
I also sewed in a little hanging chain between the collar and cape body for ease of hanging the cape later:
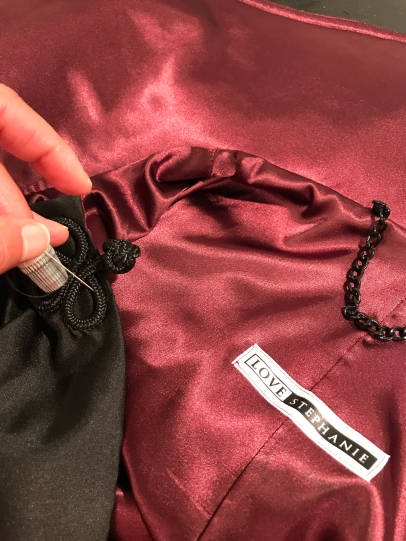
Hand sewing on the frog closure of the cape.
Once the cape was complete, I got started his vest.
The Count’s Vest:
He chose a nice grey brocade fabric for the vest, and I had black velvet to use on my outfit for the collar. I had scraps of lining material on hand to line the vest, so we were good to go.

Paisley brocade for his vest
I don’t have any other photos of the vest in progress (you’d probably get bored anyway), but all went quite well and smoothly with the vest and it’s a relatively quick garment to make.

Voila!
Now, on to my outfit!
The Countess’ Outfit:
First came my bolero jacket. I found enough of this lovely red, black and silver paisley brocade fabric at Joann’s Fabrics (using a 50% off coupon-woo hoo!) to make the jacket and over skirt. I just love these colors together, and it looked great with the black velvet, black lace, the red silk dupioni for the corset, black soutache and beaded trim and the coordinating black skirt.
I threw together a mini mood board and illustration just for fun:
Let the sewing begin!
The Bolero Jacket:

Basting stitches in a bright contrasting thread for ease of removal later
Here are some of the cutting out, sewing and adding trim details to the jacket:
The sleeve of the jacket has a gathered puffy sleeve, but I felt it was a tad limp on it’s own, so I found some stiff tulle in my scrap bin and made a little sleeve head to insert into the sleeves and make them “puffier”. I had seen this technique in my Susan Khalje Bridal Couture sewing book, so I pulled that out and found the section on creating this type of effect for a sleeve. It was a very easy addition to make and just gave that extra support to the sleeve puff as seen in the photo below:
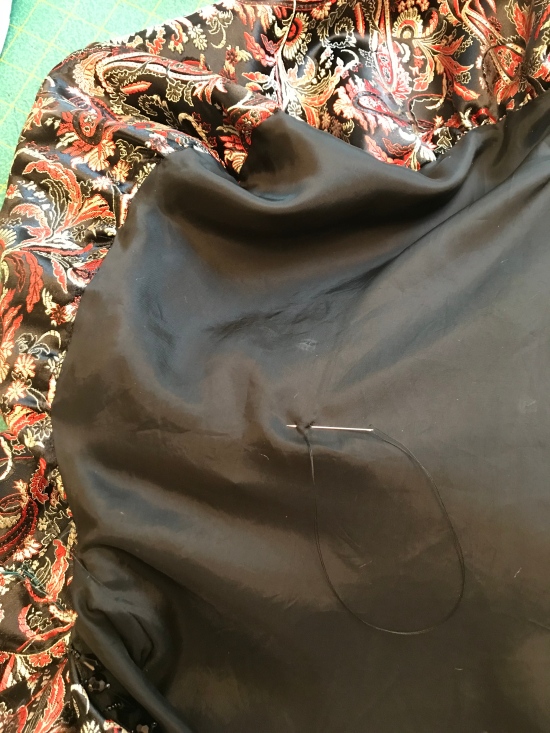
Next came the collar facing and lining. I used a nice bemberg rayon lining that I had as a scrap in by scrap bin, and a lovely black velvet that I also got at Joann’s (also with a coupon, never shop there without one!). I really loved how this was coming together!

The outer jacket, with lace and soutache trim added, and the lining and facing ready to be sewed together.

She’s just about complete, just the beaded trim at the hem of the jacket to be carefully sewn on as pinned.

The final touch: sewing on the beaded trim.
The Corset:
I had some beautiful bright lipstick red silk dupioni that I had in my fabric stash from several years ago, originally meant for a Valentine’s Day dress that never materialized, but was perfect for my costume corset, so why not use it!
I started out measuring the pattern to ensure a good fit with the corset, and I was good to go with the pattern size 12. I’ve made a proper corset before in a great class at Portland Fashion Institute a few years back, and considered just using the pattern from the class, however I felt that the corset that came with this pattern was easier with no busk closure and very little, if any, hand sewing (again, Halloween costume making short cuts).
Cutting out was fast and easy:
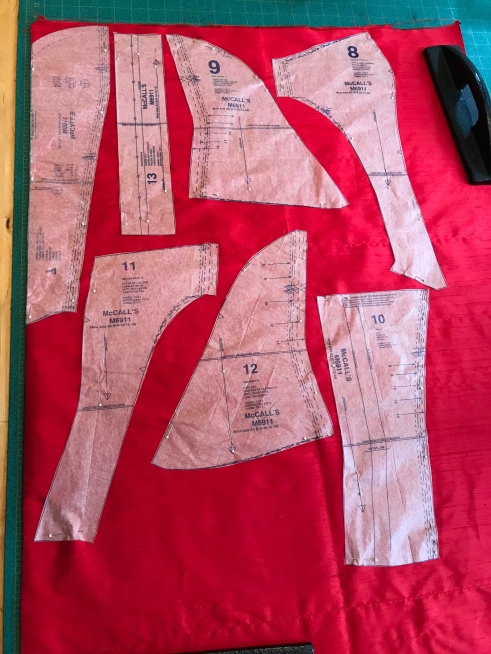

and sewing the entire thing was pretty easy, considering I used ridgeline for the corset boning which can be just sewn right into and through to the fabric, saving lots of time of making boning channels and such.

This type of boning I am not actually crazy about as it is pretty sharp at the ends and I didn’t take the time to make any tips on the end to prevent the poke through on the corset (ouwie!). Next corset will have to be done much more carefully.
Once the corset was complete, it was time to start on the one piece I have never made before: the over skirt.
The Overskirt:

Made by creating a smaller lining and creating pleats and tucks on the back of the skirt.
This bustled-effect overskirt was one item that I have never made before, but it was quite fun and interesting, yet time-consuming, to create. It consists of 4 layers of fabric; the outer, fashion fabric, two layers of tulle that creates the stiffer, pouffy effect, and a lining for the back of the skirt, and just the outer layer and lining for the front, draped piece. The outer layer and the two tulle layers of the back of the skirt are cut from the same pattern pieces, and the lining is a smaller piece that fits to the other layers once all the pleating and tucking have been done.
After the tedious basting, tacking up, pleating and sewing, the pouf of the back of the skirt is complete and ready to be attached to the lining, and then the front is attached to the back, then the waistband is sewn to both.
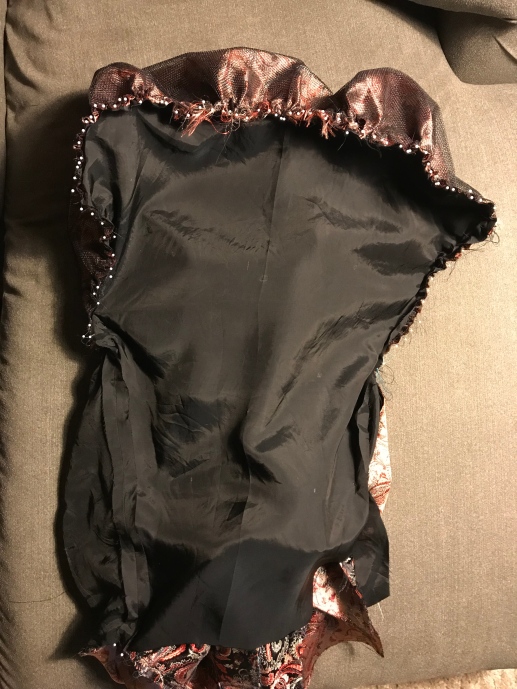
The smaller lining of the back of the skirt pinned to the tucked and pleated overskirt, ready to sew right sides together.
Additional tacking is done to the layers of the skirt to form the pickups of the overskirt
After many hours of sewing, the overskirt (my favorite part of this outfit by the way!) was complete and I could move on to the final piece of my outfit.

The bolero and matching overskirt
The Walking Skirt:
This was perhaps one of the easier parts of the outfit, although it consumed a great deal of fabric, the seams are straightforward and there are not a lot of pattern pieces to deal with. The skirt is fully lined and has an optional trim design on the bottom. I considered adding side seam pockets to this skirt, but decided not to for time sake. I did add 5 inches to the length for my height however.
I sewed the seams of this skirt mostly on my serger which was great. I basted the braided trim on by hand before machine sewing it on to ensure the placement was as I desired. I would have added more trim, and might do so at another time, but after shopping at two of the Joann Fabrics stores in my area, they were sold out of this soutache trim (as with many other items at this busy sewing time of year).

I love the length and slight train of this skirt and wish I could wear these kind of elegant clothes more often. Alas, with modern day lifestyles and fashions, this is just not going to happen. I suppose that is what costumes are for!


So finally, our costumes were complete. I didn’t get to finish the hat which was kind of sad, however I did have a feathered headband thing that I made for another costume a few years ago that worked just right for a hair accessory. Completing the looks with fangs, makeup, a wig and my new cute Victorian-esqe booties, we were ready to go!

Overall, these were really fun and exciting costumes to create, and I also learned a good deal about clothing construction and my own capabilities. We had a great time wearing them out to two different Halloween events and got tons of compliments on our outfits, so that is what I consider slam dunk sewing!

Happy Halloween!


