I am no business expert, but I have learned a thing or two about running a small business since I went full time as a entrepreneur nearly two years ago. I have learned that it takes long hours, major sacrifices, dedication, hard work and finding ways to get things done faster, better and more efficiently all while trying to spend less money and earn more.
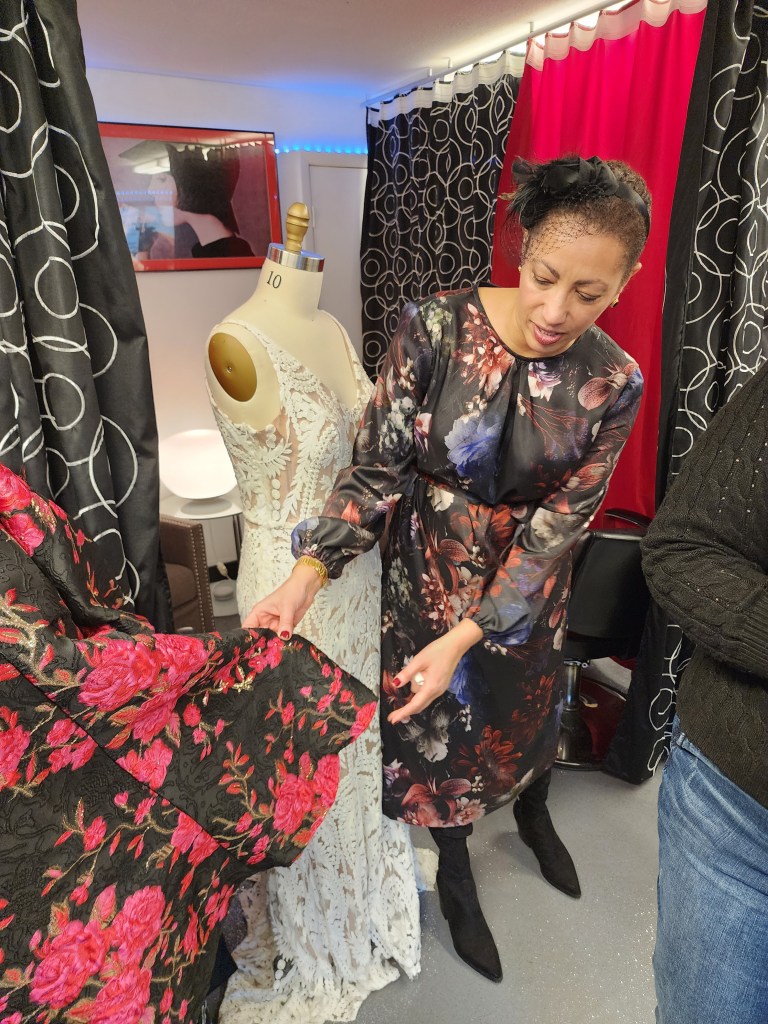
That’s me: Boss Babe Stephanie showing off some of my work!
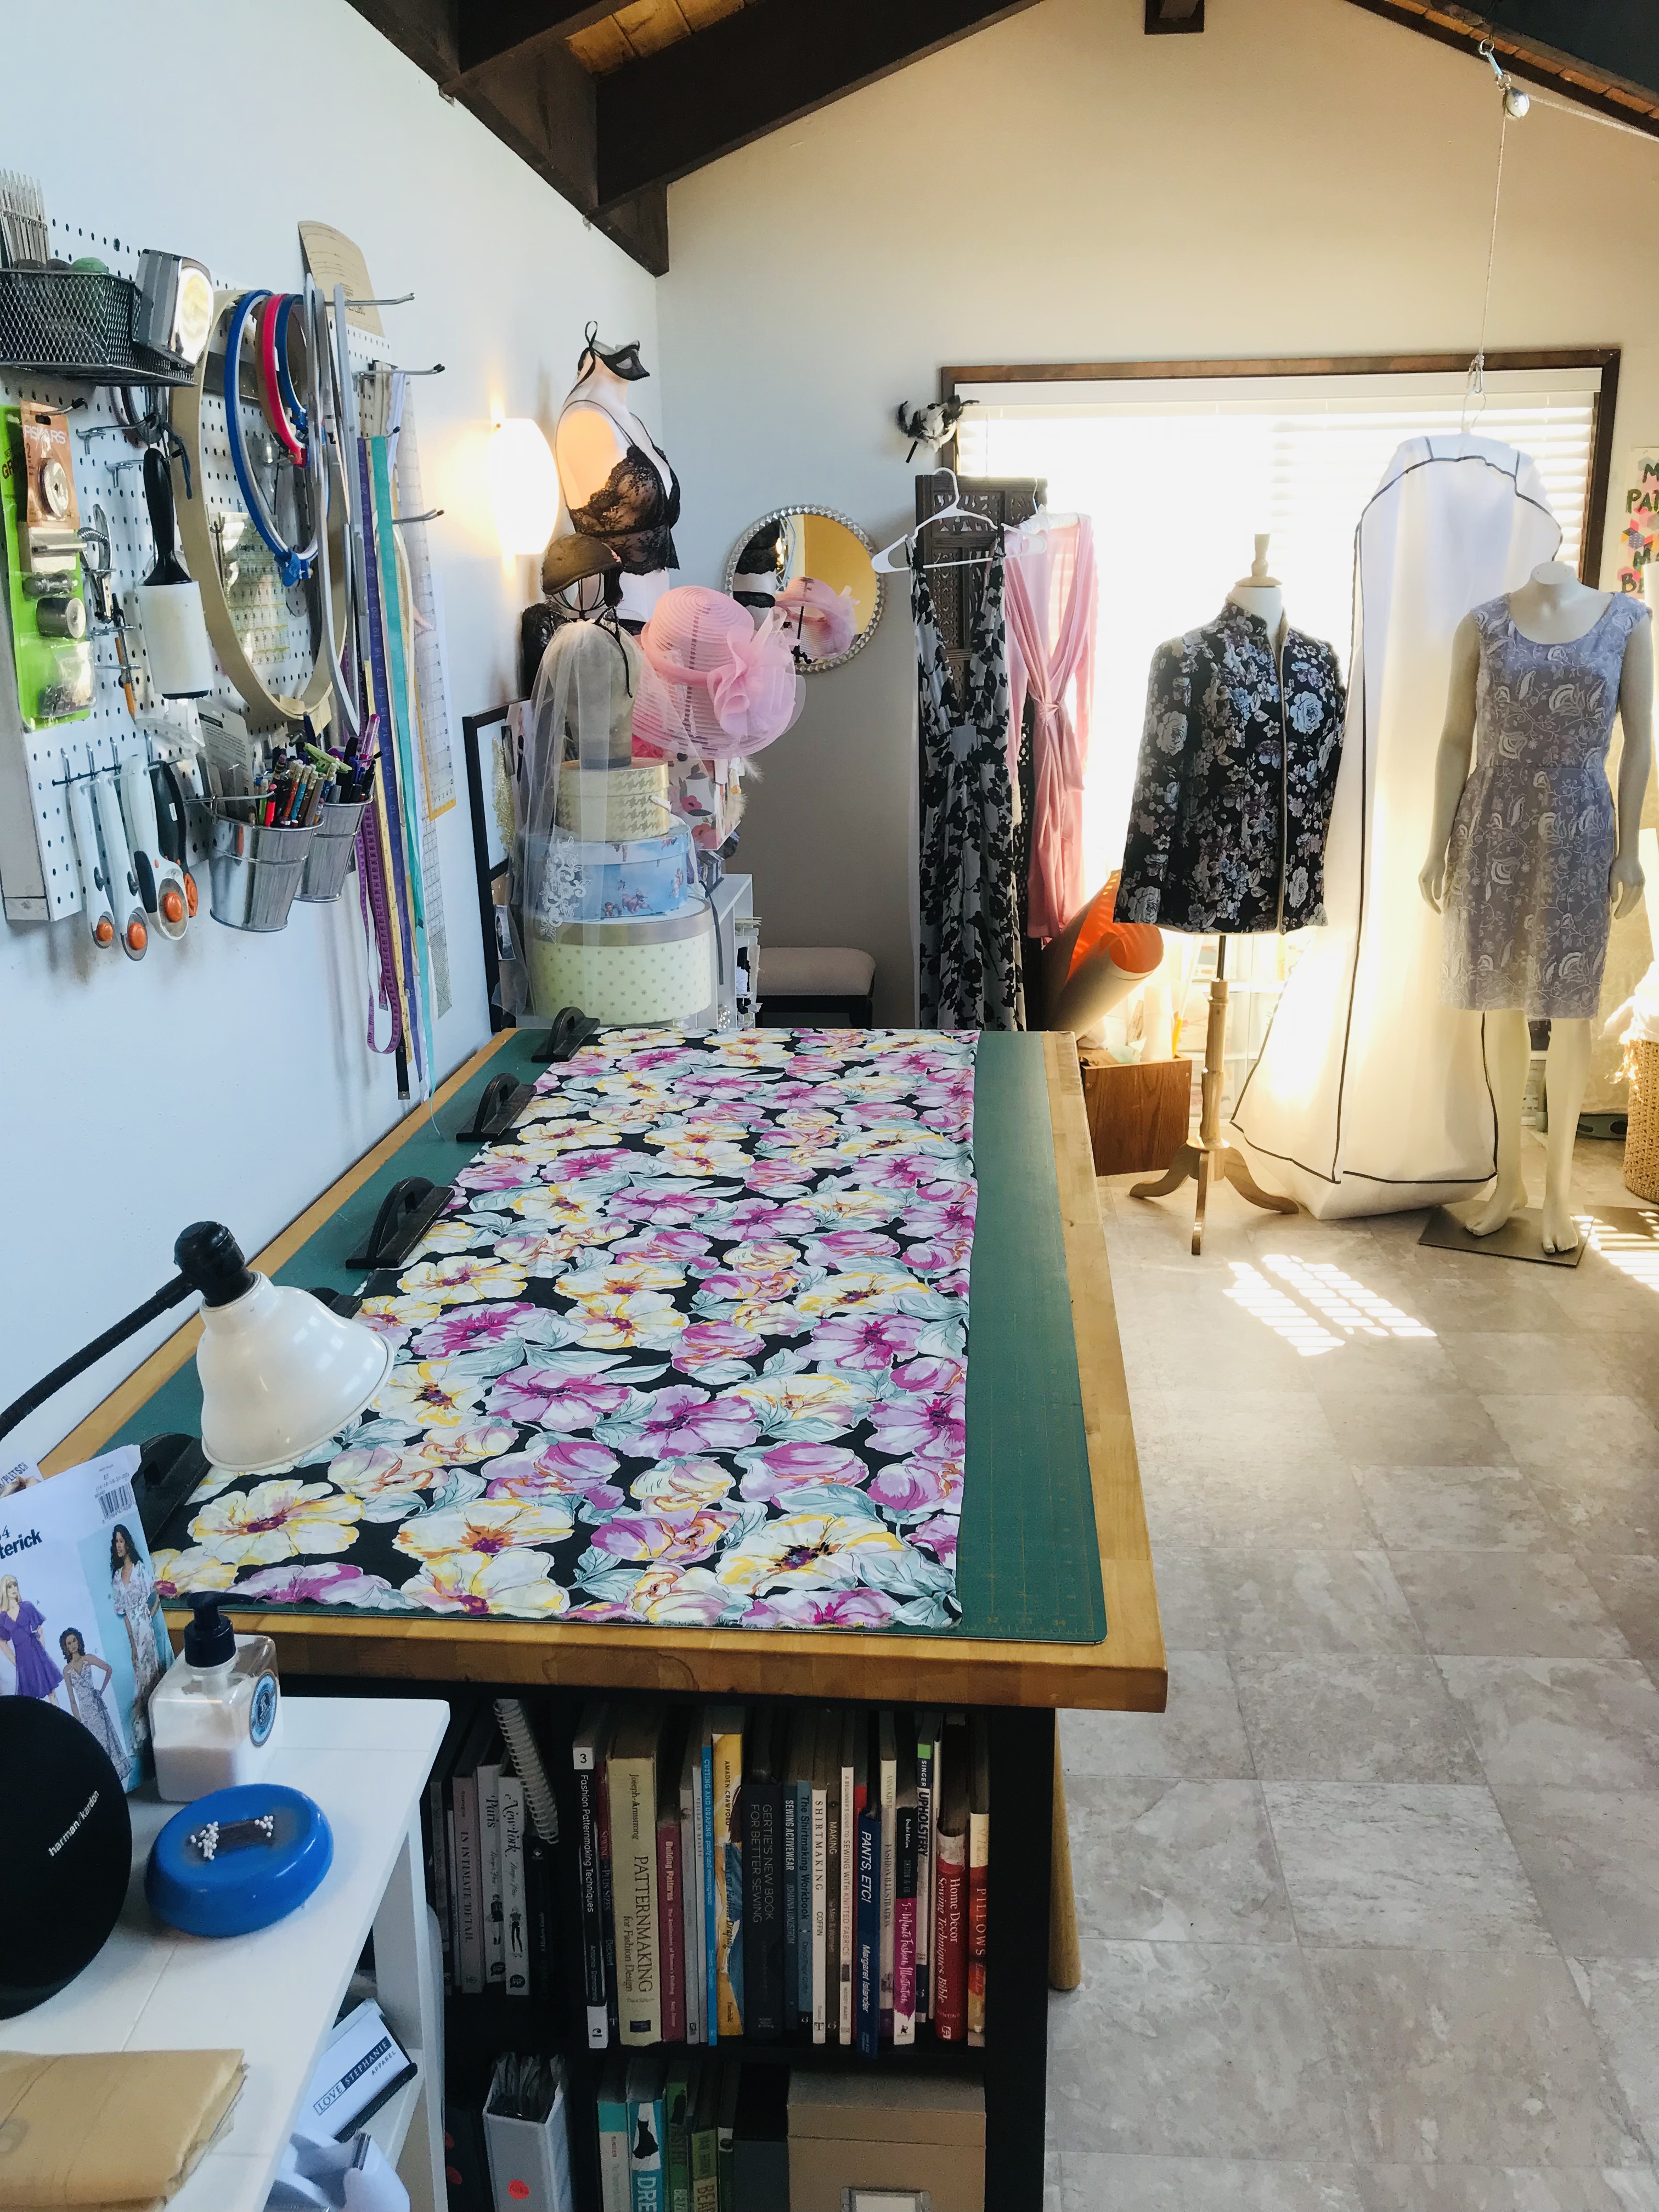
I am very proud of my business and what I do. I am a designer seamstress and dressmaker, creating custom garments for ladies focused on special occasion, bridal and tailored apparel and offer bridal alterations. I have managed to grow a client base, hone in on couture and quality sewing techniques, get the word out on what I do, decline work that doesn’t fall into my specialties or timeline (or that I simply don’t want to do), open a little boutique space outside of my home, price my products and services accordingly, earn more money year over year, and become better and more experienced with each job that I take in.
I have paid off all of my debt, paid off my car in full, and have a little chunk of savings in the bank that I would like to invest back into in my business.
I need a plan!
It’s now up to me to work on my business plan and focus in on how to grow my custom sewing & dressmaking business. I need to sit down and figure out the smartest means where I should invest my money, and that starts with a plan. I have read several books and articles on running and growing a small business, now I need to take what I have learned and apply it to my situation.
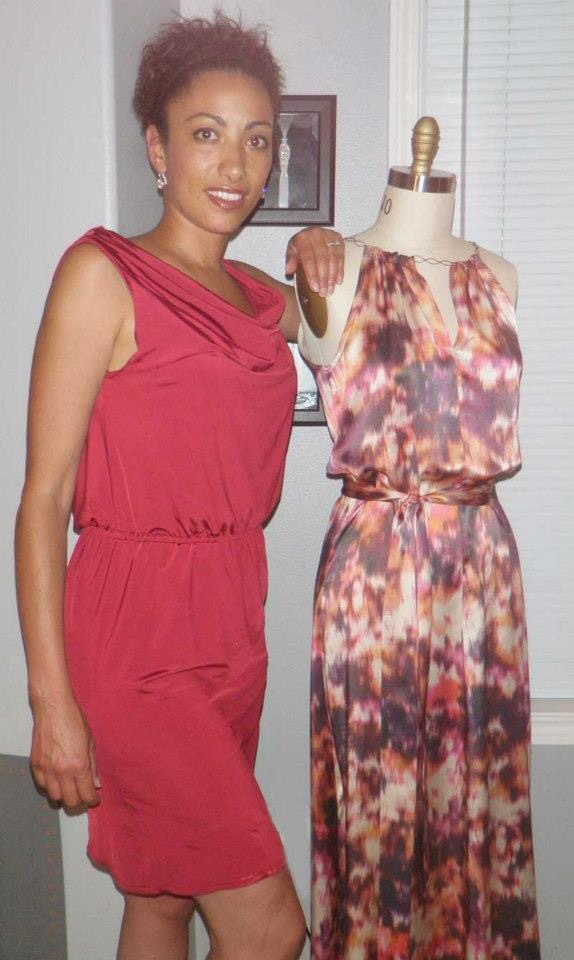
A quick shot of me and a couple of dresses I made back in 2012
Although I can’t do all of my ideas with the budget that I have, here are some of the specific ones that I have thought about that I can invest in to make my business run smoother, more efficiently, and make a profit:
*new sewing equipment, namely an industrial sewing machine
*take on an intern or part-time contract employee
*hire a professional accountant to handle business finances
*physically (and mentally) declutter & organize
*automate scheduling
*improve website
*invest in and create sellable inventory-manufacture a small collection
*invest in marketing and advertising
*hire a professional photographer
*market and target customer research
*research and development
*foster newness and excitement
*continued education
*travel
*learn from those who are more skilled and experienced than I am
*hold events to attract new clients, thank existing and previous clients
*network
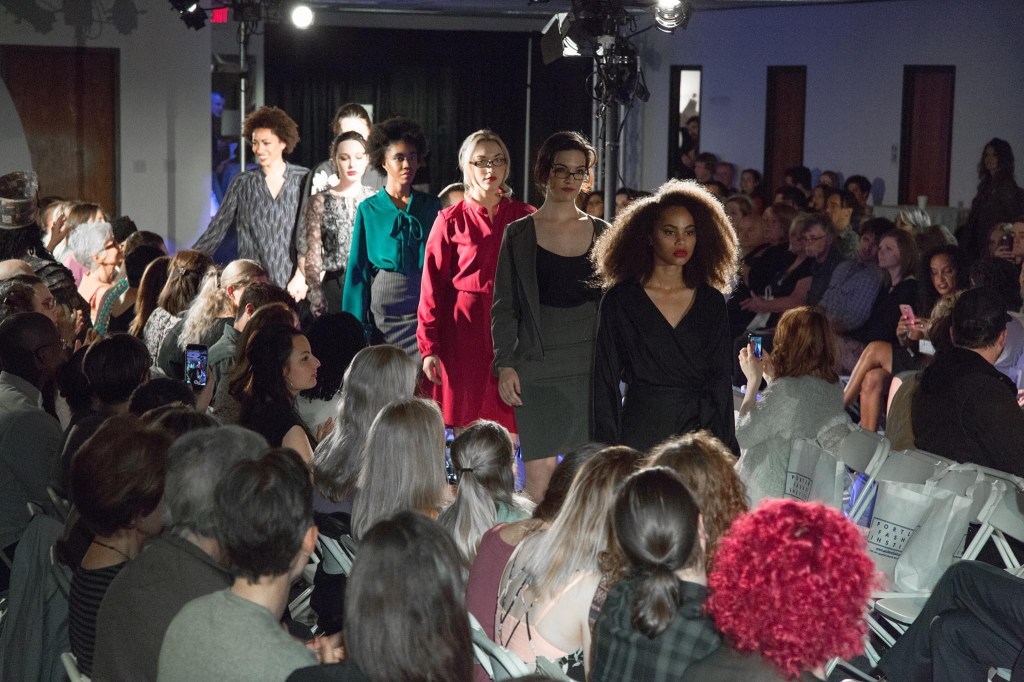
Me and my models walk the runway in my Love, Stephanie designs 2016
Do you have any good advice for growing a business, taking it to the next level with smart investments? Has something worked for you, or held you back from success? I’d love to learn more about it and try to figure out the best ways to take my business to the next level.
Me finishing up gown I made in 2023 for a special lady Michel. She said to me recently “I don’t think I’ve ever felt that gorgeous in a piece of clothing”. Words to live by!
I know I need help and can’t do alone. I also know that there are success stories and big dreams can come true, it just takes hard work, smart decisions and perseverance. And a plan.
This Boss Babe is ready for business!
Meanwhile, I’ll keep on plugging away at my existing client needs, holding up my end of the agreement, while trying to create newness and examples of my potential and sharing with my audience. Soon I will be posting about some lovely projects that I have been working on, but have to hold back the excitement until the client’s special occasion occurs so not to spoil the surprise.
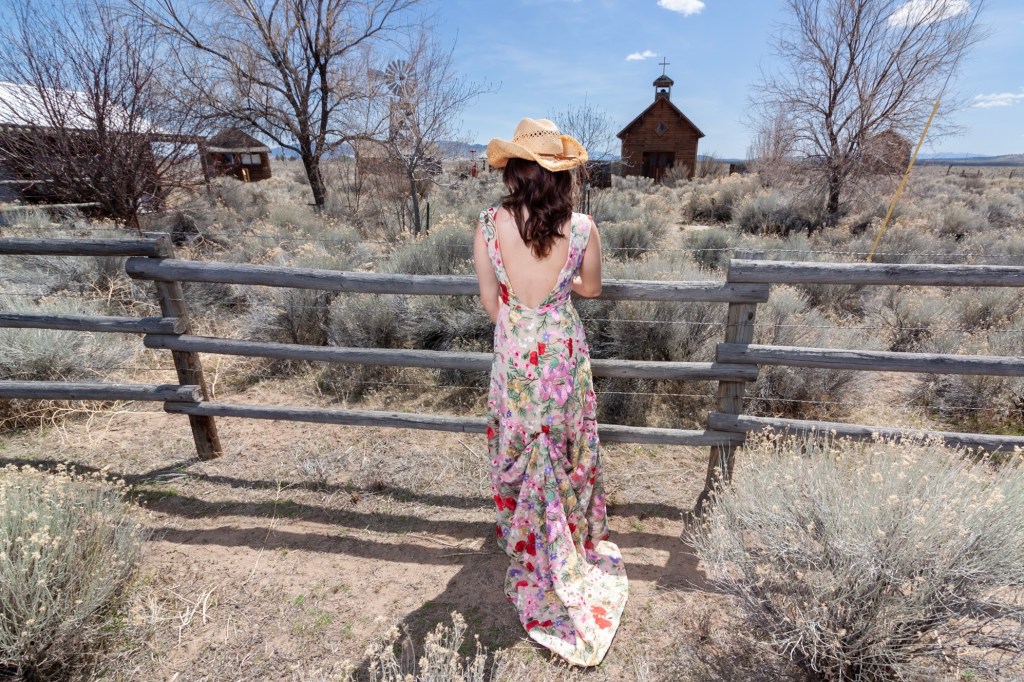
Photo shoot dream project come true of a custom gown I made for lovely Payton. More please!
Life is short, time is limited, and I want to make a difference and impact in this world and in the lives of others. Even just a small part, a little influence, make someone smile and feel beautiful in what they are wearing.
That’s all I want out of this life, at least business-wise. I feel strongly that what you wear says a million words and evokes a thousand emotions. So why not that be me to make that a reality!
One day I got a call from a young lady named Christine, looking for a designer and seamstress to take her already purchased wedding dress, alter it, add to it, and transform it into a unique gown. From the moment she said “I want a colorful wedding!”, I was intrigued and couldn’t wait to hear her ideas!
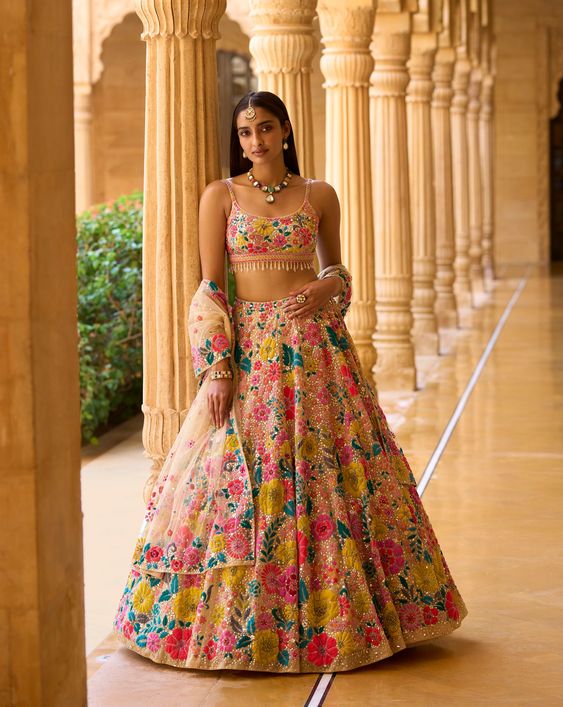
We had our first meeting and she shared her thoughts, bringing along her friend Bonnie for her input and creative ideas. Christine imagined her ballgown shaped wedding dress to be embellished with embroidered flowers, having flowers and greenery appear to “grow” up her dress, somewhat as in this image she pinned on her Pinterest board:
Multi Colored Flora Lehenga Set
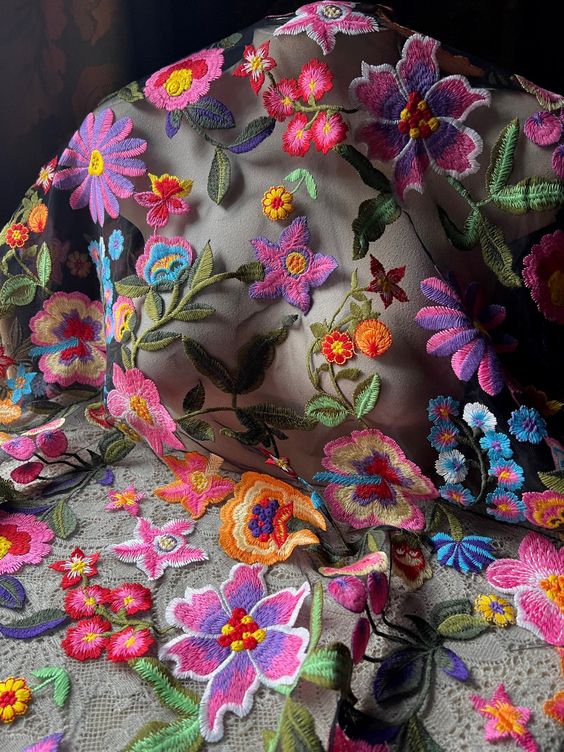
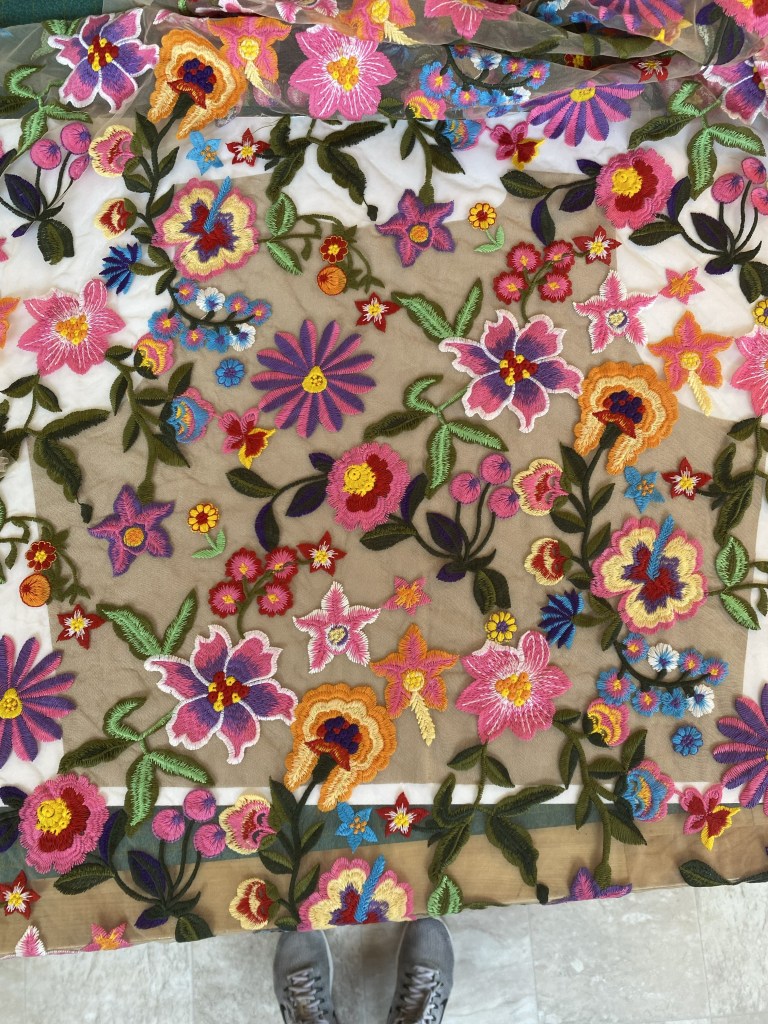
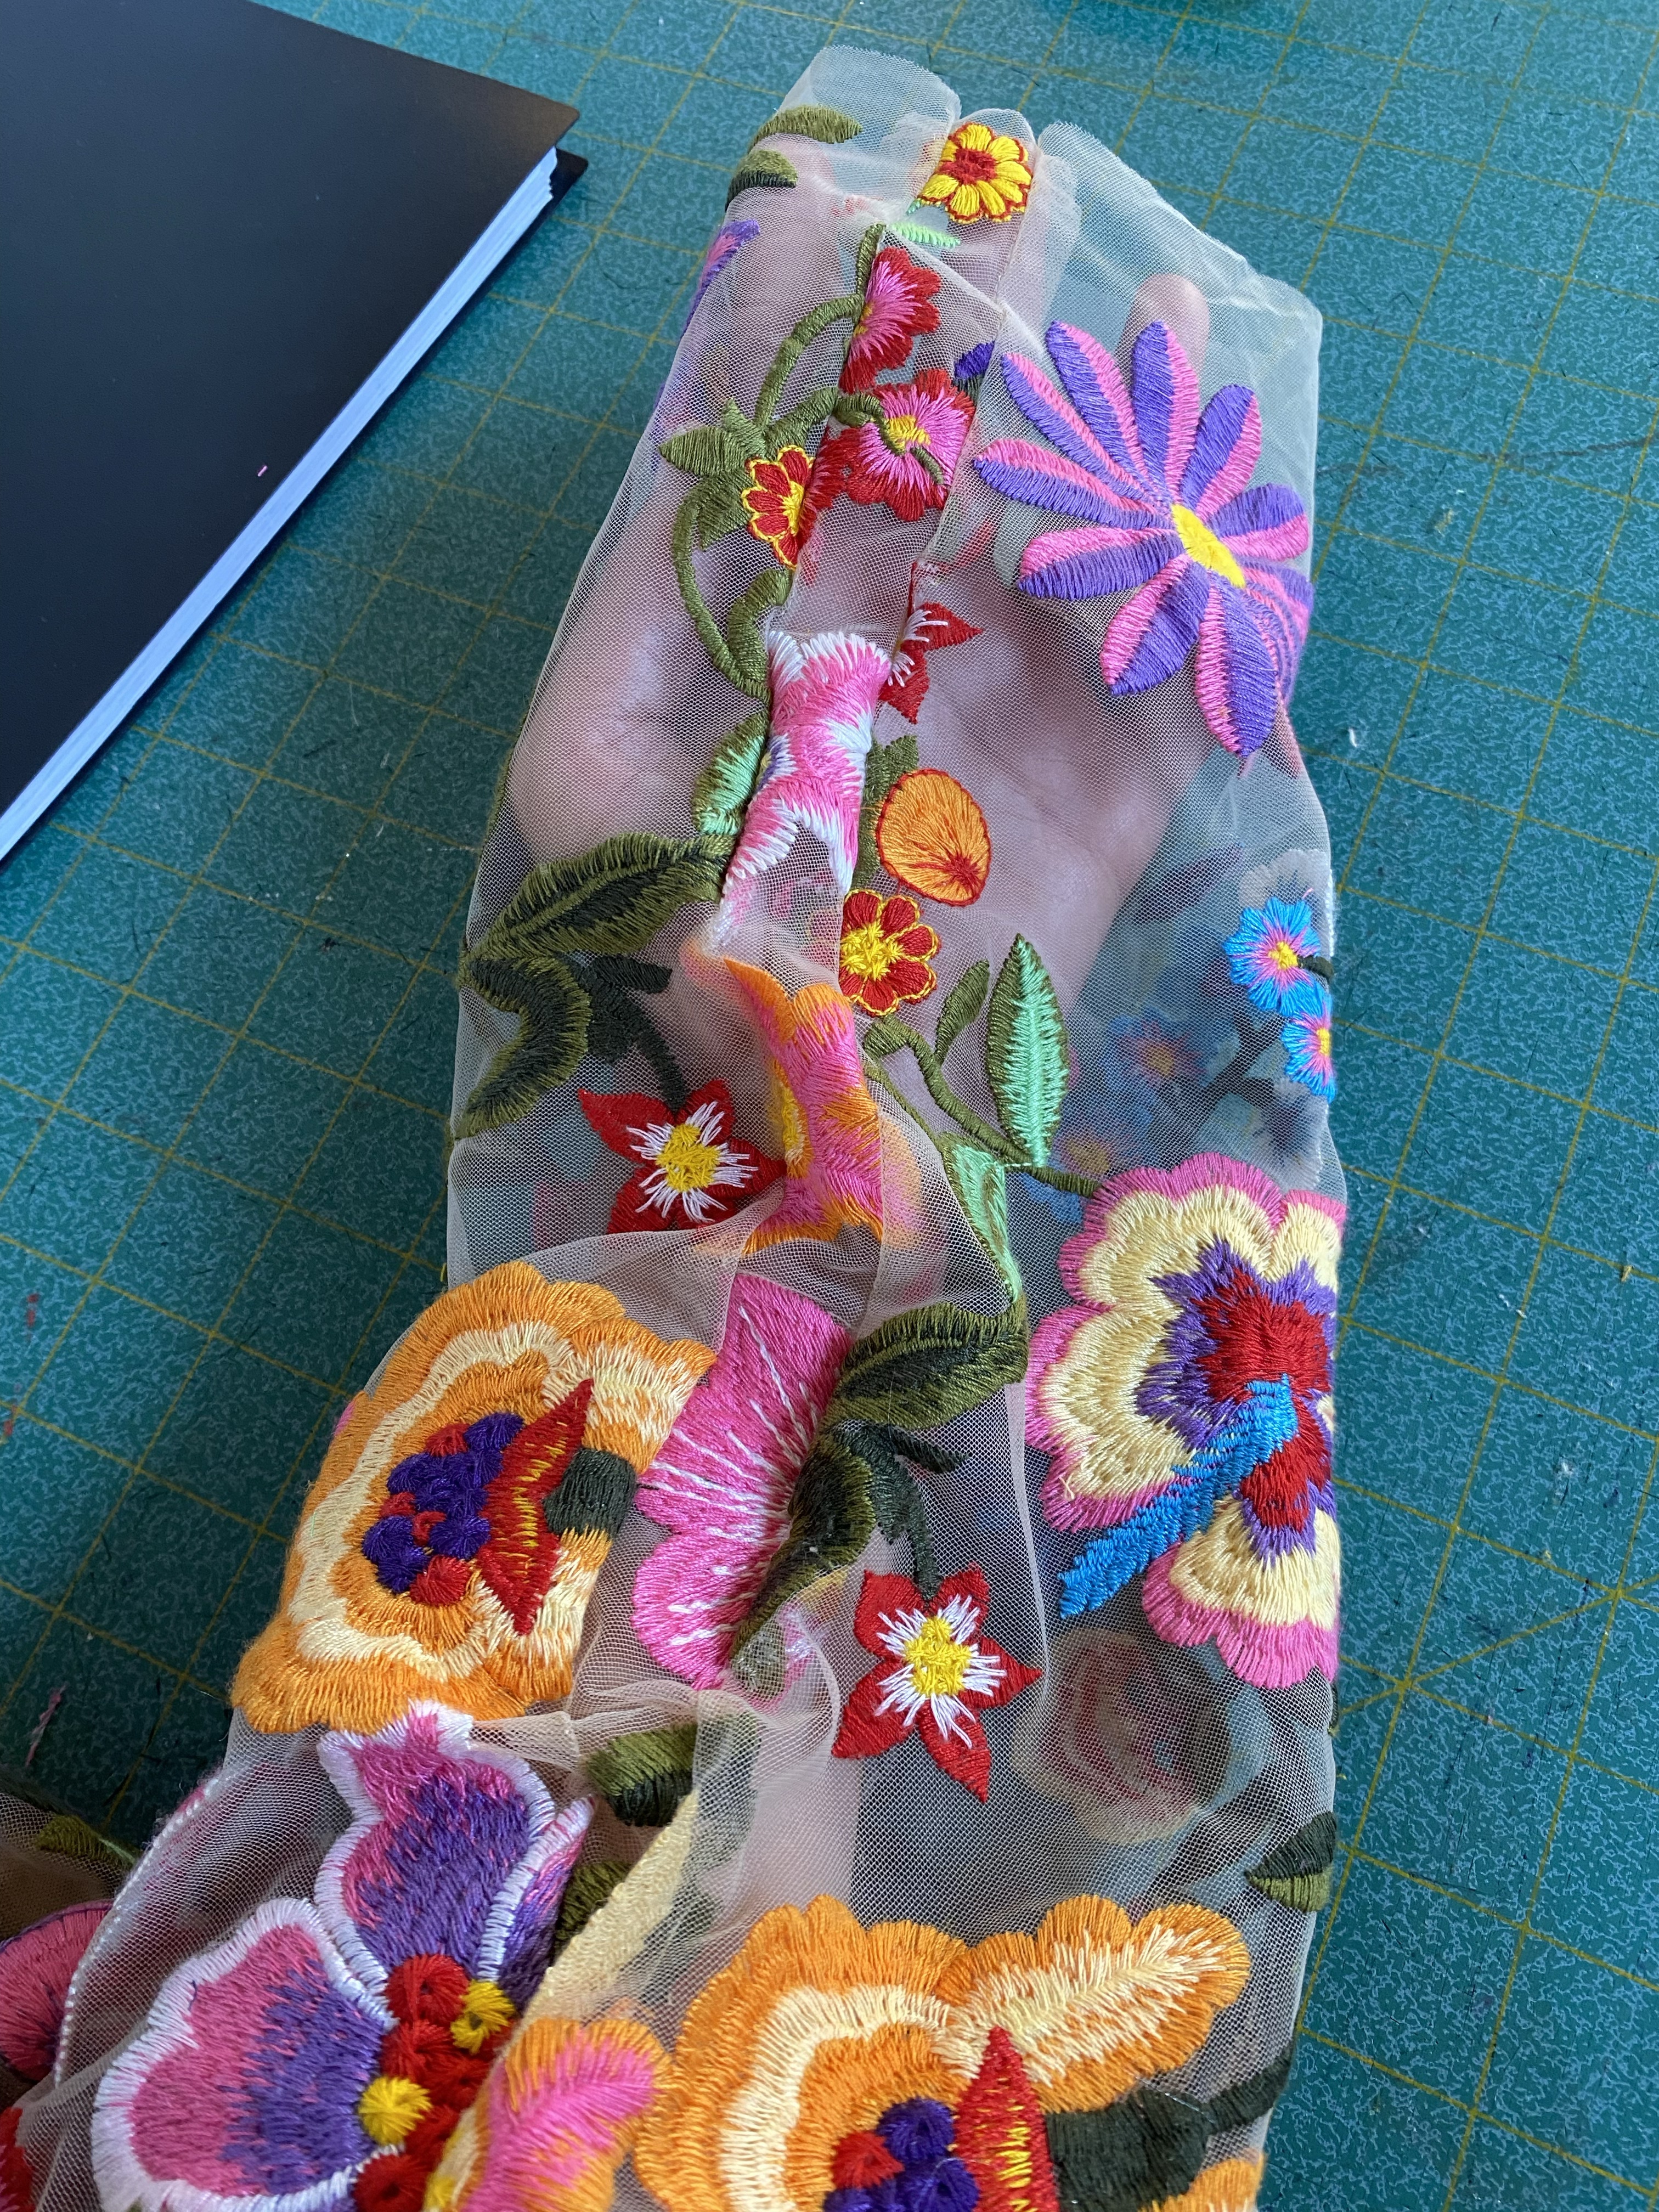
She scouted out, found and purchased a colorful embroidered mesh fabric on Etsy, perfect for both cutting out the flowers from the mesh background, and also to be used to make part 2 of her bridal look: a tulle and organza bridal skirt and a custom-made top of TBD style to be worn with the skirt:
Embroidered Mesh Fabric found on Etsy
As soon as she received the fabric in the post, we planned a meeting and got to work with the creative projects. She invited her mom, friend and future mother-in-law, all to come over to my house and get to work cutting out the individual flowers, carefully trimming them from the mesh and separating them. We spread out over my living room floor, got out sharp little scissors and got to snipping & sipping champagne.
Meanwhile, Christine also wanted me to make a top for her to wear with the bridal skirt, as well as do some alterations to both the bridal skirt and the dress. We decided on a bodysuit for the top to wear with the skirt, and I got to work making a mock-up of the bodysuit for fit and aesthetics. Well, of course I didn’t consider the lack of stretch that the mesh has, much less than that of the spandex material we chose for parts of the bodysuit.
Mistake #1
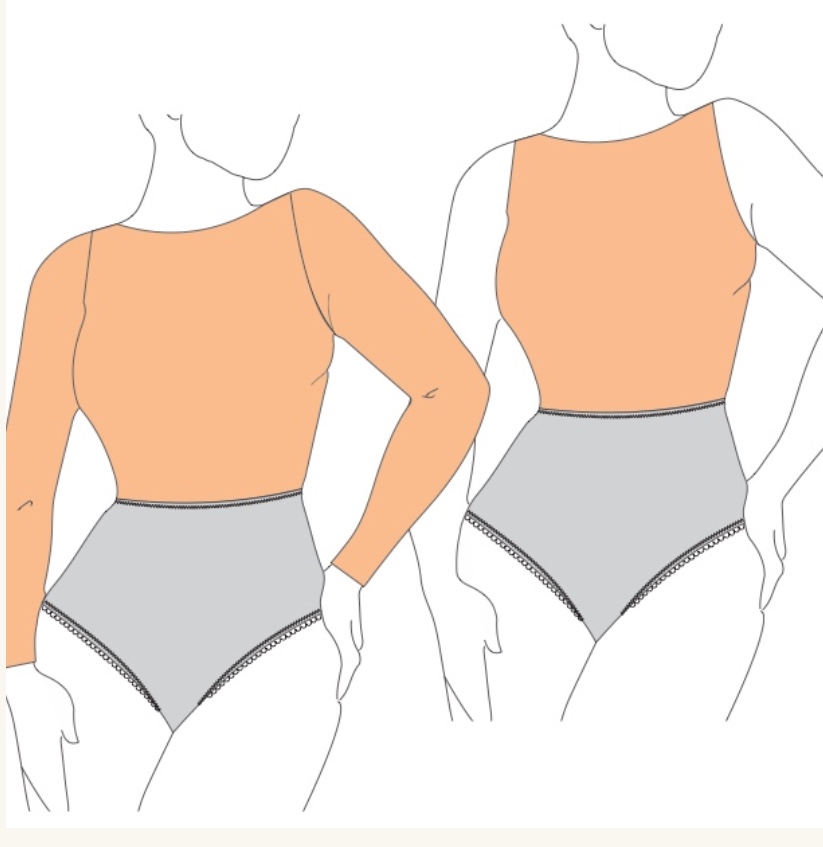
It took some time and effort to make this garment. I started with a bodysuit sewing pattern, choosing this great Belen bodysuit by Masin pdf pattern that had sleeves and a boat neckline.
#belenbodysuit
Planning the placement of the flower motifs within the bodice front of the bodysuit was a little challenge, mostly as I was trying to get her favorite flowers to be closest to her face, but also appear to be randomly scattered and not placed like pasties right smack on her boobies:
Using the bodice pattern piece of the lining to find a good placement of the flowers in the fabric.
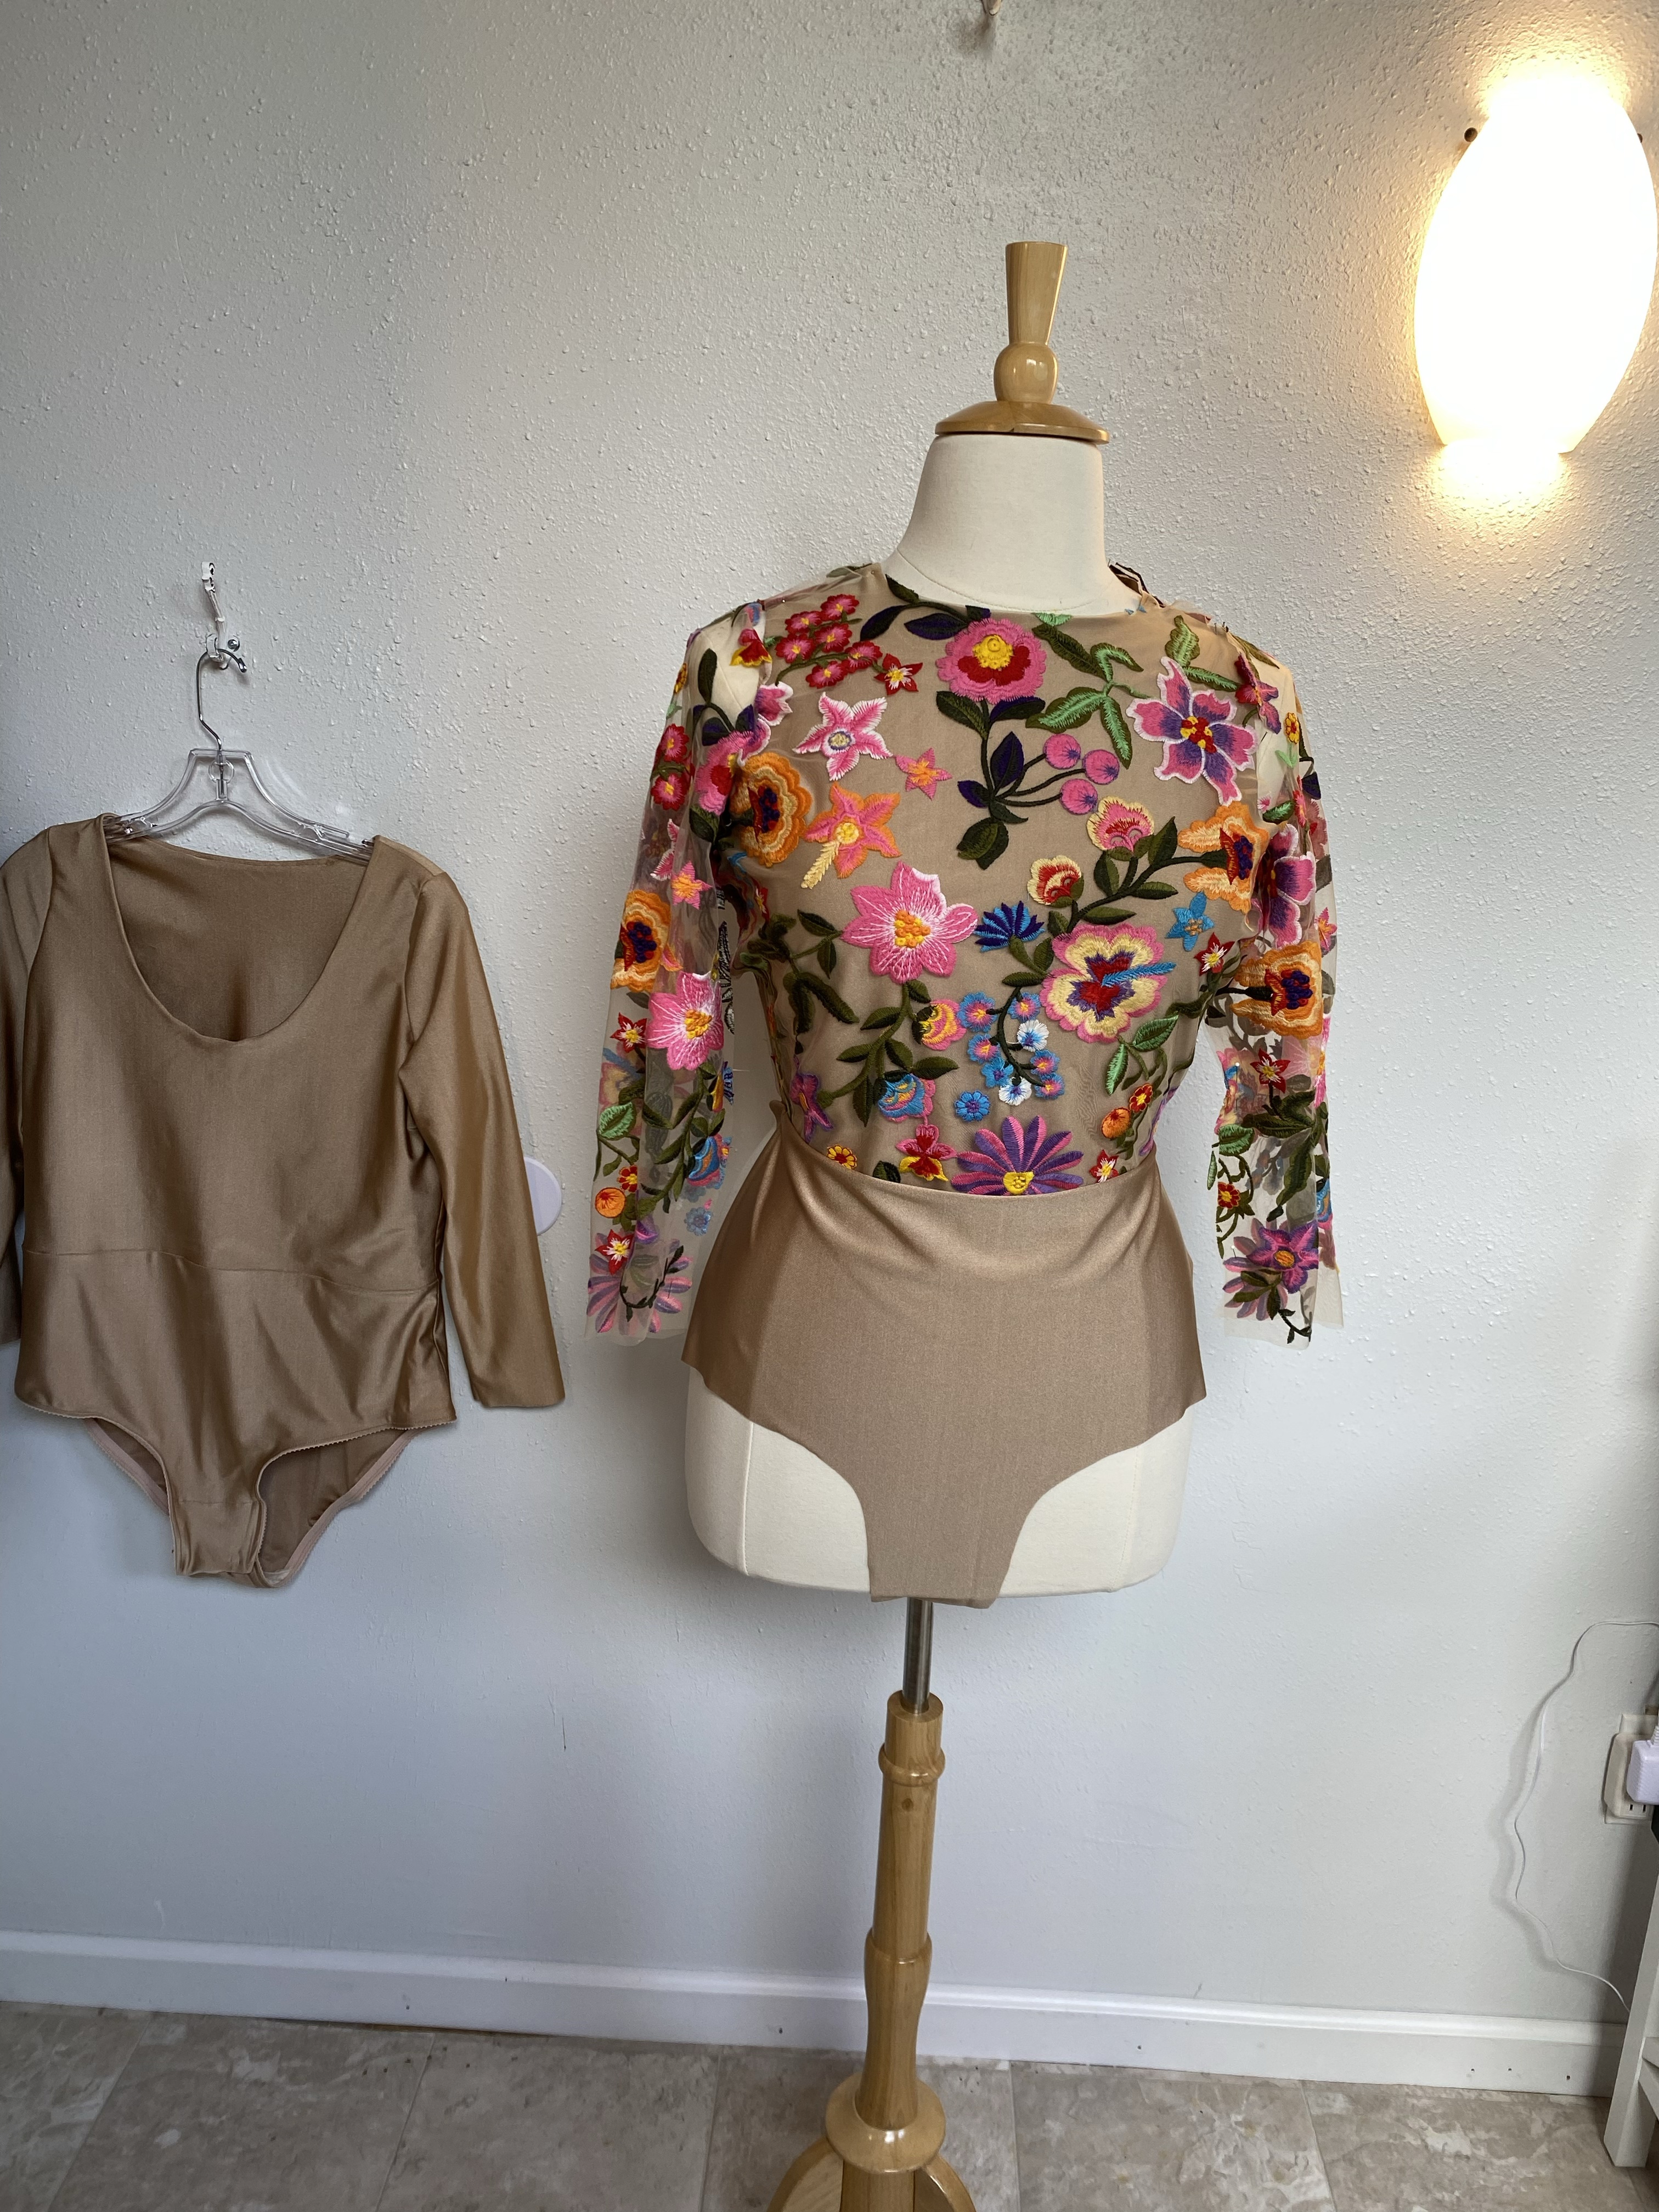
Fast forward to the bodysuit being nearly finished and ready to try on. The bodysuit looked great, and the mockup wasn’t half bad either. Well, the fitting didn’t go so well and the bodysuit was way too tight. Like, she couldn’t move her arms to save her life kind of tight. Ugh:
The colorful mesh body and the mock-up. Looks great! The fit, no so great…
Now all of my problem solving superpowers were jerked awake, stepping up and getting stuff done!
I wrote a “to-do” list (in order to keep my head strait, and to avoid having bad dreams, nightmares actually, about work, this a must for me):
Christine Chenderlin
Bridal Gown & Bridal Skirt project proposal
Wedding Date: June 18, 2023
Projects:
Strapless bridal gown alterations & additions
Added interior hanging straps
Added bra cups
Hem entire gown, including outer layer, tulle and lining layers,removing train and sewing original fringe trim back on to hem
Applique additional fabric over entire gown
Hourly rate of $60/hr for sewing work
ETA hours tbd
Help from friends
Add side seam pockets
Make a matching shrug from purchased fabric (or sleeves from cut off fabric)
Make wide straps out of lining
Edit: made straps out of lace and lining
Bridal Skirt Alterations & additions
Remove back zipper and install corset style back closure
Hem skirt, removing some tulle from underskirt
Hem outer layer of skirt
Make a crop top from purchased fabric to wear with skirt
Edit: made bodysuit from embroidered mesh
OK this is more of an outline, but I like to get my thoughts out of my head and down on paper, in an organized, shareable format, so that I can move on, plan out my time, and get to work. It’s the only way I can maintain sanity and work productively as a one woman business.
I also had a time tracker, price list, ideas, images and other notes in my dossier for Christine that I keep for each client. Keeping organized, on track, and accountable is key with helping clients such as her. She had been planning this special day for months and I was a big part of making her bridal visions come to fruition, so there was NO room for error! No pressure!
On to the gown. I added pockets, shoulder straps, bra cups, interior hanging straps, removed the entire train, made the gown floor length, hemmed it, stitched the delicate lace fringe trim back on all around the hem, plus a did a few little stitches and repairs to the lovely large floral gown.
Strap style decisions: this image was sent to Christine to choose her preference for fabrication for the added shoulder straps. Also, I added additional hanging straps (there were 2 wimpy ones included in the RTW gown that barely held up the dress on a hanger) using ribbon inside the gown to support the weight of the dress while hanging. This has become one of my favorite additions to my custom alterations, and incorporated into my bespoke garments for a little touch of luxury and garment care.I carefully slit open the side seams in the skirt outer and lining layers of her ballgown, adding in deep pockets made from lining fabric cut from her hem, so she can stash a tissue, lip gloss, and gift money!
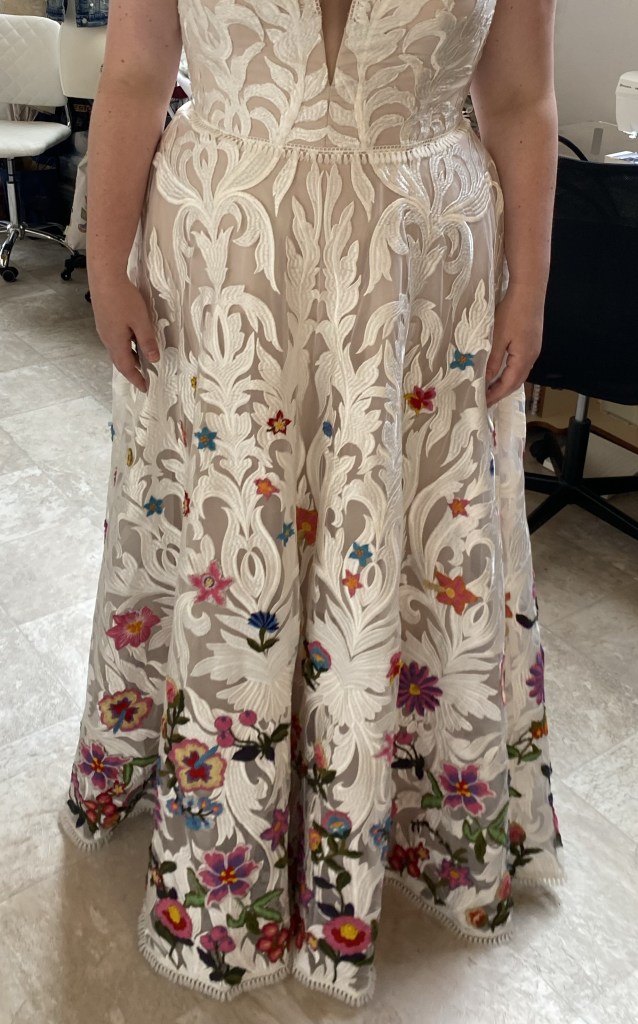
The dress was handed off to her friends and family who were more than happy to pitch in and help her with DIY wedding stuff (and there was A LOT of DIY wedding stuff!). Like little Disney forest fairy Godmothers, they sewed on those flowers lickety-split at record speeds, creating a lovely placed, yet random, flower pattern all over the skirt of her dress. She twirled in her dreamy dress and we all gasped! Super cool!
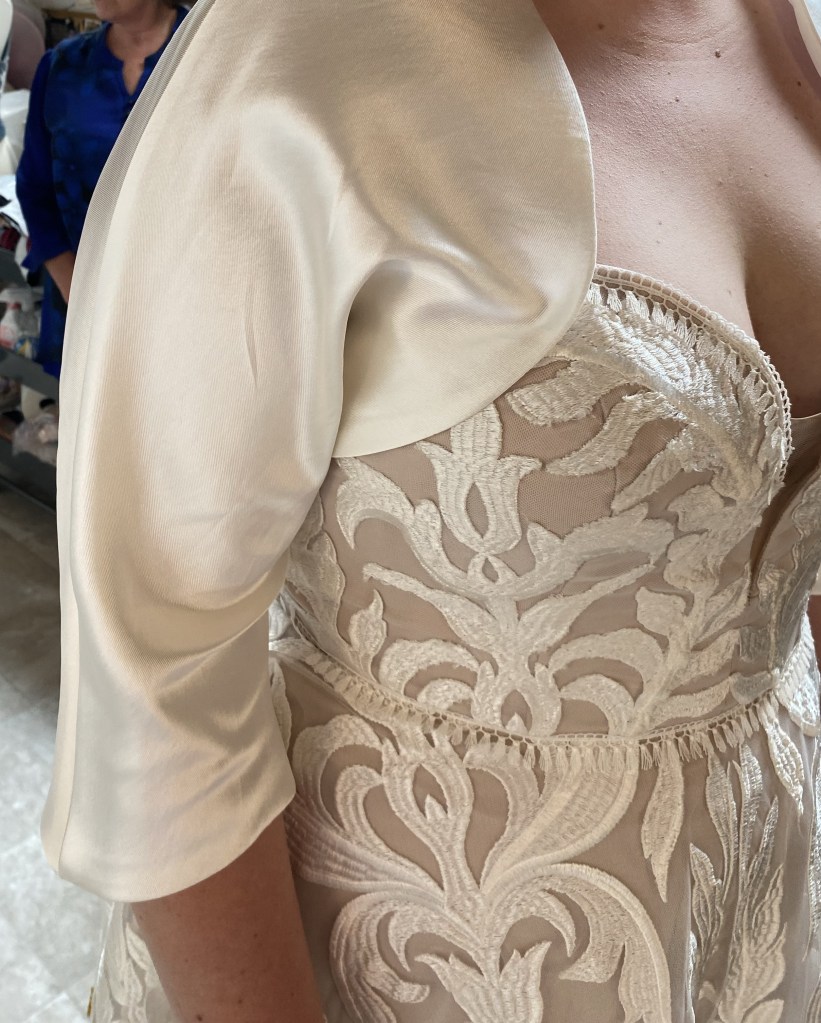
Next, she wanted a shrug of sorts to cover her shoulders, so she chose a pretty satin to match the dress and I made a simple, yet ladylike, lined shrug for her and it worked, sort of.
Mistake #2
Ugh, WHY???? This shrug was the biggest obstacle in this whole idea. No, I take that back. the bodysuit was a bigger obstacle to overcome. The shrug was runner up. For some reason, I could NOT get a nice looking fit on this darn shrug! I made the darn thing 3x and still made her cry. I felt like the crappiest person on earth for not being able to make her happy, plus the bodysuit was giving her a major wedgie and she couldn’t raise or move her arms, so panic set in.
Well I managed to alter the sleeve by adding in a panel to make it wider and not 100% cut off her circulation. I also added a gusset to the bodysuit side seam, just so it was bearable and she could move in it (kind of). A center back zipper in the bodysuit also helped getting in and out of it.
A strip of fabric added under the sleeve seam to add some space for her arm.
As for the skirt, I added a lace-up corset back closure as the zipper was too small and that worked out pretty well:
The zipper in the skirt was replaced with a hand-made corset back opening. Also the center back zipper of the bodysuit helped her in and out of it. Also the skirt got a hem and a layer of tulle removed to reduce fullness.
Fast forward to wedding time! The wedding was held at a wonderful rustic resort in the mountains of Oregon. Out of town guests were arriving, family was wrapping up last minute details and enter frazzled and frantic Stephanie!! I drove an hour to Welshes, Oregon to her venue the day before the wedding day, finished bodysuit and shrug I made for her in hand, ready to hand off then disappear, out of her hair and let her enjoy her big event. I HAD to make sure she was ready to go, had all of her wedding outfits ready to wear, and she was happy.
Mistake #1 & Mistake #2 Backfire
She tried on her outfits, things were OK (not perfect or entirely comfortable), she looked over to me, aaaaand she cried. Sobbed really. I felt like the biggest a-hole let-down on the planet. The fit SUCKED and she was so uncomfortable! AAAGGGGHHHH!
100% MY BAD
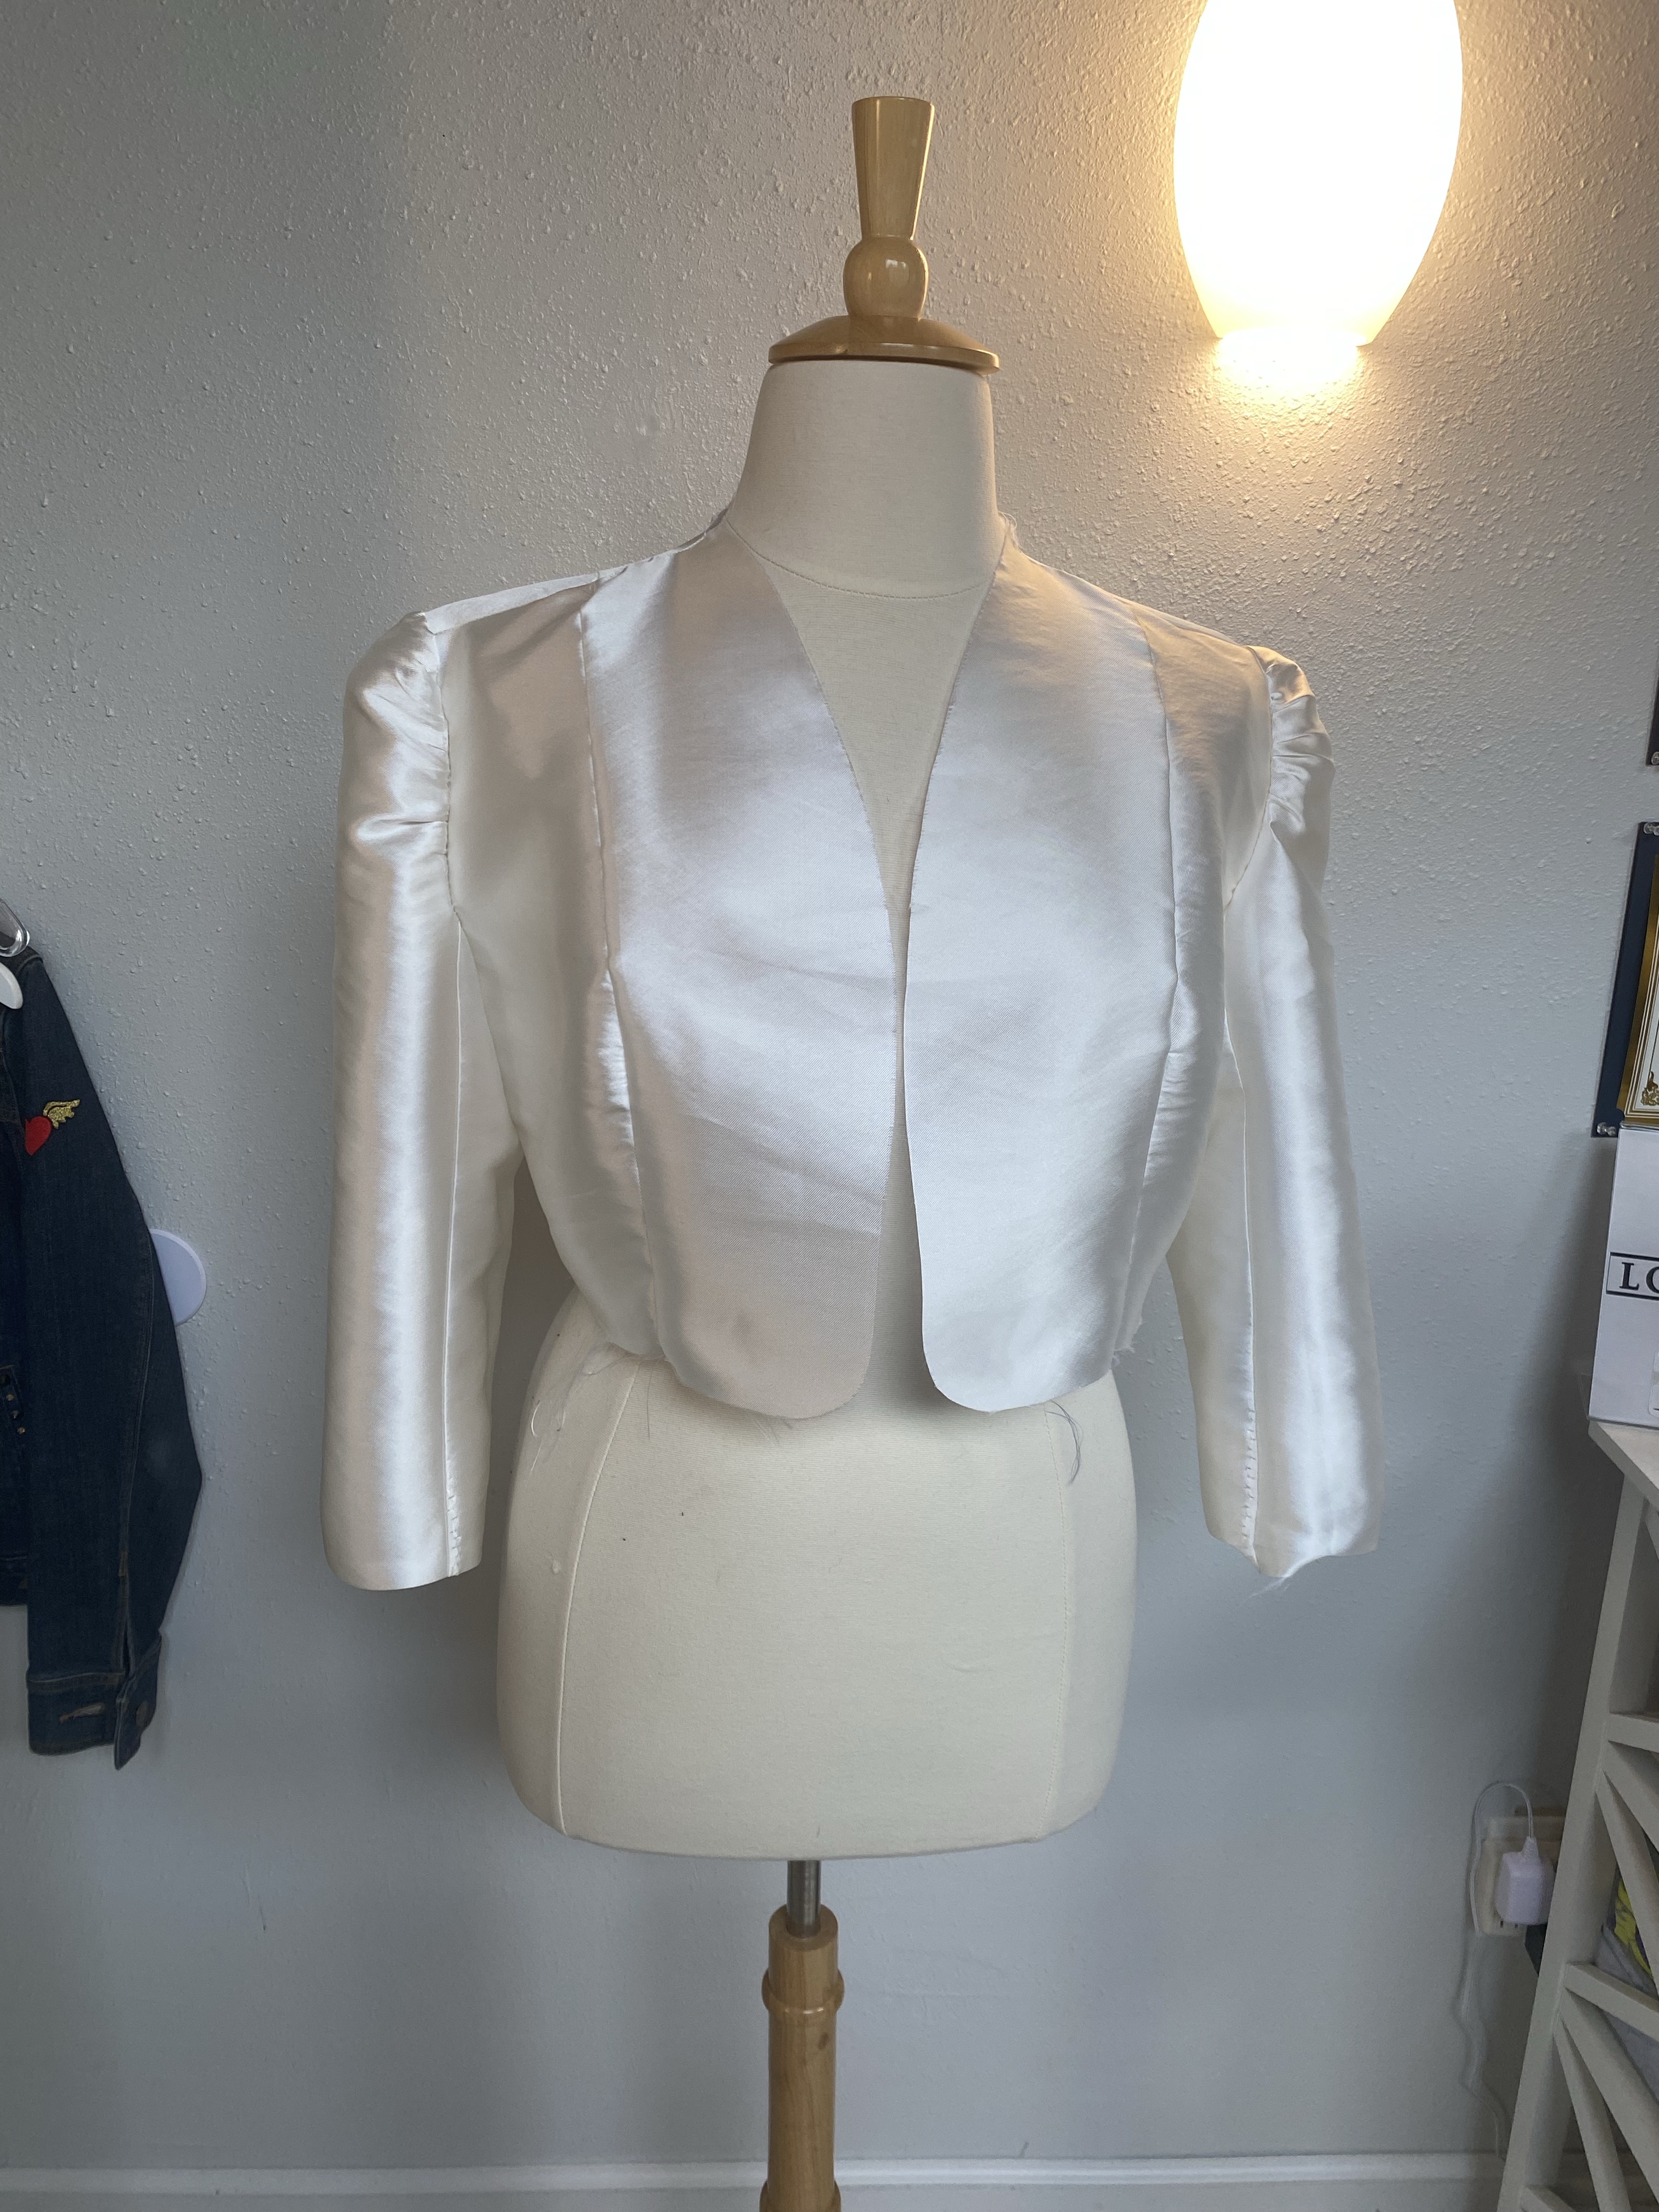
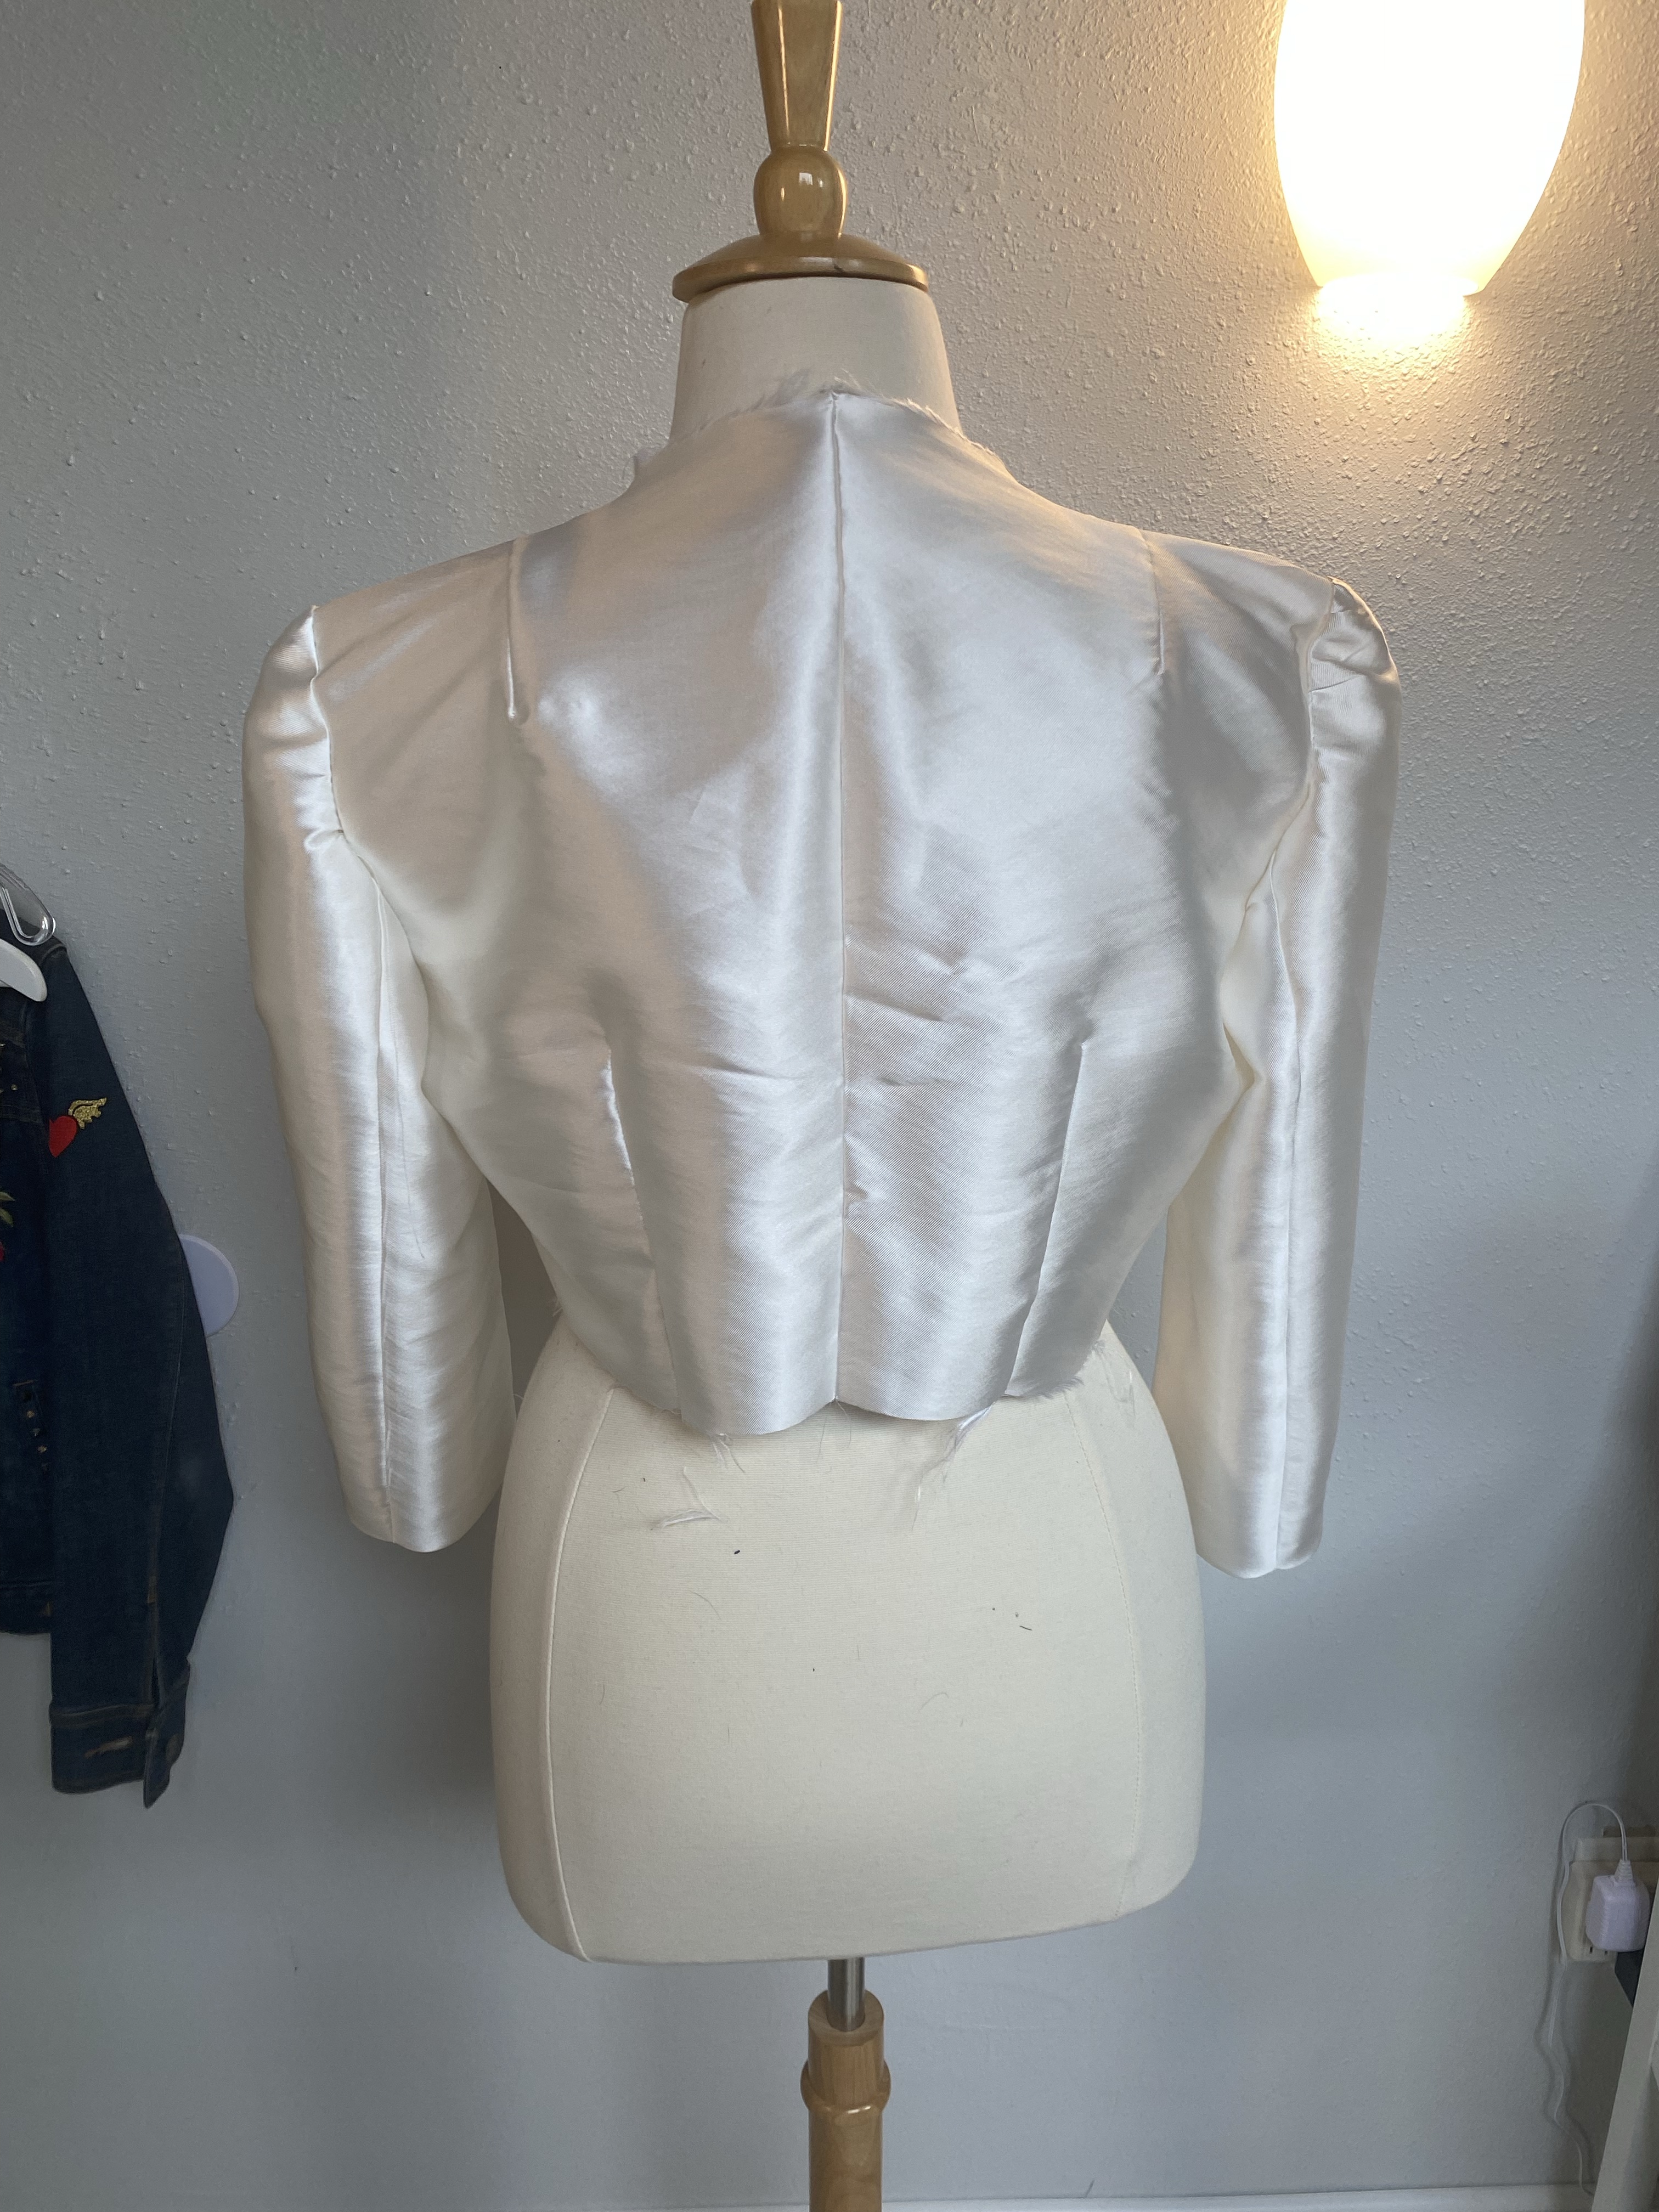
Her friends from out of town were now arriving, she was crying (not tears of joy), and I felt like an idiot and failure. I offered what I could and said I’d do what ever I could possibly do to make it work. I had some more fabric back home, we quickly found a sewing pattern Bolero Jacket 2202 by Lekala she liked for the shrug, and one I could make up over night and drive back to her in the morning. Talk about last minute!
The Lekala Bolero Jacket pattern seemed to be the perfect solution!
I left here there crying on her friends shoulder, got home, started making another NEW shrug (version #4 I think?) with the Lekala, was in touch with her best buddy Bonnie, keeping her posted with my progress, working hard to get something done that Christine would be happy with and make her not totally hate me on her most special day.
Mistake #3
Last minute Lekala shrug jacket in progress, literally graded out to her size and slapped together in attempt to please. Fail!
I showed these photos to liaison Bonnie and she simply replied “you can stop sewing now.”
Now it was my turn to break down and cry. Literally cry. I was exhausted, crushed, disappointed, and just DONE!
So I wiped my tears, turned off my sewing machine, stuffed all of Christine’s fabric scraps, bits and pieces of undone shrugs and bodysuit parts, and a shrug that was OK from version # 1, into a bag and set my alarm to get up at the crack of ass to drive it and hour away to her on her wedding day. In the morning, I drove an hour there again, cowardly dropped of her bag of stuff at the hotel front desk and tiptoed backwards outta there, leaving a note and texting Bonnie when I was well on my way home. So, so bad, and NOT ever they way I intended to conduct business, but I just had way too much shame and couldn’t face her and her family & friends again, the disappointment dressmaker chick that made bride cry.
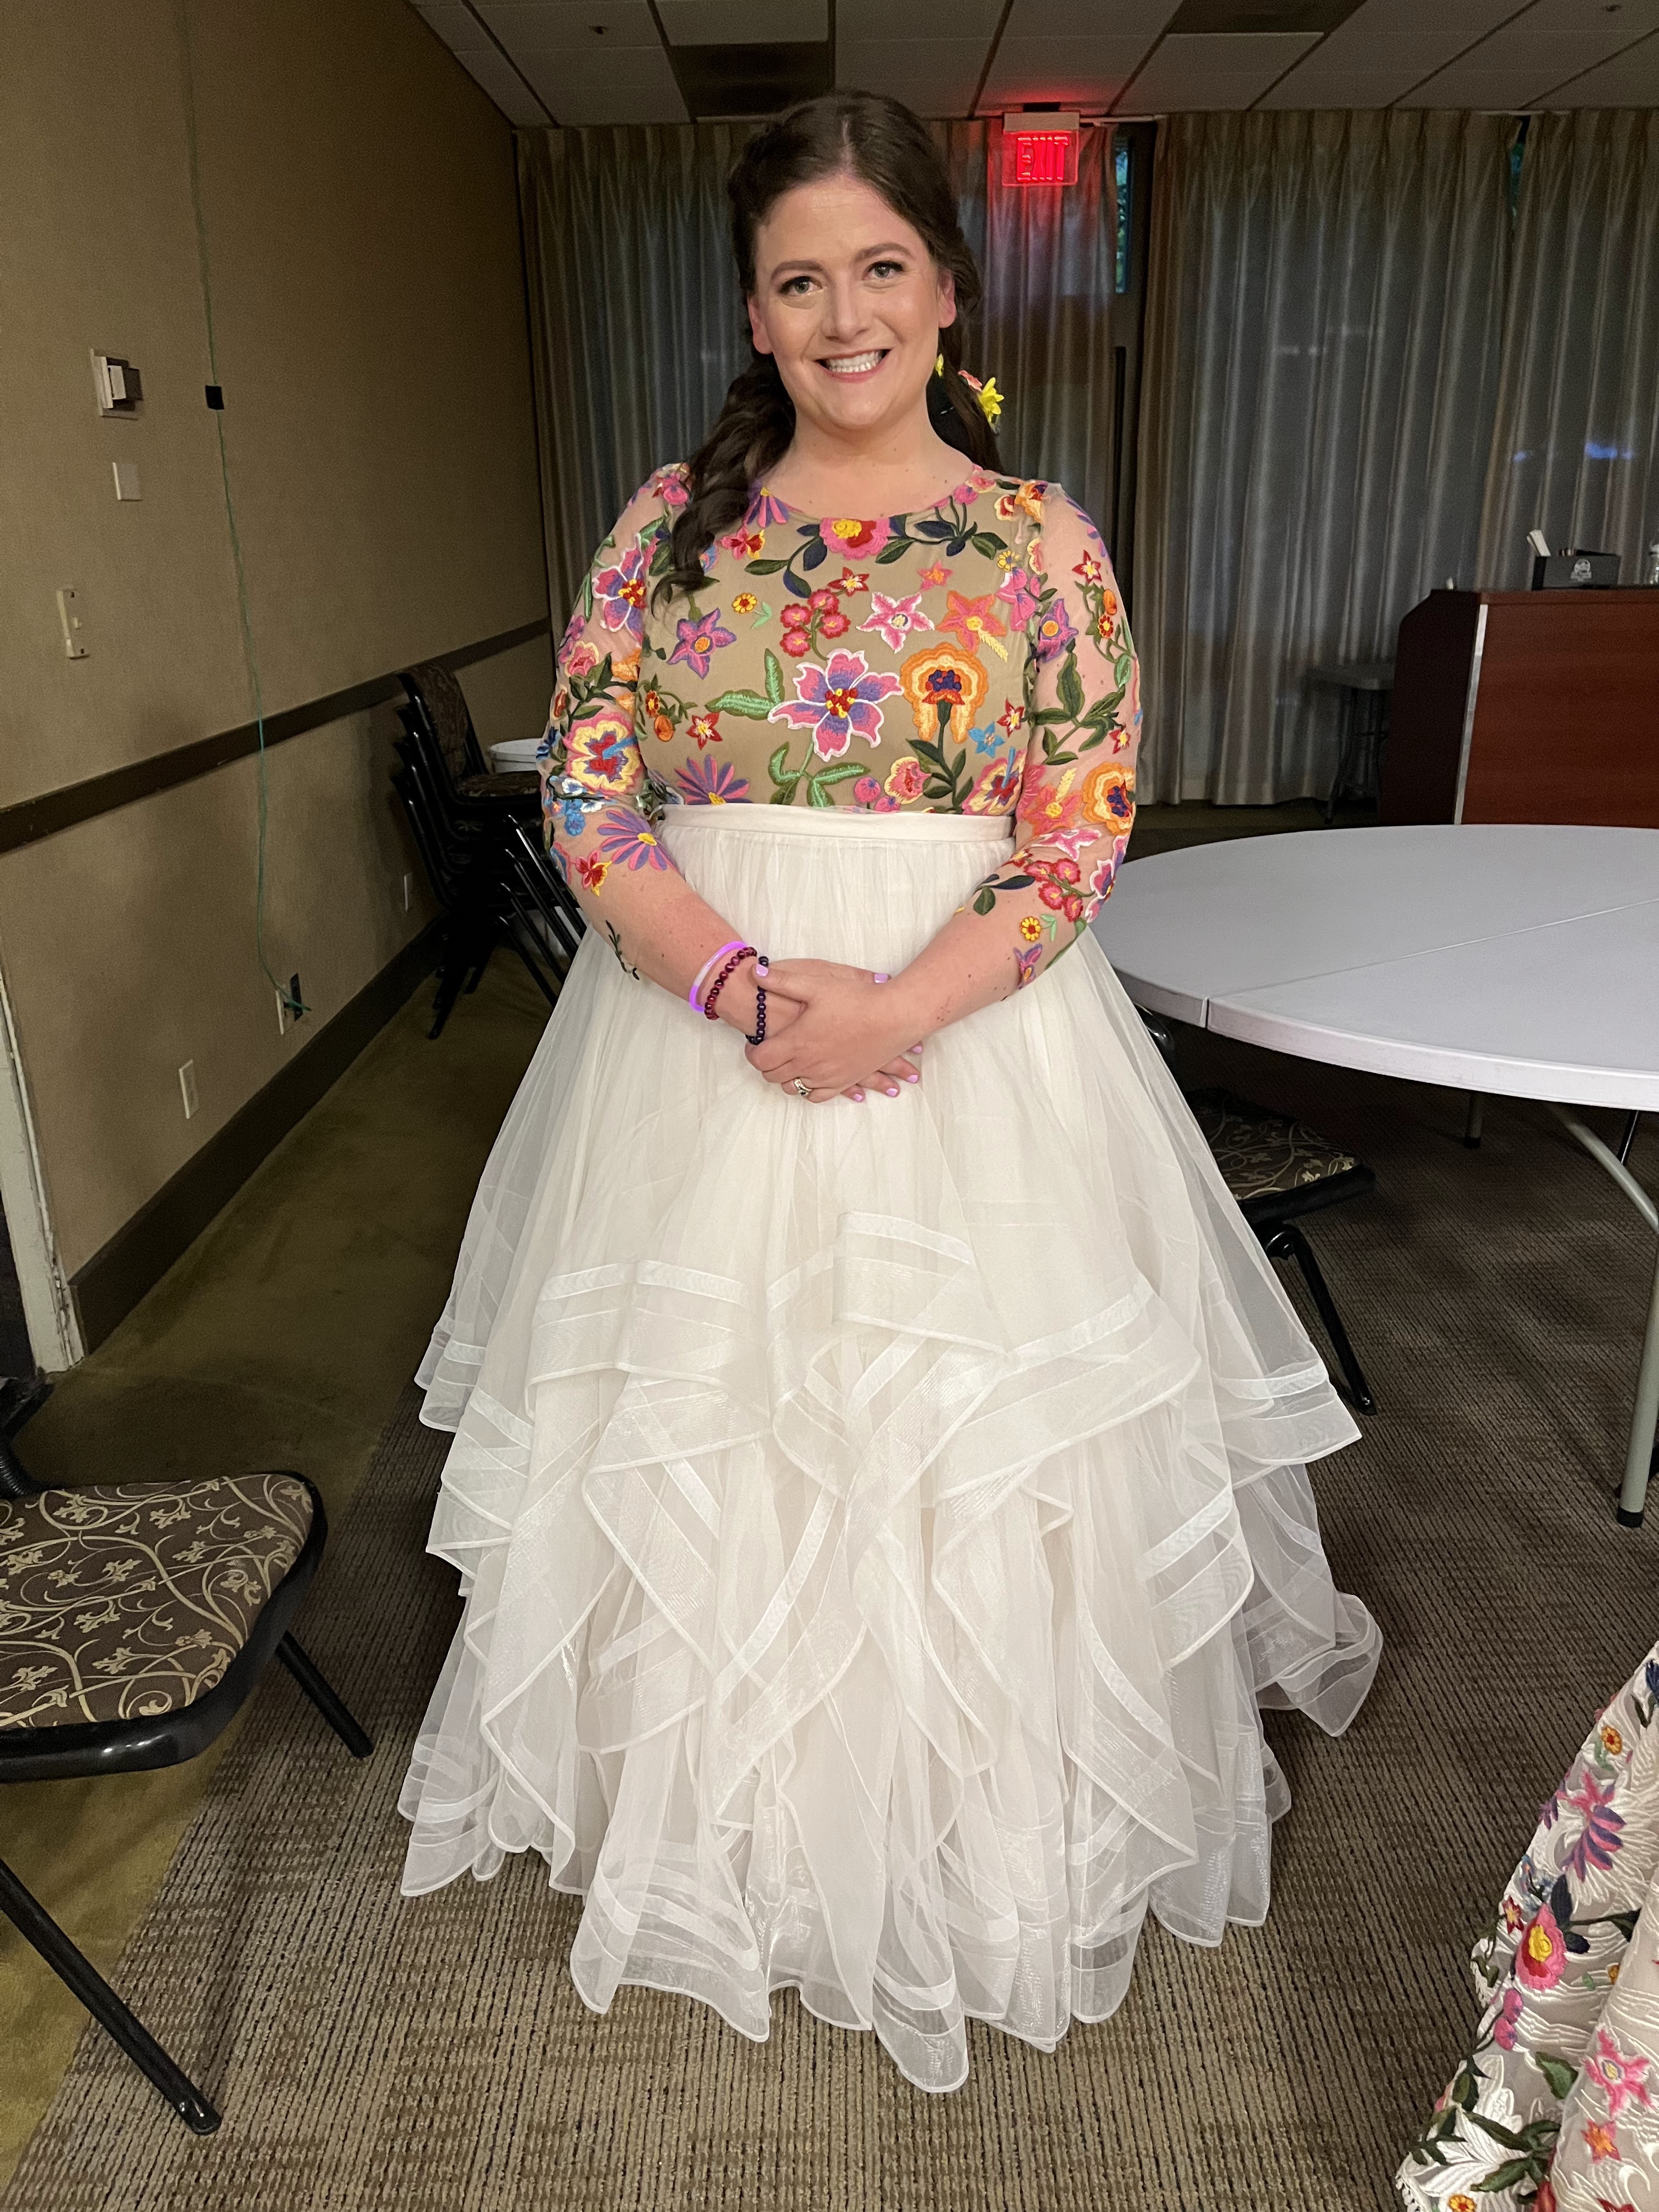
Well I must say, she pulled herself together and looked AMAZING on her wedding day! She was radiant in her custom designed gown, wearing one of the 4 shrugs I made her and looking fabulous walking down the DIY isle to marry the love of her life 🙂
Simply stunning!!! Cheers to the newlyweds!Love this fun and colorful bridal look!
She sent me photos and invited me to her share with her Google Photos album. She really pulled it off and looked radiant and so happy in her colorful bridal outfits! All of the decorations, accessories and details that were DIY’d from her family and friends were so incredibly touching and turned out beautifully.
Overall, I am SO grateful and happy that she reached out, chose me and trusted to help her achieve her dream bridal looks. It was down to the wire and incredibly stressful (for everyone!), but it was SO fun to work with her as she is delightful, creative, intelligent and just a great person to have met, plus her mom, mother in law and friend were ALL so kind, fun and caring. It all worked out in the end and she was stunning in her dresses for her wedding day.
The Newlyweds!
Lessons learned:
-Leave PLENTY of time to work and to make mistakes
-Make a list, or several lists, and make plenty of notes as needed
-Keep the client informed and posted with all decisions as well as pitfalls
-Wake up early, stay up late, keep focused and get it done
-Treat all clients projects as if they were my own projects
-Make smart and creative problem solving decisions
-Keep trying the best you can to get it right and please your client
-Work smarter, not harder
-Don’t be afraid to charge for my time
-Sometimes you deserve a break, rest, nourishment and praise : you are human after all
Whenever I have been invited to an occasion, the first thing I think of is “what am I going to wear?”. The next thing I think of is “what can I sew for myself to wear” as I love to make clothing and I love wearing things that are unique and nobody else has in their closet. From there, I pull up my pattern stash archive, pay a visit to my fabric stash (or the fabric store if I really don’t have the appropriate fabric to work with) and get started planning and sewing my outfit.
For this occasion, I was invited to a wedding of a lovely bridal alterations client who had become a friend over our many dress fittings and consultations of her beautiful wedding gown. The major part of her dress that I altered was her complicated and intricate bustle of her train that I she dreamed up and I created for her. Originally, as I fiddled and fussed to get her train bustled just right at one of her fittings, I said to her “I’ll just hide in the bushes at your wedding venue, you give me the signal when you are ready, and I’ll sneak out and help you bustle, then disappear back into the bushes and let you be on your way to the reception”. She would have none of that and insisted that I attend the wedding as her guest, and enjoy the entire ceremony plus be ready to bustle…DEAL!
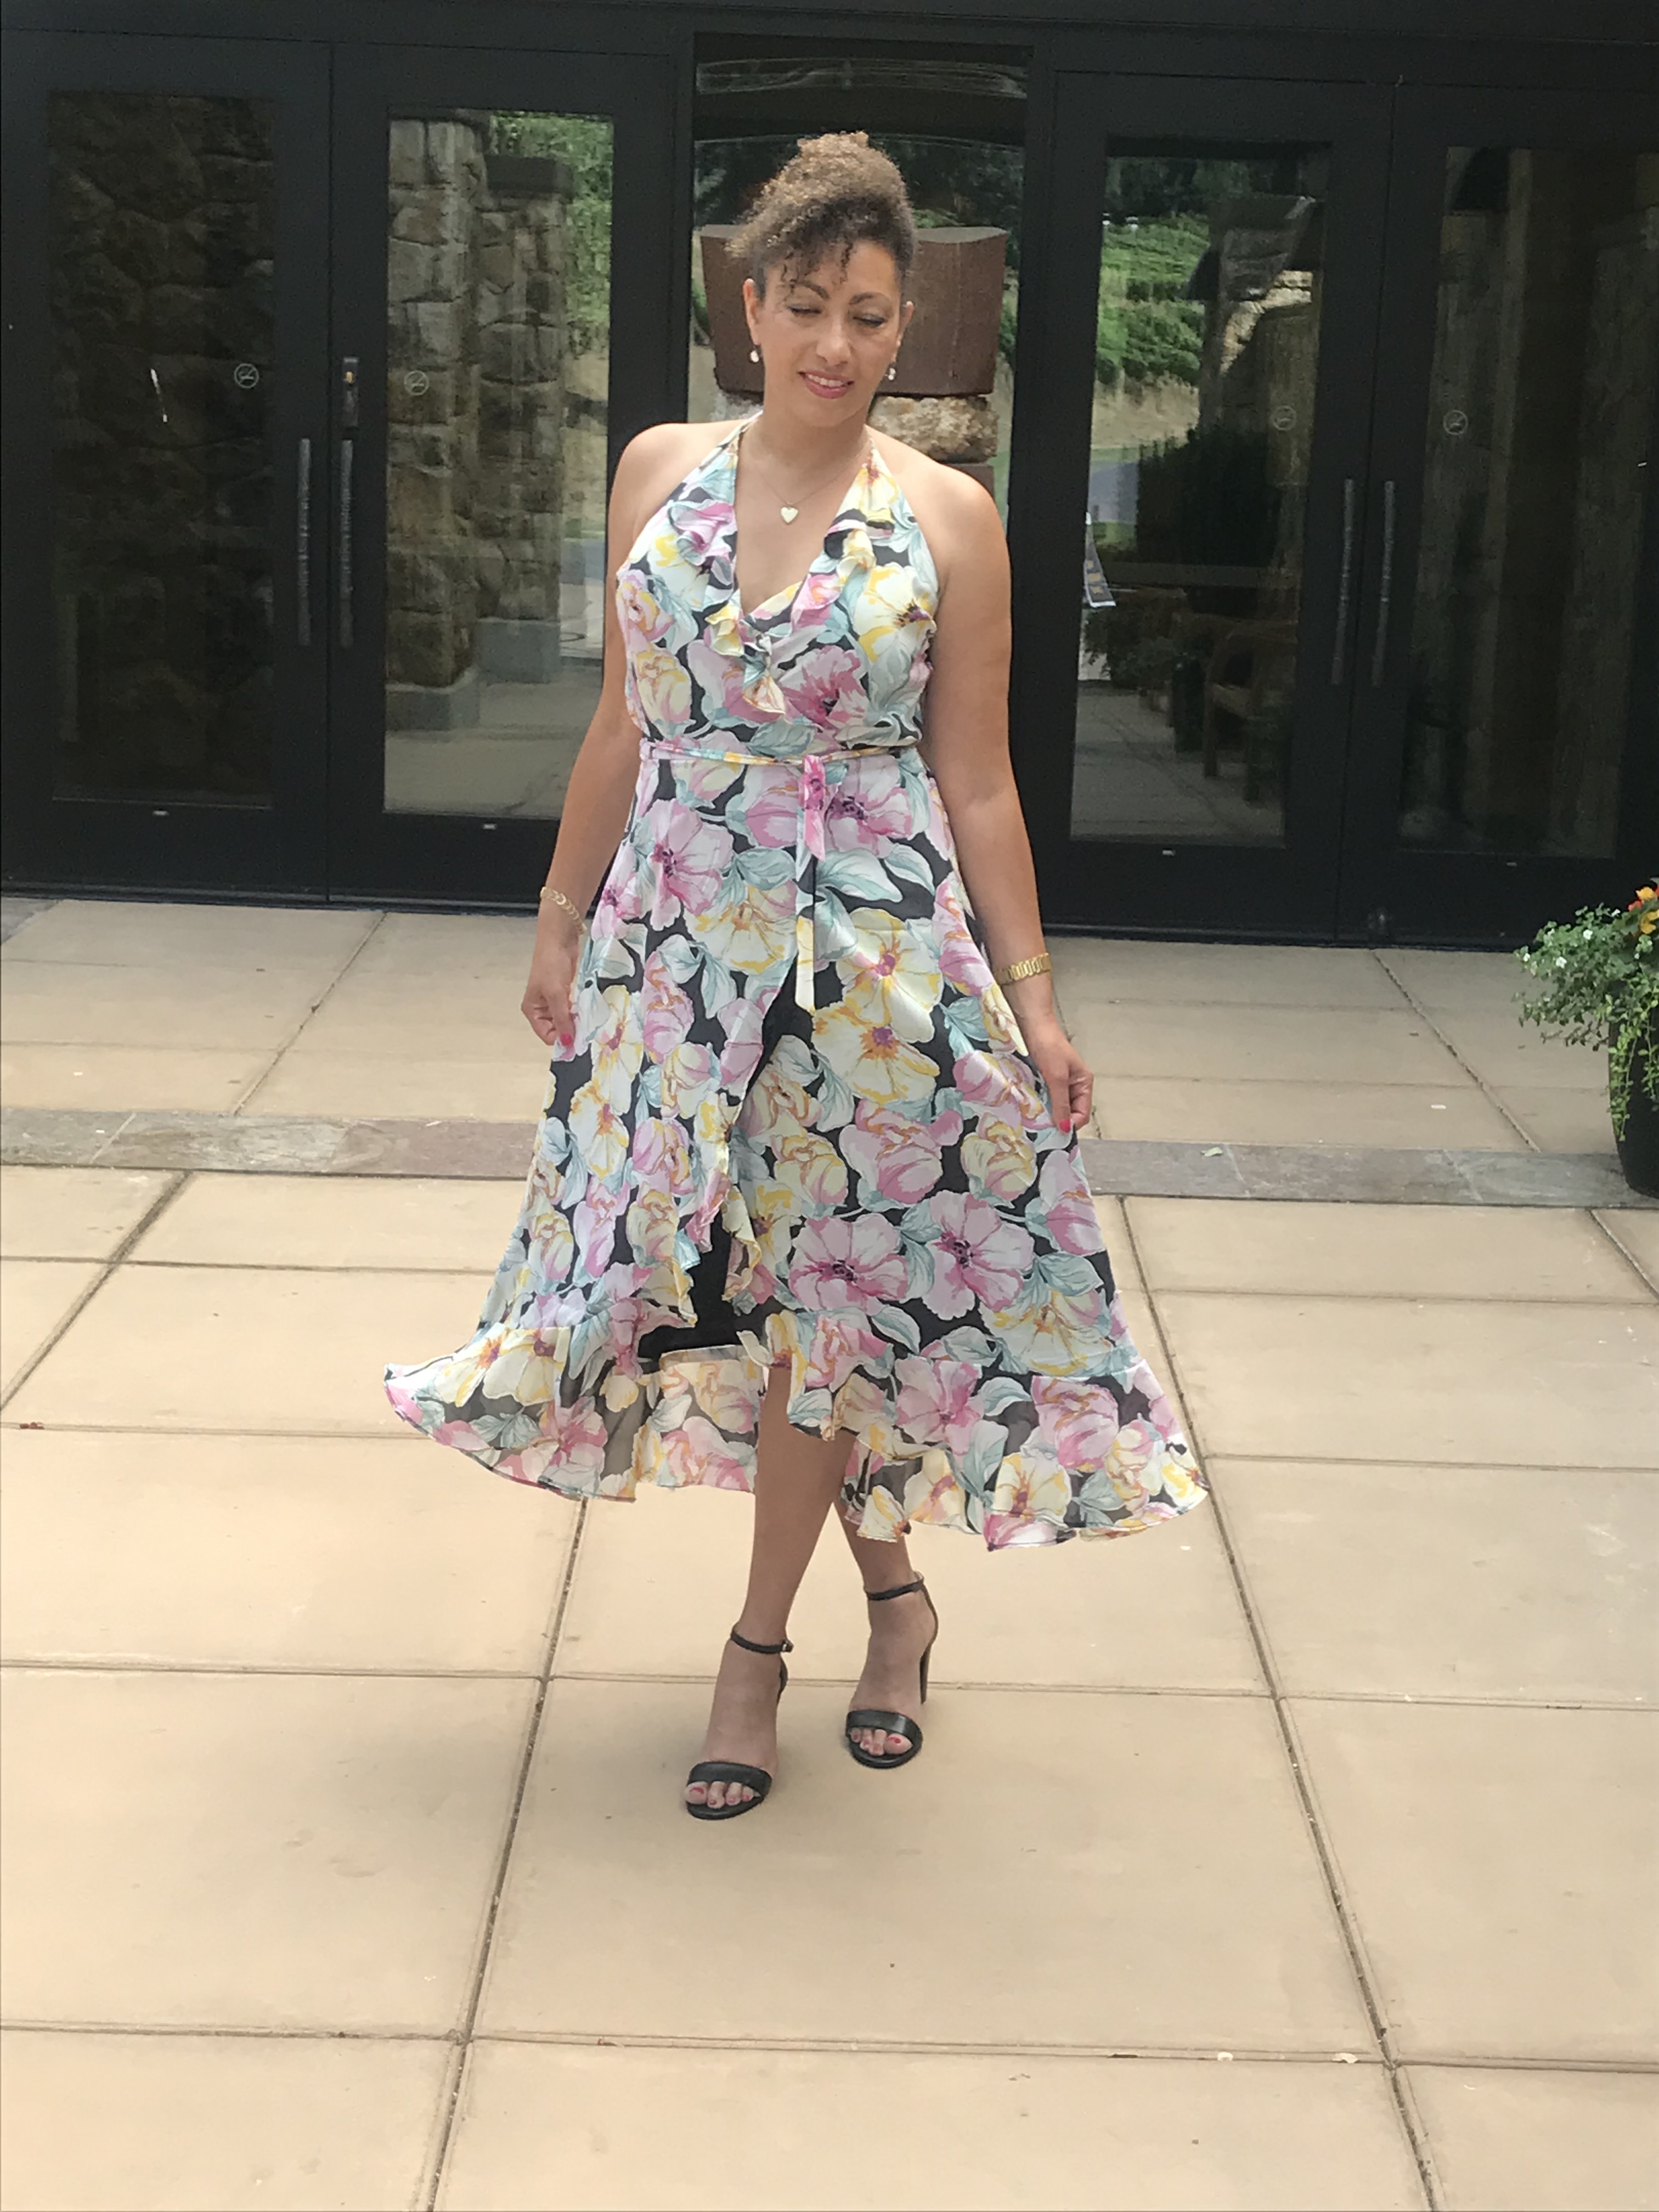
All of the ruffles and flounces in action!
So, being the alteration seamstress of honor at this wedding, I just had to have something special and handmade to wear! Not having all the time in the world to be sewing for myself with the very busy post-Covid wedding season upon us and other alterations and custom sewing client projects literally piling up in my sewing studio, I decided to make a dress that I have made before (a huge time and energy saver!) and use fabric that I had in my stash from Mill End Store in Portland, OR.
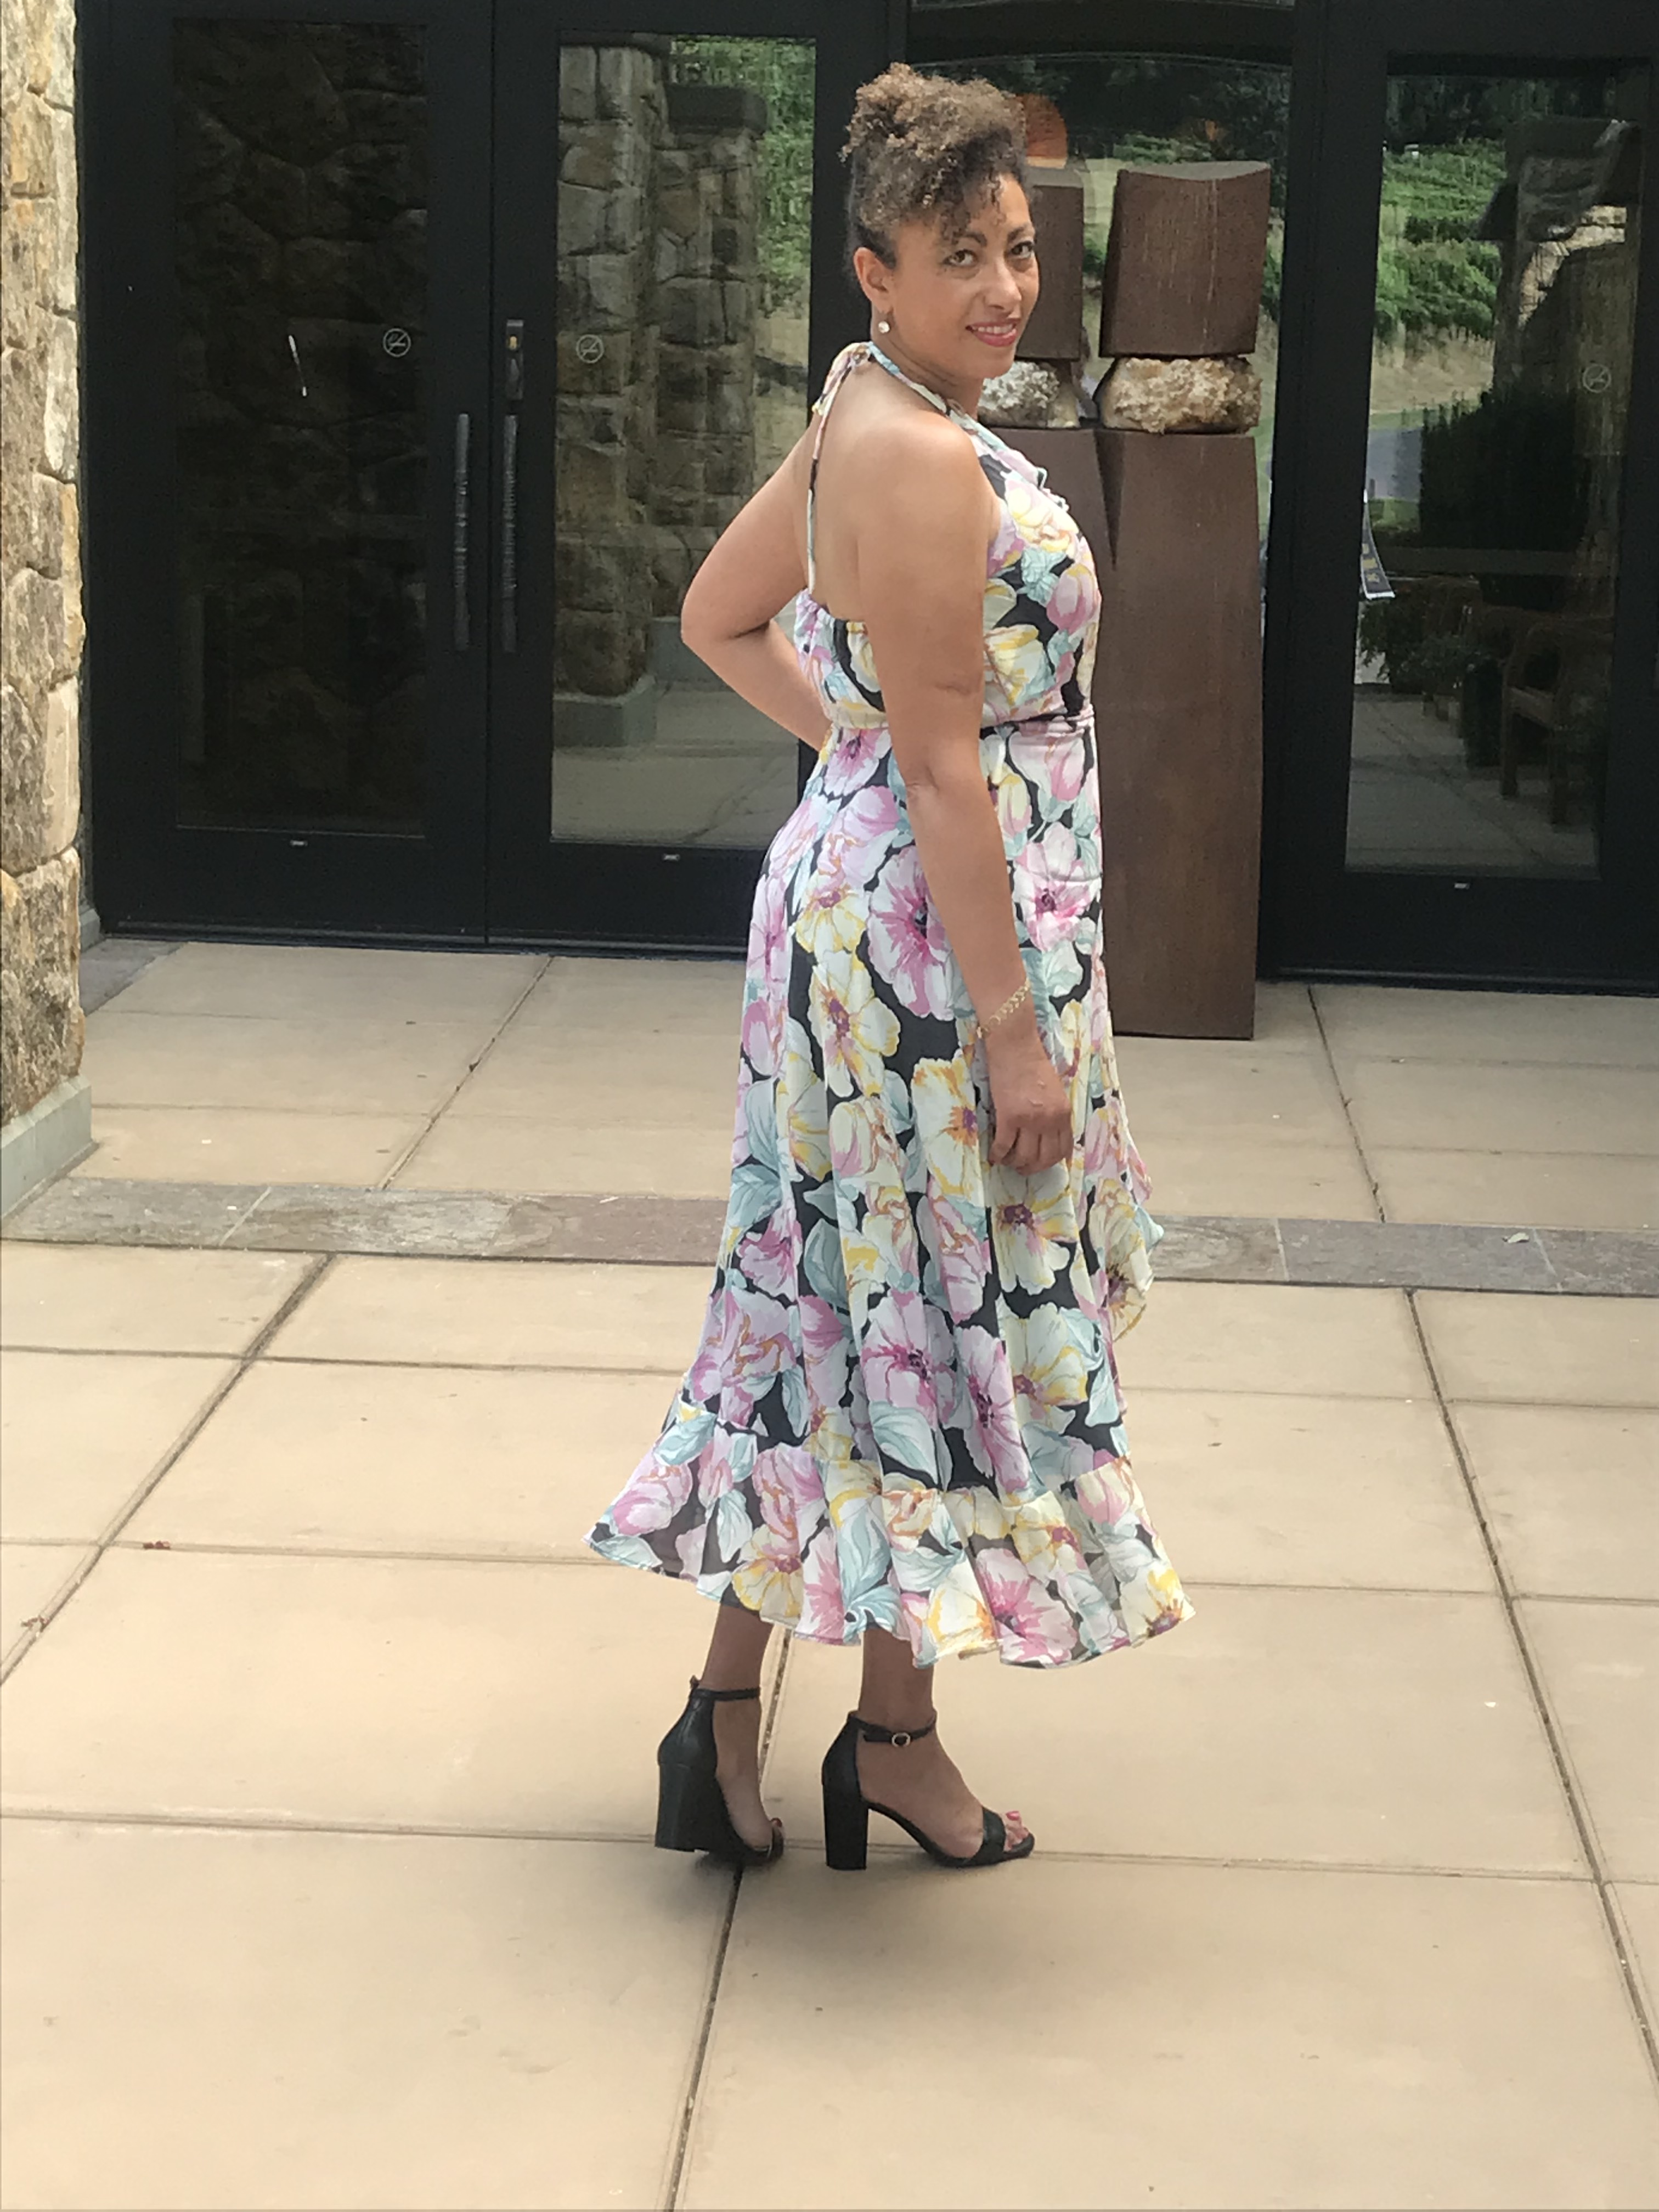
I pulled out this lovely pattern from Butterick that I had already cut out and made fit alterations to the pattern for a dress that I made a couple of years ago:
Butterick 6554 pattern
I made view C, the halter neck, ruffled and flounce dress that wraps and ties to the side.
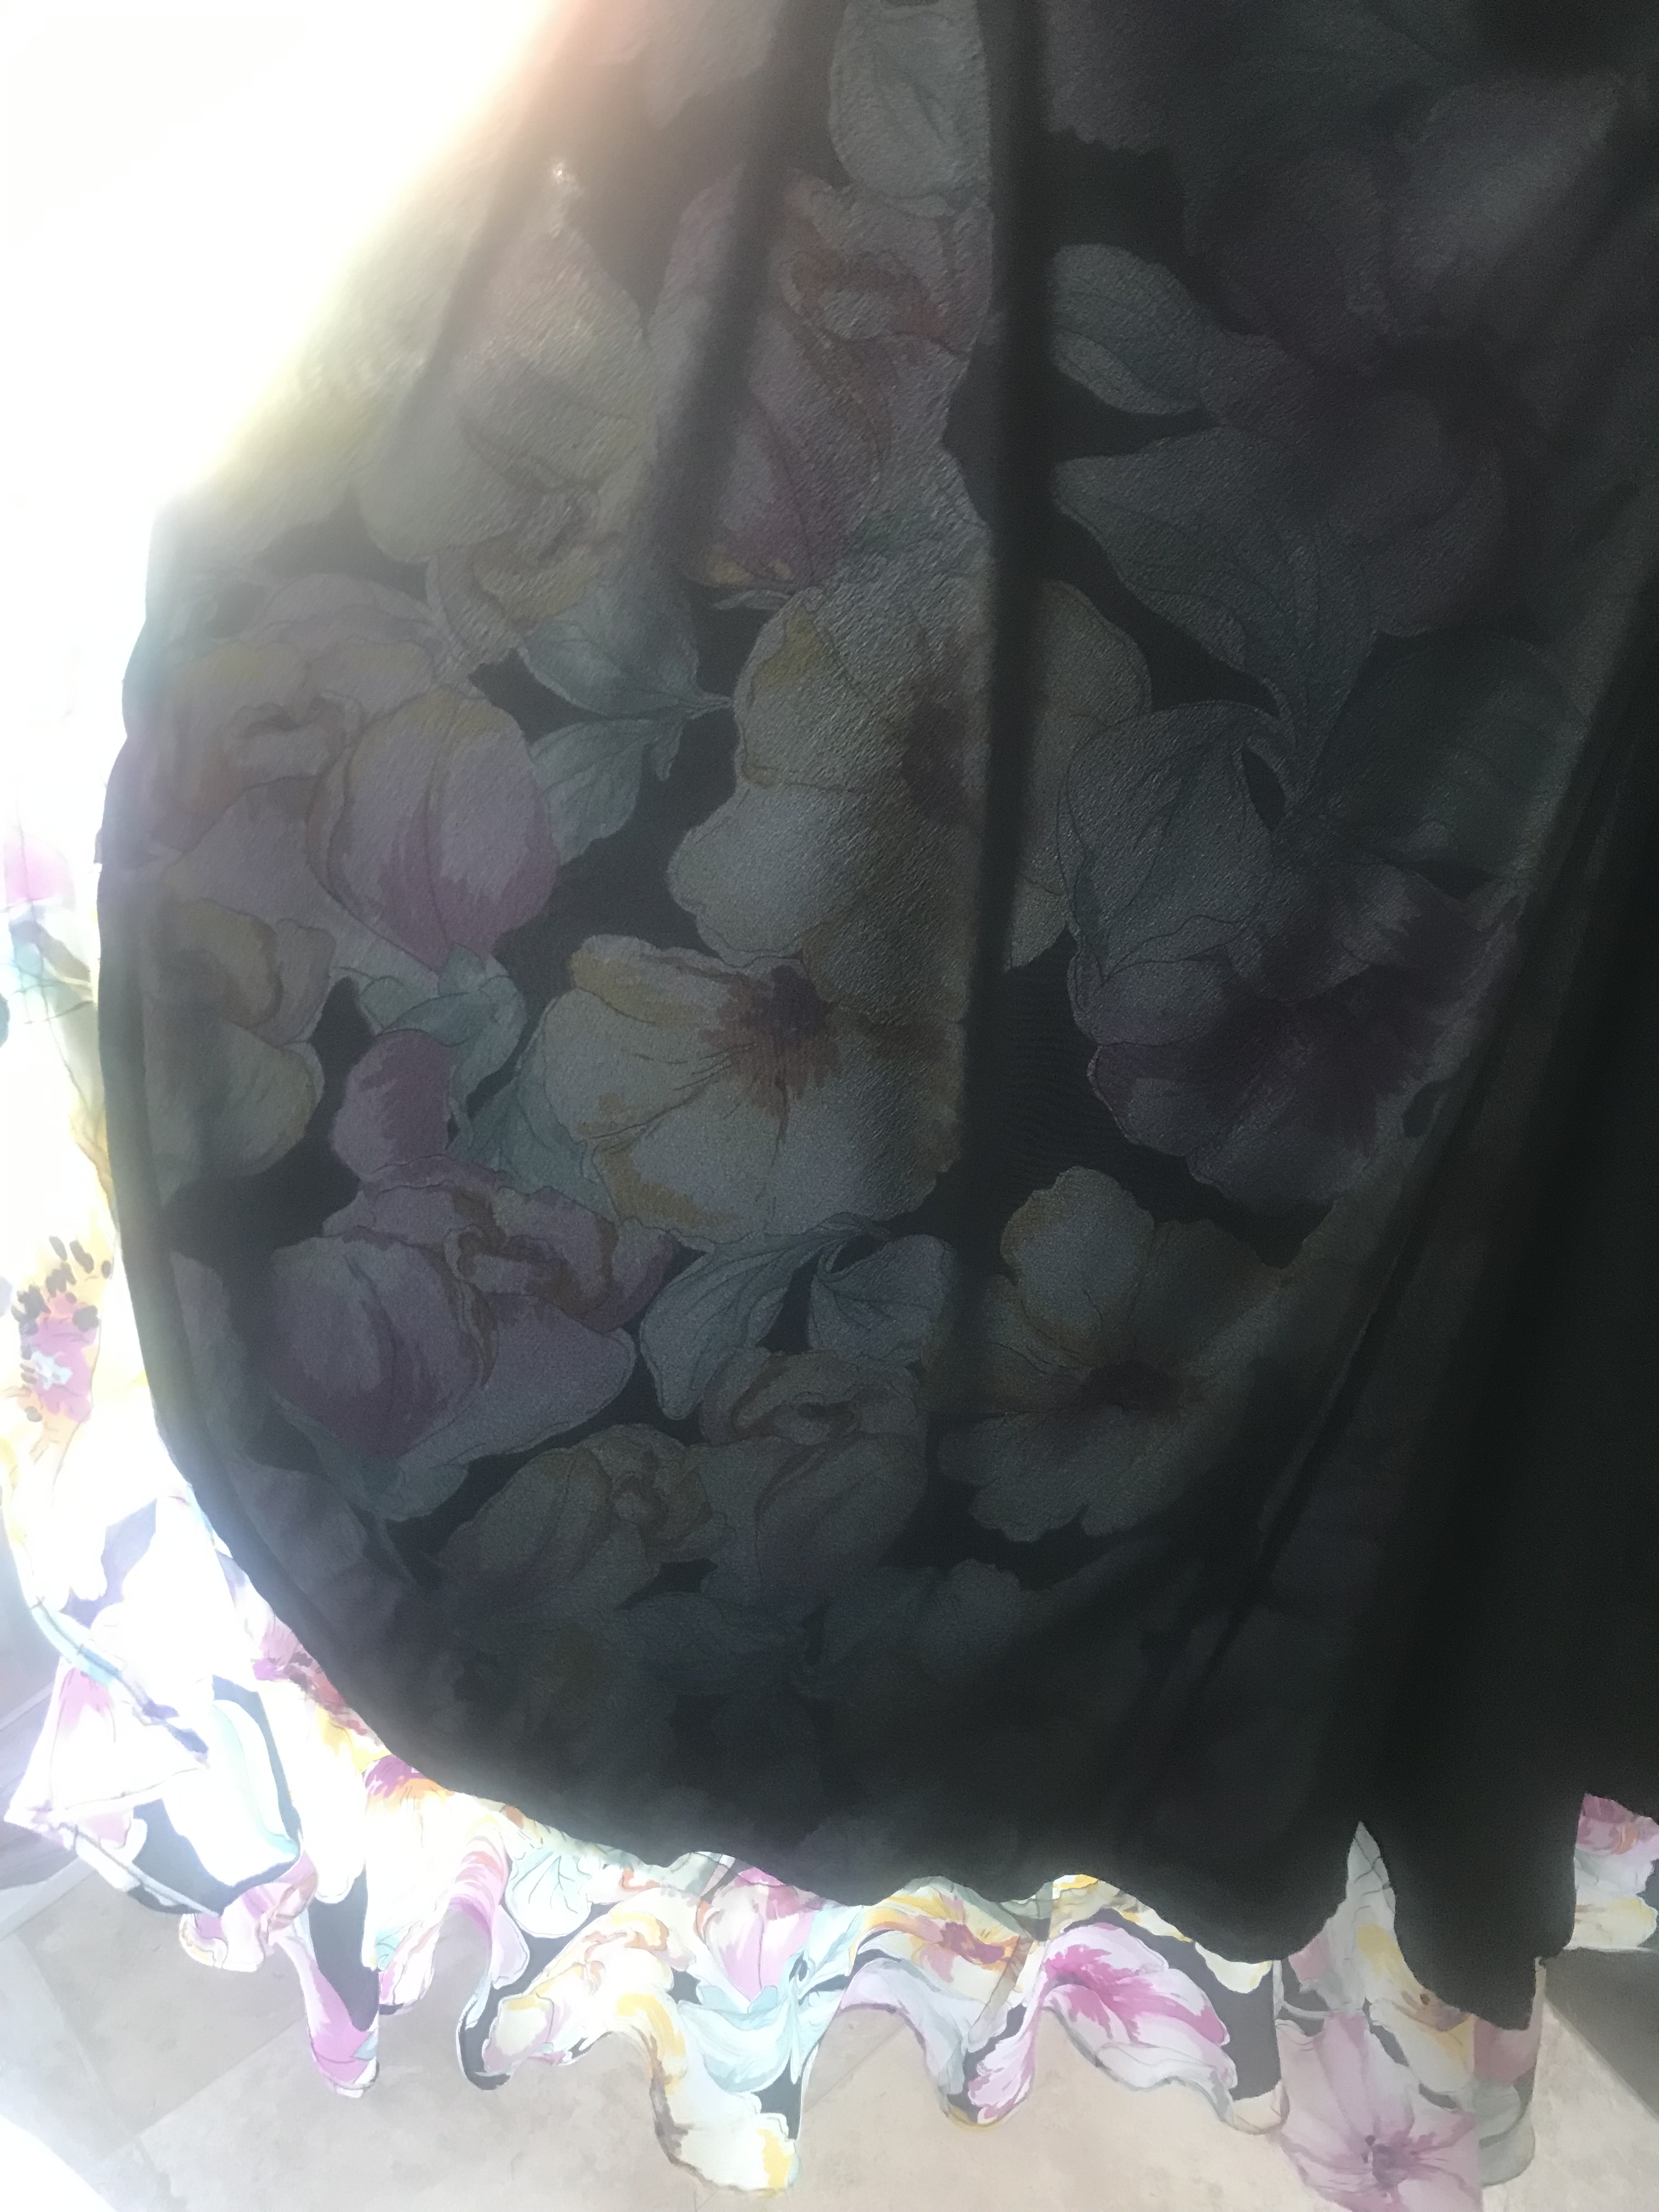
This time around, I decided to fully line the dress (instead of using the bodice facing from the pattern), meaning I cut out the entire dress, the bodice and the skirt pieces, less the flounces, in both the outer, floral silk georgette fabric and the silk lining that I also had in my fabric stash. Cutting silk, especially sheer, floaty slippery silk, is NOT easy if you’ve ever tried. It slips all over the place and misbehaves in as many ways as it can, just to drive you nuts and practically give up before you even started. But, since it was SO pretty and soft, I did my best to battle it and tackle it into submission, knowing in the end it was going to be incredible and worth it all.
The silk draped so innocently on my dress form
Anchored down and ready to cut!
So the sewing begins!
Making a tiny hem to the ruffled edge
It all went pretty well and the fact that I had made it before, I knew what to expect from the pattern instructions.
The most difficult and time consuming part was making the narrow hem on the long outside edge of the flounce that would be attached at the bottom of the skirt. Check out this pattern piece that is over 110 inches long. Yikes!
After tackling that beast, the dress was nearly done and I could start to see the light at the end of the tunnel.
Having a major deadline to hit, and other clients banging down my door and begging me to help them with their last-minute bridal requests, I finished up my dress and just got ‘er done.
One last thing I added to the dress was lightweight foam bra cups sewn into the bodice lining as that sheer stuff certainly wasn’t going to hide my bits. Thank goodness I had some on hand in my supply stash and I was able to swiftly hand sew them into my dress, no problem! Confidence boosters for boobs-horray!
Bra cups sewn in saved any wardrobe malfunctions!
I just have to share the insides of the dress with the lovely silk lining!
Here I cheated and used my serger to attach the waist of the bodice to the skirt and hide the raw edges.
The skirt lining that ends just above the flounce
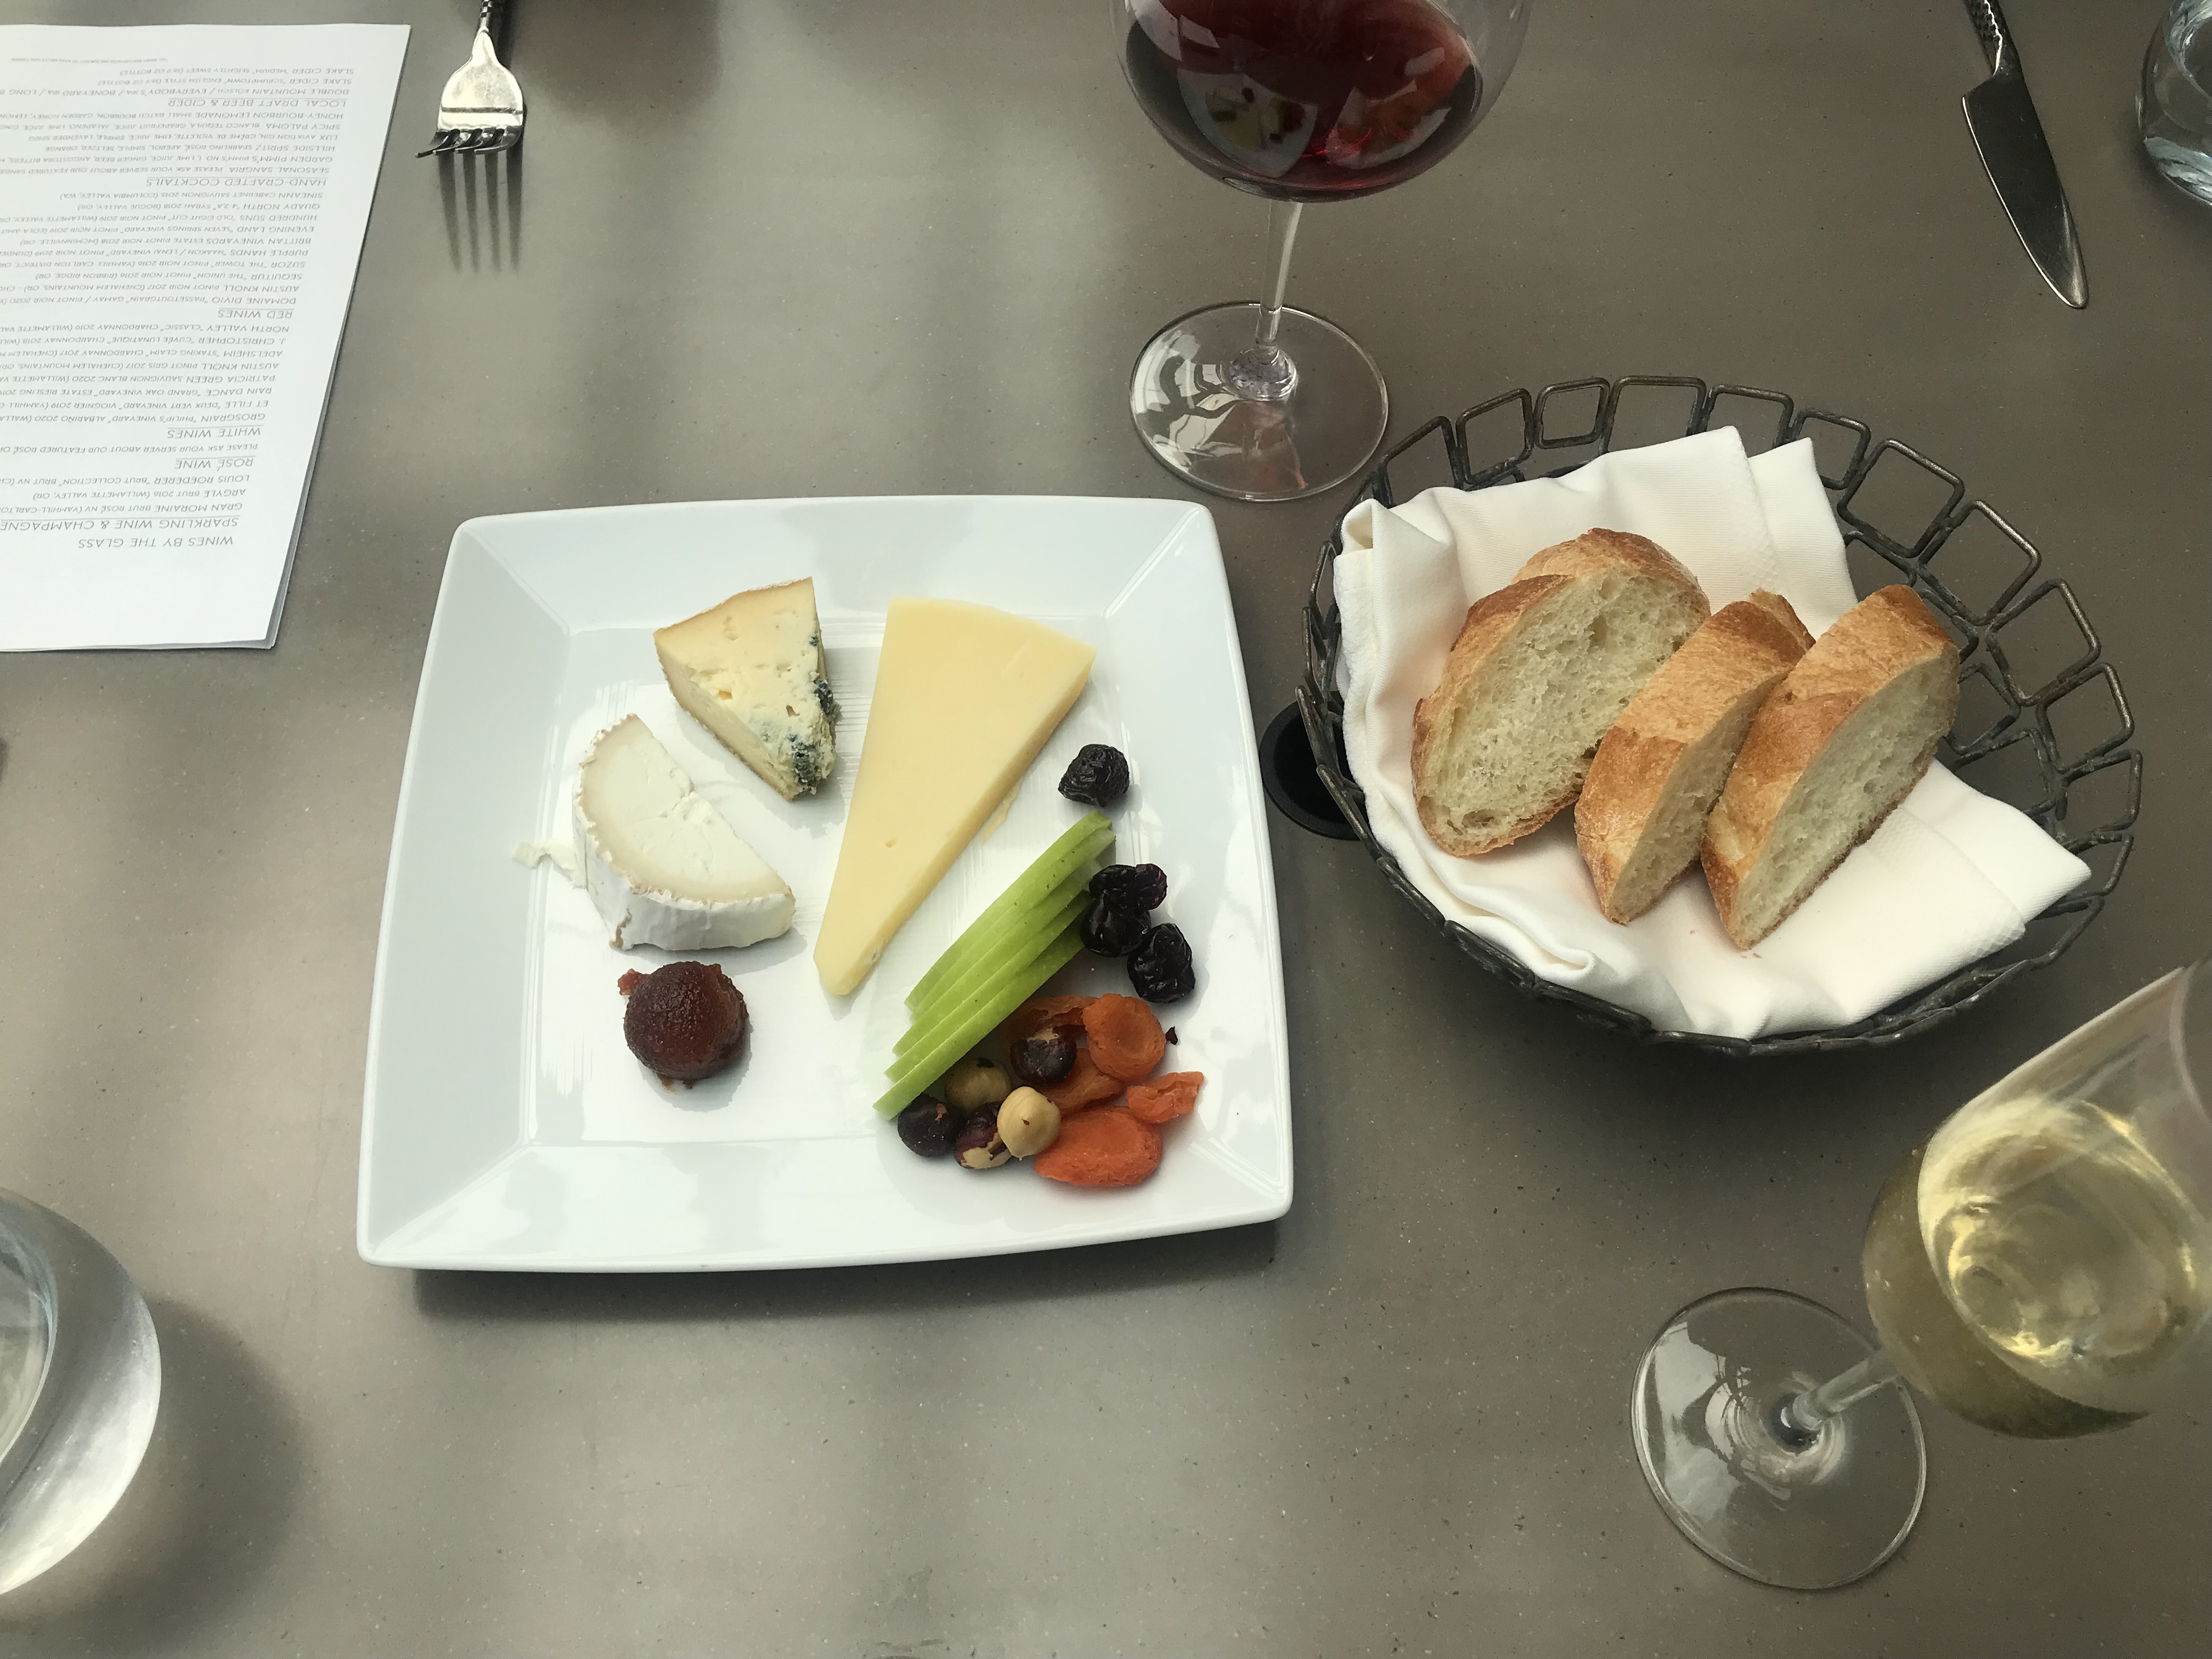
So off we went to the wedding, leaving enough time to stop at one of our favorite spots in the wine country of the Willamette Valley in Oregon, The Allison Inn and Spa, to snap some photos and have a glass of champagne and a light cheese plate before the wedding. Perfect!
Let’s go up there, that’s where the champagne is served!
The lovely snack we shared over a glass of wine and champagne!
Watch that breeze!
As much as I enjoy the entire process of making a new dress, it feels so good to be done with this one, wear it to a fun wedding (and not have to hide in the bushes!) and hang it up on my wardrobe for another occasion.
I am lucky enough to have made some wonderful friends at work. Friends who are smart, fun, sweet, supportive and interested in happenings of life outside of the workplace. Alyssa is one of these friends.
When Alyssa got engaged to the love of her life Connor, we all were, of course, delighted and so happy for her! We threw a bridal shower for her at work which was super fun, and sent her off to enjoy her wedding day and honeymoon in Hawaii.
Several months before the wedding, as one usually does, Alyssa purchased a beautiful wedding dress that fit her perfectly, but needed to be hemmed. Guess who she asked to alter her special dress for her? Yours Truly!
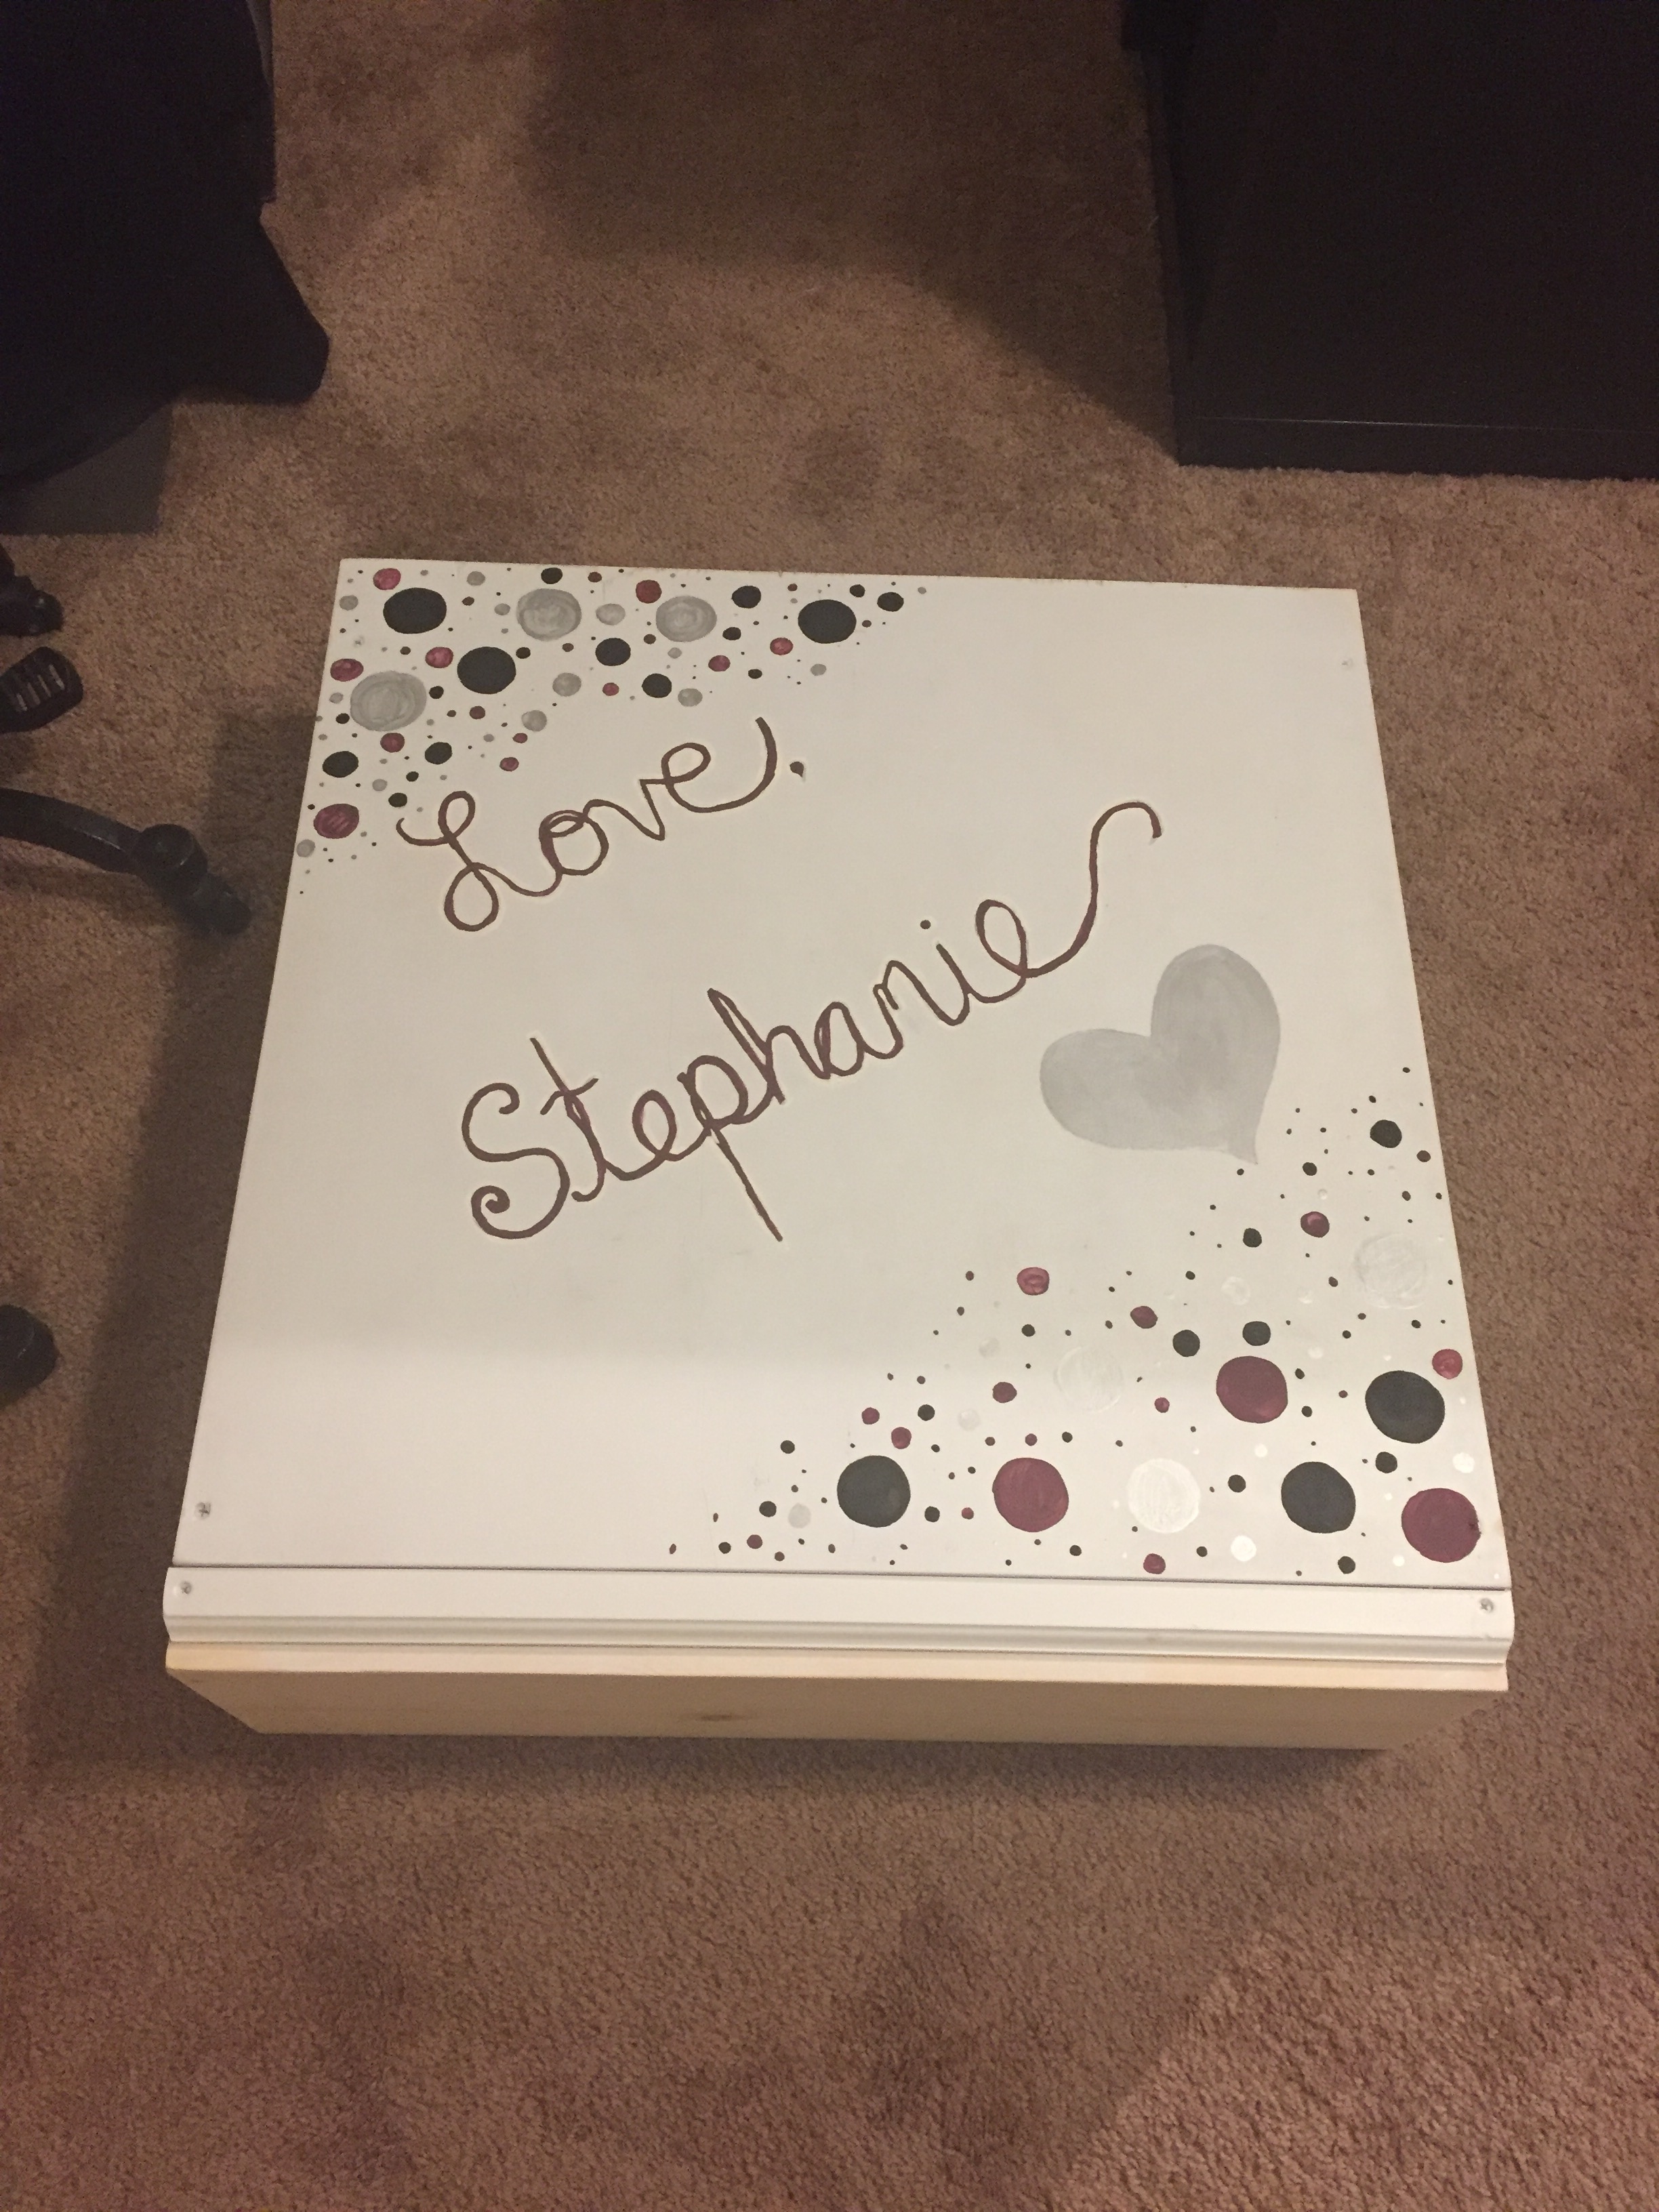
She came over to my apartment for the first fitting already bearing gifts. She made me this wonderful box to use as a platform for alteration clients to step up on while pinning a hem. She even painted it with my Love, Stephanie logo on it. It is perfect and I love it! So sweet!
As she was trying on her dress, she thought it would be really nice to add a little “sumpn’, sumpn’” to it for two reasons: one to add her own twist and flair to the dress, and two to add extra support to the little skinny straps so that they don’t cut into her shoulder so with all the weight of the beaded bodice and full skirt of the dress.
Hemming the skirt was part 1 of the alteration which was the easy part:
It was a pretty even cut around the three layers of the skirt. The tulle outer layer was just cut off, and the two under layers I used a baby hem. (Wedding) cake!
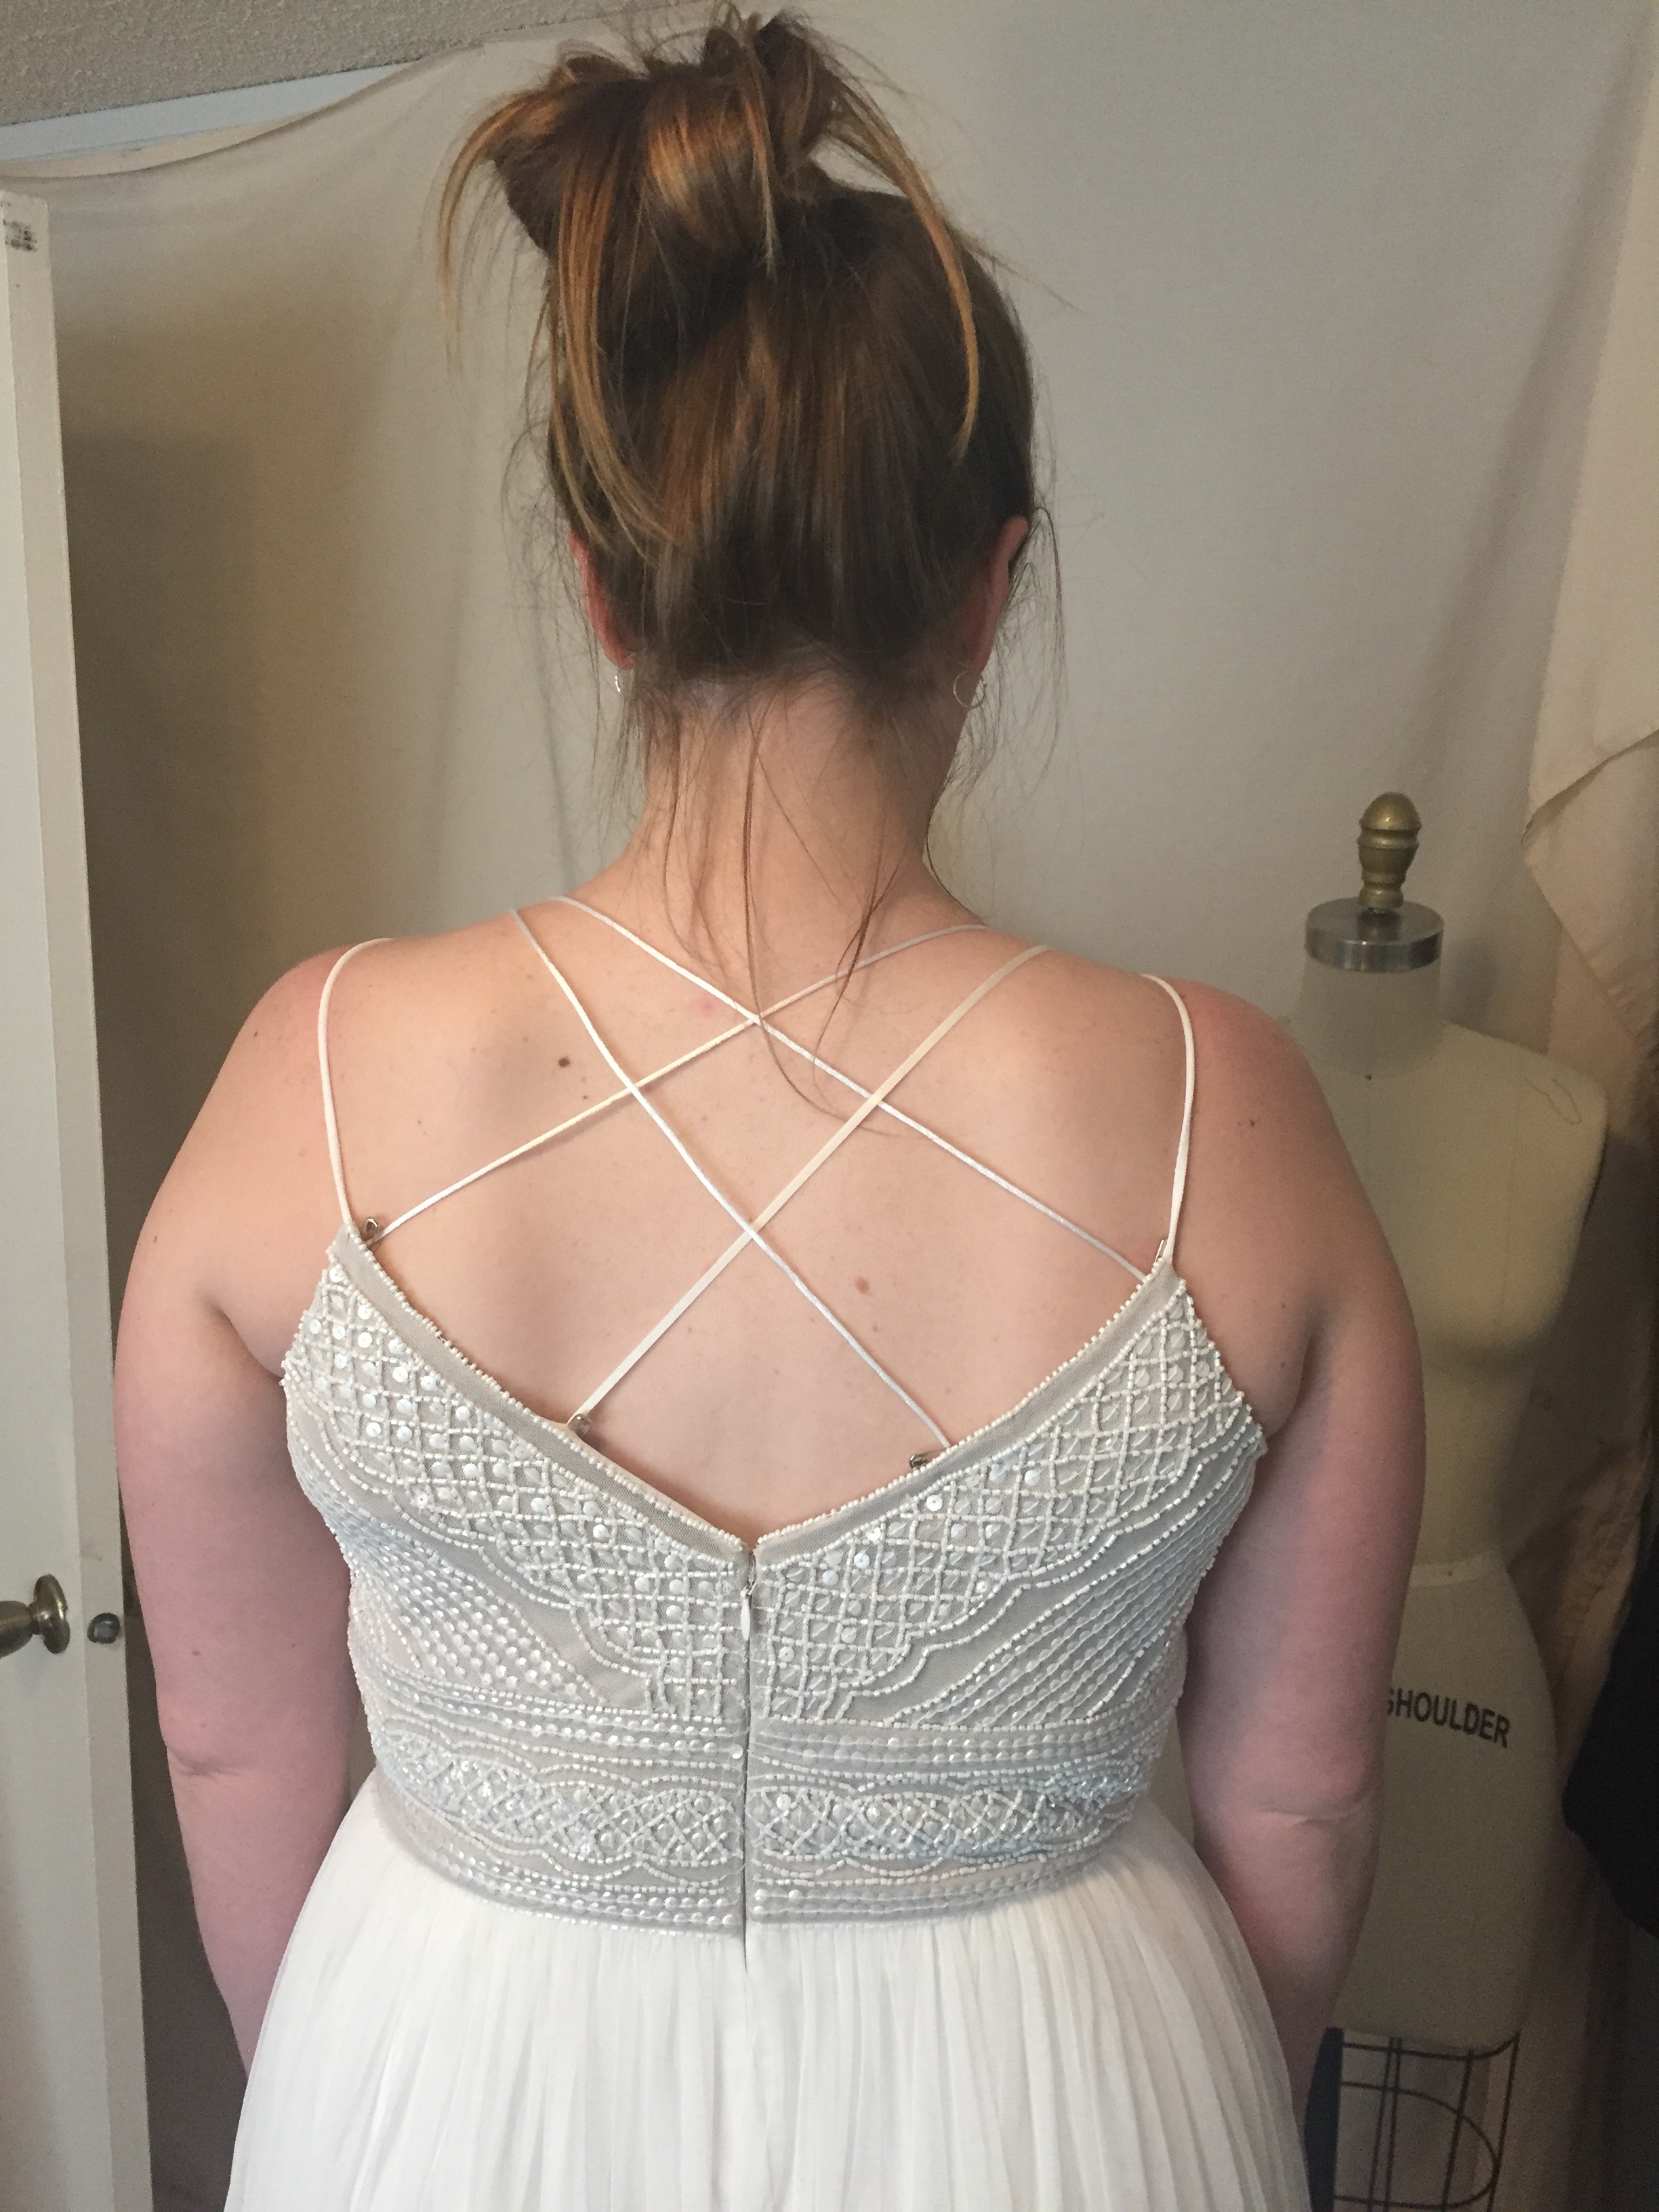
I thought I could take what I cut off the hem of the skirt lining and use the fabric to make skinny straps. We played with some ribbon I had laying around and came up with a nice criss cross strappy design for the back of the dress. Here we I just pinned the ribbon in the pattern that we liked for the straps:
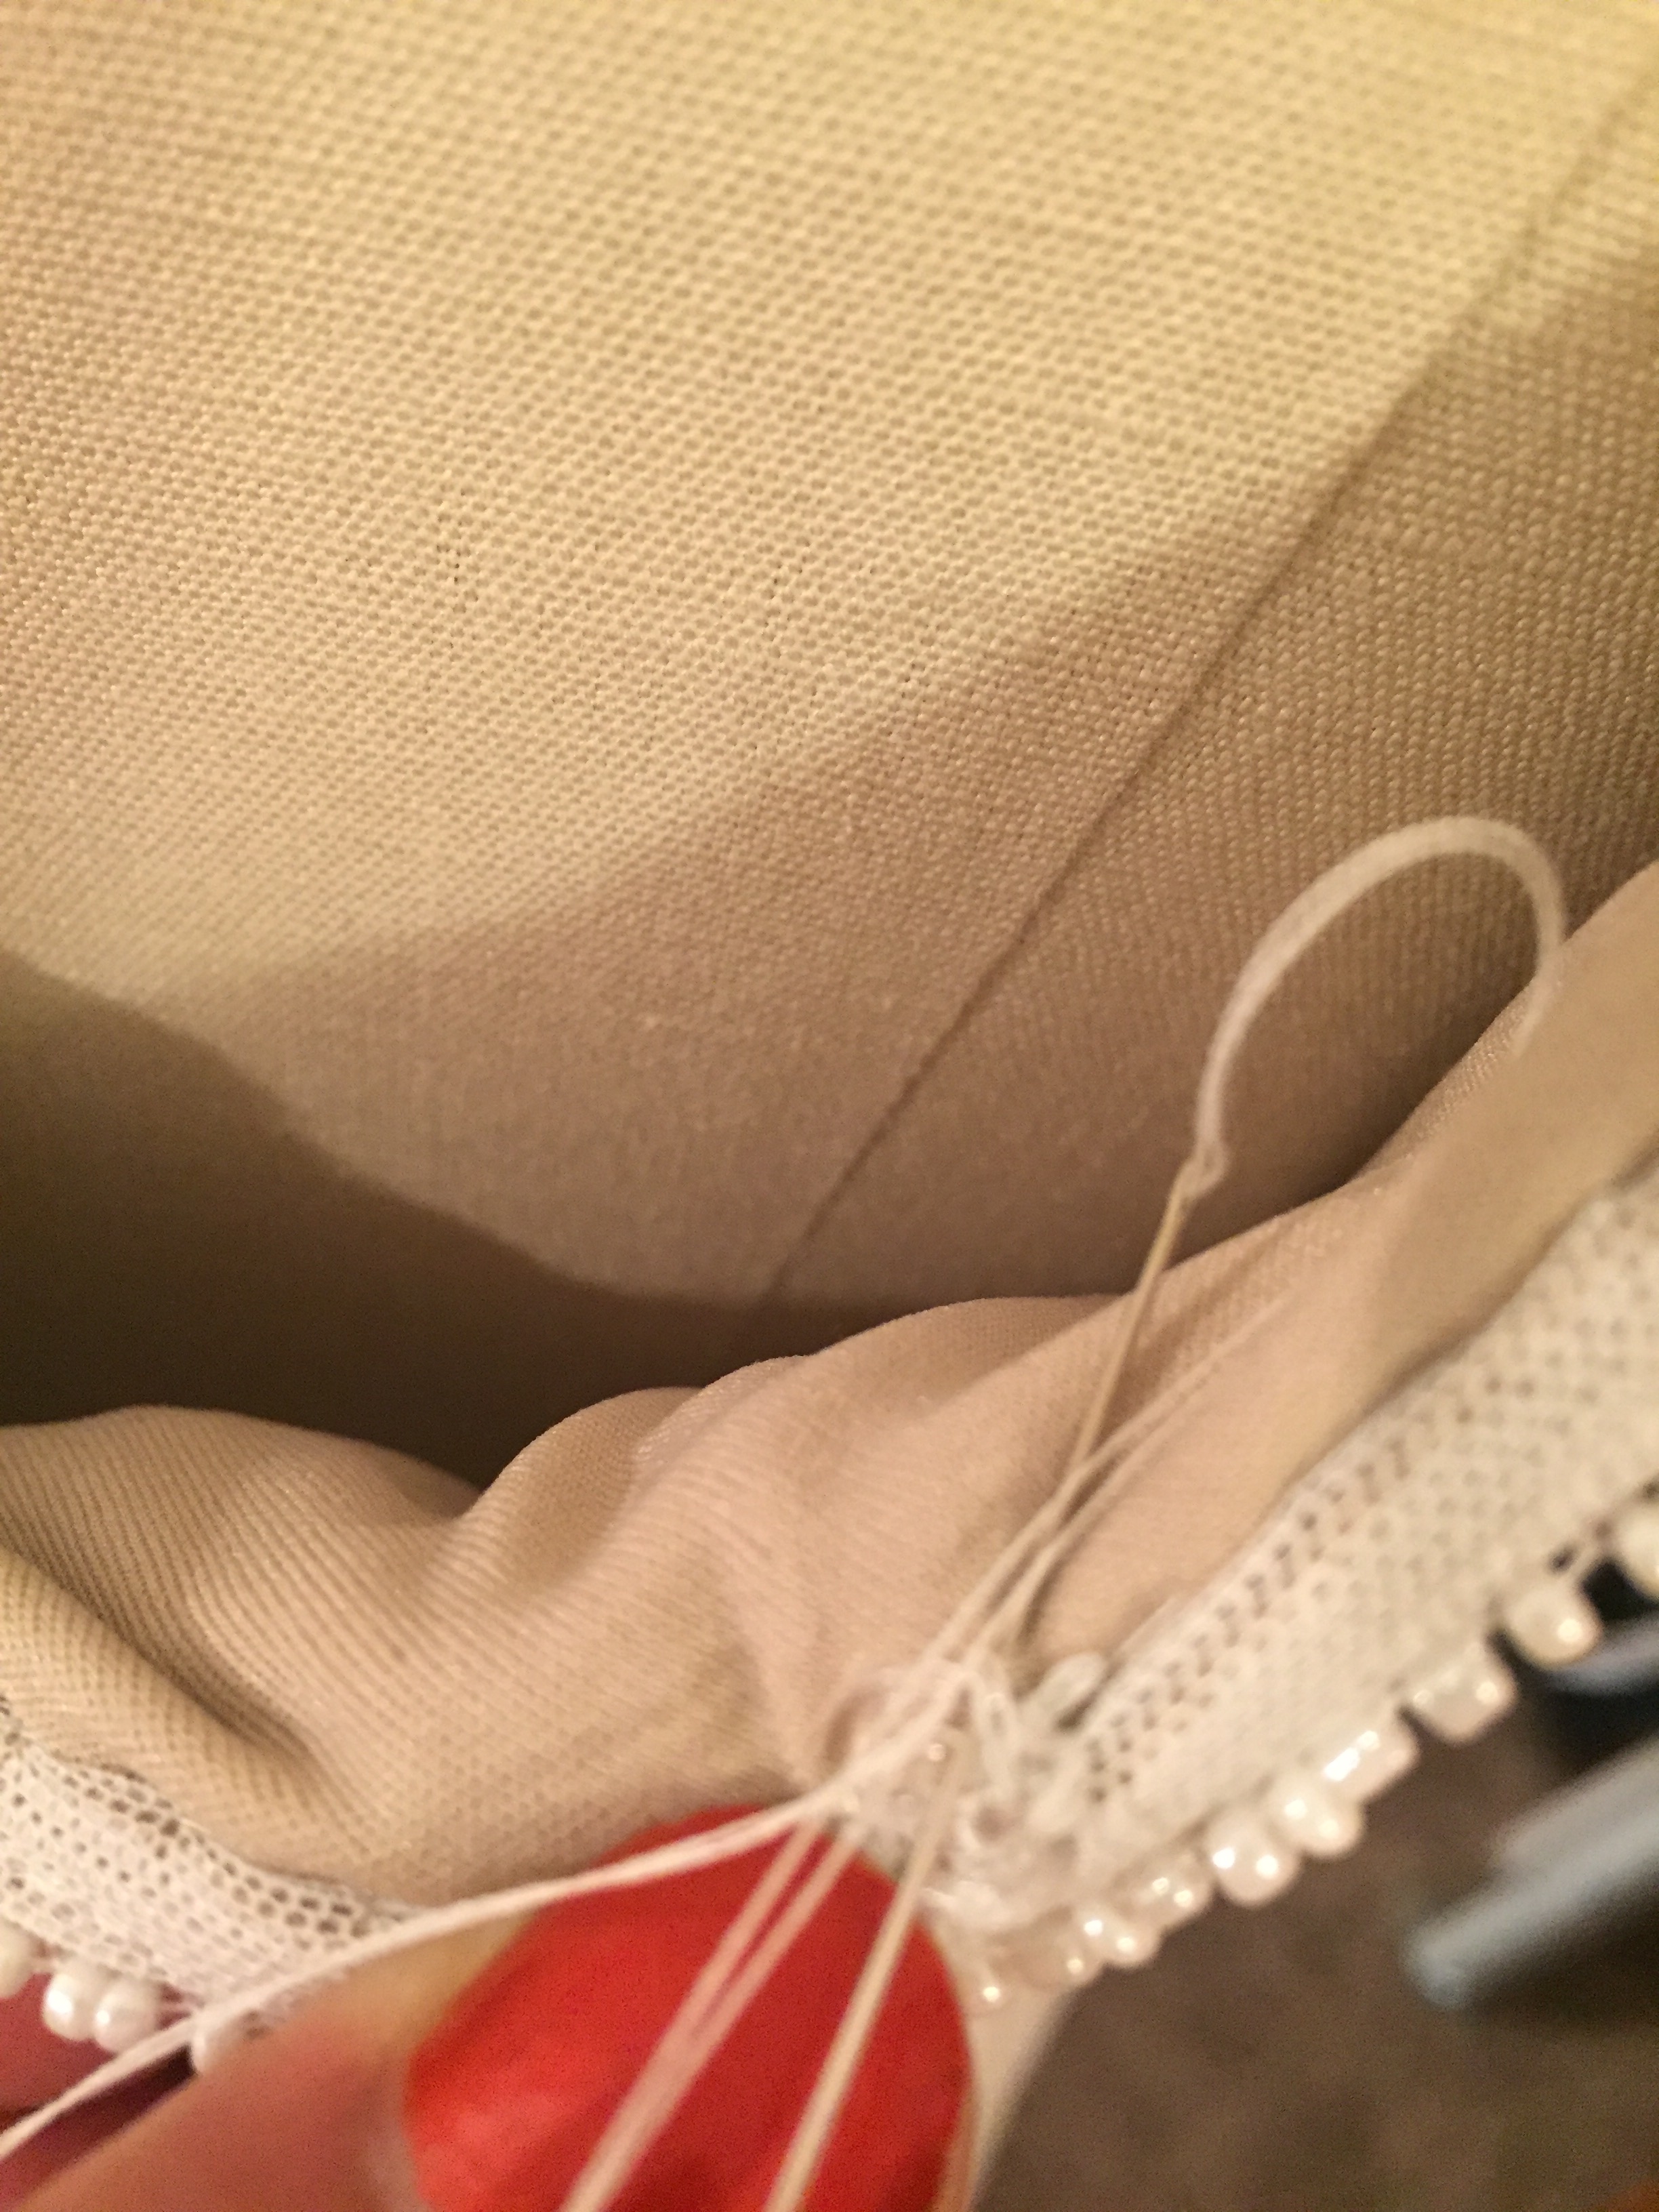
I cut strips out of the scraps of the hem, and sewed long skinny tubes out of the strips, then sewed in by hand the straps to the front of the bodice.
At the back side of the dress, I sewed in tiny clear snaps to the inside of the dress and the the mate to the snap near the end of the strap.
I needed her once again to try on the dress and make the straps exactly the right length across her back so that they were long enough to go across her back, but didn’t sag when worn.
Before the straps
After the straps
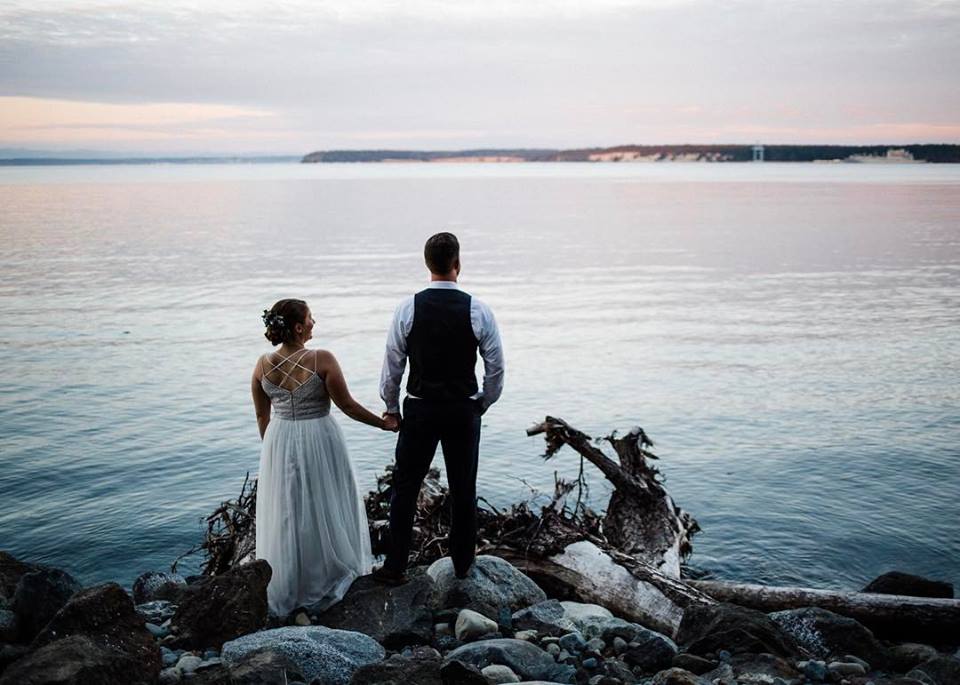
Fast forward to the Big Day. Everything went smoothly, the straps held up, and the bride was radiant in her beautiful customized dress. Yay!!!
Congratulations Alyssa and Connor! May you have the rest of your lives together filled with love and happiness!