Fringe Benefits

I’ve been thinking about making a kimono like this for a long time. I’ve made a couple of them for myself in the past, had some lovely material on hand that was perfect for this style, and have a current client that I am making a manly version for as well, so the time was right to just go for it.

My fringe velvet kimono

Many of my ideas stem from images I find down some rabbit hole also known as Pinterest. I have a few pins to share, but these are just a few to spare you the boredom (and to save you some of your own Pinterest time suck):

Velvet Kimono with Fringe
Another Velvet Kimono with Fringe
Catch my drift?
My kind of outfit

So, with this amazing silk burnout velvet that I had purchased from Mood Fabrics on hand all I needed was some fringe for the hem and binding for the edges.

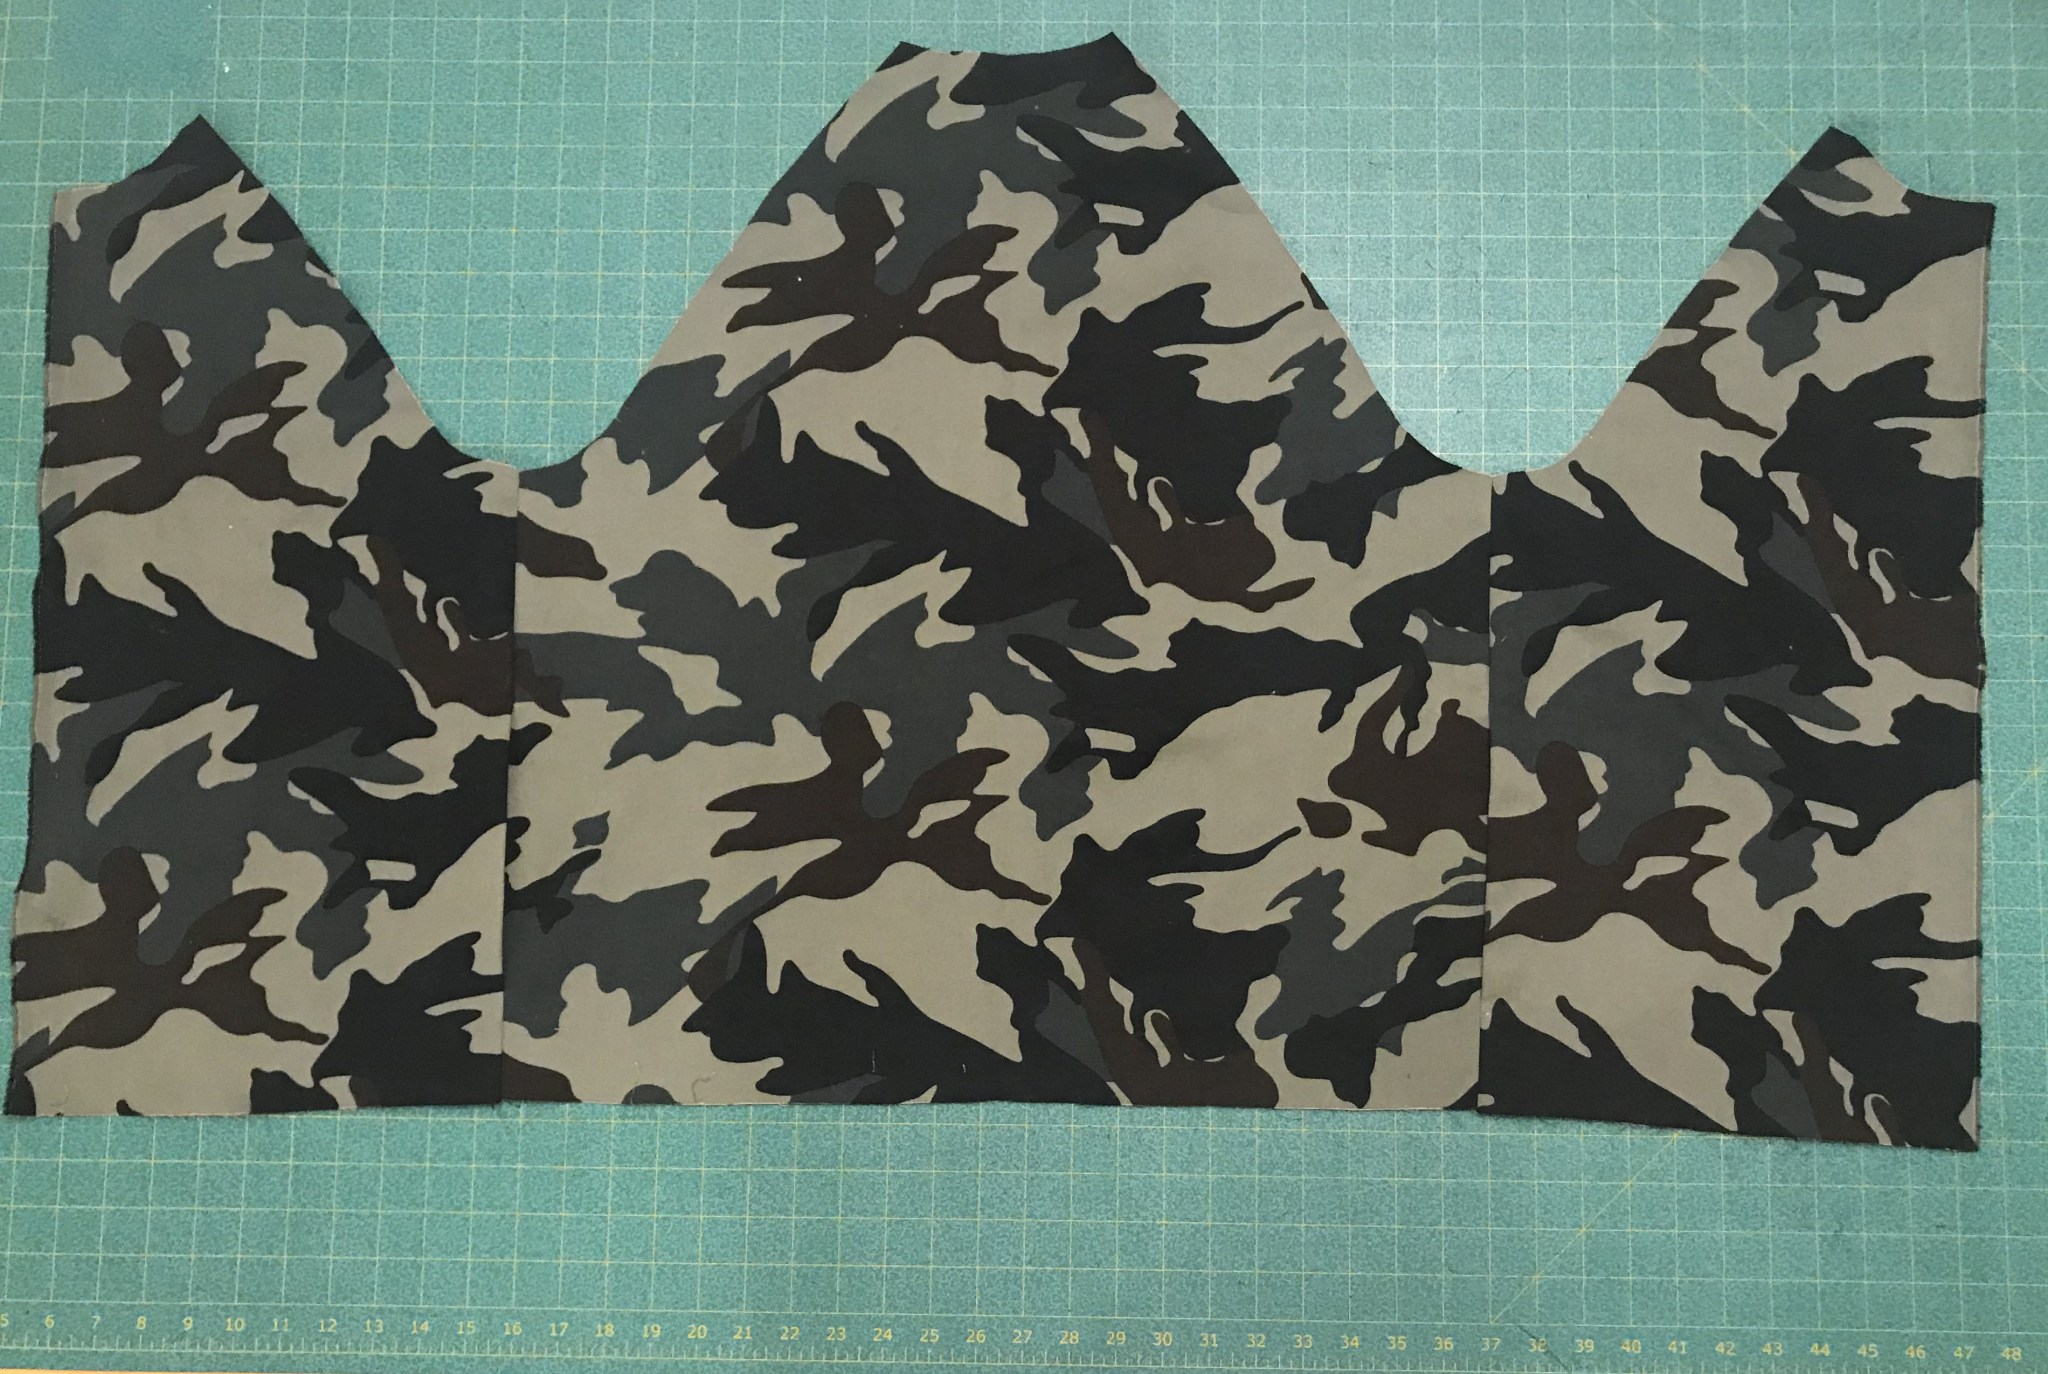
I really like Simplicity patterns for straightforward and uncomplicated patterns like this one Simplicity 1108, one of their Easy-to-Sew patterns. https://www.simplicity.com/simplicity-storefront-catalog/patterns/brands/simplicity/simplicity-pattern-1108-misses-kimonos-in-different-styles/

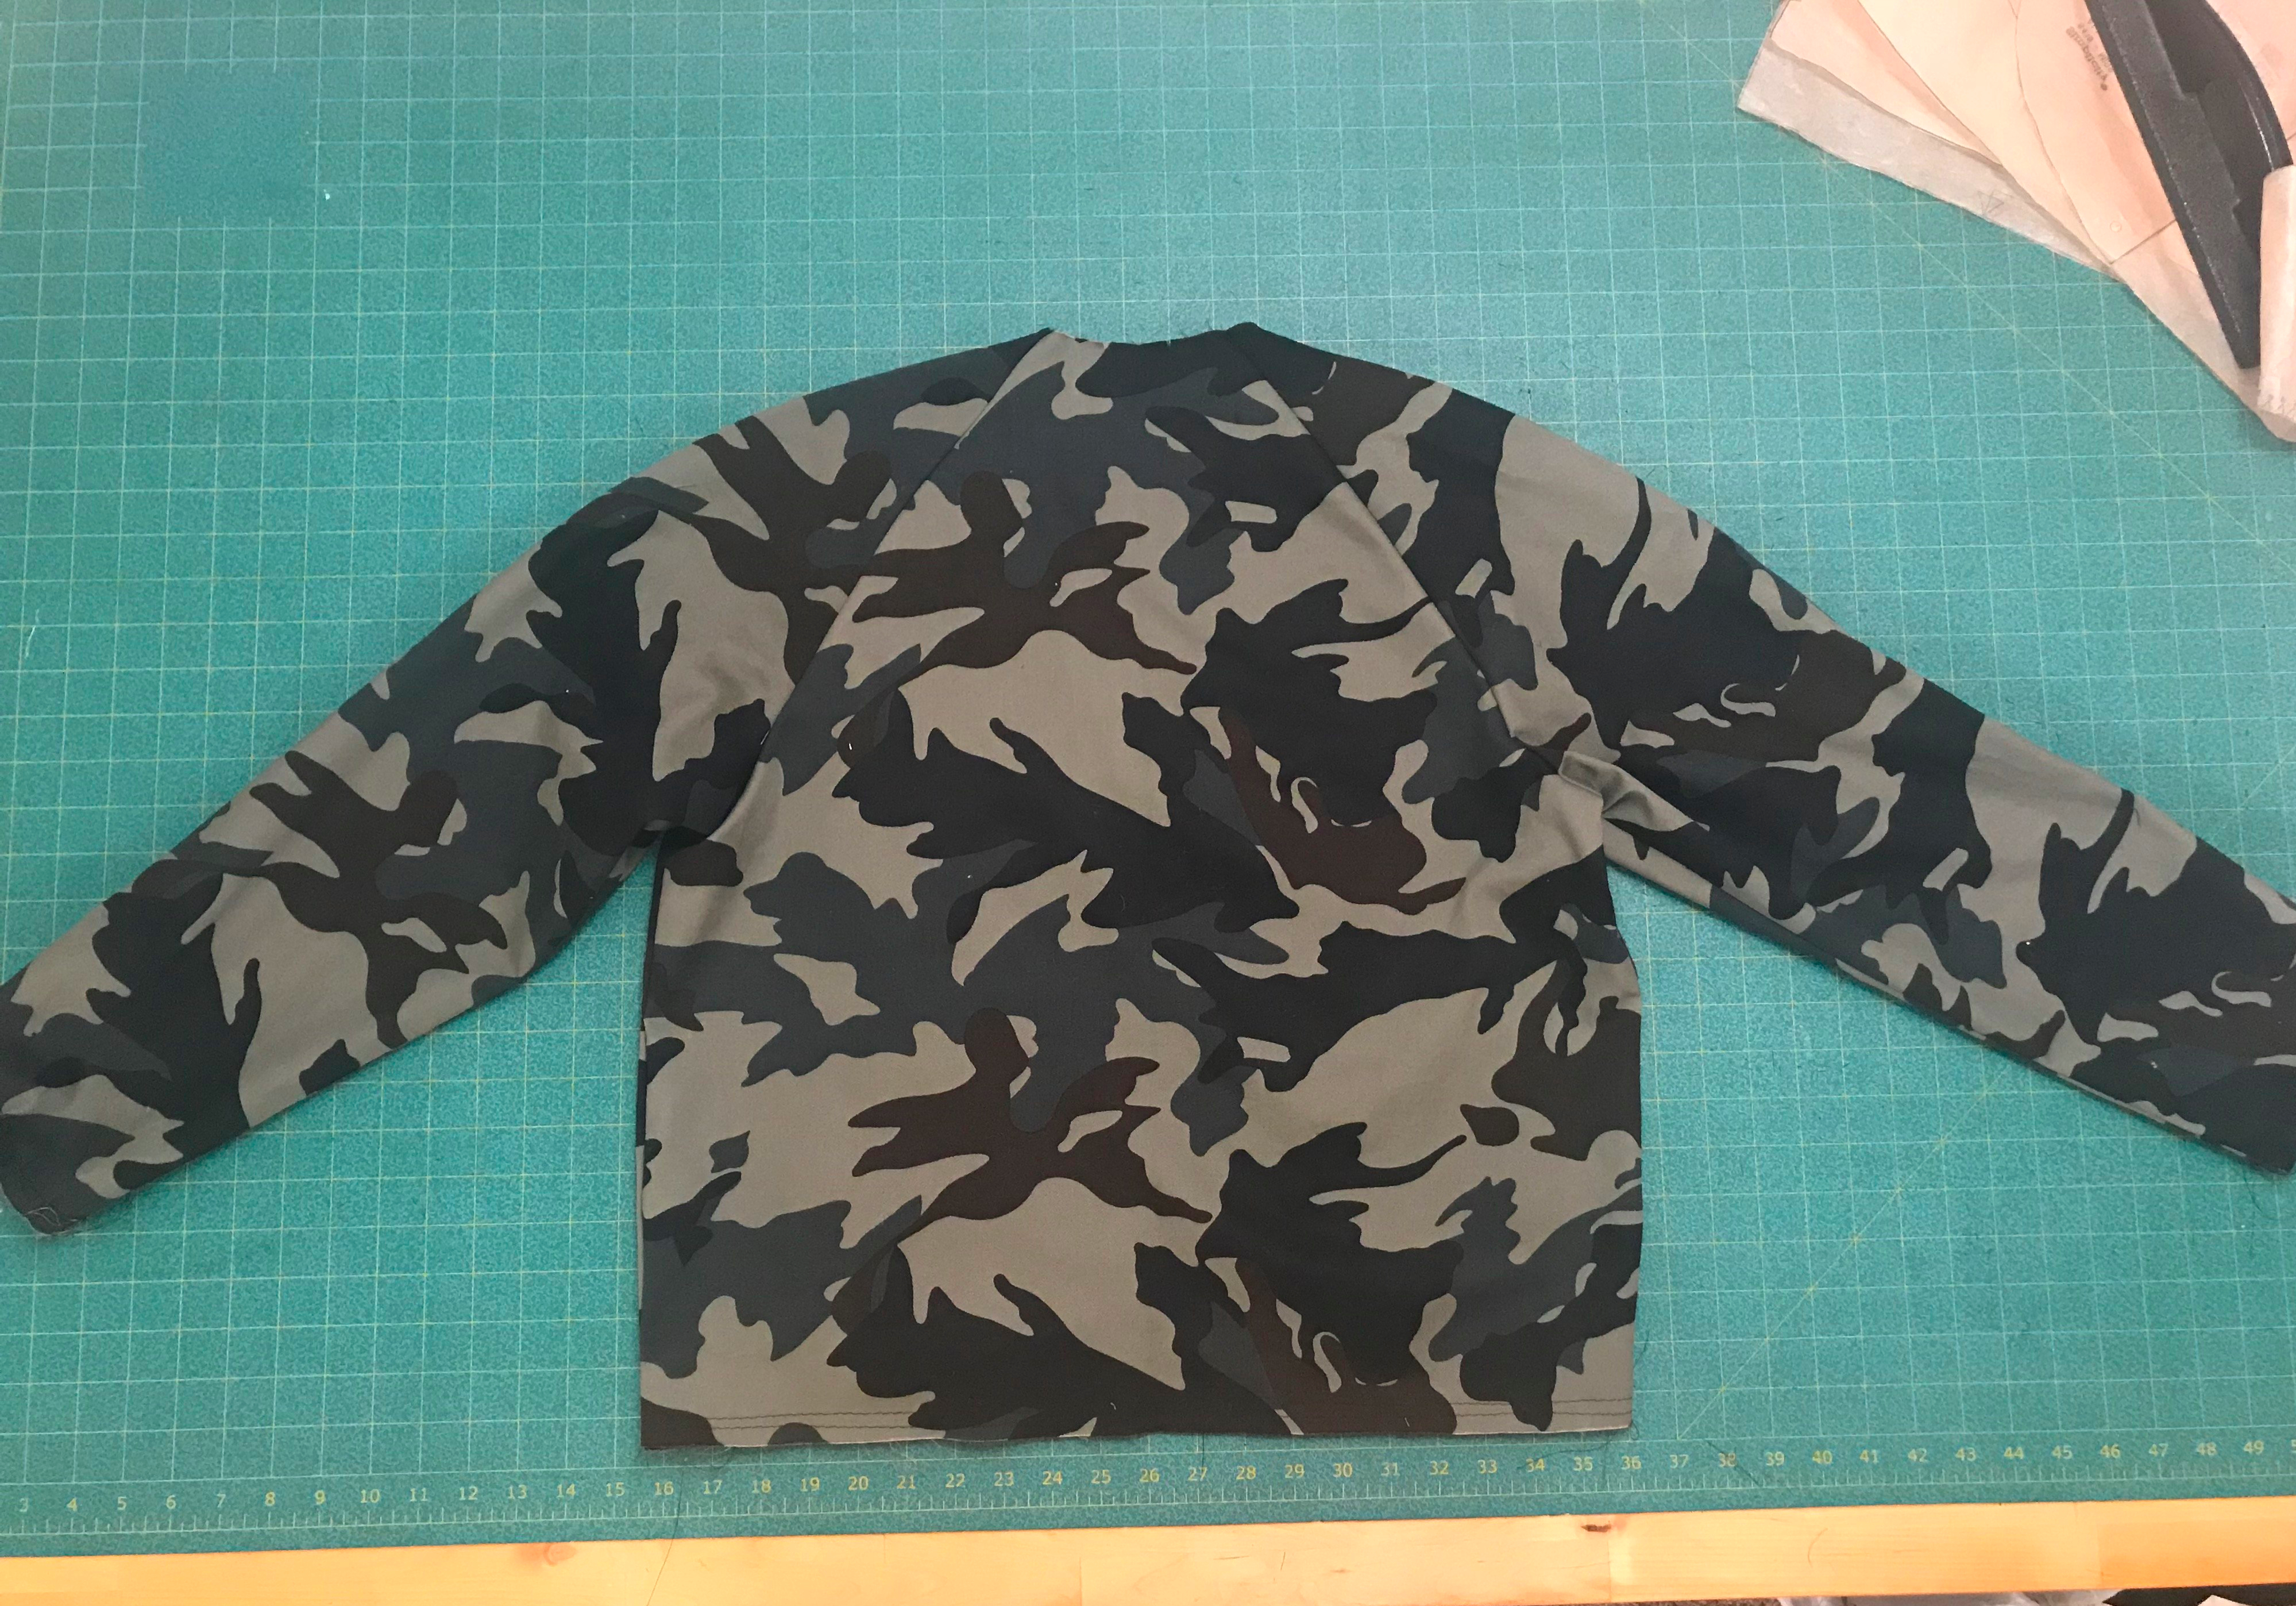
Using a simple pattern like this one it didn’t take long and was truly easy to sew. I used view D and added trim and wide binding to the sleeves:

Simplicity 1108 pattern

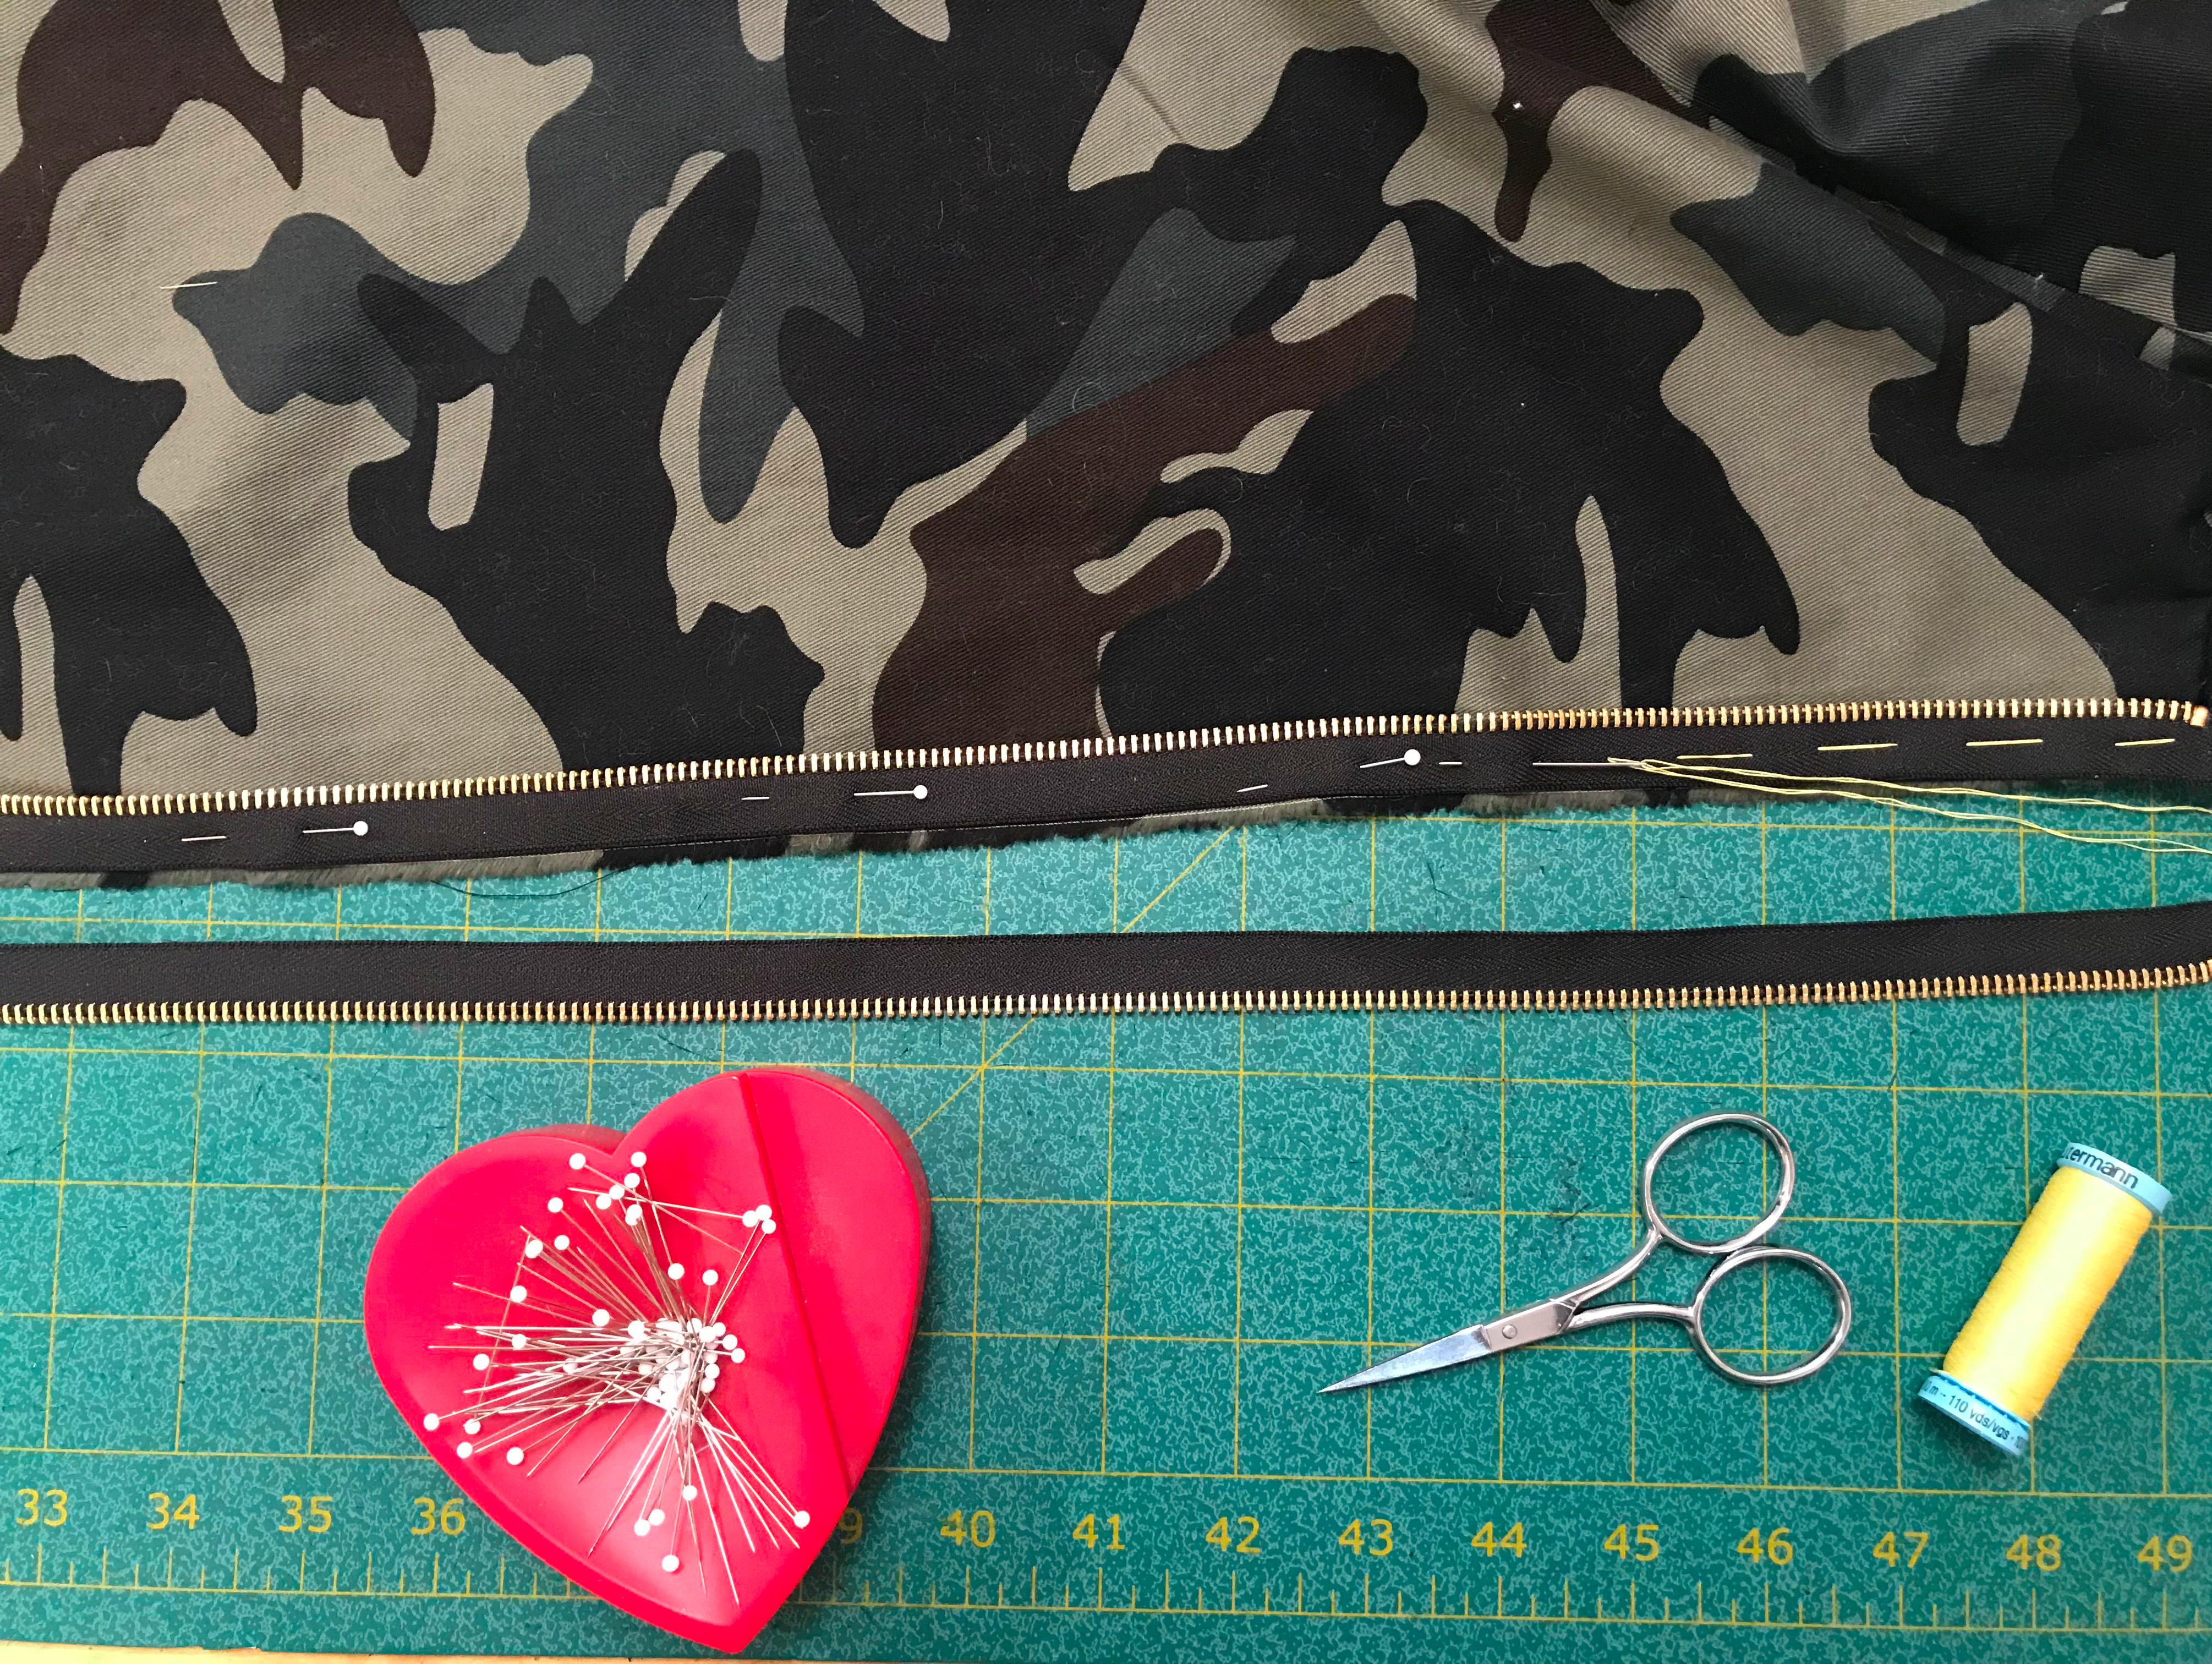
The most difficult bit for this little number was the fabric. The velvet wants to shift and dodge around while sewing, and the fact that it was silk also made it tricky and delicate to manage. Sewing on the binding was the pits as the two slippy materials did not want to behave and it just shifted all over the place.

Then there came applying the fringe and many inappropriate swear words were used. Ugh. I had to sew it on carefully by hand as my sewing machine refused to cooperate or participate in that nonsense.

Now I can appreciate why these kinds of little tops are so expensive. Yes they are simple garments, but MAN, all of the above factors really take a toll on one’s patience! Plus that fringe was not cheap, much less that fabric.

Well, as usual, the time and effort paid off and I now have a lovely and special top I can just slip on over a nice tee and jeans, or my leggings and I’m ready!

Luxe Bomber: Worth the Wait

This little gem took me months and months to make, but the actual sewing took only a few weeks to complete. My biggest weakness when it comes to sewing is starting a wonderful and exciting new project, then something else shiny (or someone who’s paying) comes along and I set it aside for far too long. This baby was exactly one of those scenarios.

I love making jackets. They are a big part of my wardrobe and can be easy to sew. They are even easier to sew if you’ve made the same one before, as I did for this bomber jacket pattern. I used Simplicity 8418 pattern for the second time to create this beauty, and it is certainly not the last time.

Now, for the ingredients that make this recipe top notch, I used beautiful silk material, quality threads, and smart sewing techniques. The main fabric for this version I decided to finally use an end remnant of gorgeous silk jacquard labeled from Chanel that I won years ago in a fabric giveaway and was stashing for a special project. I also happened to have enough of a piece of silk lining-weight material in the perfect shade of purple to coordinate with the colors of the Chanel silk, also in my stash (If you don’t know me already, I have a very healthy stash of fabric in my possession).

Of course, I also had Pinterest to add to the inspiration for this creation, which made the decision to cut into this beautiful material more bearable, because after all, you only life once and you can’t take it with you. Here are just a few of the bomber jackets that inspired me:

I got right to cutting out the pattern pieces from the main fabric and the lining, as well as the light weight batting I used to quilt the silk to. The last time I made this pattern, I quilted the entire lining and left the outer side as it were. This time, I wanted the quilting to be part of the texture of the outer garment.

Well, I quilted part of the back of the jacket, and that’s about the time when I got busy with other pressing projects, paying clients, and teaching others to sew, so the jacket partially made and the cut pattern pieces was gently laid aside on the “to be continued” pile. There it sat patiently for months.

Fast forward to October of 2021 when I was planning to attend a conference that involved the professional sewing guild that I belong to, Association of Sewing and Design Professionals or ASDP for short.https://sewingprofessionals.com/. I knew that I wanted to wear garments that I had made to the convention and had a long wish list that I had wanted to create, but for the sake of time, and to tackle my growing pile of UFO’s that stare at me when I’m in my sewing room, and seem to beg for me to just work on them just a little bit, I revisited the silk bomber project and decided it would be a fantastic option for the convention.

Hence, the sewjo for this project sparked a new light in me and I got right back into the groove of quilting this baby and getting it going in time for the convention. Whatever the motivation was, it worked and I pulled through and finished the jacket in time to wear it a couple of times even before having to pack it up and fly to Boise, Idaho for the sewing pro retreat.

Well, the convention was amazing and I got a ton of compliments on my jacket which I was proud (and perfectly comfortable) to wear. Now I call that a job well done and worth the wait!

Red is The Color of Love

It’s been far too long since I have posted anything here on my beloved blog, so I thought it was time to update and refresh with a quick post. What better way to do that with a bright and exciting project that I made for myself for our first wedding anniversary!

So, here she is:

Red maxi dress with flutter sleeve and sash

I cut out and sewed this dress in three days during time after work hours and the weekend before our dinner date, so it was a bit of a rush job. Due to lack of time and general dressmaking laziness, I didn’t make a mock-up, I just went by my body measurements, comparing to the pattern measurements, and a mini tissue fitting (essentially holding the pattern tissue up to myself and eyeballing what I needed to adjust). I added 4 inches to the skirt length knowing I wanted it to be long enough to wear with heels and for it to be floor length. I may add more length next time so it really touches the ground. I also fully lined it (the pattern instructs to just line the bodice) and made French seams for the skirt side seams.

I just love how this dress turned out! It was so comfortable to just slip into, strap on some heels, a pretty necklace and earrings, a dab of Miss Dior perfume at my neck, and DONE!

Yes, I realize that I match my front door.

I used this Simplicity 8832 sewing pattern, view C, for this dress. I just love the simplicity of this pattern (ha, haa, meant to do that) and the lines of the dress design:

Line drawings of Simplicity 8832 pattern

What I am NOT so crazy about is how they styled the pattern cover. I think they could have chose a different fabric, or had multiple versions made up in different fabrics, to show off the designs of this pattern:

Simplicity 8832 Sewing Pattern Cover

I hope that I am not coming off as a snob. My apologies if I am offending anyone, but I just looks a tad, I don’t know, “old lady shower curtain” to me in this particular fabric:

Don’t get me wrong, I love a beautiful floral fabric for a light and airy dress such as this, but I was going for a look more like this:

Dark green floral dress

Or even this:

Gorgeous burgundy velvet dress

I suppose I can chalk this one up as a wearable test dress and can plan to make it again in a more luxe fabric for the next time. That is part of the beauty of knowing how to sew and make your own clothes. You get to be the designer and create your own vision! I just love that about sewing and it brings me a great deal of joy and satisfaction.

Meanwhile, happy first anniversary to my loving, cutie-pie husband! It’s been a wonderful first year and I look forward to many, many more!

Back to the drawing board and up to the sewing room as I have a few exciting new client projects that I am working on. Yay!!!

The Bomb-er


I’ve always wanted to own a bomber jacket. There is something cool and so easy about them, for all sexes and ages. I suppose that are a combination of an aviator jacket and a varsity jacket, and are seen everywhere in fashion nowadays.

The opportunity and time to make one for myself when we decided against dressing up and going out for Halloween this year as we had made previous plans for a double date with another couple the one good night for going out on the town. That disappointed me a bit as I was looking forward to making us costumes and going to a party or event, however, left me with some time (and fabric money) to make something else instead. So I chose a bomber jacket!

I picked up this sewing pattern a couple of months ago and started finding information online about the pattern and who had sewn it:

simplicity-bomber-jacket-pattern-8418-envelope-front

I learned that many sewists had really enjoyed making this pattern and it had rave reviews on PatternReview.com.

Some had even taken gone one step further and made the jacket reversible! I thought, if they could do that, why couldn’t I? So I went for it and made it happen!

I gathered up what materials I wanted to make the jacket out of, including the cotton camouflage print fabric and the flannel-backed satin for the two sides of the fabric and lining, the 2-way metal zipper (I ended up using a different zipper than the one shown in the photo below), and the gold metallic thread of which I planned to quilt the satin lining:

I got to work cutting out the two sides as I knew the quilting would be the most time-consuming and wanted to get to it as soon as possible. I spent a good amount of time making chalk lines of the quilting pattern I wanted on the jacket front and back pieces of the satin side before sewing it to the batting and creating the quilting pattern:

front quilting lines

The quilting was somewhat of a slow and careful sewing process. My sewing machine didn’t get along so well with the metallic thread (yes, I used the right kind of needle and tension on my machine!) and caused some technical difficulties, but with some patience and rethreading the machine many times, we eventually got through it together.

I decided to leave the sleeves of the satin sides smooth and un-quilted to avoid any “you look so, um, puffy today” comments when wearing the jacket with the satin side out. I think that was a great decision plus a huge time saver.

Sewing the rest of the jacket was pretty much a breeze, including the two-piece raglan sleeves, the pockets and even the ribbed knit collar, waistband and cuffs:

IMG_0475

the front pieces sewn to the back


IMG_0479

The sleeves sewn to the front and back

IMG_0480

I basted the zipper in by hand before machine sewing it in for the most control of this “touchy” bit of the process:

IMG_0481

Then, sewn by machine:

IMG_0483

Before long, I was on the home stretch doing my final top stitching using my edge stitching foot (one of my favorite machine feet!) on the front opening edge of the jacket and she was about done!

IMG_0484

I was thinking that I would like to add some cool embroidered patches to my bomber jacket, but didn’t come across any ones I liked in time, so I figured I could always add some and sew them on by hand if I come across any  the I like in the future. Meanwhile, I LOVE my new bomber jacket and am so excited to wear it, and inside out!

IMG_0509

IMG_0501

THE BOMB!


PS and disclaimer: this post has no affiliation with the crazy-ass bomber who was just arrested for mailing bombs to prominent Trump critics! Just say’n…