

I’ve always wanted to own a bomber jacket. There is something cool and so easy about them, for all sexes and ages. I suppose that are a combination of an aviator jacket and a varsity jacket, and are seen everywhere in fashion nowadays.
The opportunity and time to make one for myself when we decided against dressing up and going out for Halloween this year as we had made previous plans for a double date with another couple the one good night for going out on the town. That disappointed me a bit as I was looking forward to making us costumes and going to a party or event, however, left me with some time (and fabric money) to make something else instead. So I chose a bomber jacket!
I picked up this sewing pattern a couple of months ago and started finding information online about the pattern and who had sewn it:

I learned that many sewists had really enjoyed making this pattern and it had rave reviews on PatternReview.com.
Some had even taken gone one step further and made the jacket reversible! I thought, if they could do that, why couldn’t I? So I went for it and made it happen!
I gathered up what materials I wanted to make the jacket out of, including the cotton camouflage print fabric and the flannel-backed satin for the two sides of the fabric and lining, the 2-way metal zipper (I ended up using a different zipper than the one shown in the photo below), and the gold metallic thread of which I planned to quilt the satin lining:


I got to work cutting out the two sides as I knew the quilting would be the most time-consuming and wanted to get to it as soon as possible. I spent a good amount of time making chalk lines of the quilting pattern I wanted on the jacket front and back pieces of the satin side before sewing it to the batting and creating the quilting pattern:

The quilting was somewhat of a slow and careful sewing process. My sewing machine didn’t get along so well with the metallic thread (yes, I used the right kind of needle and tension on my machine!) and caused some technical difficulties, but with some patience and rethreading the machine many times, we eventually got through it together.
I decided to leave the sleeves of the satin sides smooth and un-quilted to avoid any “you look so, um, puffy today” comments when wearing the jacket with the satin side out. I think that was a great decision plus a huge time saver.
Sewing the rest of the jacket was pretty much a breeze, including the two-piece raglan sleeves, the pockets and even the ribbed knit collar, waistband and cuffs:


I basted the zipper in by hand before machine sewing it in for the most control of this “touchy” bit of the process:

Then, sewn by machine:

Before long, I was on the home stretch doing my final top stitching using my edge stitching foot (one of my favorite machine feet!) on the front opening edge of the jacket and she was about done!

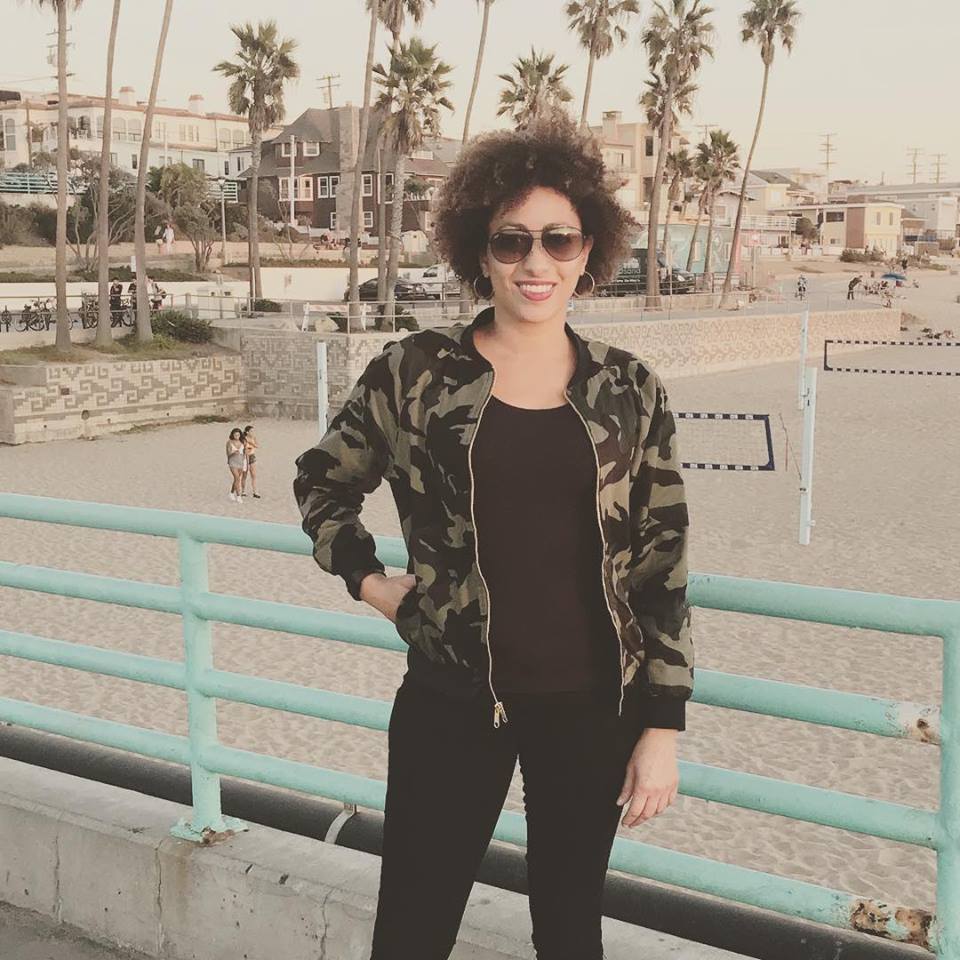
I was thinking that I would like to add some cool embroidered patches to my bomber jacket, but didn’t come across any ones I liked in time, so I figured I could always add some and sew them on by hand if I come across any the I like in the future. Meanwhile, I LOVE my new bomber jacket and am so excited to wear it, and inside out!


THE BOMB!
PS and disclaimer: this post has no affiliation with the crazy-ass bomber who was just arrested for mailing bombs to prominent Trump critics! Just say’n…
