If you know me at all, you know that I often bite off more than I can chew. I eat my food like I’ll never have another meal again, gobbling down faster than anyone else at the table. Then have to control myself to not go back for seconds and let myself digest what I just devoured.
It’s not all that different when I have a new idea for a project that I want to tackle. Once I narrow down and choose something from the long wish list of garments and crafty projects I keep in my notes app on my phone, I jump in and start, thinking about how I am going to actually accomplish it later. A similar way to how I eat.
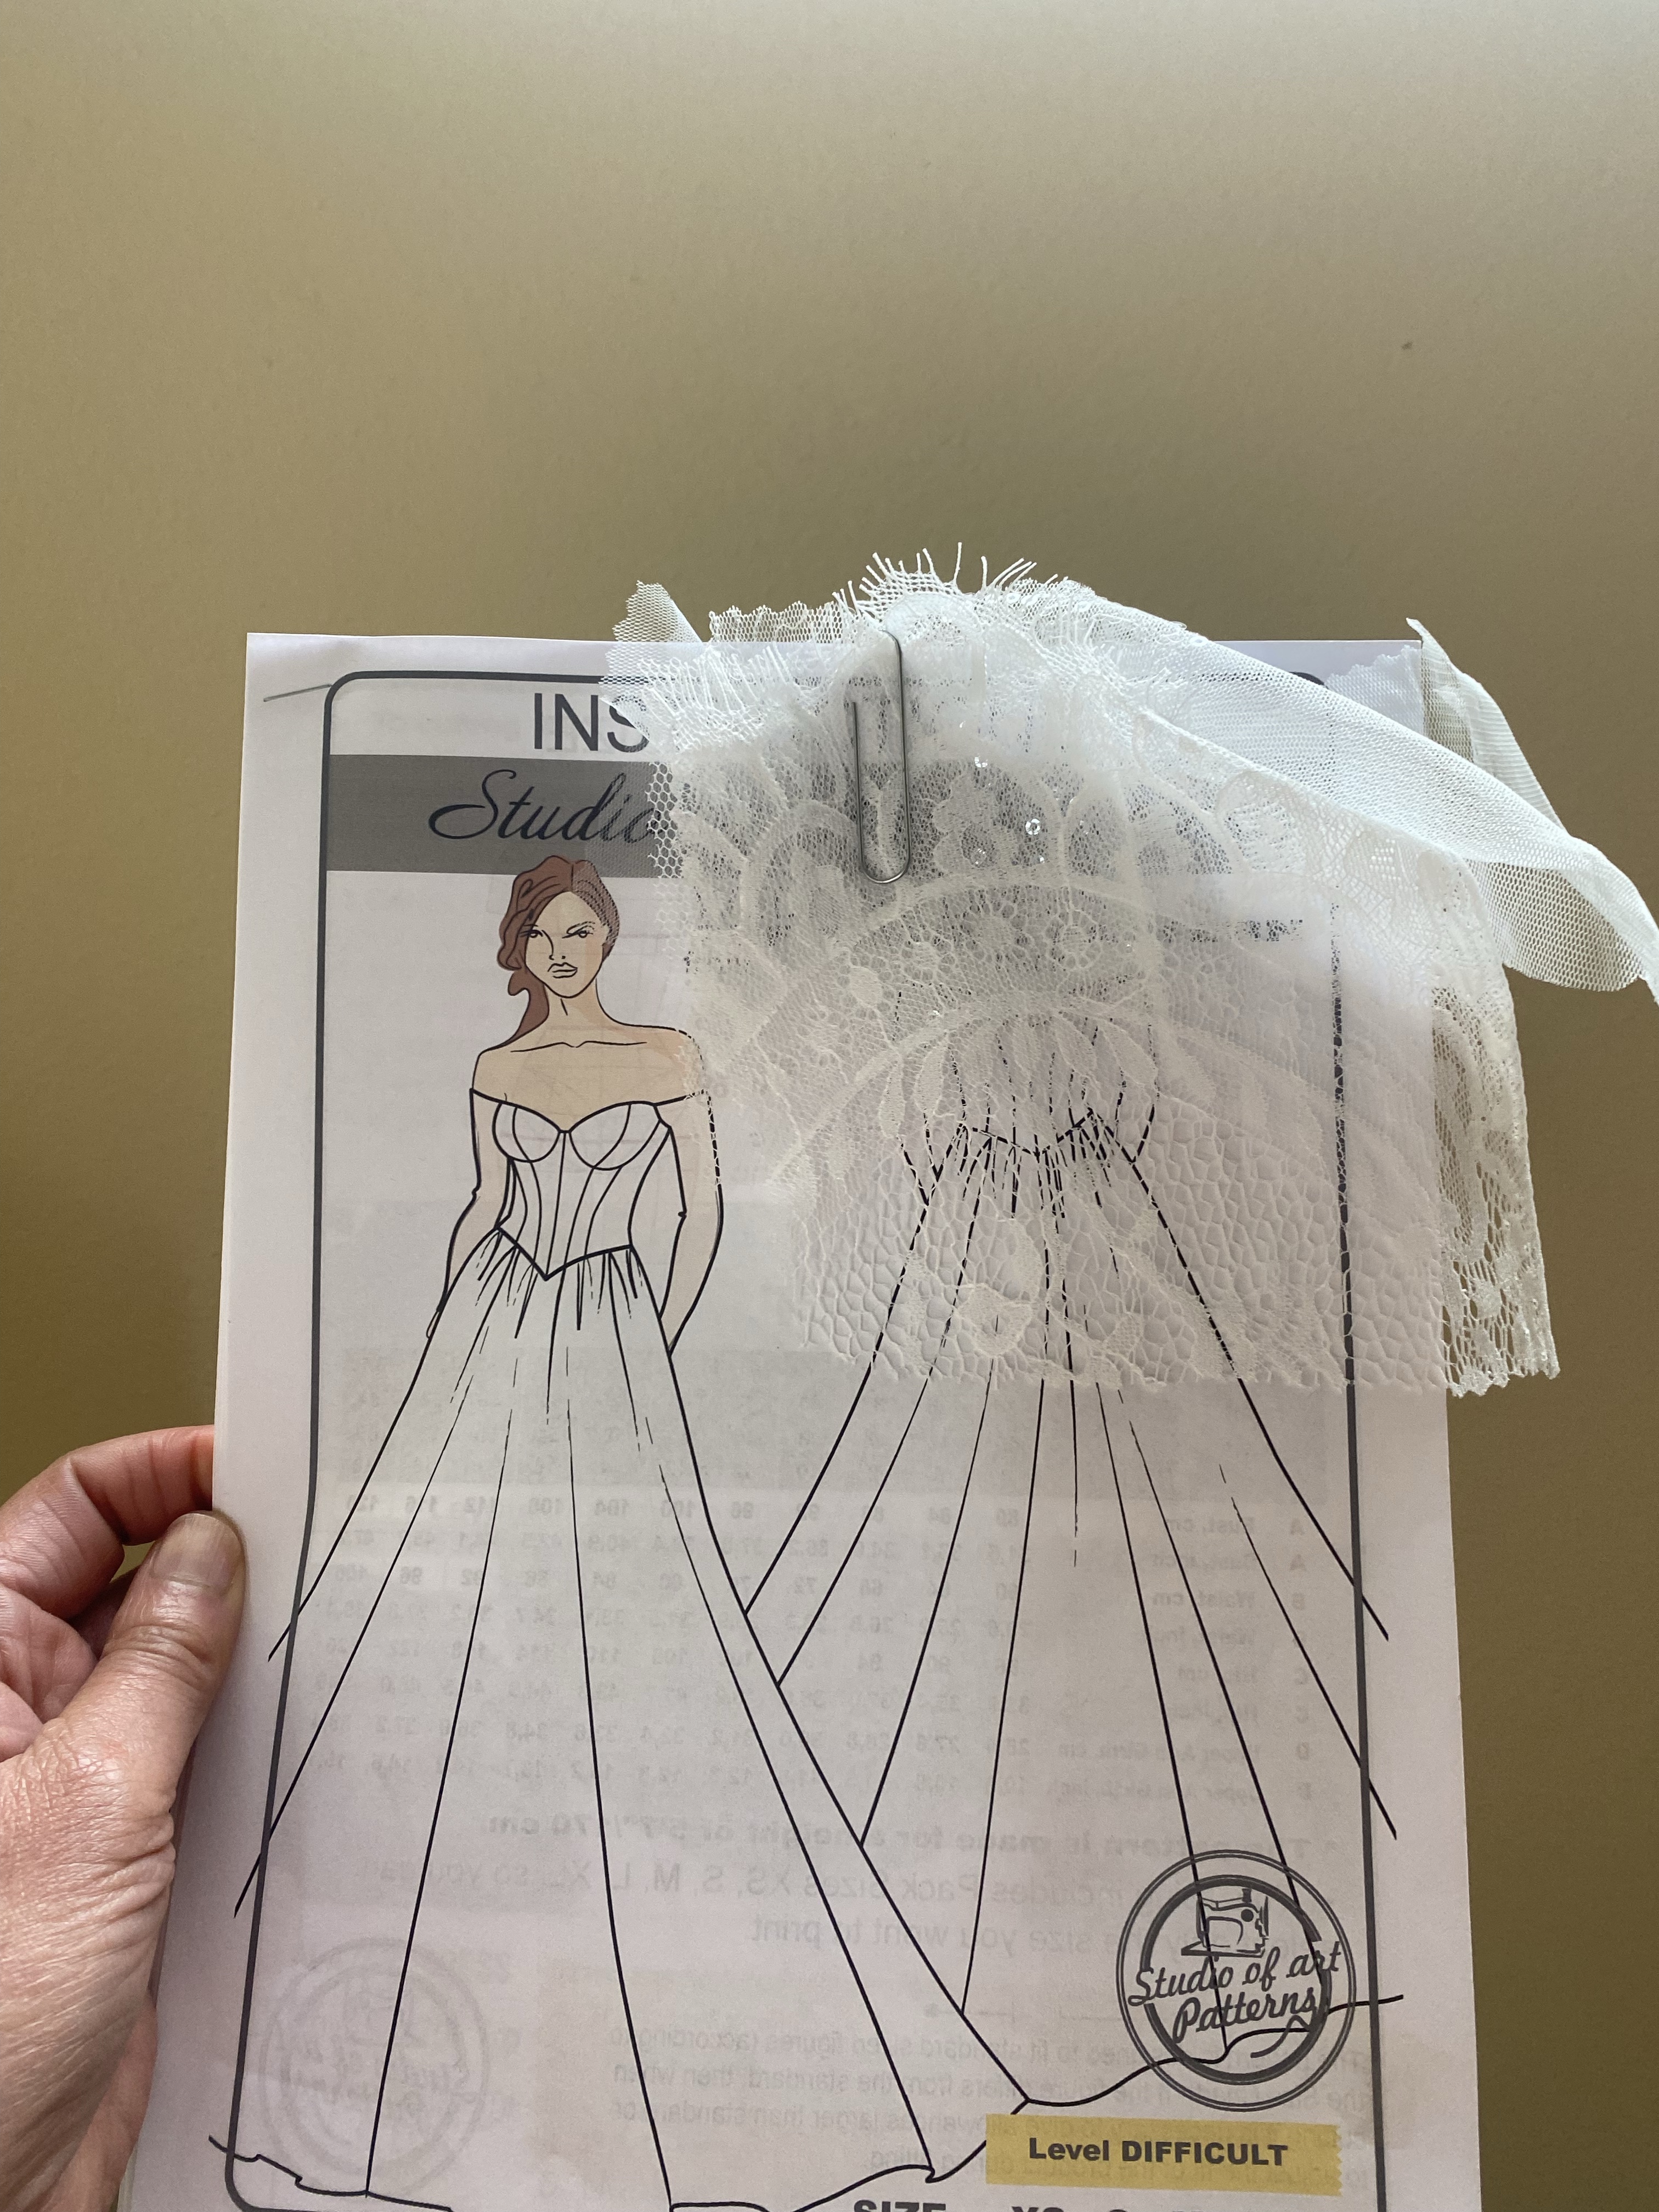
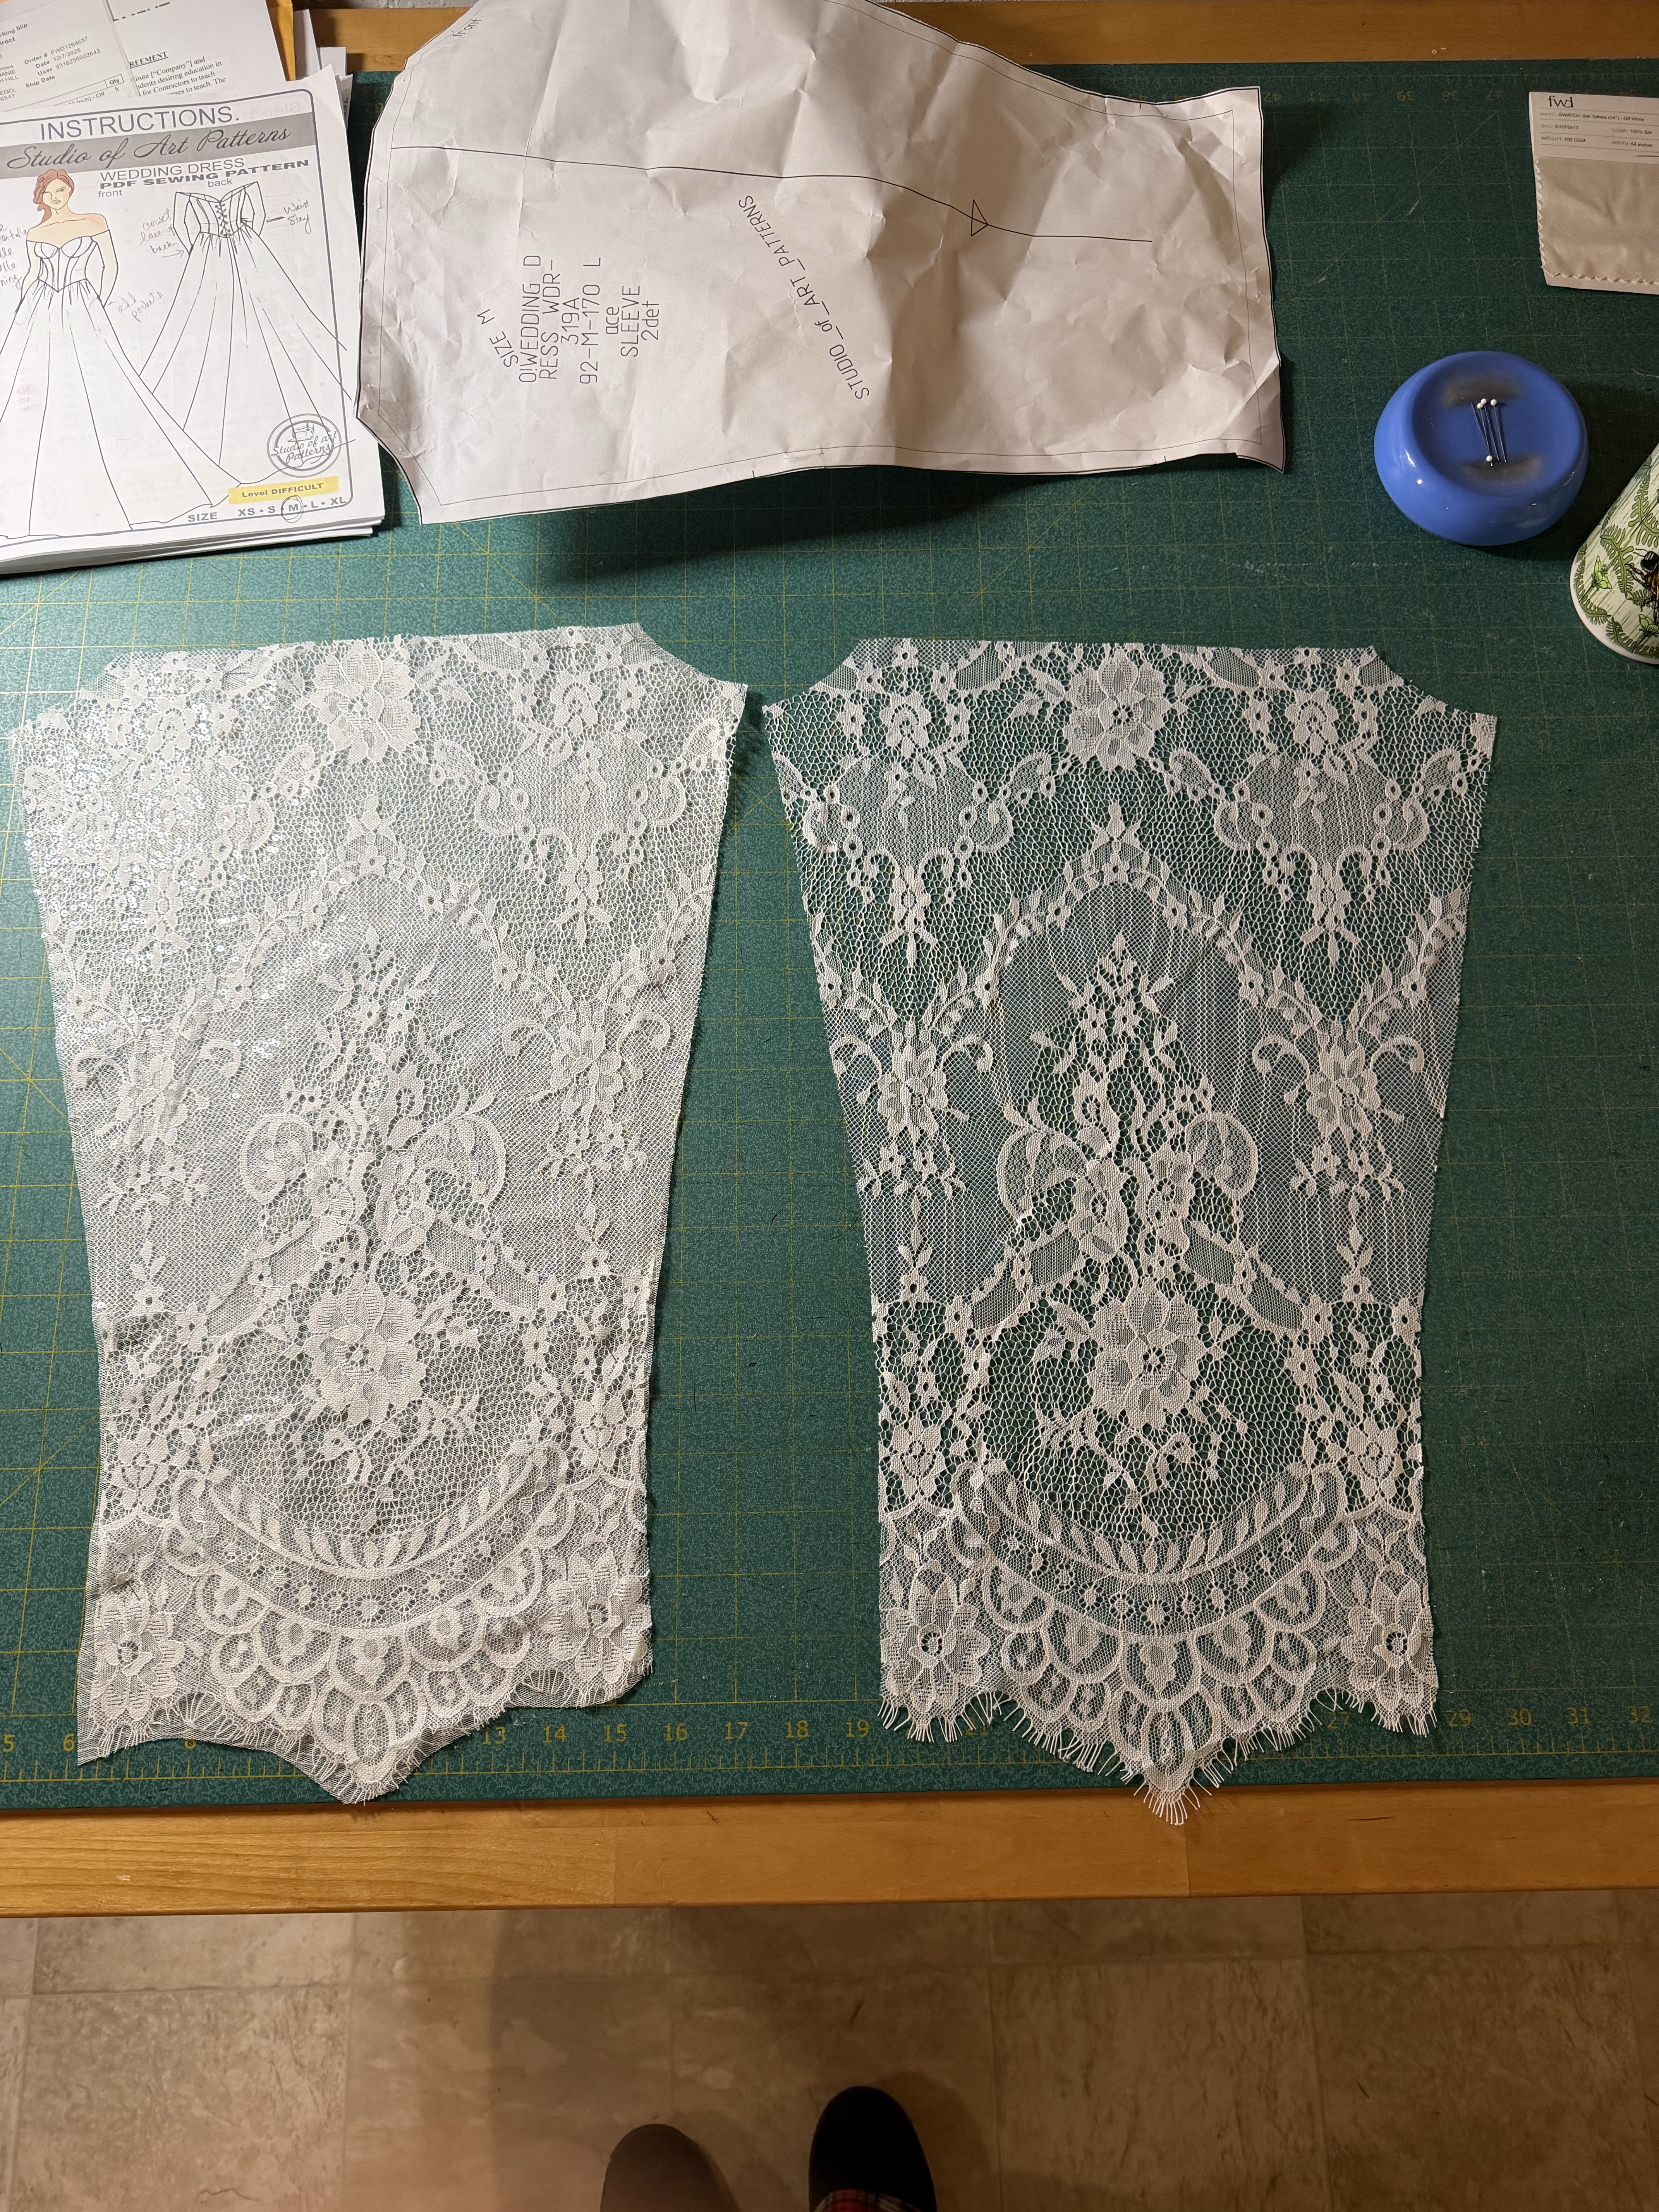
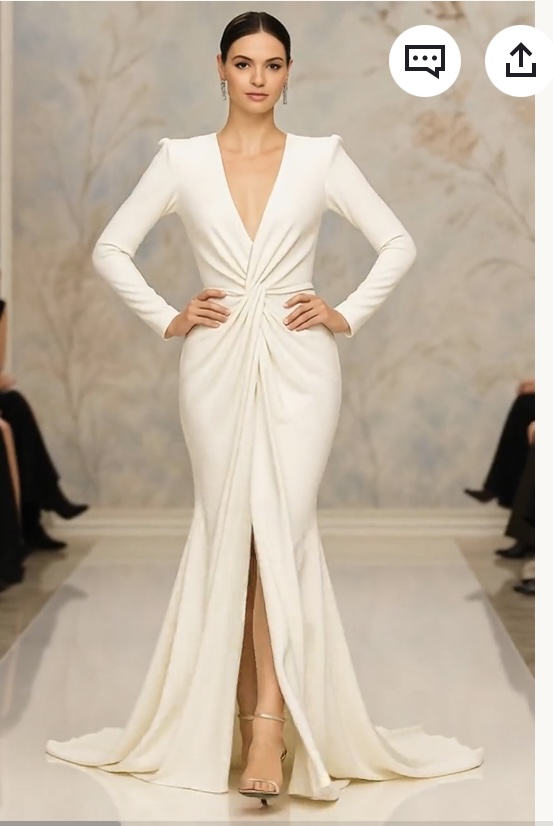
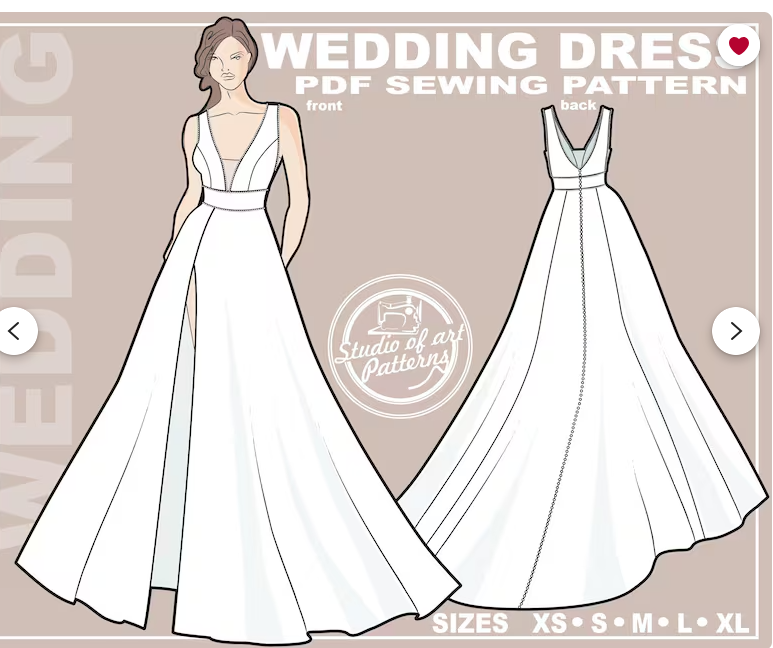
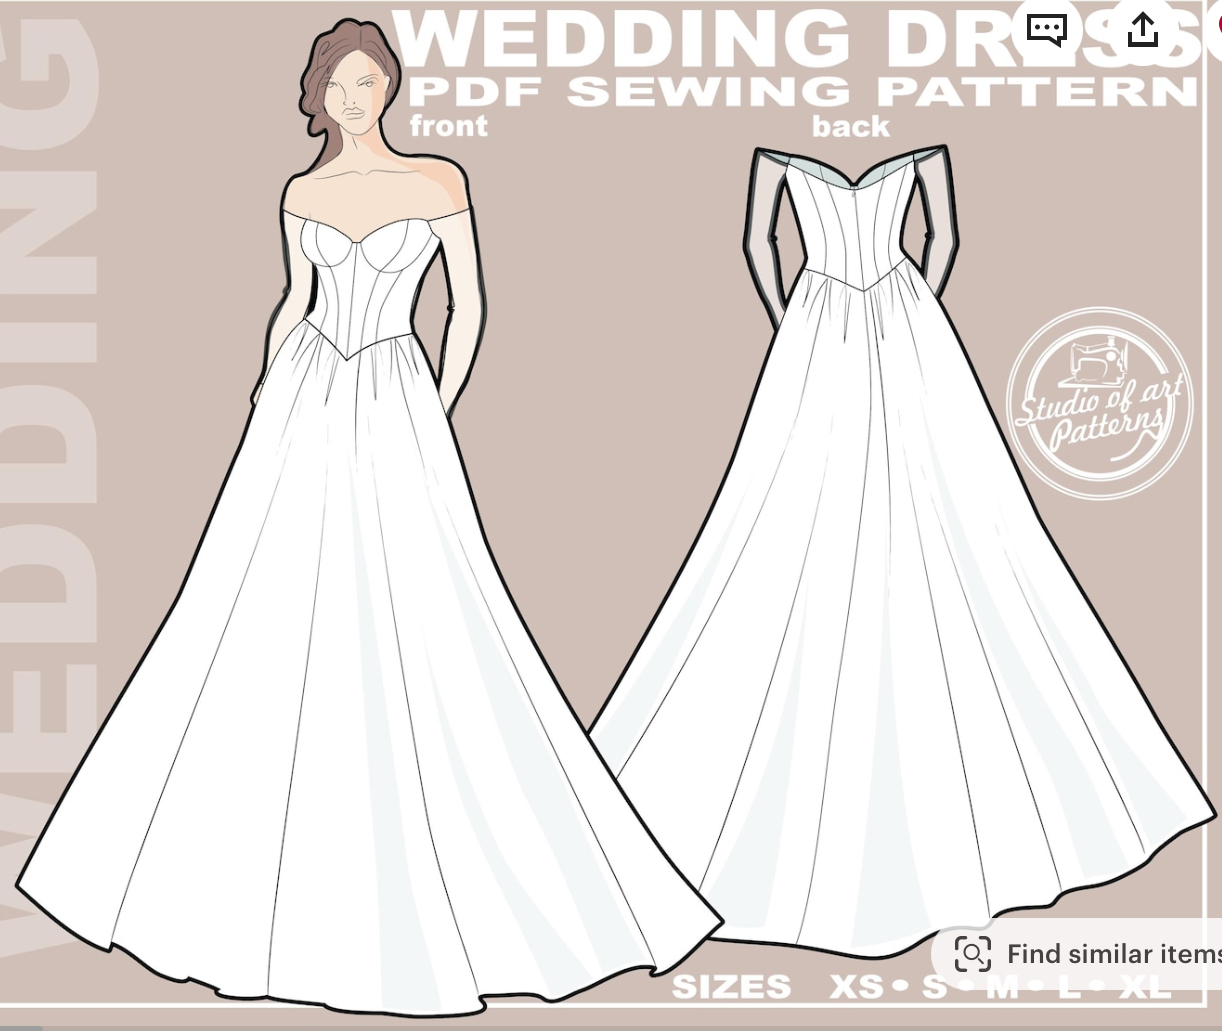
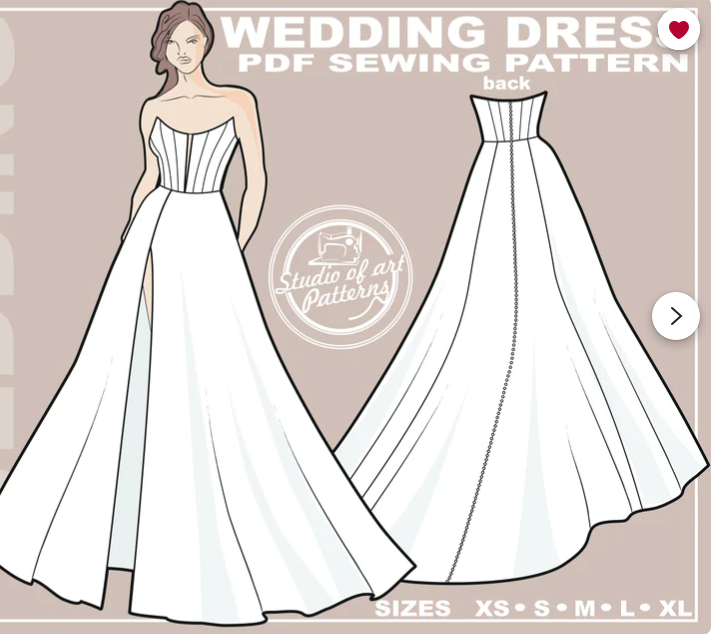
One of my favorite sources of sewing patterns recently is Studio of Art patterns found on Etsy. I just love some of the designs they come out with for bridal and special occasion dresses that you can’t get anywhere else and result in high-end, dramatic and showcase ready creations. The patterns are usually difficult and challenging to construct, require skill, space and plenty of time for best results, and can take a great deal of material to make.
I have made several of their patterns now and have been so pleased with the results. They came out with this sewing pattern and I just had to have it!

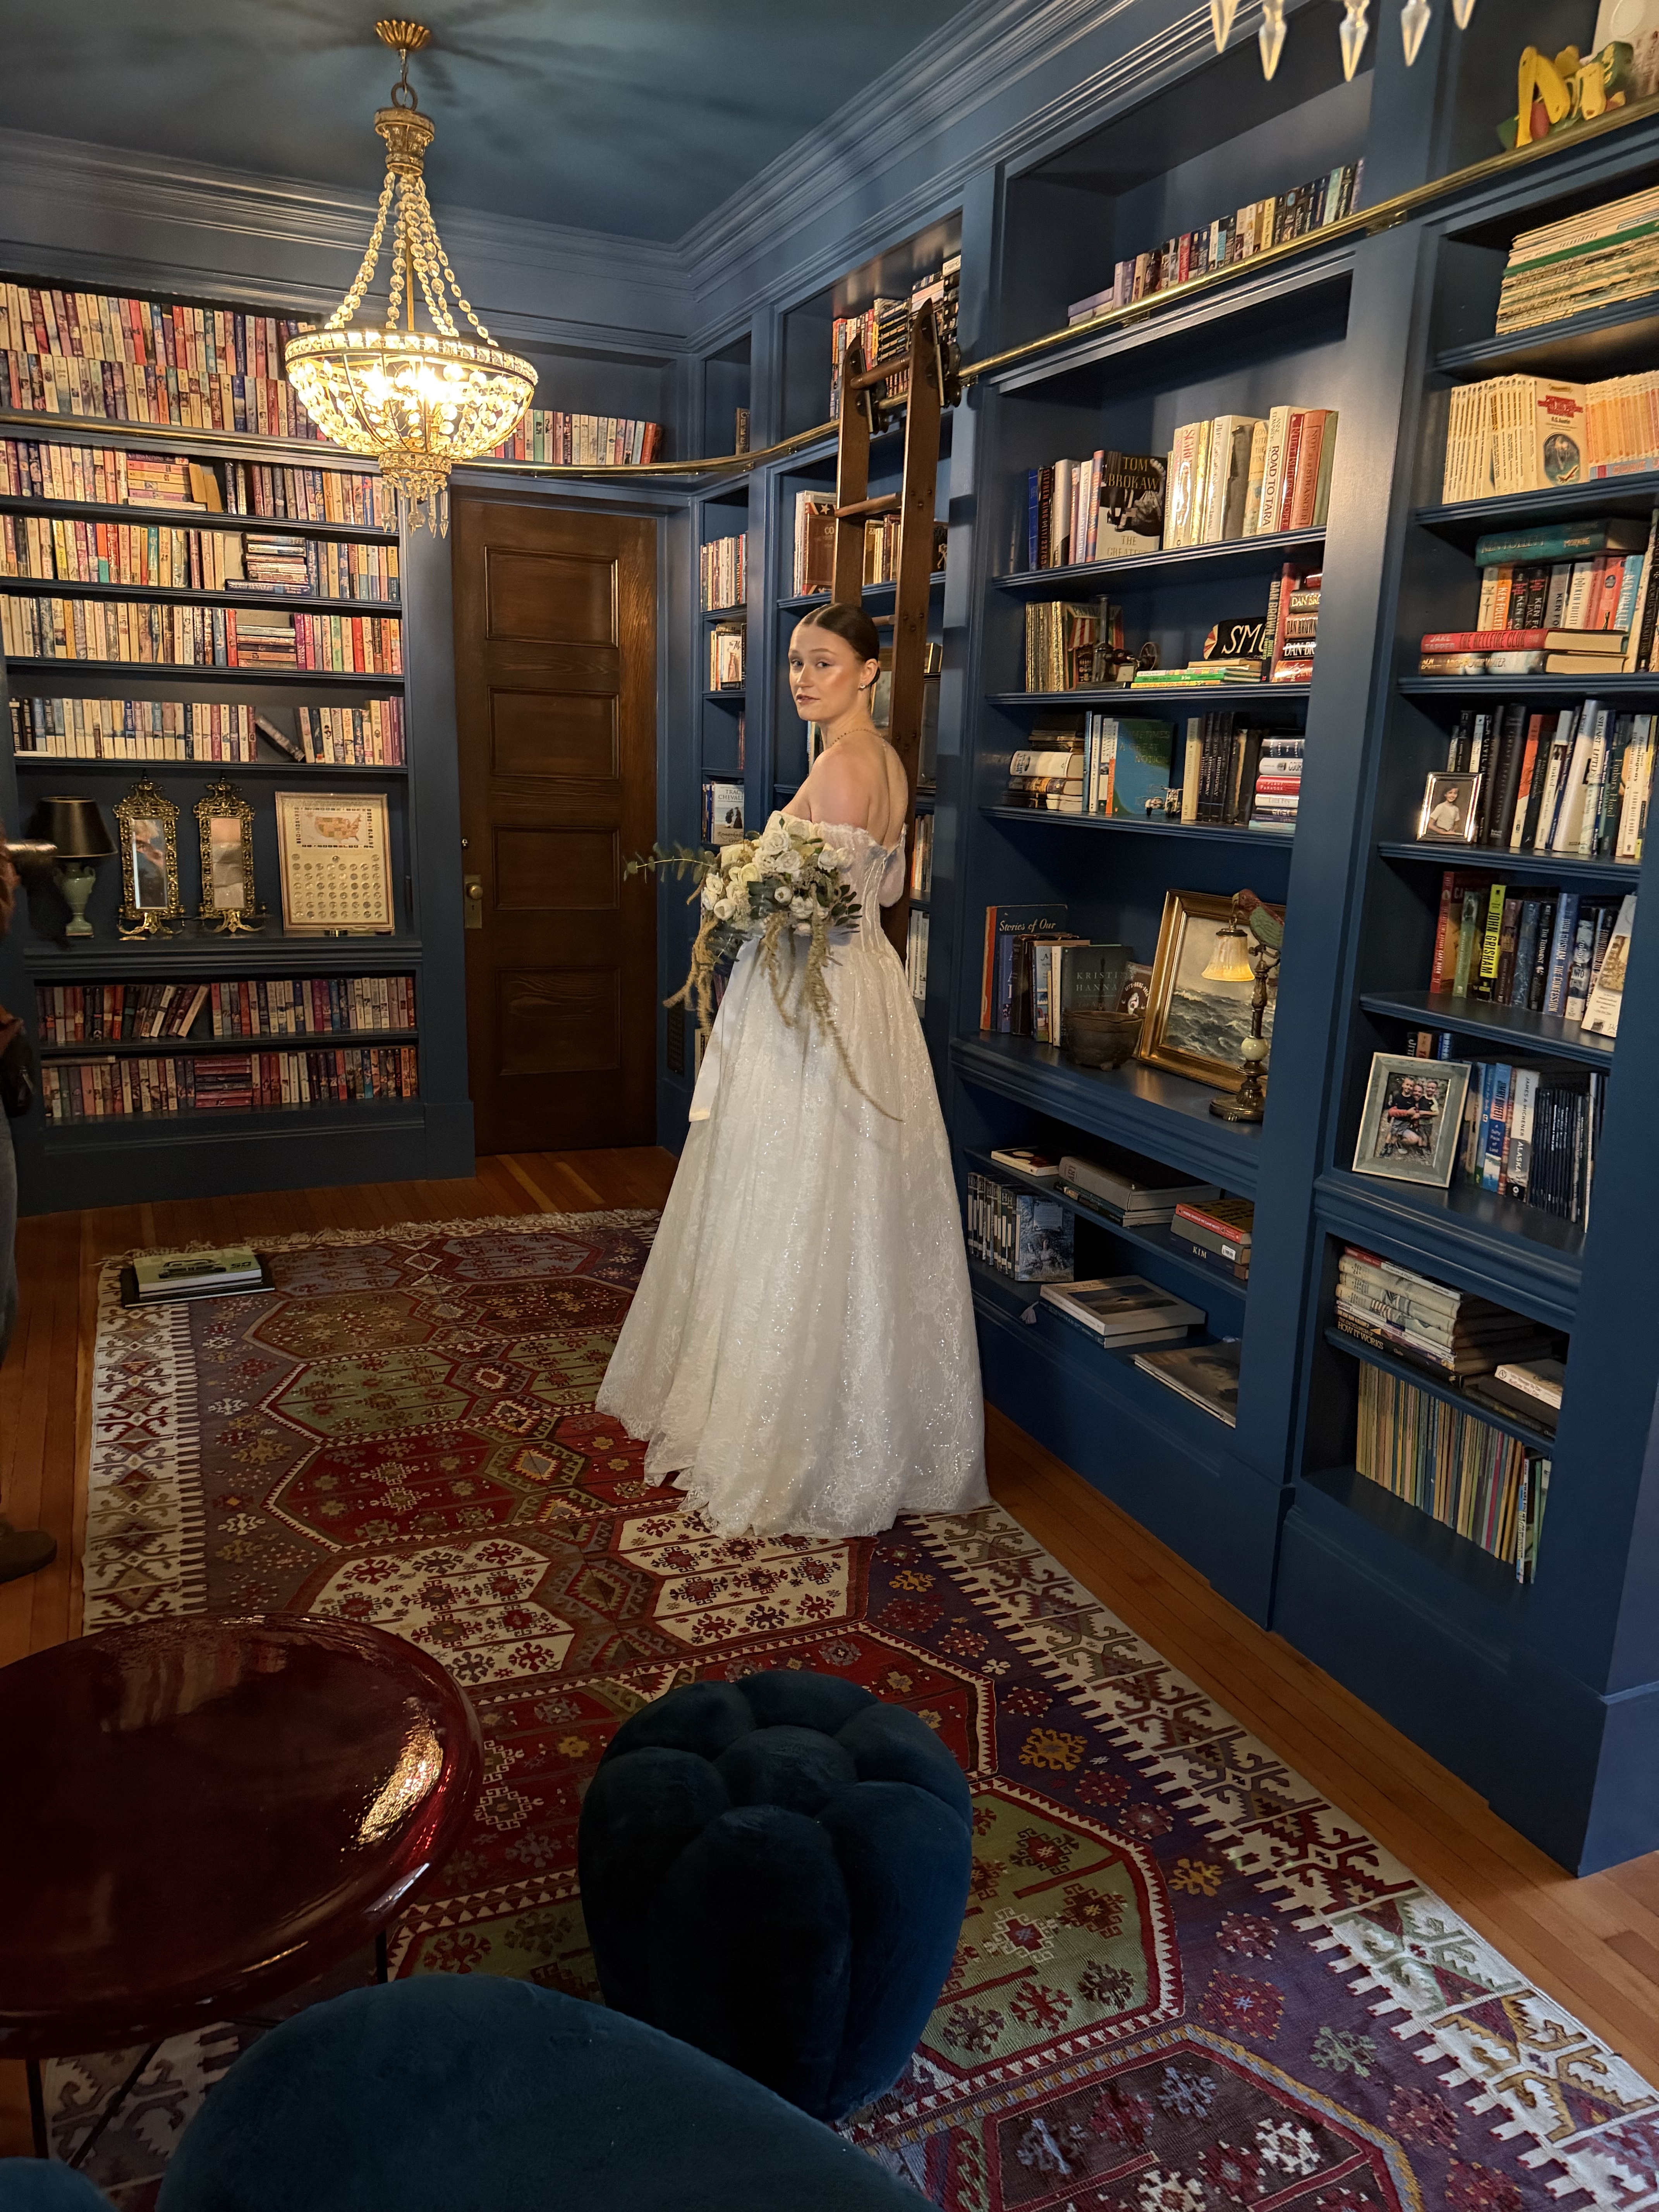
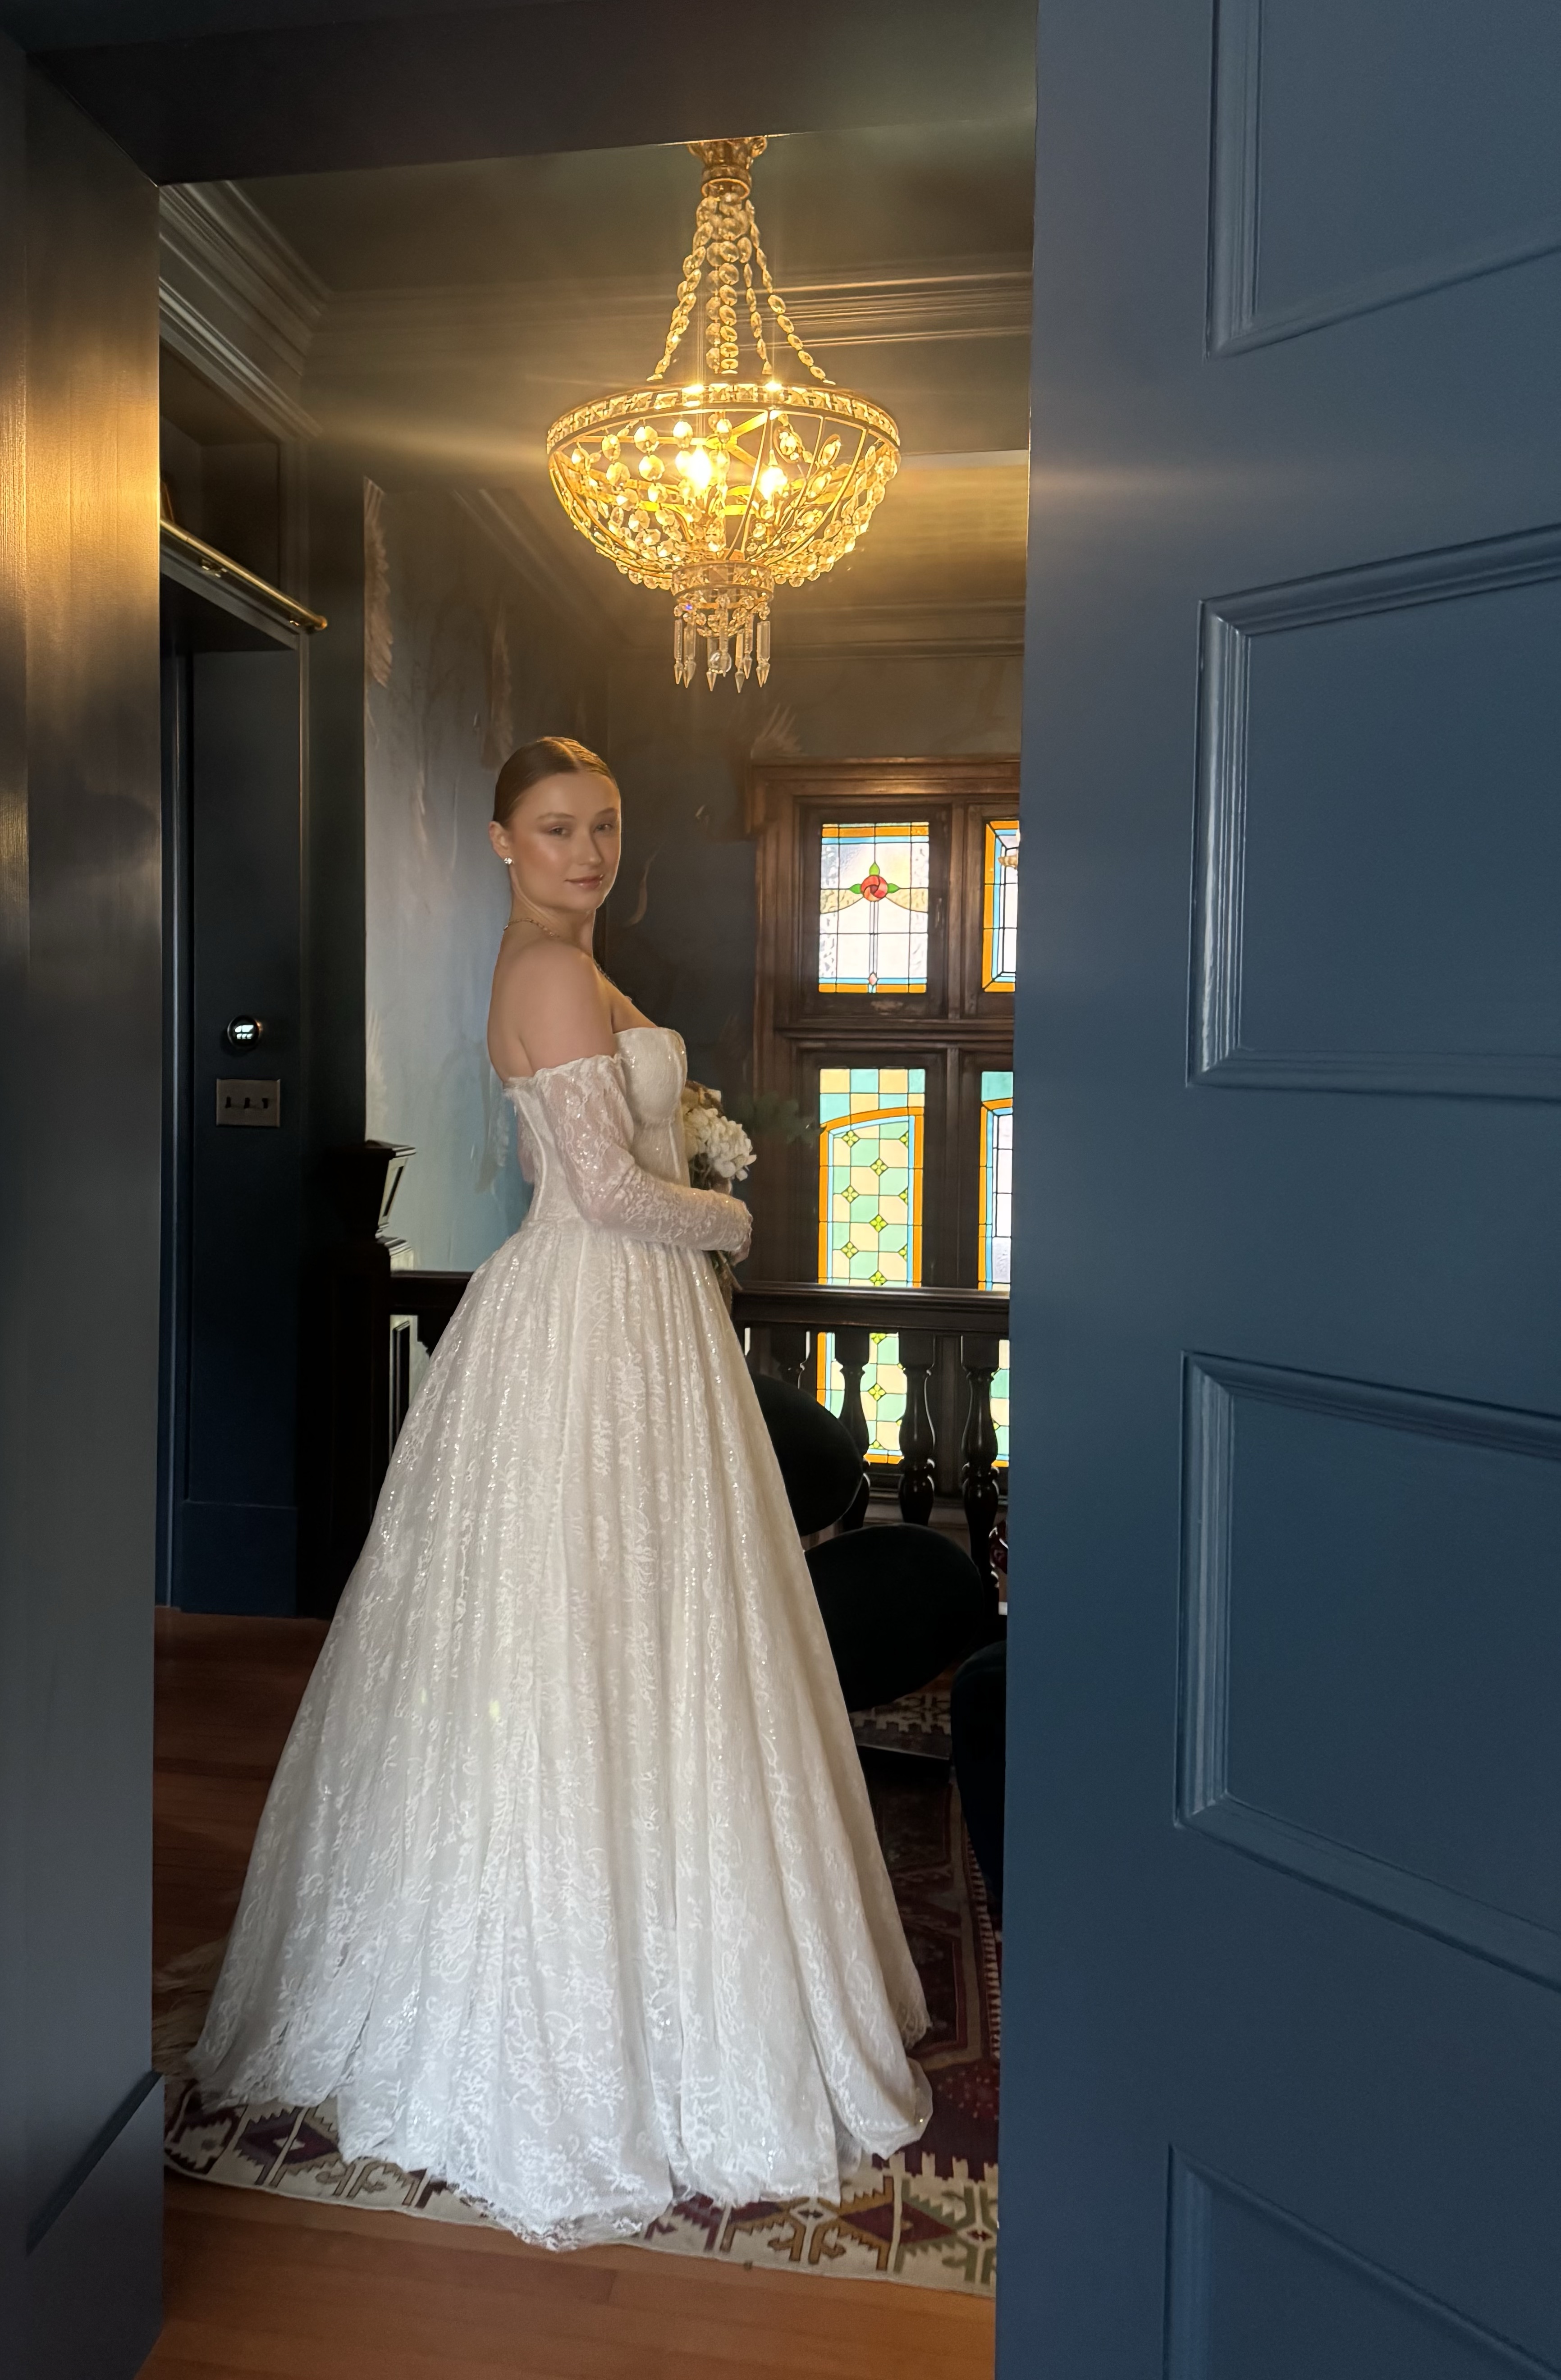
This stunning pattern features a corset style bodice with bust cups and built-in boning support, off the shoulder long sleeves, a gathered waistline and a large ball gown-style multi layered skirt.
I gathered my supplies, ordered yardage consisting of a delicate Chantilly lace, a glittered tulle, soft tulle, rigid tulle and lining materials.
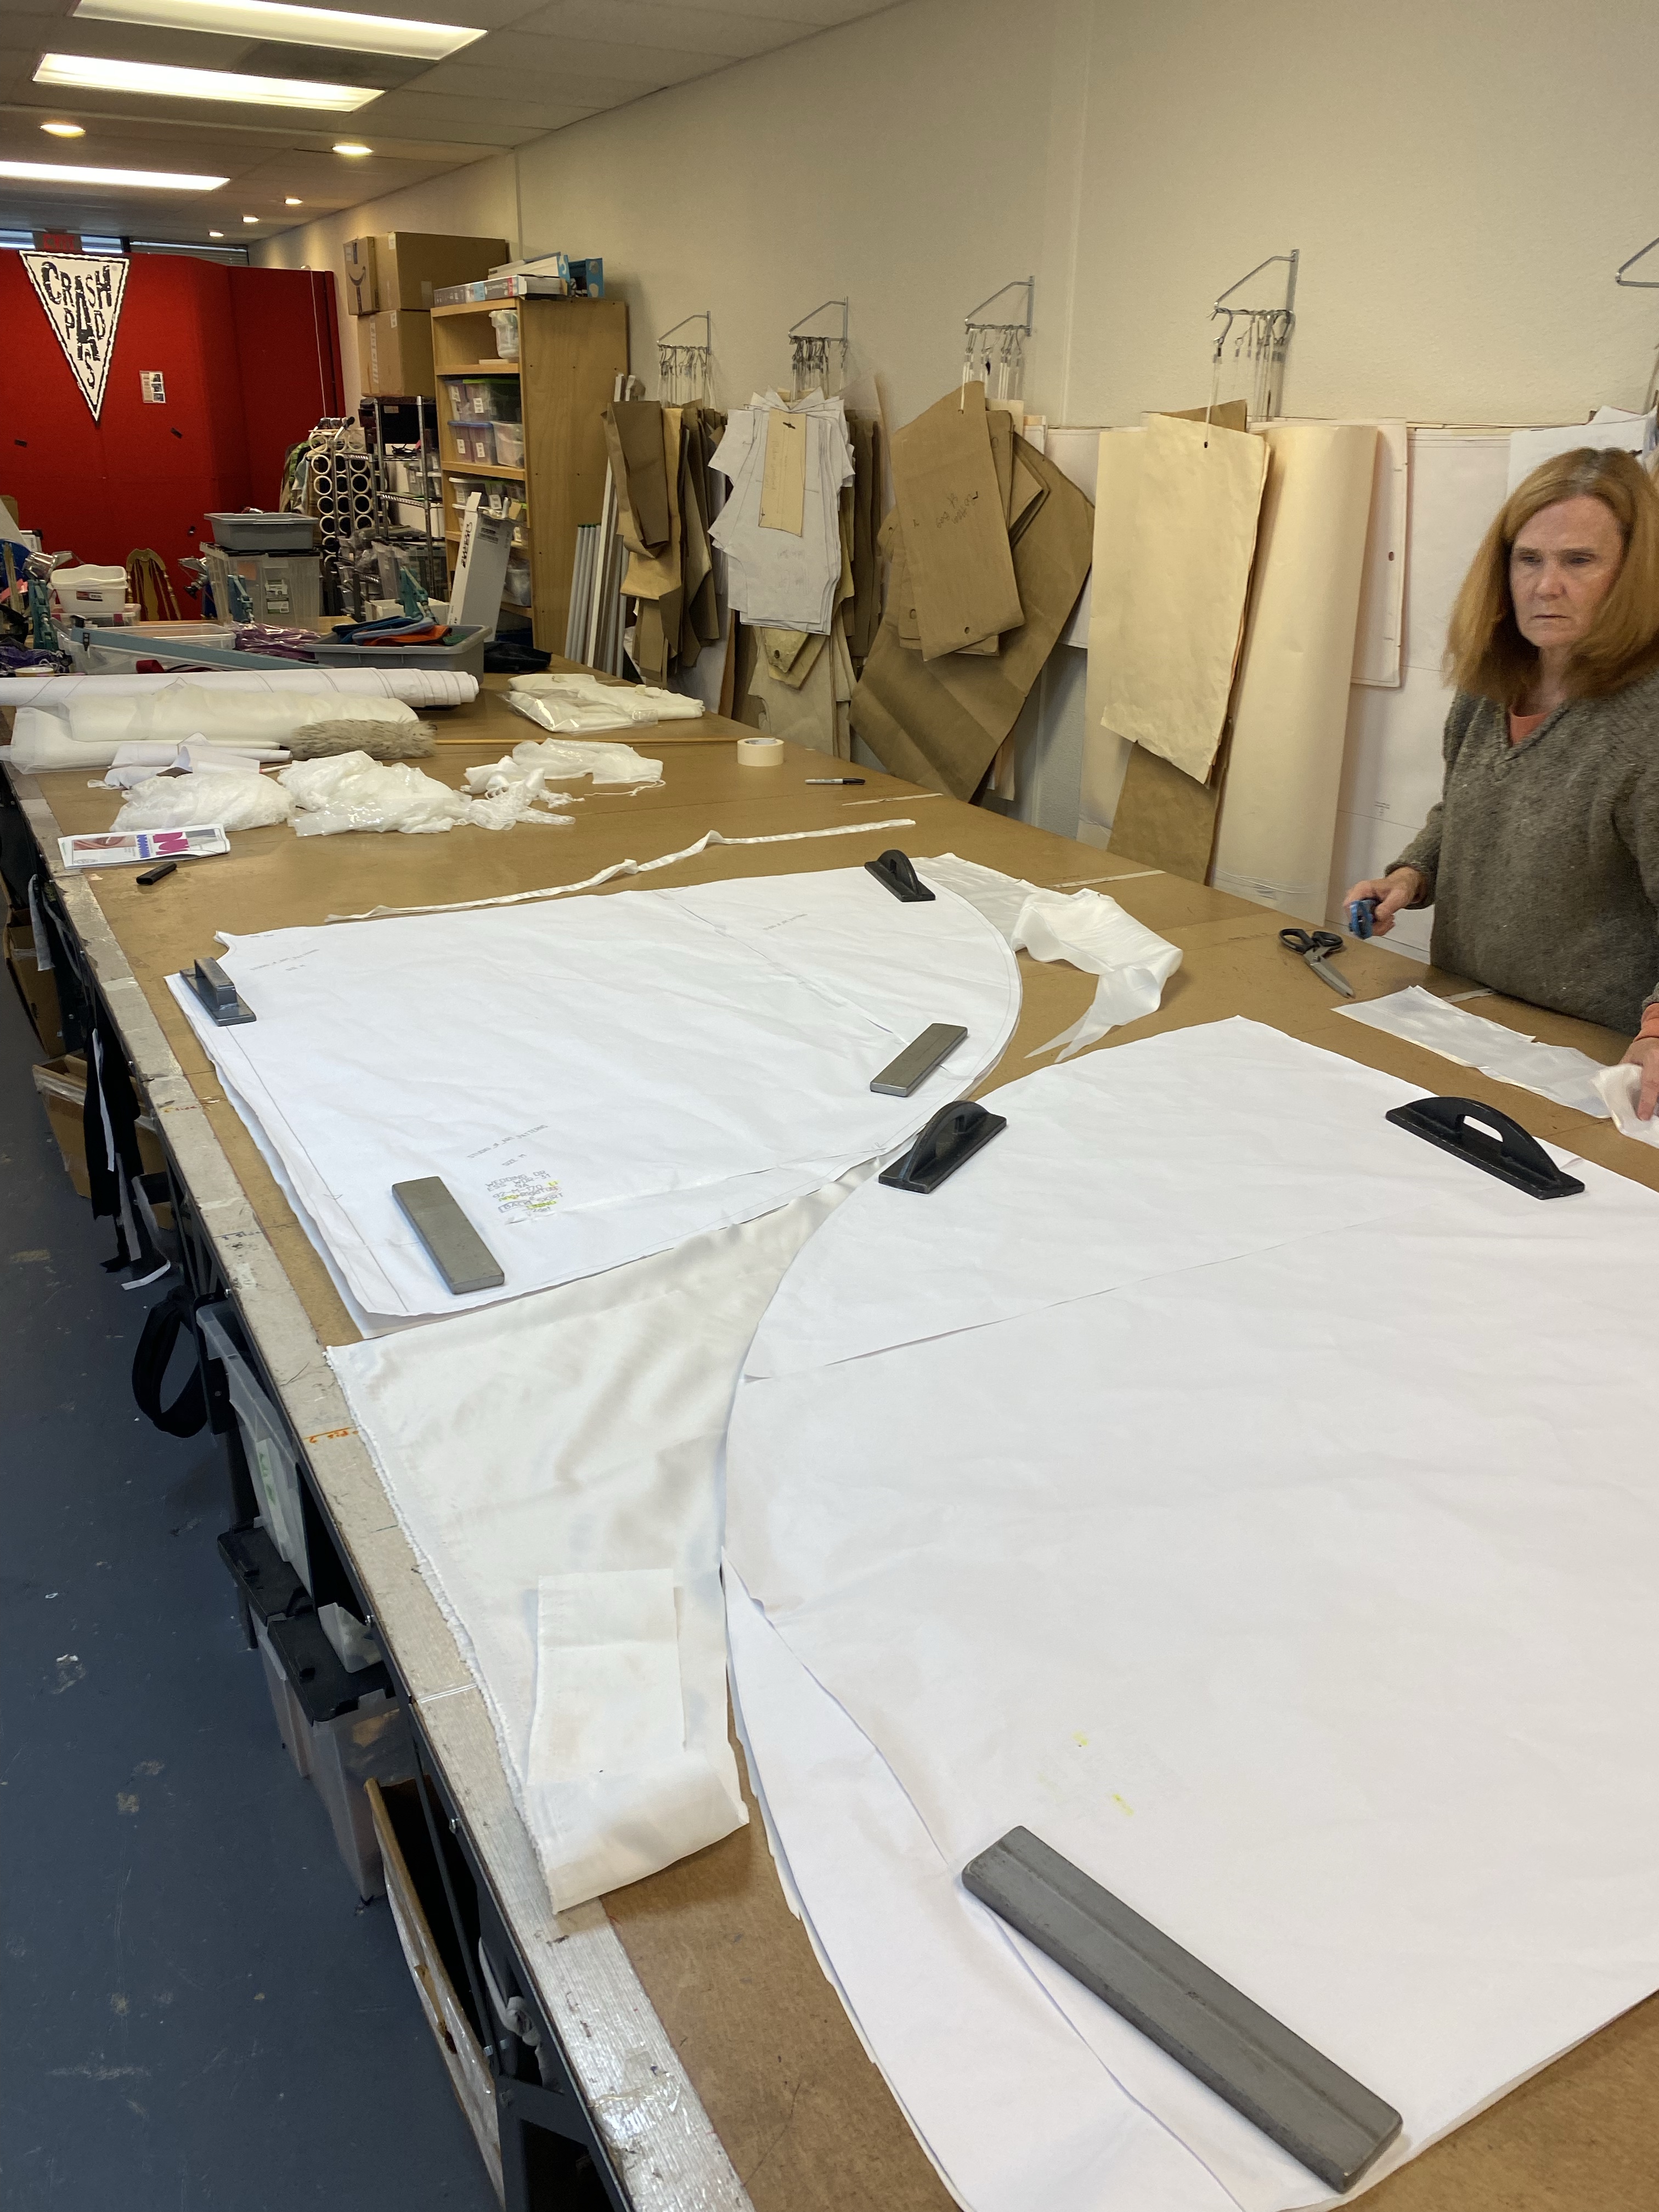
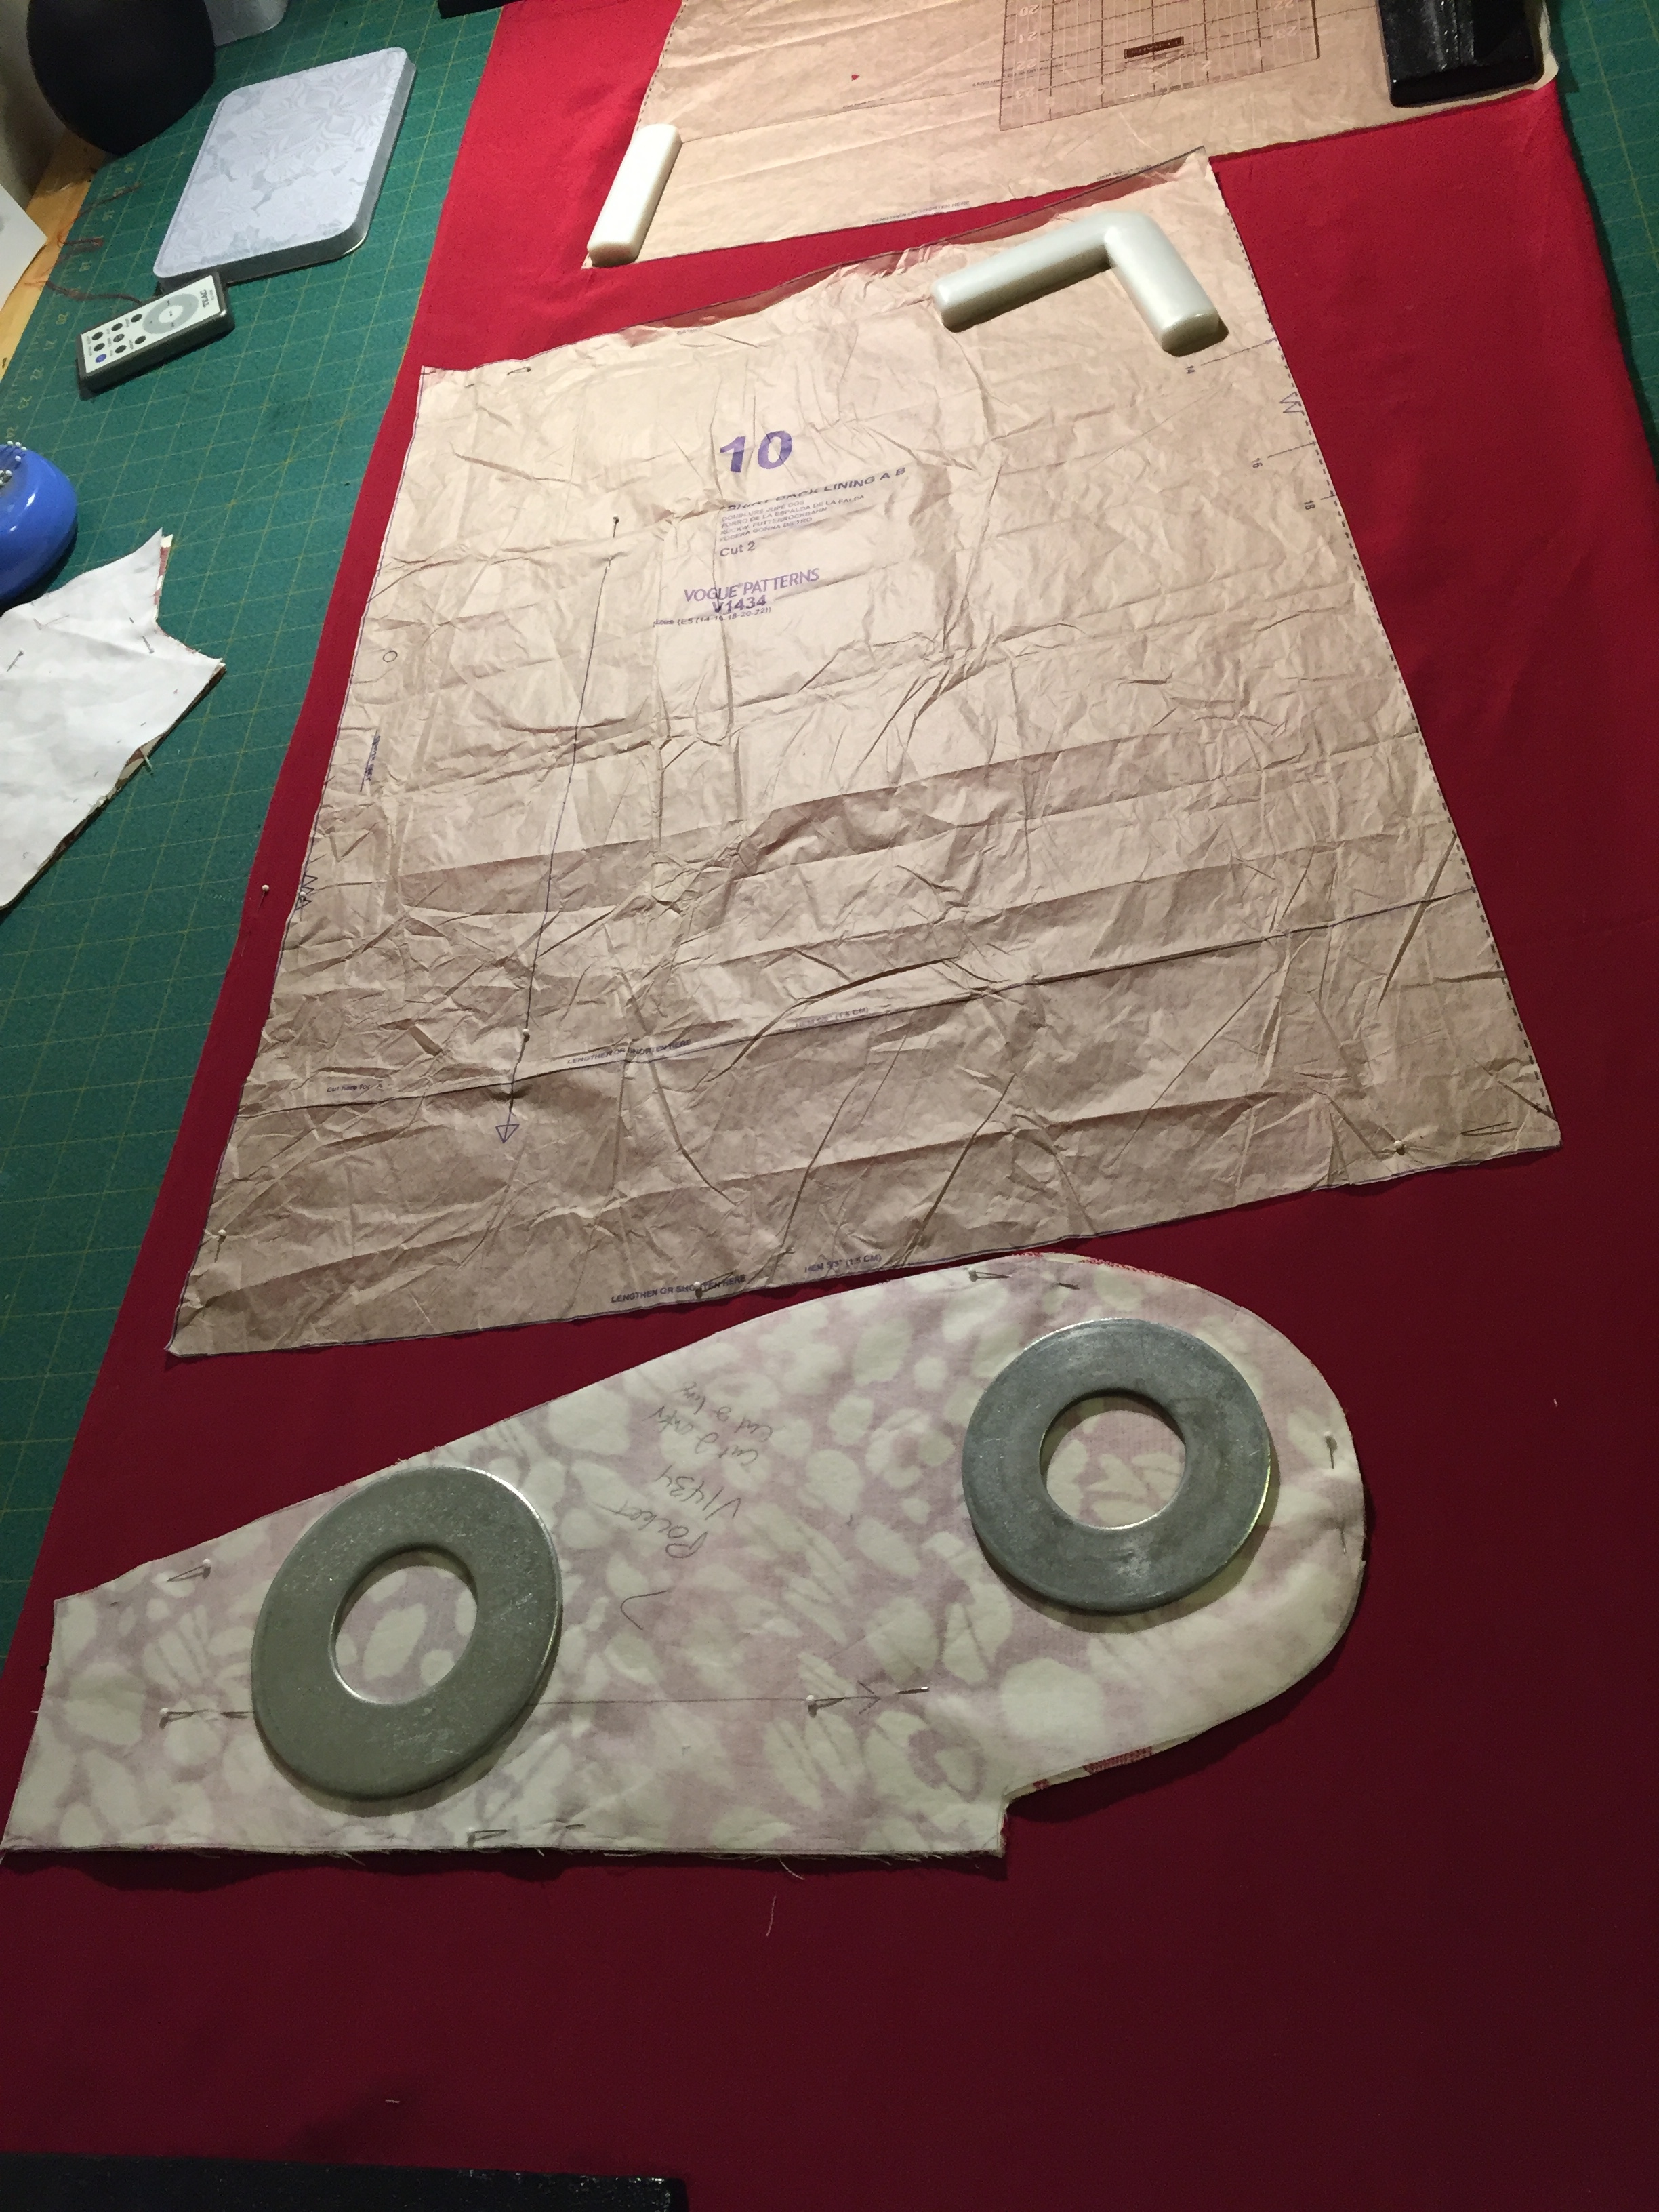
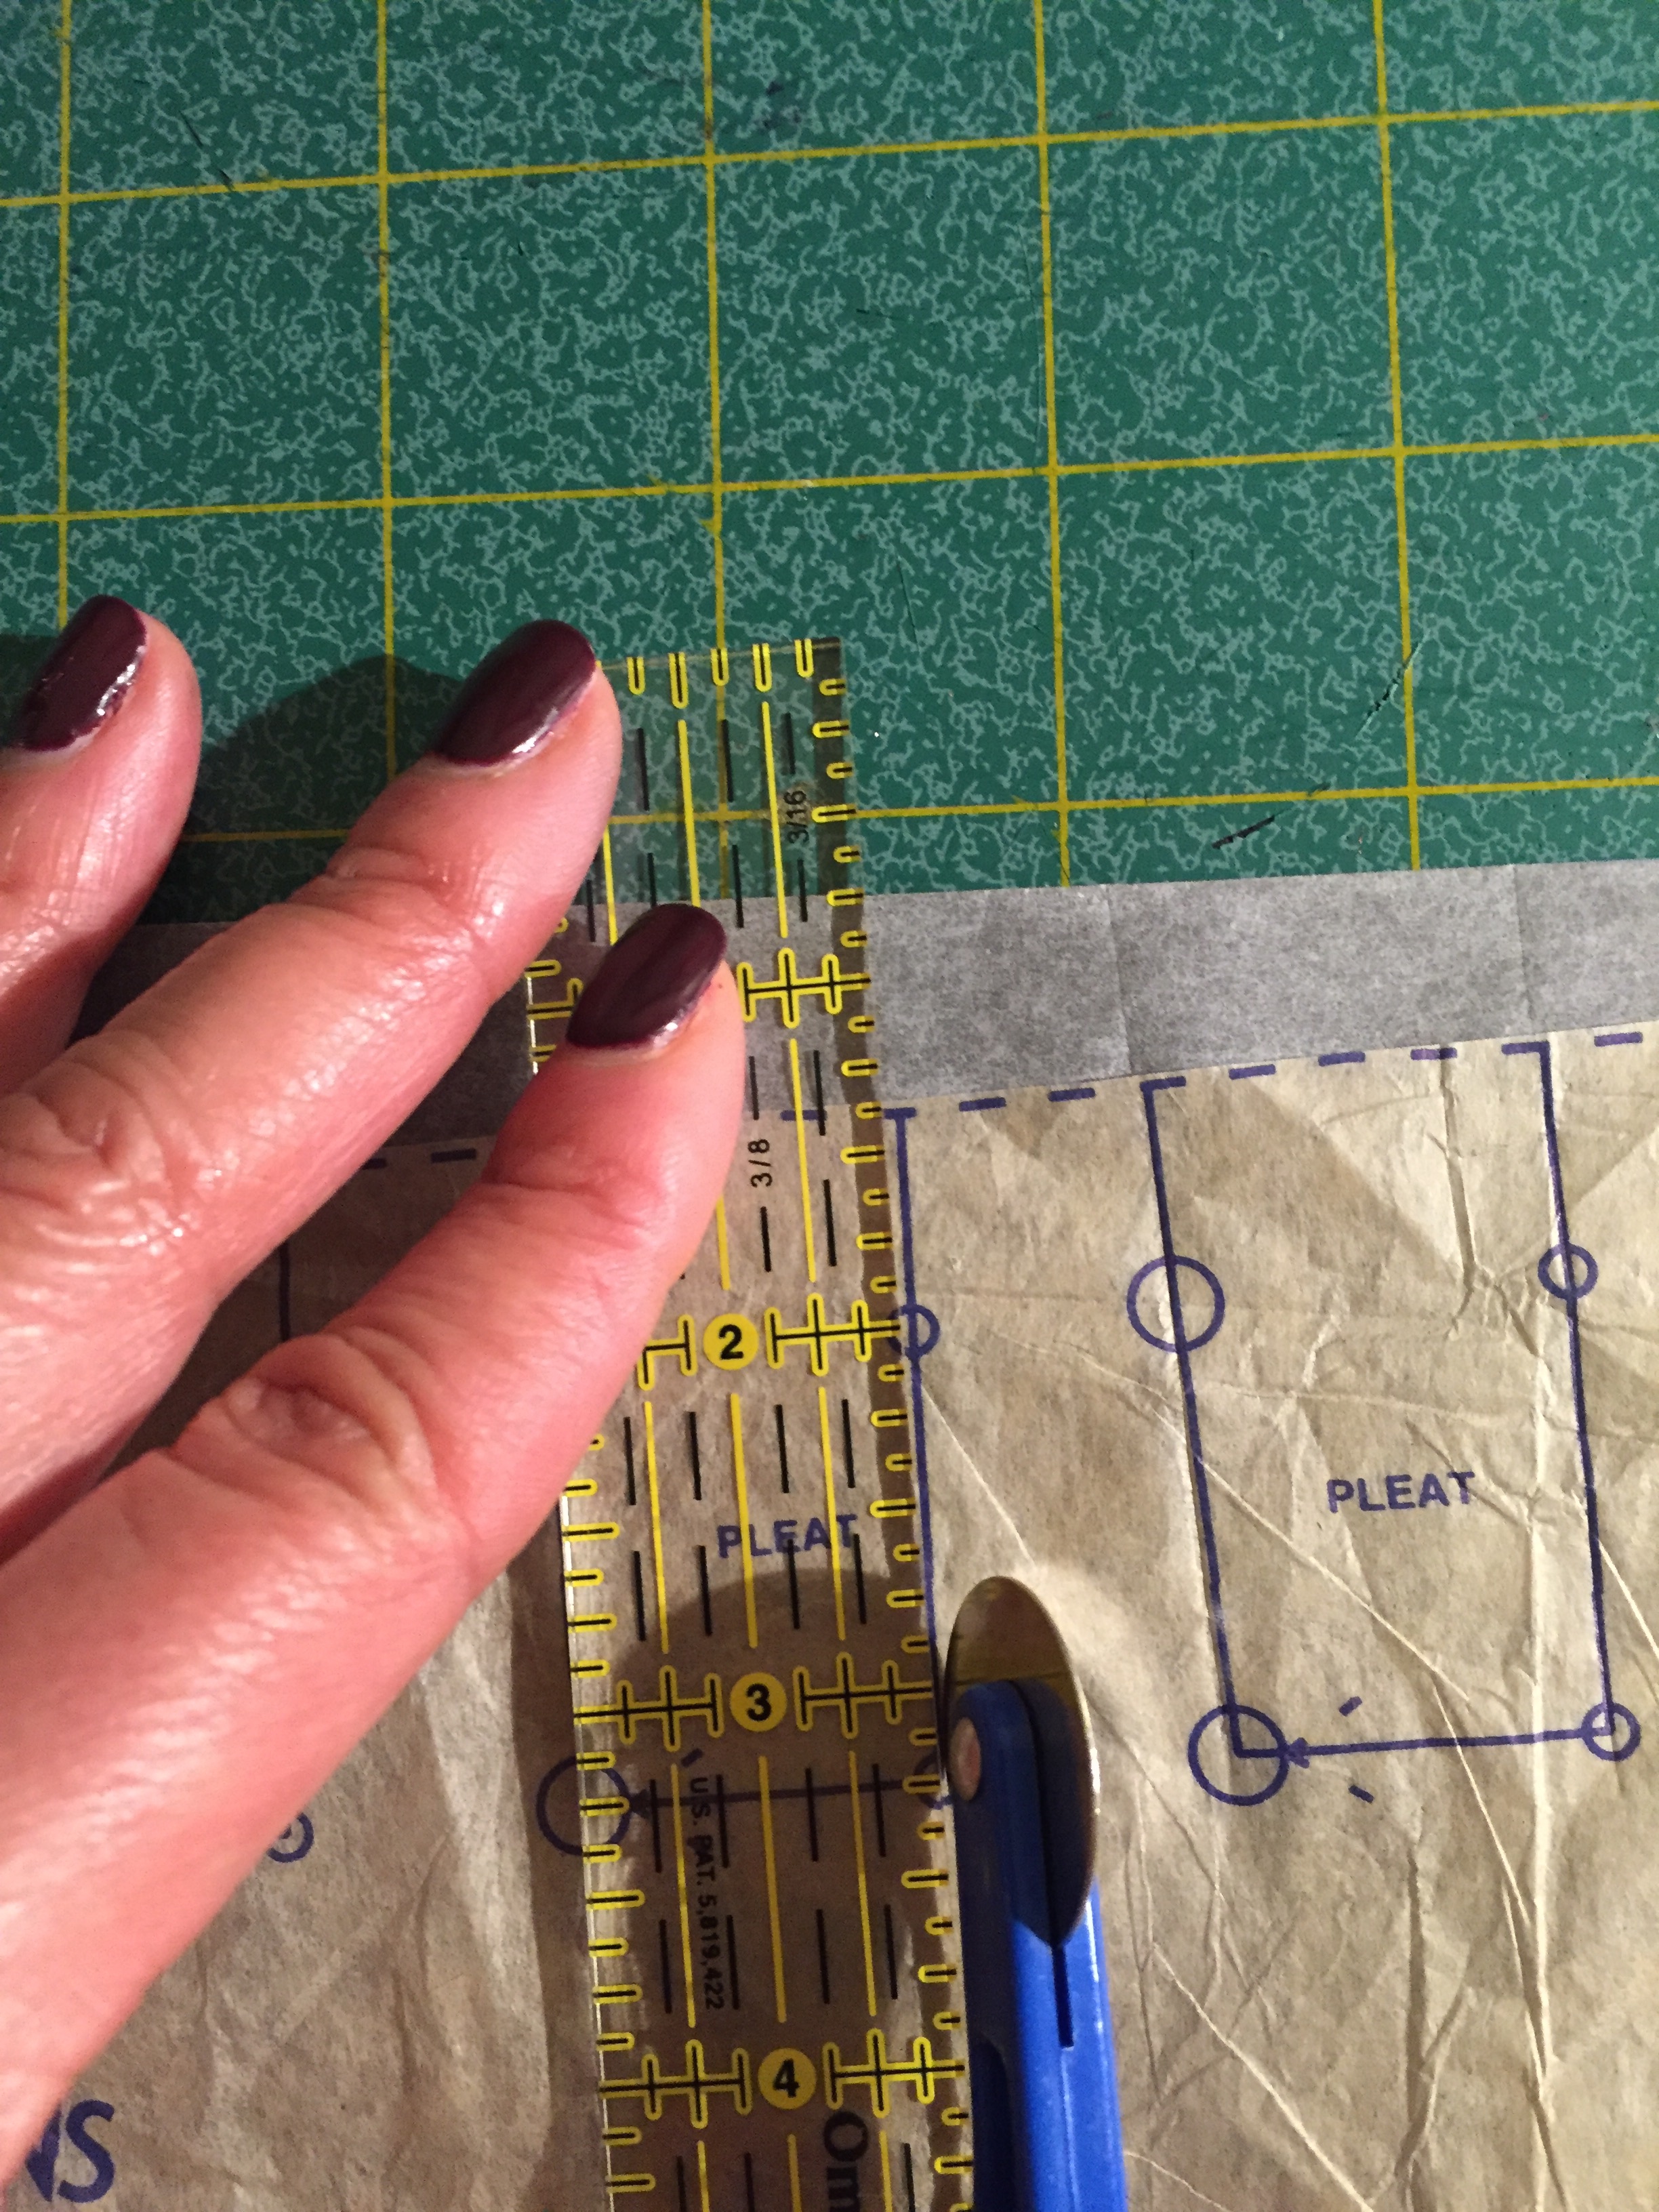
Having enormous pattern pieces and several layers of many yards of fabric to carefully cut out, there was no way that I would be able to accomplish this at my home studio. Luckily, my sister is good friends with a woman, Sheila, who owns and runs a small local garment manufacturing facility called Westside Sut & Sew and allowed me to come and use her huge cutting table. She also helped me to lay out and cut the fabric layers, plus organize, separate and package up the cut pieces which was wonderful! Thank you Sheila!
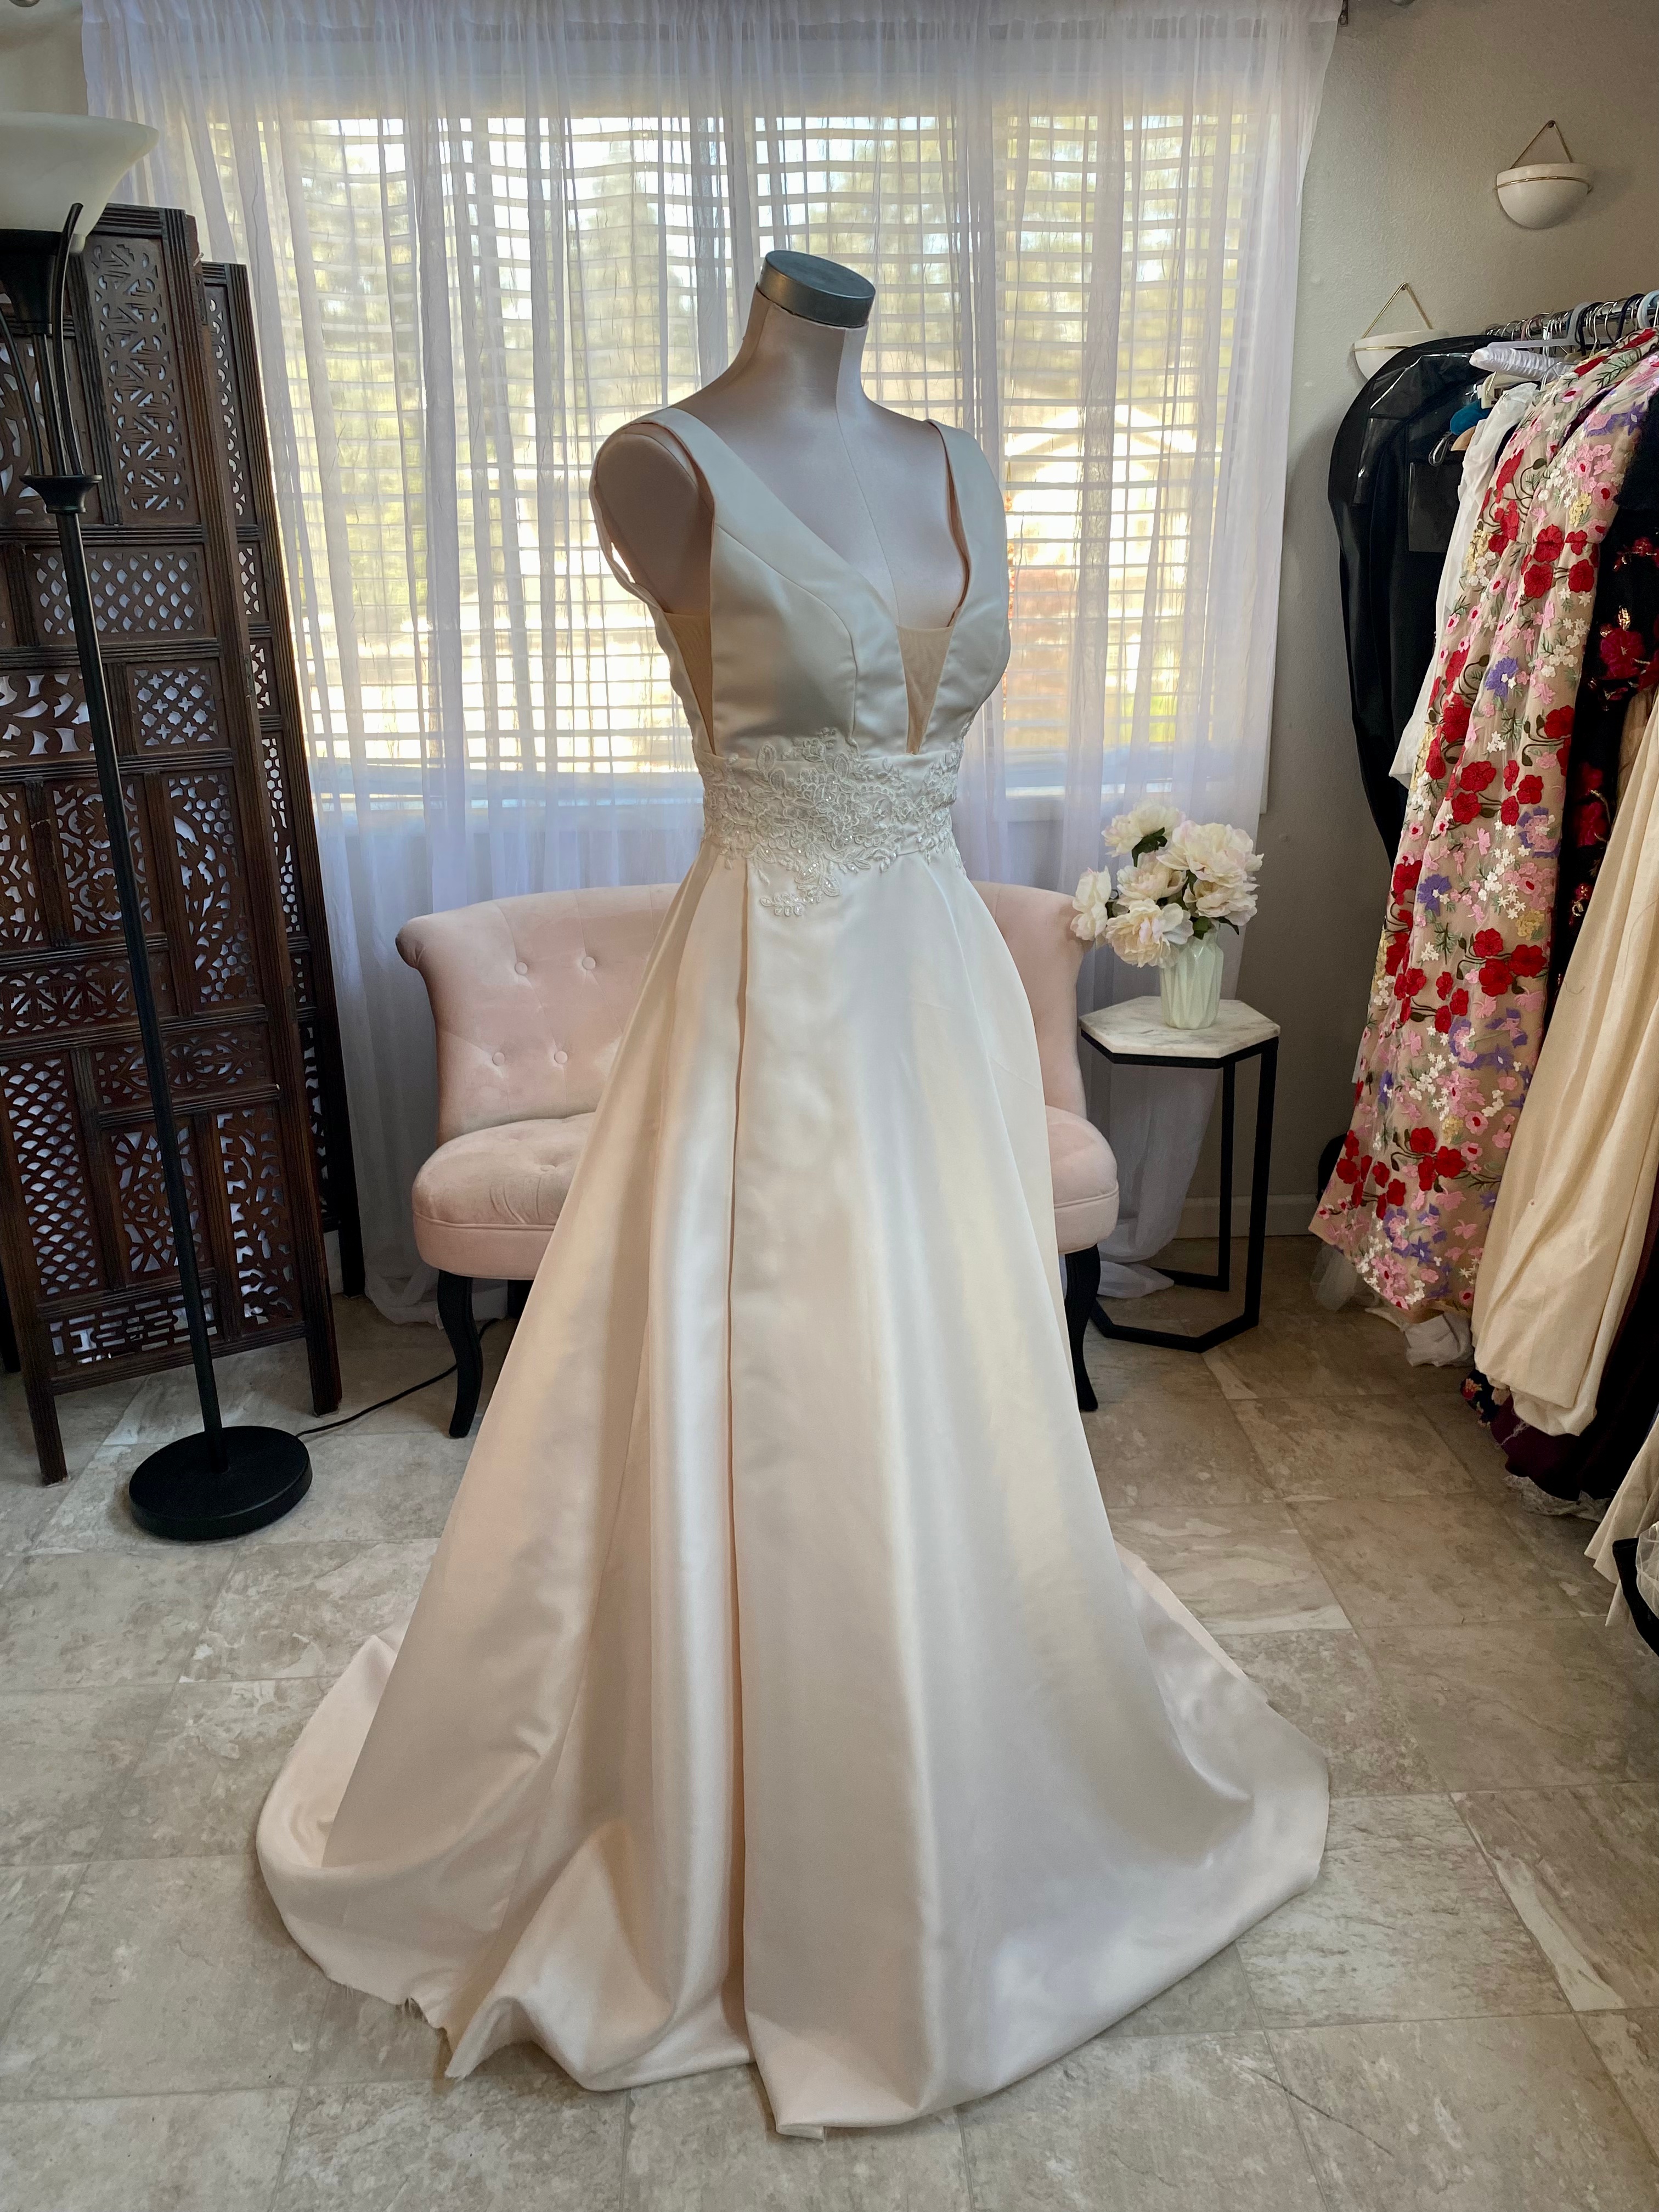
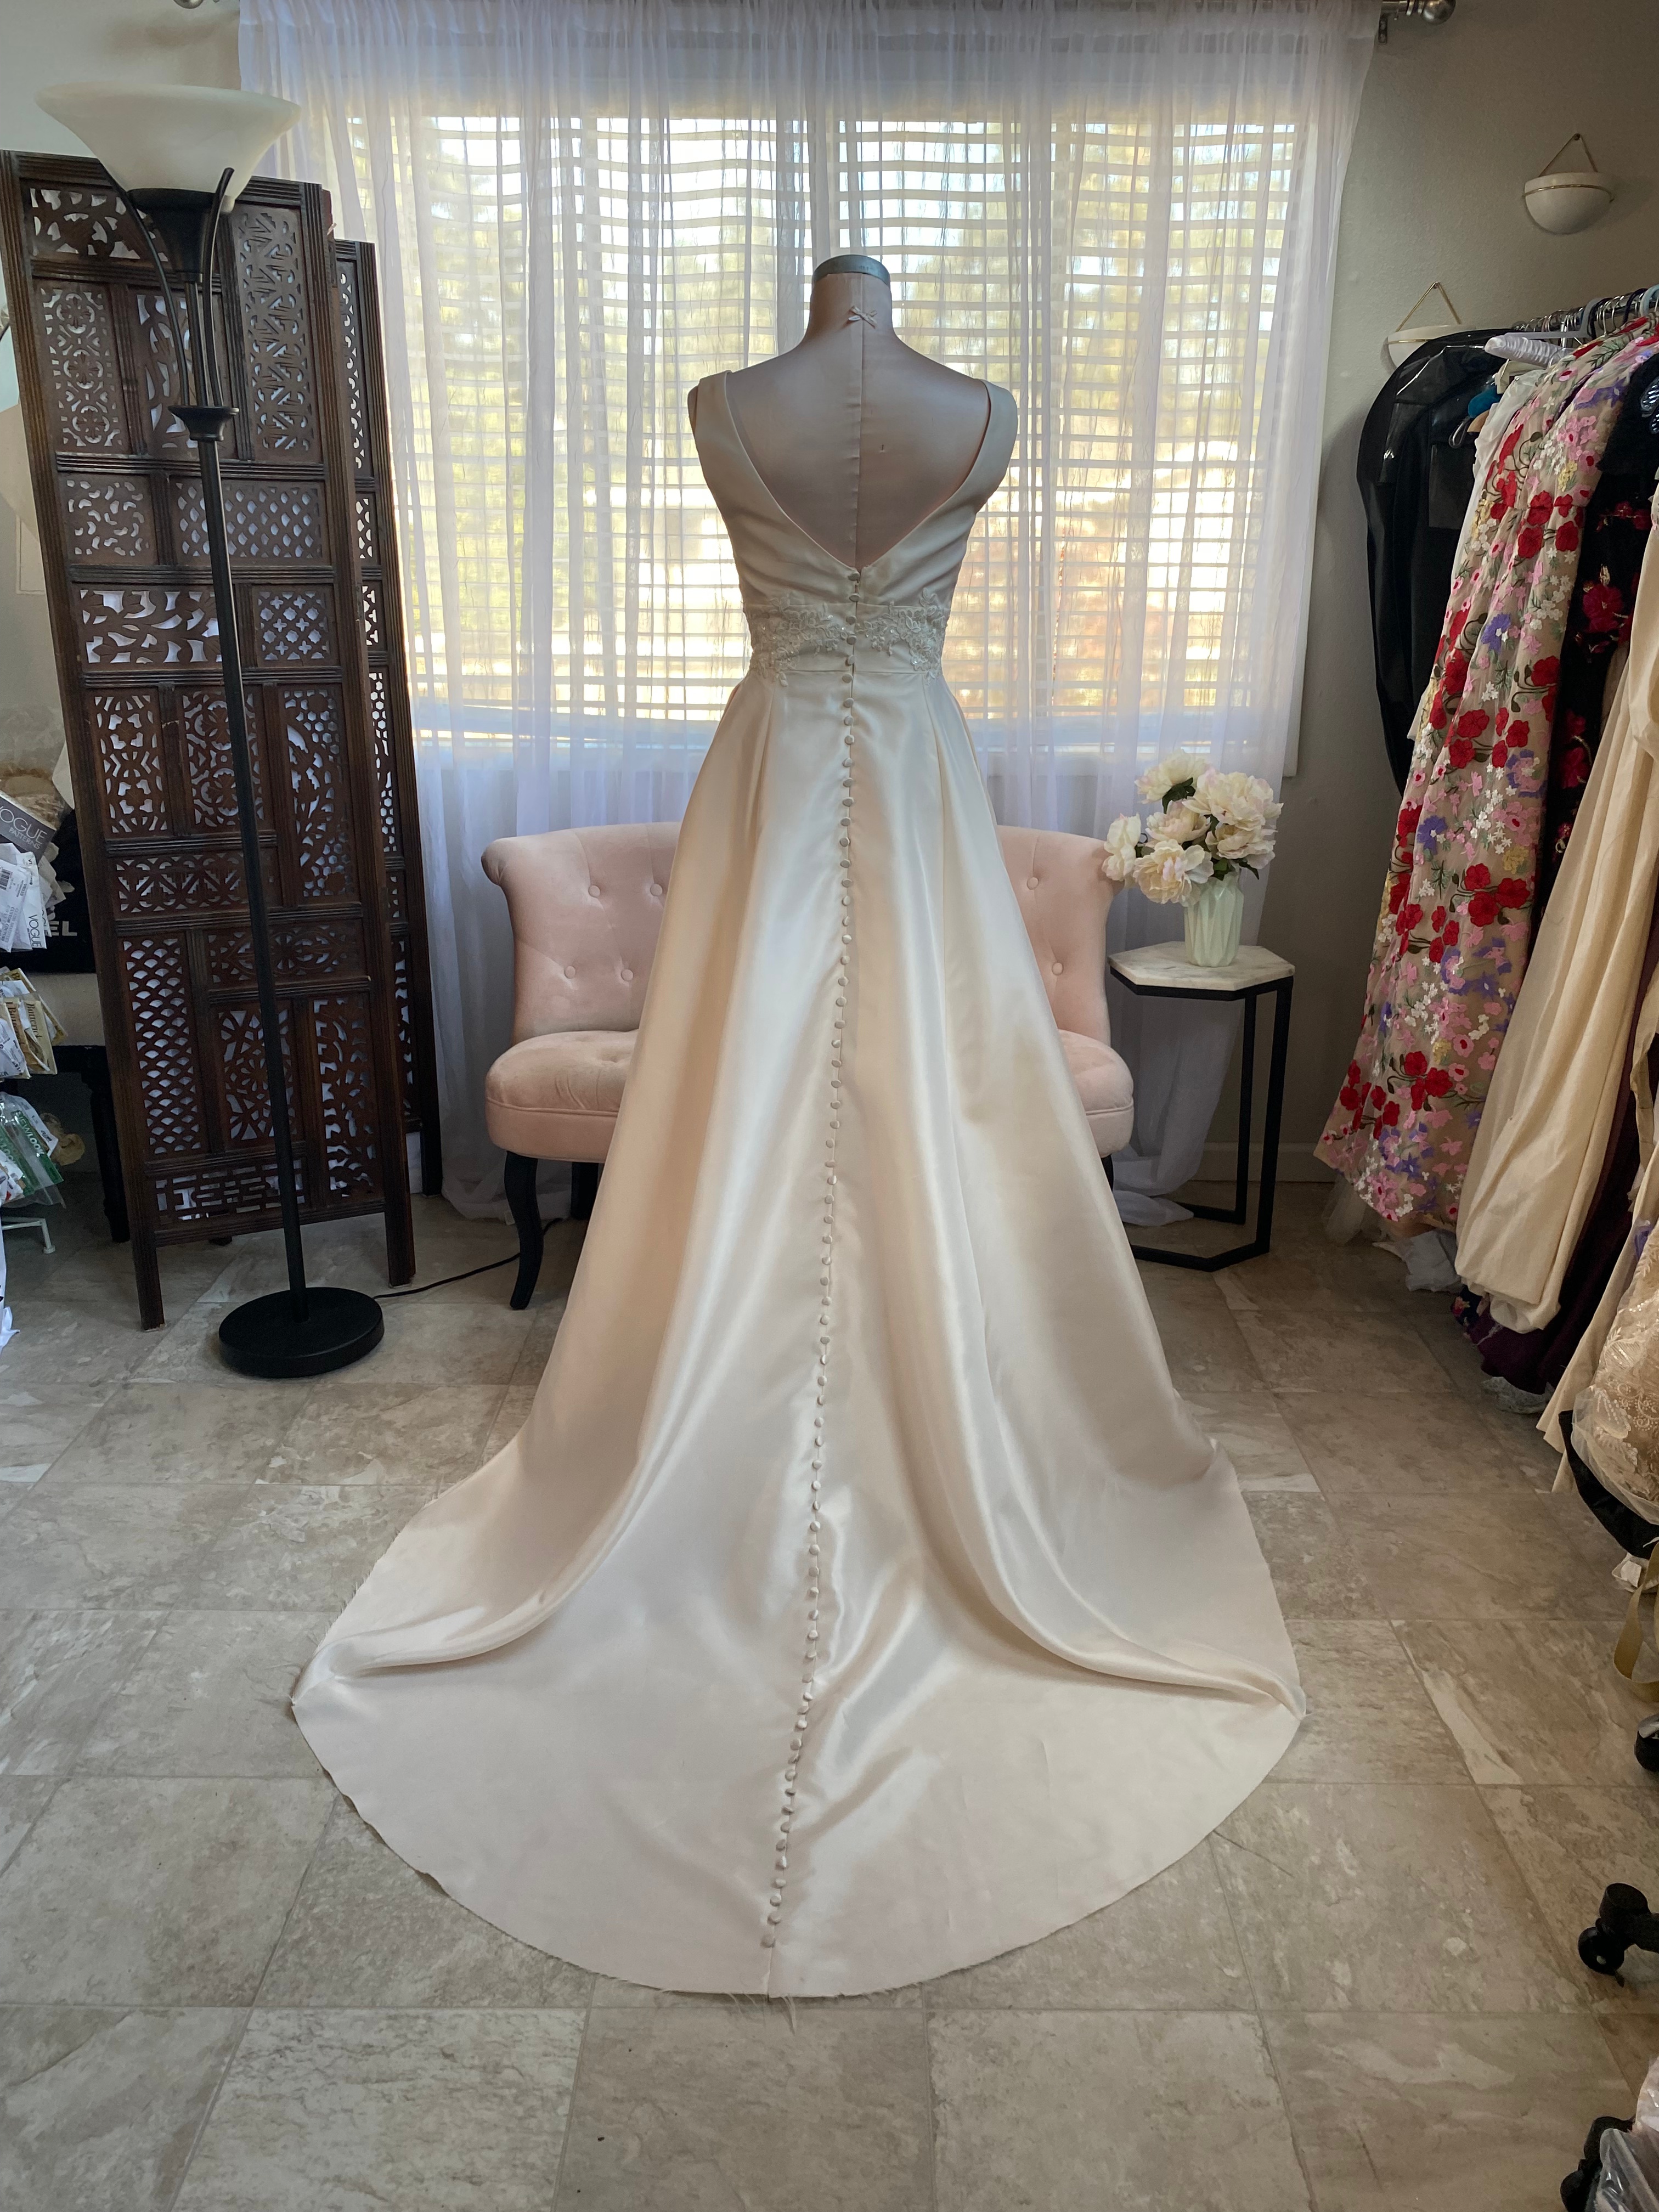
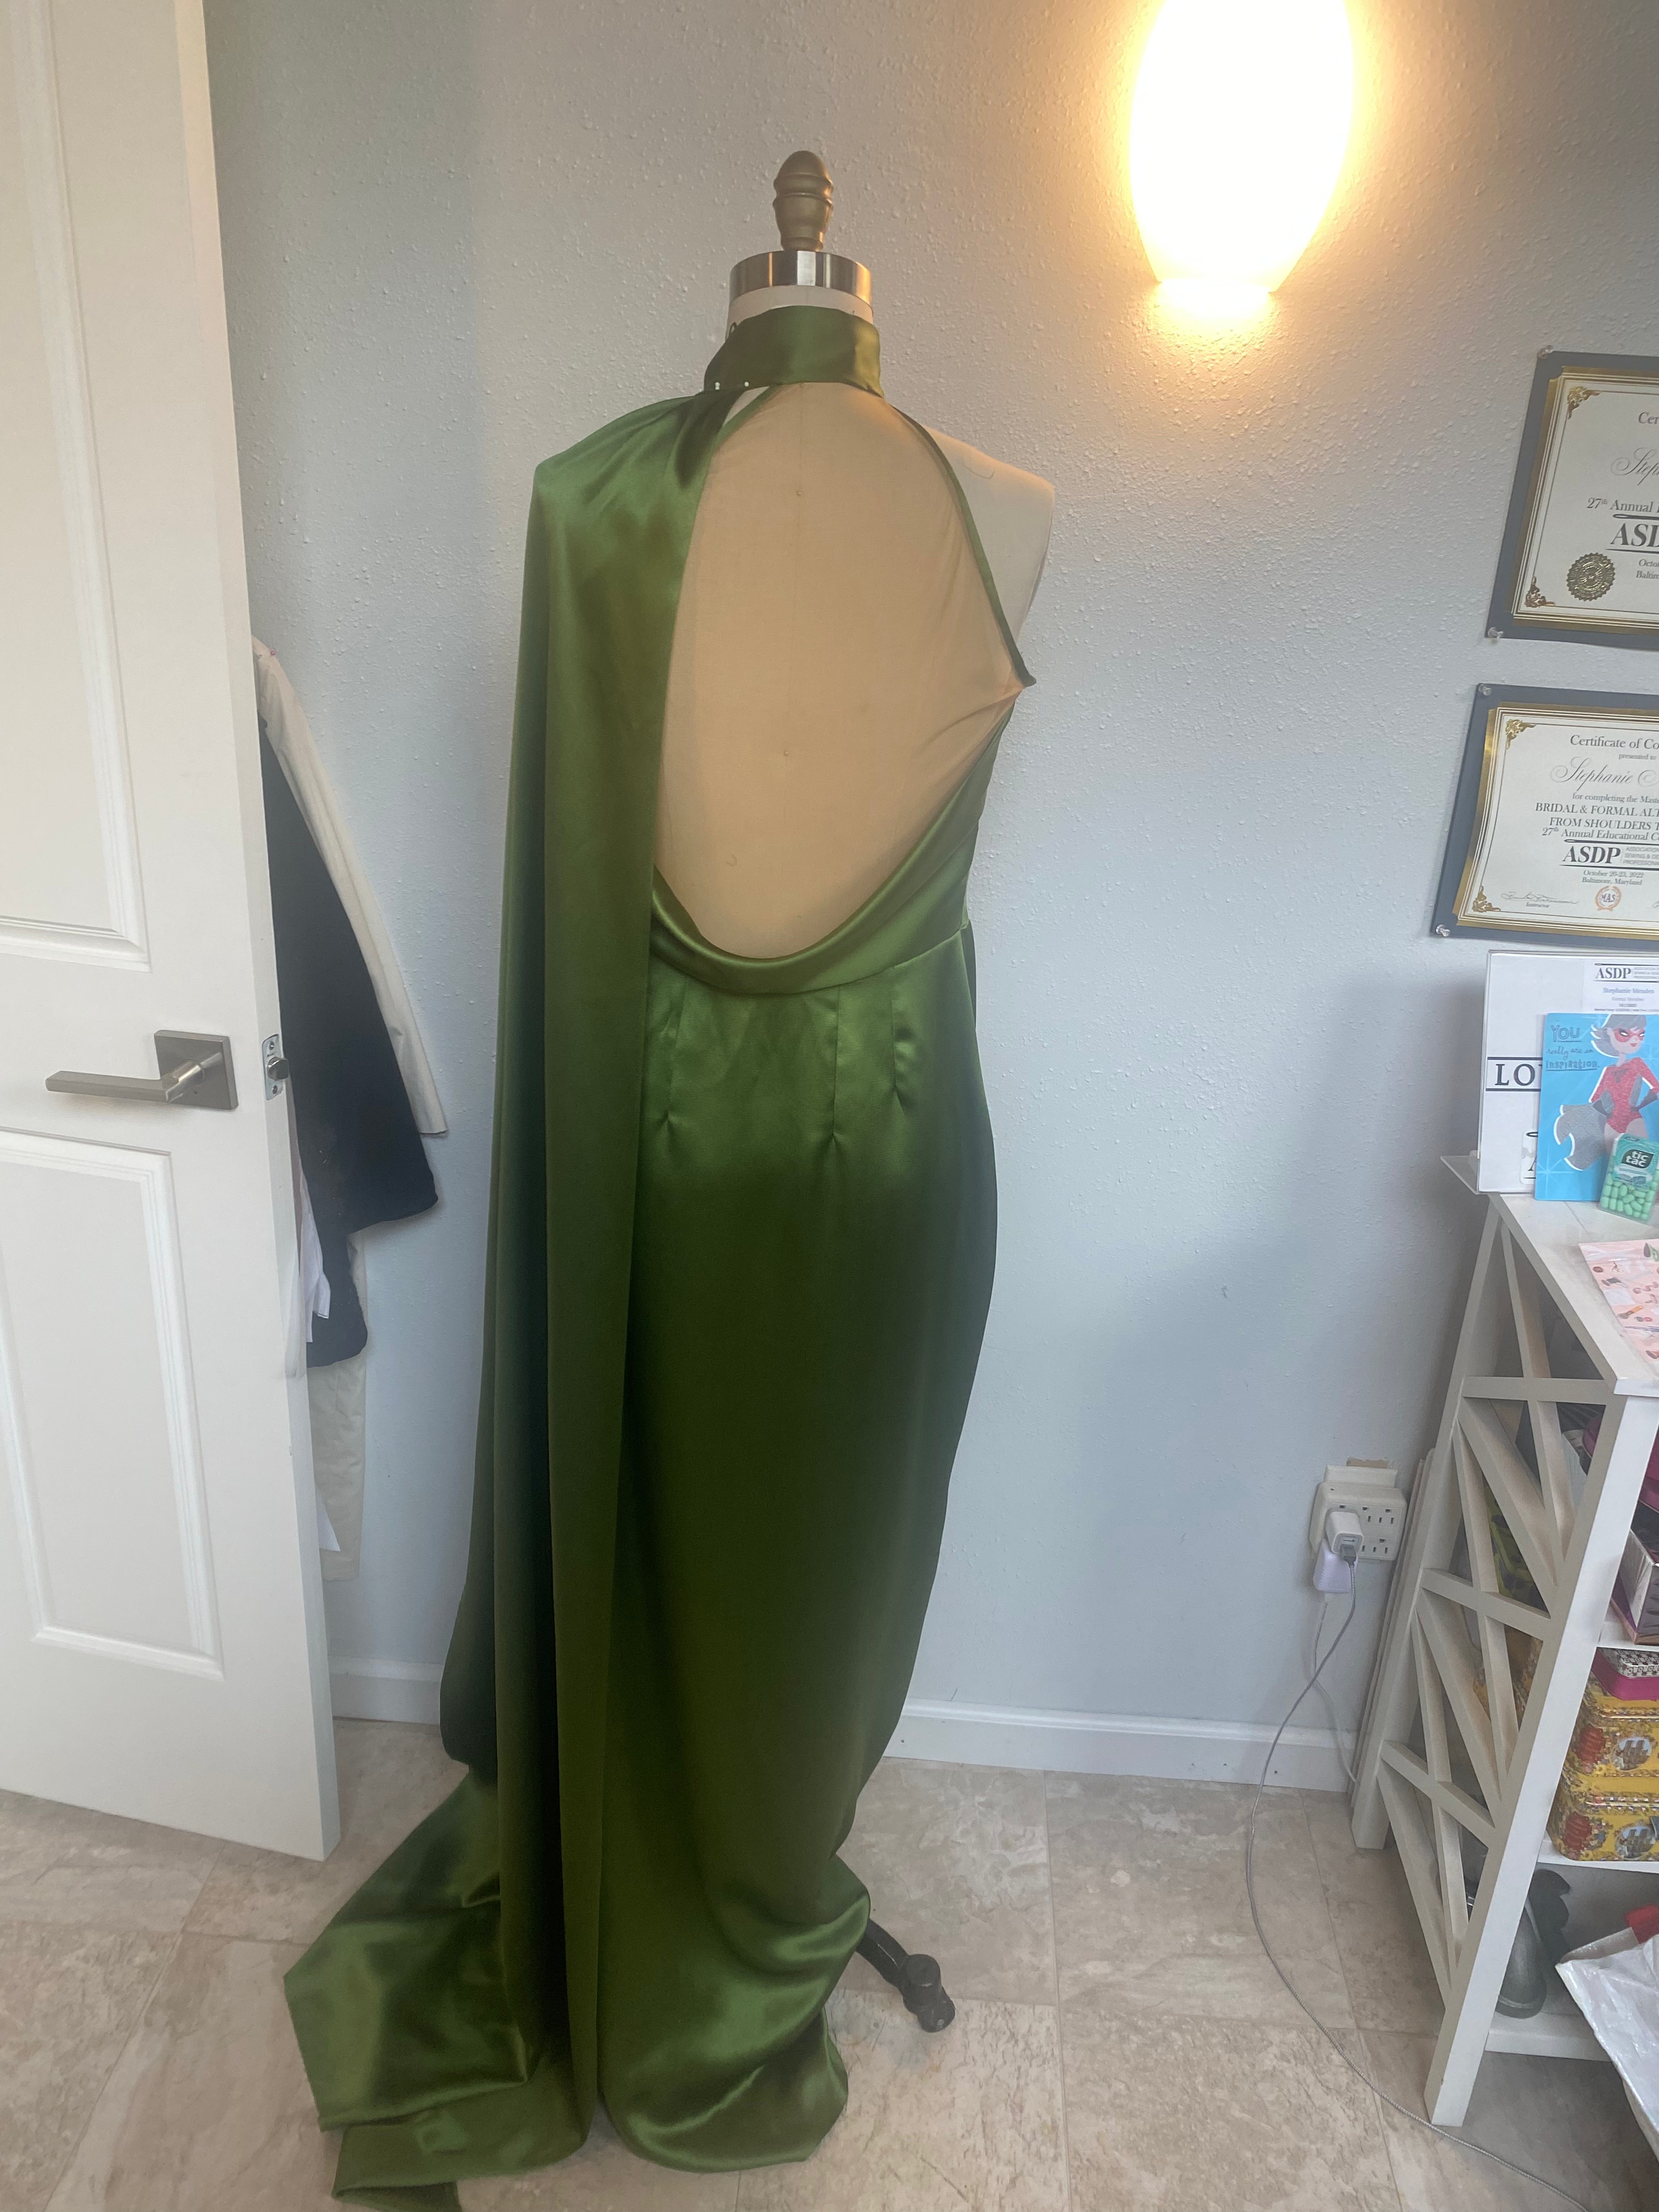
I wanted it to be a real fantasy gown, getting an idea from a bridal gown that I had the pleasure of altering in 2025. One of the great perks of doing bridal and special occasion dresses is that I get to really study how the garments are constructed and what fabrics and techniques are used as I work on them for my clients. This particular gown that stuck in my head had a layer of fine glittery tulle under the outermost layer of the dress that just gave a lovely hint of shimmer and sparkle as the bride moved around in her dress.
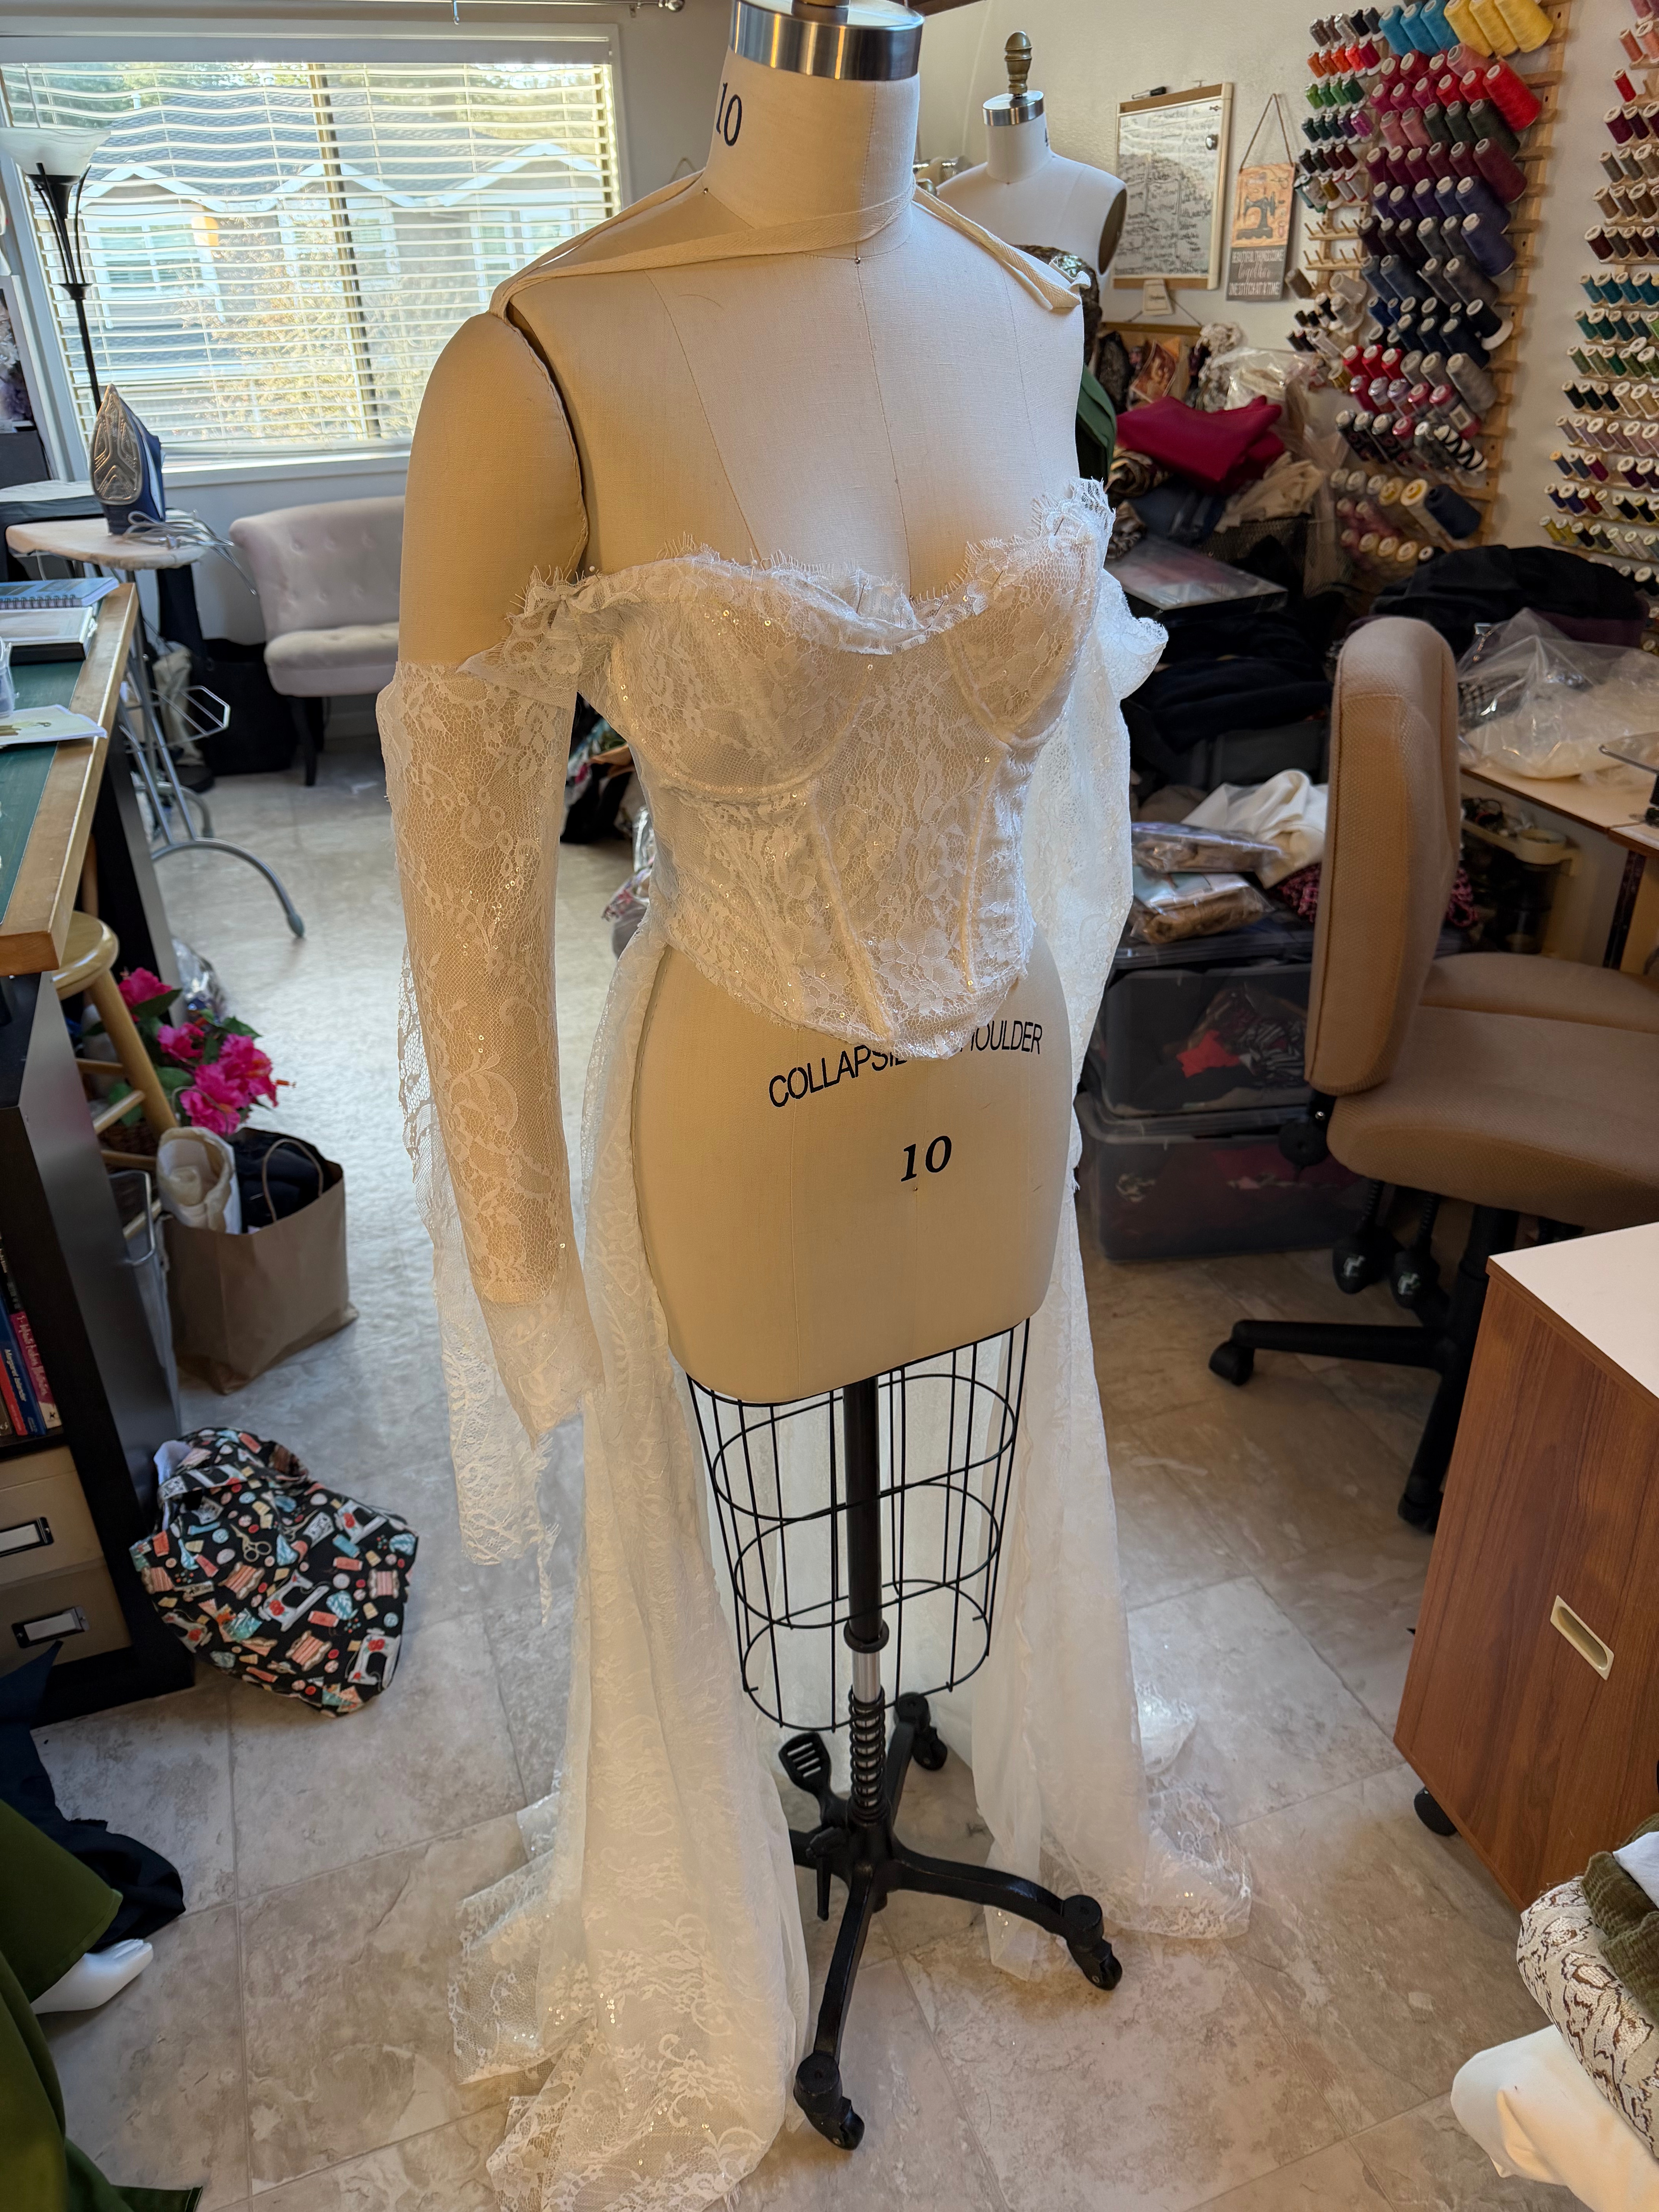
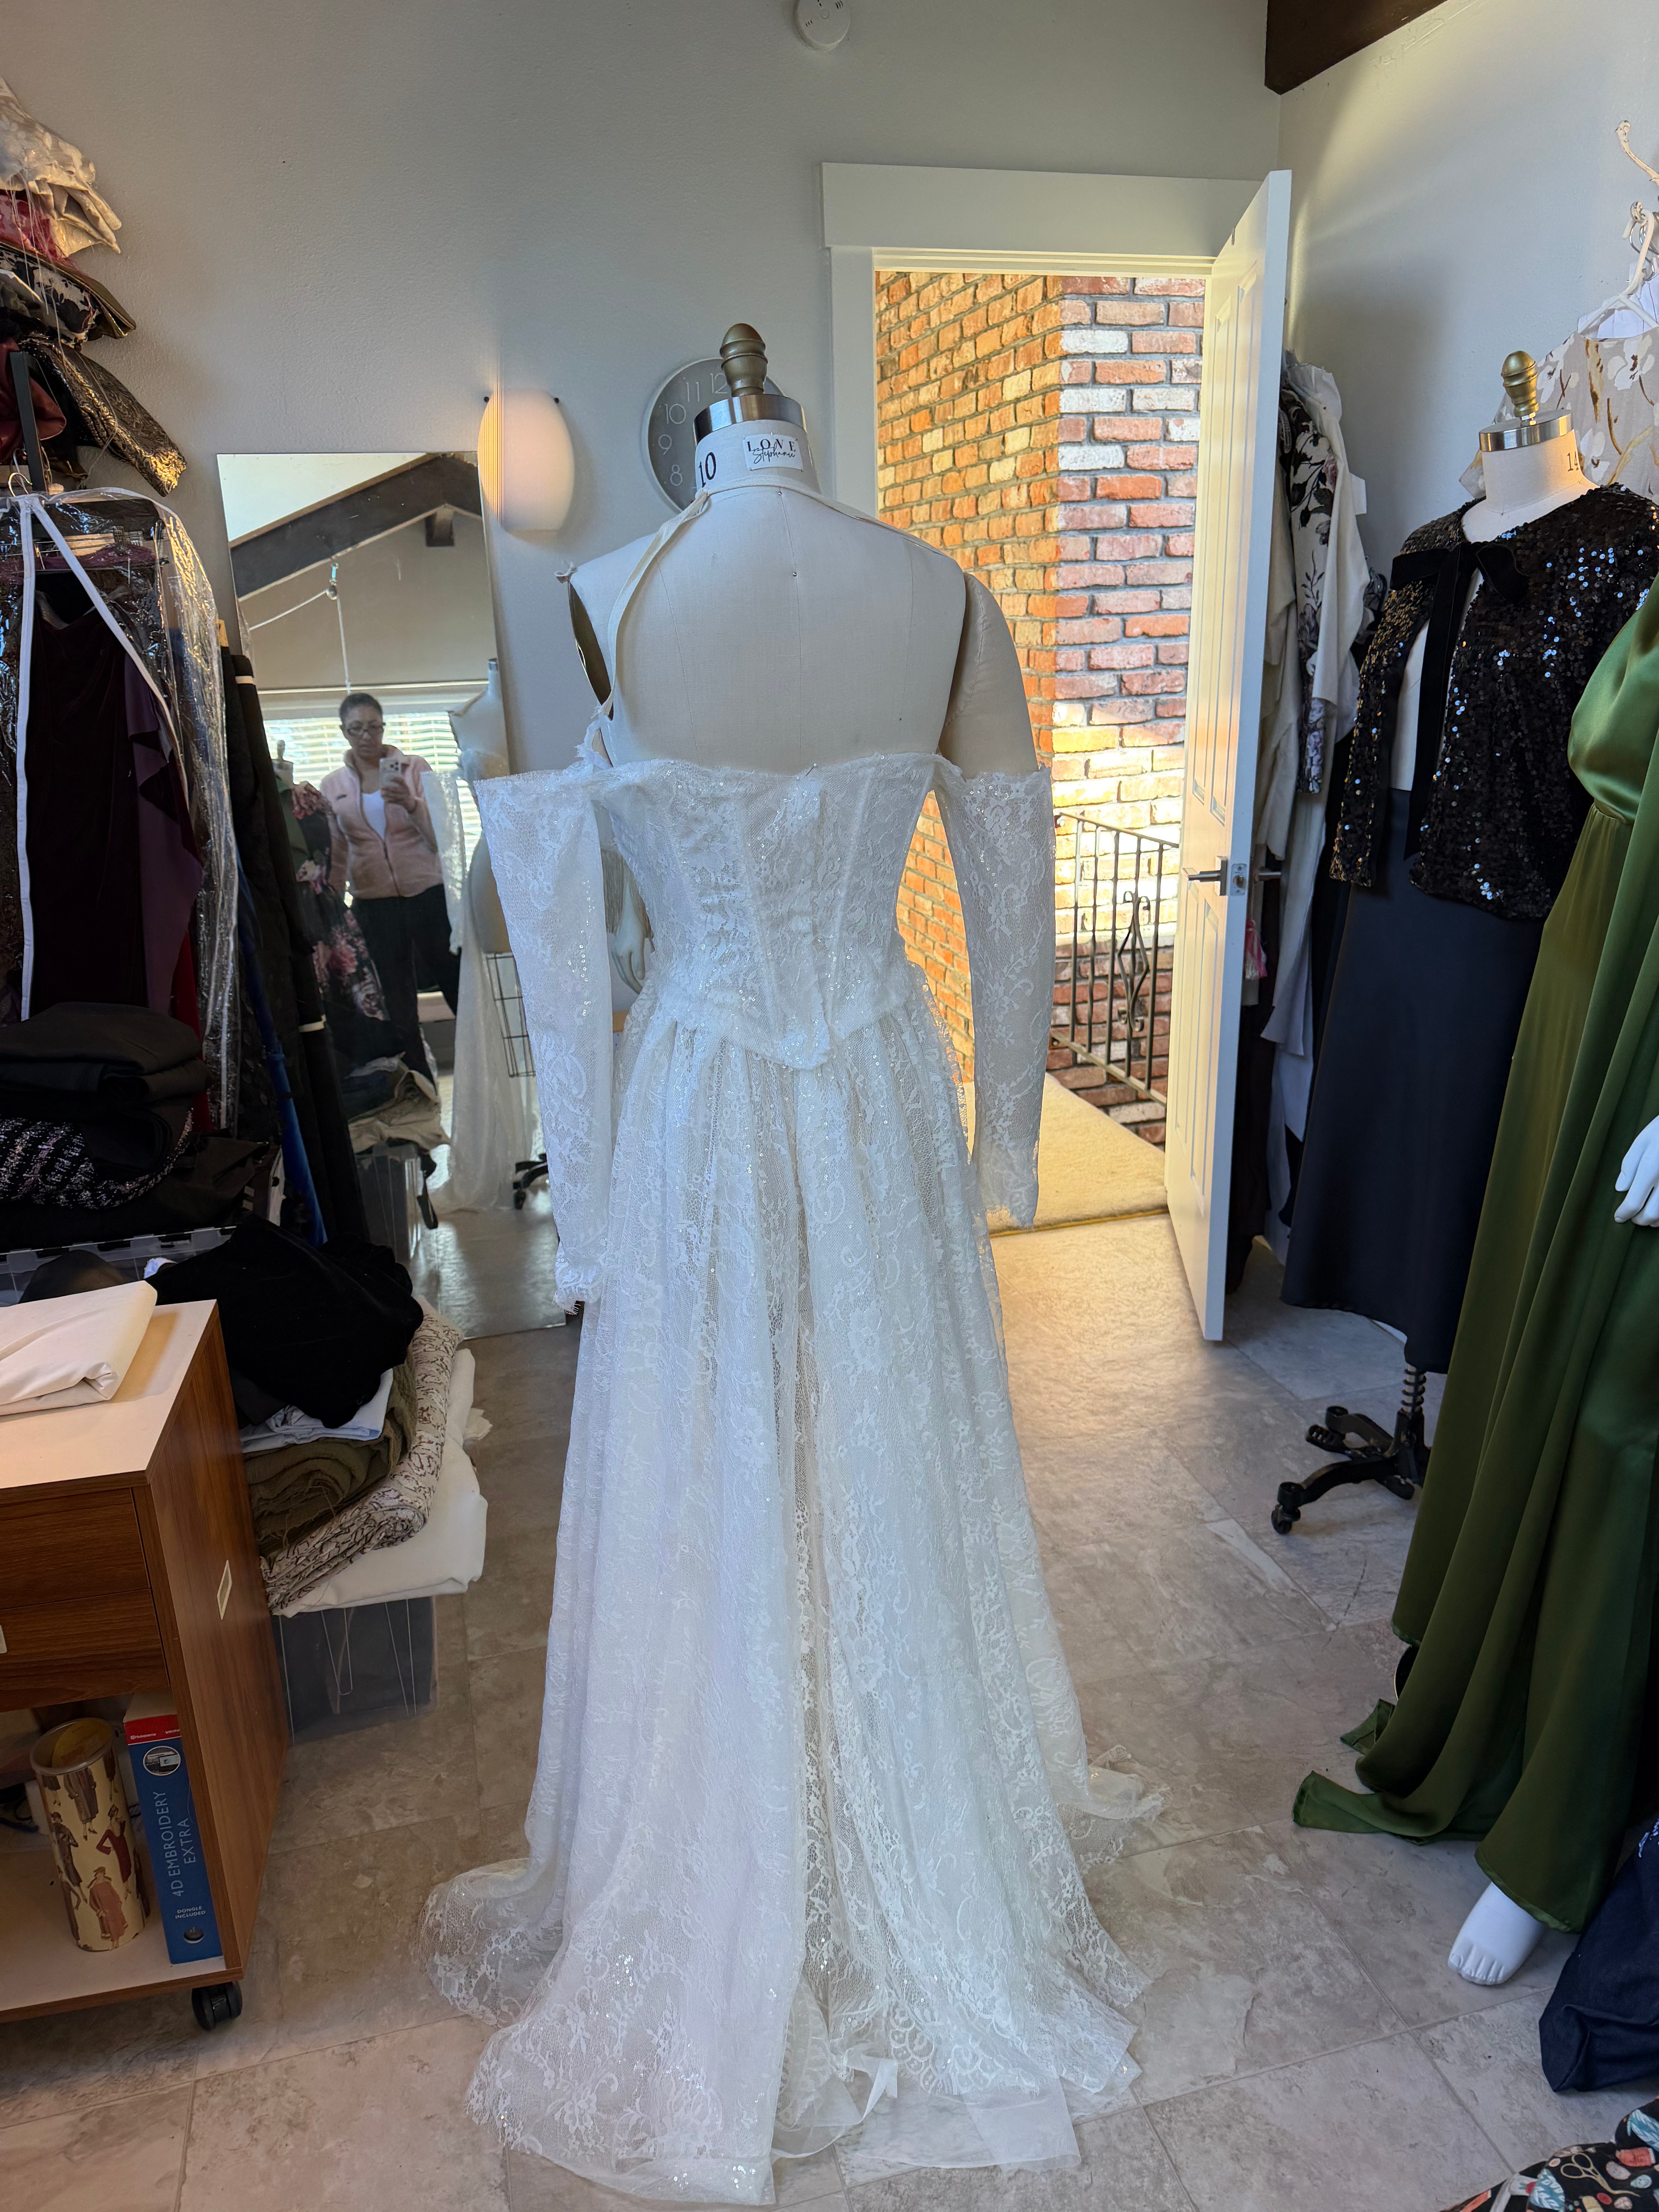
I decided that this pattern was a great opportunity to incorporate this glittery effect to the underlining of the dress. I layered the fabrics using the lace on top, the glitter tulle under the lace, 2 layers of soft tulle, a layer of stiff tulle, and the lining layer. These many layers gave a lovely swishy, twinkly and flowy (all technical terms) effect to the ballgown.
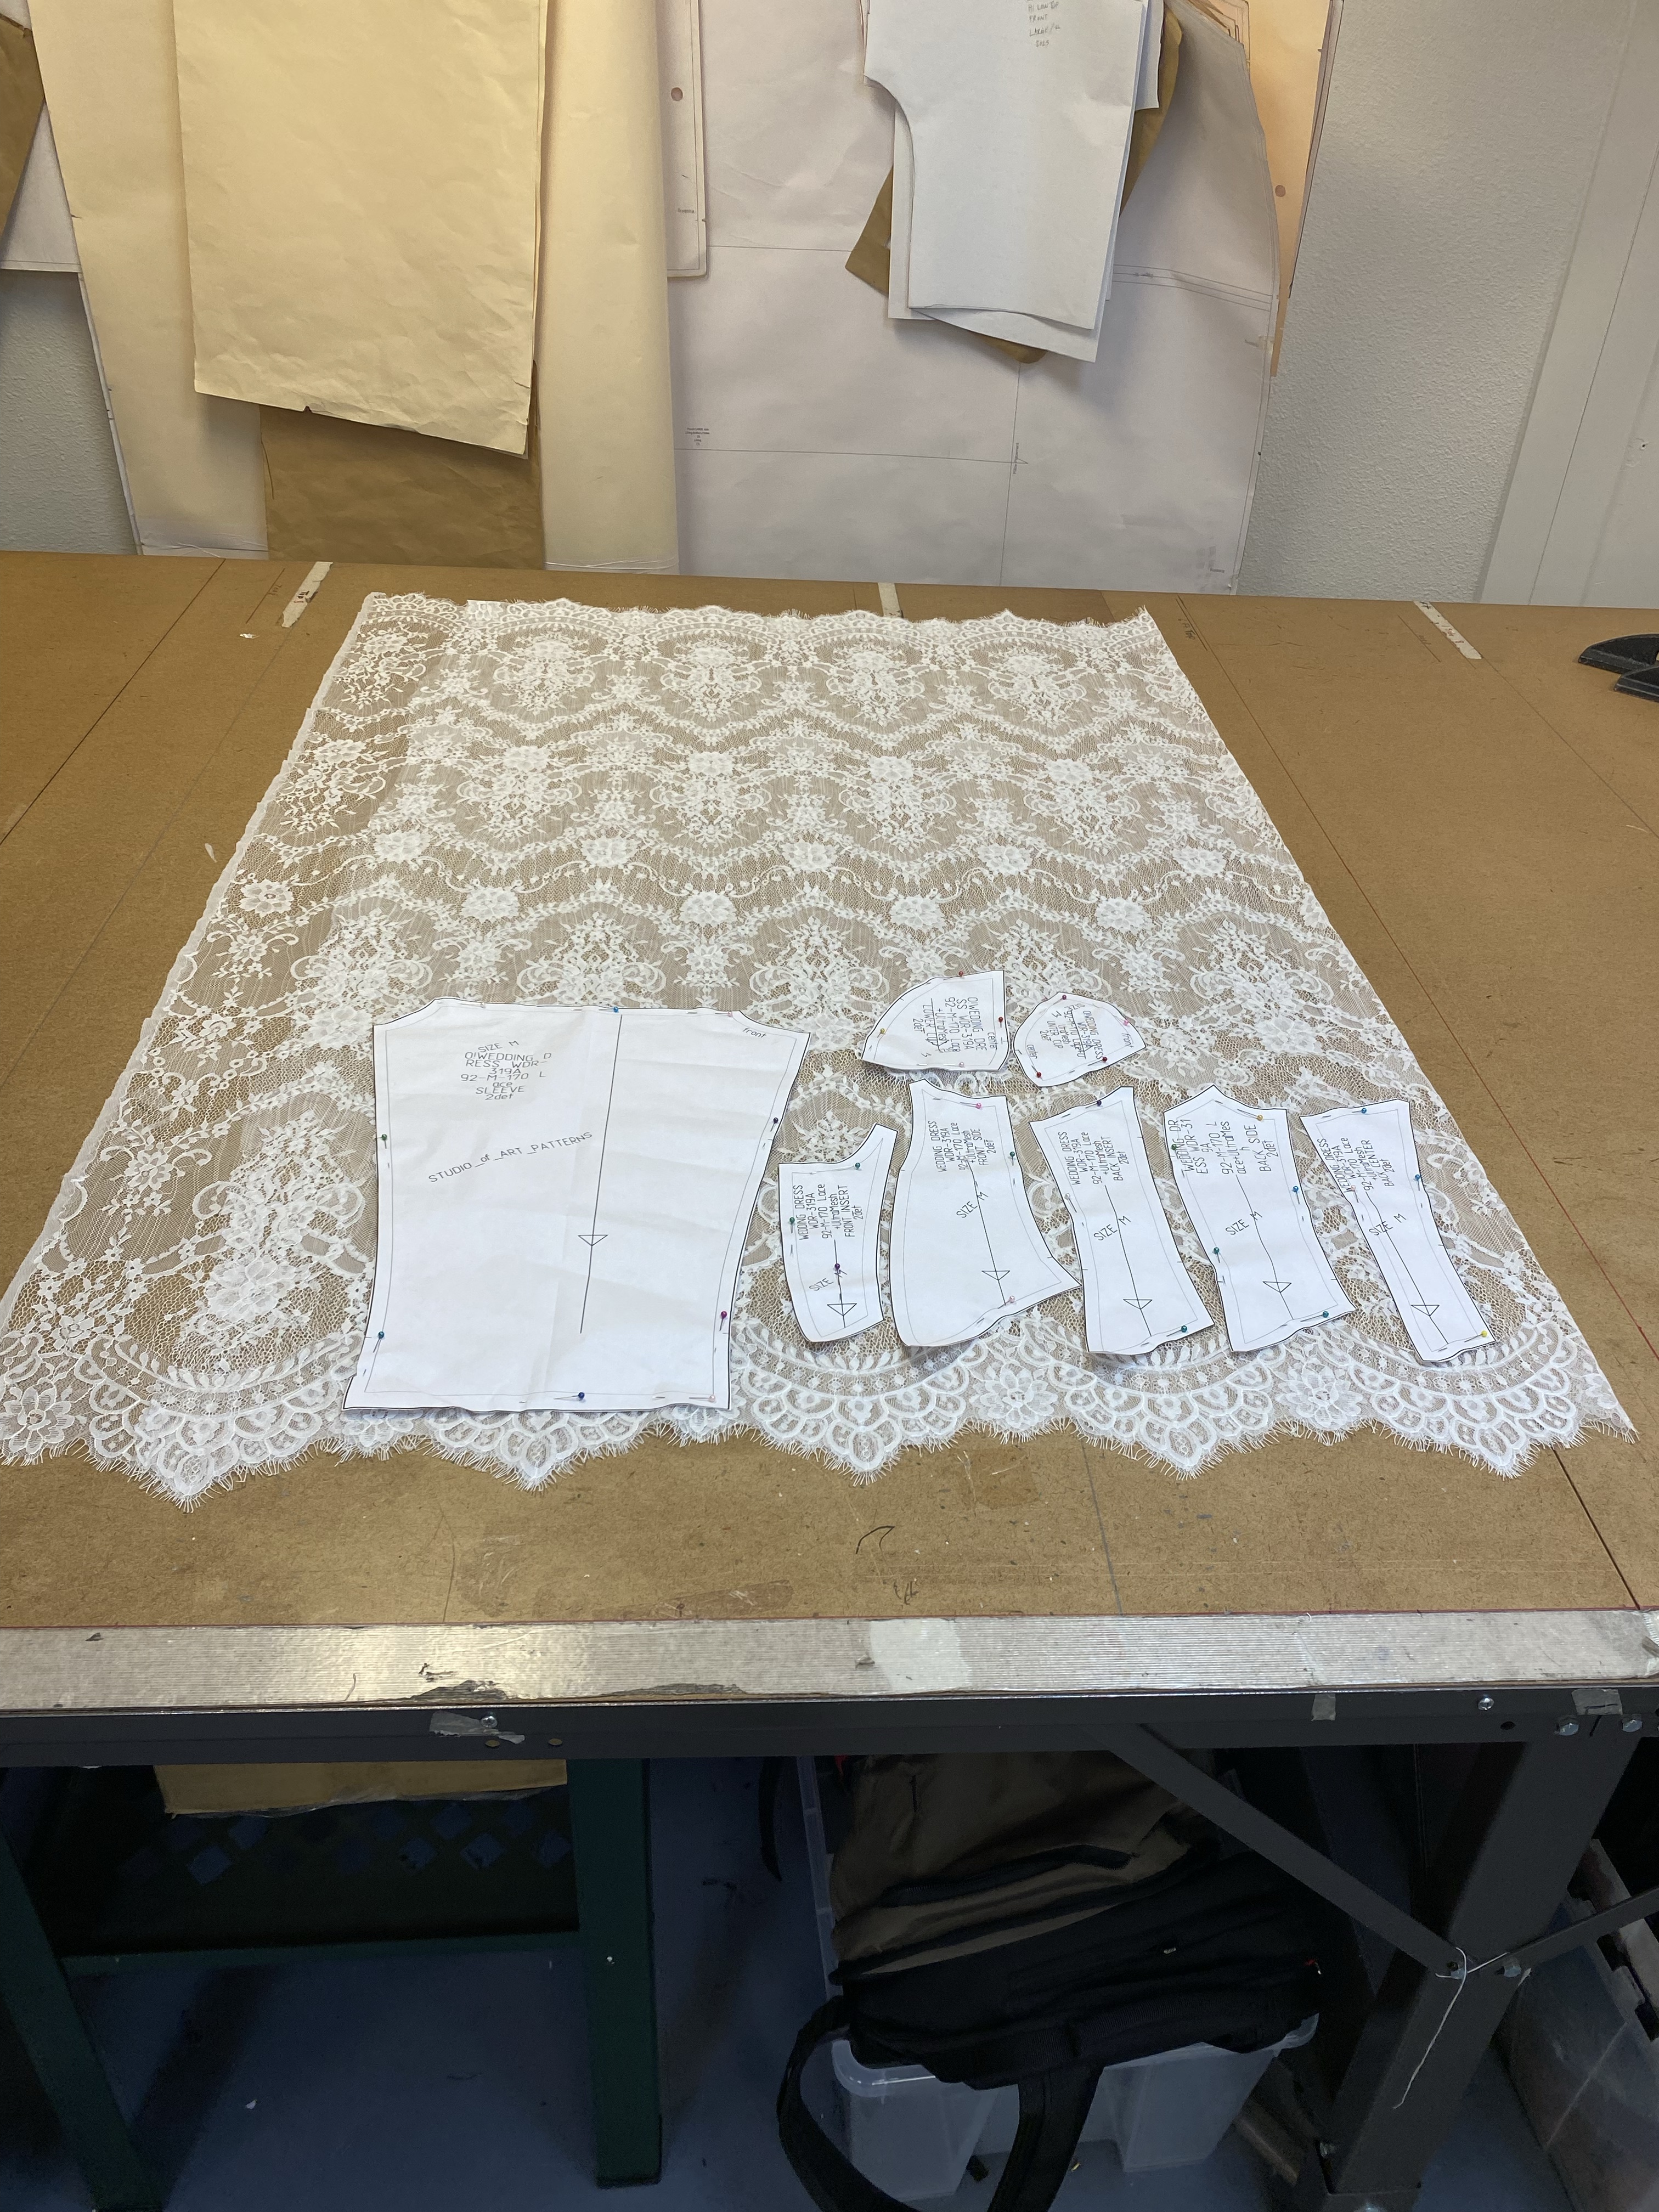
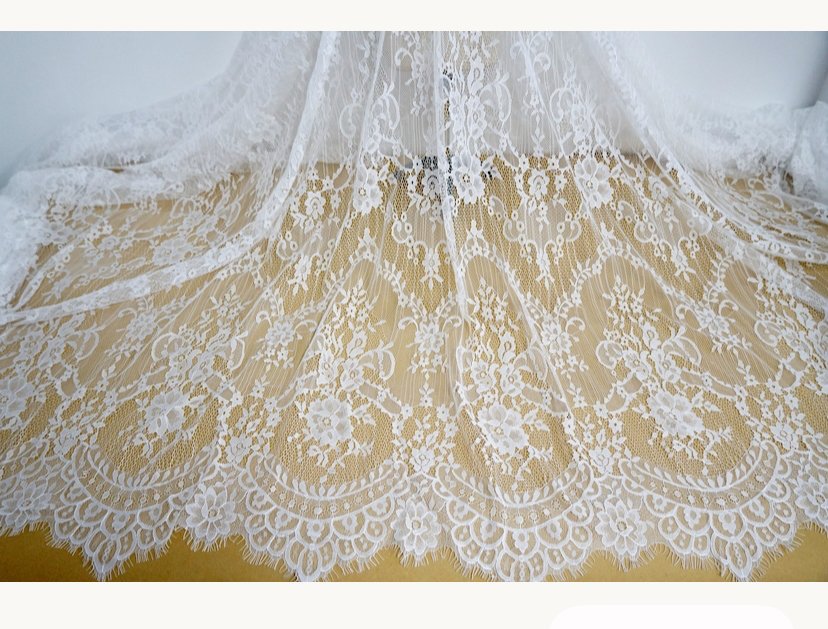
There is just something about lace that captivates my interest with its beauty and pattern. I love all kinds of lace, but this Chantilly lace was just so delicate and perfect for this gown with the floral motif and scalloped eyelash edge. So so pretty!
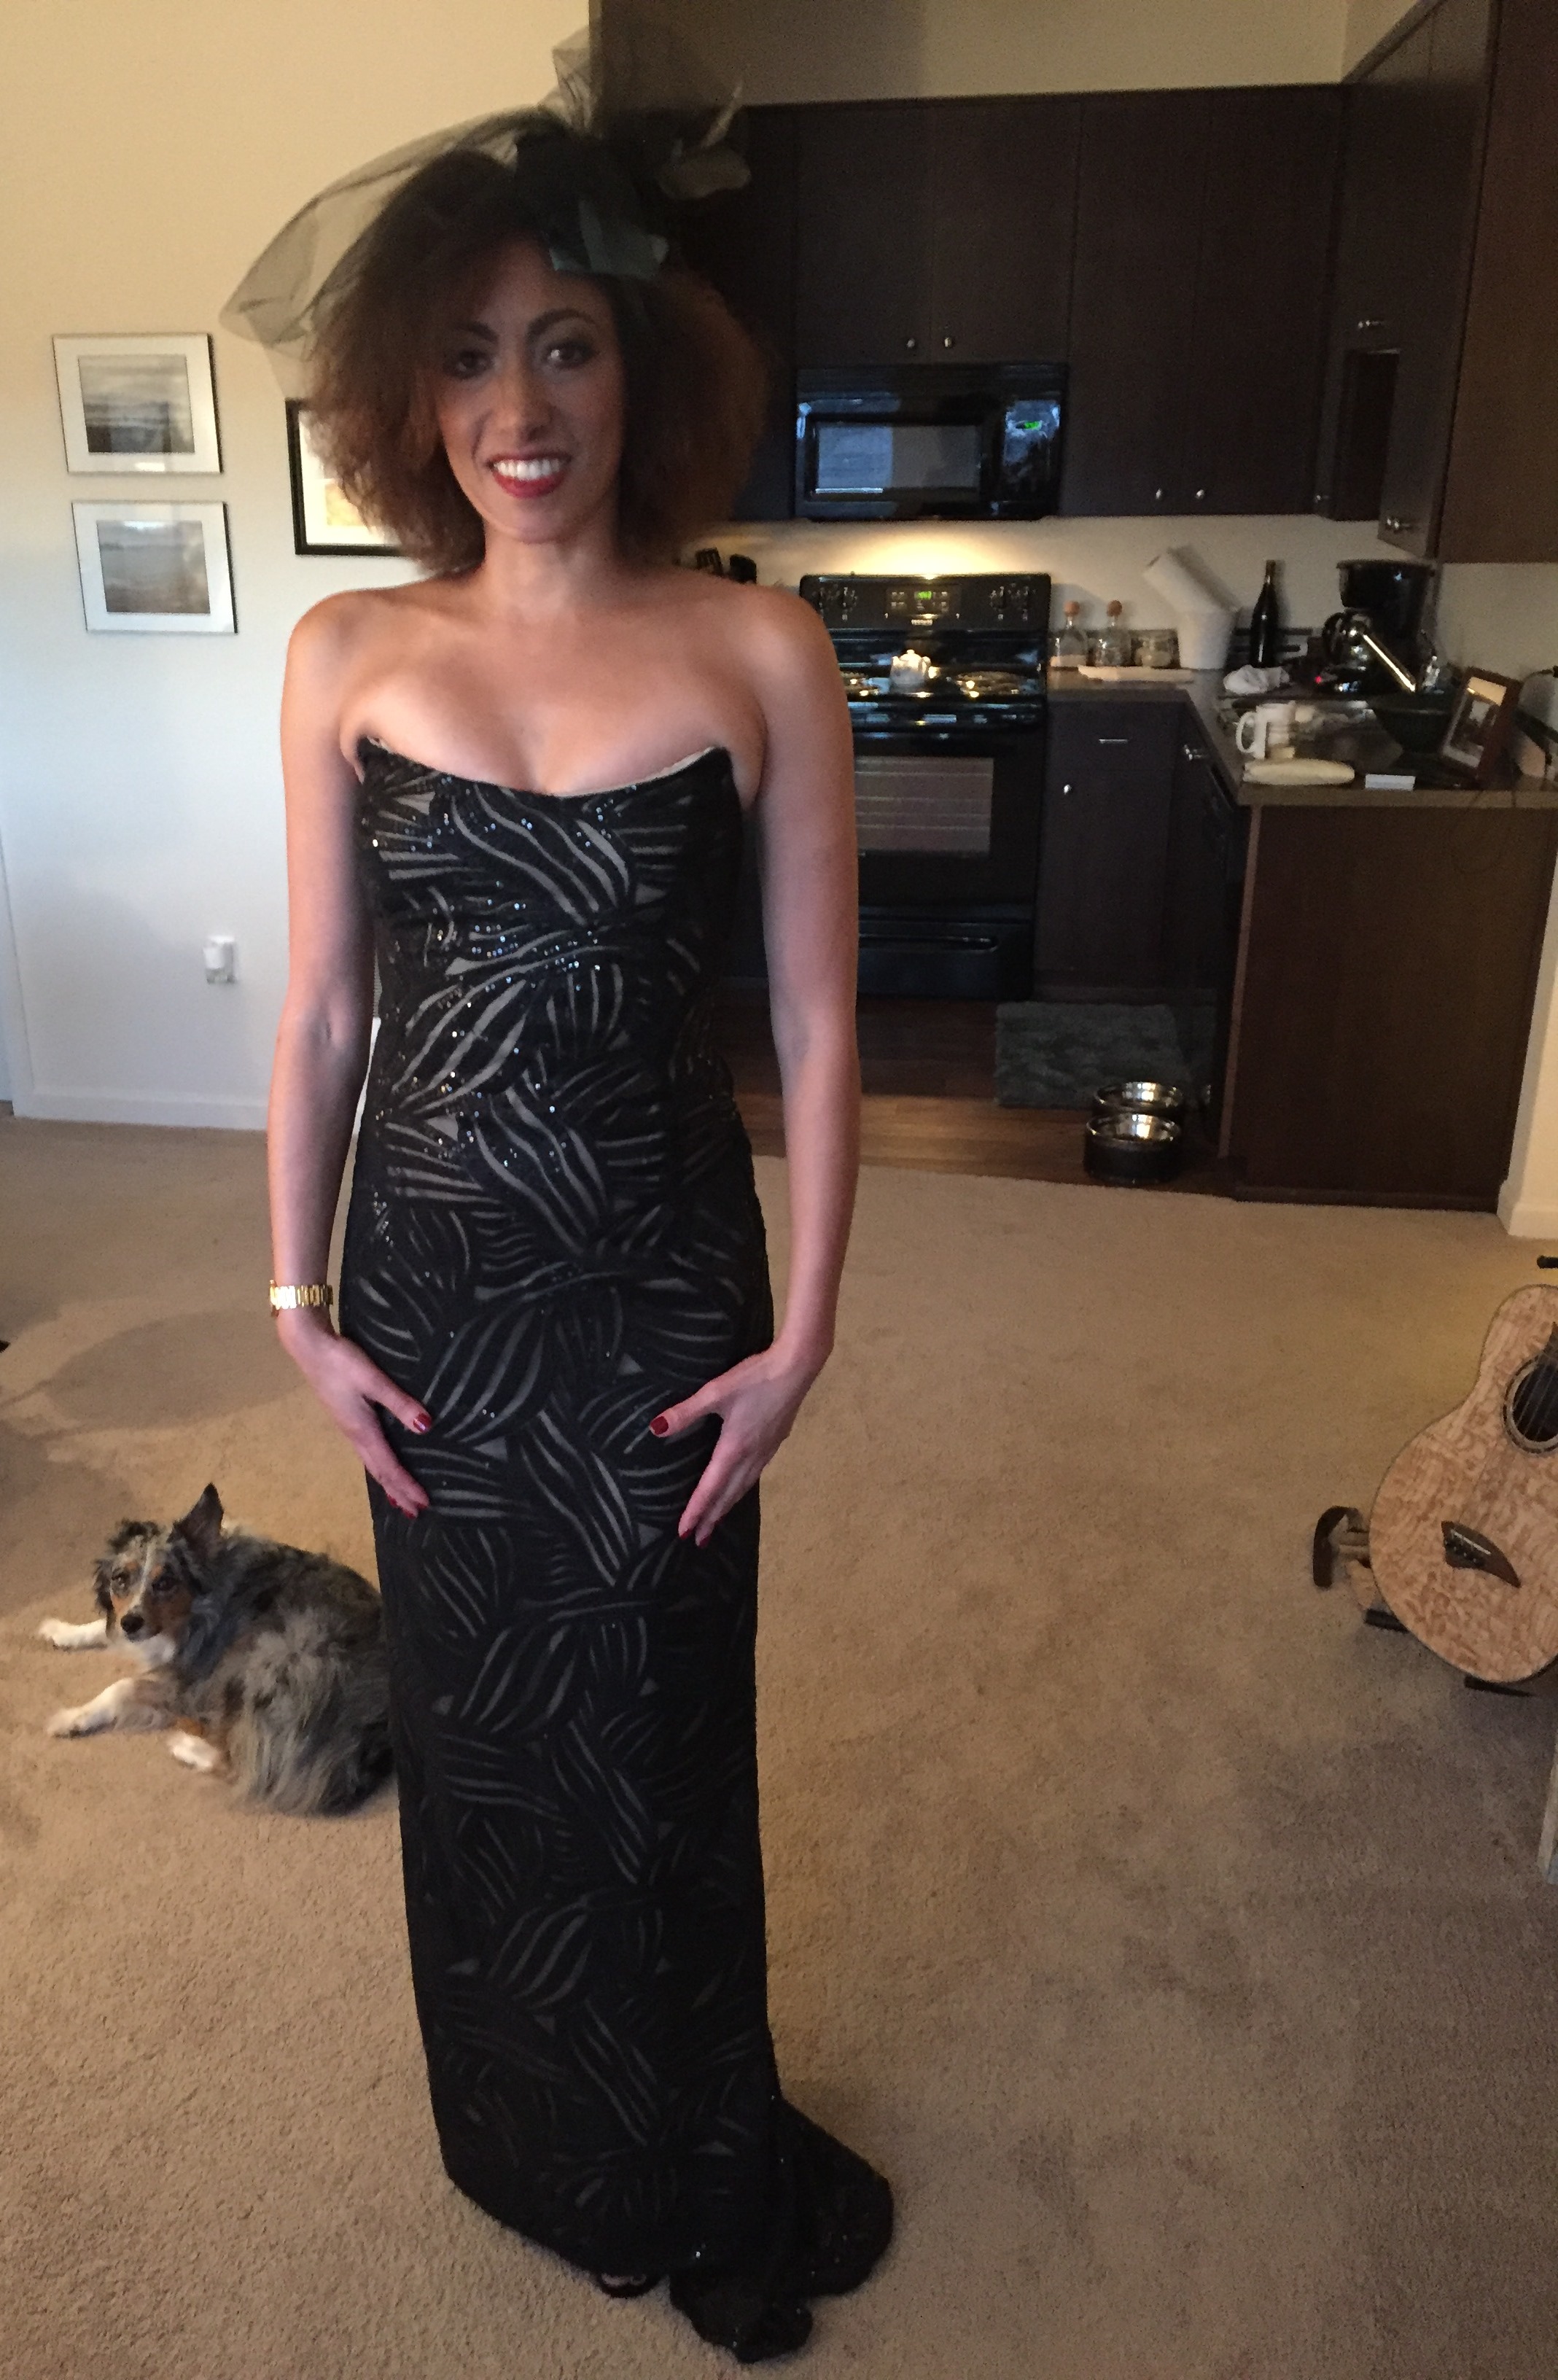
Once all the fabric was cut from the pattern, I placed it in a box, set it aside and took a little break from the project to work on other things I needed get done. I had actual clients that needed their projects finished, and this gown was meant to be a wish list, stretch my skills, creative learning type of project just to display in my studio or use for a photo shoot, not for anyone specific, so she could wait.
After I had the necessary client work completed, paid for, and out the door, I found some time to get started on making the dress. First, I had to sew the initial layers of the lace and glitter tulle together by hand and then treat them as one layer as I constructed the dress. Each pattern piece was basted together at the edges to keep the fabric layers close to create some stability to the delicate lace while adding the little shimmer of tiny sequins of the tulle. That was time consuming in of itself, not to mention getting glitter and little bits of lace cuttings all over myself and my sewing room. My hand held battery operated vacuum cleaner came in quite handy!
Day by day, little by little, I was able to work on the constructing the dress. I really started to see progress when the bodice was basically complete and I could pin it to my dress form and admire my progress!
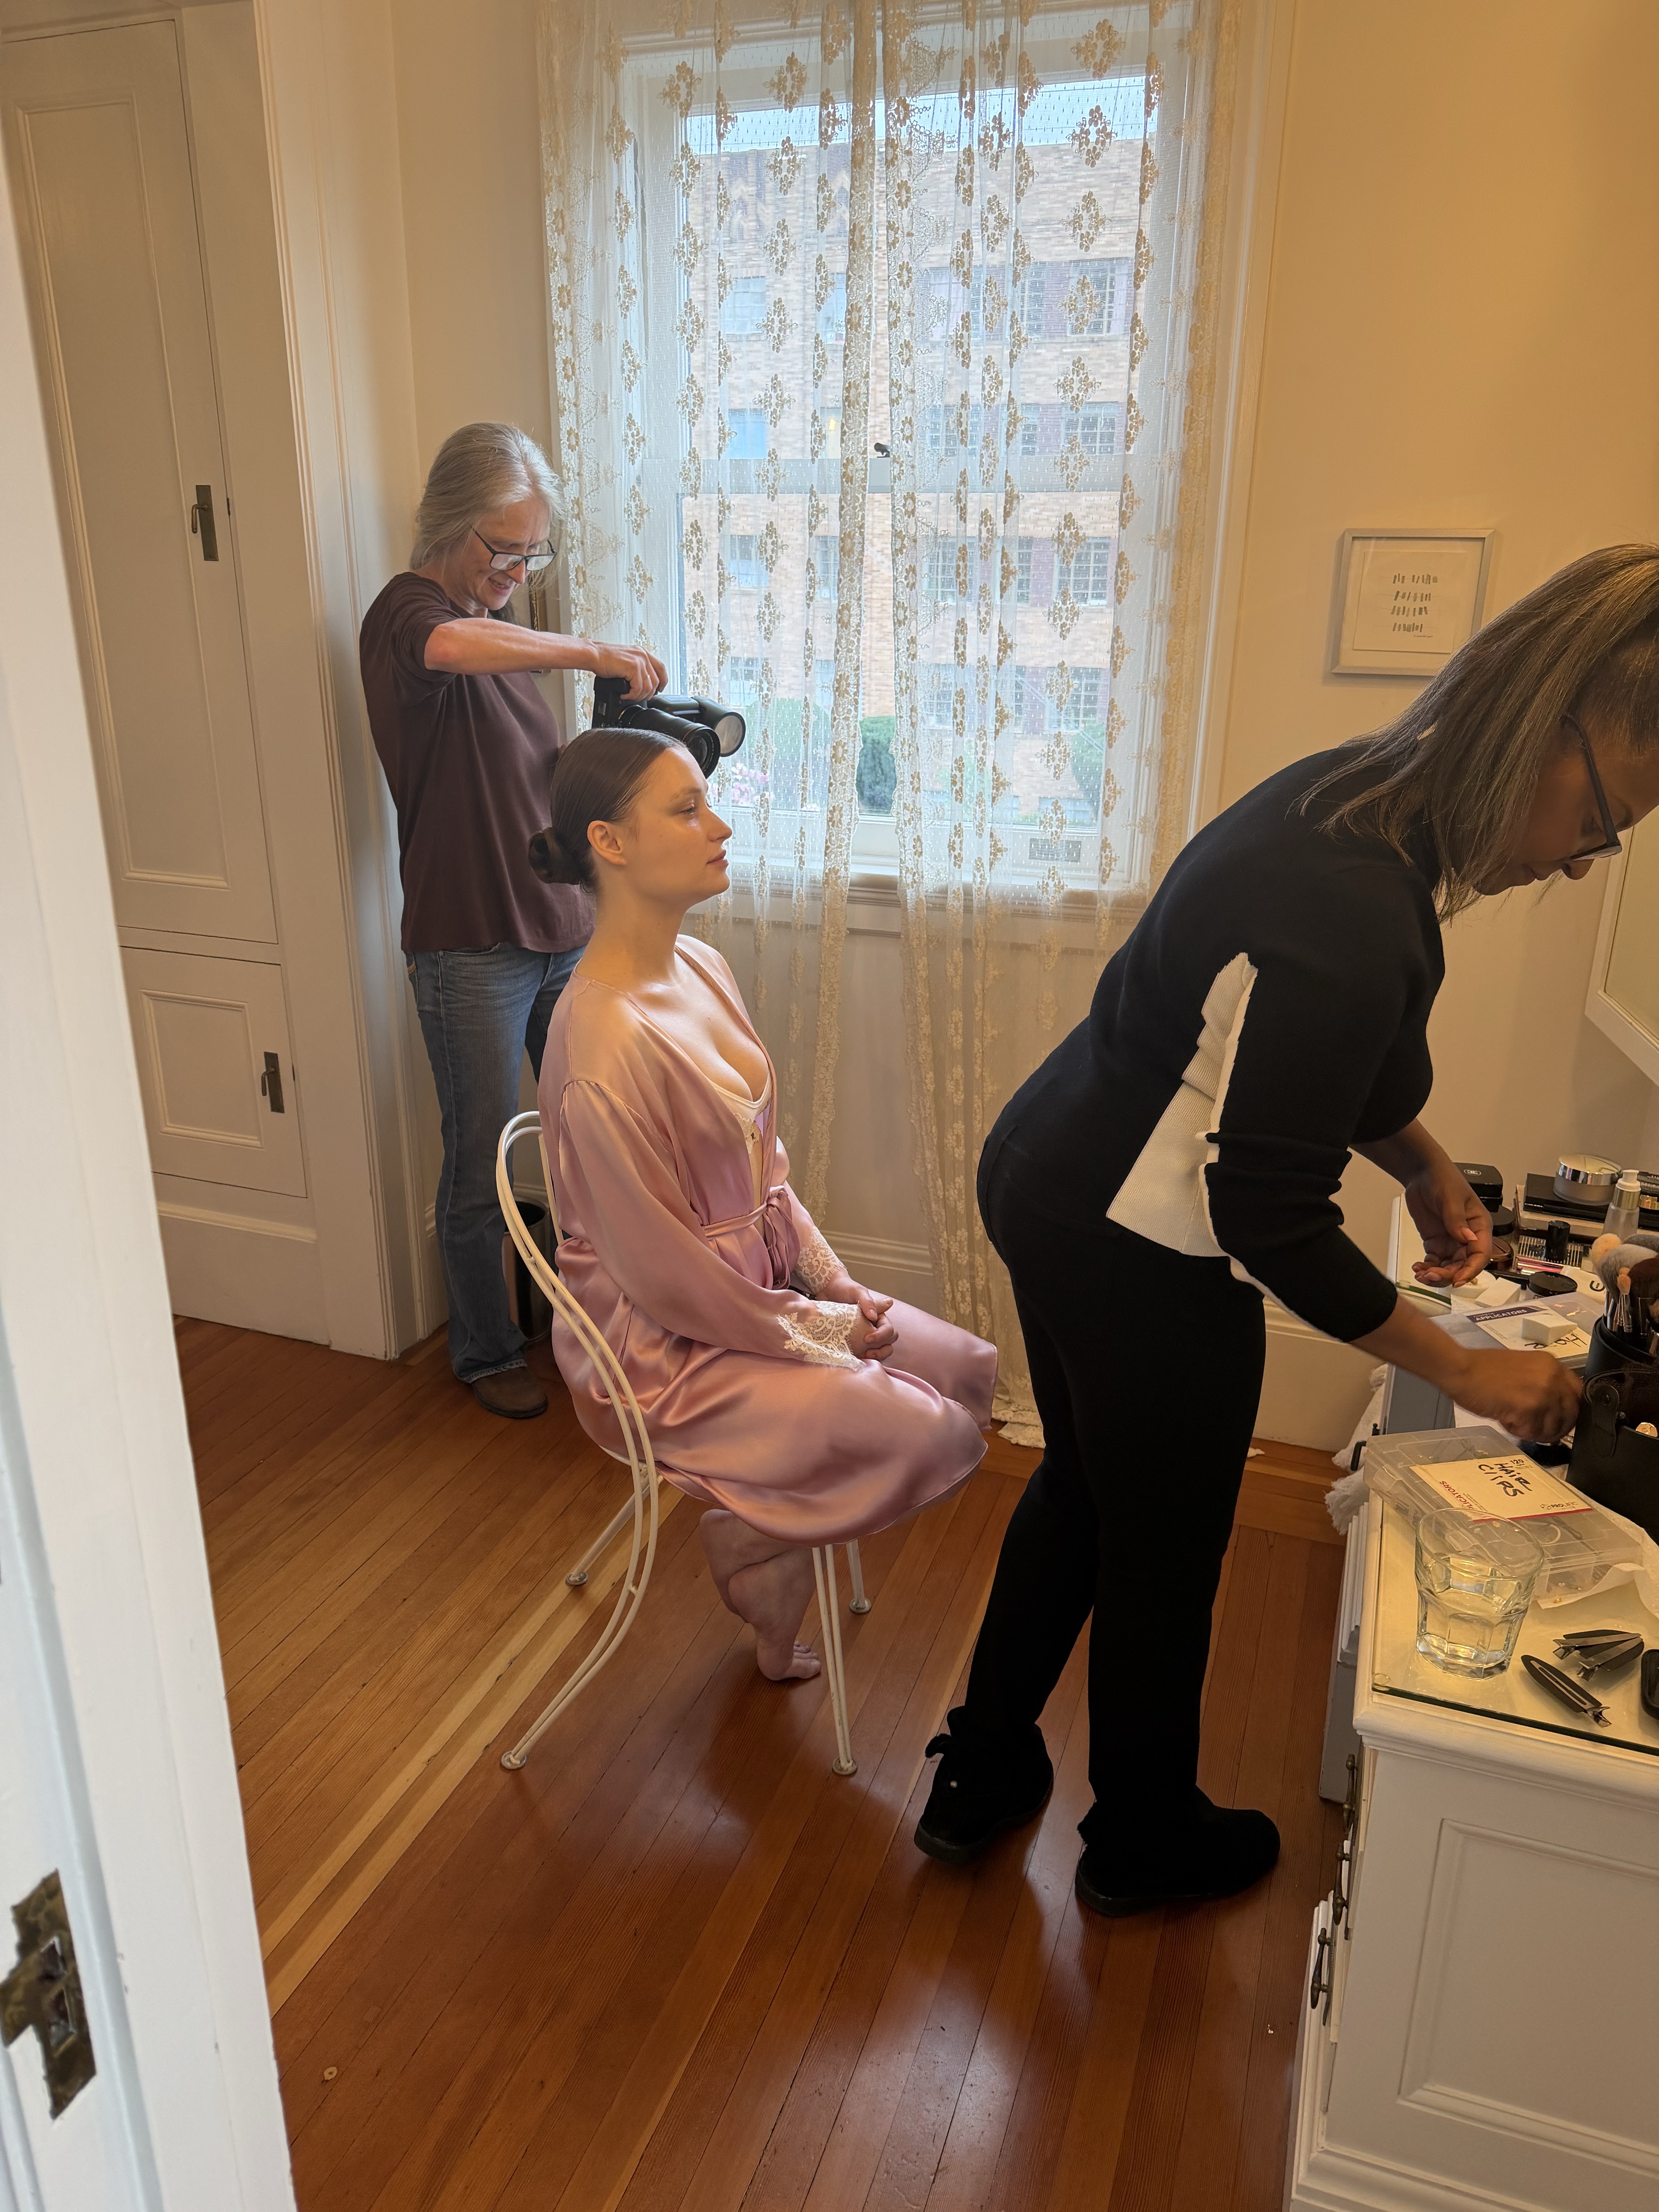
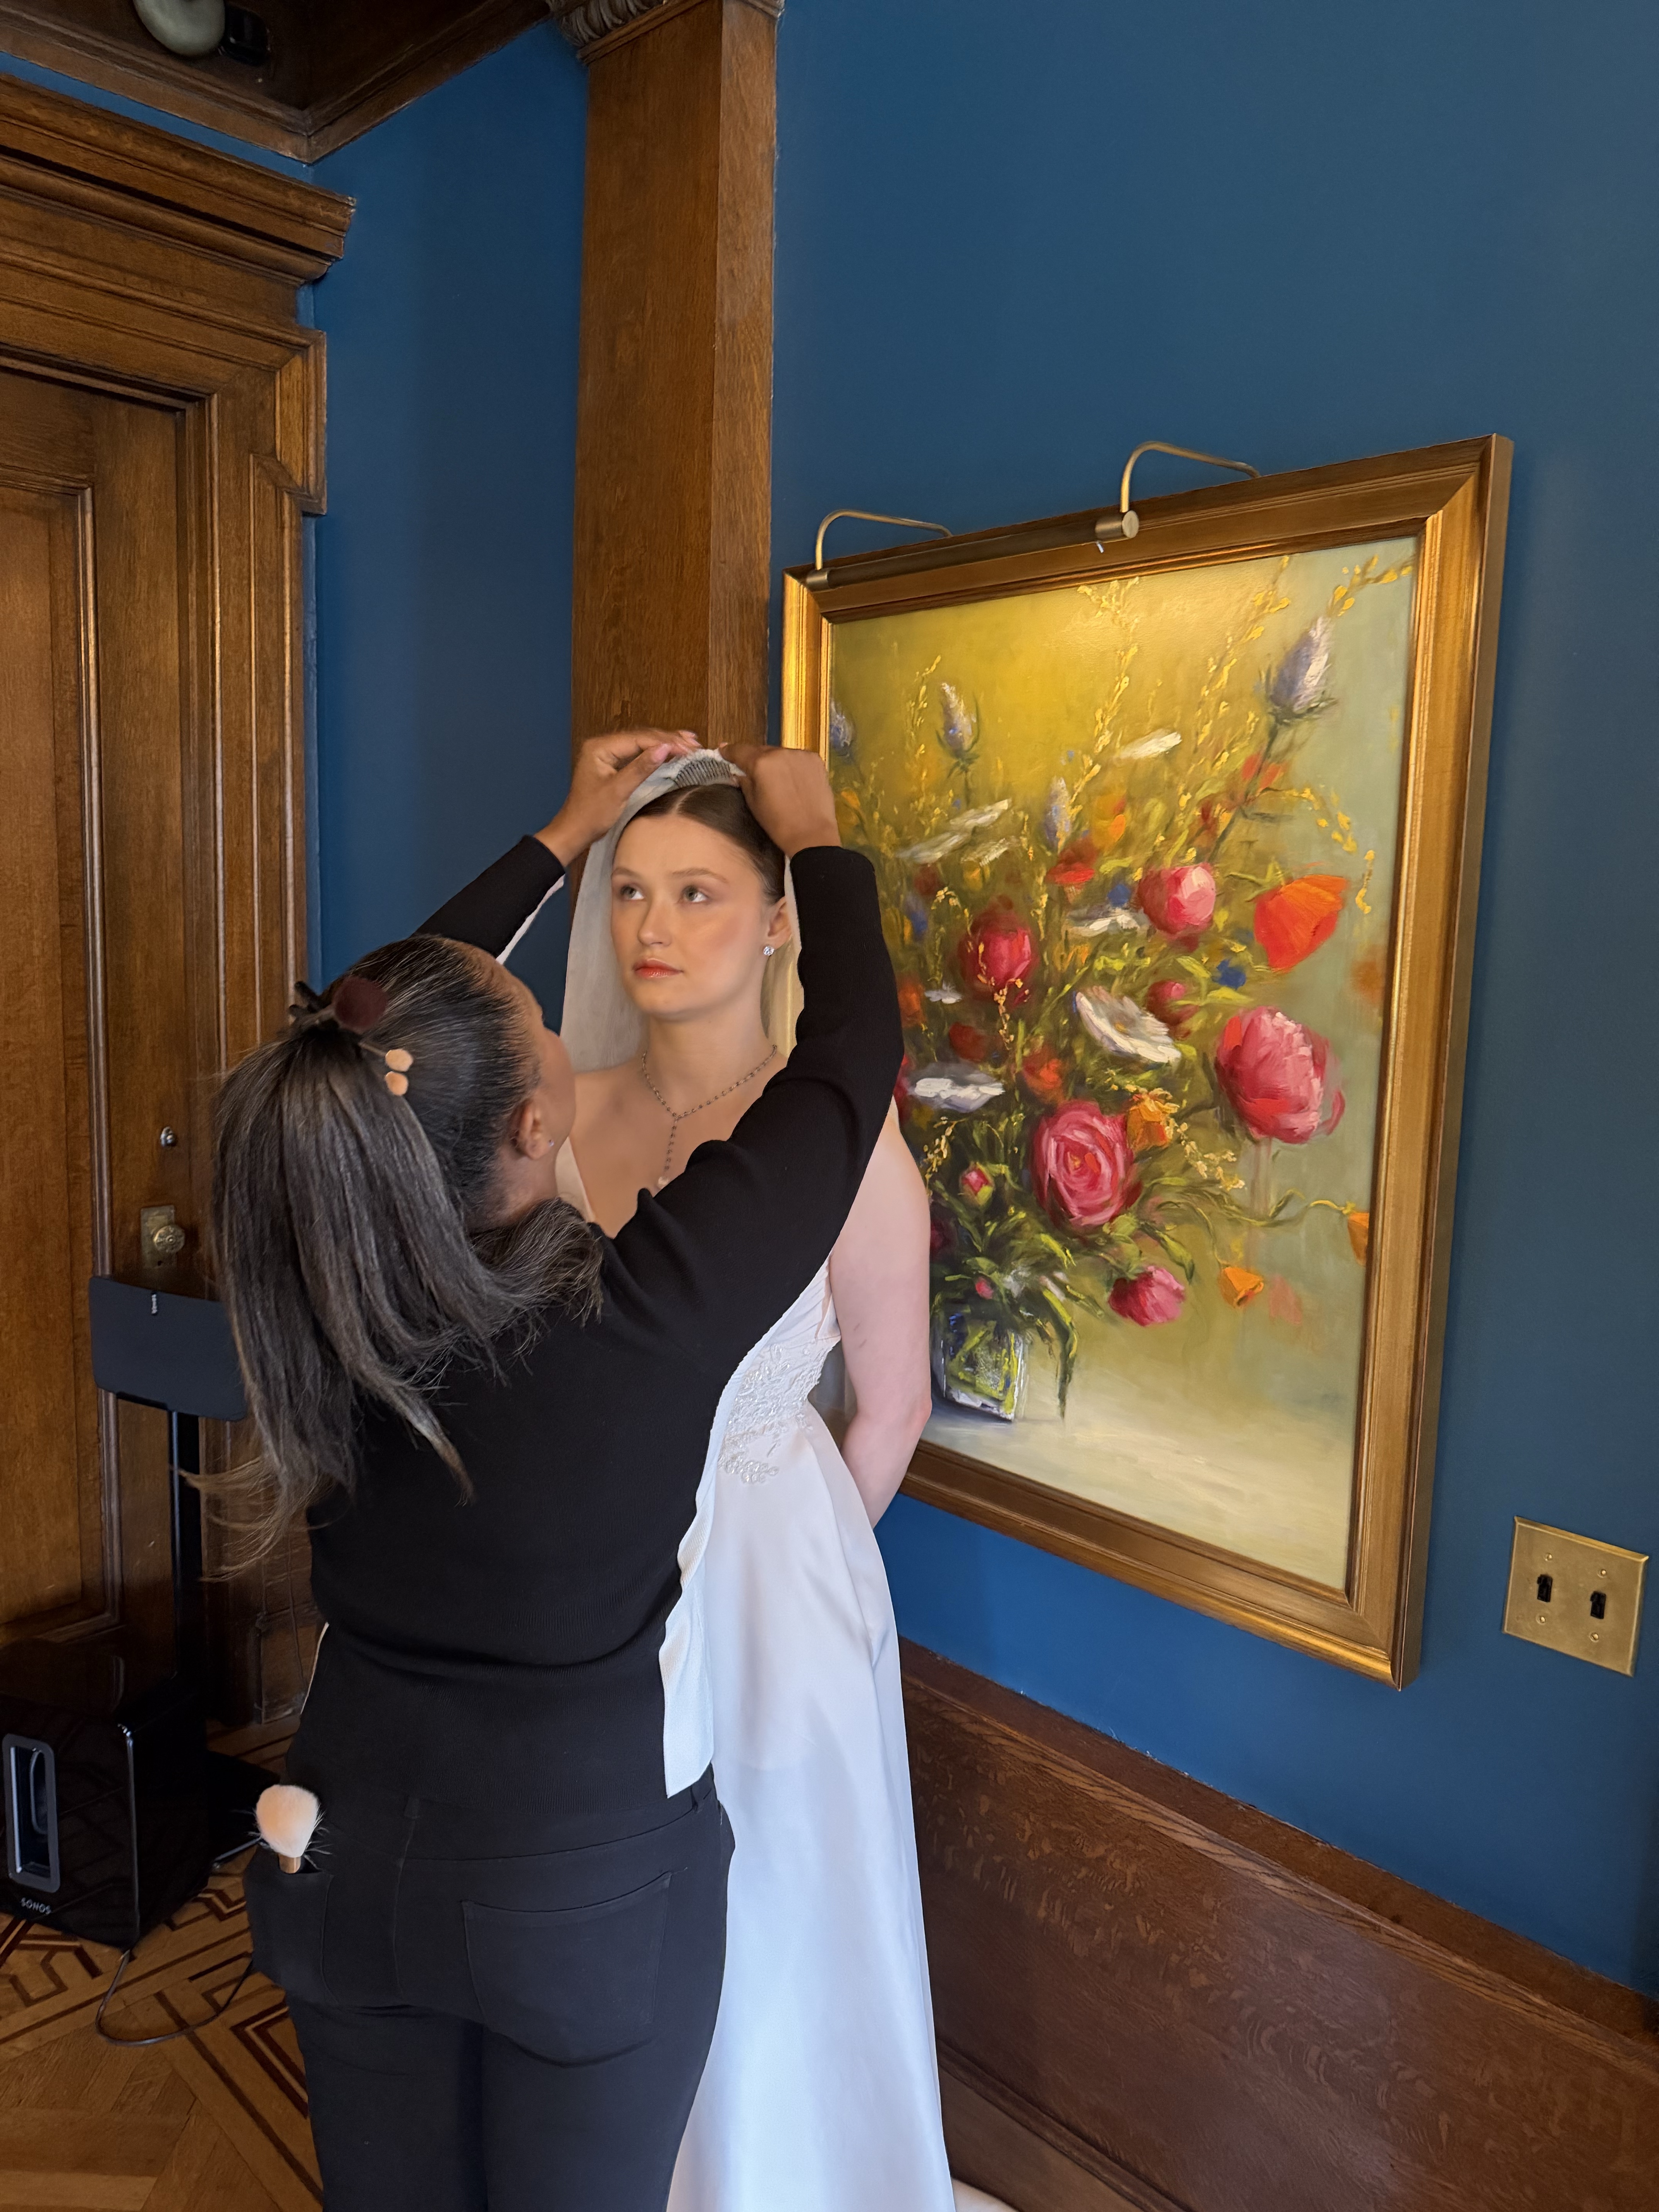
It was about at this stage of construction of the dress when I got the call from Katherine. She asked if I’d like to participate in a photo shoot she was doing with someone that needed a bridal gown and accessories. Katherine is a lovely and talented makeup artist and hair stylist who I met at a fashion show as she and her team were doing all of the MUAH (makeup and hair) for the models. She owns Event Cosmetics and has a shop in the Pearl District in Portland, OR. She does many shows, weddings, and events, plus has many contacts in the fashion and creative industries in the Pacific Northwest.
Katherine was planning this photo shoot with a photographer that she had previously done a shoot with, Amy Isacson. Amy lives and works in McCall, Idaho and runs her successful wedding photography business Amy Isacson Photography. She was going to be in Portland for just a short time and wanted to get some new photos for her portfolio while in town and also collaborate with other local wedding vendors including a location, florist, jeweler, makeup artist, model and dressmaker.
Of course, I jumped on the opportunity and immediately got in touch with Amy. I talked to her about what dresses I have made that could be used at the shoot, plus accessories such as veils that I could bring along. This was the perfect reason to get the gown finished and ready to shoot on location.
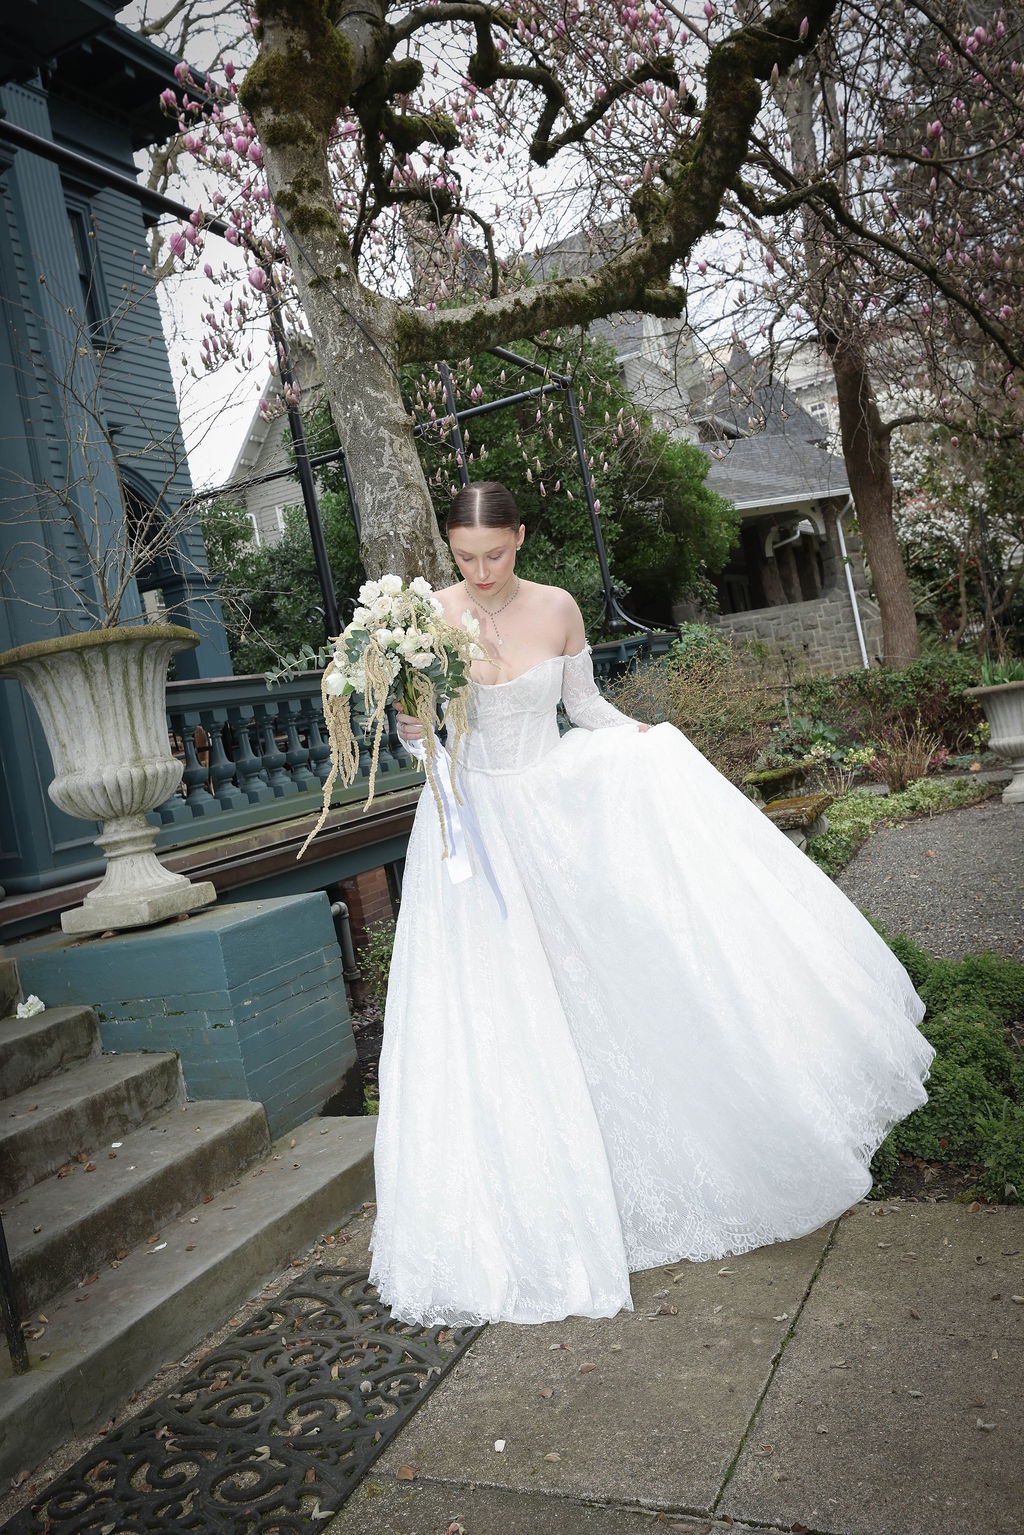
We were able to book one of my favorite models, Leann, to star in the shoot. I have had the pleasure of working with Leann on a few occasions, hiring her to model for me in several of my dresses. She just has a lovely delicate yet versatile face and a perfect curvy figure, plus is fun to be around and sassy to boot.
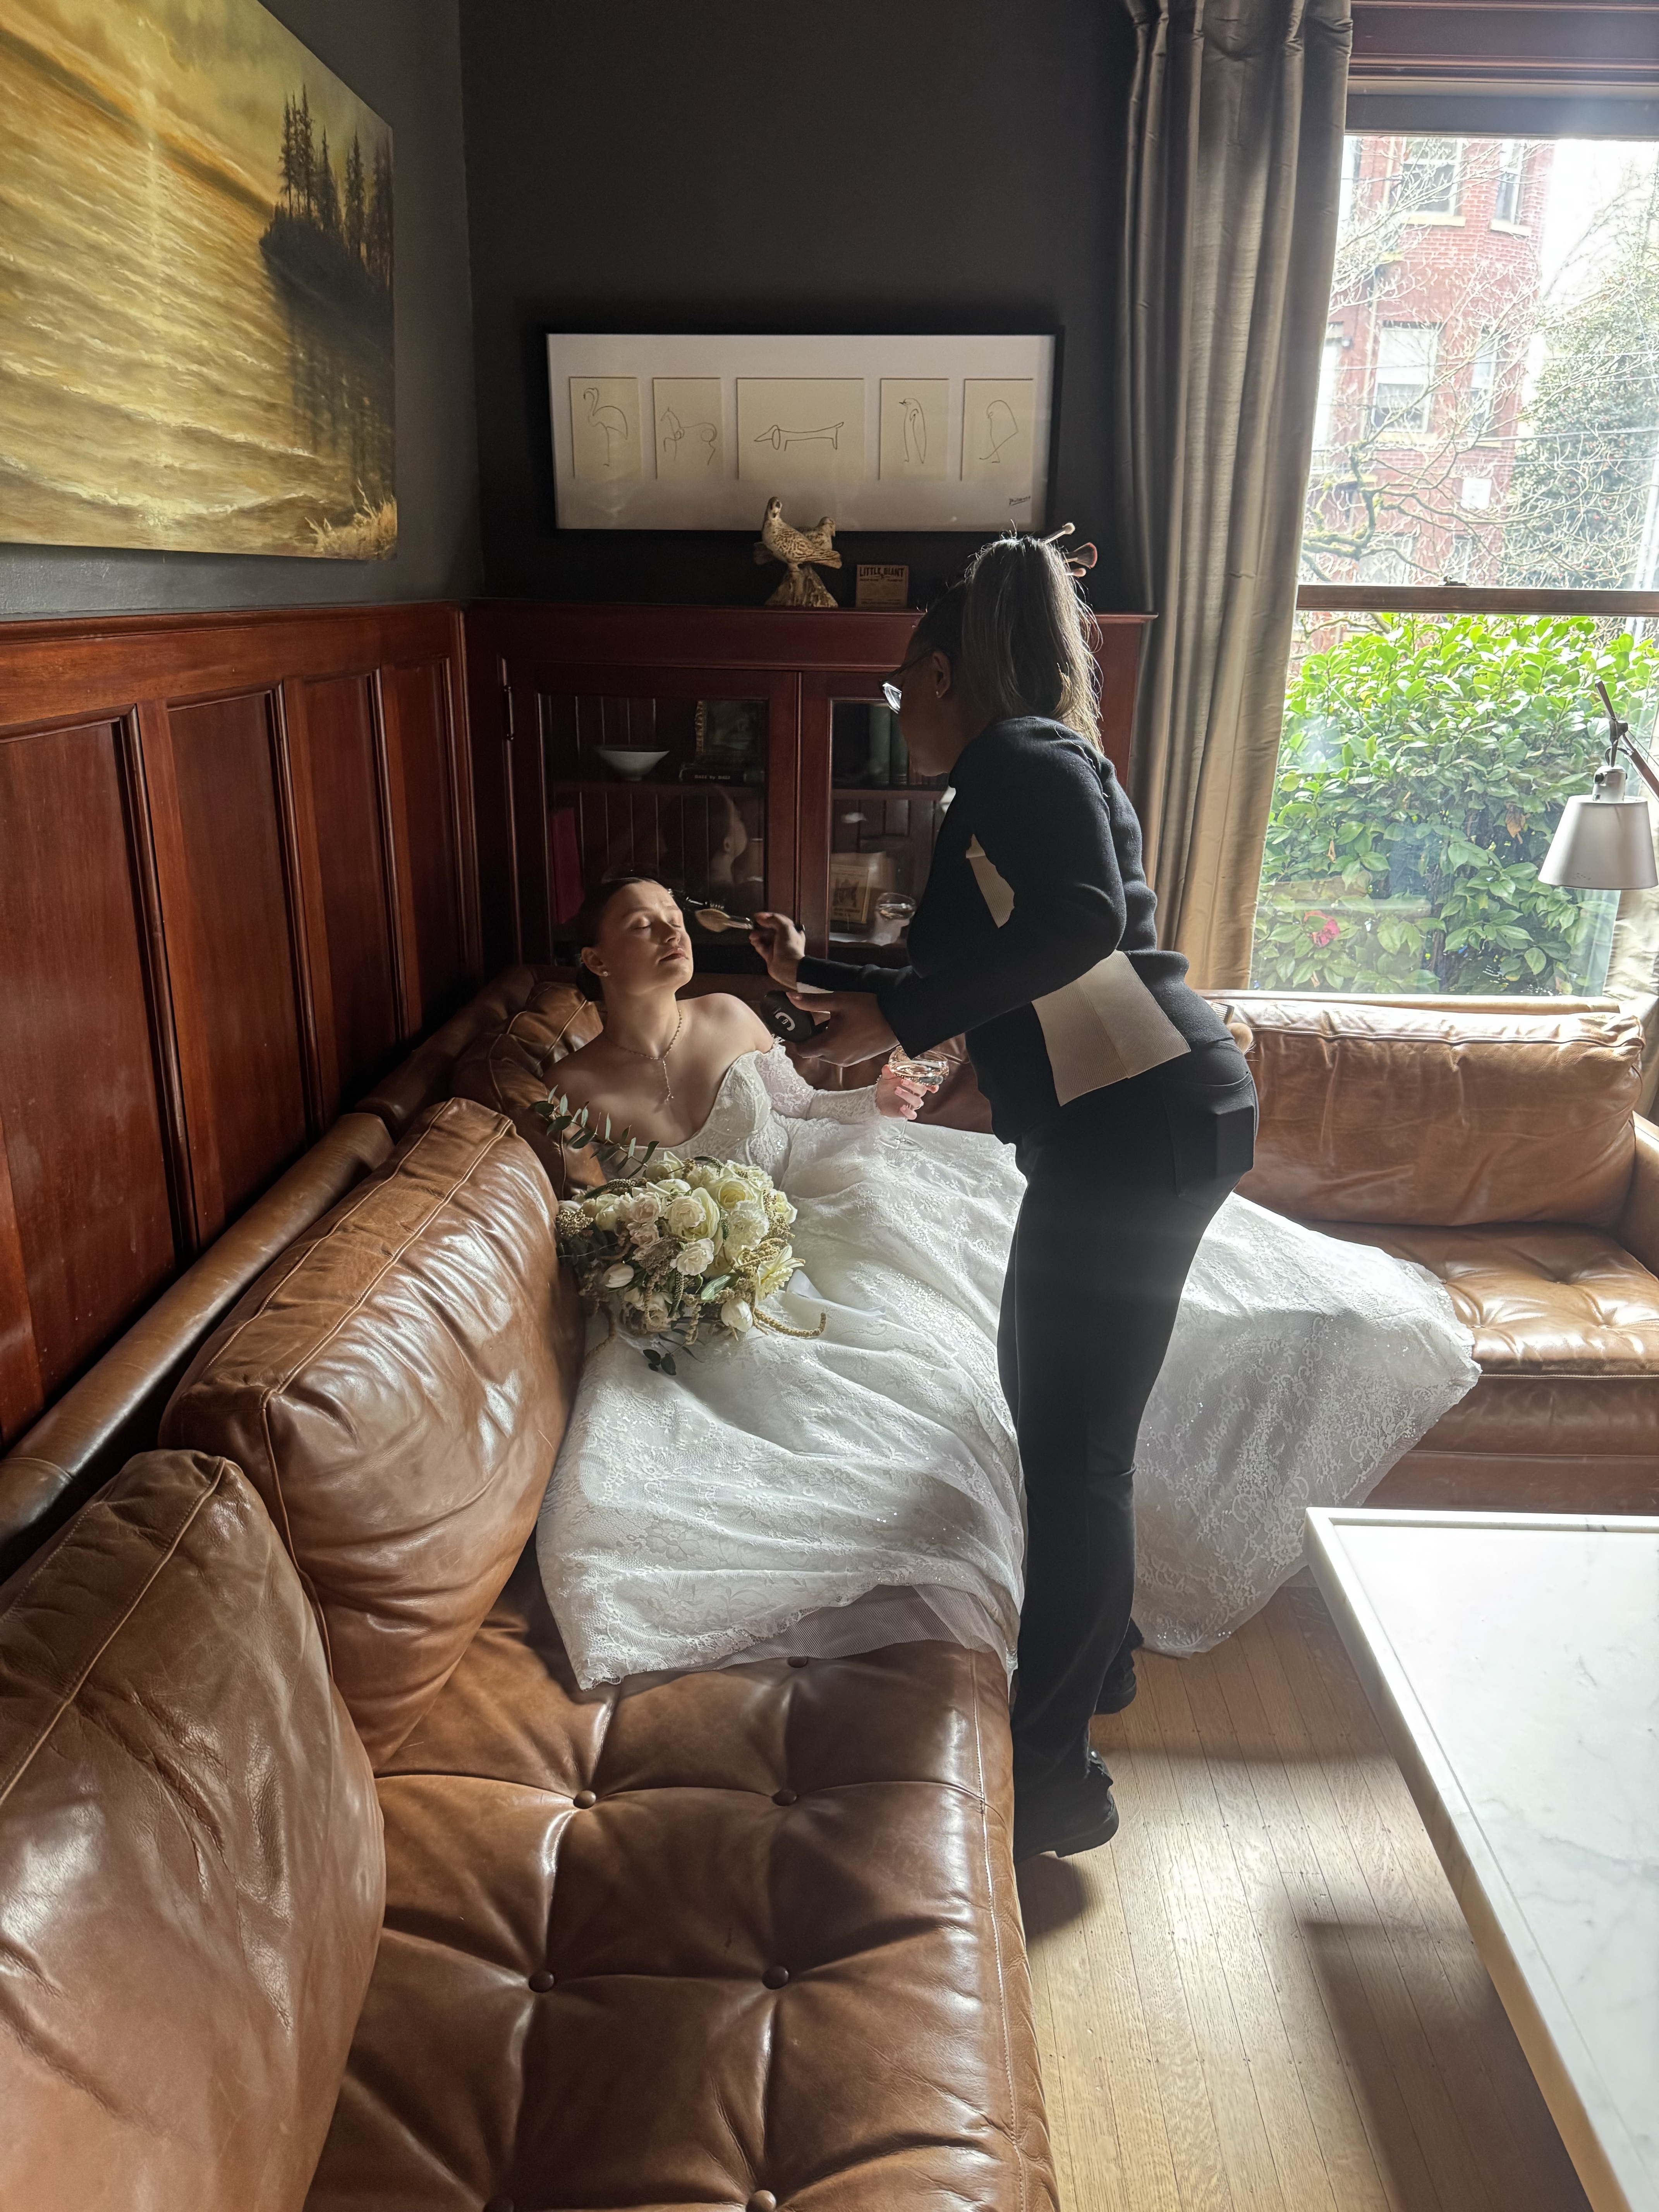
I asked her if she would be able to come over and do a fitting in the dress so that I could finish it up and it would be ready to just zip up and go at the shoot. This meant that I really had to push and get the gown finished ASAP. I also asked my wonderful friend and hired marketing help Mackenzie to come along and get some photos while we were doing the dress fitting so that we could get some behind the scenes footage, plus she knows Leann well and was the one to introduce us, so it was a win-win for everyone!

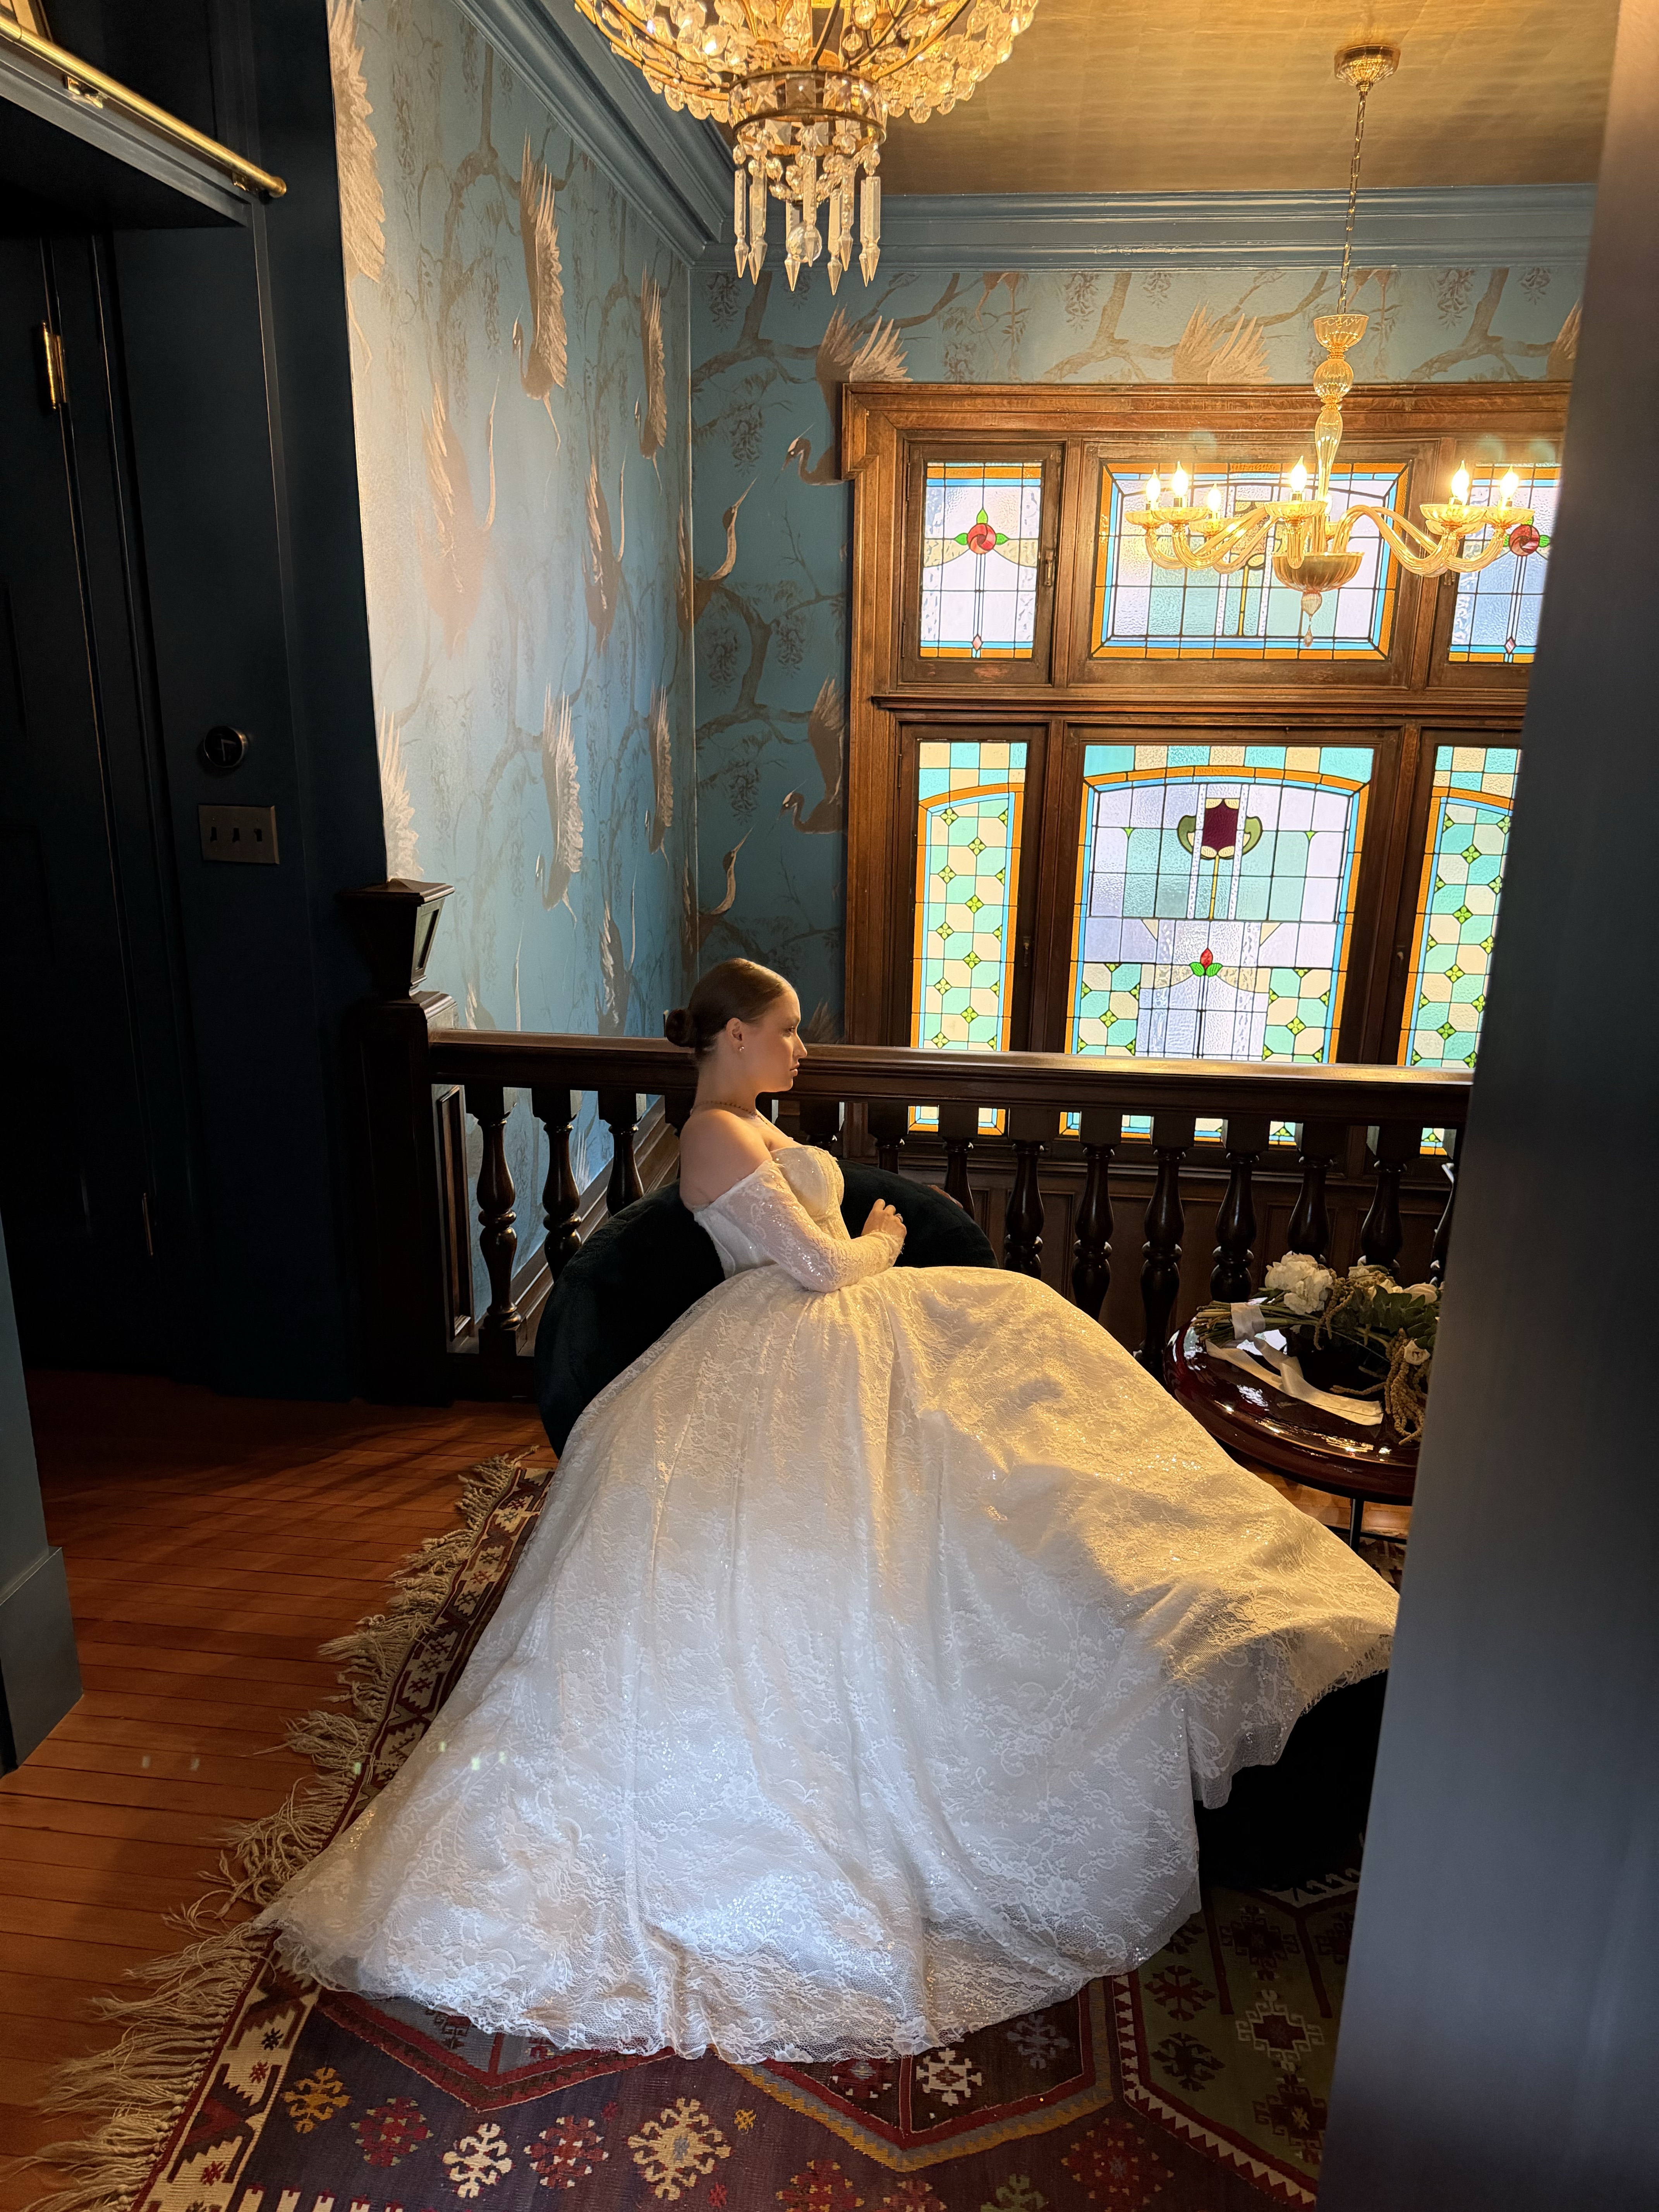
It all came together so fast with Amy, Katherine, Leann and myself, along with Amy’s son Jack to take videos. We met up at the location for the shoot which is this absolutely gorgeous restored historic home in downtown Portland. Amy is friends with a man, John, who works for the homeowner’s business called Arciform. They specialize in interior design, renovating and restoring homes. They have done an amazing job on the home in which we had the honor to have the photo shoot. John was there at the house to supervise and give us some history on the house and show us around. What a treat it was to get to go inside and explore around this lovely home!
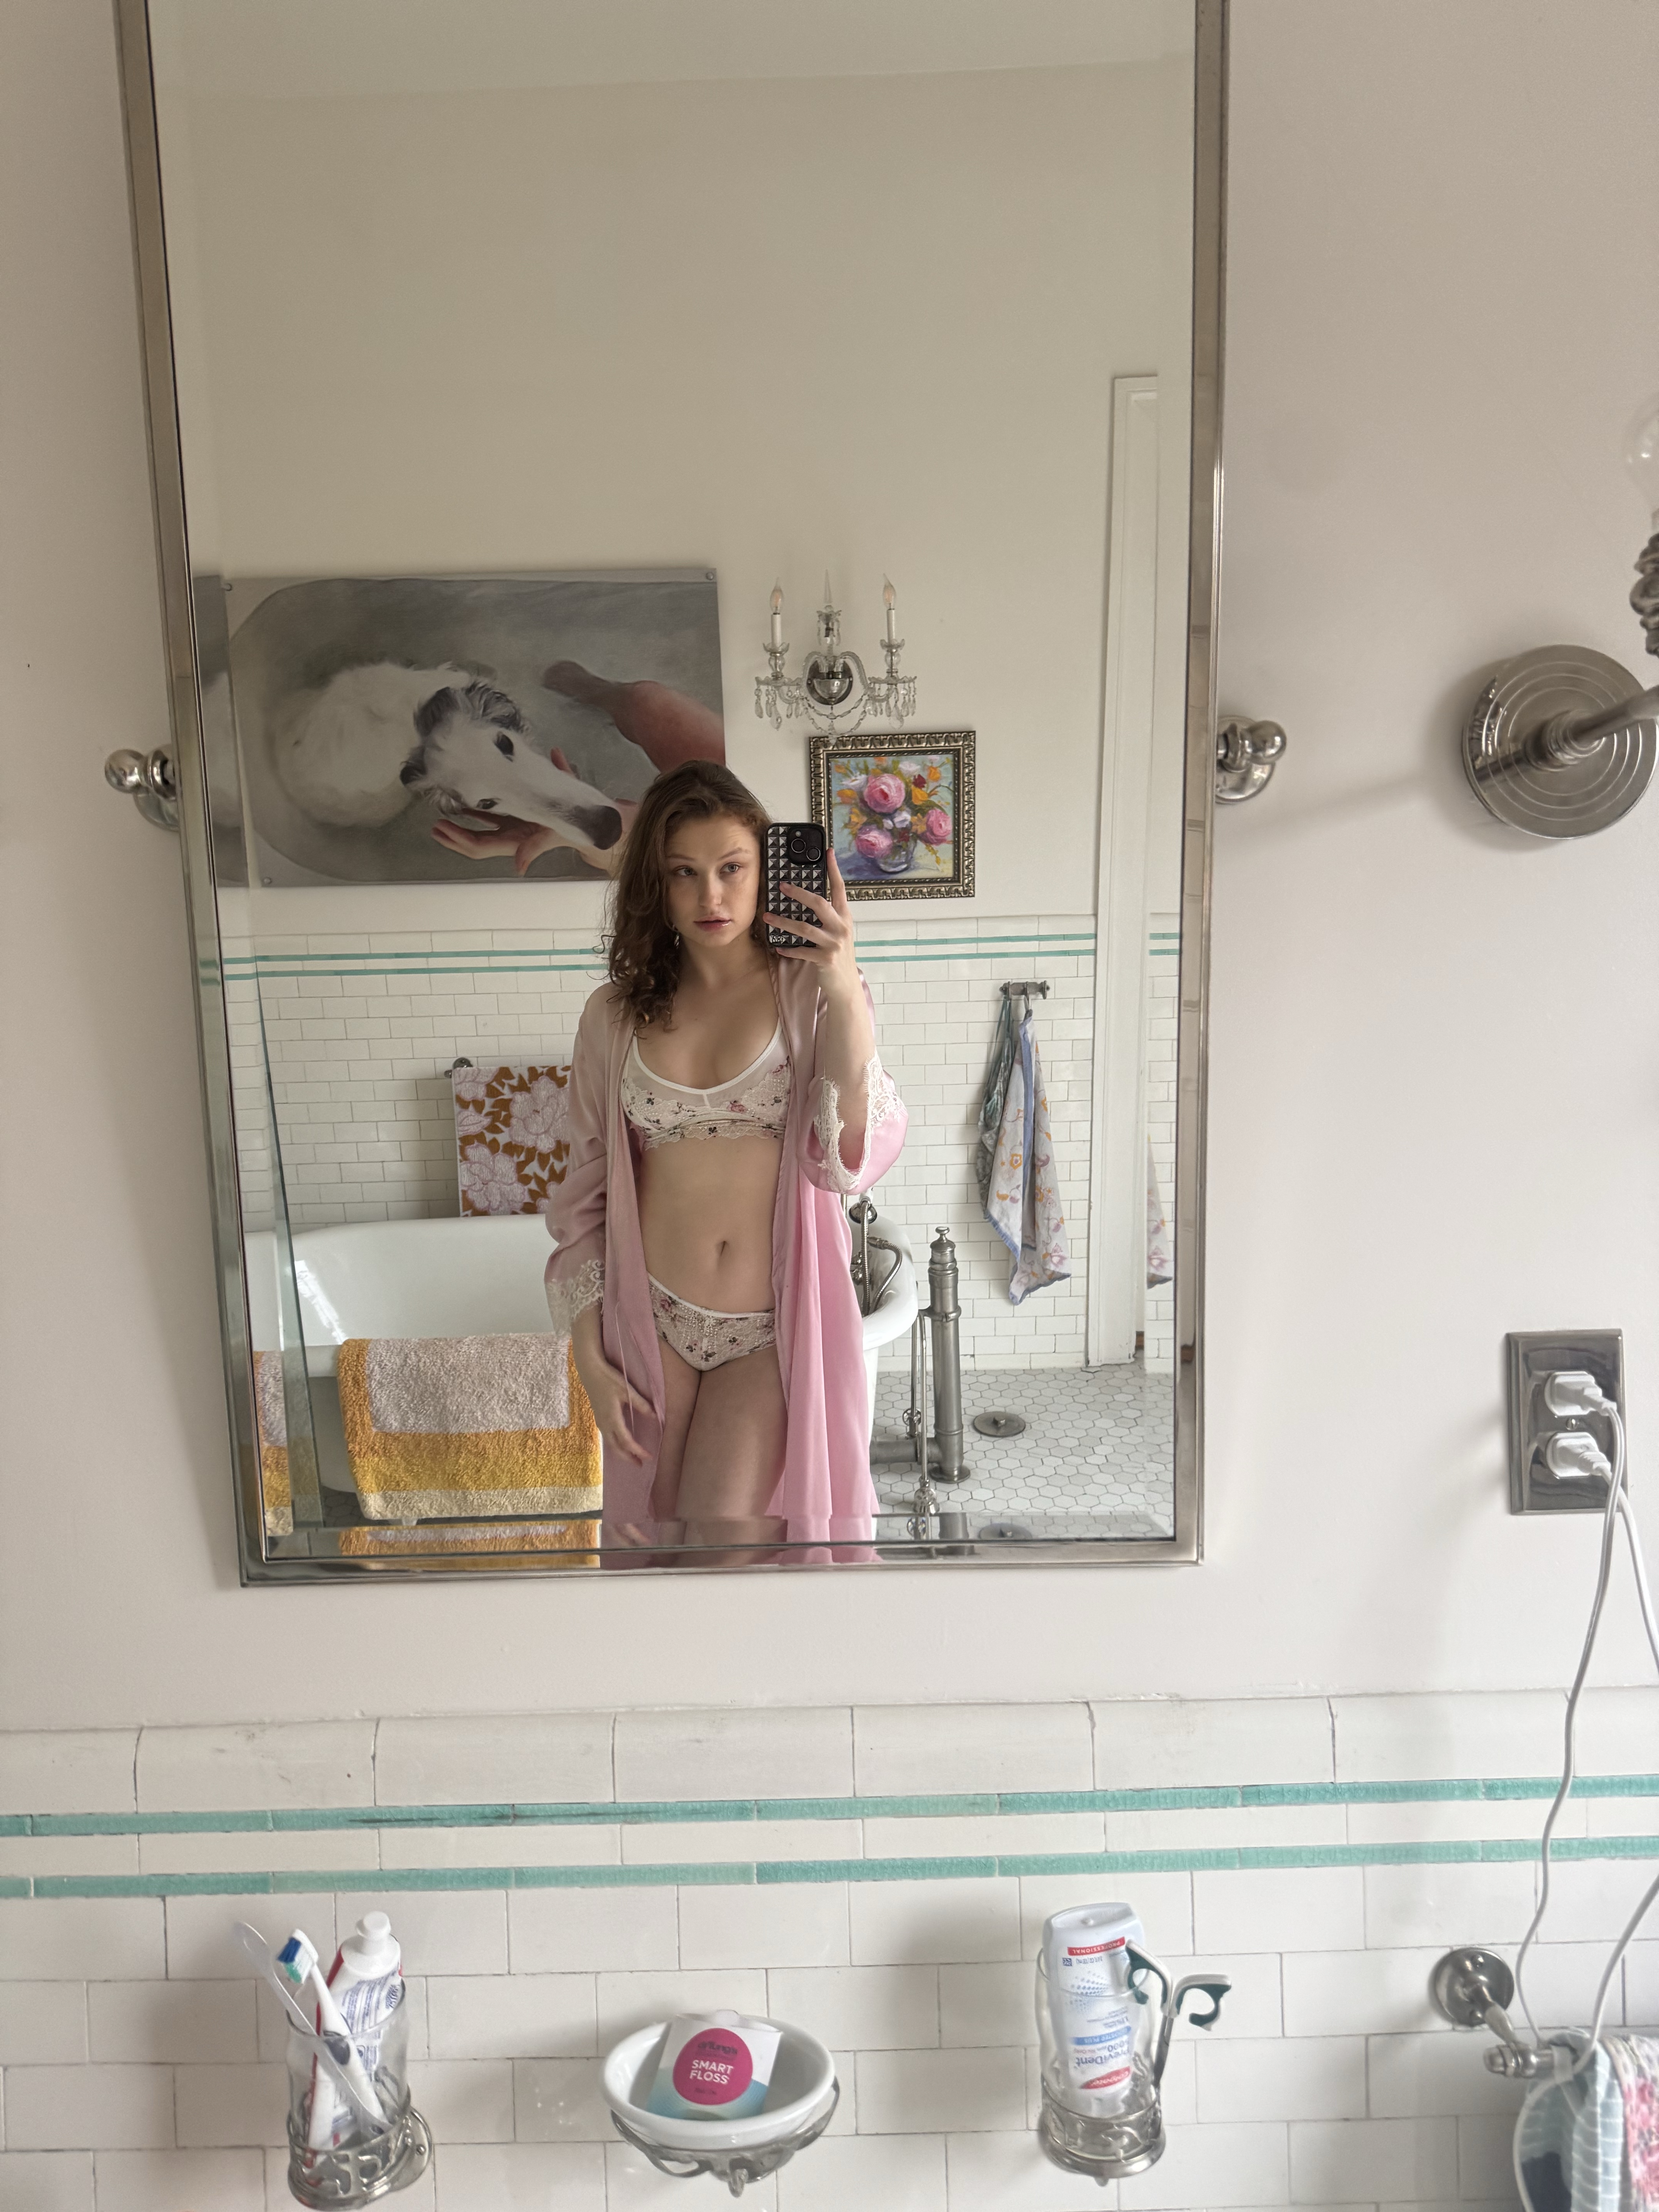
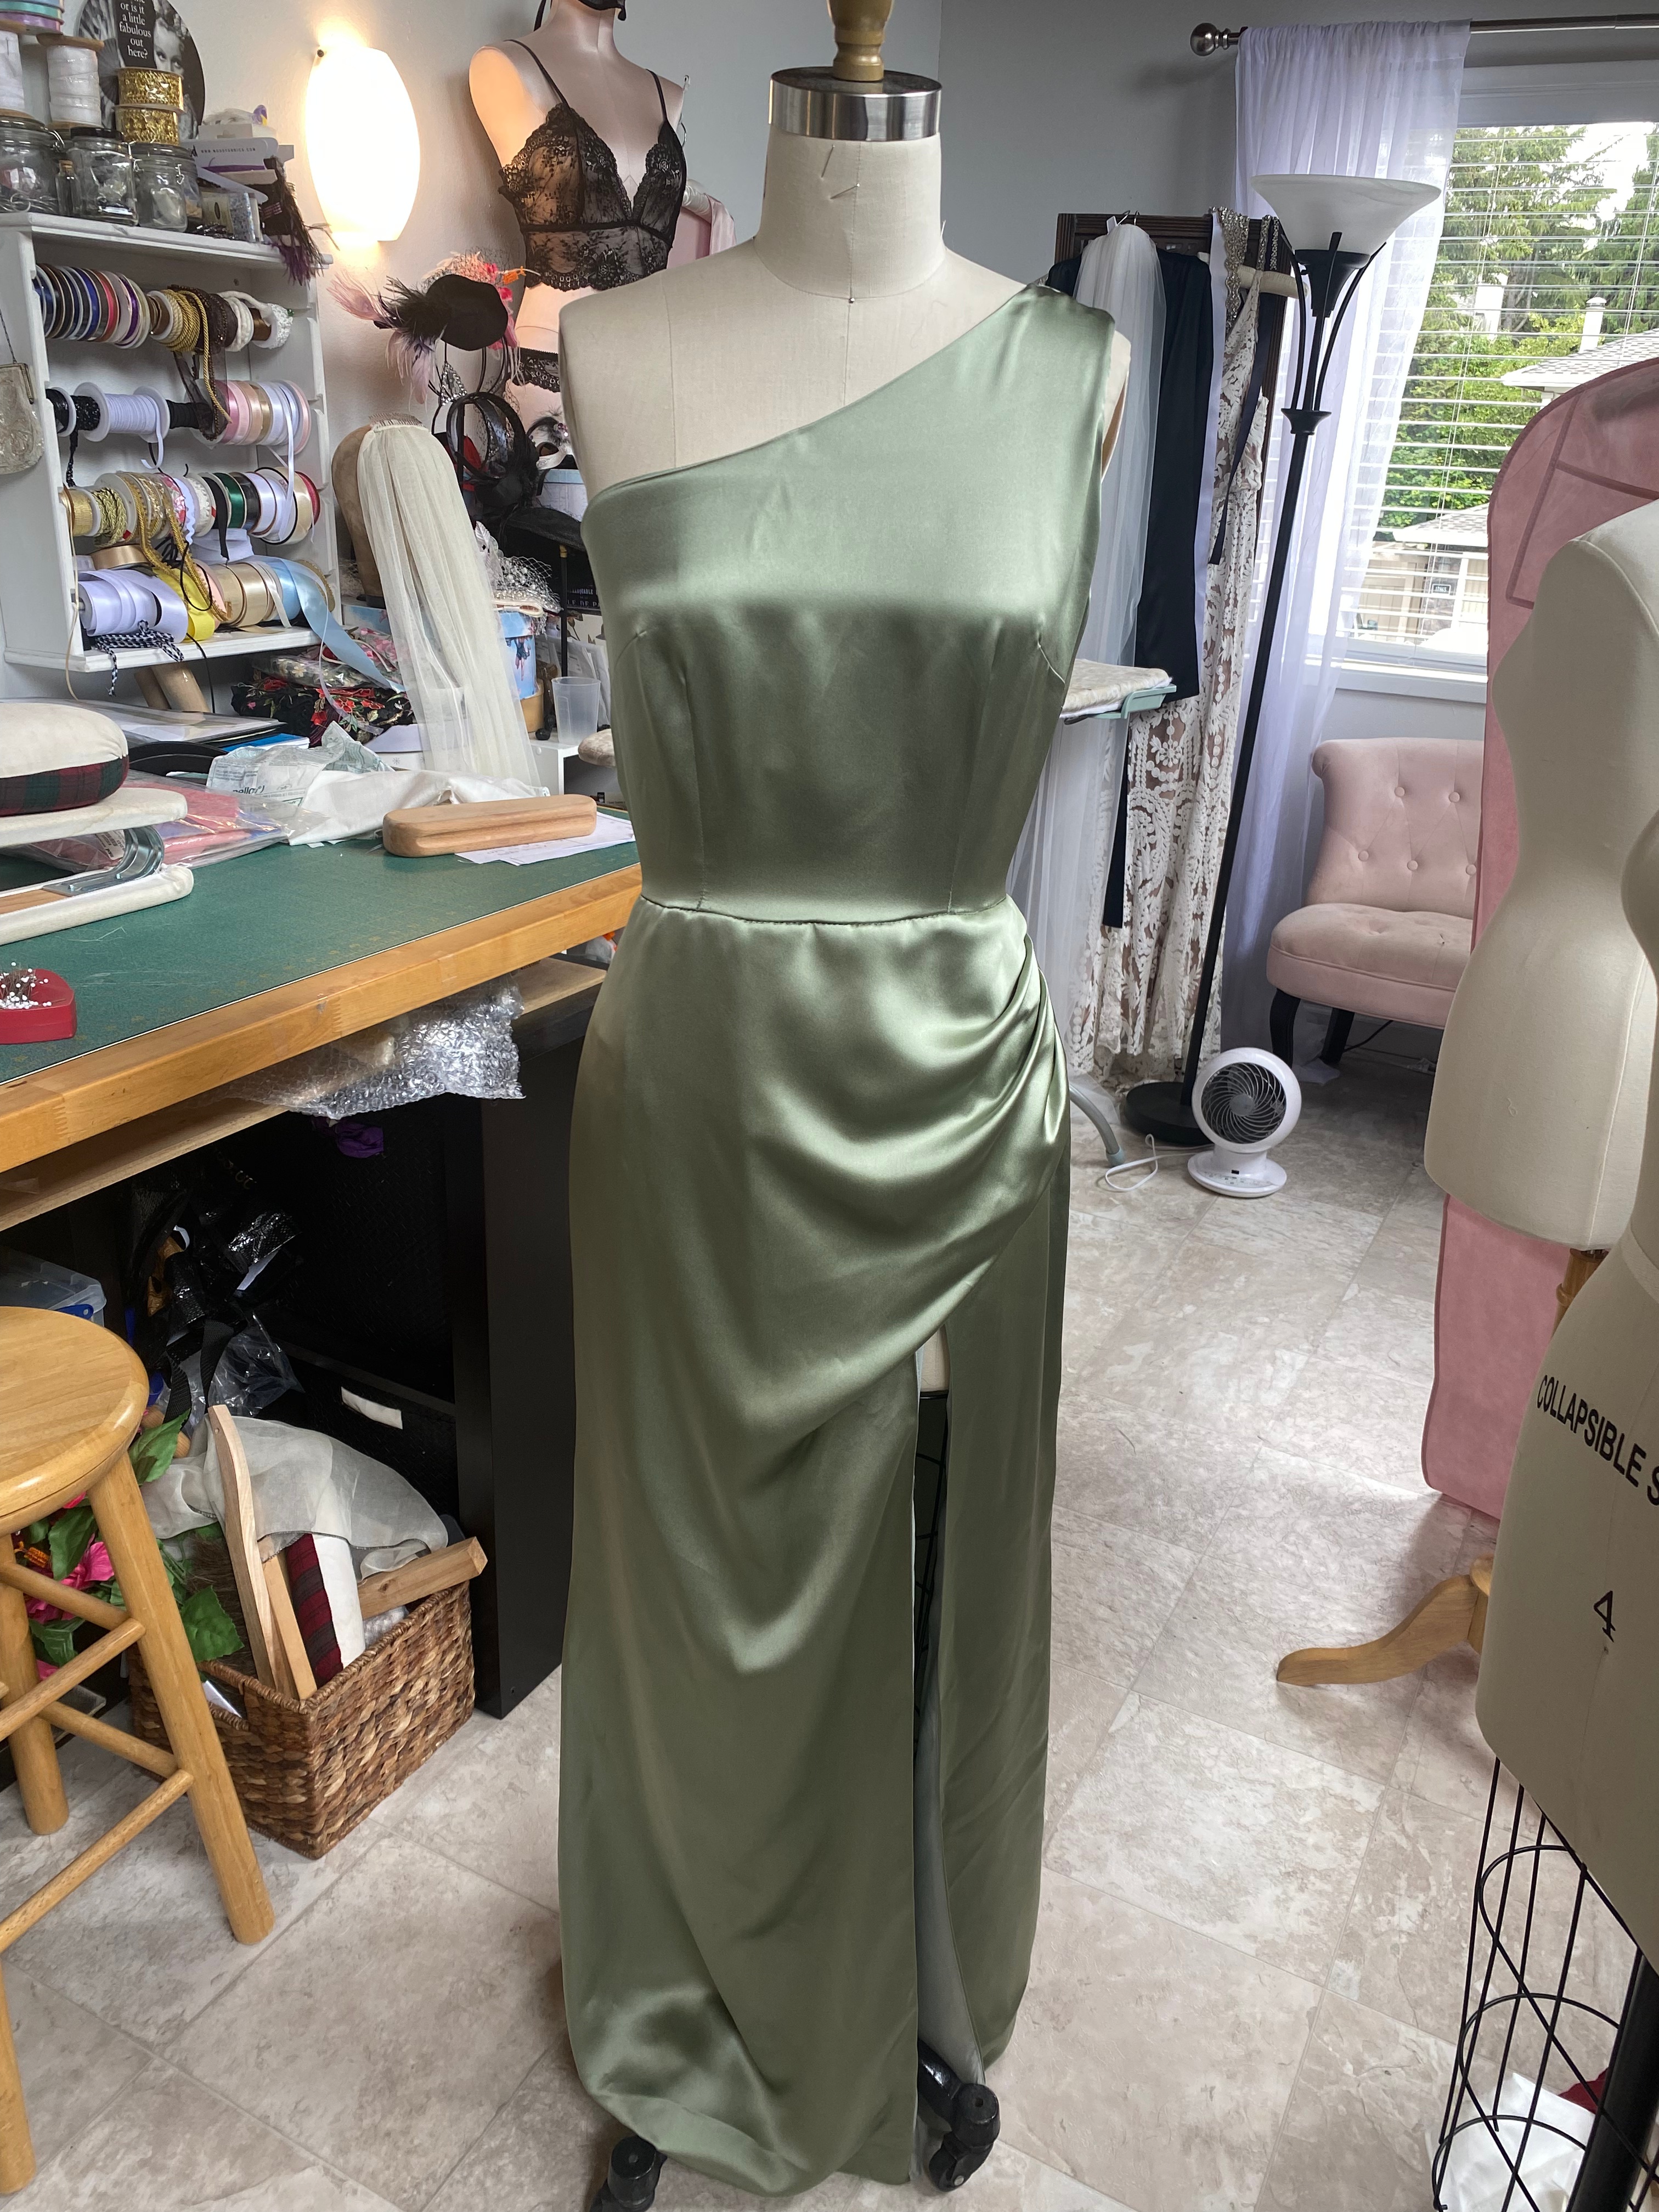
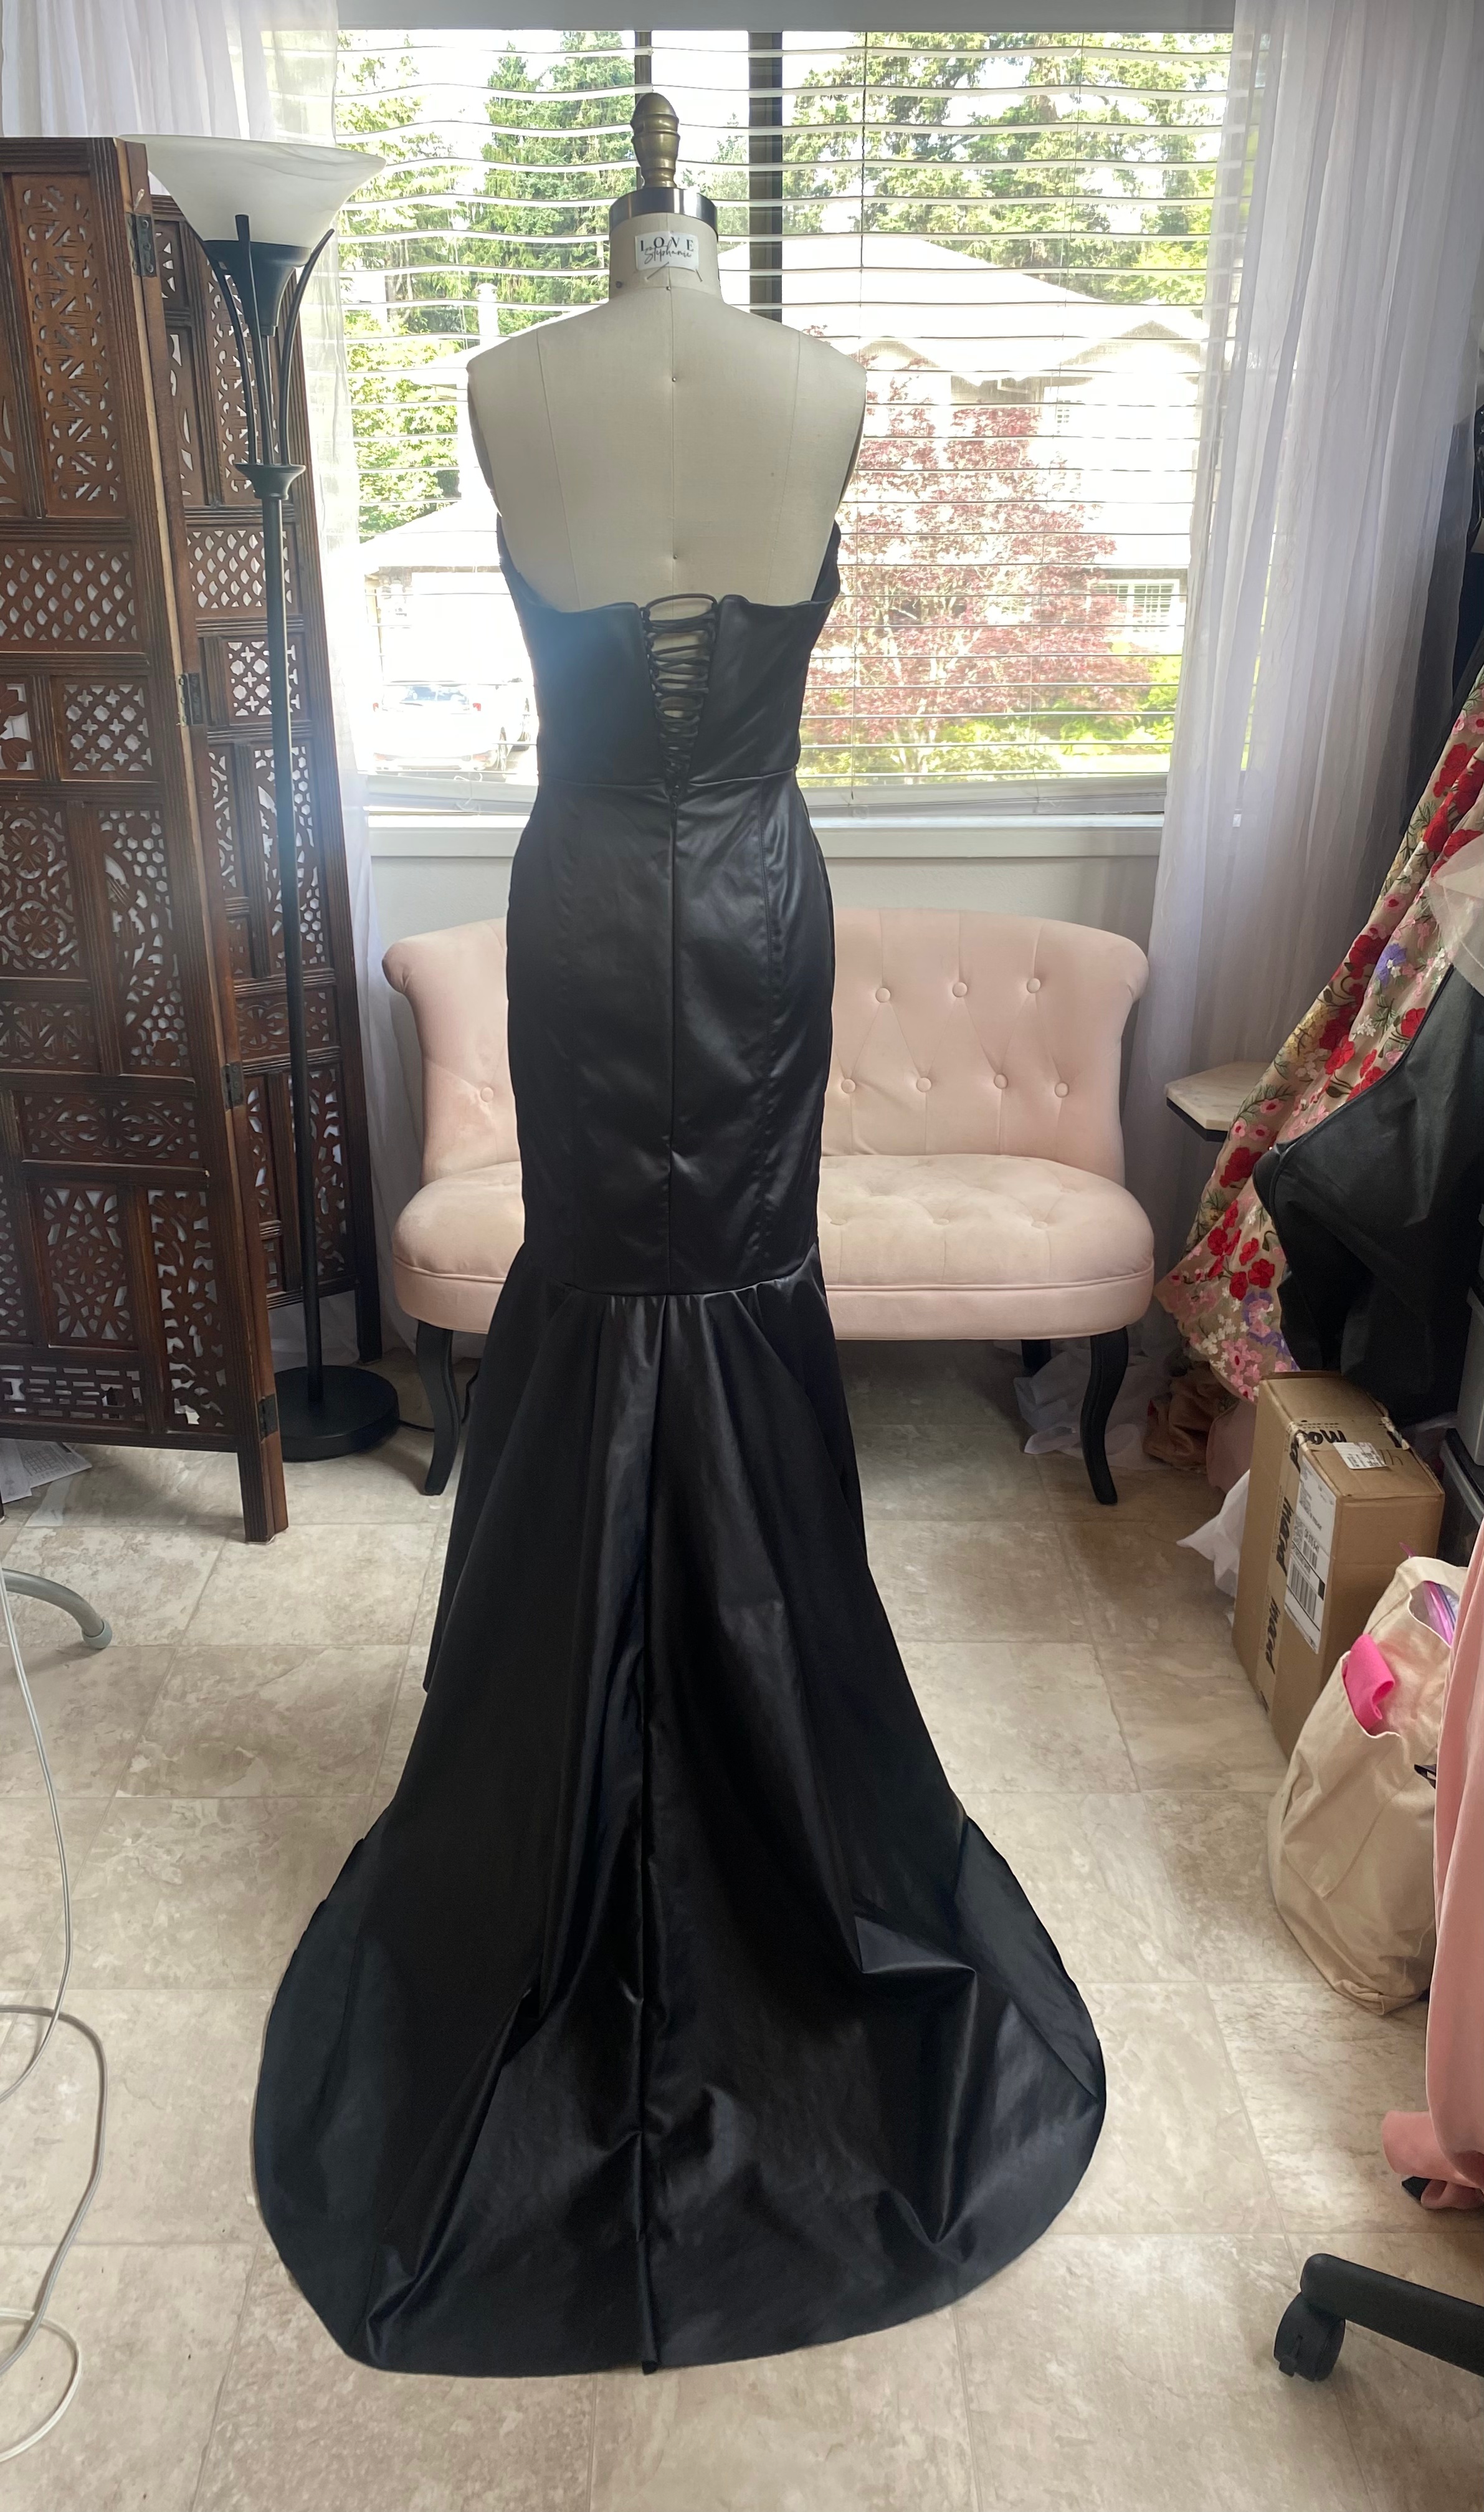
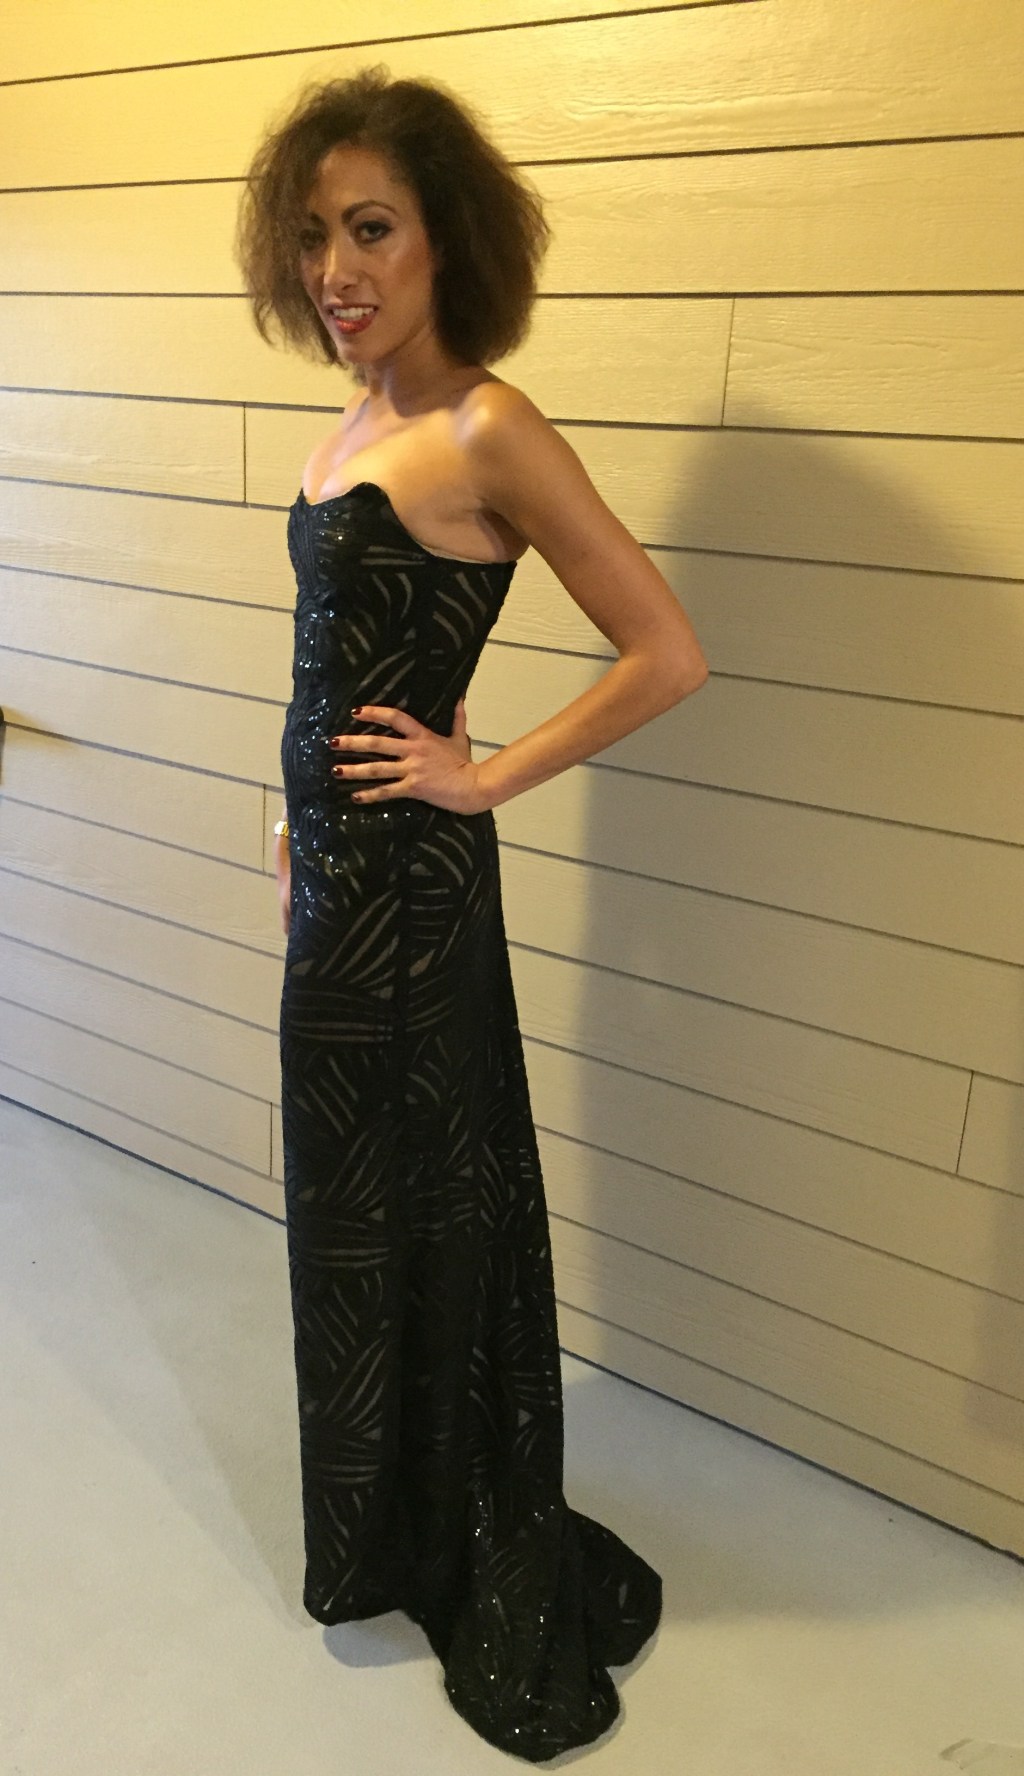
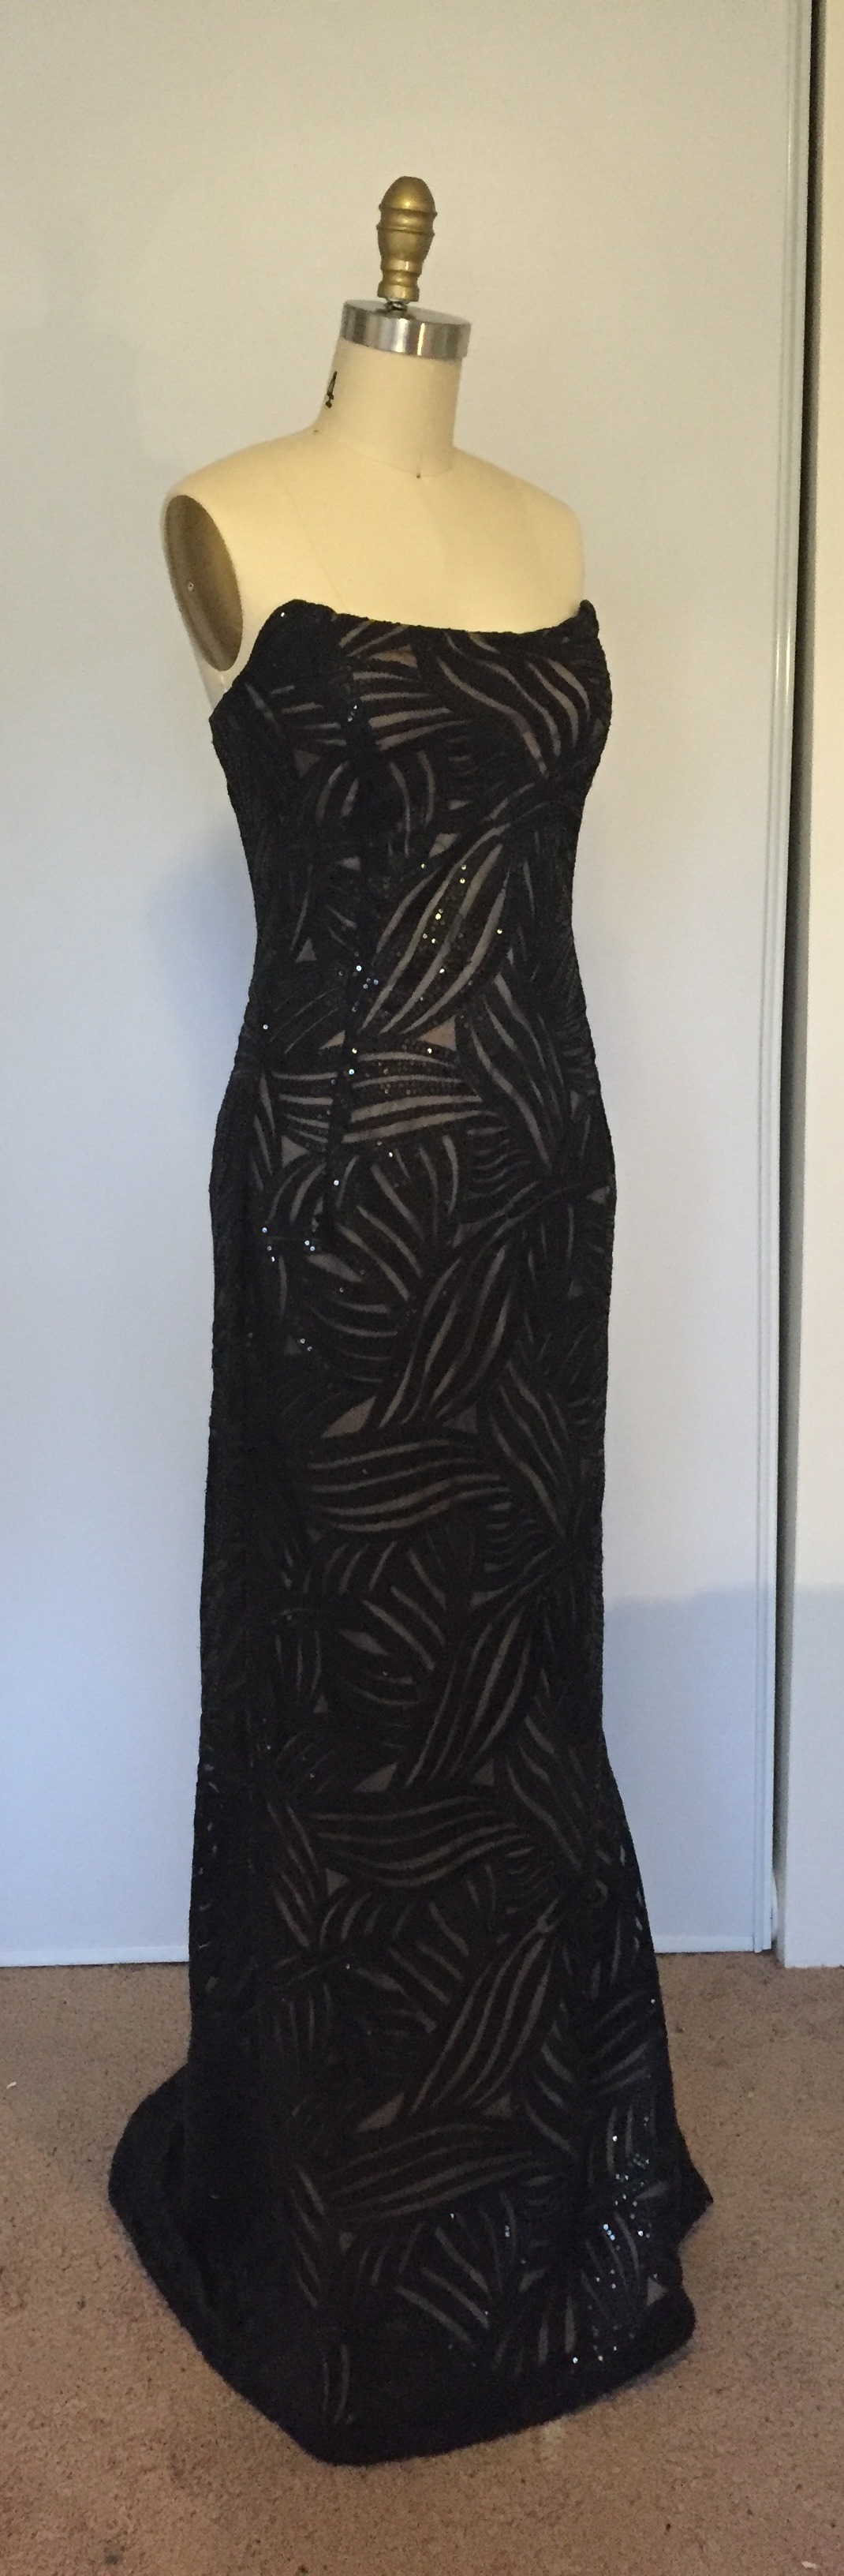
The shoot went so well and had so many lucky breaks along the way! As Katherine was doing Leann’s hair and makeup, Leann wore some lingere and a silk robe that I had as part of another collection and brought along with me to the shoot. She looks gorgeous in just that!
As the shoot happened around the house, I fluffed the gown, then got out of the way!

I brought along another dress as well as some veils and a fur shrug in case Amy wanted to capture another look. This worked in my favor as I got even more photos with my creations included!
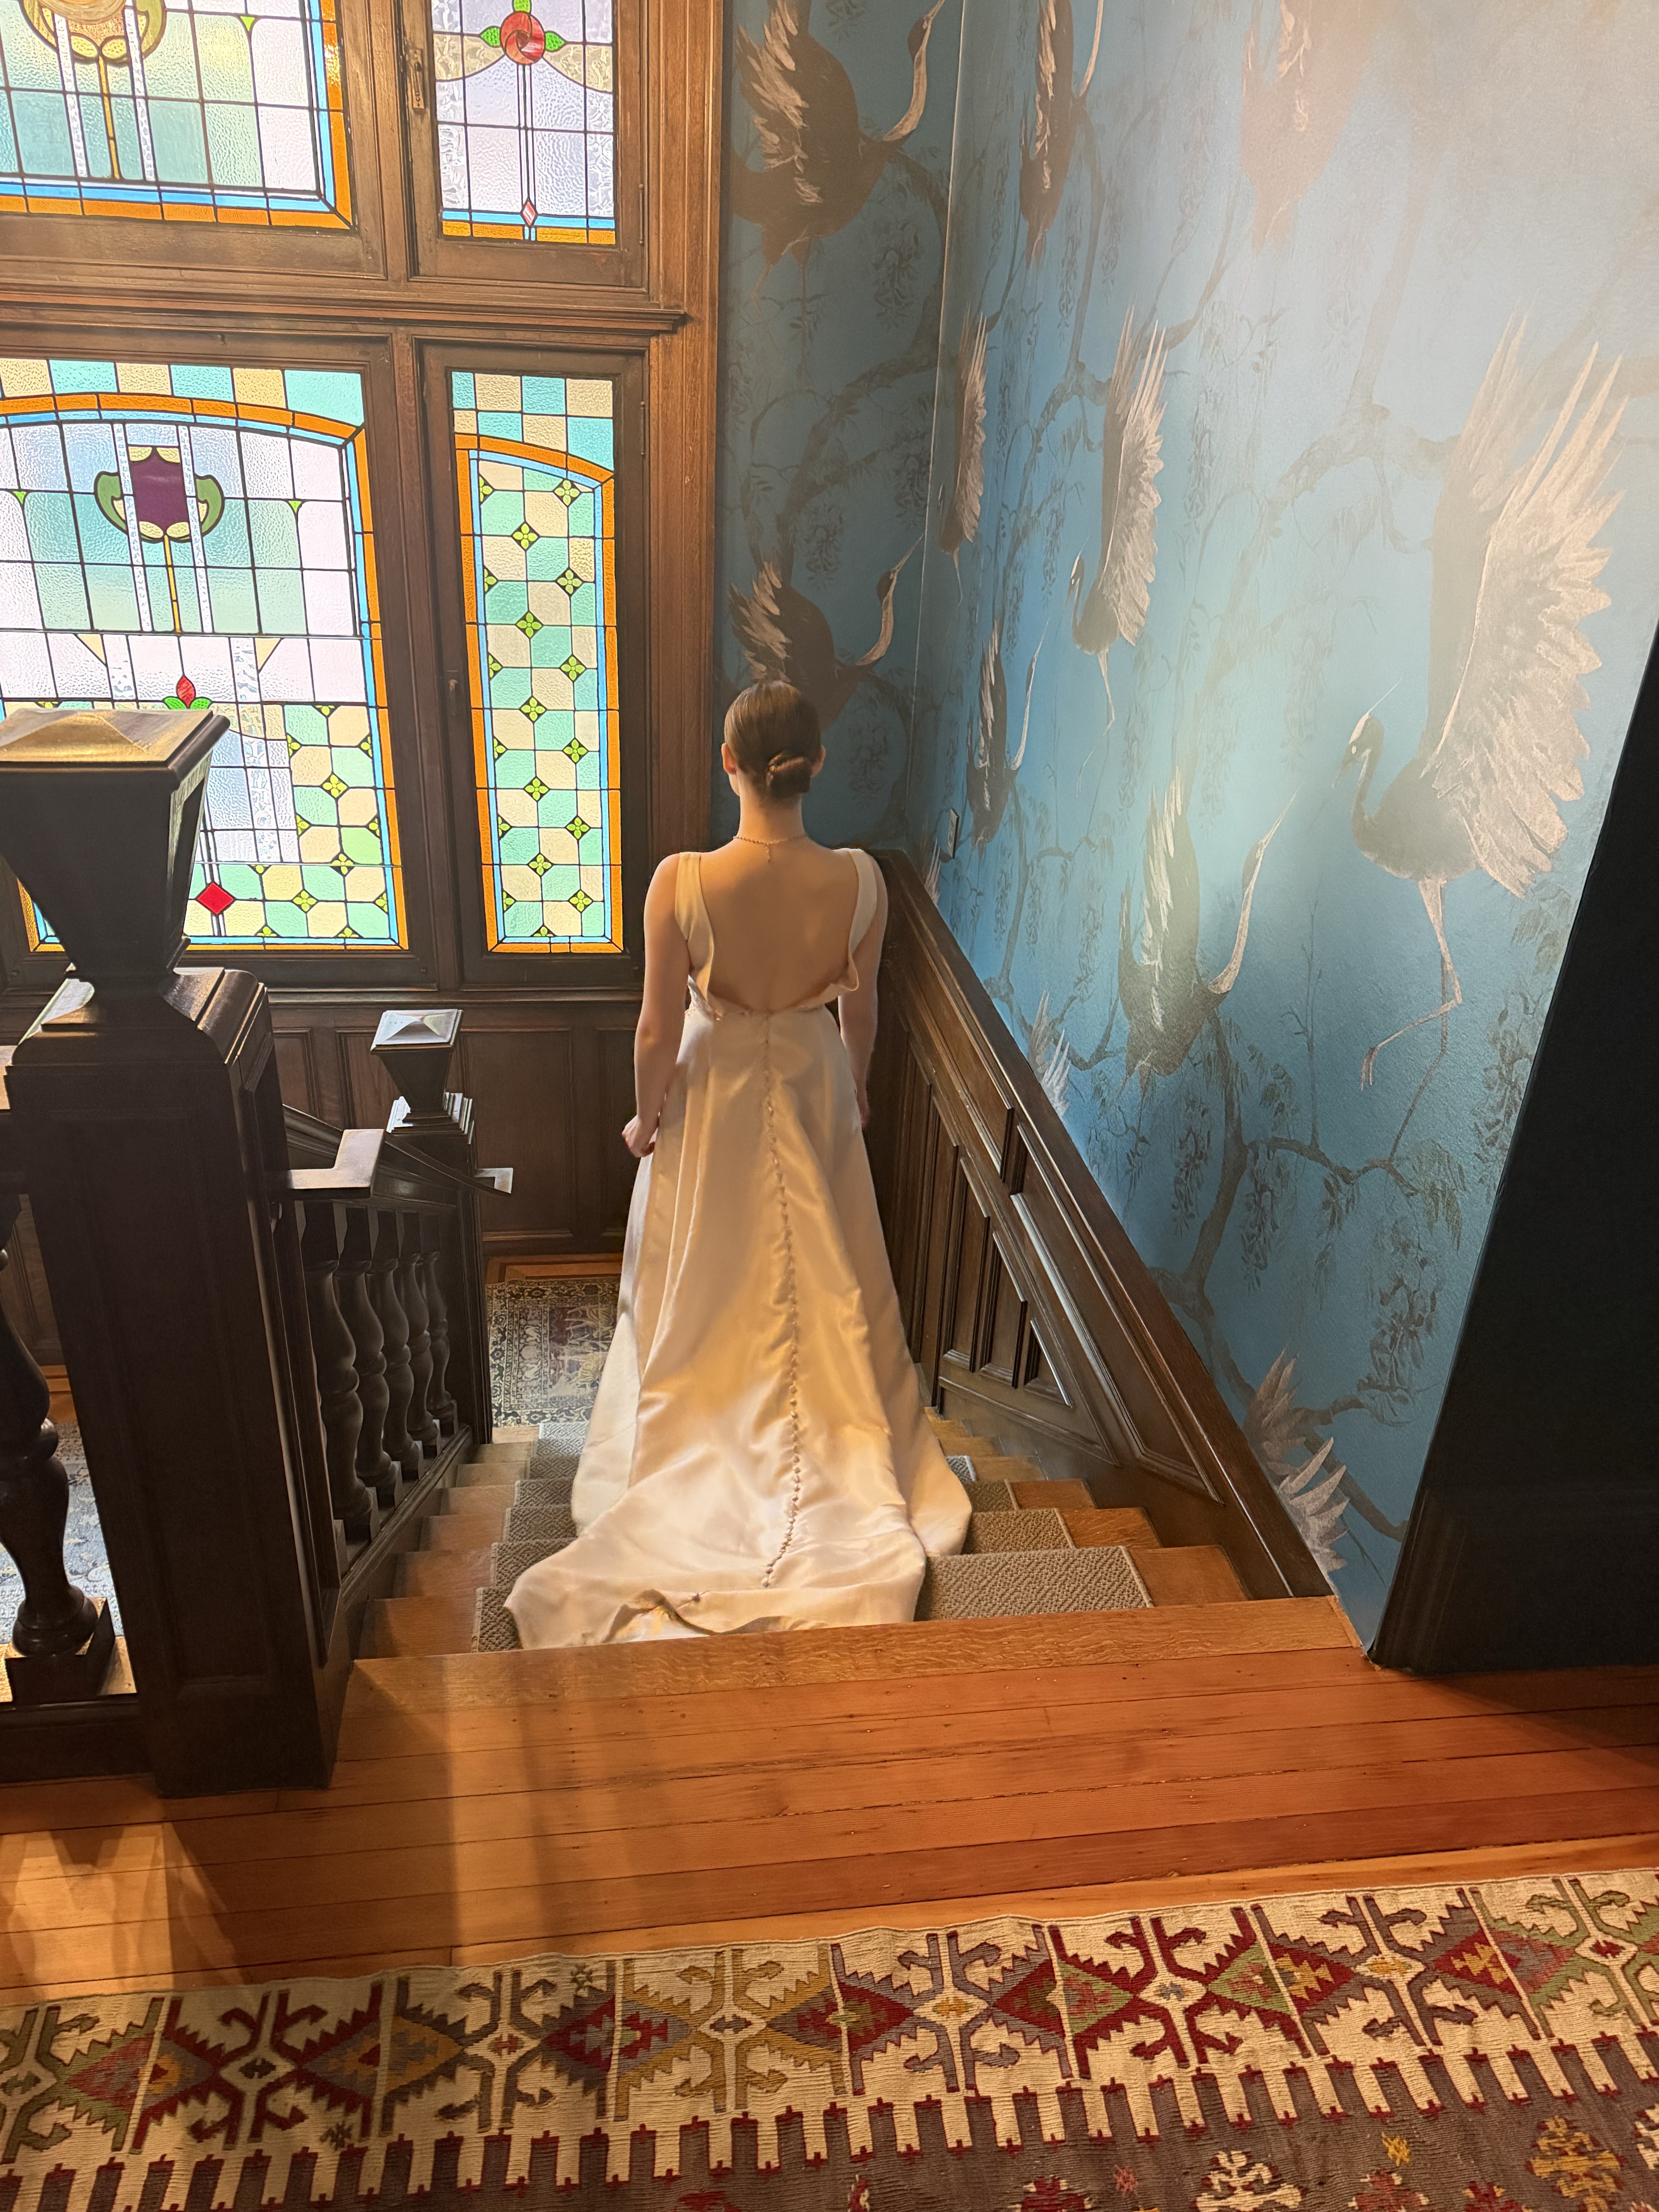
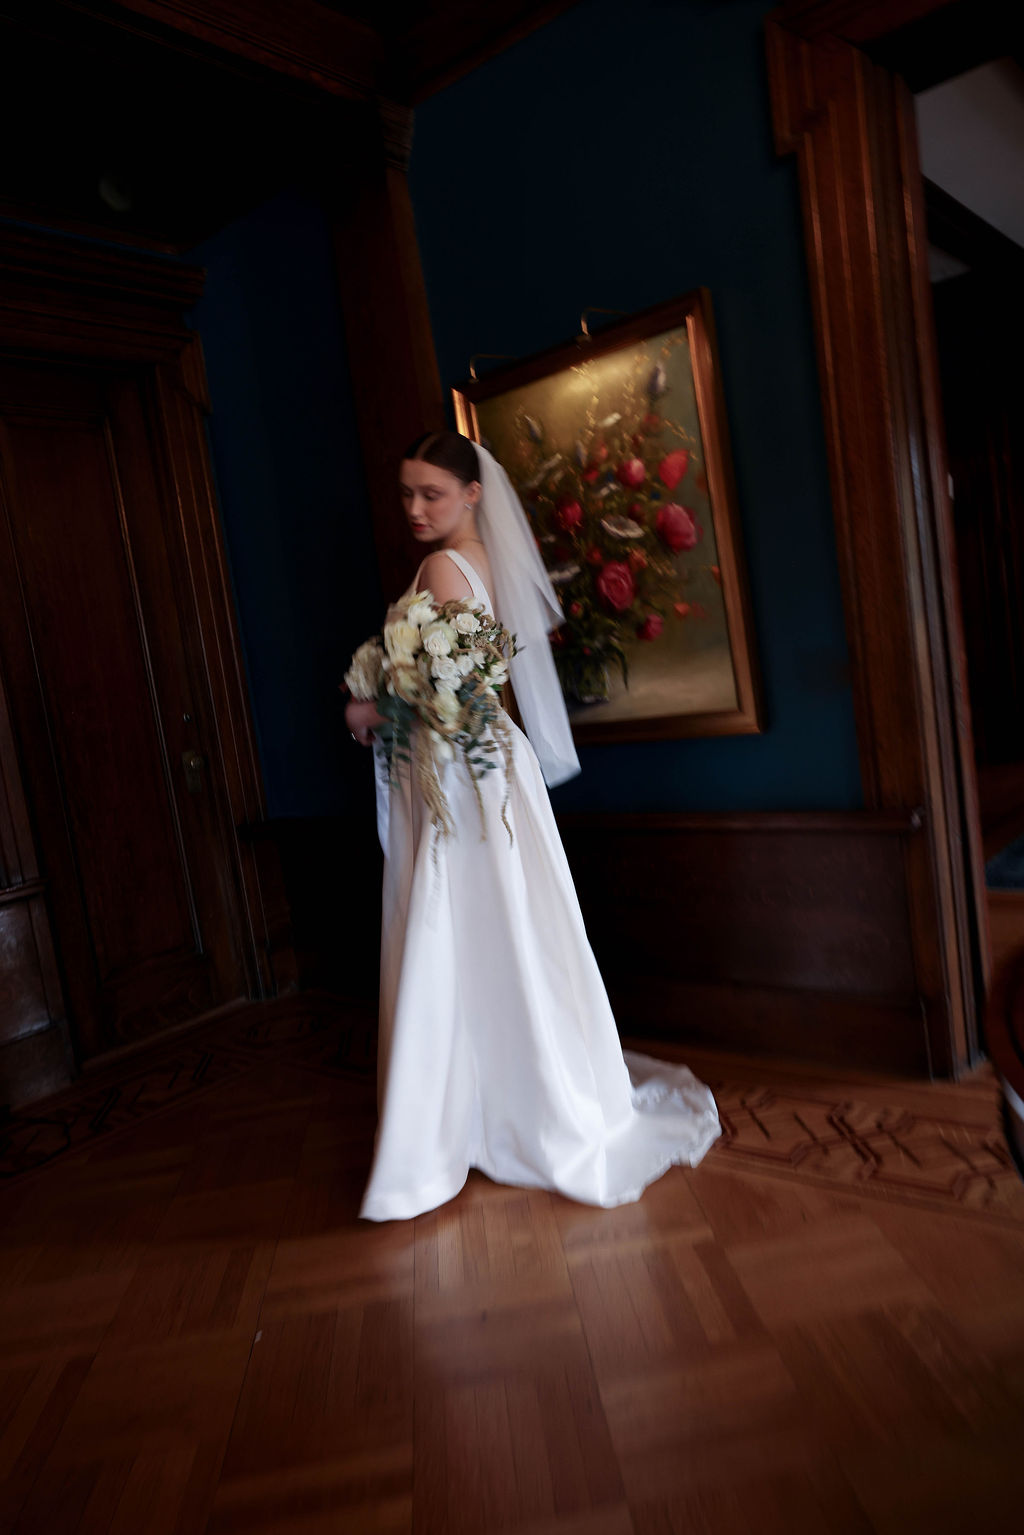
We had such a fun day and came away with some amazing photos and videos that we all can use for our portfolios! It certainly was exciting and a great motivation to keep going and creating just for the love of creating. I hope this brings even more opportunity to collaborate with other artists locally and beyond.

Another Dream Dress Come True!


