Watercolors in Silk

I just love a great watercolor painting, how the colors softly flow into each other, creating emotion with how they blend together to evoke a mood.

Speaking of Mood, the renown fabric store in New York, Los Angeles, and online at MoodFabrics.com, the store where the Project Runway design contestants run around like chickens with their heads cut off trying to find fabric, trim, notions and inspiration (and hopefully a lucky Swatch sighting), all within a ridiculous 30 minutes, is running a series of contests using their fabrics. I thought how fun it would be, and also a challenge for me, to order some silk and whip up something for their MoodMadeSilk18 contest by the deadline of today, April 30th, 2018.

I went ahead and ordered 2 yards of this gorgeous watercolor floral silk chiffon and was even happier when it arrived!

IMG_E8948

Isn’t it SO pretty?!

I gave it a gentle wash and laid it flat to dry, then got to smoothing it all out perfectly on grain and ready to be cut:

IMG_8951

I thought this would be a perfect fabric for this pattern view A from McCall’s that I had recently acquired from their new Spring ’18 collection:

M7747_a

Pinterest is one of my favorite resources to find inspiration and ideas for sewing (also for cooking, art and other ideas). I found a couple of flouncy cold shoulder tops and pinned them for inspiration and thought, “I could make something like that, easy!”

floral cold shoulder long sleeve top                                             coral flounce cold shoulder top

So, I proceeded to do just that!

By taking measurements of the flat pattern and comparing them to my own body measurements, I knew that the torso would need to be lengthened in order to not feel too short on me when done, so I altered the pattern and added one inch to the front and back pieces using the “slash and spread” method (sorry, that sounds kinda dirty) before cutting the top out of fabric:

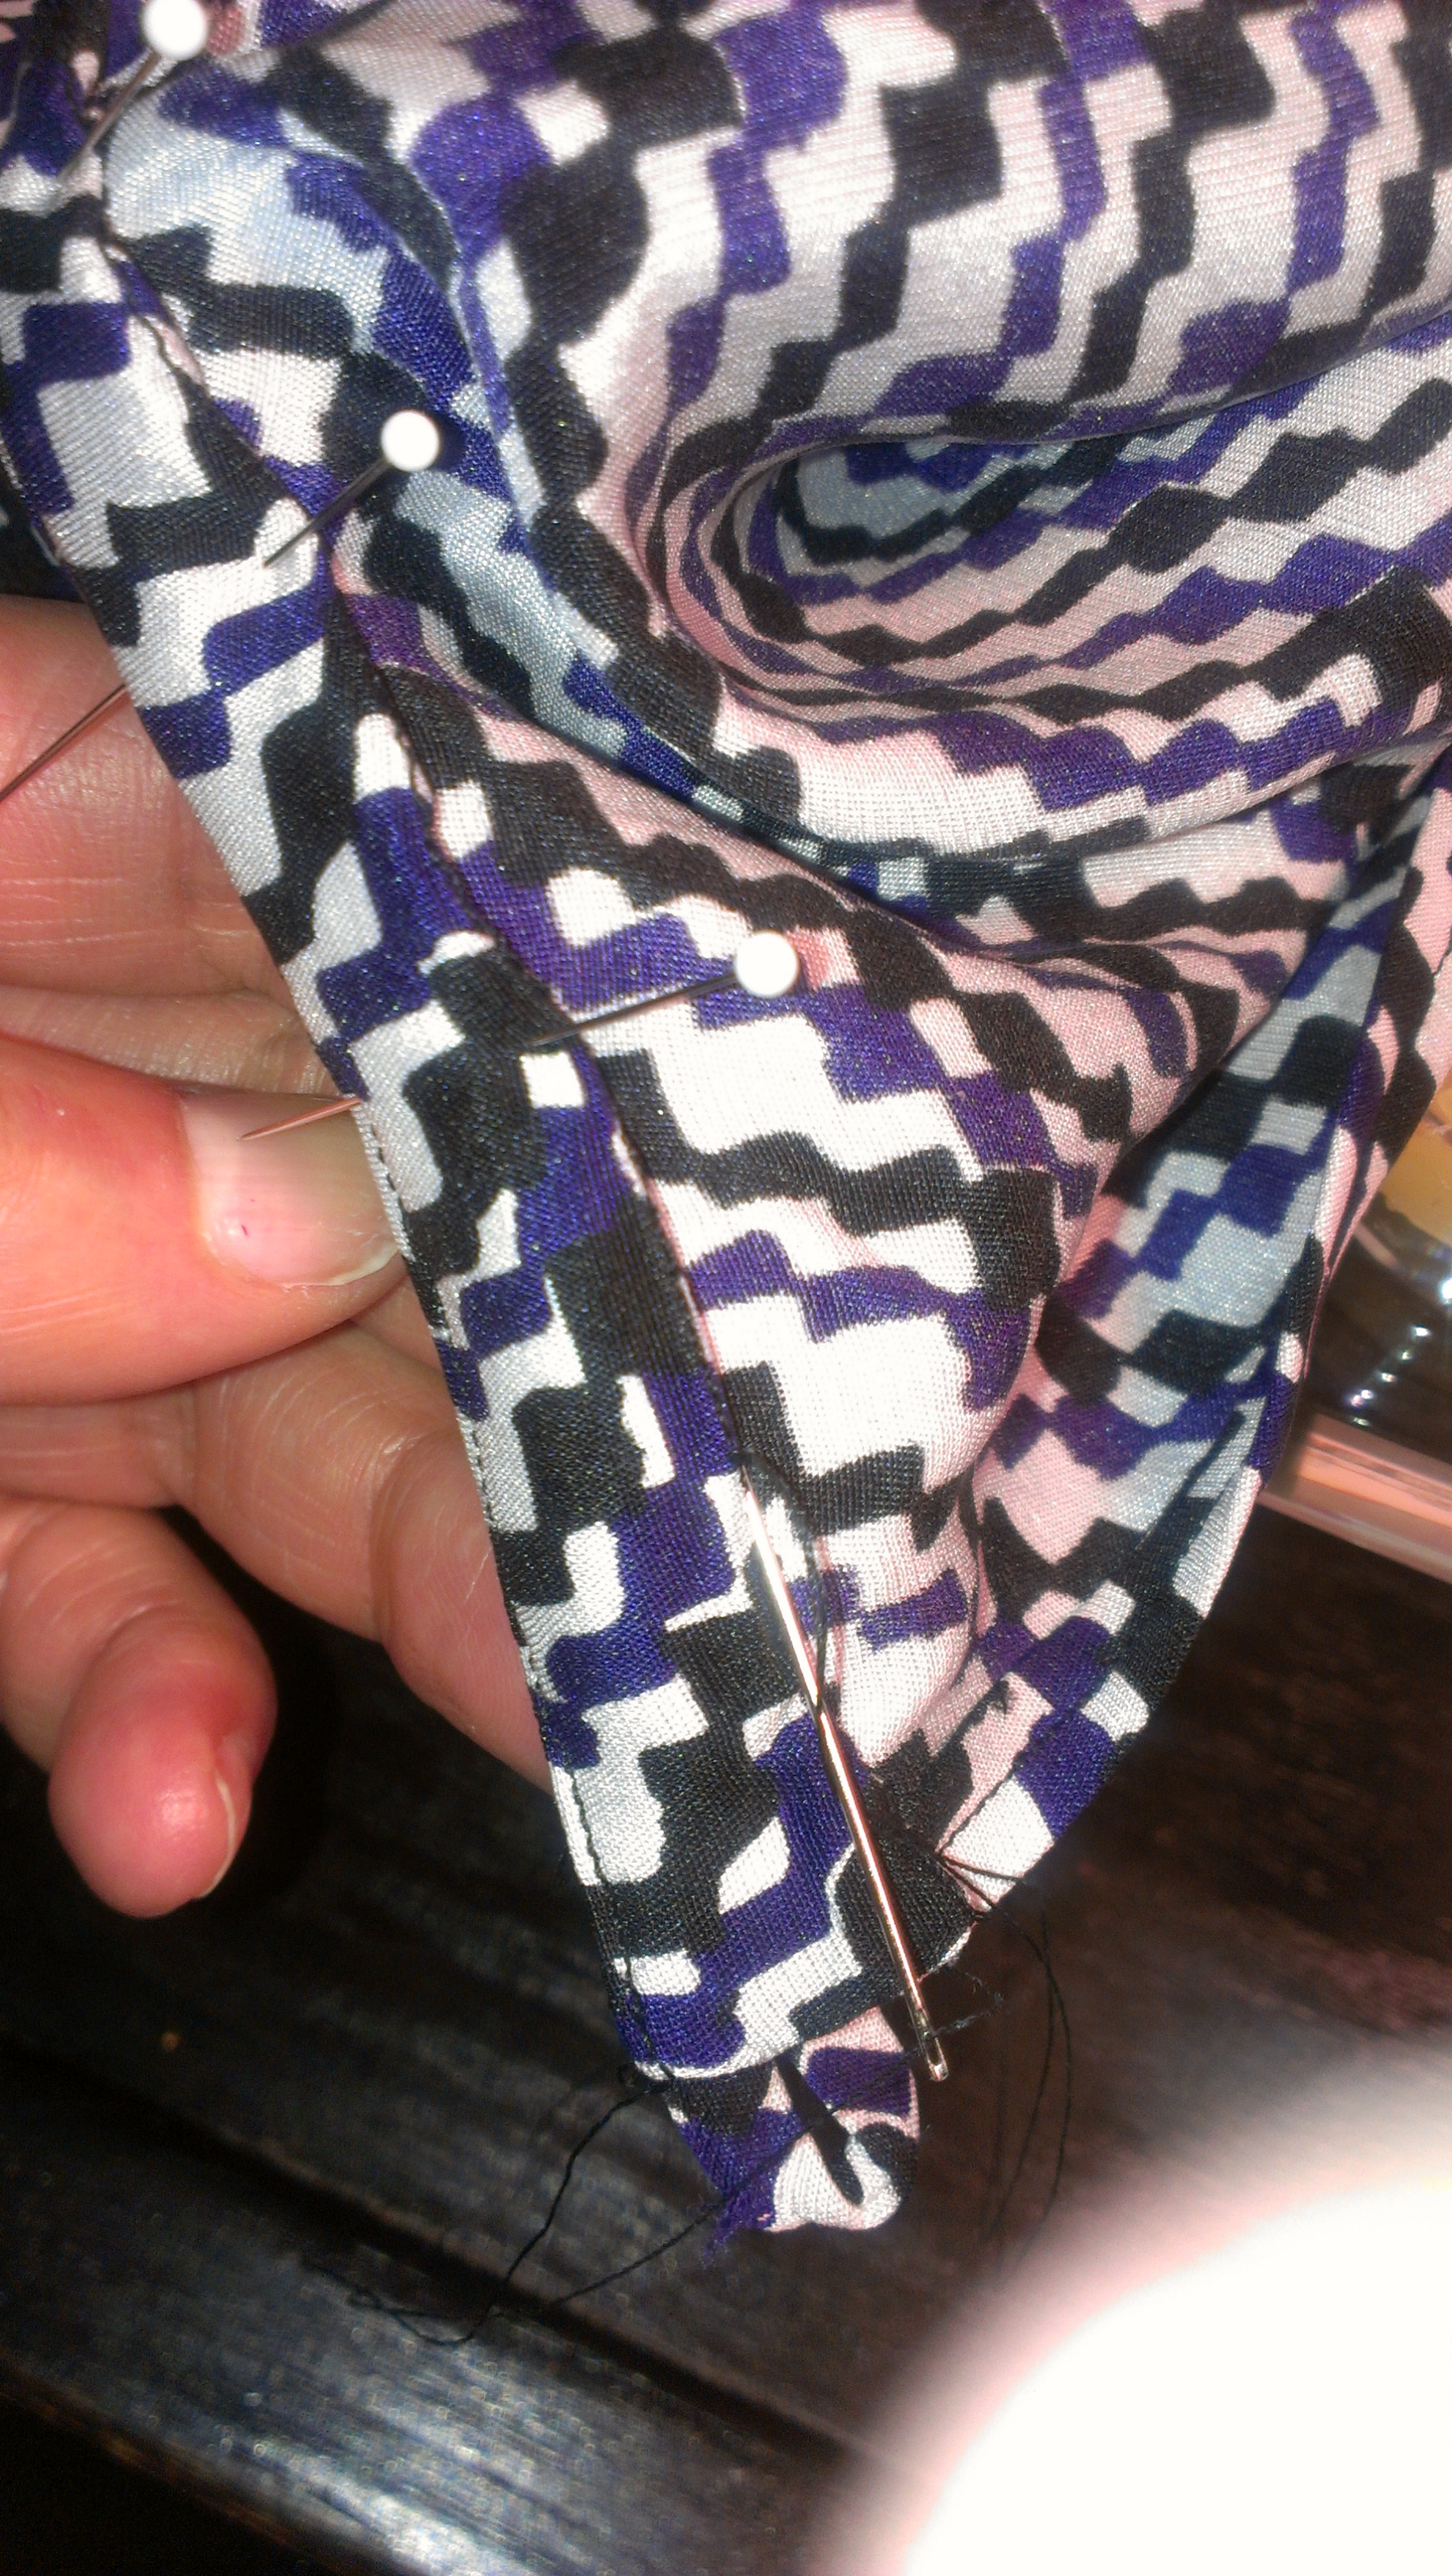
With the top only being a few pattern pieces, it went together fairly quickly, not including the pain-in-the-assery of working with silk chiffon, of course. For one thing, I had to carefully mark the wrong sides of the fabric as I went along so that I didn’t sew them incorrectly:

IMG_8973

Plus, make French seams on most seams since the fabric is so sheer and frays like a beeotch:

IMG_8982

sewing seam part #2 of a French seam

I decided that the fabric of the top was SO sheer that I would feel indecent prancing around in this with all of my “stuff” showing underneath, so I ran out and bought enough additional silk chiffon in a deep navy to layer under the print to create some opacity:

The top took me a little over a week to completely cut out and sew in my free time, so that was not too bad. I love the flounce and halter neck, and the fabric most of all on this top.

As for pattern changes, I left off the elastic at the waist, and didn’t add the zipper as the pattern suggests as I think that would be too much weight for this super delicate and sheer material. I also skipped the facing and sewed the lining in it’s place for a much better finish to the edge and to combat some of the sheerness.

IMG_8983

Detail of the French seam made on the flounce piece

I am not 100% sold on this pattern as I feel the fit is a tad “off” and the cold shoulder is really, really cold showing so much skin. It is way too big in the underarm as it turns out and shows off a good deal of side boob here. Making a dart here to take up some space is not going to work on the finished top (note to self: make more pattern alterations in this area, and maybe try a muslin too, before cutting into spendy materials like this, silly girl Steph!) so for now, I think I’ll make up a coordinating bra or a panel on the side to avoid any wardrobe malfunctions…

DSC_0315

Don’t look now, but your side boob is showing…

I finished the top just in time to throw it on, slap on some makeup, do something to tame (or tease?) my crazy hair, and have my sweet and patient man snap some photos of me to post on my Instagram with the hashtag #MoodMadeSilk18 to enter the contest by the deadline. I would love to win the $100 gift card to Mood as the winning prize, but there are some other amazing garments that sewists have made with silk from Mood for this contest, so I wouldn’t be upset if I didn’t win. Just making stuff and challenging myself is fun for me!

DSC_0325_2

DSC_0327


THANK YOU MOOD!!! Say “hi” to Swatch for me!

Cold Shoulder Ruffled Tank Top


I bought this lovely coral pink silk crepe de chine from NY Fashion Center Fabrics online as I just love the quality of their silks and the color was SO yummy!

coral pink silk crepe de chine

I was not sure what I was going to make with this fabric when I bought it, but I knew that I wanted to make a fun, pretty top for summer.

Once I got my sewing mo-jo going, I decided a good match with this fabric could be this cute ruffled cold shoulder pattern from New Look that I had in my pattern stash since early spring:

NL6490

I know, it’s super trendy, we see this cold shoulder trend everywhere, however, I really like it (in most cases, when it is not super cheap-y looking or just a whimpy little peek a boo shoulder). I don’t want to disappoint anyone, so here are just a few inspirational photos I have gathered of this popular trend:


Pretty, right?

So, I set forth cutting this baby out from this pattern using my lovely fabric.

Things were going along pretty well, cutting out carefully and sewing it in parts in between other projects and life happenings.

Here I am sewing a ruffle to the side seam:

NL6490a

I didn’t realize that this top was lined when I was looking at the back of the envelope and the fabric yardage and type needed for best results. It is quite nice that it is lined, but added a little more work and time to this project that I was not expecting. Luckily, I had a nice tan light weight silk remnant on hand that was perfect for the lining. Here I am examining the outer layer and lining of this top:

NL6490b

I added the ruffle incorrectly, sewing it all the way down to the side of the top instead of leaving it free under the arm to form the “cold shoulder” affect, so I had to carefully unpick the seams and re-sew. It actually didn’t look too bad just sewn down to the side as a tank top, but I really wanted the cold shoulder look, so I took a deep breath, took a seat and got comfortable with my seam ripper.

Here, I pinned the top to my dress form with her little arm attachment thing-y to just see how it was laying before adding the shoulder straps:NL6490c


I had some major issues with the shoulder straps. The instructions are not helpful for this part and I think the illustrations are incorrect. I sewed it as best I could, but ended up having to unpick most of it, pin it in place and re-sew it so that it made sense and laid flat against the neck. Not fun.

Making the hem is usually my favorite part of most projects because it means I am almost done! This was an easy one with just a double turned under top stitched hem for both the outer and lining layers:

NL6490

I love how the top turned out, although it is quite large and low at the side under the arm (pretty peek-a boo bra opportunity!) and I should have really made some sort of test muslin. Despite all of the hick-ups with this pattern, I’ll be wearing this top very soon as now summer is pretty much over. I hope to post some good photos of me wearing my new top as long as my hair cooperates, and I don’t look like an old lady trying to look young and hip in it. We’ll see…


Wish me luck!

PS: I LOVE my new top!

IMG_1107


IMG_1140

Kiss me, Darling!

Luxe Silk Overlay Top

M7411e


I just finished sewing up this lovely top in silk georgette. It turned out gorgeous and so luxe to the touch. I can’t wait to wear it, but first, it is meant for a sample to showcase in an adorable little shop in Lake Oswego, Oregon, Nick and Figs, where I aspire to teach and instruct sewing this top in the near future.

The material is a silk georgette I bought at Mill End Store in Beaverton in a gorgeous shade of green:

teal silk georgette

the color of this fabric is more of a blue/green than this photo shows

This fabric was NOT easy to sew! It frays, it’s super slippery and figetey to work with. This fabric is lucky that I love it, otherwise, this would never be in my sewing room!

I used this new McCalls pattern 7411 to make this top:

M7411

I traced off onto separate pattern paper and cut out view C in size Small with no changes or adjustments to the pattern. The only thing I goofed up on was the side seam of the overlay. I is supposed to be split and longer in the back than the front as this line art shows:

M7411viewClineartI didn’t realize this and just cut the overlay straight across from the front to the back, so the seams match and are not split as shown. I’m fine with that, it’s just not as the pattern intended.

On one of my Pinterest boards, I had pinned some lovely tops in a similar look to keep in mind while making this top:

Hello Spring

Looks great with white jeans

Red overlay top


After settling in with the pattern cut and all my markings and notches were complete, things went fairly smoothly with sewing this top. Taking my time pinning each raw edge together and carefully sewing, I completed this top in a few days:

M7411detail

pinning the front neckline

M7411sewing1

making a baby (hem)

M7411closeup1

tiny hook and eye hand sewed to the back neck edge


The most difficult parts of sewing this double layer top was getting the part where the two layers of the back opening at the bottom of it to come together perfectly and have a smooth finish to it. I carefully went over this area twice so not to have a gaping hole here, then gave her a good press to make it smooth and ripple free. Sorry, no photo…

Also, figuring out the last part, sewing the two layers of the shoulder seams together was a little confusing and tricky, but after some careful thought and basting seams here, I figured it out by just imagining what it should look like when finished and sort of thinking backwards (if that makes any sense). Sorry again, no photo…it wasn’t a pretty sight anyway…


After all that, it turned out a lovely simple yet luxe top that I hope to sew again, next time along with eager students in my intermediate sewing class at a wonderful little local creative arts school.


Happy Spring!

Printed Silk Tank Top

I felt the itch to sew up something quick and easy to wear, so I made up this little silk top using Simplicity 1253 pattern and some lovely Derek Lam printed silk/lycra fabric:

Simplicity 1253 top in Derek Lam printed silk

Simplicity 1253 top in Derek Lam printed silk

Simplicity 1253 in Derek Lam designer silk

Simplicity 1253 in Derek Lam designer silk

This little top pattern took just a couple of days of on and off sewing time and under 2 yards of fabric. It features a pleated front, hi/low hem and a neck band.

Front neck pleat detail

Front neck pleat detail

The neck band took a little time to sew on, as I chose to sew the inside enclosing seam by hand instead of the stitch in the ditch method that the pattern has you do. This method NEVER turns out well for me, so I just take out my needle, thread and thimble and get to work hand sewing:

Slip stitching the inside of the neck band by hand

Slip stitching the inside of the neck band by hand

There is a little keyhole opening in the back with a loop and button closure which is a nice little feature:

back of top with loop and button closure

back of top with loop and button closure

I like to layer these little silk tops under jackets and cardigans or on their own:

My new top layered under a jacket

My new top layered under a jacket

I almost always have inspiration styles after which I try to model my sewing projects:

Joie "Corette" printed silk tank $158

Joie “Corette” printed silk tank $158

Joie printed silk tank top

Joie printed silk tank top