On Patternreview.com, the LWD Sewing Contest is in full swing, with only 8 days left to enter my version of a little white dress. I have decided, after debating over about 4 fitted sheath dress commercial sewing patterns, to sew New Look 6123, making view C with no sleeve flounce or any other drape, sleeve or added style details:

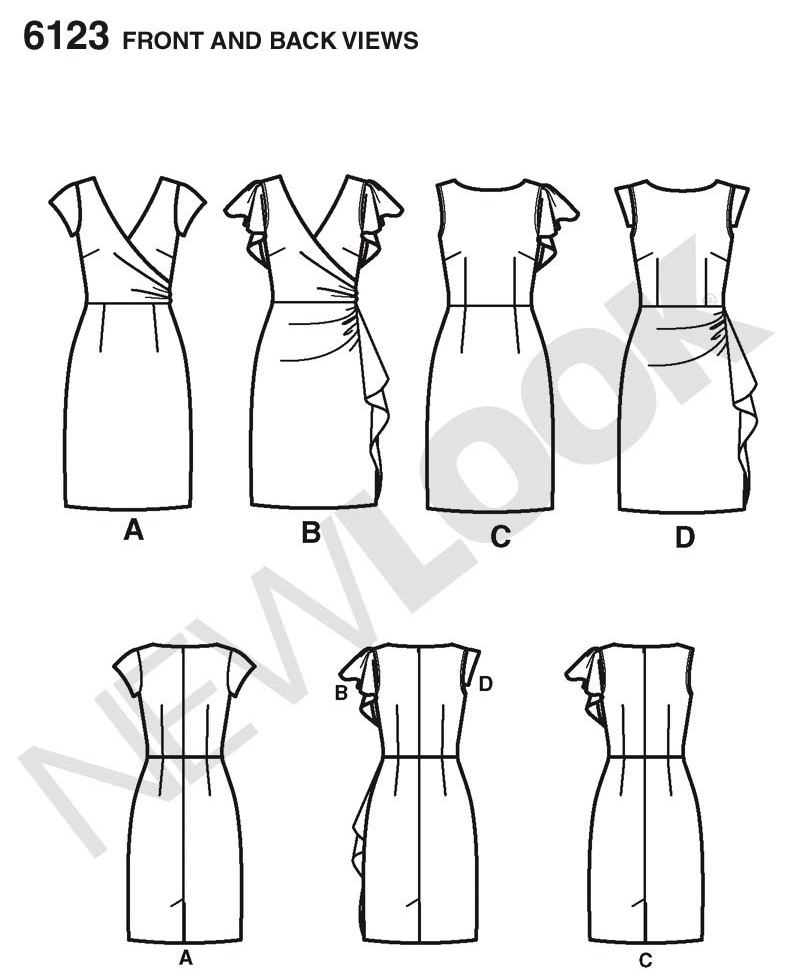
If this dress is successful, I will use this pattern again and possibly use some of the other included design details such as the little tab sleeve, the short, cap sleeve, the crossover bodice, and possibly the draped skirt (just the pleated part though, no extra hip and thigh attention is needed on this body). Plus, it would be a great dress for a client.
Some of my inspiration LWD dresses are the following silhouettes on these lovely ladies:


I am using a white stretch cotton lycra blend woven material, sort of like a stretch sateen minus the sheen, for the outer dress, and a poly/rayon/lycra (at least I think that is the blend) lining material.
As the pattern does not come with instructions for a lining for this dress, and the tight white dress with no lining will surely be too hideous by revealing all my awesome saddlebag cellulite and flabby little tummy pooch, I am going to make my own lining from the pattern pieces of the dress. Hopefully the stretch lining material from Mill End Store in Beaverton, OR I chose will help to smooth out and suck in my icky areas!
Too many of these nice dress patterns come with no lining instructions, or instructions for only lining the bodice. I find that so frustrating! But oh well. I suppose that is one of the many reasons why I have taken the time and spent the money to take sewing, pattern making, draping and apparel construction classes from various sources, conduct research online, and acquire sewing books that will teach me what I need to know about sewing. I plan to take the time to design my own patterns, be more creative, and fulfill my dreams of being a great sewer and designer. For now, I use commercial sewing patterns (I own more than 450 of them. Wow!), and I love every minute of sewing!
So, back to my dress creation. I have decided on a simple silhouette for a LWD as too much fuss on a LWD can just look, well, wrong. The bodice is sleeveless, high boatneck, with waist and bust darts. The skirt is a simple, darted, pegged-in, strait pencil skirt. Very basic, nothing crazy, kind of boring actually. But I want to keep it clean and streamlined. I may install the invisible zipper as the pattern calls for, or possibly the silver metal fashion zipper I bought at Joann Fabrics on clearance for $9, exposing the metal zip teeth for a design edge. I have not decided on that element yet.
The only pattern changes I made were to cut the skirt in size 14 (the bodice I cut the size 12) and taper the skirt waist to a 12 on the front and back top edges, and also to taper the hem of the skirt to be more of a pegged, pencil skirt. Both of these were done using my hip curve design ruler. I know I could get more creative with this simple sheath by moving darts, adding seams, adding a beading or embroidered design and such. Next time.
I am actually using this pattern as a test dress for fit, and if I like it, to use as a base for many style, color and fabrication versions. White is not very forgiving, nor is it usually slimming, and my weirdly shaped, aging body, is not getting much skinnier! But white is a great, cool color to wear, and has so many outfit options. So, a great fit in a nice fabric, made well, are the only true tools I have for this kind of sheath dress to be a winner and for the most flattering outcome. I hope it fits!
Plus, this is the first time I am using my new, wonderful Babylock Imagine serger in a project! So far, I used it to overlock all of the inside edges of my fabric cut out dress and lining pattern pieces for this dress to prevent fraying and to have nicely finished interior seams. So wonderful!
I will post my finished LWD (cross your fingers for a good one!) as soon as I am finished and follow up with more sewing and fitting notes!
Saturday 2/8/14
I worked on my LWD today for several hours. I basted it together and got it fitted by my husband. I found the upper part of the back too wide, as usual, but the rest of the dress fit well. I made adjustments to the pattern for future reference, and marked and re-serged the back edges of the dress as well as to the lining, creating a new center back seam allowance.
Here is the dress, basted together, and on my dress form. Also a shot of the back side of the dress with the silver metal fashion zipper pinned into the center back seam:


So far, so good! It looks a little “nurse-y”, but that can happen with LWD’s, so that’s to be expected.
I went on to sew the entire lining exactly the same as the outer dress leaving out the zipper. Here are the twin dresses. The outer dress (right dress) and lining (left dress), all ready to be sewn together and joined at the neckline and sleeve openings:

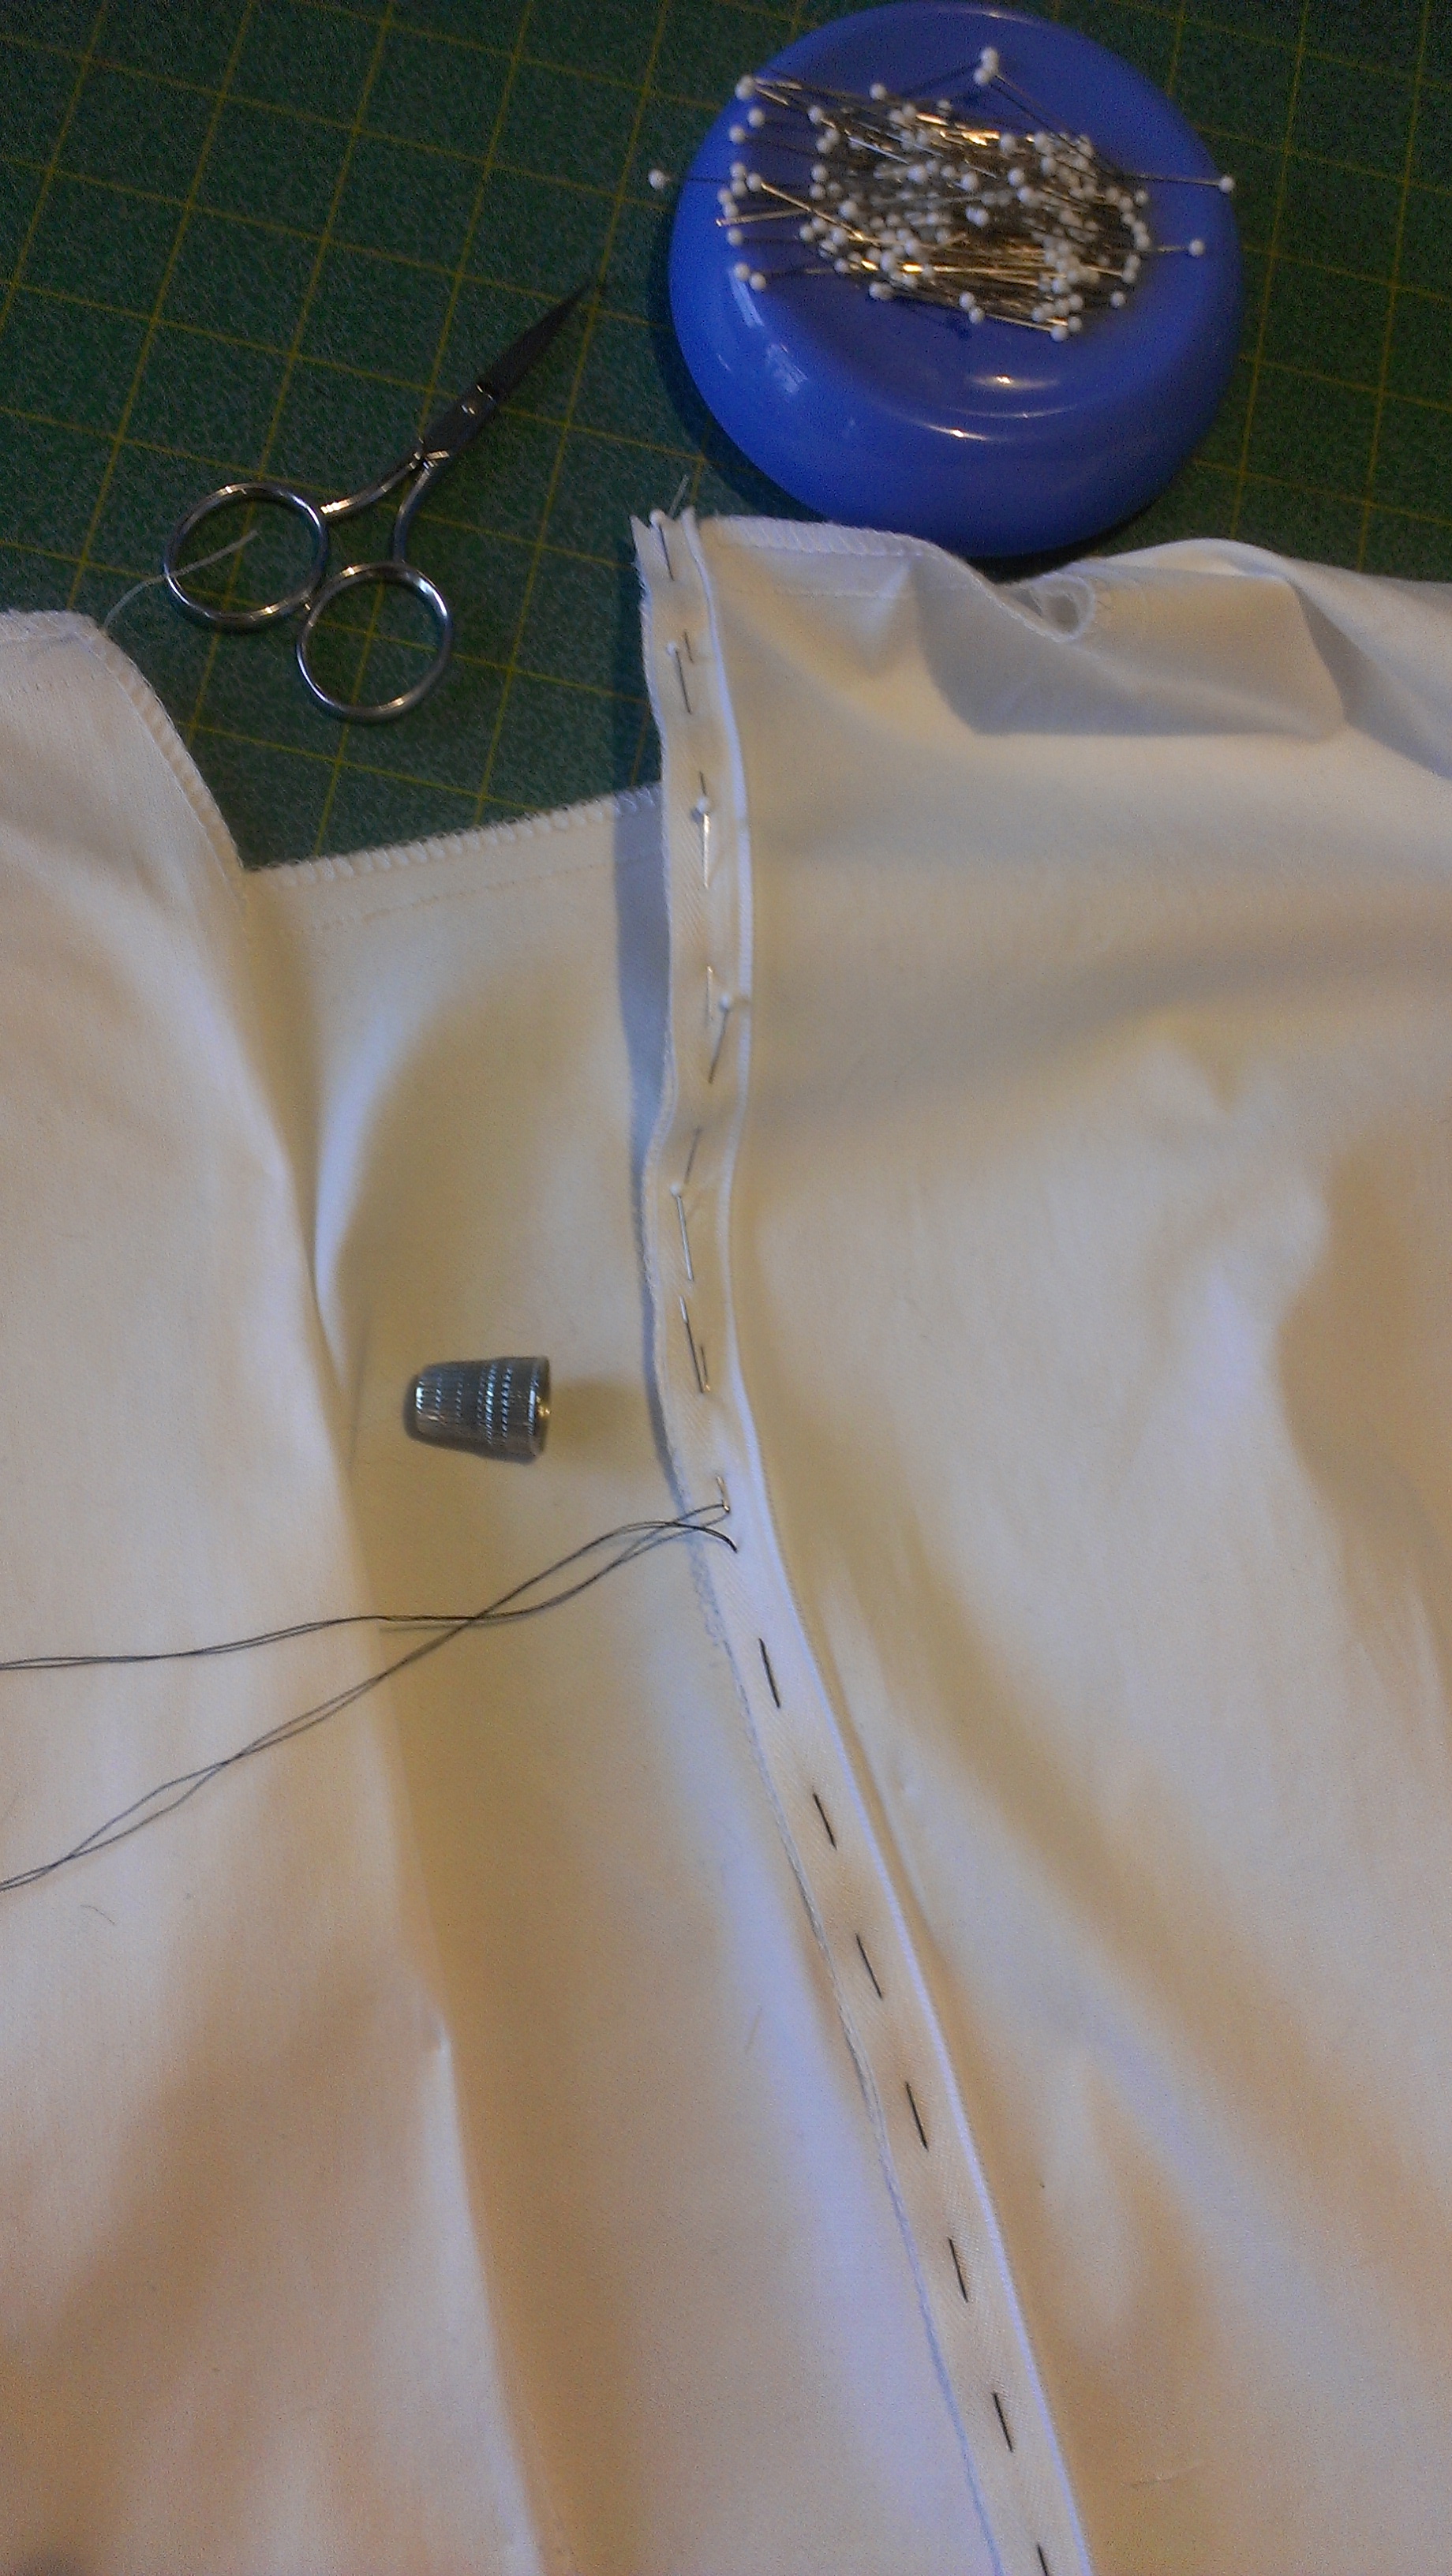
I decided to not do the silver zipper as it may limit the style in a way, so I chose the invisible zip as the instructions with the pattern include. Here is my progress so far with hand basting in the invisible zip:
Next up:
- Finishing installing the invisible zip
- Sewing in my Love, Stephanie label to the lining
- Sewing the lining to the dress
- Pressing well
- Understitching the lining to the seam allowance
- Stitching the lining to the zipper opening either by hand or machine
- Figuring out how to do the back vent split with the lining
- The hem
Update Thursday 2/13/14
Well I got a good ways on my LWD over the weekend, especially since we had a snow storm and the entire city shut down for 4 days, so I got a lot of good sewing done while cooped up in the house.
I followed a great zipper installation video tutorial on Craftsy.com to install my invisible zipper with the lining. It came out really nice! However, after the zipper was in, it was impossible to figure out how to sew and finish off the armholes and the bottom hem of the dress on the sewing machine, so I think I’ll have to resort to doing this by hand. I began pinning the armholes in preparation to slip stitch the lining to the outer material, but had to stop here and begin a new project right away, a black dress for a funeral. See the next post for this adventure.
Meanwhile, here is my LWD nearly done and laying on my table waiting with high hopes to be finished in two days to enter into the LWD contest:

July 31 2014 Update:
I finally completed my LWD! Needless to say, I did not make it in time to enter my LWD into the contest, but I did finish it in time for mid-summer wardrobe opportunities. I really should have finished this dress sooner as it’s a great little wardrobe staple, especially for summer!
I am very pleased with the fit of this dress and will go back to this pattern for more versions of it. It actually make a nice sloper to use for other dress designs. I have some other nice stretch woven materials in my stash, including some solids and a nice Ikat print, that would work very well made up in this pattern.
Also, I have enrolled in and have been watching the Craftsy online class Patternmaking and Design: Creative Darts and Seamlines with Suzy Furrer. In this classes, Suzy takes a basic sloper and shows how to add creative darts and seamlines to make a more interesting garment. I want to try some of the methods to create a more interesting twist beginning with a basic design, and this pattern is the perfect base to begin with.
Apologies for the blurry photos. My in-house photographer/Dear Husband is out of town on a business trip so I had to use the self timer on my camera to take photos today (does that count as a selfie???).


Leave a comment