It all began when my sweetheart popped the question back in early December 2018. I knew then, and even before then, that I wanted to design and sew my own wedding dress. I love weddings and all of the lovely elements of a wedding: the flowers, the music, the gathering of family and friends to celebrate love, and of course, the dress!
The wedding gown carries that special purpose for a bride. It should highlight her personality, her uniqueness, her beauty and make her feel like the star of the day.
Once the word was out, my close girlfriends could not wait to go wedding dress shopping with me. I made appointments to try on gowns at a couple of local bridal salons and invited my girl gang along for the occasion, with one condition: I was just looking for inspiration and was absolutely NOT buying a dress! I was determined to make my dress no matter what!
I tried on some gorgeous gowns, all while trying to sneak a look at the construction and sewing methods of my favorites. I found that my favorite look was a sleeveless, low V-neckline gown with a fitted trumpet skirt, all in lace. Nothing poofy, simple and clean, maybe a vintage vibe to it. Something achievable to create and practical to wear.
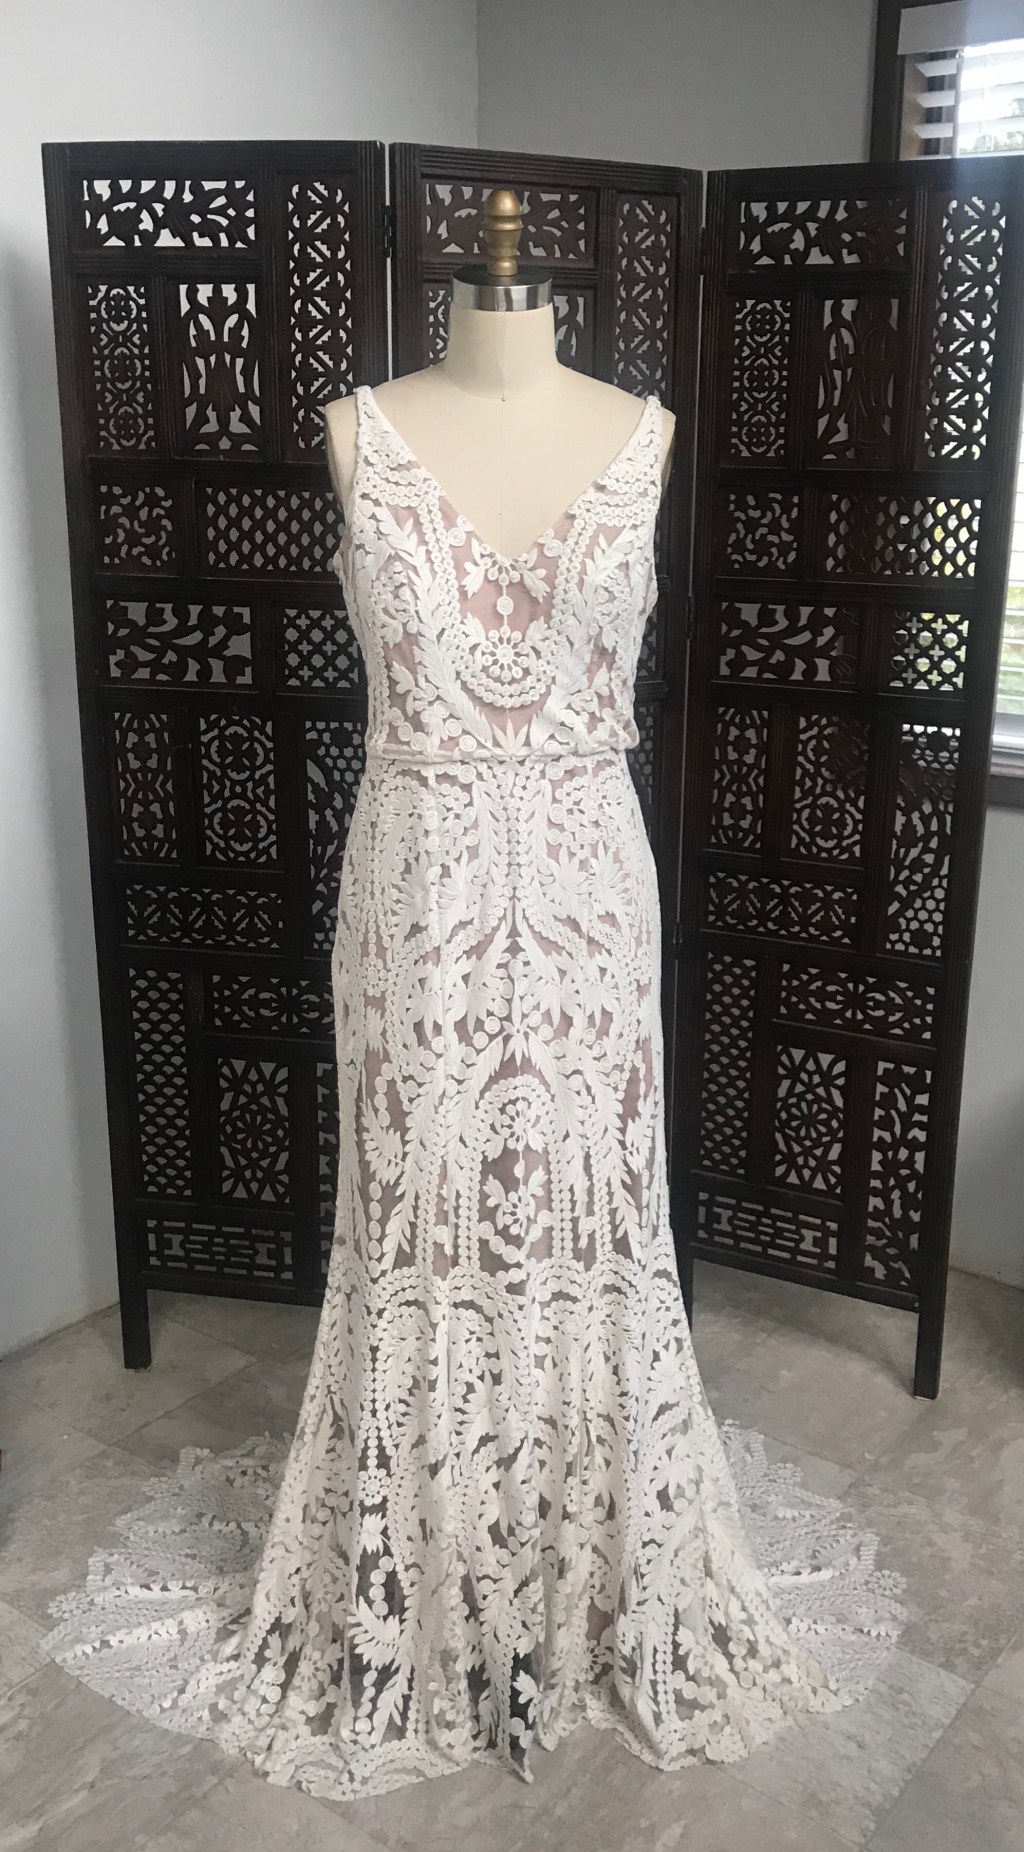
One dress that I really liked (and tried on several times) was this gown from Willoby named “Corella”:

I tried this gown on at The English Department, surrounded by my wonderful friends, who captured this image of me in this swoon-worthy gown:

I knew that I could recreate this look with the right fabric, lining and pattern as it is a relatively simple design with not a lot of complicated seams or construction details.
So, I got to work right away with finding a pattern to start with and most importantly, the perfect fabric to work with.
I found some commercial patterns to start with, knowing that I’d have to make several changes and adjustments to it for fit and to achieve the look I was going for. I started with this dress pattern from Simplicity, which also happened to be designed by Leanne Marshall, a young woman from the Portland, Oregon area who won Project Runway Season 5. How cool is that!

I really liked the low V-neckline, front and back, of the bodice of this dress as you can see in the line drawings of this pattern:

I wasn’t as keen on the skirt of this pattern as I wanted something simple and straightforward, which probably could have achieved by eliminating the seams and flounces of the skirt, but I didn’t want to do that much work, so I kept looking. I found this Simplicity pattern in their Prom line of patterns and thought it would be a perfect base for the skirt:


After purchasing the patterns (on sale for $1.99 each, thank you very much Joann Fabrics!), I made an appointment with one of the best ladies in Portland who could help me with the fit and construction, Marla Kazell.
I have taken many sewing lessons with Marla and her equally-awesome sewing teacher/partner Elizabeth Miles at Mill End Store in Beaverton during their Open Sewing lessons. I knew that Marla had the skills, experience and sewing knowledge to help me make the best gown possible. Paying her was the best money spent as I learned SO much about fitting and construction that I will use for many projects in the future for years to come.
Marla and I got to work doing a tissue fitting of the patterns, a couple of muslin fittings, and fabric cutting and construction consultations until I was 100% comfortable and confident with moving forward with the sewing.

After shopping around the Portland area fabric stores, I just couldn’t find the perfect fabric that wasn’t stupid expensive or enough yardage for the dress (I needed about 8 yards), so I decided that I needed to visit the next closest place for great fabric options-Los Angeles!
With my pattern, sketches in my Fashionary notebook,

and an empty carry-on suitcase, I took the day and flew to LA (only about a 2 hour flight from PDX) and hit Mood Fabrics. Good idea!

I spend the better part of the day at Mood, with my pattern and sketches handy, finding a friendly and patient store worker to help me with my hunt. The young lady who helped me (her name escapes me) was so sweet, patient and happy to help me. She pulled out heavy bolts of fabric, shlepped it around the store, and helped me to decide on the best choice. She even helped me pick the lining material, notions and fabric for my veil that I was also planning to make. Thank you Mood!


I got to work planning out the layout for the lace as the pattern repeated in a certain way and had the edge that I wanted to keep for the train:


Once I cut the pattern pieces, I pinned them like they were to be sewn and draped it on my dress form. I was immediately in love and felt a rush of excitement!

Gasp!
The fittings with Marla continued, each time getting closer and closer to the Big Day and the Big Reveal (I was hiding all of this the entire time from my future husband’s curious eyes!)!

Fast forward, it was only a few days until the wedding day! Luckily, my crafty sister Donna was here several days leading up to the wedding and helped me to do some final fitting and offered to help make my veil. She was a wonderful help in making it all happen, even though she didn’t know how to use my sewing machine (at least not well), she could cut out the net of the veil and hand sew. Thanks to YouTube, we found some tutorials on making a veil that were fast and easy. She watched, cut, hand sewed, and I machine sewed the fine soutache trim around the edge of the veil. Easy peasy!
My other sister Lisa arrived a couple of days before the wedding and helped me decide on the drape of the bustle along with my cousin Heather. I couldn’t have done it without them!


The wedding day came up so fast! I was ready though, ready to wear the gown that took me months to plan and create, all with great joy, pride and love for my future husband.

Here comes the bride!


Happily ever after!

aaaand, scene….

Leave a comment