
My birthday falls on December 28th, three days after Christmas and three days before New Years. Every year since I can remember, my birthday has either been extra fun and special or exceedingly forgettable and uneventful. I have learned to accept combination Christmas/Birthday/New Years gifts and wishes, wrapped in cheerful paper, re-gifted items unwanted from Christmas, a marked-down deal, or nothing at all. Time and maturity has made me accept this and embrace the holiday season with gratitude and grace.
I have sewed a record number of garments and other items in 2024, something in the ballpark of 40-50 things (some started and unfinished), not to mention alterations and repairs, plus sewing samples and mock-ups for clients, teaching sewing students, and sewing samples towards earning a professional certificate. That’s a whole lot of sewing projects! Most were successful, some were dismal, all I can chalk up to experience and development.

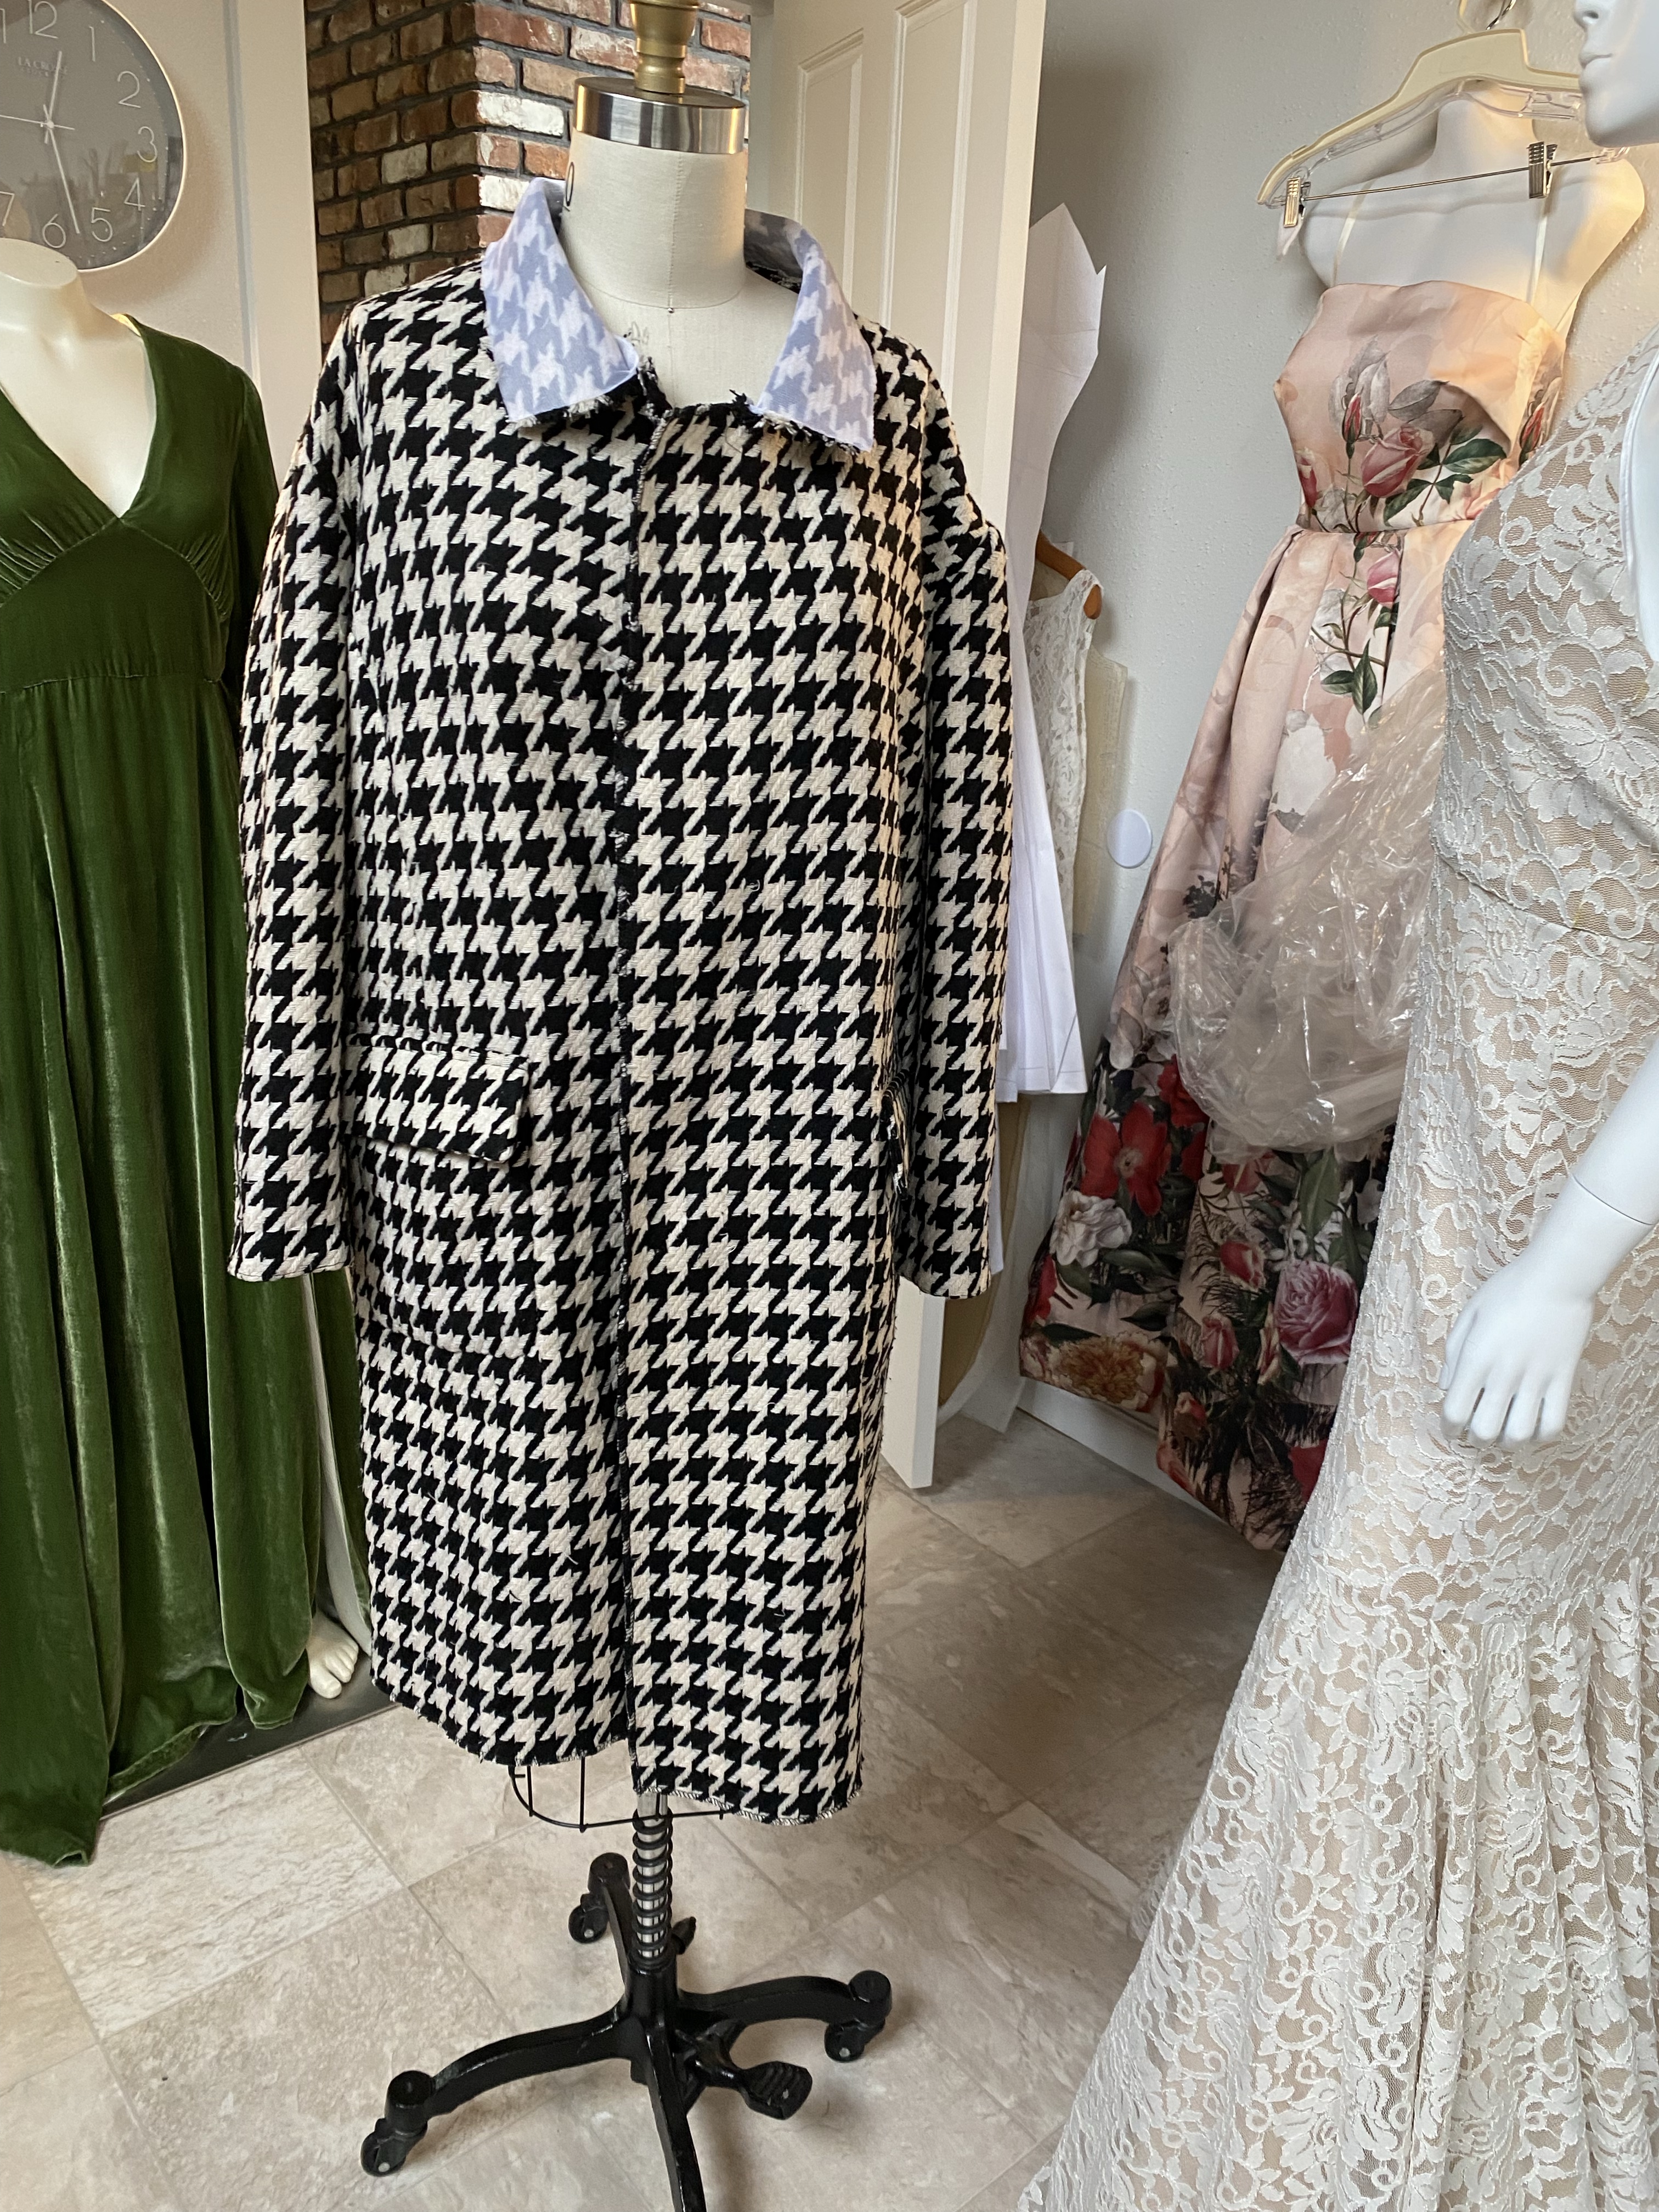
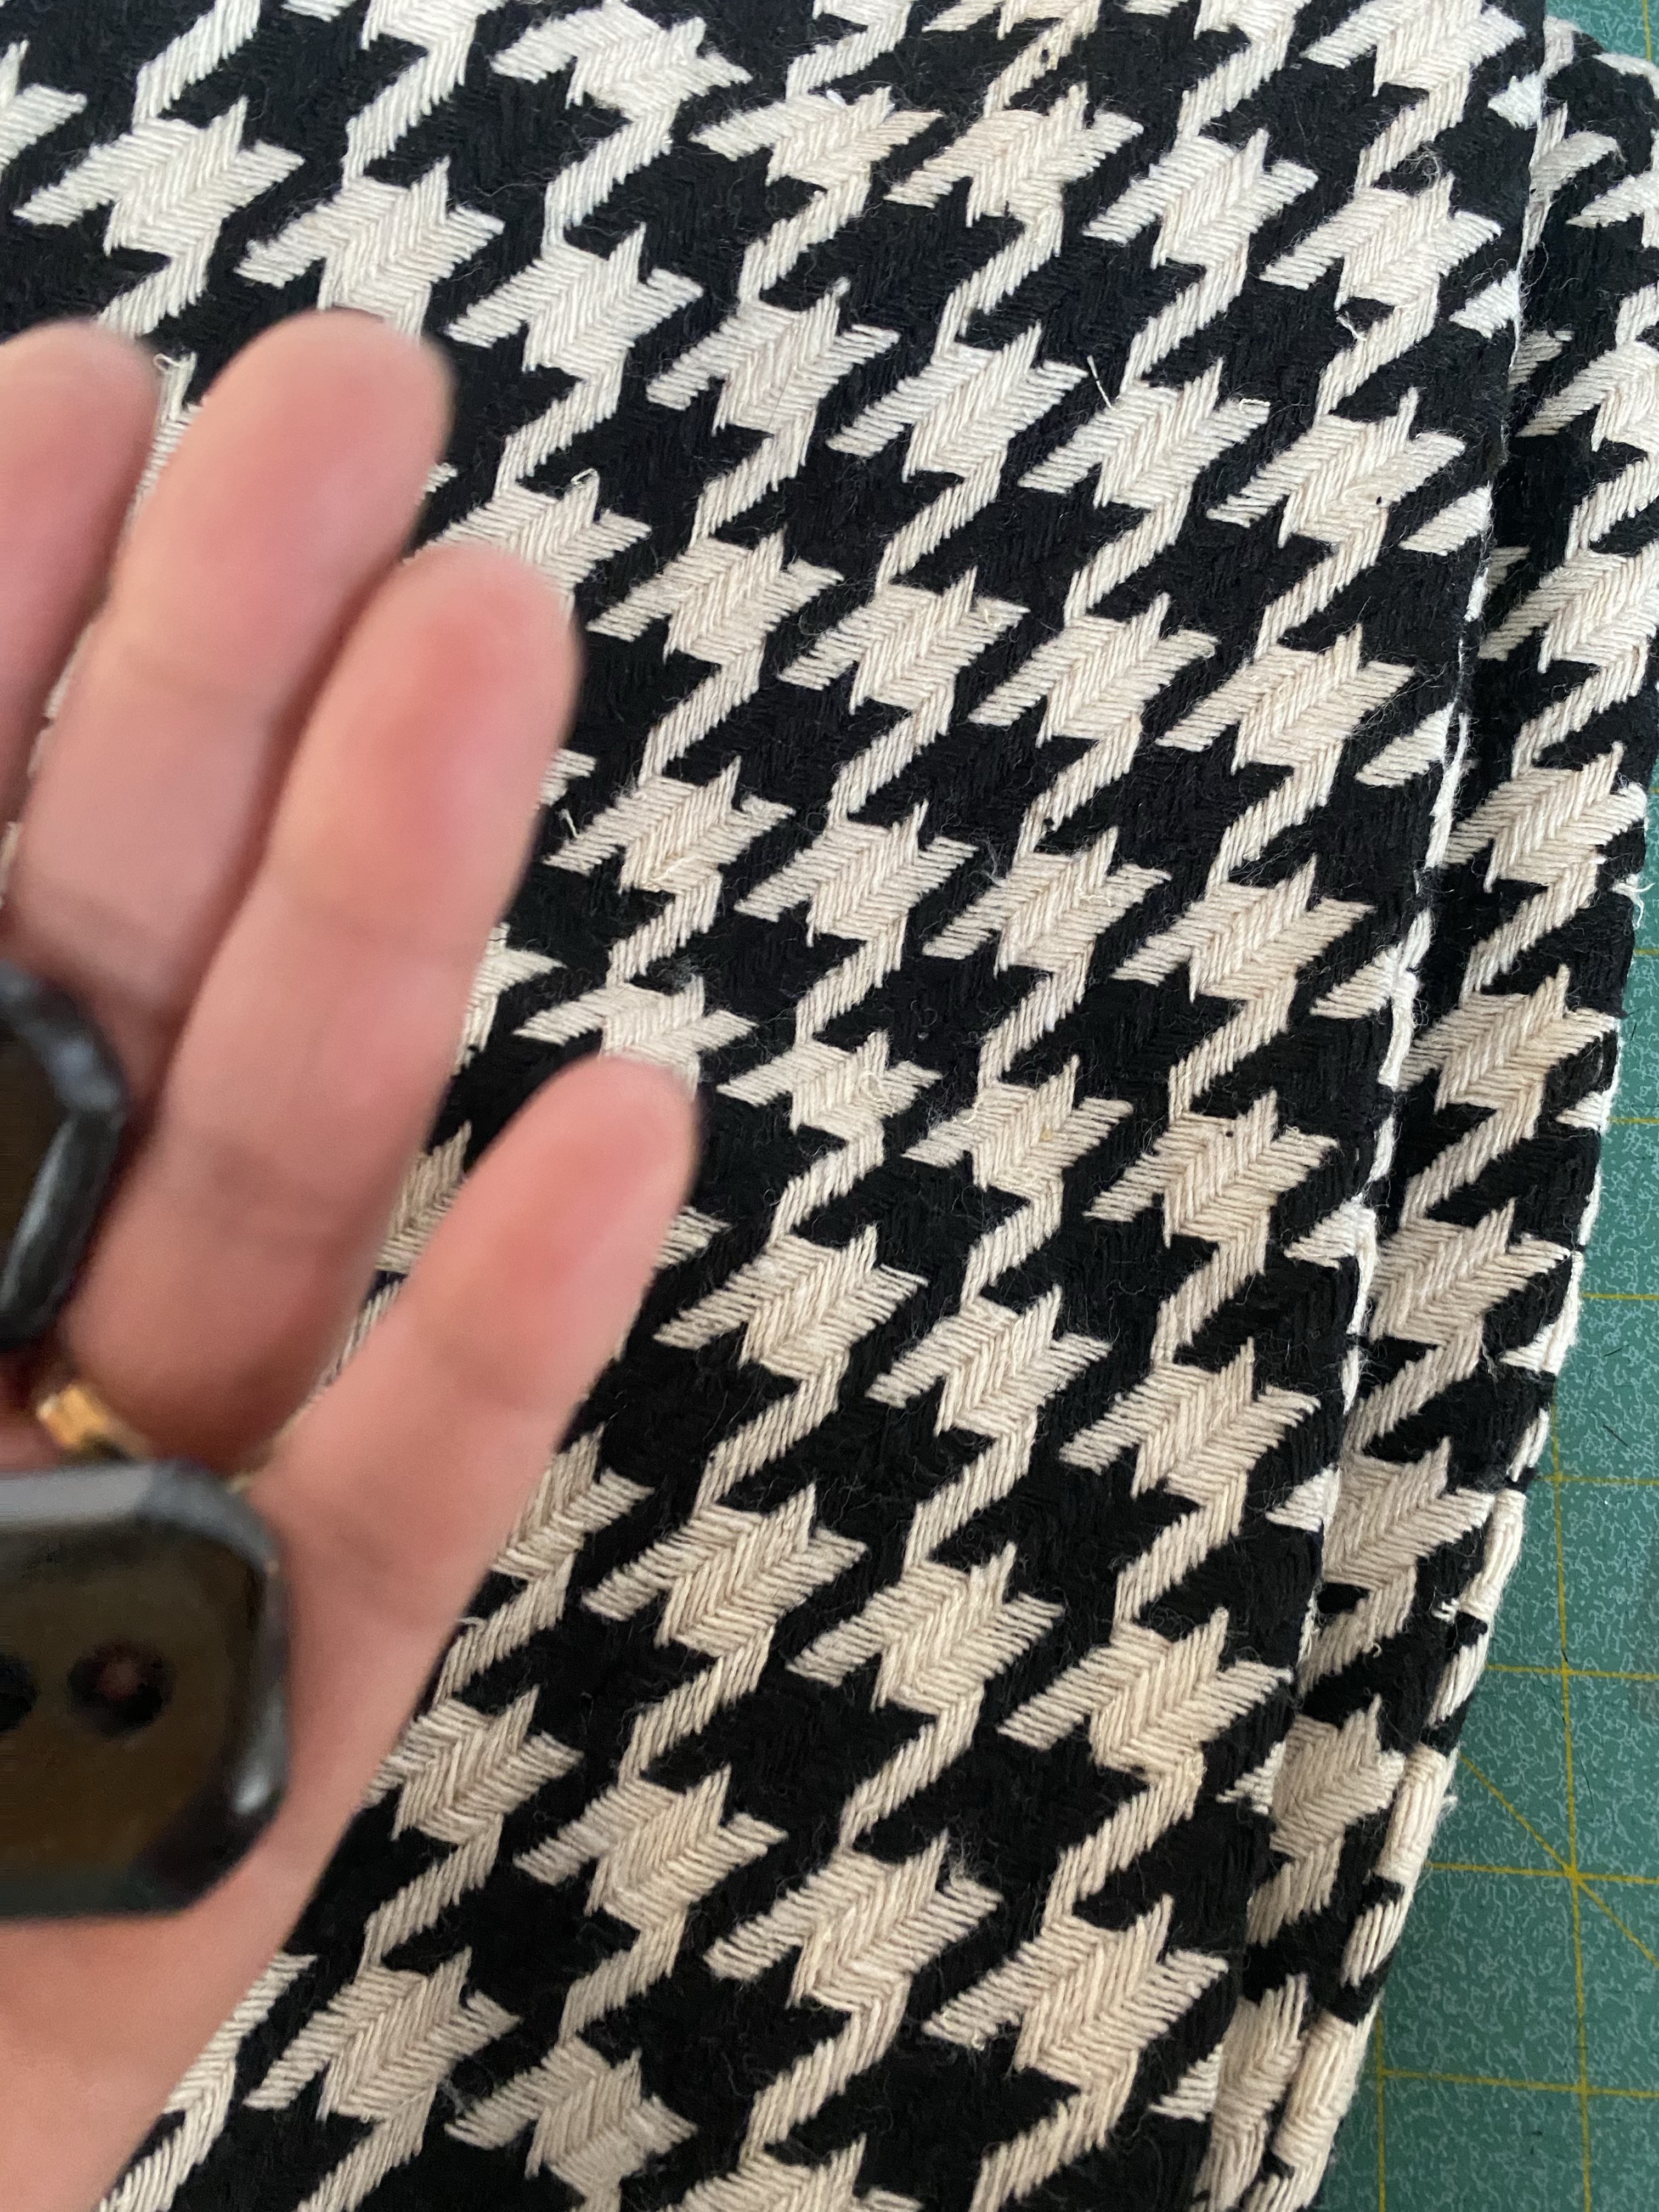
This year, I decided to make something special for myself for my birthday, using fabrics that I had been saving in my stash for just that, a special occasion. I wanted something that I would wear often and not just for one occasion, something practical yet fashionable, wearable yet unique, versatile yet not for everyday. So, I pulled out the 3 1/2 yards of a wonderful wool houndstooth I purchased several years back when I had a “real” job and disposable income, and dug up a fabulous red silk blend fabric I also had been stashing away for just the right project.
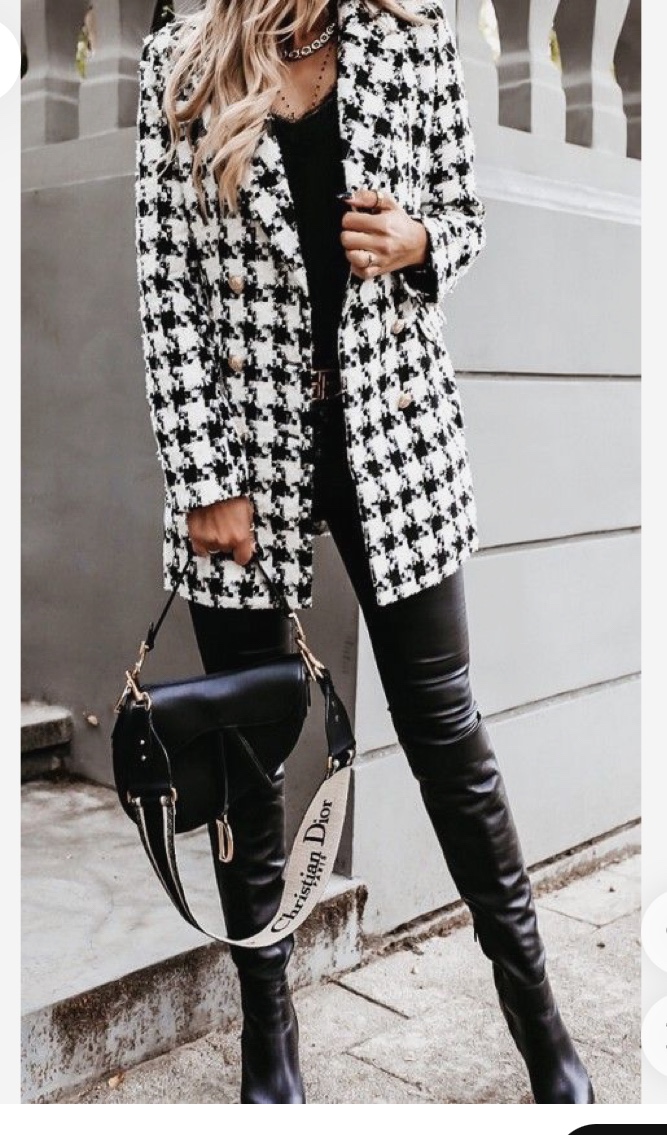
I got to work doing my research (aka Pinterest) on what type of garment I wanted to make. I had earmarked the houndstooth wool for a coat, and have many coat sewing patterns also in my collection, so a lovely warm and stylish coat was the main focus. I then was watching a sewing-related YouTube video (as I do daily as I am sewing) that was all about sewing the trends. The YouTube channel, Crumpets, Tea & Sewing hosted by Tea Ray-Grover, has many wonderful tips, suggestions and reviews about sewing, patterns, fabrics and ideas for the home sewist, and was also hosting a sewing challenge collaboration over on Instagram with other YouTubers aptly tagged #sewthetrends, so I figured why not challenge myself to sew up a current trend and enter it into the challenge, just for extra funsies!
I settled on this sewing pattern, Simplicity 9854. Its a relaxed fit, fully lined coat with a notched lapel collar and patch pockets with a flap:

This coat is not for everyone as it is oversized and boxy, and could overwhelm a petite figure or add bulk to a larger frame. I am pretty tall at 5’9″, so I feel I can pull off such a look, so I just went for it and cut out the pattern. Life is short, so why not!
Now, making a coat is not for the faint of heart, for any skill level of sewist. It is not all that difficult to construct (for those with a sewing experience) as most of the pattern pieces are large, however the precision of certain parts are where the sewing can get you. On top of all the bulk and weight of the pattern pieces and keeping track of what side of the fabric is which, as well as those other fiddly details, is what makes it a challenging undertaking. I feel those fiddly bits are what making a coat that much more rewarding when it is done.
So with about a week to make my coat before my birthday celebration of dinner out with close friends and family, I got to cutting out and making it.
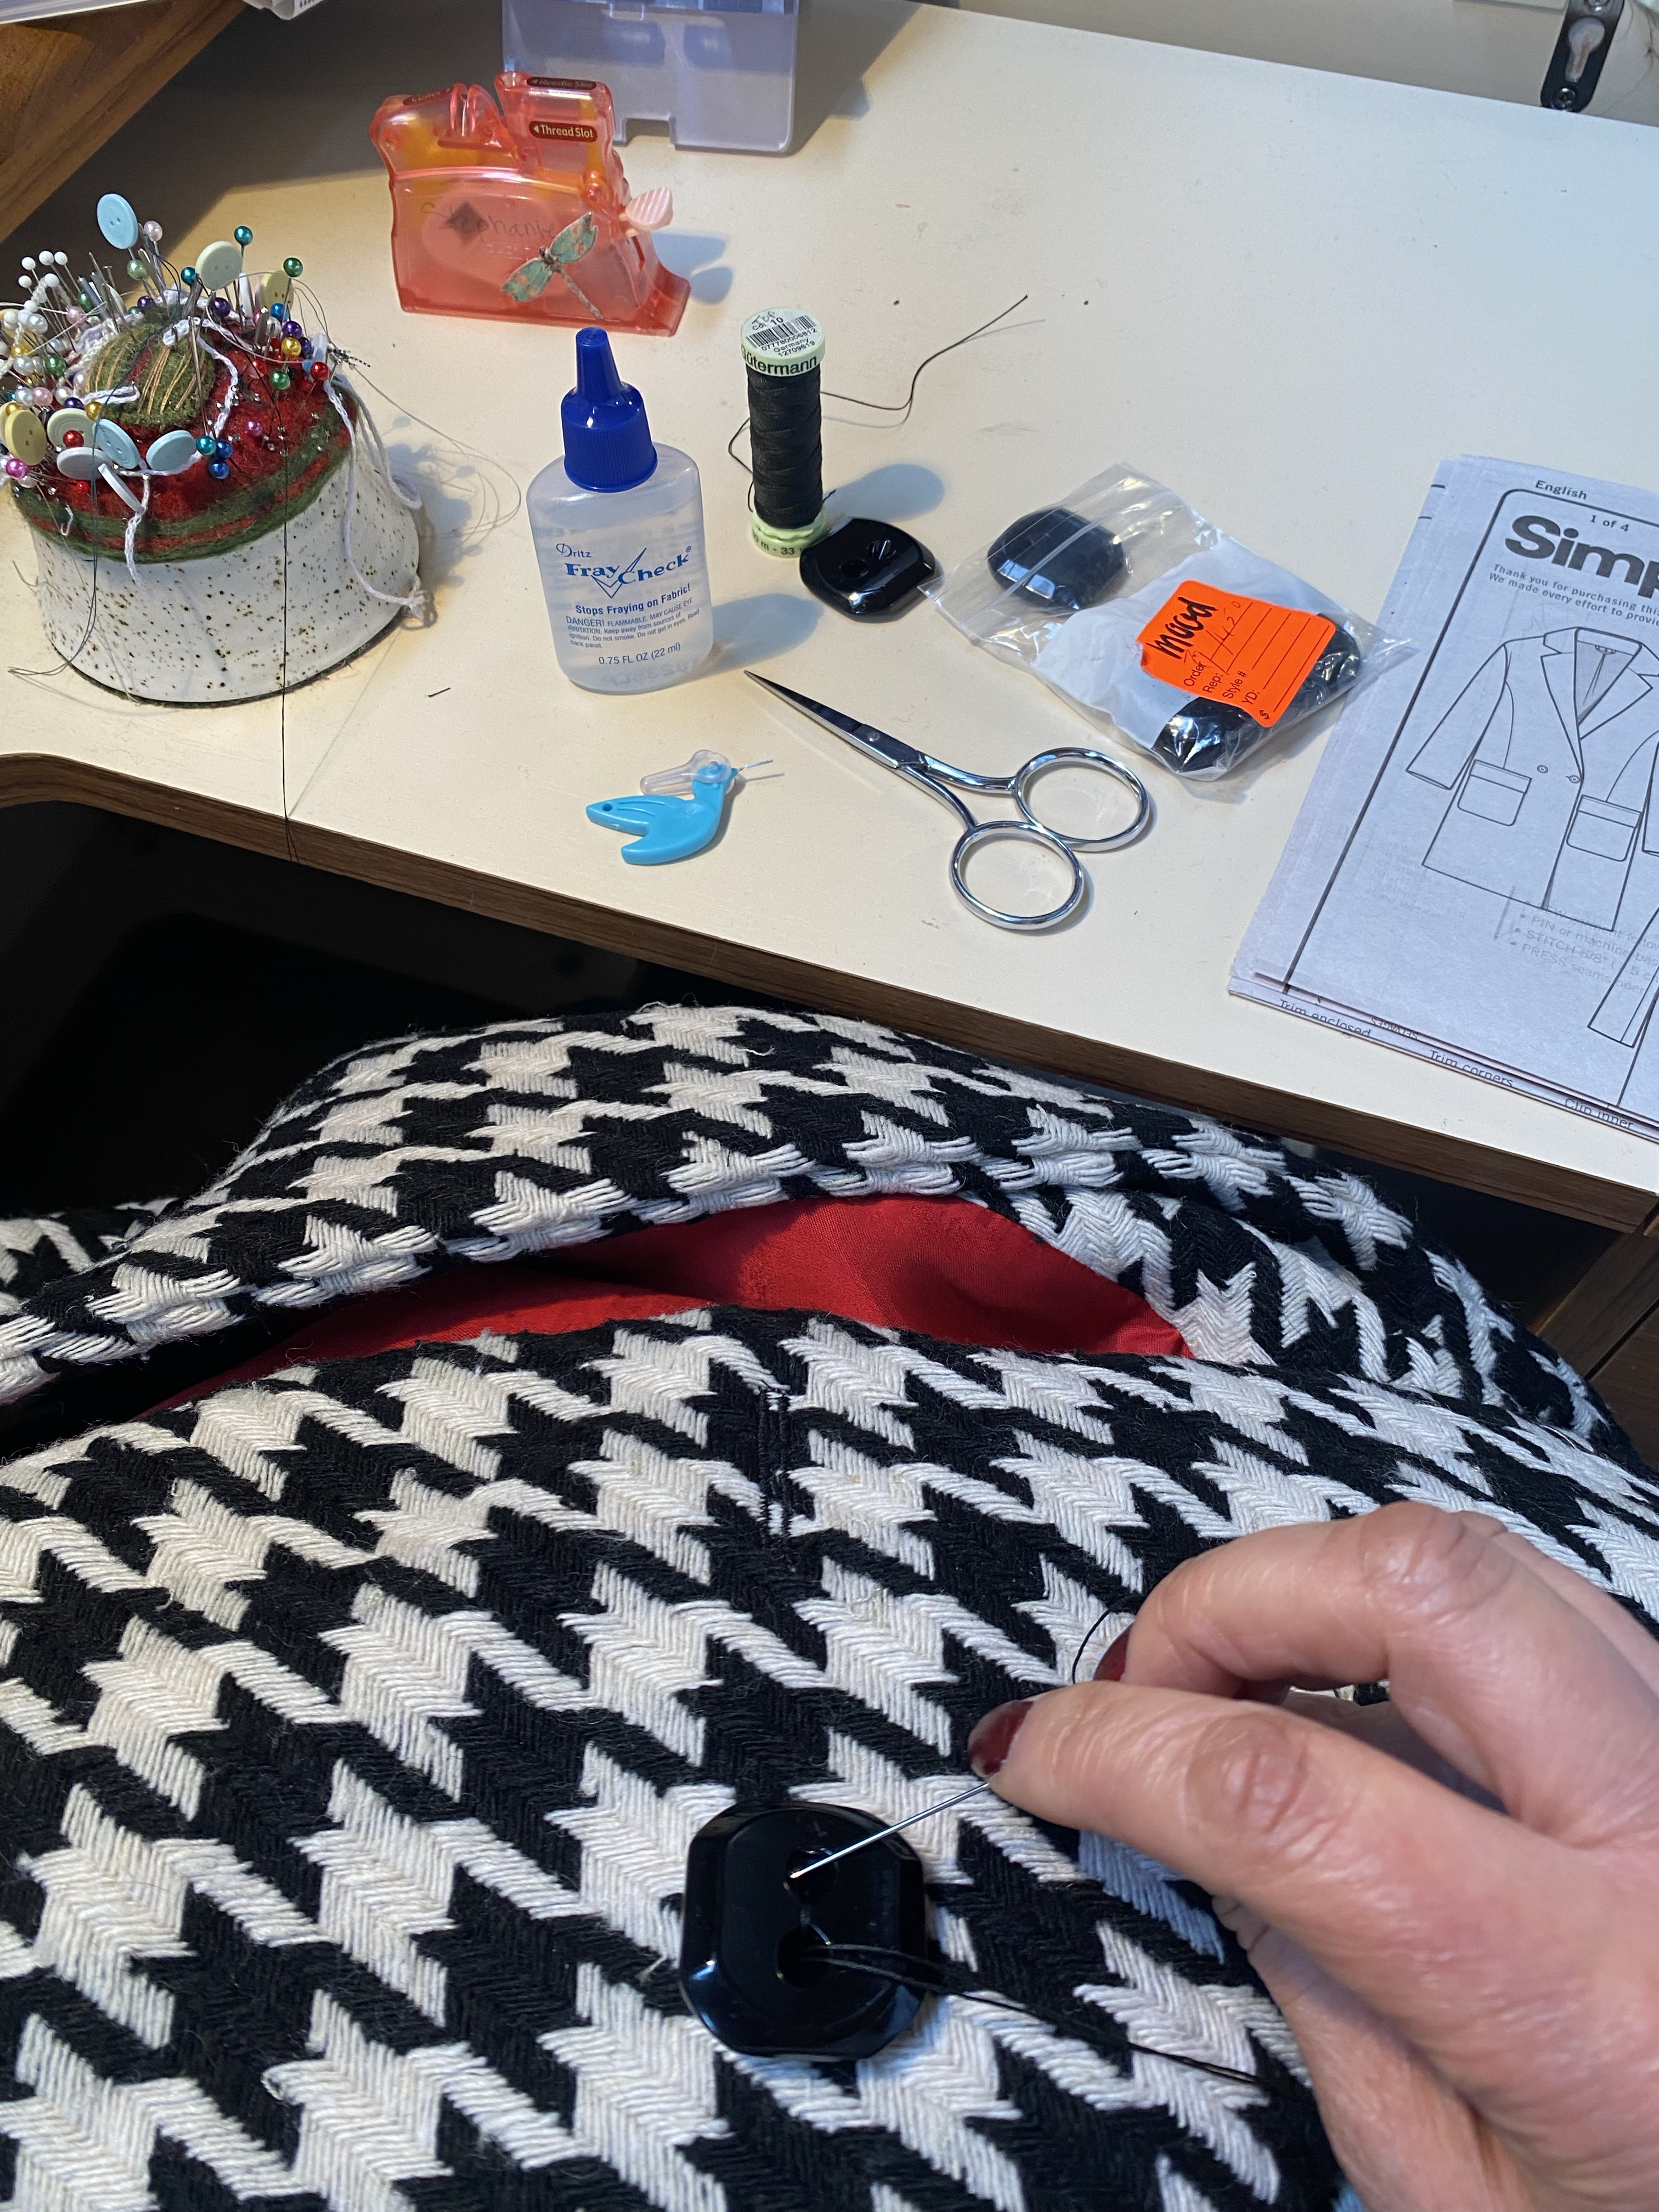
One of the first steps to constructing the coat is making the pockets and applying them to the front panels of the coat. This pattern features patch pockets with a flap for the top opening of the pocket. I decided to go the extra step and line the pockets as the pattern did not include this. I feel that the pockets would be more comfortable and less scratchy when using them and also have a bit more stability with wear and tear on the loosely-woven fabric if they had a lining. So, I cut out matching pattern to the pocket in a light-weight satin, pressed in the edges, and hand sewed the lining in the wrong side of the pockets.

After the pockets are made, the next step in the pattern instructions have you machine sew the pocket to the outside of the front of the coat using an edge stitch. I, however, decided to hand sew this part as well for best results. I know my machine, and with the thickness and bulk of this wool material, I knew machine stitching probably would come out really wonky, so the precision of hand sewing was the best option.


It was then time to attach attach the lining to the facing of the coat. I chose this beautiful, bold red silk blend satin fabric for the lining which I think is my favorite part!

So, after the under collar is attached to the main body of the coat, the sleeves are sewn together and then sewn to the armholes of the coat, then the upper collar is attached to the facing and the coat is sewn together at the outer edges of the coat. This step takes a while merely due to all the weight and bulk of the two layers of the coat going through the sewing machine and stitching should be slow and careful, not rushed. Inner seams of the coat need to still be accessed in order to anchor the two layers together at key points from the inside, as well as finish the hems of the sleeves and bottom of the coat with a neat finish. Ugh, a process, but we are SO close!
So once the coat is fully sewn together, turned right side out, under stitched where possible, and given a really good press, you are ready to do the finishing touches.
I happened to come across these cool square shaped buttons I had in my stash from Mood Fabrics (when I actually bought them is a mystery, but it must have been one of my trips either in Los Angeles or New York). Anyway, they were the perfect size and shape for the front of the coat.
And with that, my new coat was complete! Easy Peasy! I love it, it is warm, stylish and fits in so well with my mostly black wardrobe.
I’ll start with some inspiration photos of an oversized hounds tooth coat outfits I pinned on Pinterest:


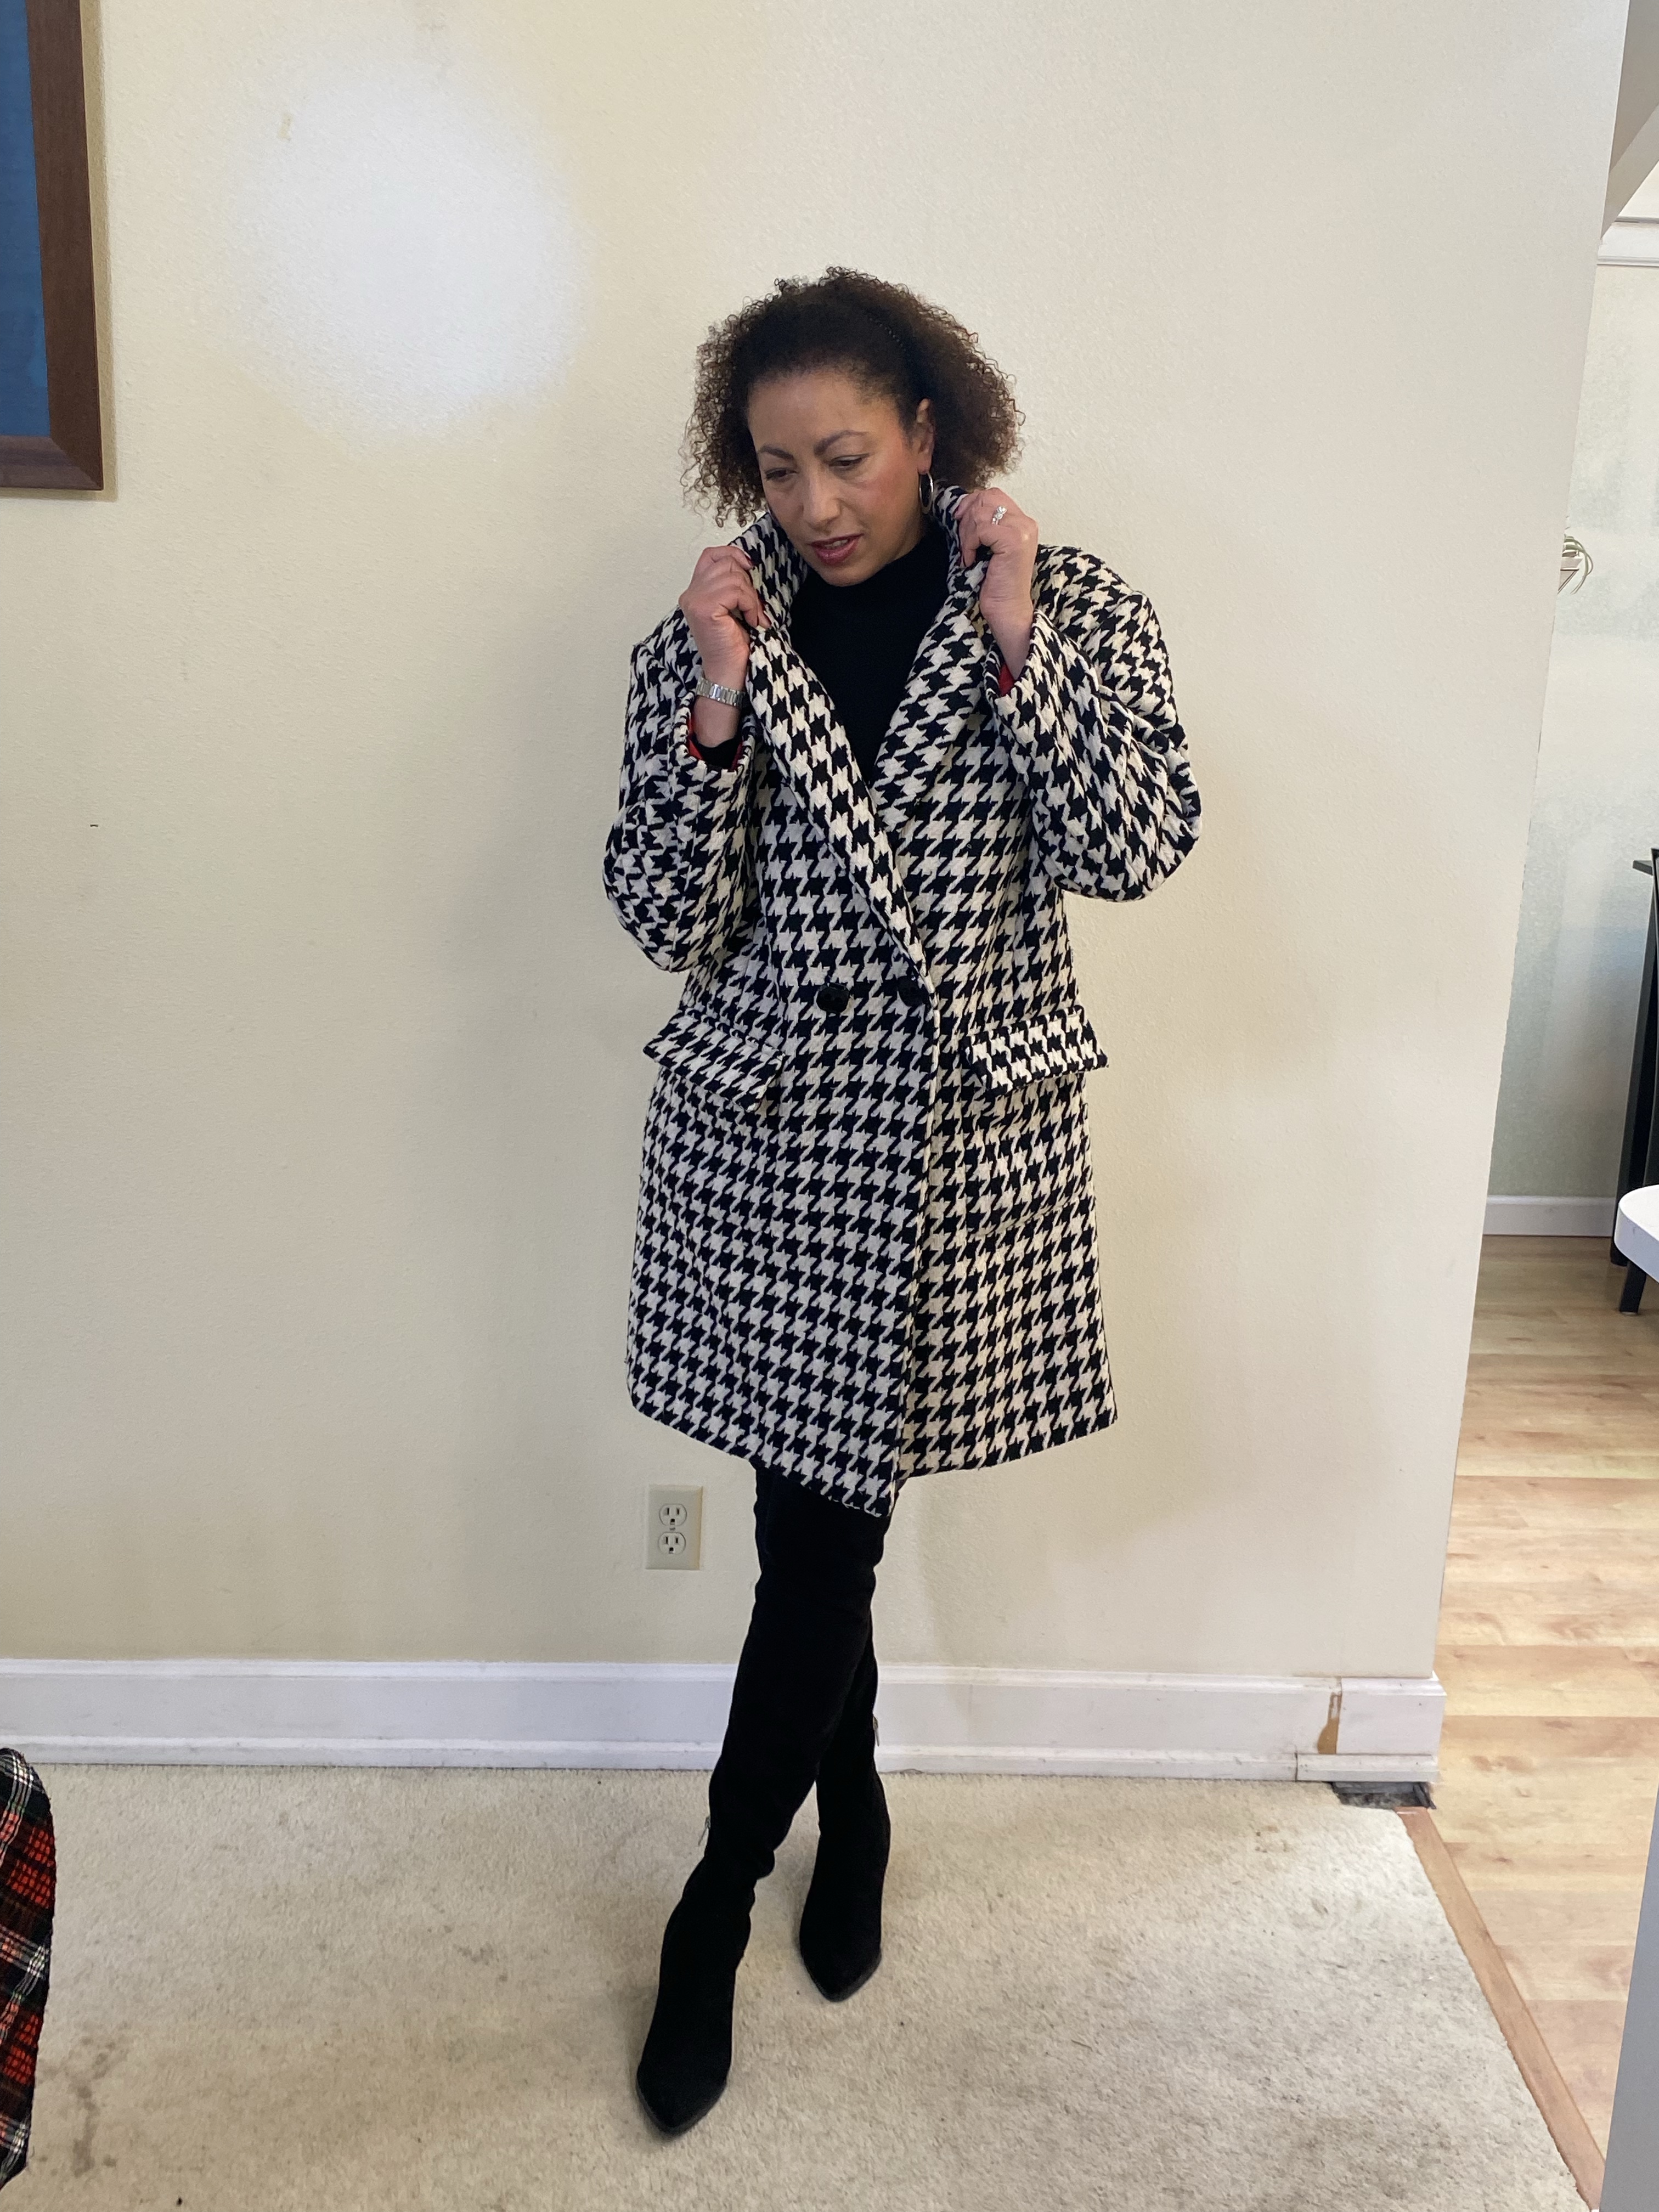
Sorry about the terrible background in these photos. We are constantly in “renovation” mode and have a ways to go, so hopefully you can “unsee” those ugly parts and look at my pretty new Birthday coat!
Thanks for stopping by!

Leave a comment