
I gasped out loud when I was contacted through my Yelp profile: a mother of a bride was asking if I could create a kimono-style, robe like top for her daughter who was getting married. She sent over some inspiration photos and asked how much I would charge to make a similar garment:
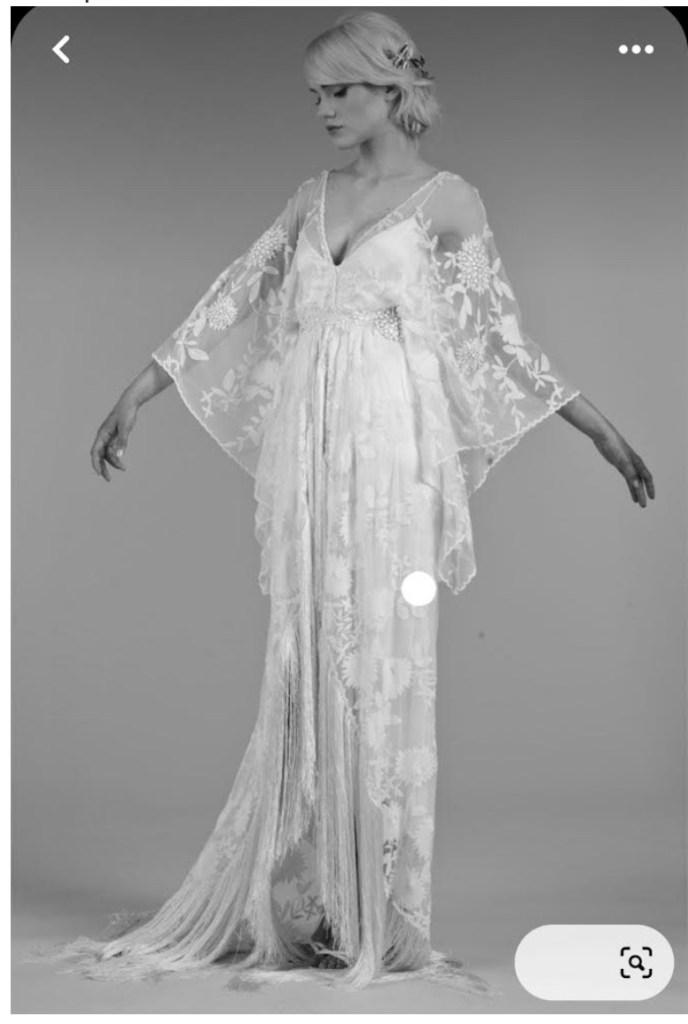

Wow, I thought, I love that idea of a fancy kimono style top to wear for the wedding! I love kimonos and robes and have made many of them over the years, but never a bridal one such as this.
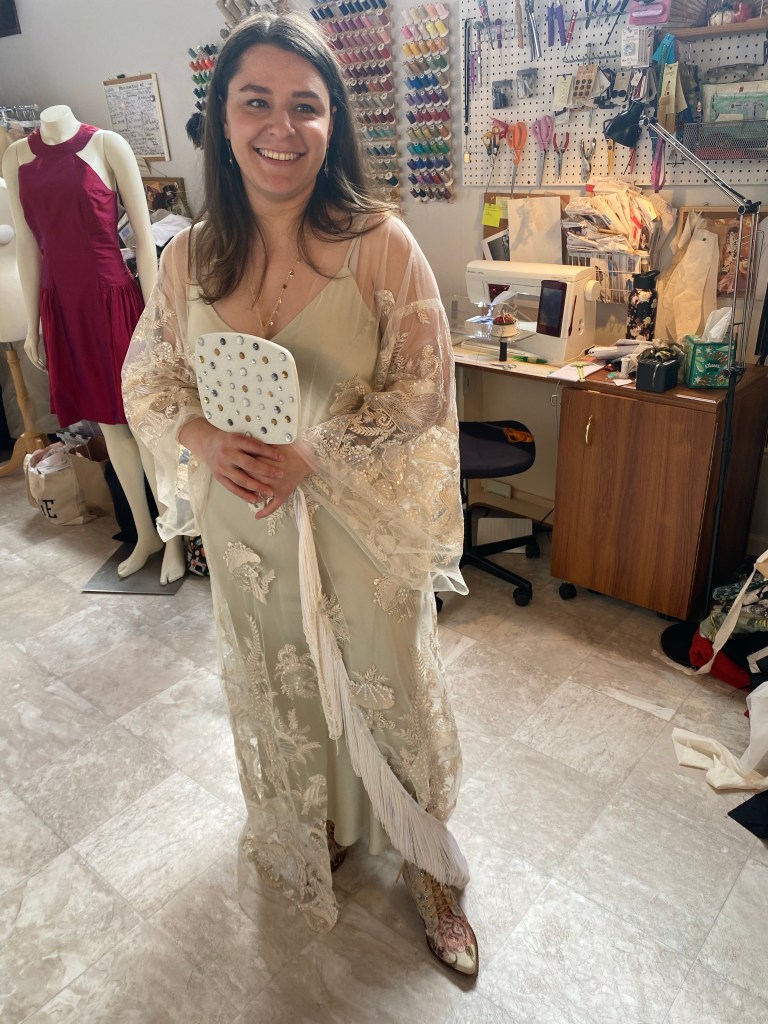
The client bride Brittney already had purchased the fabric she wanted the robe made out of: a mesh tulle type of fabric with mushrooms of various sizes embroidered to the fabric and embellished with little sparkly sequins. So pretty!

She also wanted fringe trim added all around the edges of the kimono for more drama and movement:
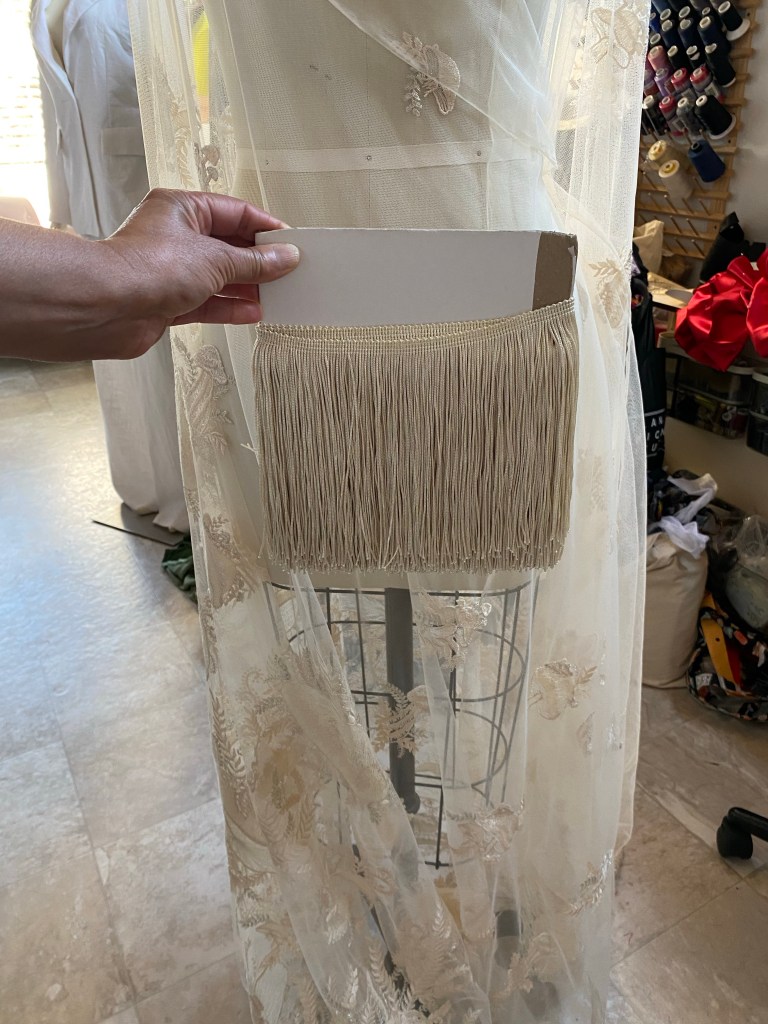
Brittney is quite the creative type of lady as you might have already guessed, and was doing as much DIY for her wedding as possible. She made the invitations, the designed the floral arrangements and dyed the table cloths. She also wanted to use the fringe yardage she bought and try to dye it to match the fabric of the kimono. Meanwhile I ordered some swatches of fringe trim from Etsy and found this perfect match, which we ending up going for.
I had a pattern in mind for the kimono, Simplicity 1108, one that I had made before and could change up a bit to suit her needs:
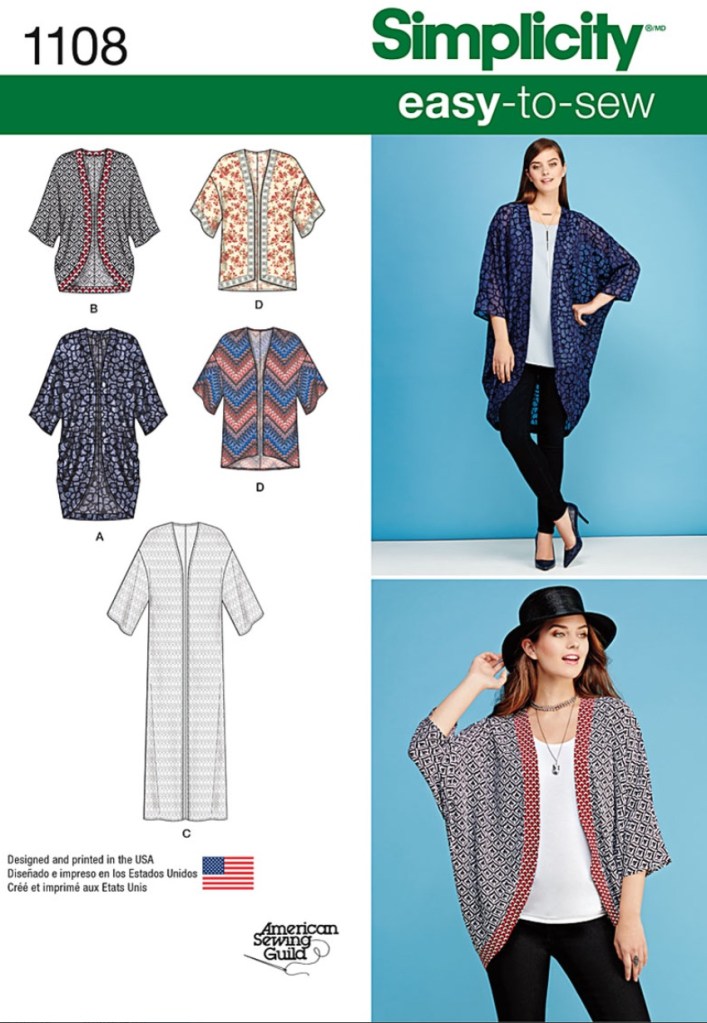
Using view C of the pattern, I cut it a little shorter and made the sleeve more of a triangular shape instead of a rectangle. I didn’t even bother making a mockup of it as it was so loose fitting and easy to change up a bit to fit as needed.
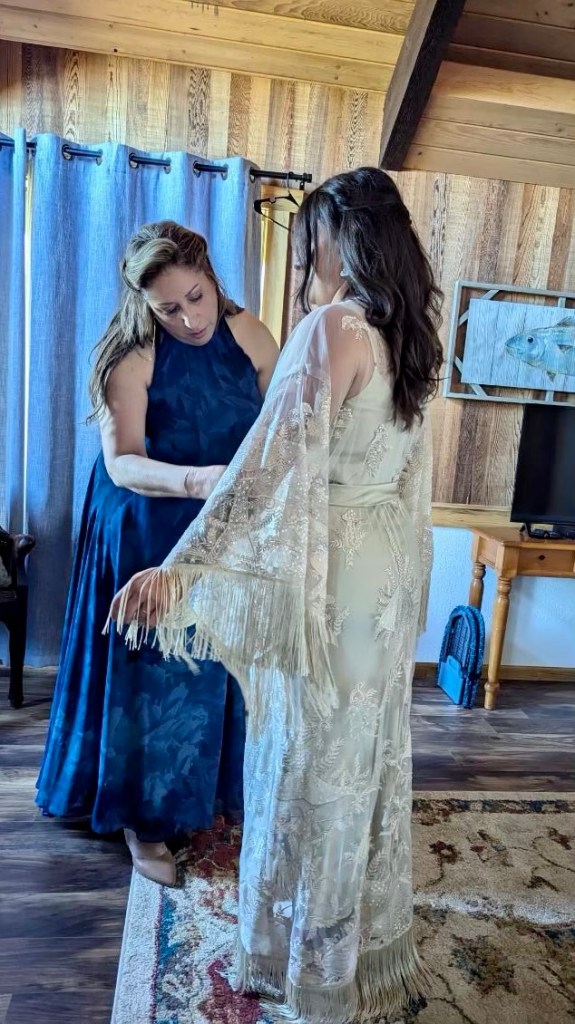
She and her mom came over several times for planning and fittings which was really fun! We had a great time playing with the ideas for the look, and talking about the wedding plans.


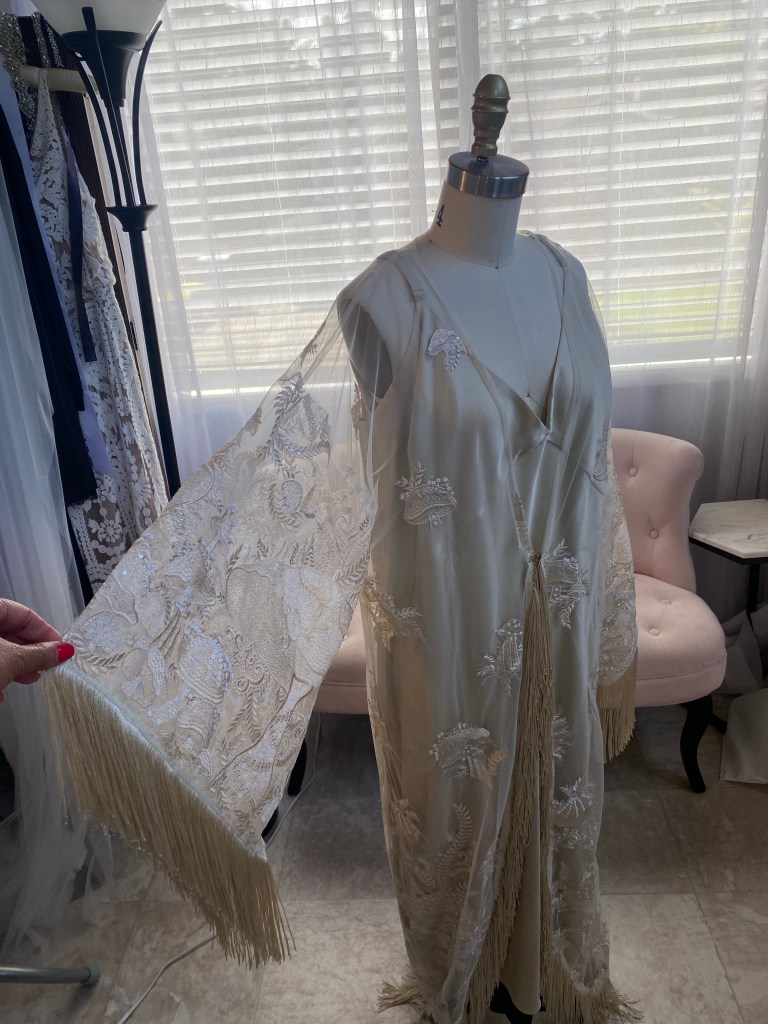
She had a little slip dress to wear under the kimono that she got for a very good price, and decided to purchase another dress to use for additional fabric to make a matching sash to cinch in the waist. So, I made her two belts, one skinny and one wide, so she could choose what felt better for the look.
The kimono was coming along so well and we all were excited for the end result! I loosely sewed (basting stitch) the fringe trim by hand to the outside edges of the kimono. That took forever! Once the length and shape of the edges of the top were confirmed by Brittney, then I cut away the excess fabric and more permanently sewed the fringe on my sewing machine. That also took forever to do as I had to sew very carefully the trim to the edge so as to catch the slippery top edge of the fringe to the narrow hem opening of the sheer mesh kimono fabric, all without catching any fringe edge in the stitches or get caught in my sewing machine. Tedious work to say the least!
Brittney was getting really excited about wearing it for her wedding! I really loved how it was coming along as well, and decided that I wanted to make another version of the same concept for my own collection. I purchased enough yardage of the mushroom fabric and fringe trim, as well as fabric to make the under dress, to later make a version of the outfit for my upcoming fashion show and to display as an example of my work.
Come the big day, Brittney was simply radiant in her bridal ensemble! It was perfect for her style, and a unique garment that could be worn again and again for other occasions. I am so happy they came to me for her special custom look for her wedding! It really brings me joy to make someone’s special occasion all that more beautiful!


Another happy day and successful creation! I love my job….

Leave a comment