Tag: Wedding Guest Dress

  • Draped in a Dream Dress

    Draped in a Dream Dress

    This journey began with a bright eyed beauty, curious to know more about what I might be able to create for her and what the process of creating a custom dress looked like. Laura contacted me, looking for a custom dress to wear to her sister’s wedding event. She wanted a dress with a 1930’s feel, one that had fabric interest with unique design details.

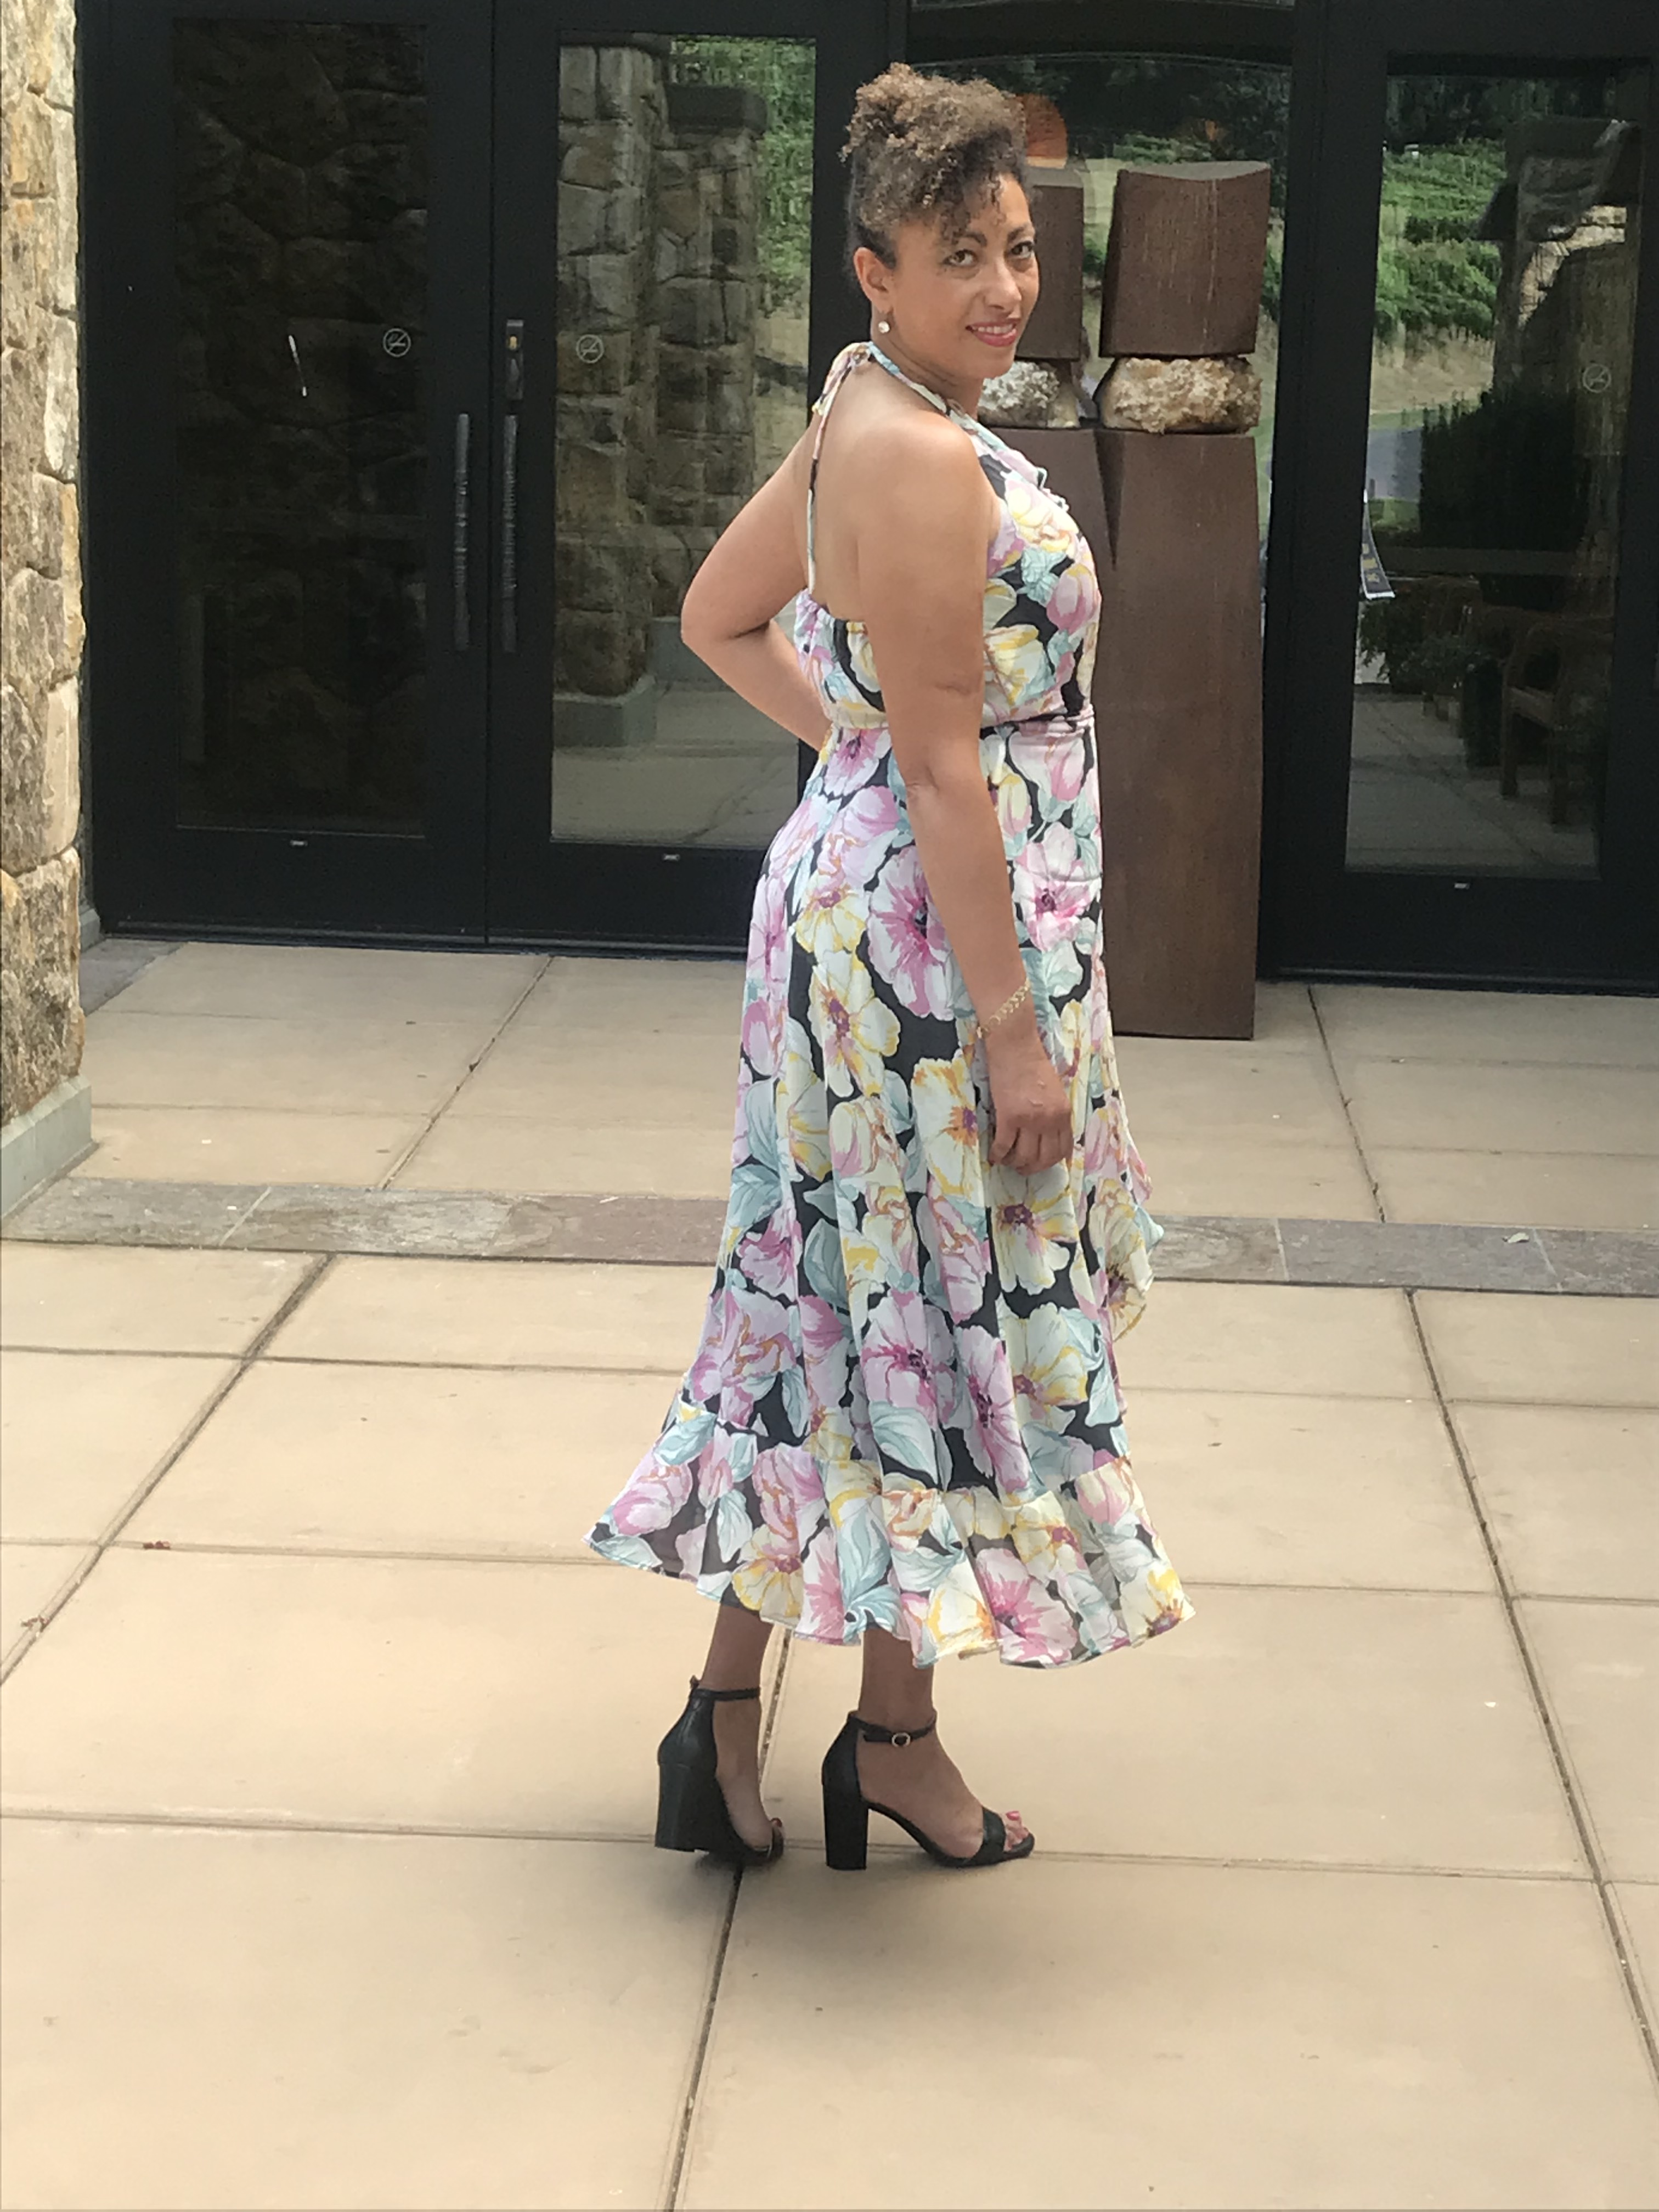
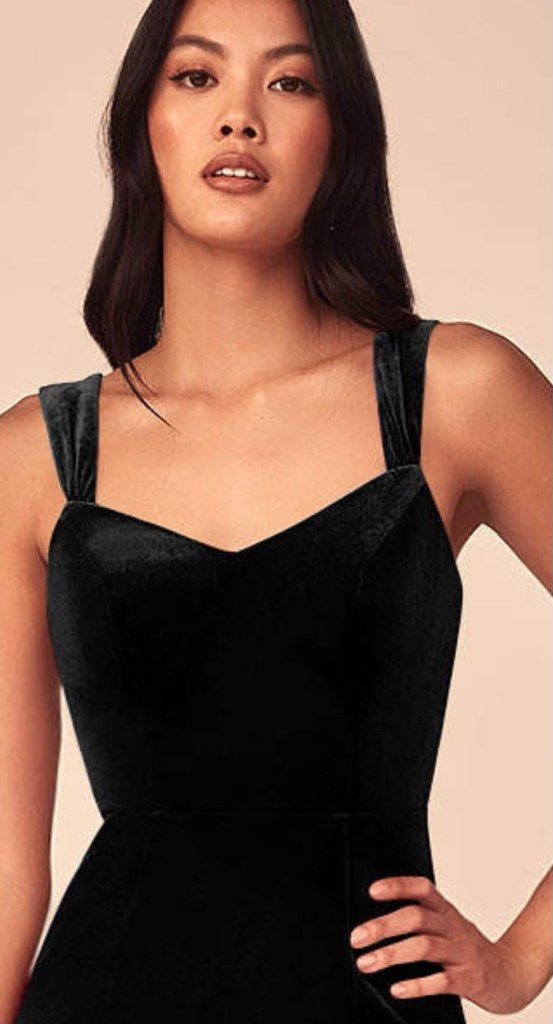
    She had seen a dress in a movie that she loved and wanted to get a similar look. She sent me photos of screen shots from the movie, plus some inspiration shared on Pinterest

    She loved the rich tones of the fabric combination, and the soft ruffled neckline of this dress
    She also loves the straps of this dress

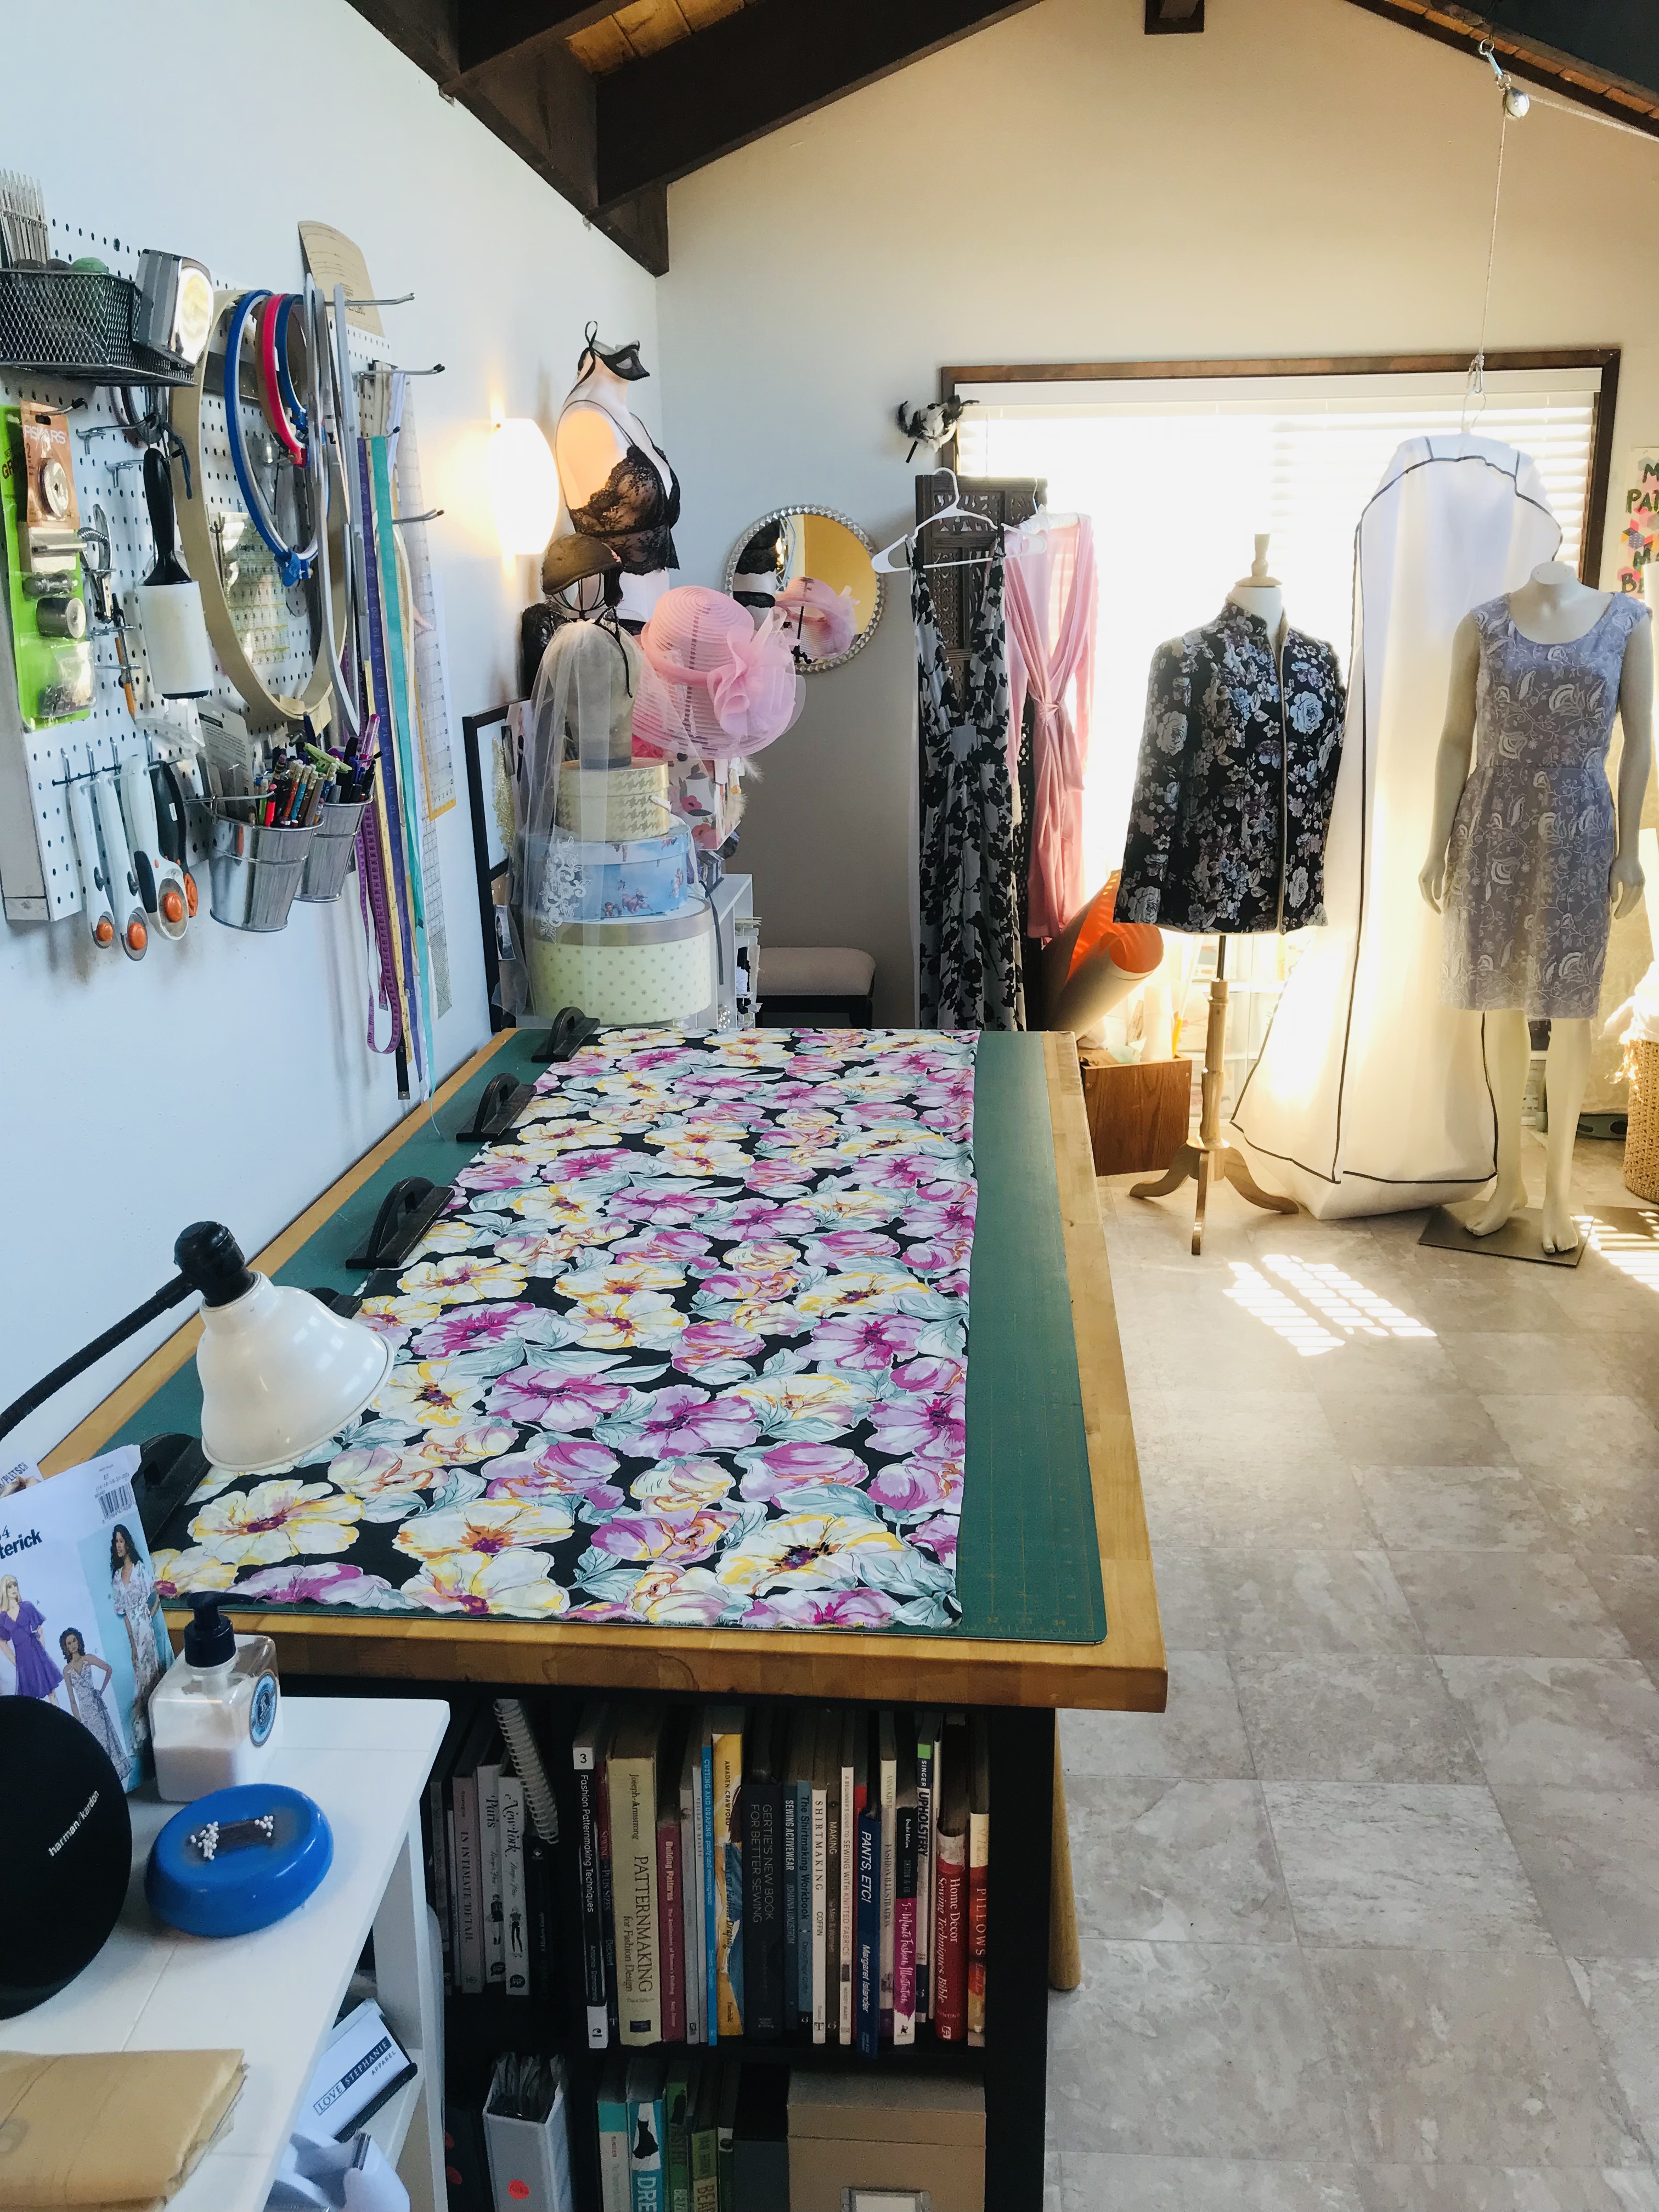
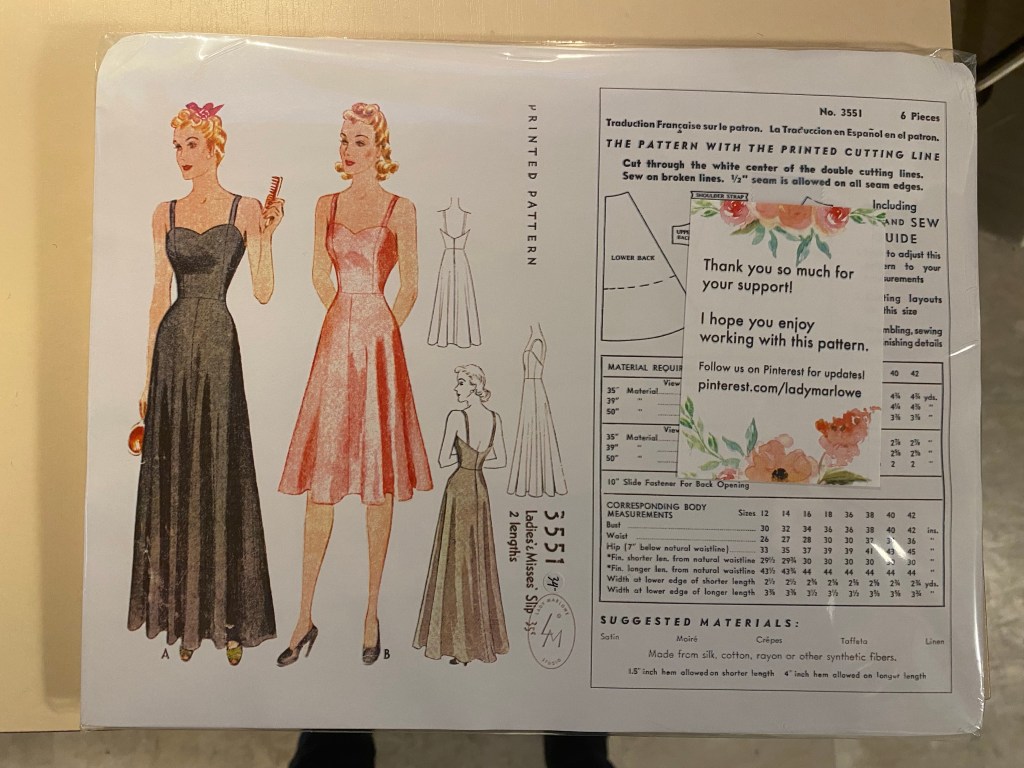
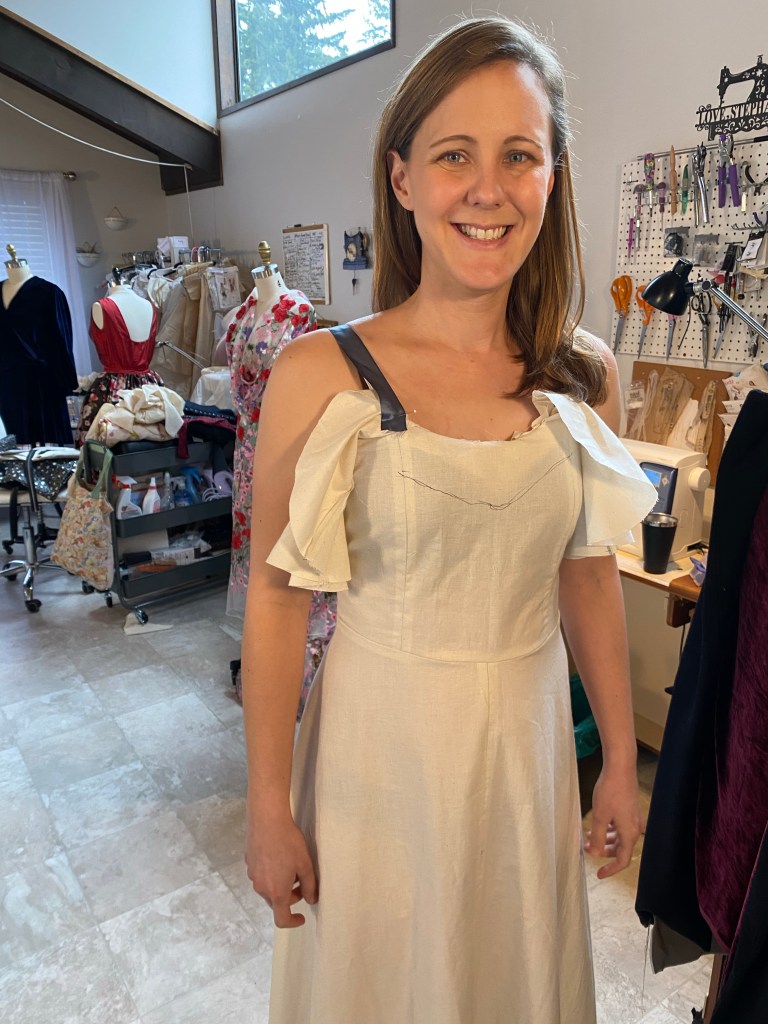
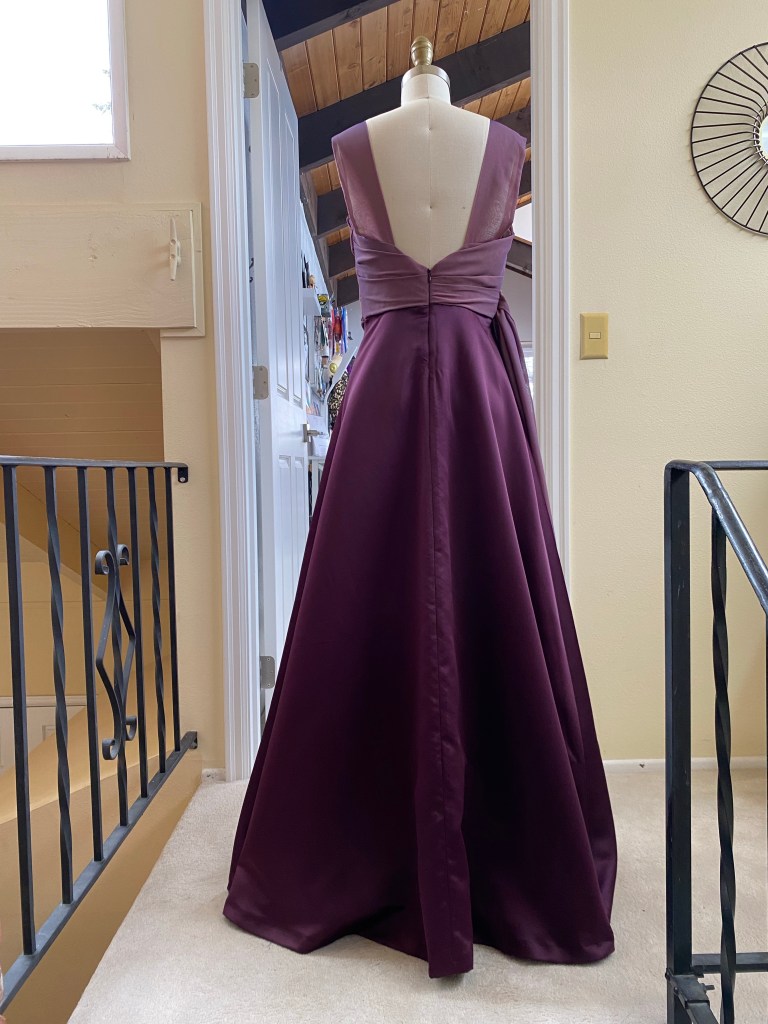
    I got to work and found a pattern that was designed in the 1930’s and had the basic shape of the dress style she liked including the sweetheart neckline, the low back and the long, softly shaped skirt

    I found this pattern and ordered it from Etsy

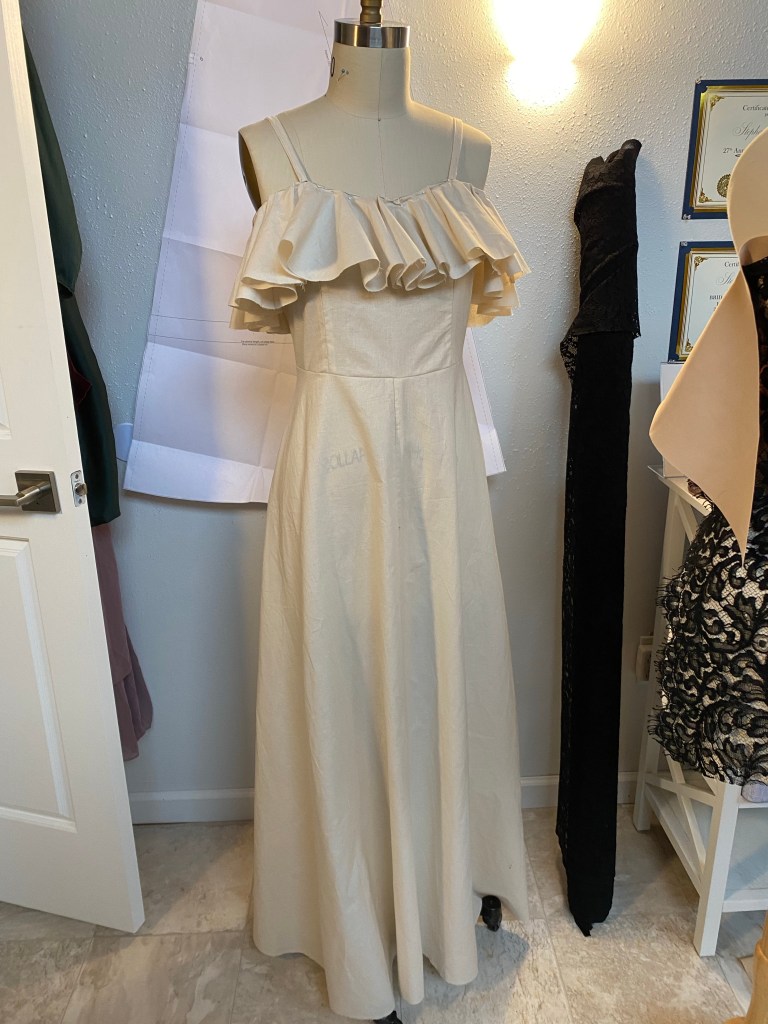
    We hit the fabric store shortly after I received the pattern, and I also made a mock up of the dress for her to try on

    It was my first time making a ruffle like this at the neckline of a dress. Although we like it, we decided it was a bit too much for her.
    The fit of the dress was great, but here we are playing with different strap placement and neckline shape

    Back to the drawing board!

    As the construction of the dress progressed, I kept Laura posted with details of what I was doing and got her input on any options she had.

    She loves the combination of the drapey lavender chiffon with the deep plus satin. I also thought the colors were beautiful together, just the placement was not as compelling as it could be.

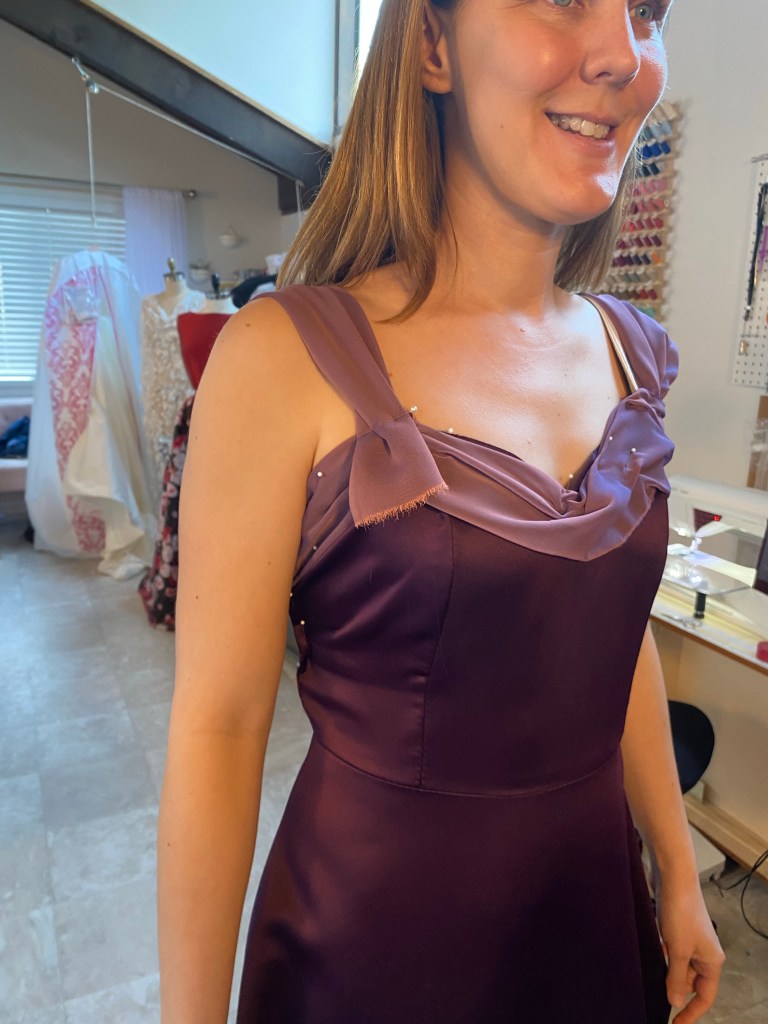
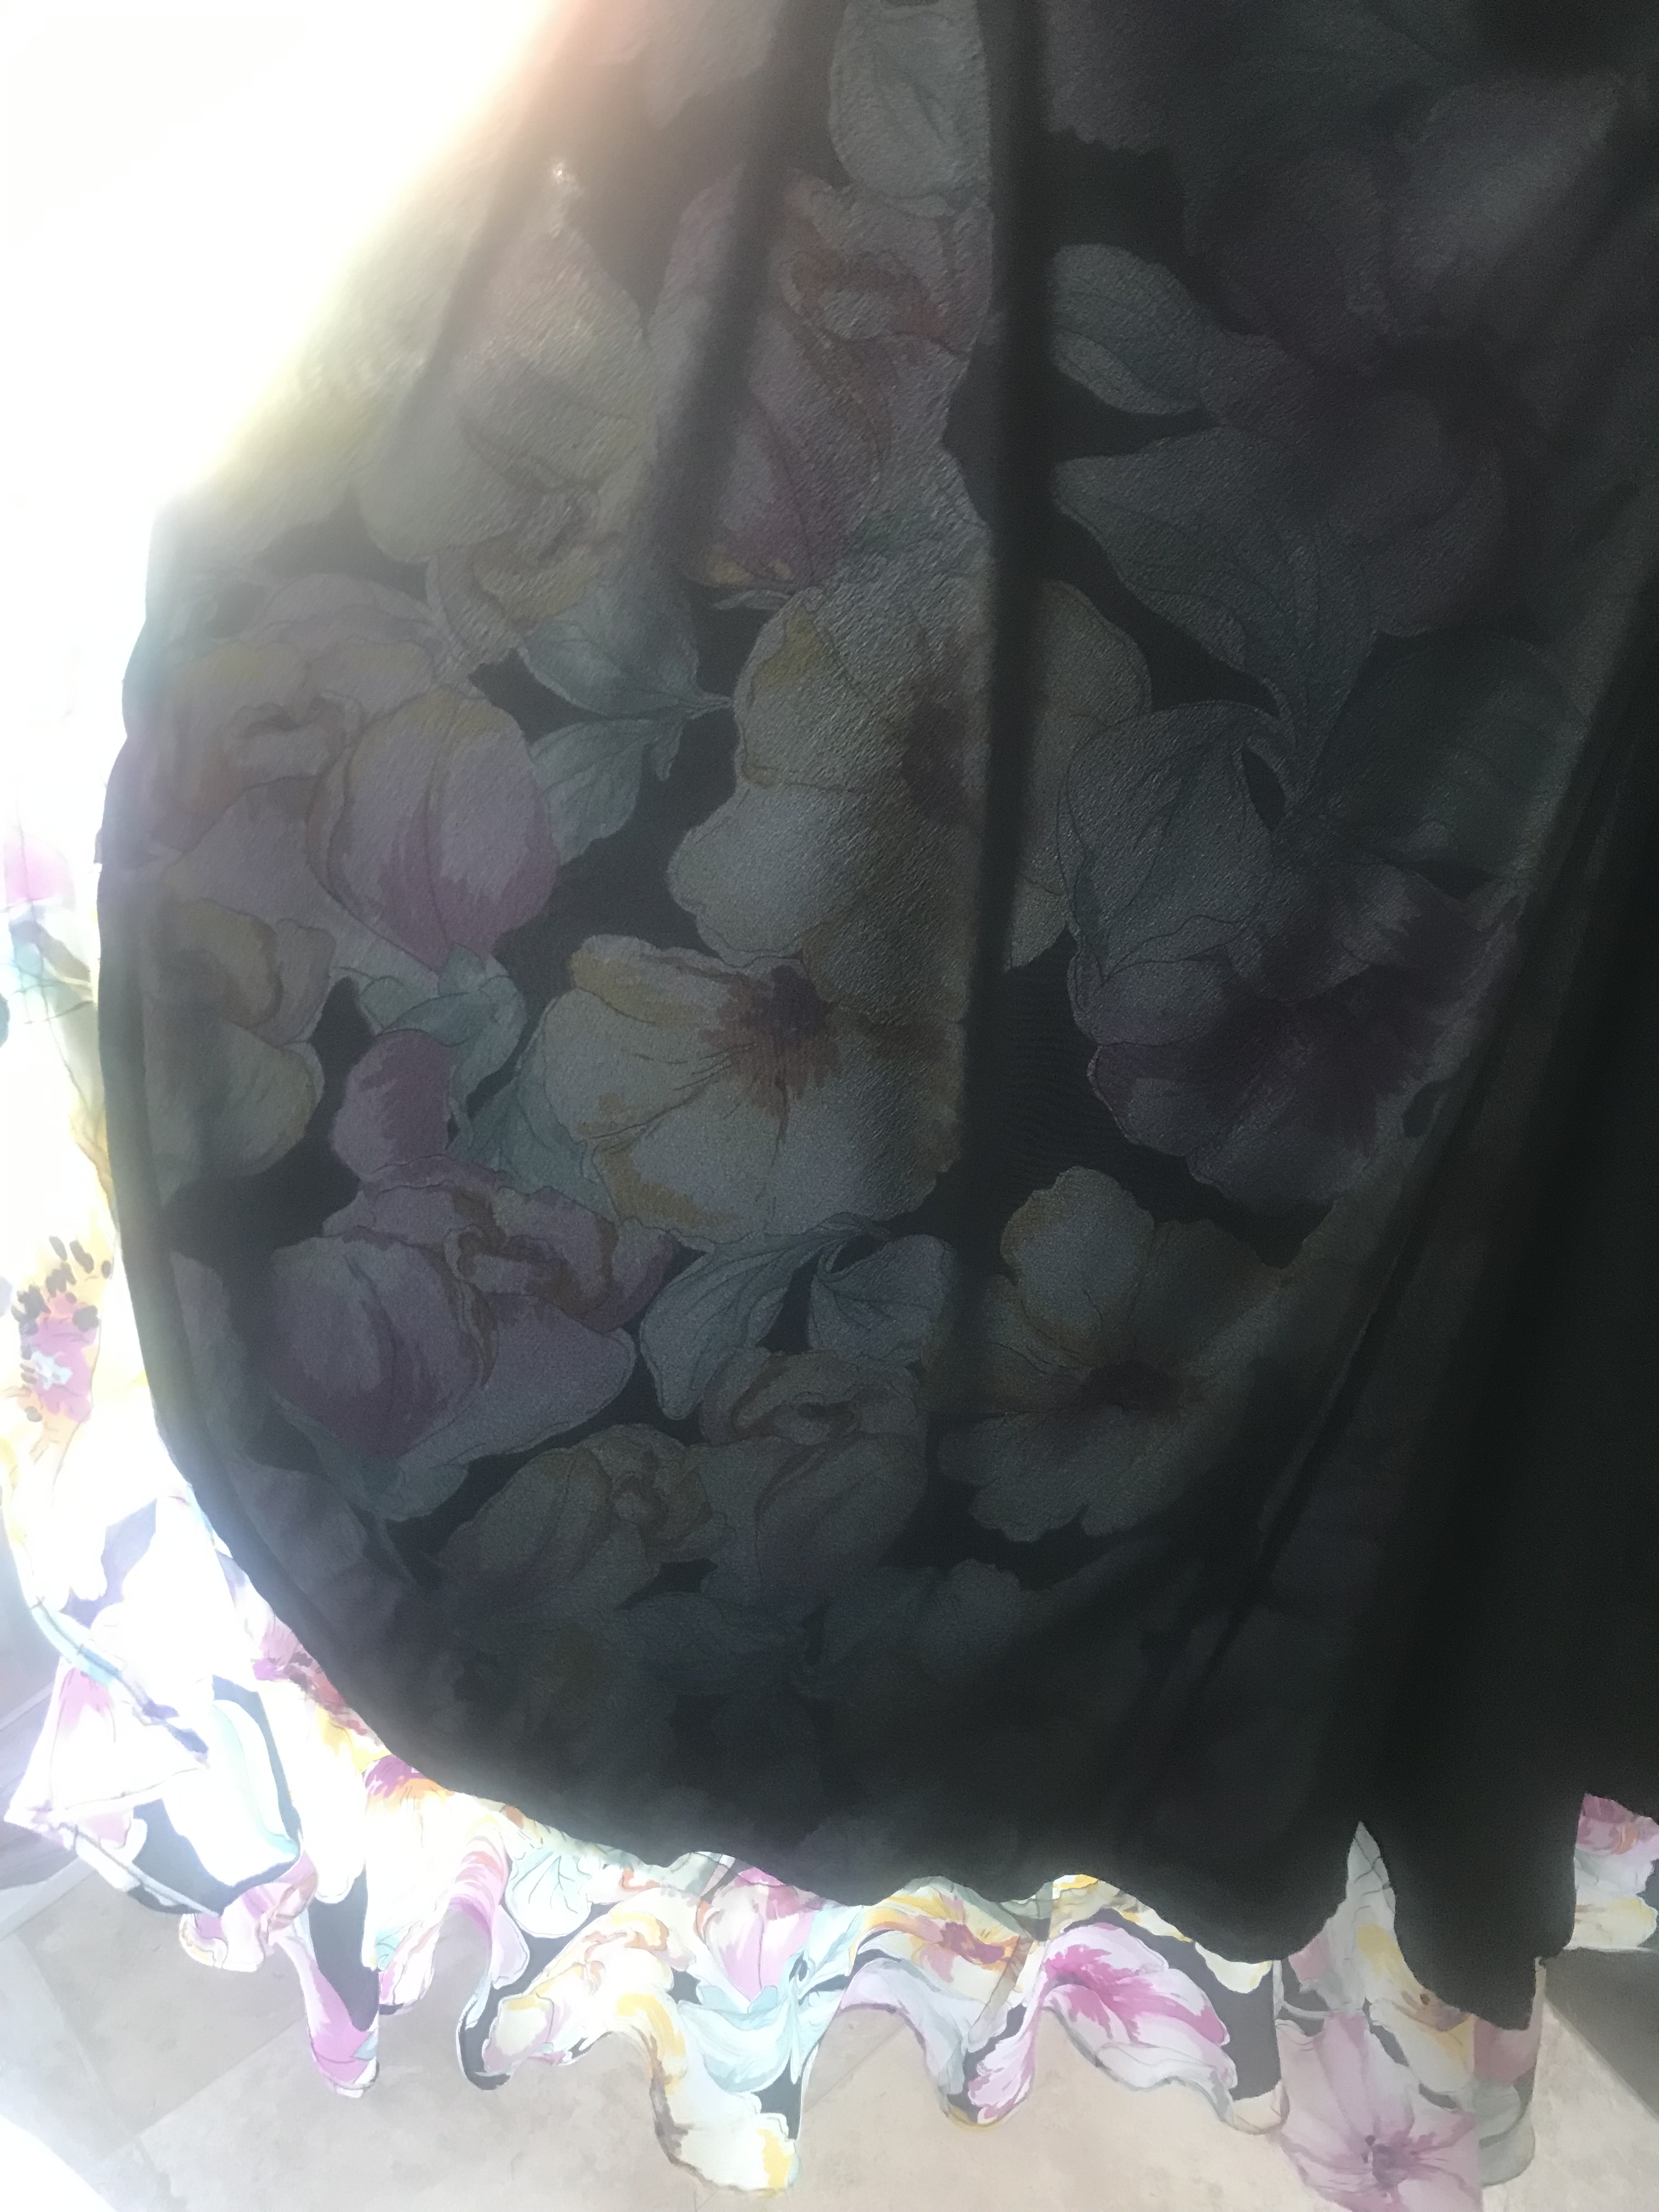
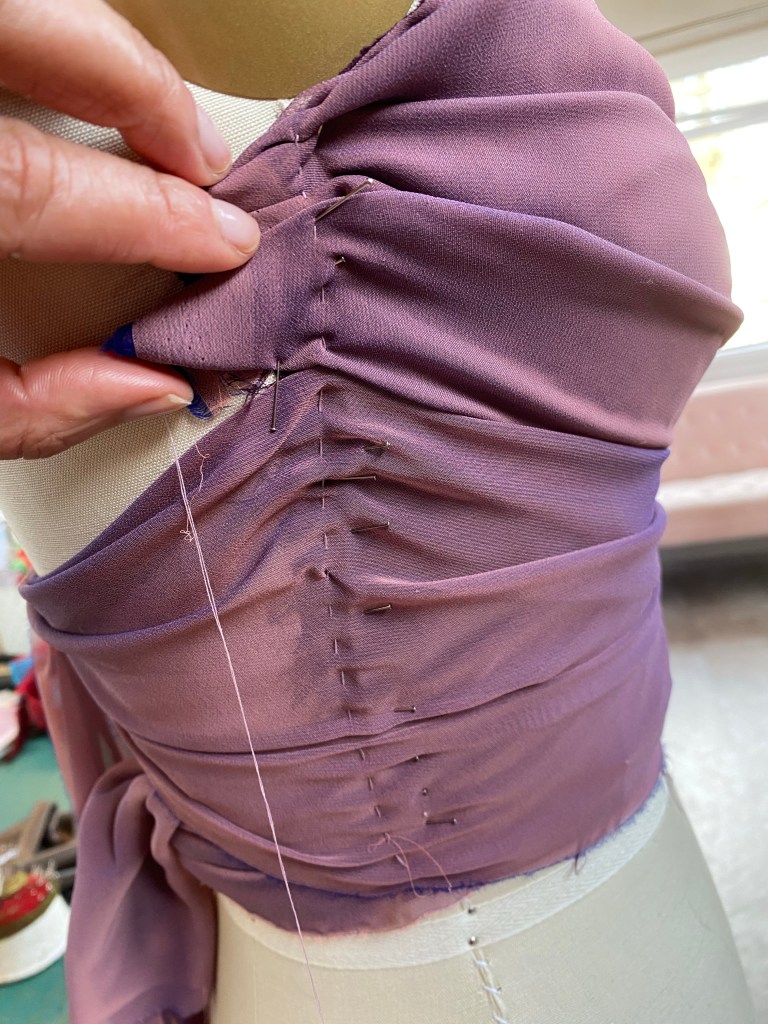
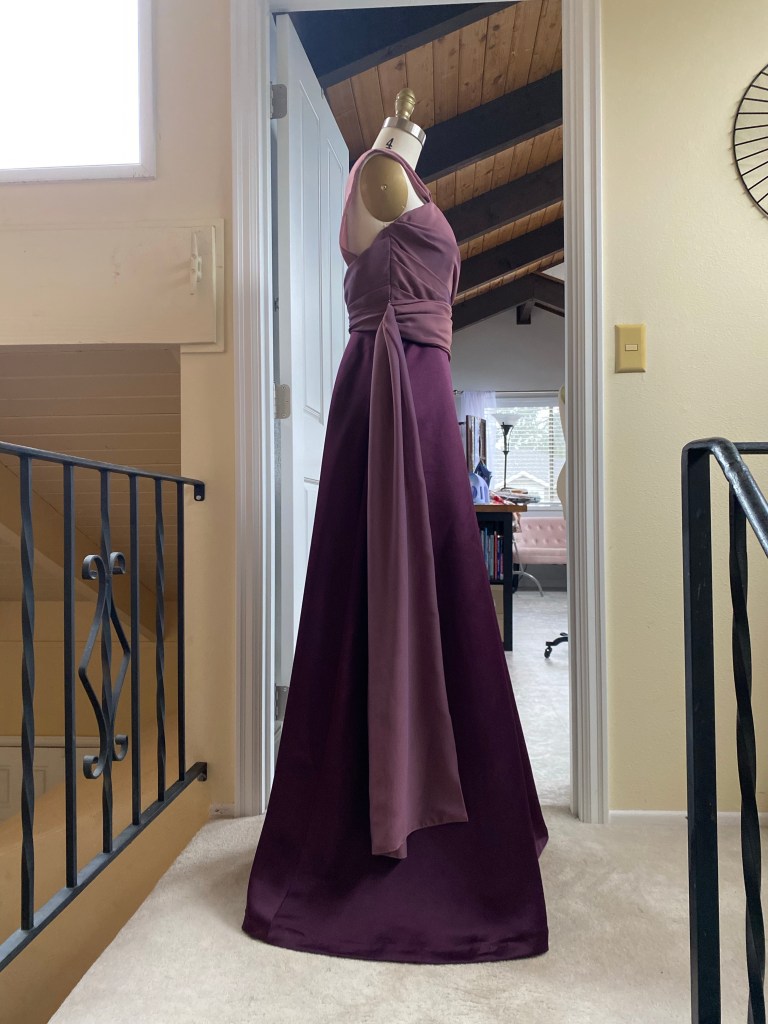
    I brought up an idea of draping over the entire top of the dress, allowing both fabrics to have their moment. I presented her with this idea of draping and criss crossing the chiffon over the bodice.

    She really like that idea, approved it, so I got going on making it happen!

    I finished constructing the dress underneath by adding boning and bra cups to the lining of the dress.

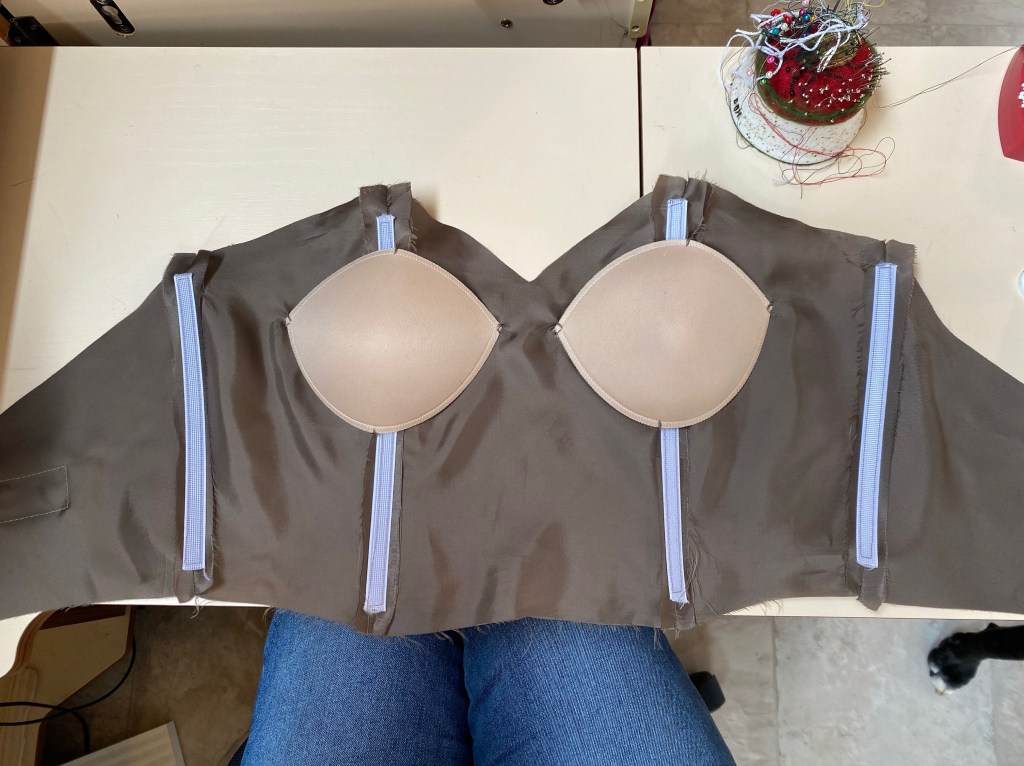
    The lining turned out beautifully and was a pleasure to look at as she slipped into the dress. That kind of detail makes me happy, and hopefully also the case for the wearer!

    The bodice and skirt lining ready to be installed into the dress!
    Plenty of pining and hand sewing happening on my trusty dressform
    The bodice front, sides, and eventual side drape piece, all pleated and basted, ready to be sewn together, then sewn over the main dress bodice.

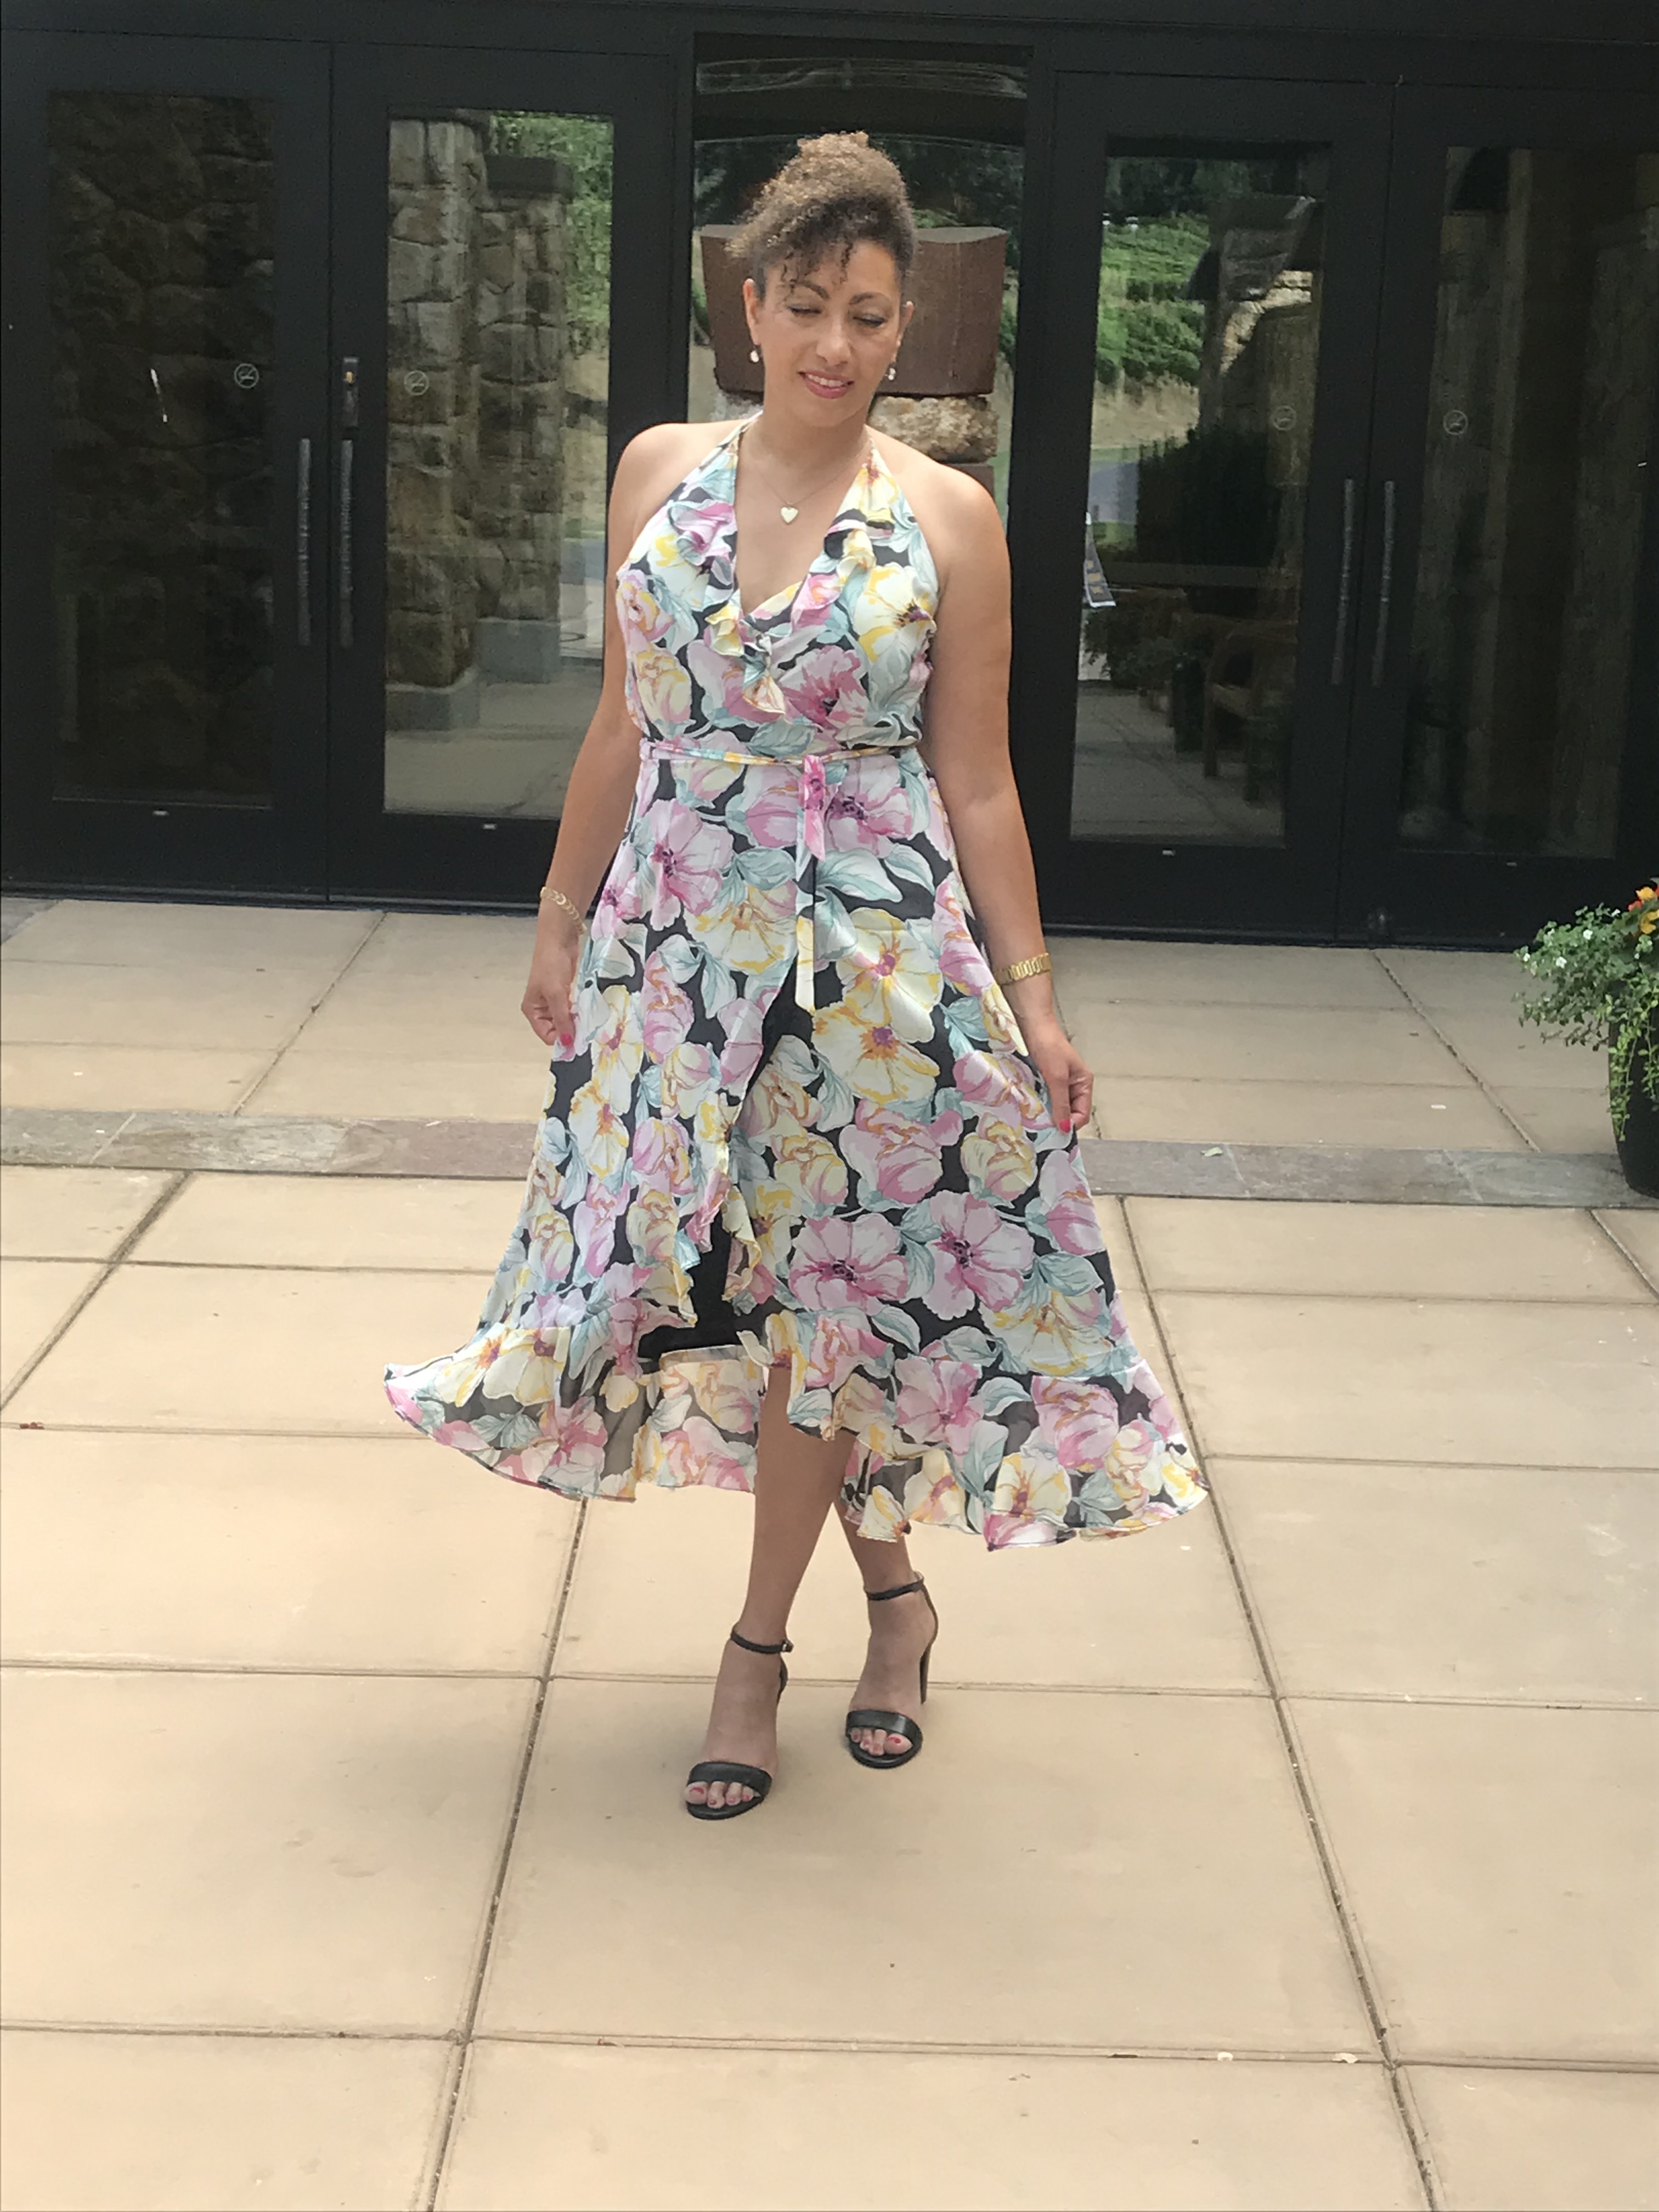
    So after quite a bit of trial and error, as this was my first time creating such a dress with the draping detail, I finally finished the gown!

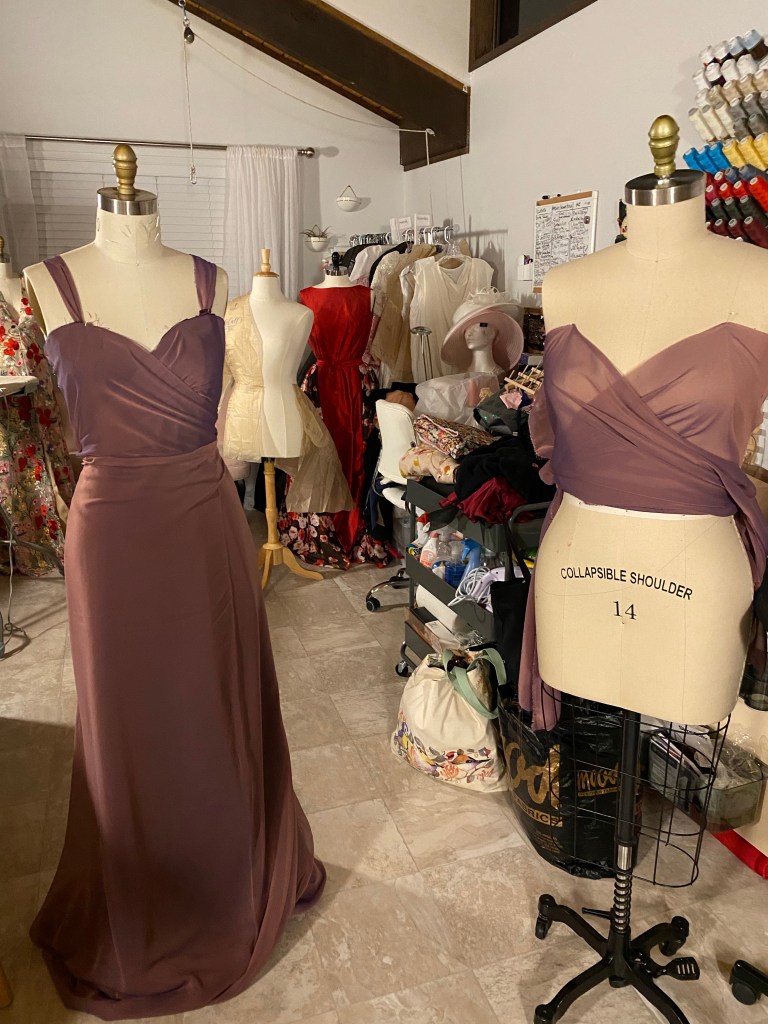
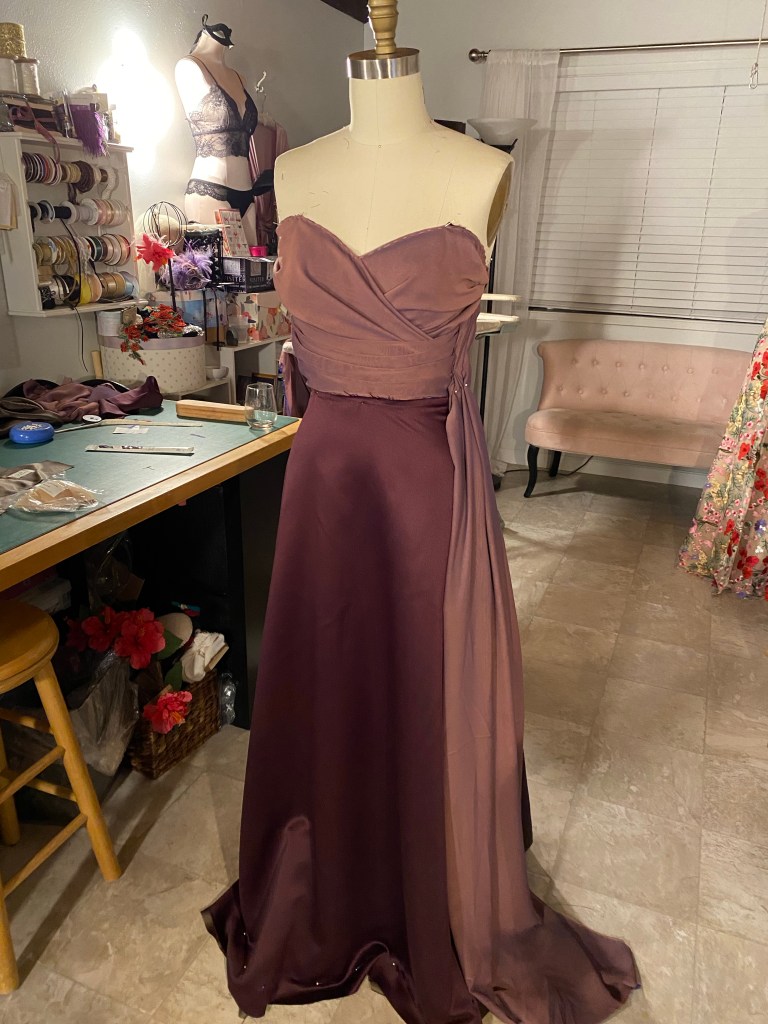
    Here are some photos of the versions I sent over to her before finishing up on her final version:
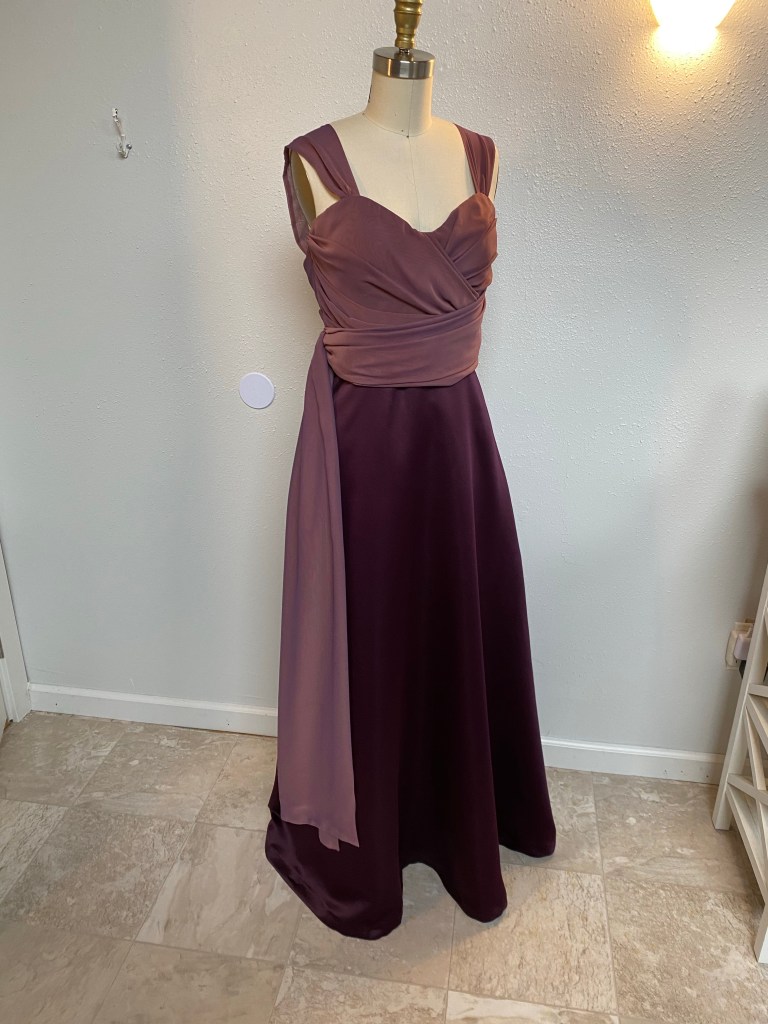
    She looks so pretty and elegant, even unfinished!
    The drape happening in the back would also look so gorgeous! I might need to make this dress again just for fun!

    And the finale!

    The final gown!

    Meanwhile, Portland was hit with a big snowstorm that essentially shut down the city and trapped many people at home. Well, that didn’t stop me! My sweet husband offered to drive me and the finished gown over to Laura’s house and deliver it in person in his SUV that is great in the snow. What a nice guy!

    Laura was radiant in her dress as she tried it on in her bedroom! I brought along a small sewing kit and supplies to do any last minute fixes as needed.

    Well, it turned out that the dress needed a little more than just a few stitches to make it perfect. So, unfortunately I had to take the dress back home and make some fitting changes to the bodice and straps to make it just right. No problem! OK, one major problem: the dress was meant for her to take along to wear at her sister’s wedding event in California the next day and it wasn’t ready. UGH!!! I was hoping to be able to make the changes that same day and drive the dress back over so she could pack it for her trip. I ran out of time and wasn’t able to make it happen. You have no idea how SO disappointing this was for me, not to mention for her as well. So she left early the next morning for California, all without the dress we worked so hard to make in time for the event. GRR, I was SO upset with myself!

    Well, now the dress is complete and altered and ready to go for the next occasion she may have to wear it. All in all, Laura was such a wonderful client to work with and I hope that she’s willing to work with me again on another gorgeous creation, and possibly even teach her some sewing lessons so that she can learn to make her own beautiful and unique clothes!

    Lesson learned: time management is KEY to making deadlines and leaving room for error.

    The gown turned out so elegant and eye catching!
    Every angle of the dress has interest
    We love the low back!
    And the drape! So pretty and elegant!

    Thank you so much Laura for choosing me to create such a beautiful gown for you! I enjoyed every moment of the process, mishaps and all. Enjoy wearing your dress and may you glow and shine in it as you do so naturally! Love, Stephanie

  • Floral Silk Girly Dress

    Floral Silk Girly Dress

    Whenever I have been invited to an occasion, the first thing I think of is “what am I going to wear?”. The next thing I think of is “what can I sew for myself to wear” as I love to make clothing and I love wearing things that are unique and nobody else has in their closet. From there, I pull up my pattern stash archive, pay a visit to my fabric stash (or the fabric store if I really don’t have the appropriate fabric to work with) and get started planning and sewing my outfit.

    For this occasion, I was invited to a wedding of a lovely bridal alterations client who had become a friend over our many dress fittings and consultations of her beautiful wedding gown. The major part of her dress that I altered was her complicated and intricate bustle of her train that I she dreamed up and I created for her. Originally, as I fiddled and fussed to get her train bustled just right at one of her fittings, I said to her “I’ll just hide in the bushes at your wedding venue, you give me the signal when you are ready, and I’ll sneak out and help you bustle, then disappear back into the bushes and let you be on your way to the reception”. She would have none of that and insisted that I attend the wedding as her guest, and enjoy the entire ceremony plus be ready to bustle…DEAL!

    So, being the alteration seamstress of honor at this wedding, I just had to have something special and handmade to wear! Not having all the time in the world to be sewing for myself with the very busy post-Covid wedding season upon us and other alterations and custom sewing client projects literally piling up in my sewing studio, I decided to make a dress that I have made before (a huge time and energy saver!) and use fabric that I had in my stash from Mill End Store in Portland, OR.

    I pulled out this lovely pattern from Butterick that I had already cut out and made fit alterations to the pattern for a dress that I made a couple of years ago:

    Butterick 6554 pattern

    I made view C, the halter neck, ruffled and flounce dress that wraps and ties to the side.

    This time around, I decided to fully line the dress (instead of using the bodice facing from the pattern), meaning I cut out the entire dress, the bodice and the skirt pieces, less the flounces, in both the outer, floral silk georgette fabric and the silk lining that I also had in my fabric stash. Cutting silk, especially sheer, floaty slippery silk, is NOT easy if you’ve ever tried. It slips all over the place and misbehaves in as many ways as it can, just to drive you nuts and practically give up before you even started. But, since it was SO pretty and soft, I did my best to battle it and tackle it into submission, knowing in the end it was going to be incredible and worth it all.

    The silk draped so innocently on my dress form
    Anchored down and ready to cut!

    So the sewing begins!

    Making a tiny hem to the ruffled edge

    It all went pretty well and the fact that I had made it before, I knew what to expect from the pattern instructions.

    The most difficult and time consuming part was making the narrow hem on the long outside edge of the flounce that would be attached at the bottom of the skirt. Check out this pattern piece that is over 110 inches long. Yikes!

    After tackling that beast, the dress was nearly done and I could start to see the light at the end of the tunnel.

    Having a major deadline to hit, and other clients banging down my door and begging me to help them with their last-minute bridal requests, I finished up my dress and just got ‘er done.

    One last thing I added to the dress was lightweight foam bra cups sewn into the bodice lining as that sheer stuff certainly wasn’t going to hide my bits. Thank goodness I had some on hand in my supply stash and I was able to swiftly hand sew them into my dress, no problem! Confidence boosters for boobs-horray!

    Bra cups sewn in saved any wardrobe malfunctions!

    I just have to share the insides of the dress with the lovely silk lining!

    Here I cheated and used my serger to attach the waist of the bodice to the skirt and hide the raw edges.
    The skirt lining that ends just above the flounce

    So off we went to the wedding, leaving enough time to stop at one of our favorite spots in the wine country of the Willamette Valley in Oregon, The Allison Inn and Spa, to snap some photos and have a glass of champagne and a light cheese plate before the wedding. Perfect!

    Let’s go up there, that’s where the champagne is served!
    The lovely snack we shared over a glass of wine and champagne!
    Watch that breeze!

    As much as I enjoy the entire process of making a new dress, it feels so good to be done with this one, wear it to a fun wedding (and not have to hide in the bushes!) and hang it up on my wardrobe for another occasion.

    Until next time, cheers!