BurdaStyle.com was taking entries for making the Gathered Tube Dress pattern and the winner would be featured as the pattern model in place of the illustration:
I decided that this was an easy enough pattern, and I could make it up quickly with some nice fabric. It definitely was a fast and easy sewing pattern, with only a front and a back pattern piece, a measured and fabric strip for the waist elastic casing. The entire dress took only about 3 hours to make it. Downloading it from the BurdaStyle website and taping the pattern pieces together took the most time actually!
I ran out to Mill End Store in Beaverton, OR and grabbed up this lovely printed silk as I felt this would be great fabric for this dress. I did need more fabric than the dress calls for because I wanted to try to match the colors of the pattern at the side seams. The lovely ladies at the fabric store helped me to decide on this fabric as they felt it was artistic and colorful and would stand out in photos.
Also, thanks to two of my super cool girlfriends, they help pick a great spot as a backdrop to take photos and snapped away! Thanks Girlfriends!
I am happy with my dress, although I should have taken a few extra minutes and measured the pattern pieces again, as I feel that the fit around my hips is a bit too tight, and I fiddled with that the whole time I was wearing it. The annoying, ill-fitting half-slip I was wearing under this didn’t help either.
I was informed today that I am actually one of the four finalist in the contest! So if I win, you might be seeing me in my dress as the model for this sewing pattern on BurdaStyle.com. Pretty cool!
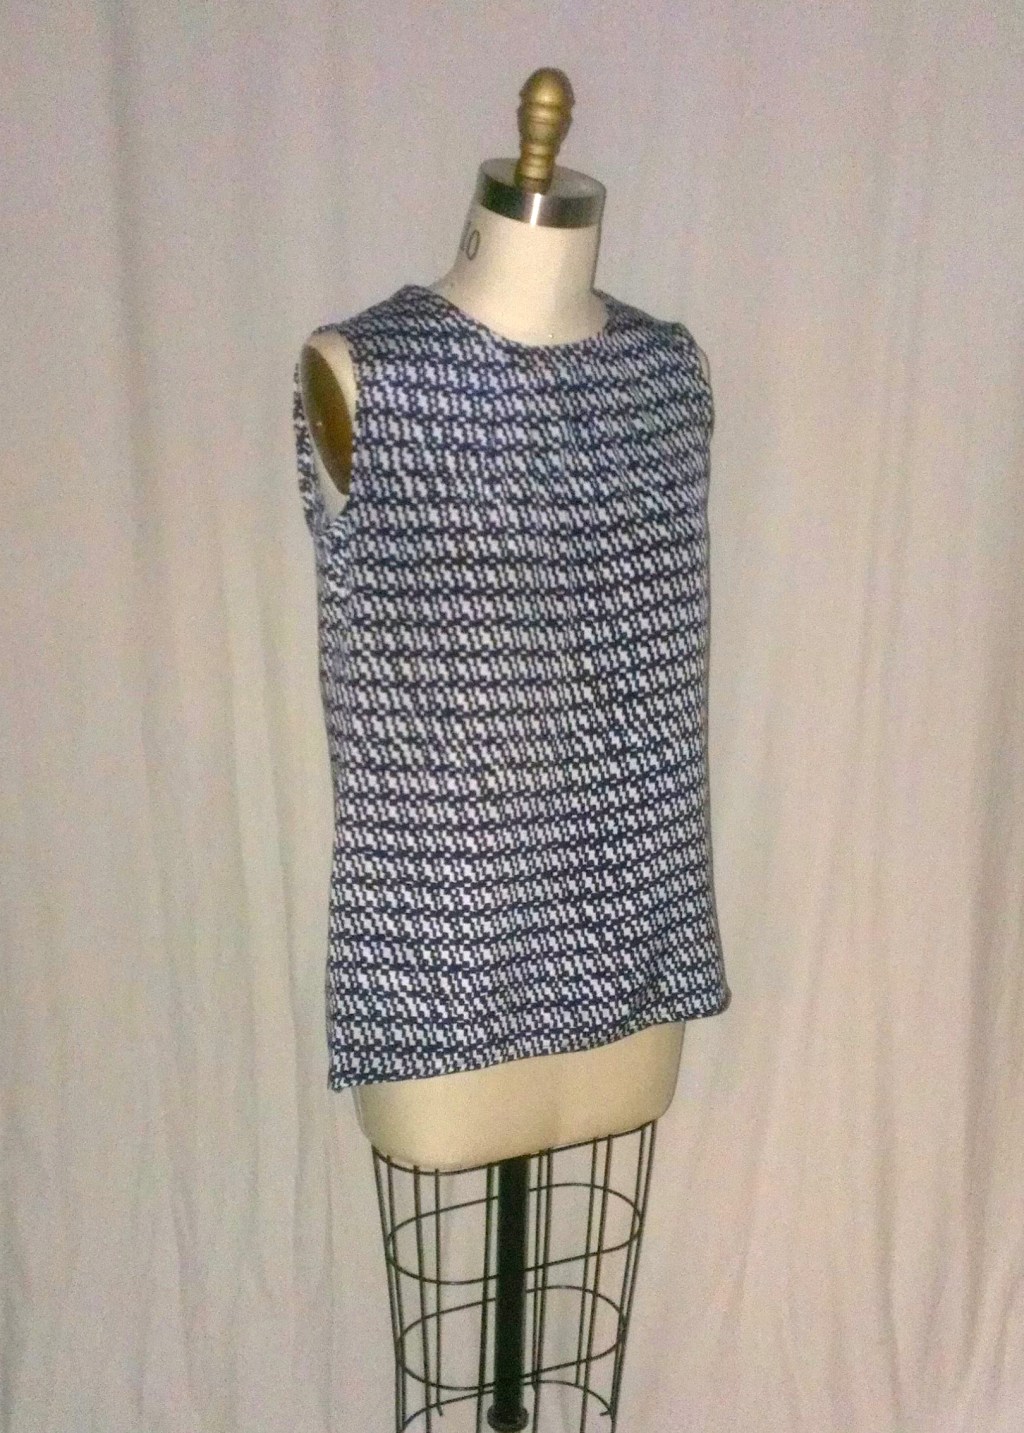
I felt the itch to sew up something quick and easy to wear, so I made up this little silk top using Simplicity 1253 pattern and some lovely Derek Lam printed silk/lycra fabric:
Simplicity 1253 top in Derek Lam printed silkSimplicity 1253 in Derek Lam designer silk
This little top pattern took just a couple of days of on and off sewing time and under 2 yards of fabric. It features a pleated front, hi/low hem and a neck band.
Front neck pleat detail
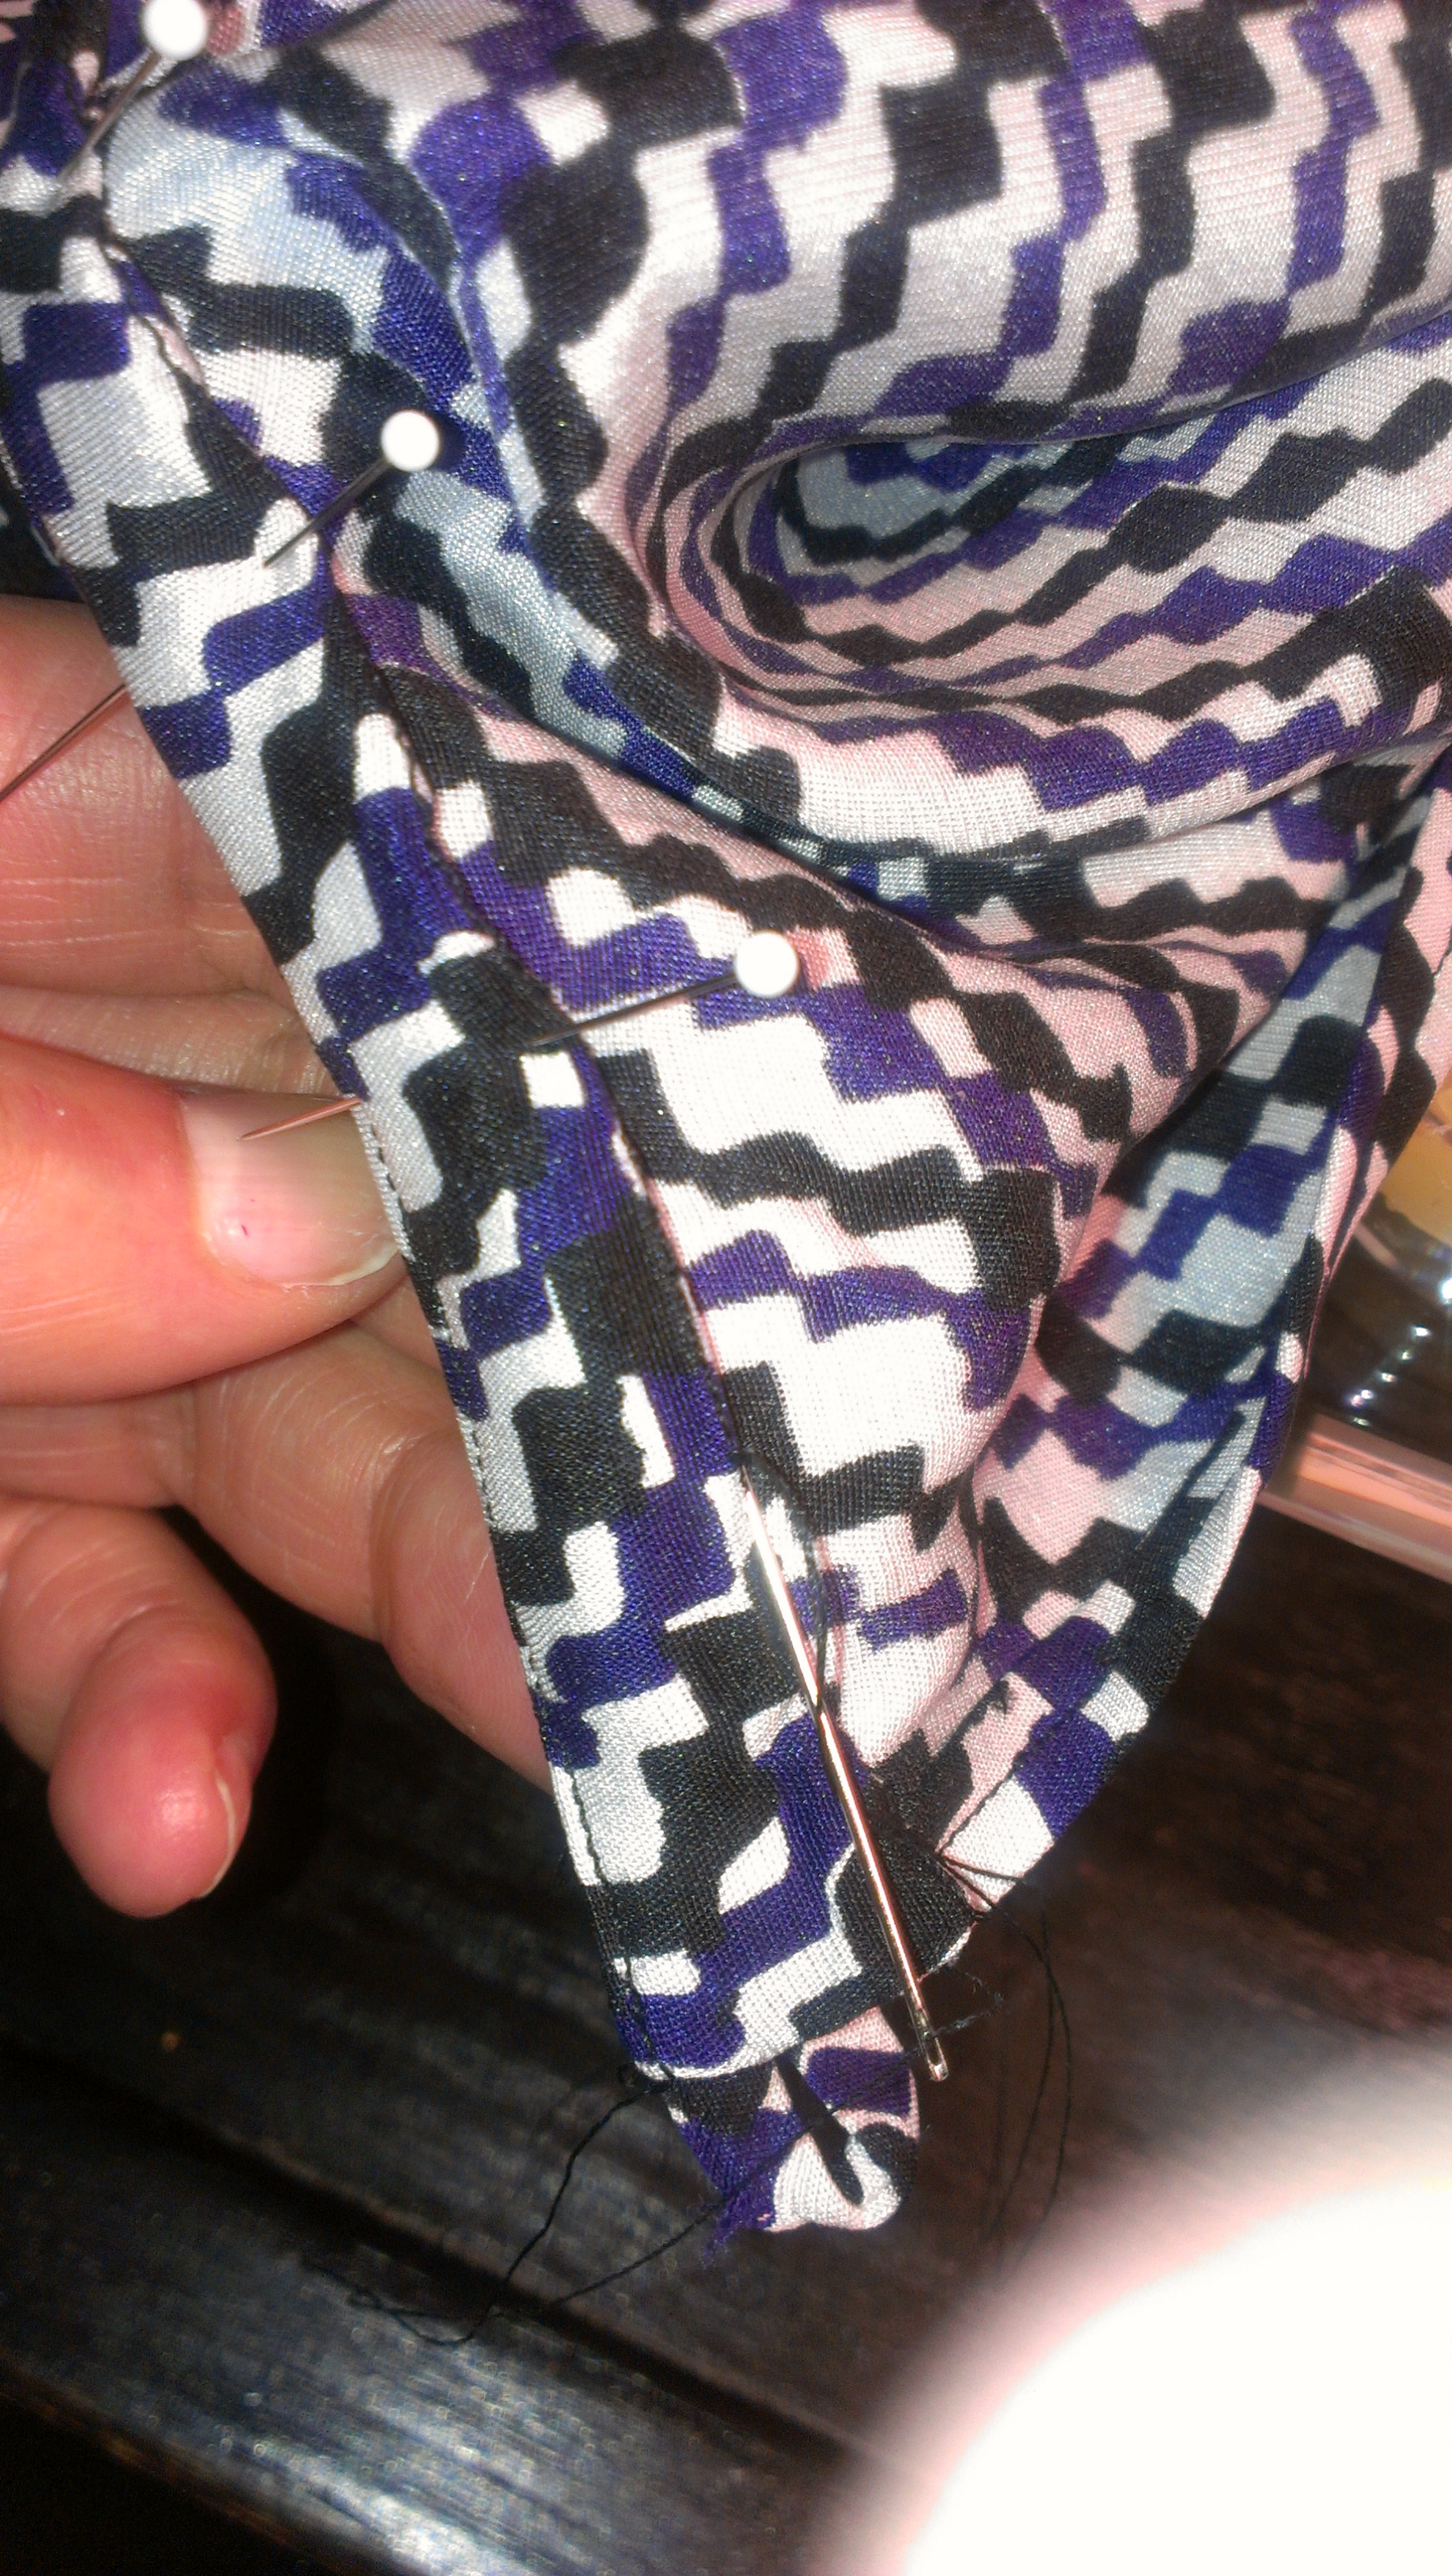
The neck band took a little time to sew on, as I chose to sew the inside enclosing seam by hand instead of the stitch in the ditch method that the pattern has you do. This method NEVER turns out well for me, so I just take out my needle, thread and thimble and get to work hand sewing:
Slip stitching the inside of the neck band by hand
There is a little keyhole opening in the back with a loop and button closure which is a nice little feature:
back of top with loop and button closure
I like to layer these little silk tops under jackets and cardigans or on their own:
My new top layered under a jacket
I almost always have inspiration styles after which I try to model my sewing projects:
Joie “Corette” printed silk tank $158Joie printed silk tank top
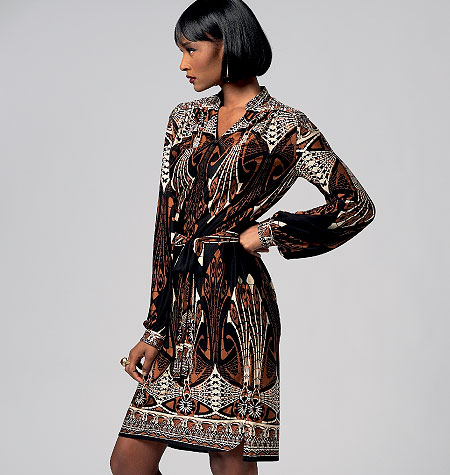
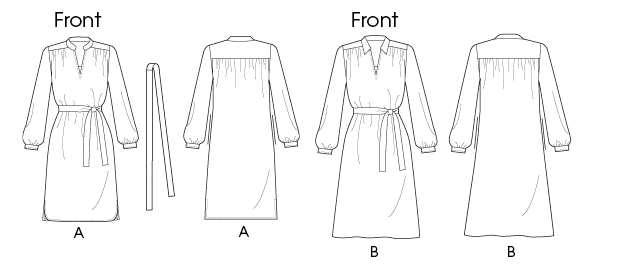
I made up this nice shirt dress in a nice Liberty silk crepe de chine print using Vogue 8847 pattern (now out print unfortunately).
Vogue 8847 pattern photoVogue 8847 line drawing
It was not too bad of a pattern to sew, it took me a couple of weeks over weekends and evenings after work. The pattern features a stand up collar, open placket, self-lined yoke, long sleeve gathered into a barrel cuff and self belt. I chose to not add the pockets because the fabric I used was pretty light and delicate, and I thought that the pockets would just weigh down the dress, especially if I had my hands in them.
I made View A essentially for the collar style and the length of the dress, modifying the hem to be just straight across instead of curved at the front, split at the sides and straight at the back as the pattern features.
I added 2 inches to the front and back pattern pieces of the dress in order to have enough length in the torso and for the dress to “blouse” when I belted it:
Added 2″ in length to the front and back pattern pieces
I cut out the pattern pieces of the dress as best I could, not really following the pattern cutting layout for view A, which calls for an insane amount of fabric, essentially 6-7 yards of fabric, if using a border print. I just went by view B to estimate the amount of fabric to purchase, more like 3 1/2 yards of 45″ wide material.
Instead of using sew-in or fusible interfacing, I used silk organza to interface the front facing and the collar. This was a great suggestion from the sales associate at Josephine’s Dry Goods, the wonderful fabric store where I purchased the material.
silk organza used in the front facing and collar pieces as interfacing
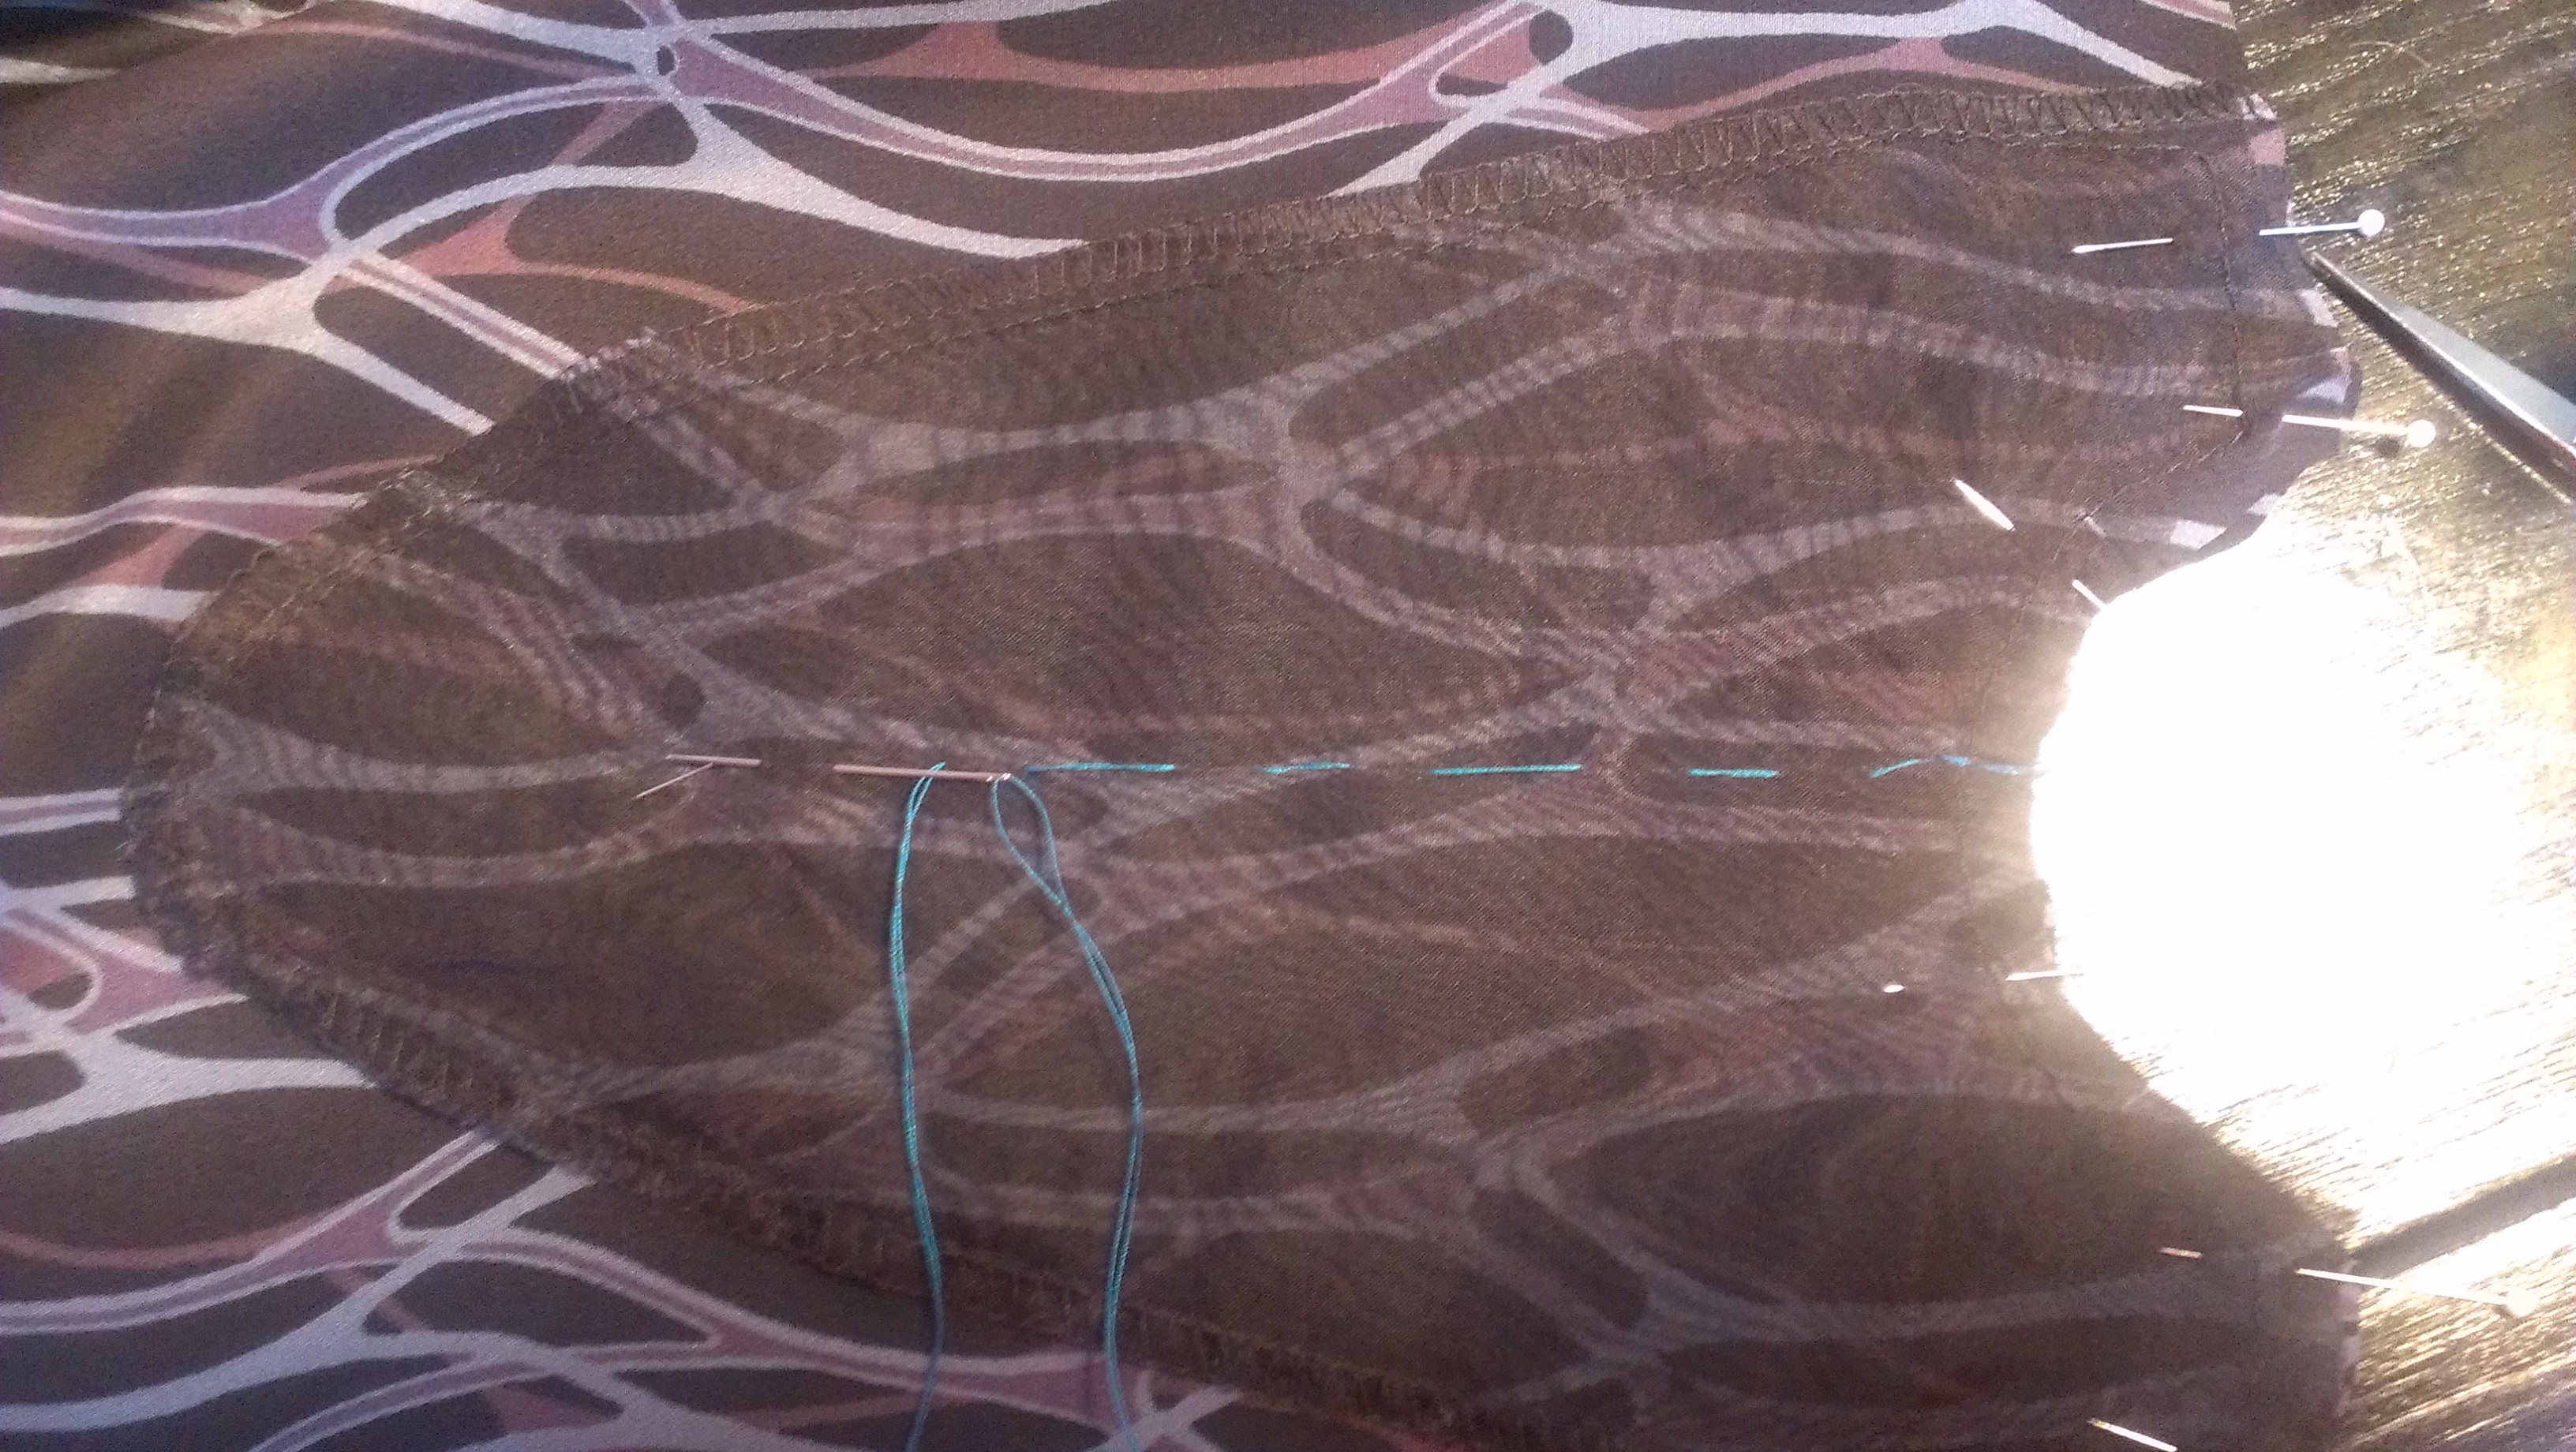
I used hand basting with silk thread to baste the front facing to the front of the dress:
front facing basting stitches to mark the cutting line
One part of the instructions were missing, the step between 11 and 12, where you are to sew the yoke back to the yoke front, attaching the front of the dress to the back of the dress, so that is something to take note of.
It took some time and careful pinning to get the gathers at the yoke just right:
I love how this dress turned out and am quite happy with the results! It is a lovely, casual yet elegant dress to wear and I just love this Liberty printed silk!
Back view of Vogue 8847 dressSide view of dress
This dress reminds me of some dress styles that I have been saving in my sewing inspiration files like these:
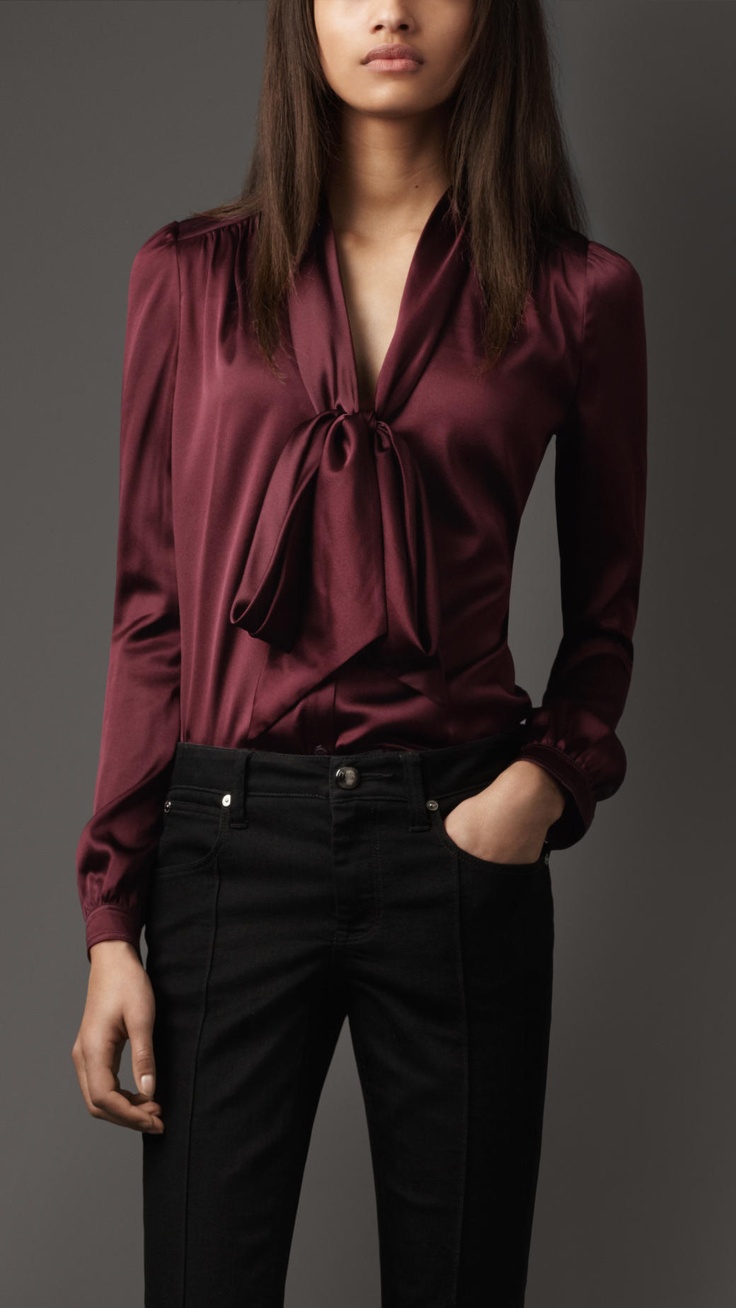
OK, maybe these tie neck or “pussy bow” style tops are old school, maybe they are haute couture. I don’t know for sure. All I know is I love them. And, I know that I will make them over and over again, until I cannot bare to make any more:
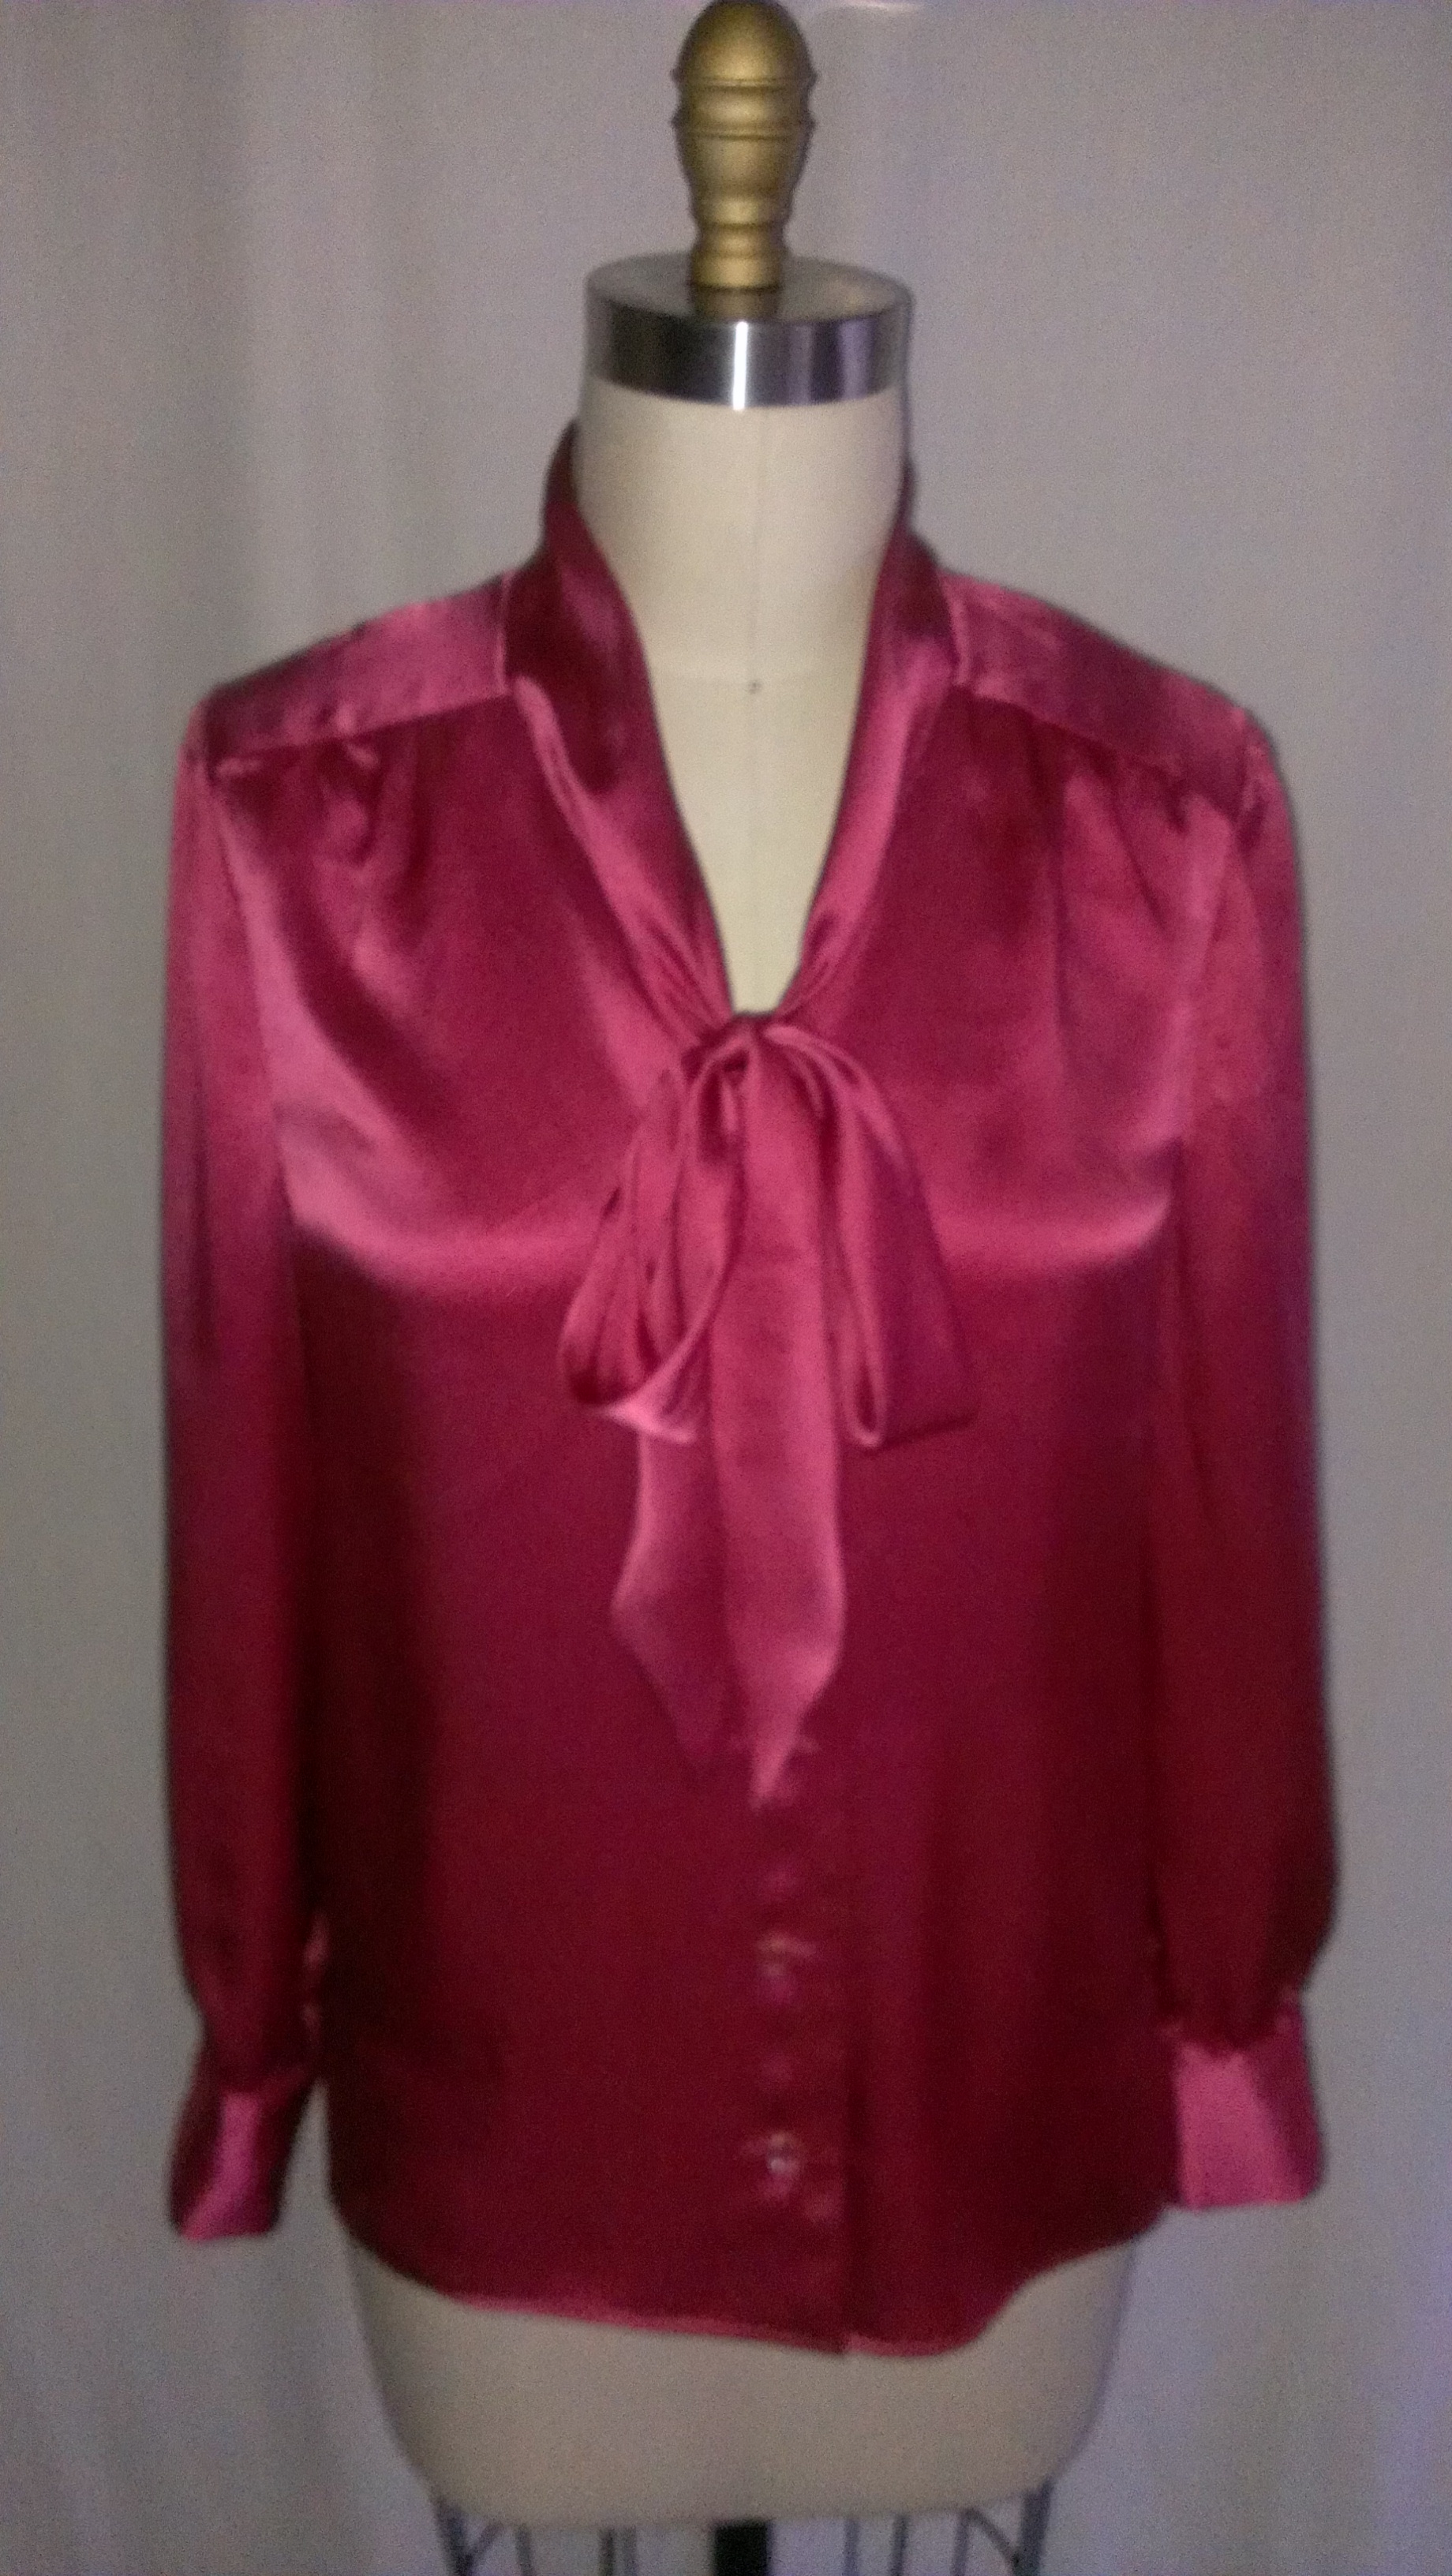
This beauty I made for my stunning brunette friend (you know how you are 🙂 ) as a gift. I have had this pinky/coral colored lustrous silk charmeuse for about two years now, keeping Her in mind to make a top for. I finally had her body measurements (I measured them for her on Thanksgiving 2014 before dinner), and figured she would look really nice in a lower cut, tie neck blouse, in a favorite color that she loves, not to mention looks really pretty on her.
I used Simplicity 1784 pattern, view A, to make this blouse.
Simplicity
I ran out to Button Emporium to find some pretty , unique, and special buttons to use for this top. I found some lovely German Word War II-era pink glass buttons and grabbed up enough, plus extra, to button up this beauty.
Buttoned barrel sleeve cuff
Front buttons of blouse
I attempted to make this top as nicely as I could. I used French seams for the side, sleeve and armhole sleeves, plus hand stitched the interior of the cuff and neckline seams. Next time I make this top, or any top like this, I will not use fusible interfacing, at least not in the neck facing, because it left the facing a little warpy and stiff, plus it shows a little. I will try a silk organza, or the self material, for any interfacing parts the next time.
I have seen, and Pinned, several tops and blouses lately, that were an inspiration for this creation:
I hope that She loves and enjoys this top and can wear it for many years to come. Who knows, maybe she will commission me to make her more of these, or similar ones, to add to her wardrobe and wear for the future. I would LOVE to do that! For Her, or anyone else who would like that. And who can afford me too 😉
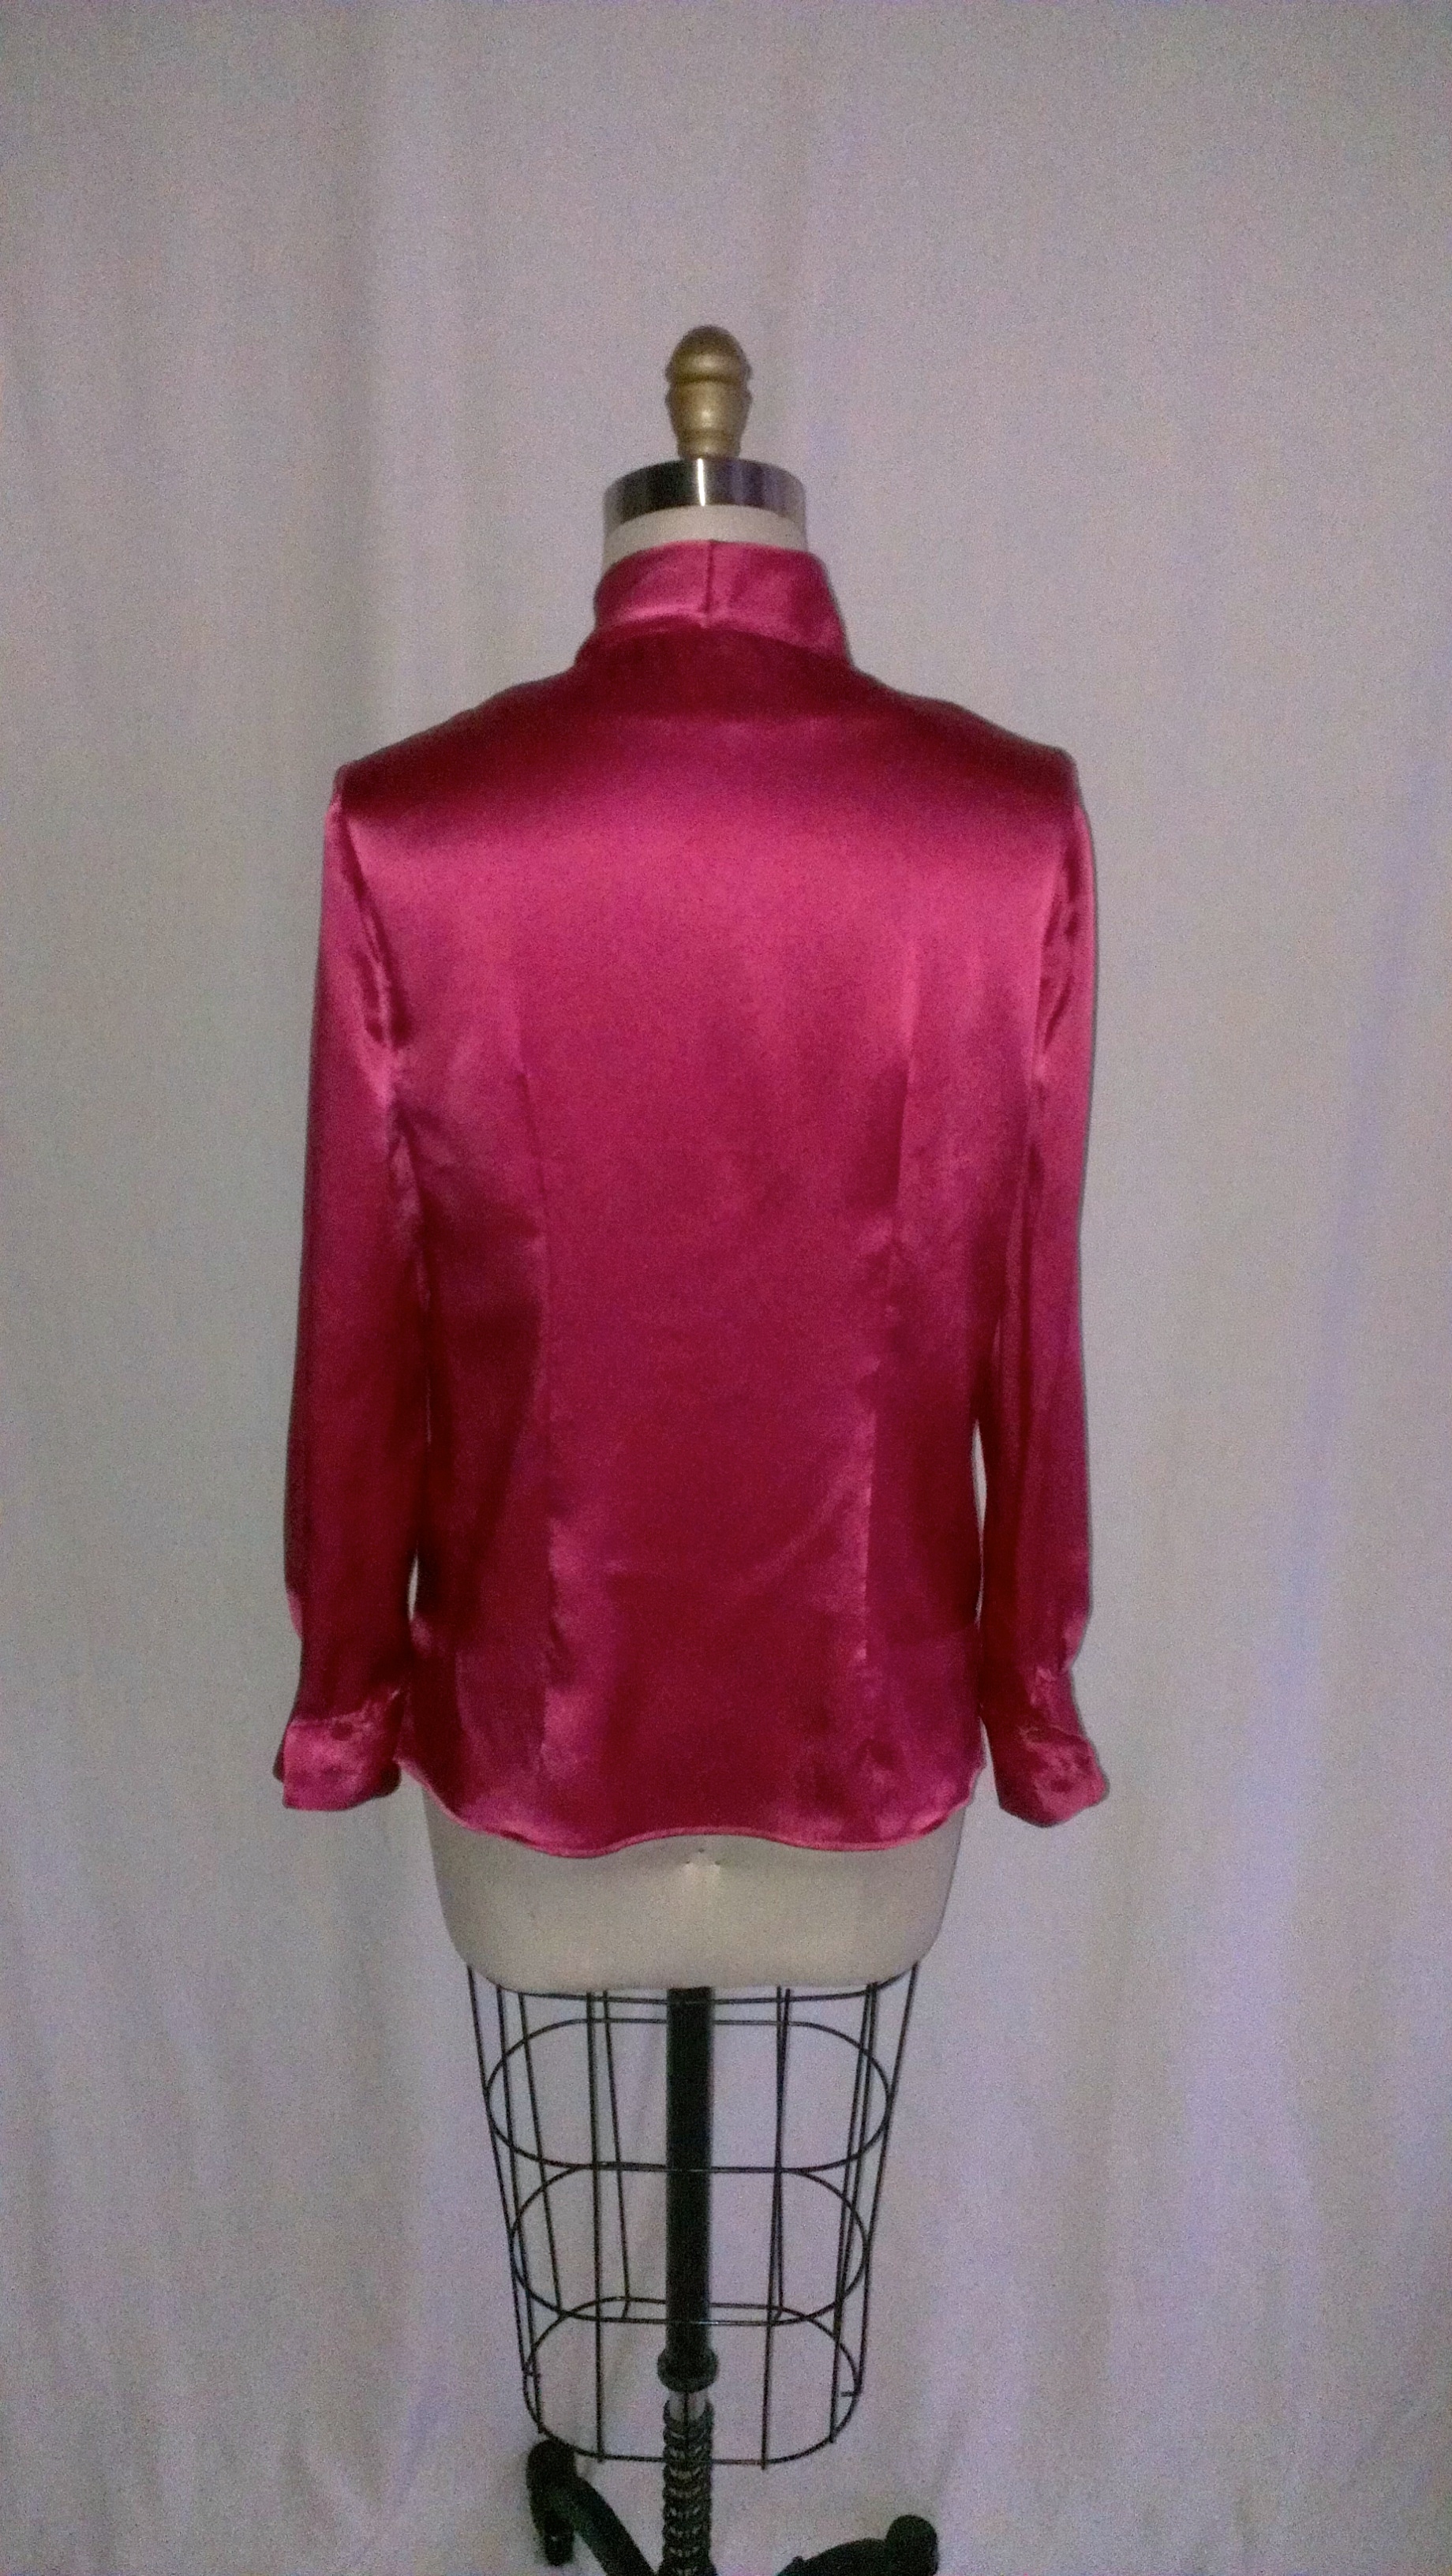
I just finished this lovely silk charmeuse top made in a gorgeous shade of blue. I picked this color blue to wear with the new sapphire ring my husband bought for me while on vacation in Mexico.
I used Simplicity 1315 pattern view A to make this top, using French seams to finish the side, sleeve and raglan sleeve seams. The pattern features a pleated neckline, raglan sleeves and barrel cuffs. There are also options to embellish the cuff or sleeve, but I chose not to embellish this time. I would, however, love to make this top again and possibly do some beadwork on the cuffs of the top. How pretty would that be!
I managed to find some lovely little blue buttons made in Italy with tiny rhinestone insets to use for this blouse at Fabric Depot in Portland, OR. So, the little special buttons give a nice touch to the finishings of this top.
The top was not too difficult to sew. The hardest part was hand sewing the neck band all the way around the neck edge. Well, that was not actually difficult, it was just time consuming. The slippery fabric was a challenge to manage and sew at times, but I have dealt with slippery silk before and knew how to handle it.
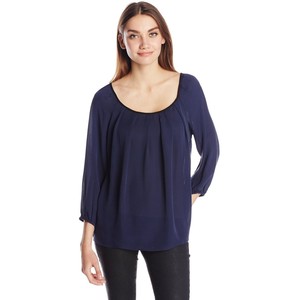
I found some inspiration photos of similar silk tops and blouses on the internet to compare to this look:
Joie raglan sleeve silk top $258Cluny silk blend raglan sleeve top $197
Overall, I love my new blouse and love to wear it with my shiny new beautiful ring!
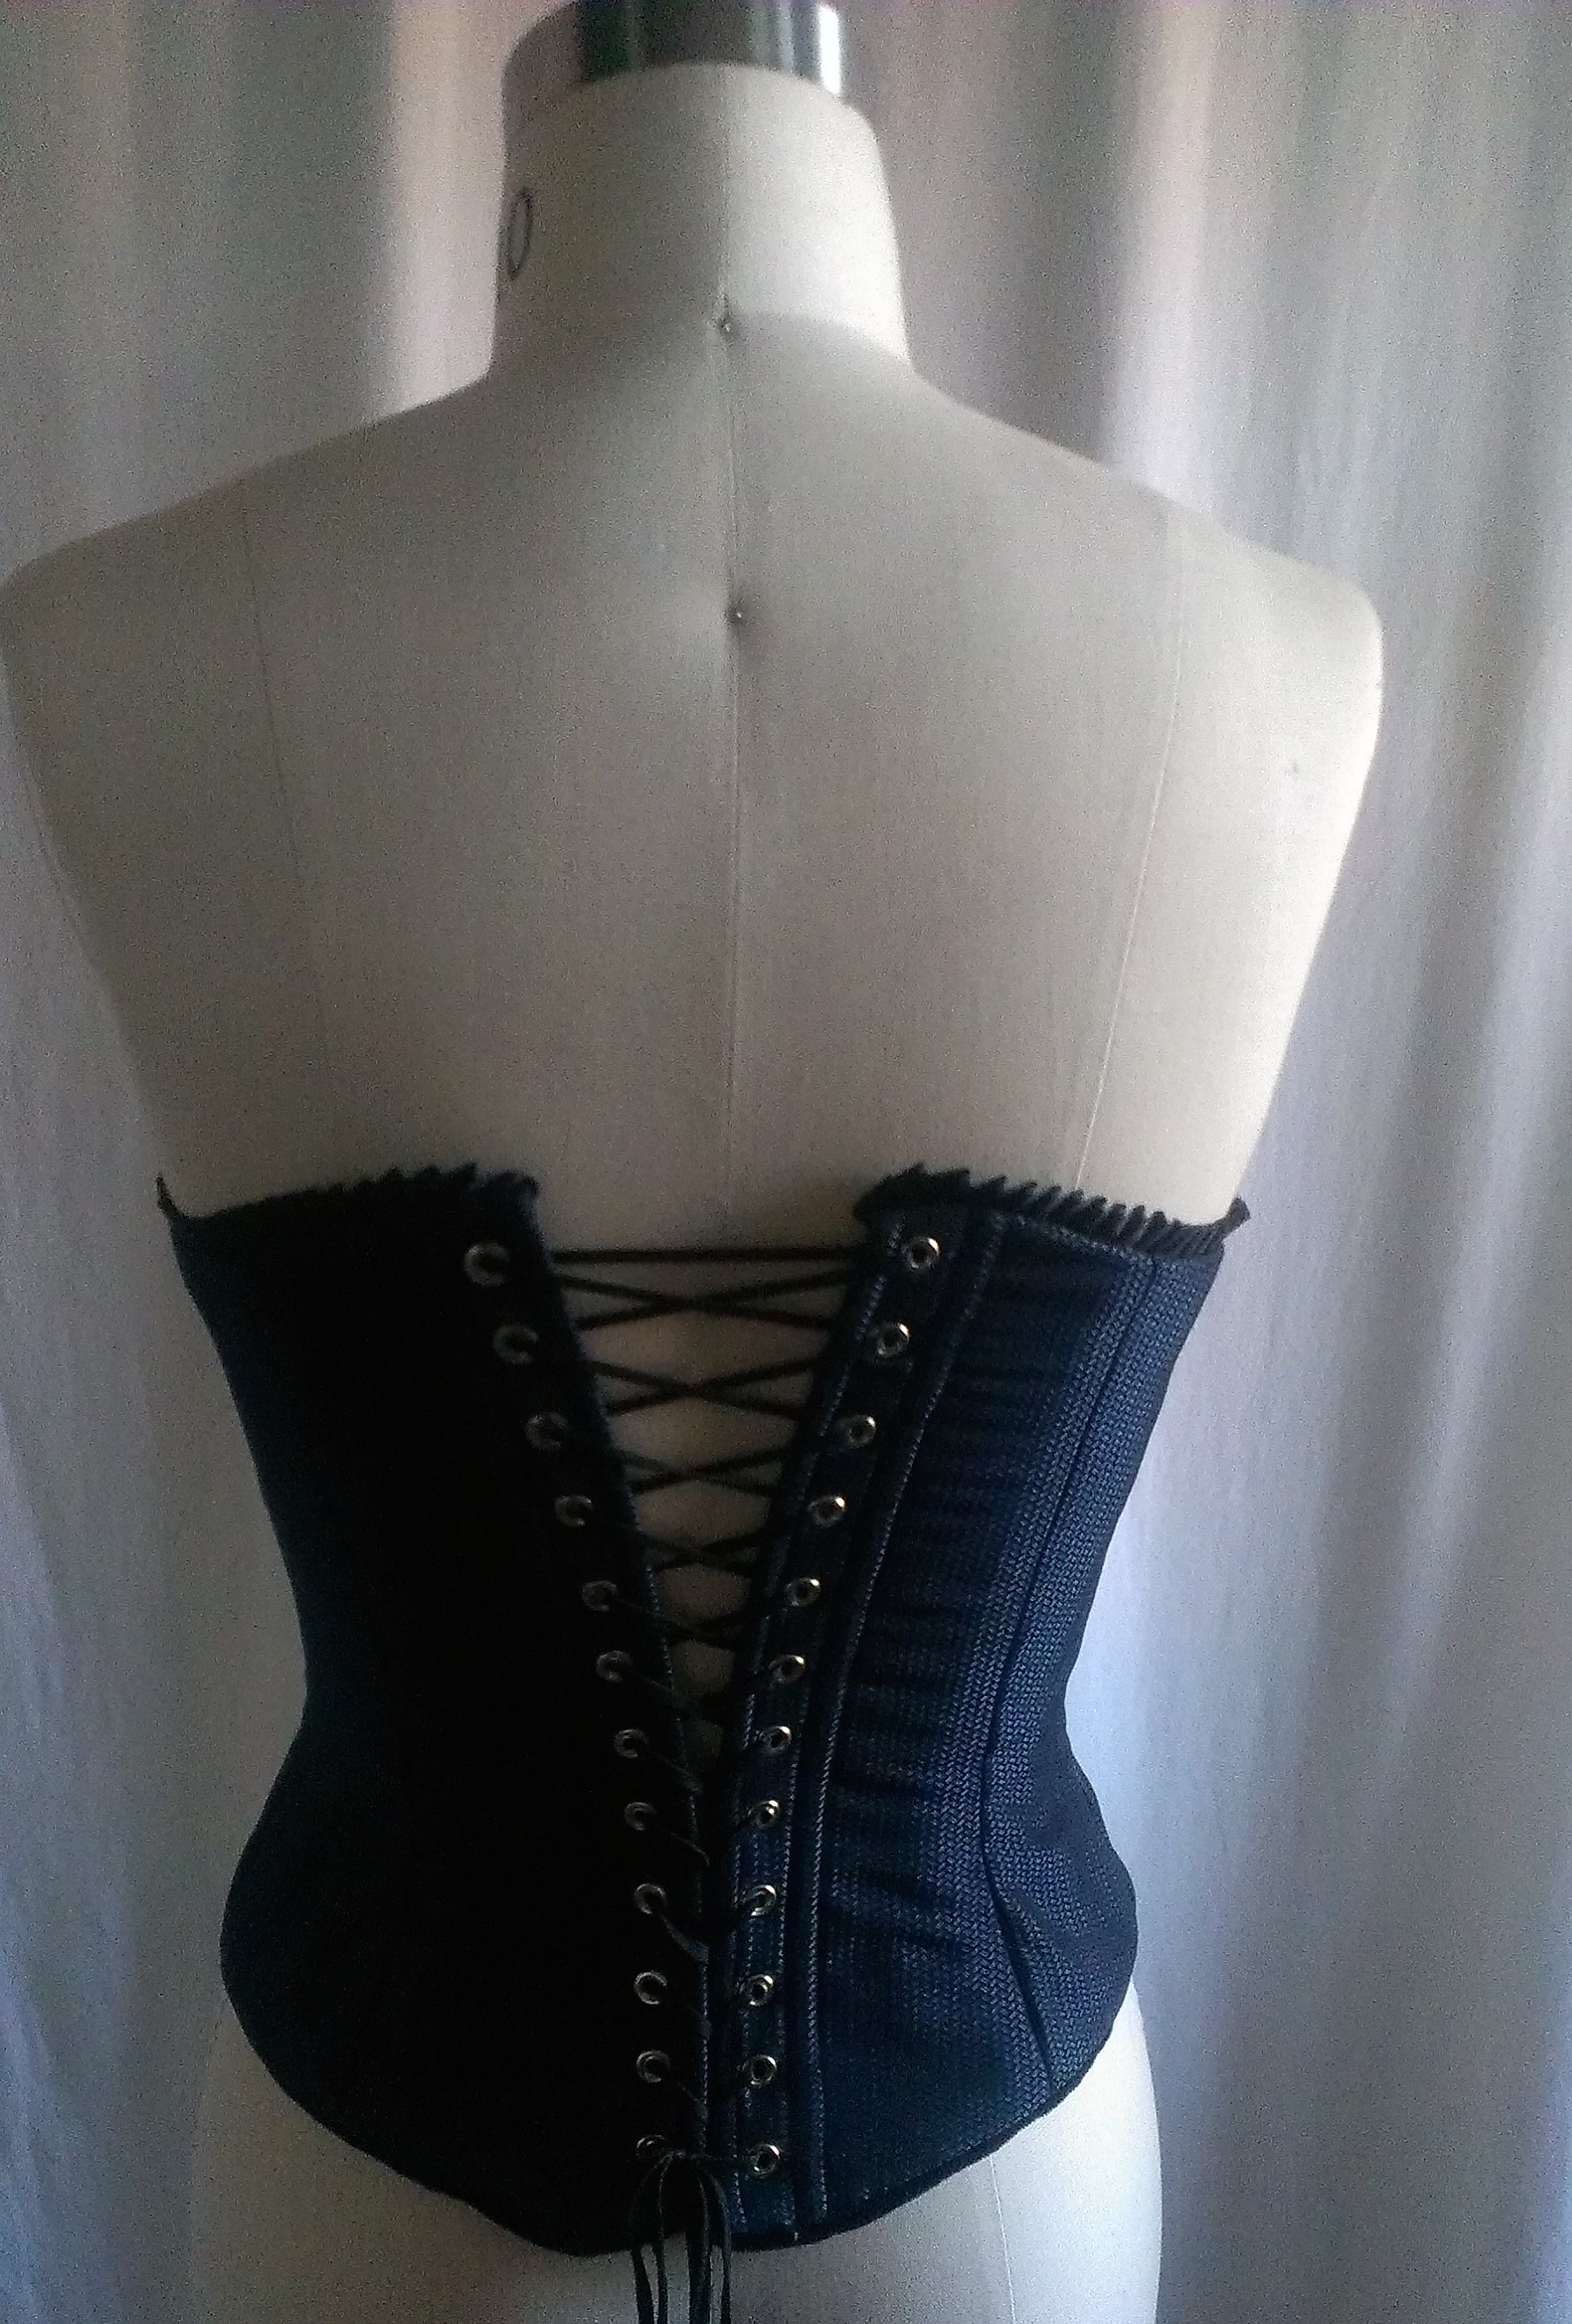
I finally completed making my very first corset, and I know this will not be my last!
Laughing Moon Mercantile pattern #100 corset made in polyester jacquard with velvet and ruffle trim.
I loved every moment of making this corset, even though it was a long and sometimes downright difficult project, it was just exciting!
I made this corset as a part of the Corset Making Class at Portland Sewing School in Portland, Oregon with instructor Jason Bray. Jason works in the costume department at Portland Opera and knows how to make a corset, or any other theatrical costume, by heart. He is amazing, and so fun to learn from!
Jason Bray in Corset Class
For this class, we used Laughing Mercantile #100 Dore and Silverado Corset pattern kit.
The kits, which were ordered in one size as needed, came with the corset, chemise and drawers patterns and sewing instructions, coutil for the inner corset construction, the busk, steel grommets, steel spiral boning, boning casing, twill tape for a waist stay 5 yards of lacing, and even an awl for setting the grommets. Everything I needed was included in the kit I ordered to make the corset besides the fashion fabric, lining and any trim I wanted to make my corset out of. I made View A, the Dore.
We made up a muslin of the pattern according to the size that we each ordered. From there, we partnered up and fitted each other’s muslin in class, taking careful consideration to fit and making markings on the muslin as needed.
After the muslin was a good fit, we transferred our newly custom fit pattern on to oak tag.
Oak Tag Pattern Pieces of Corset
This is really great because I now have a custom fit corset pattern ready to go and sew up in whatever other material I want and really to be used as a base of other designs! Love it!
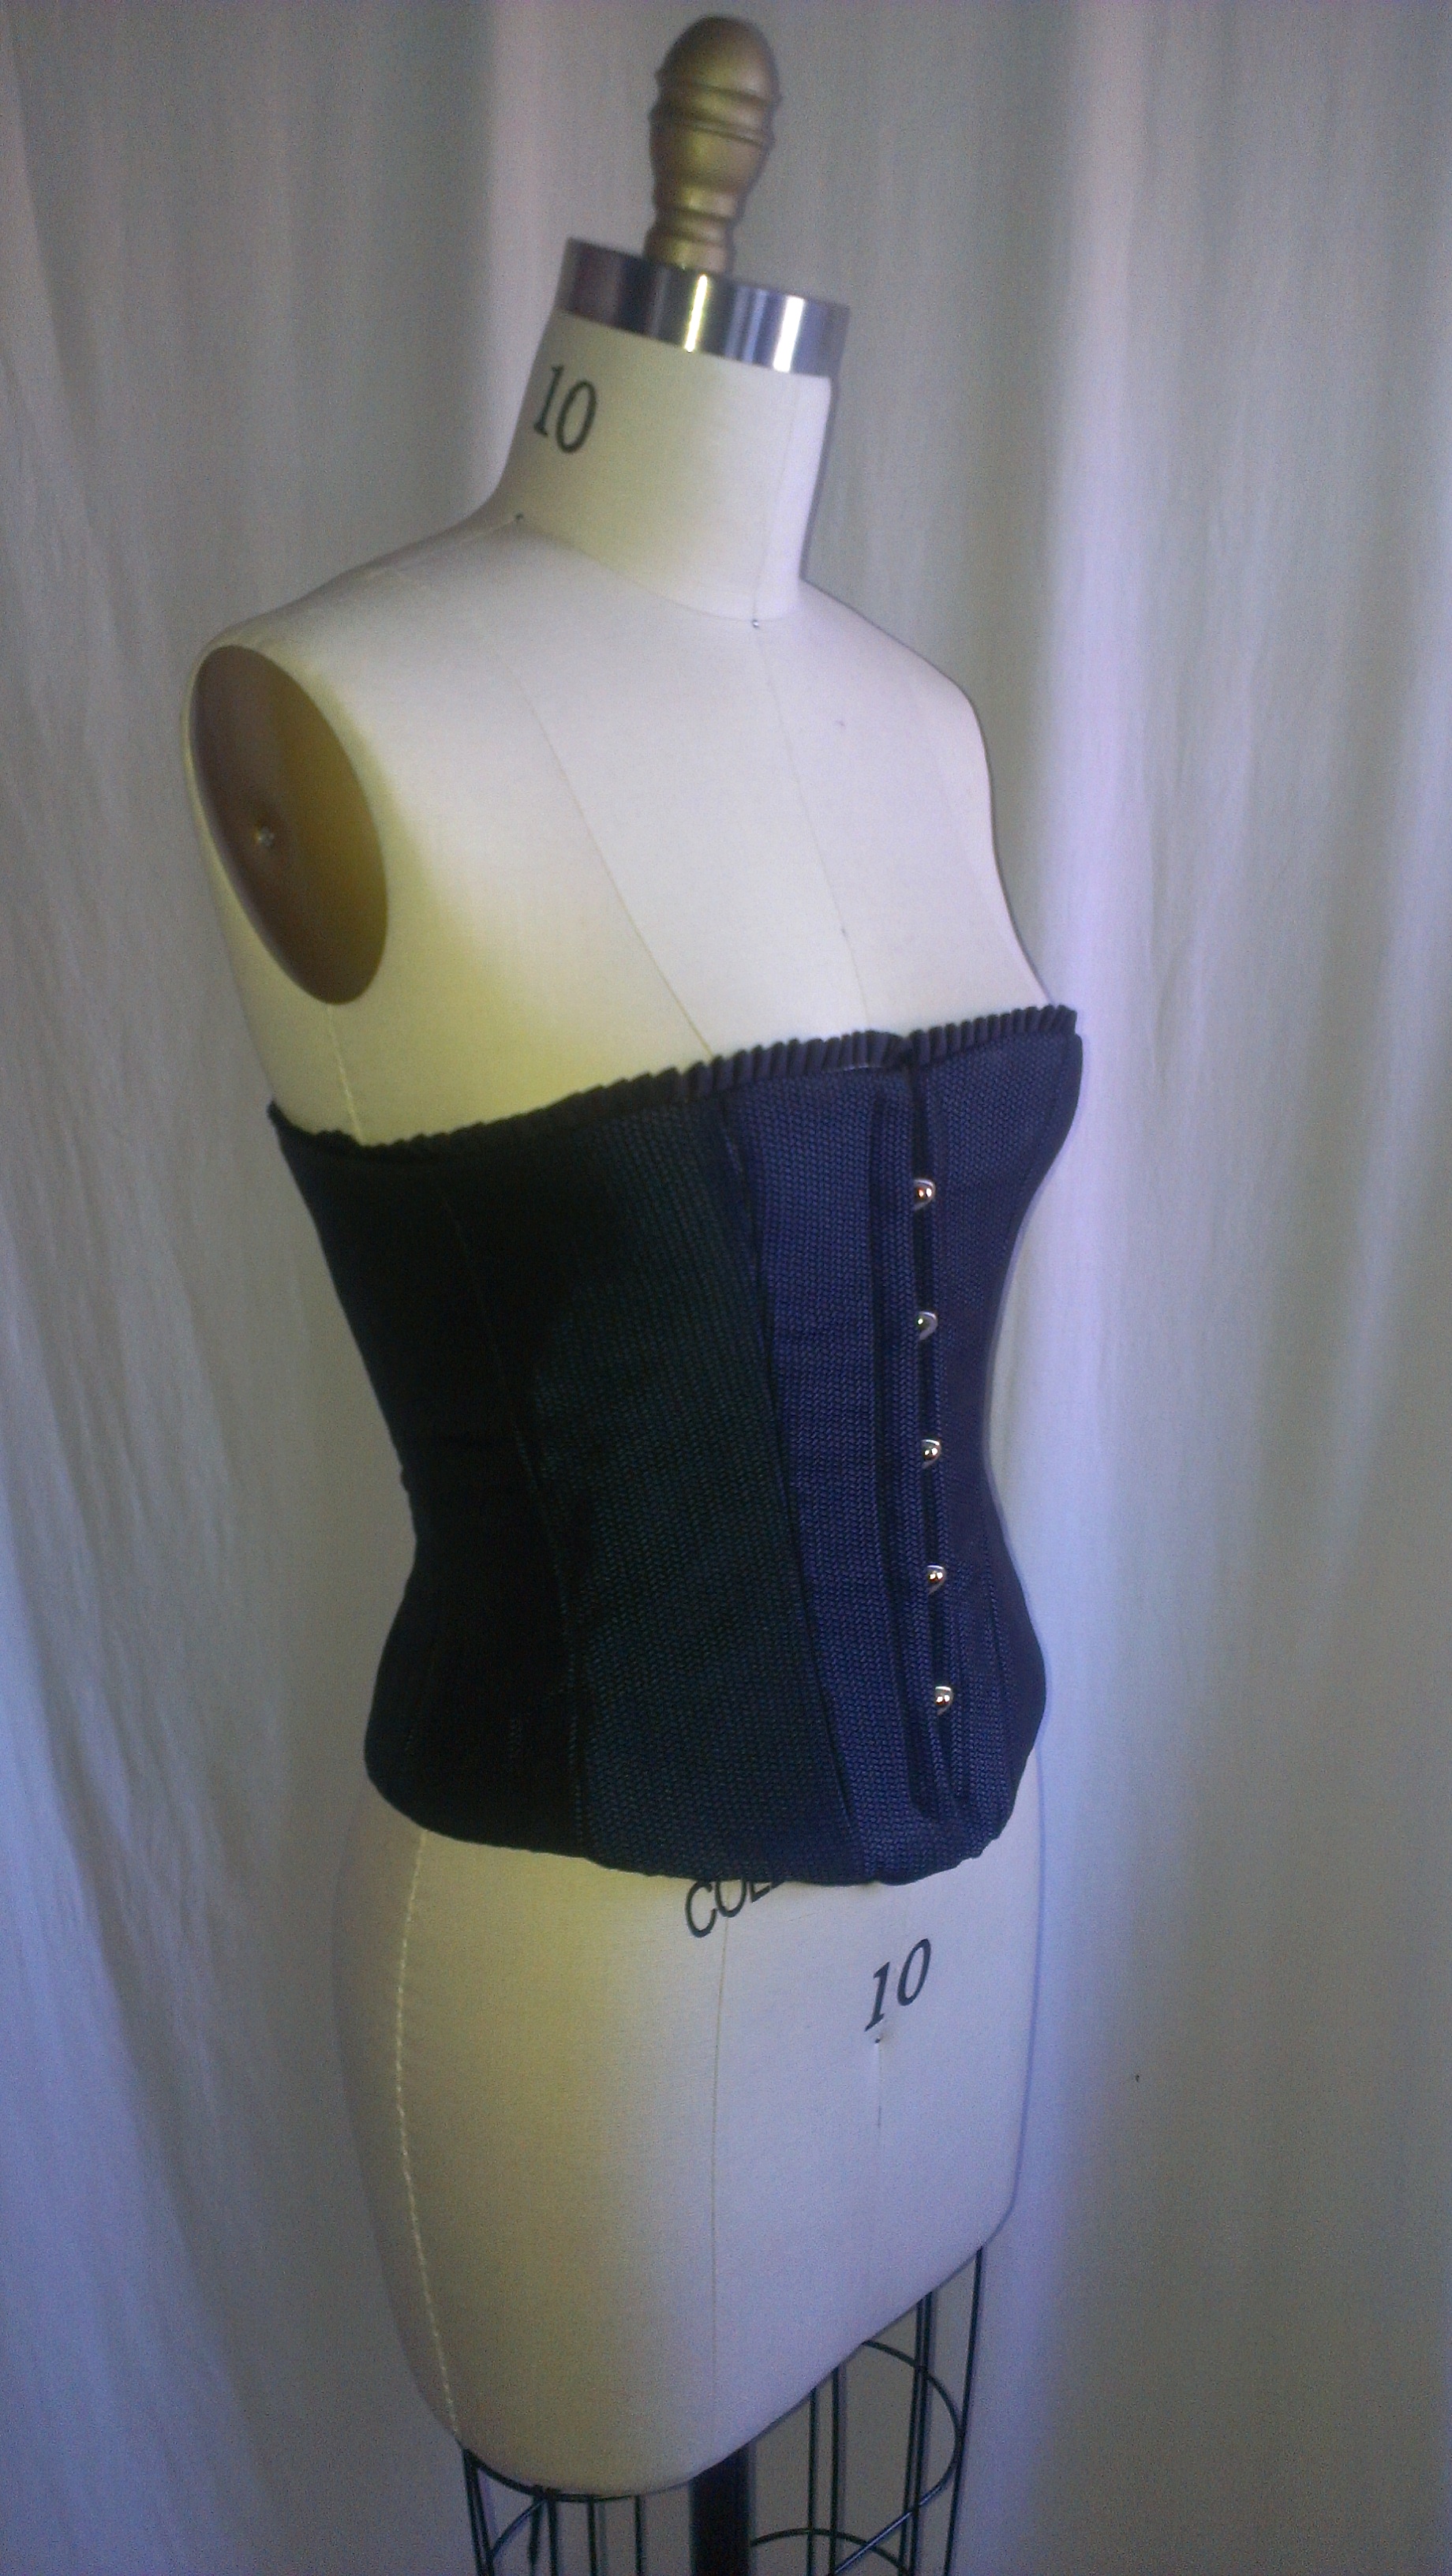
After the pattern was ready, we cut out the coutil material, as well as the fashion fabric, from our 5 pattern pieces. I chose a blue and black polyester jacquard material for the corset and Ambiance bemberg rayon lining. I cut my lining later in the process.
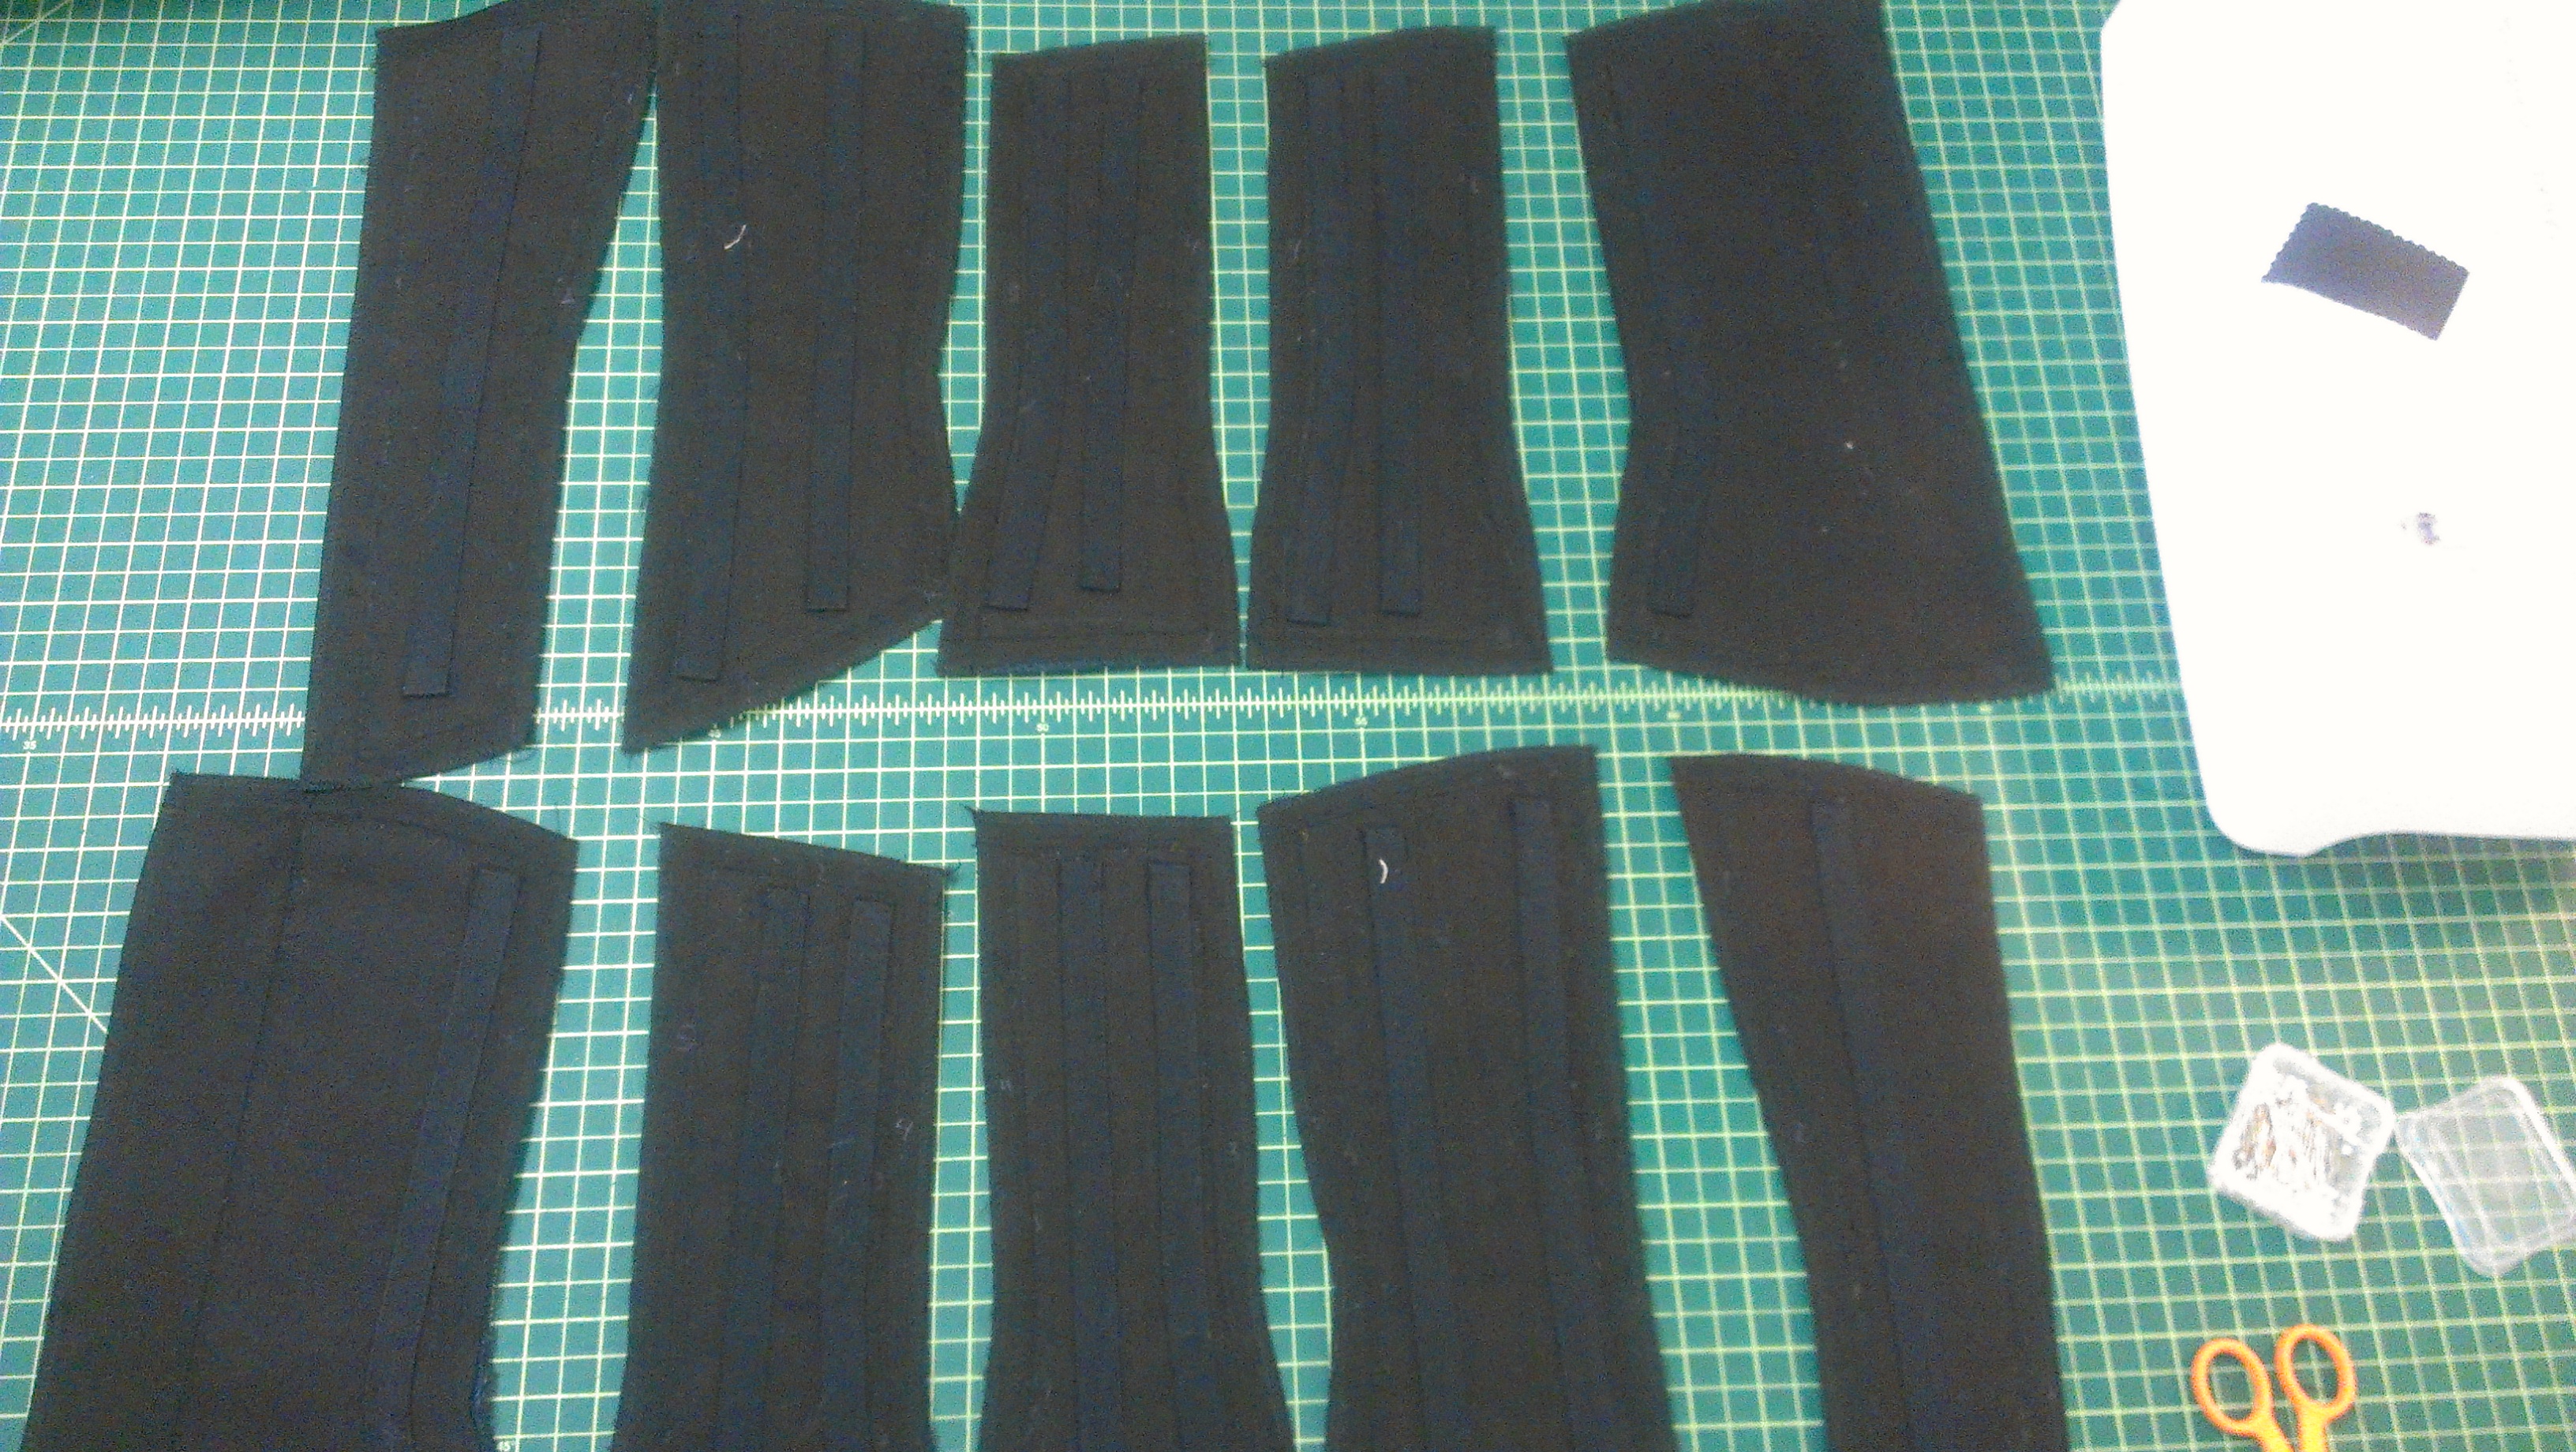
corset cut out in coutil material with boning casings placed
I serged the raw edges of my coutil, fashion fabric and lining pieces before sewing as both tended to fray easily. This step of serging the raw edges was quite helpful and made for a better interior of the corset. We carefully planned the placement of each boning (I think I used about 14 bones in all!) and then sewed the narrow boning casing to the coutil, leaving the top edge of the casing open to later insert the boning. Four of the steel bonings were used at the both sides of the grommets to support the openings here.
We then sewed a baby flannel backing to the interior of the coutil pieces to give some comfort between the boning casings and the inside of the tight fitting garment. This makes the corset look a bit more padded than I thought it would, and would not work for all fabrics I may want to make a corset out of, but it worked for this one.
Then it was time to insert the busk in the front. This step took some time as we had to carefully mark the placement and openings for the eye parts of the busk to stick out, then perfect placement of the coordinating nob part of the busk that fits into the eye parts as a front closure to the corset.
After the front was finished, we moved on to setting the grommets. This also was a very precise process, and sometimes downright difficult part of the constructions.Those grommets were hard to set!
I hand-sewed the velvet cording and the grosgrain ruffled trims to the bottom and top edges of the corset before hand sewing the lining to the corset. This hand-sewing took a long time, but was necessary for control of the desired outcome of trim and fabric, and would never have worked sewing with the sewing machine. I have actually come to enjoy the process of hand sewing in most cases and can get though it relatively quickly. Close-up photos of these details will be added later.
I really enjoyed making this corset! I aspire to make more corsets such as lace, velvet, brocade, embellished and embroidered fabrics, and even incorporate them into dress construction or making really good quality costumes if the occasion arises. Corsets are beautiful!
I, of course, have inspiration photos of gorgeous corsets to share!
So, if you know anyone who wants or needs a custom corset, call me!
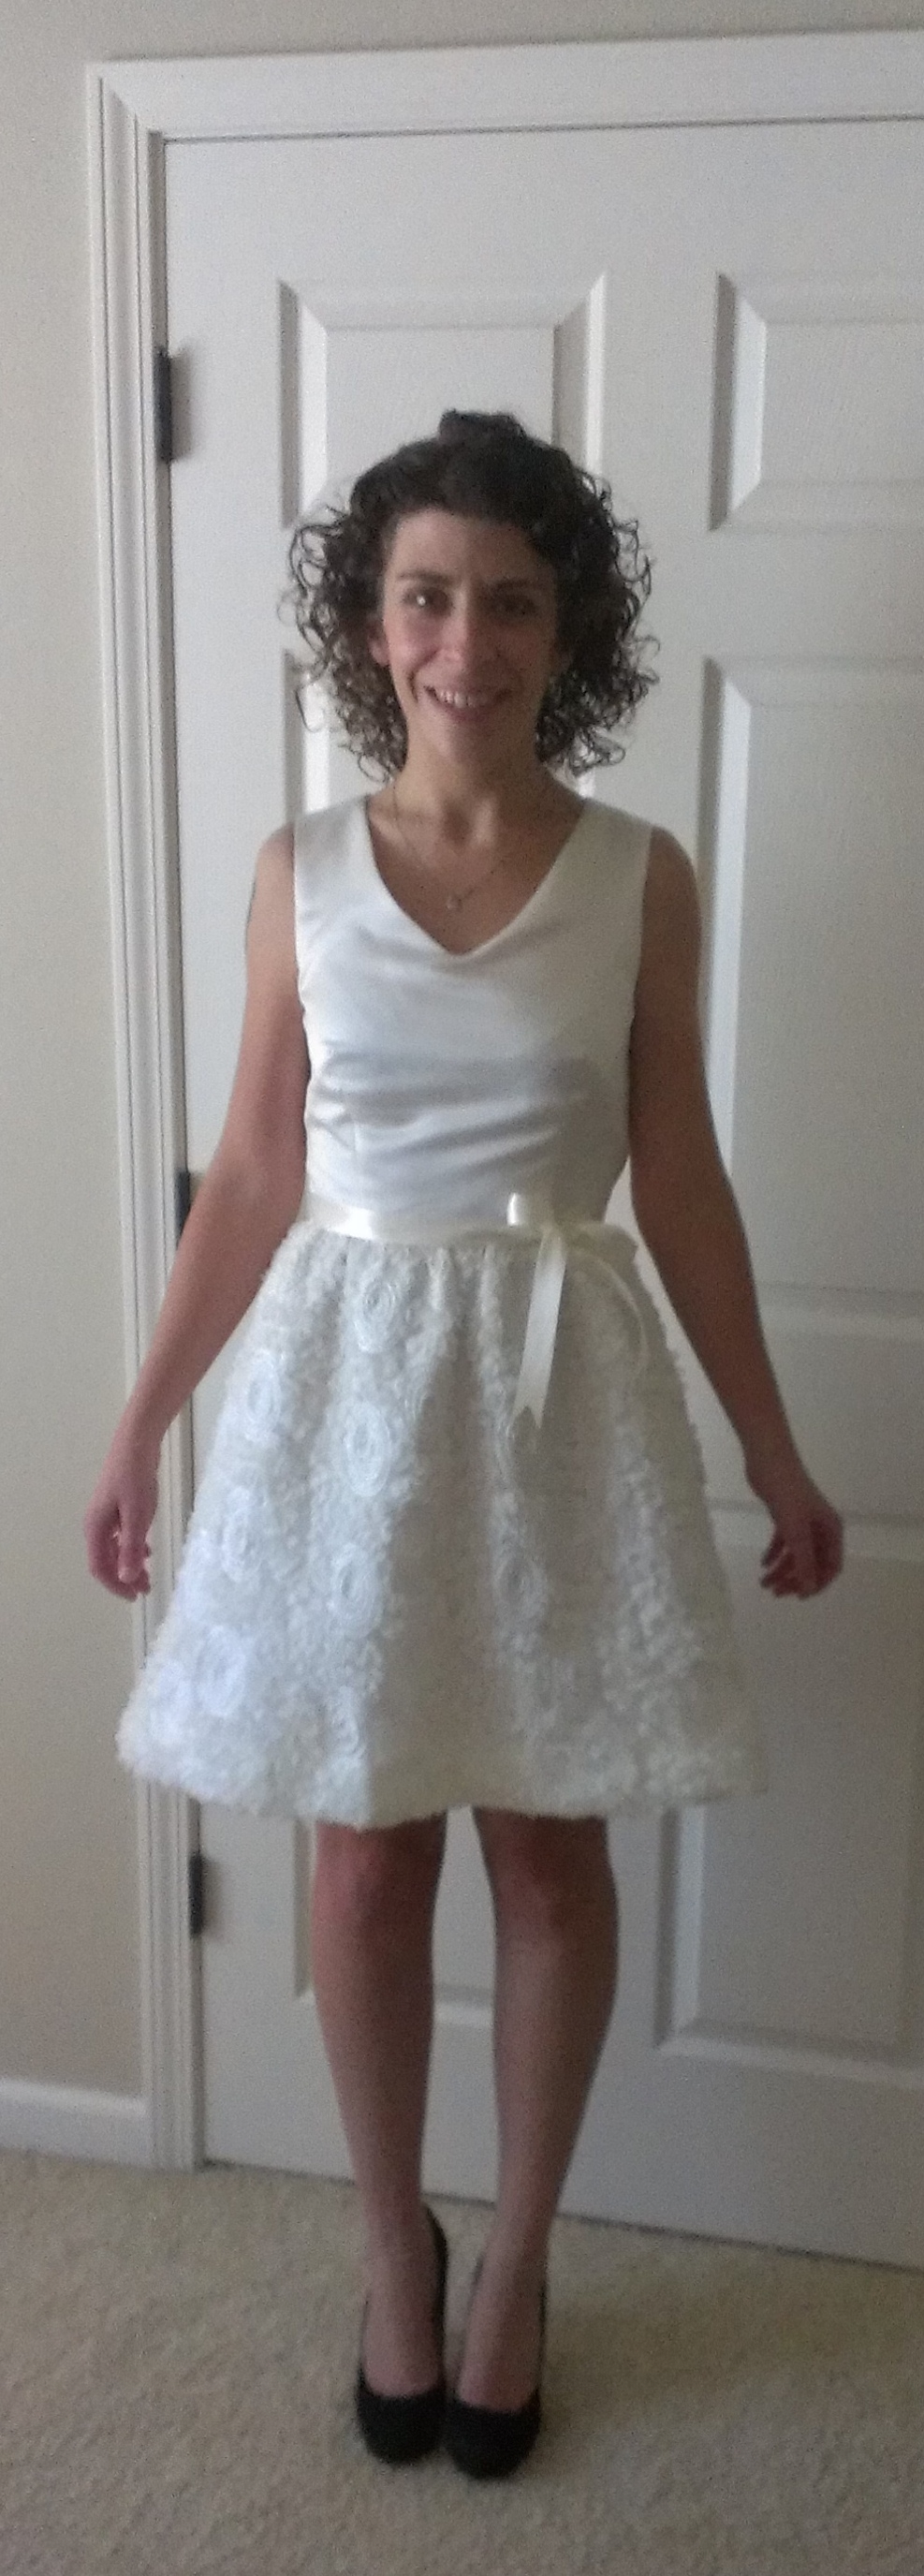
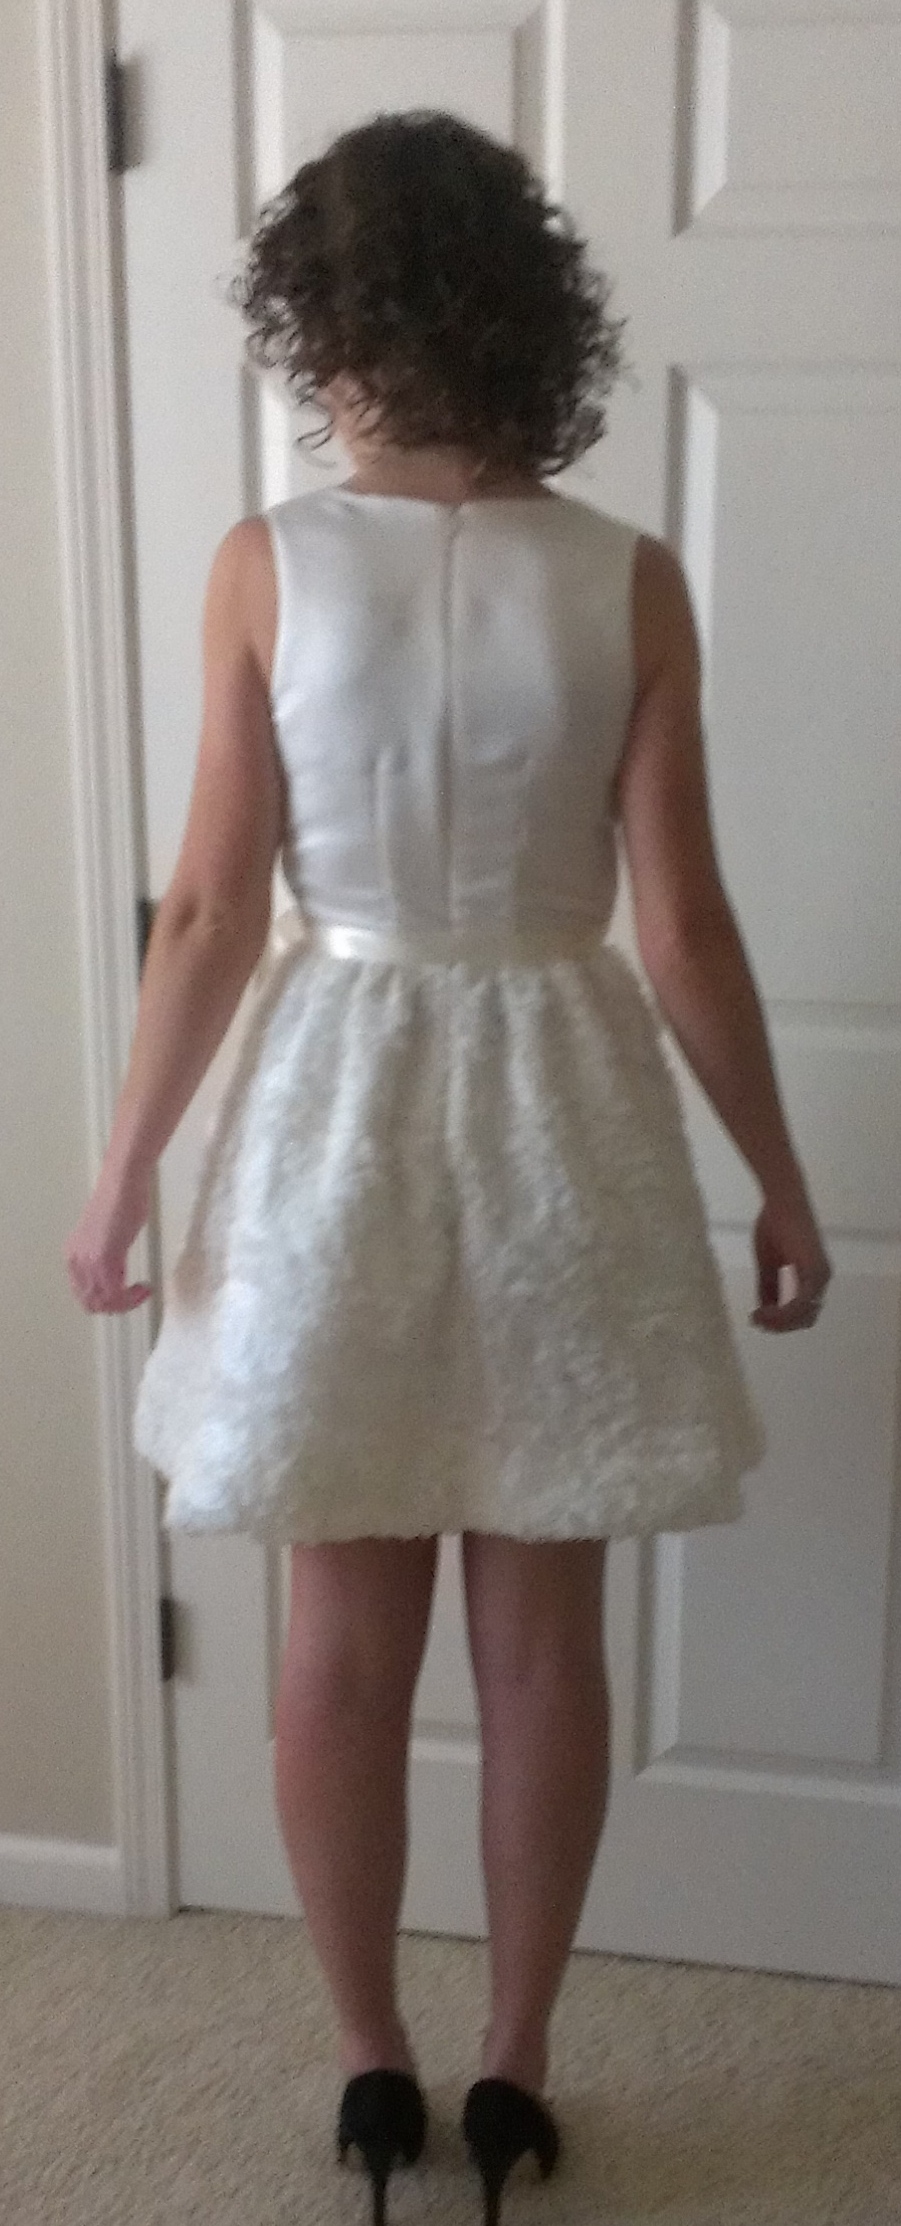
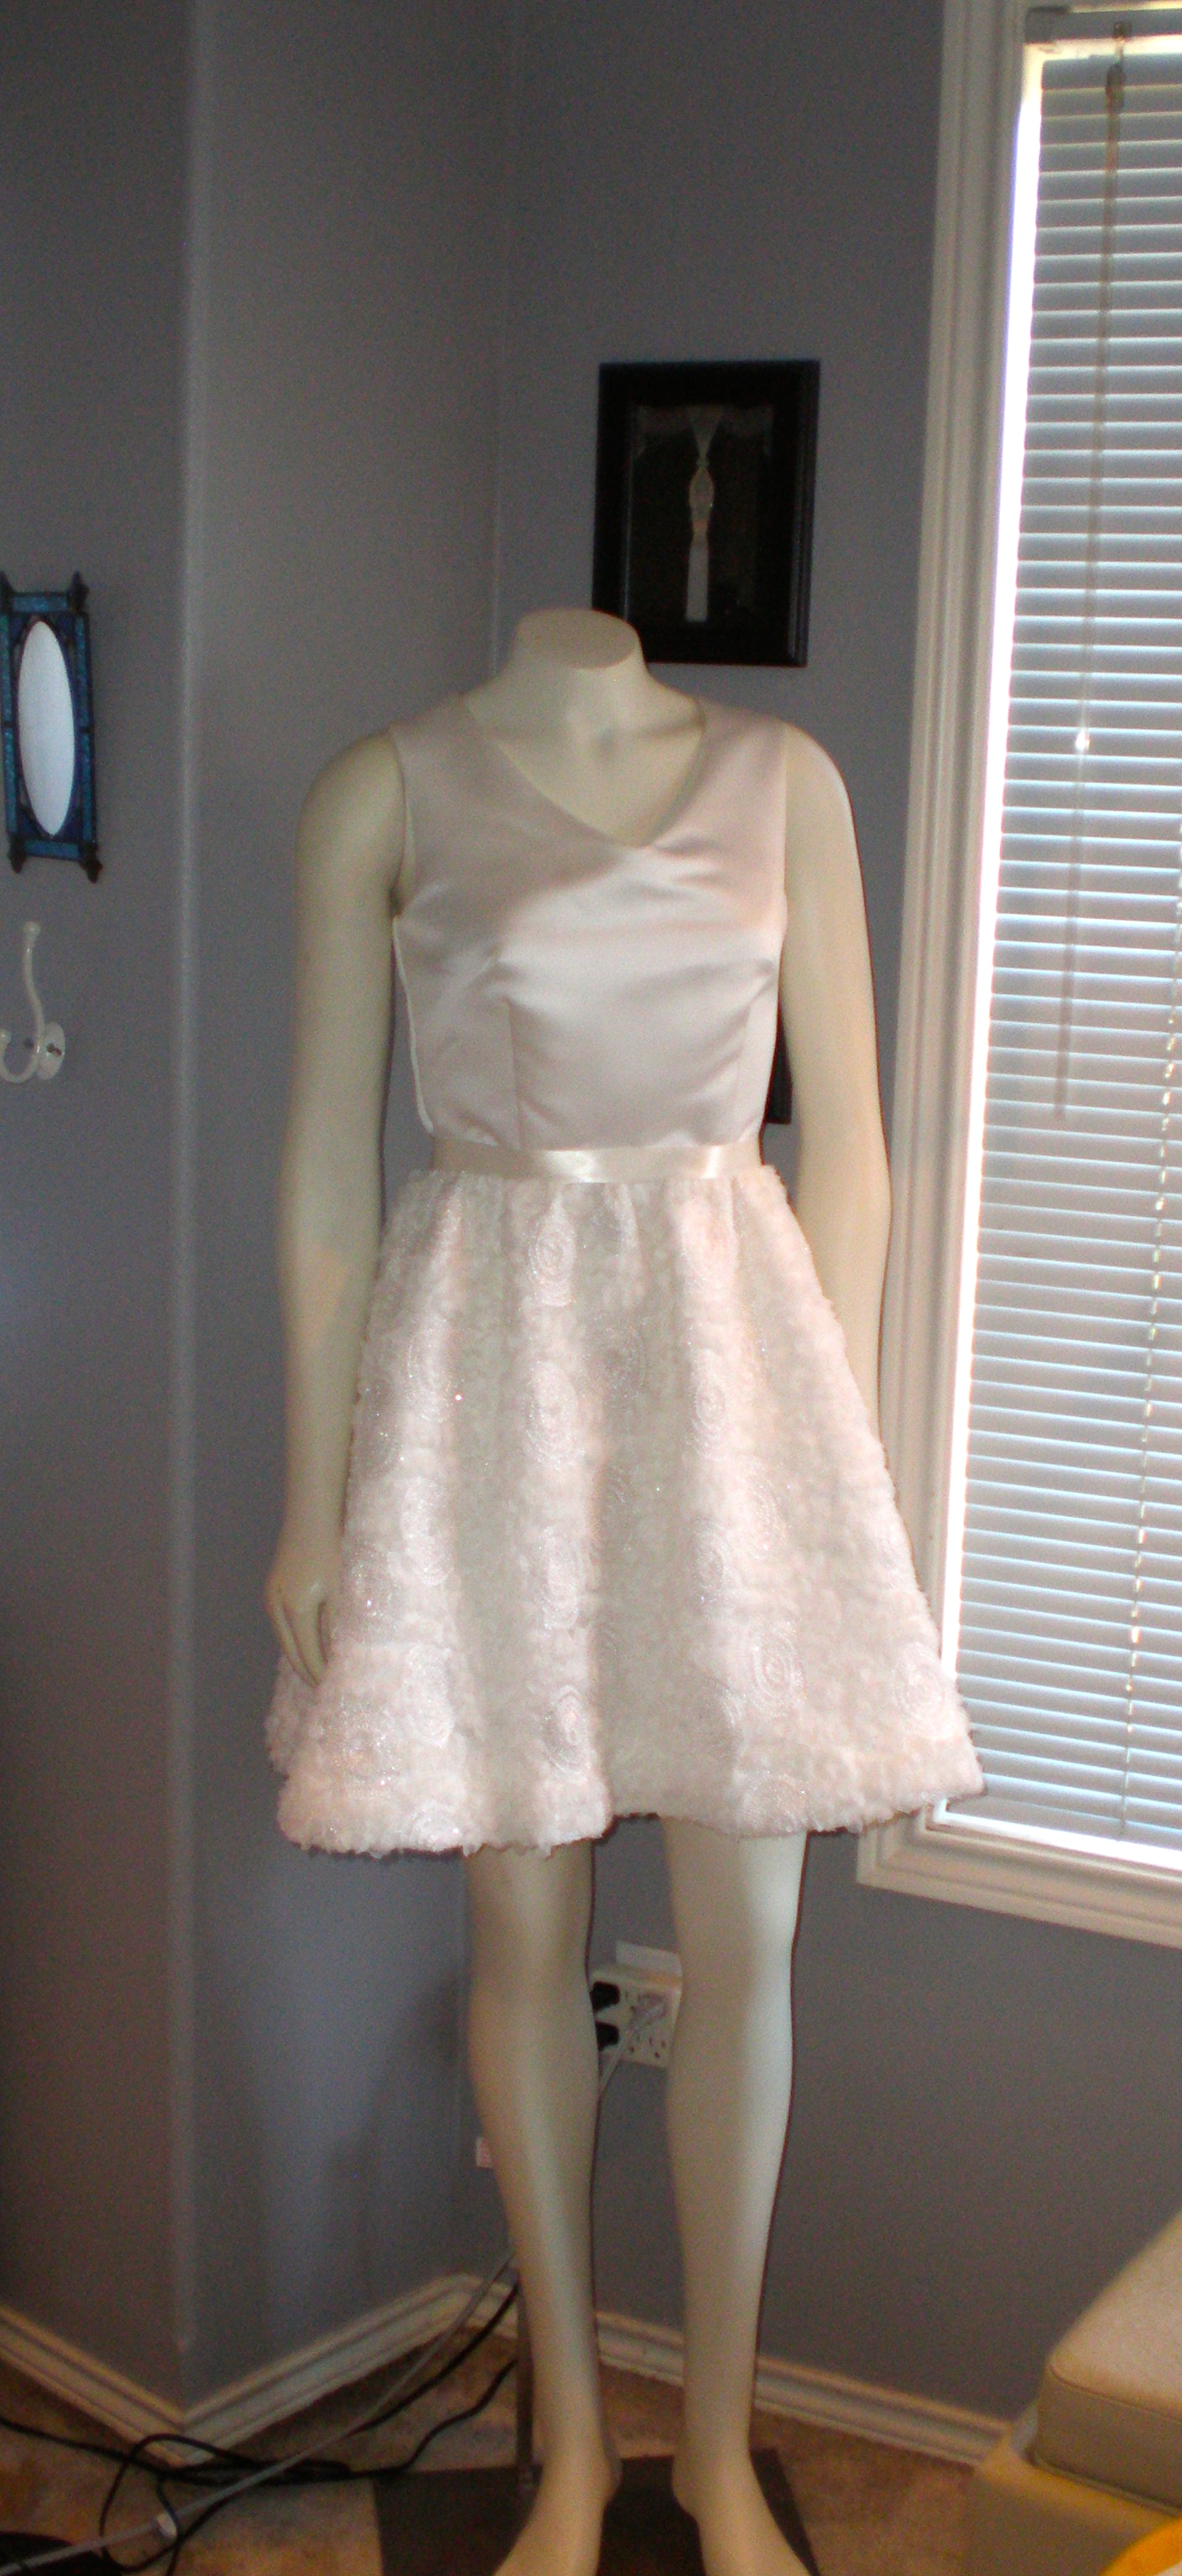
Katrina and Duncan got married! Yayyyyy!!!! They got engaged, then 6 weeks later, decided to tie the knot in a civil ceremony at the courthouse. She was pressed to find a wedding dress quickly, and thought of me and how fast I can churn out a nice dress.
She had a dress style in mind. She wanted a fit and flare short dress (this is wedding #2 for her, so this was an opportunity to wear an alternative wedding dress), nothing too fancy, but appropriate for the occasion. At first, I copied a really casual knit dress that she had in her wardrobe that she liked the fit, and traced out a new pattern, but then as we talked about materials and what she was looking for, a commercial pattern was a better choice as I knew that there was plenty of variety of patterns to choose from to make a nice little dress. We looked through pattern books and found this New Look pattern to fit the bill perfectly:
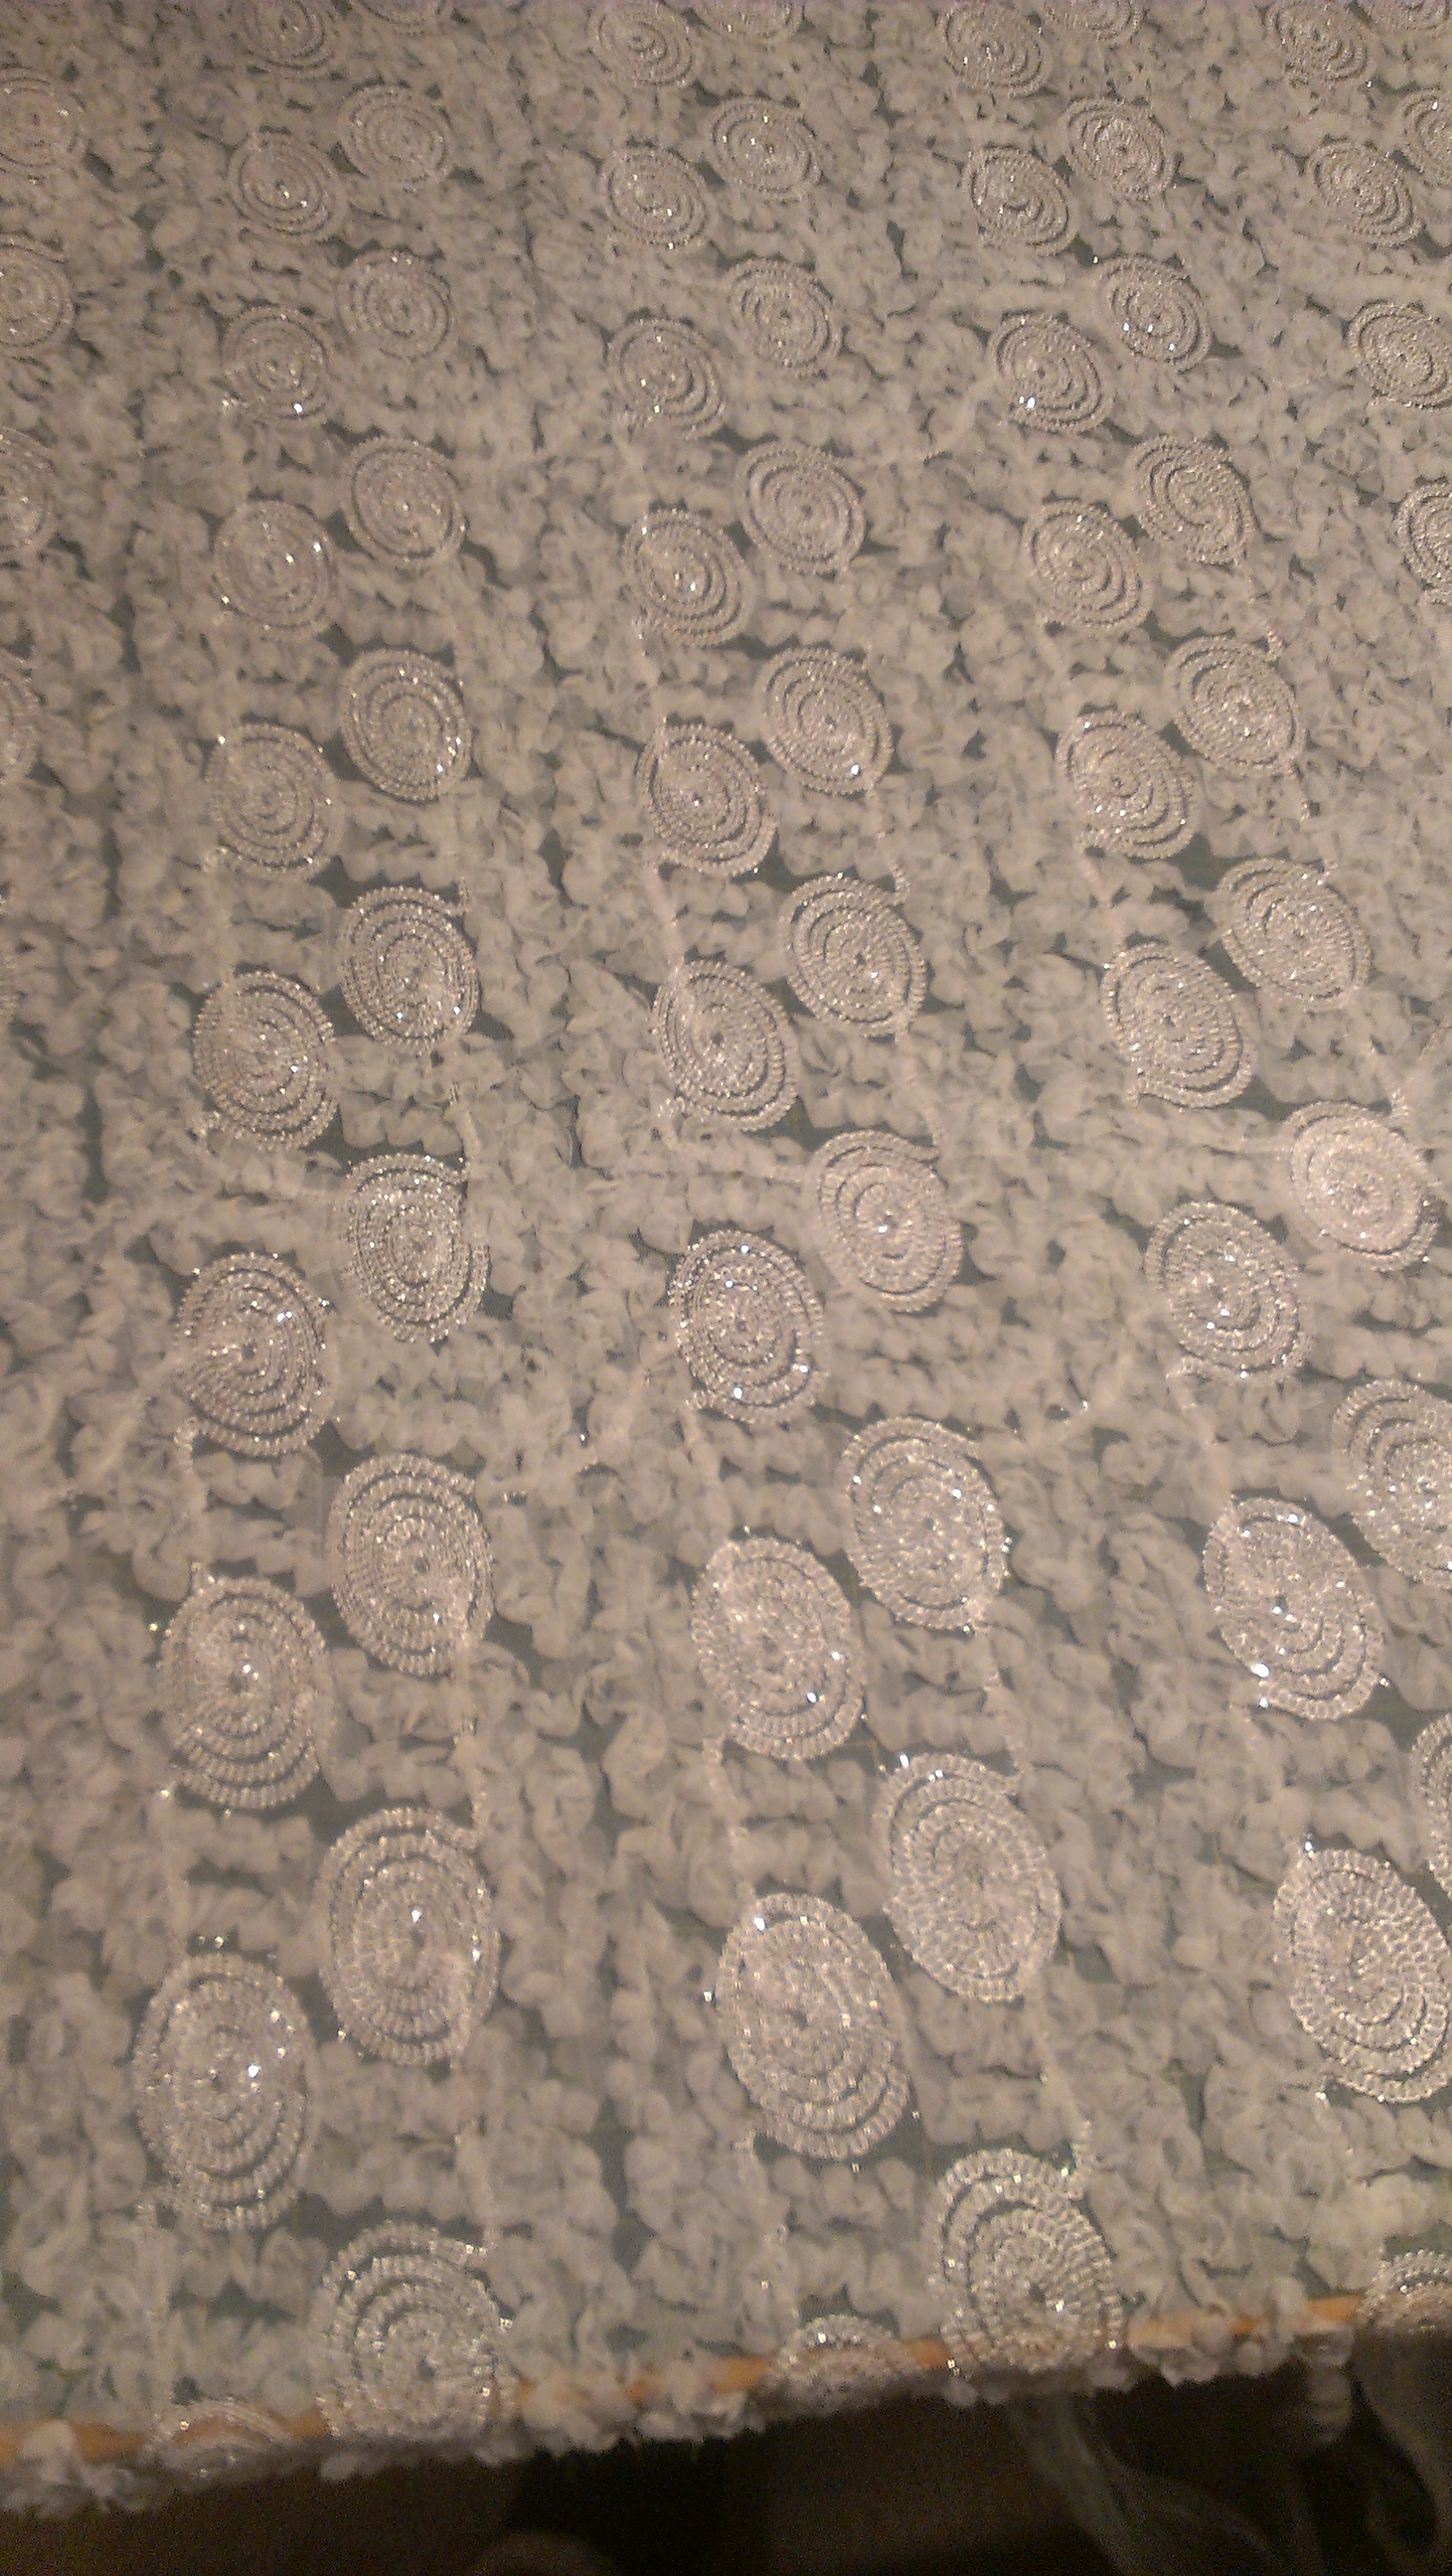
So we went shopping, but not at a bridal shop, but the fabric store. Fabric Depot in Portland, Oregon is the best store in town for bridal and special occasion fabrics. She fell in love with this lovely embellished ruffled tulle fabric:
This fabric was perfect for the skirt! She wanted a solid top, so we found a perfectly matching off white satin to match.
The total cost of materials, including lining and a zipper, was about $30 (I had a coupon!). Awesome!!!!!
We didn’t have a lot of time to make this dress (one week actually), so I got to work immediately to make a muslin. I was done with tracing out the pattern, the cutting out and sewing the muslin within 2 hours, so the same day that we bought the fabric, I went over to her house to fit the muslin.
muslin done in 2 hours!
She is tiny on the top, so I did have to take a good amount on the bodice back and front darts of the dress, but nothing too crazy. After making the fit changes to the original pattern, I cut out the fashion materials and lining. The original pattern does not actually have a lining included with the instructions, just facings at the neckline and bias binding at the armholes, but we needed a lining for this dress. Not a problem, I know how to line a dress.
So, within 5 days, I had the dress nearly done and just wanted to fit her before I put in the zipper and hem.
cute, but something is not 100% right with the fit of the bodice
The dress looked adorable on her, although I was not really happy with how the bodice fit. It bubbled out a bit at the top of the V neckline and stuck out. I must have done something wrong with the fit changes and maybe over compensated for something without adding somewhere else.
Well, she was OK and happy with it, and we were essentially out of time to make any changes, so we went with what it was. If I had more time, I would have remade the bodice.
So here is the finished dress on my mannequin:
added a satin ribbon at the waist
Not too shabby for a quick dress custom made in less than a week!
I found this dress on Pinterest that is a similar look, Ted Baker London selling at Nordstrom for $675!:
‘Flawra’ Rosette Detail Fit & Flare Dress
She was so happy, pretty and cute in her new dress for her wedding, and splurged on a fabulous pair of blue shoes to wear! Success!!!!
Congratulations Katrina and Duncan and best wishes for a long and happy marriage!
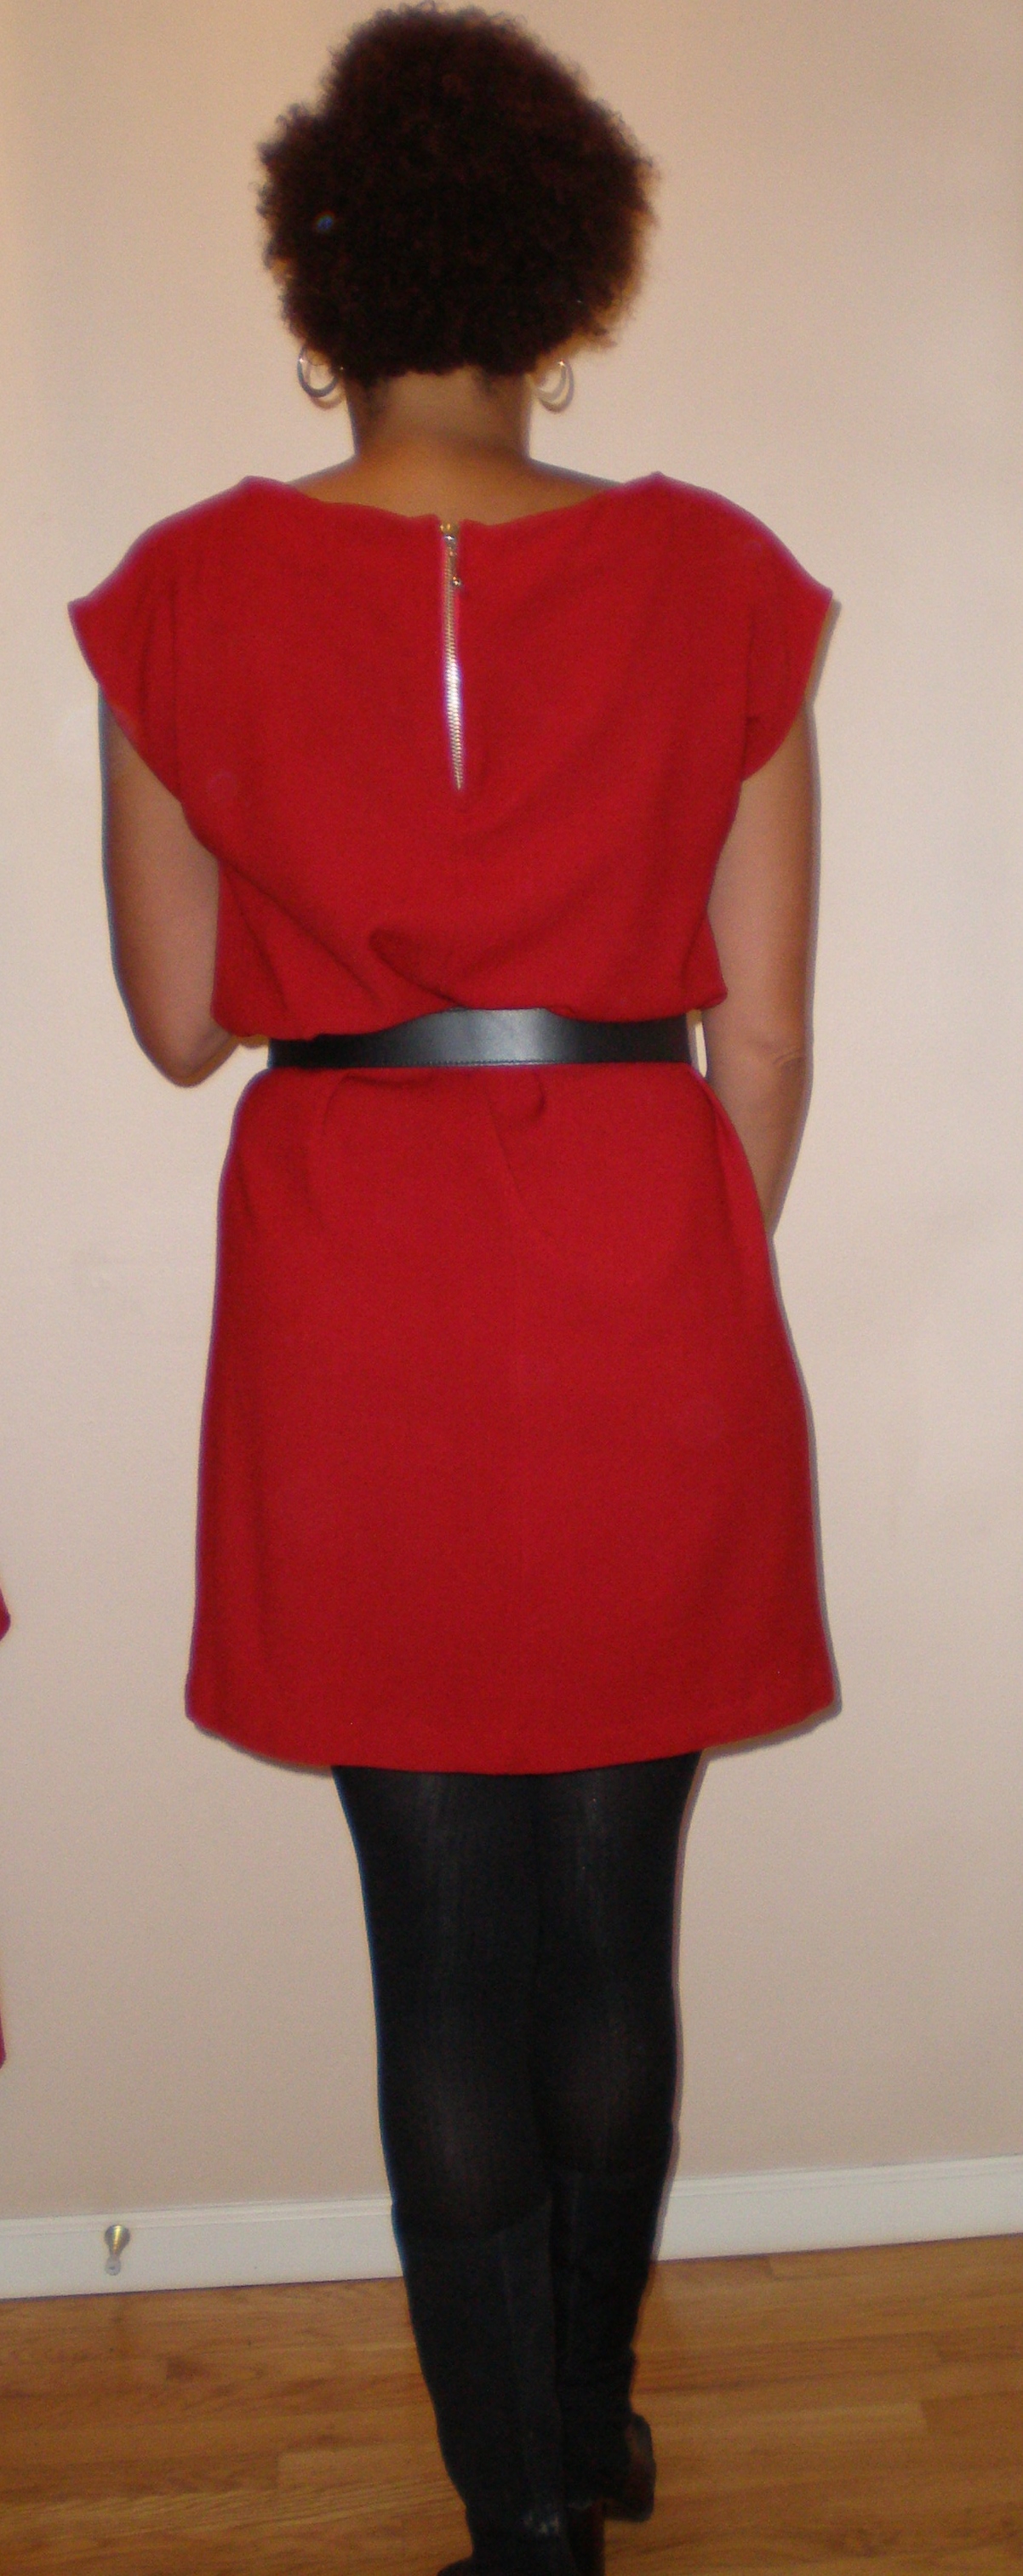
I have no idea why I left this dress project left unfinished for a year. WHY!!!!????
made from Butterick 5211 pattern
This dress was easy to make and easy to wear. I have no idea why I waited so long to finish it!
As I recall, the pattern was a pretty easy one to follow. It is out of print now, but I’m sure still easy to track down. I made View B. It is just a front and back pattern piece. unlined, has a faced neckline and a back seam. A self belt is optional as well.
I used a nice dress weight wool crepe in red bought from Mill End in Milwaukie, OR. The metal zipper is from Fabric Depot in Portland.
If I make this again, I’d probably line it, just to make a better dress, and avoid wearing a slip underneath. However, in a lighter weight material, like silk or linen, a lining would not be necessary.
This dress could be made up nicely in many fabric types, and possibly an elastic waist addition for more waist shaping.
Here are some similar dress looks that could be easily made from this pattern:
I am happy with my new dress and glad that I finally finished it!
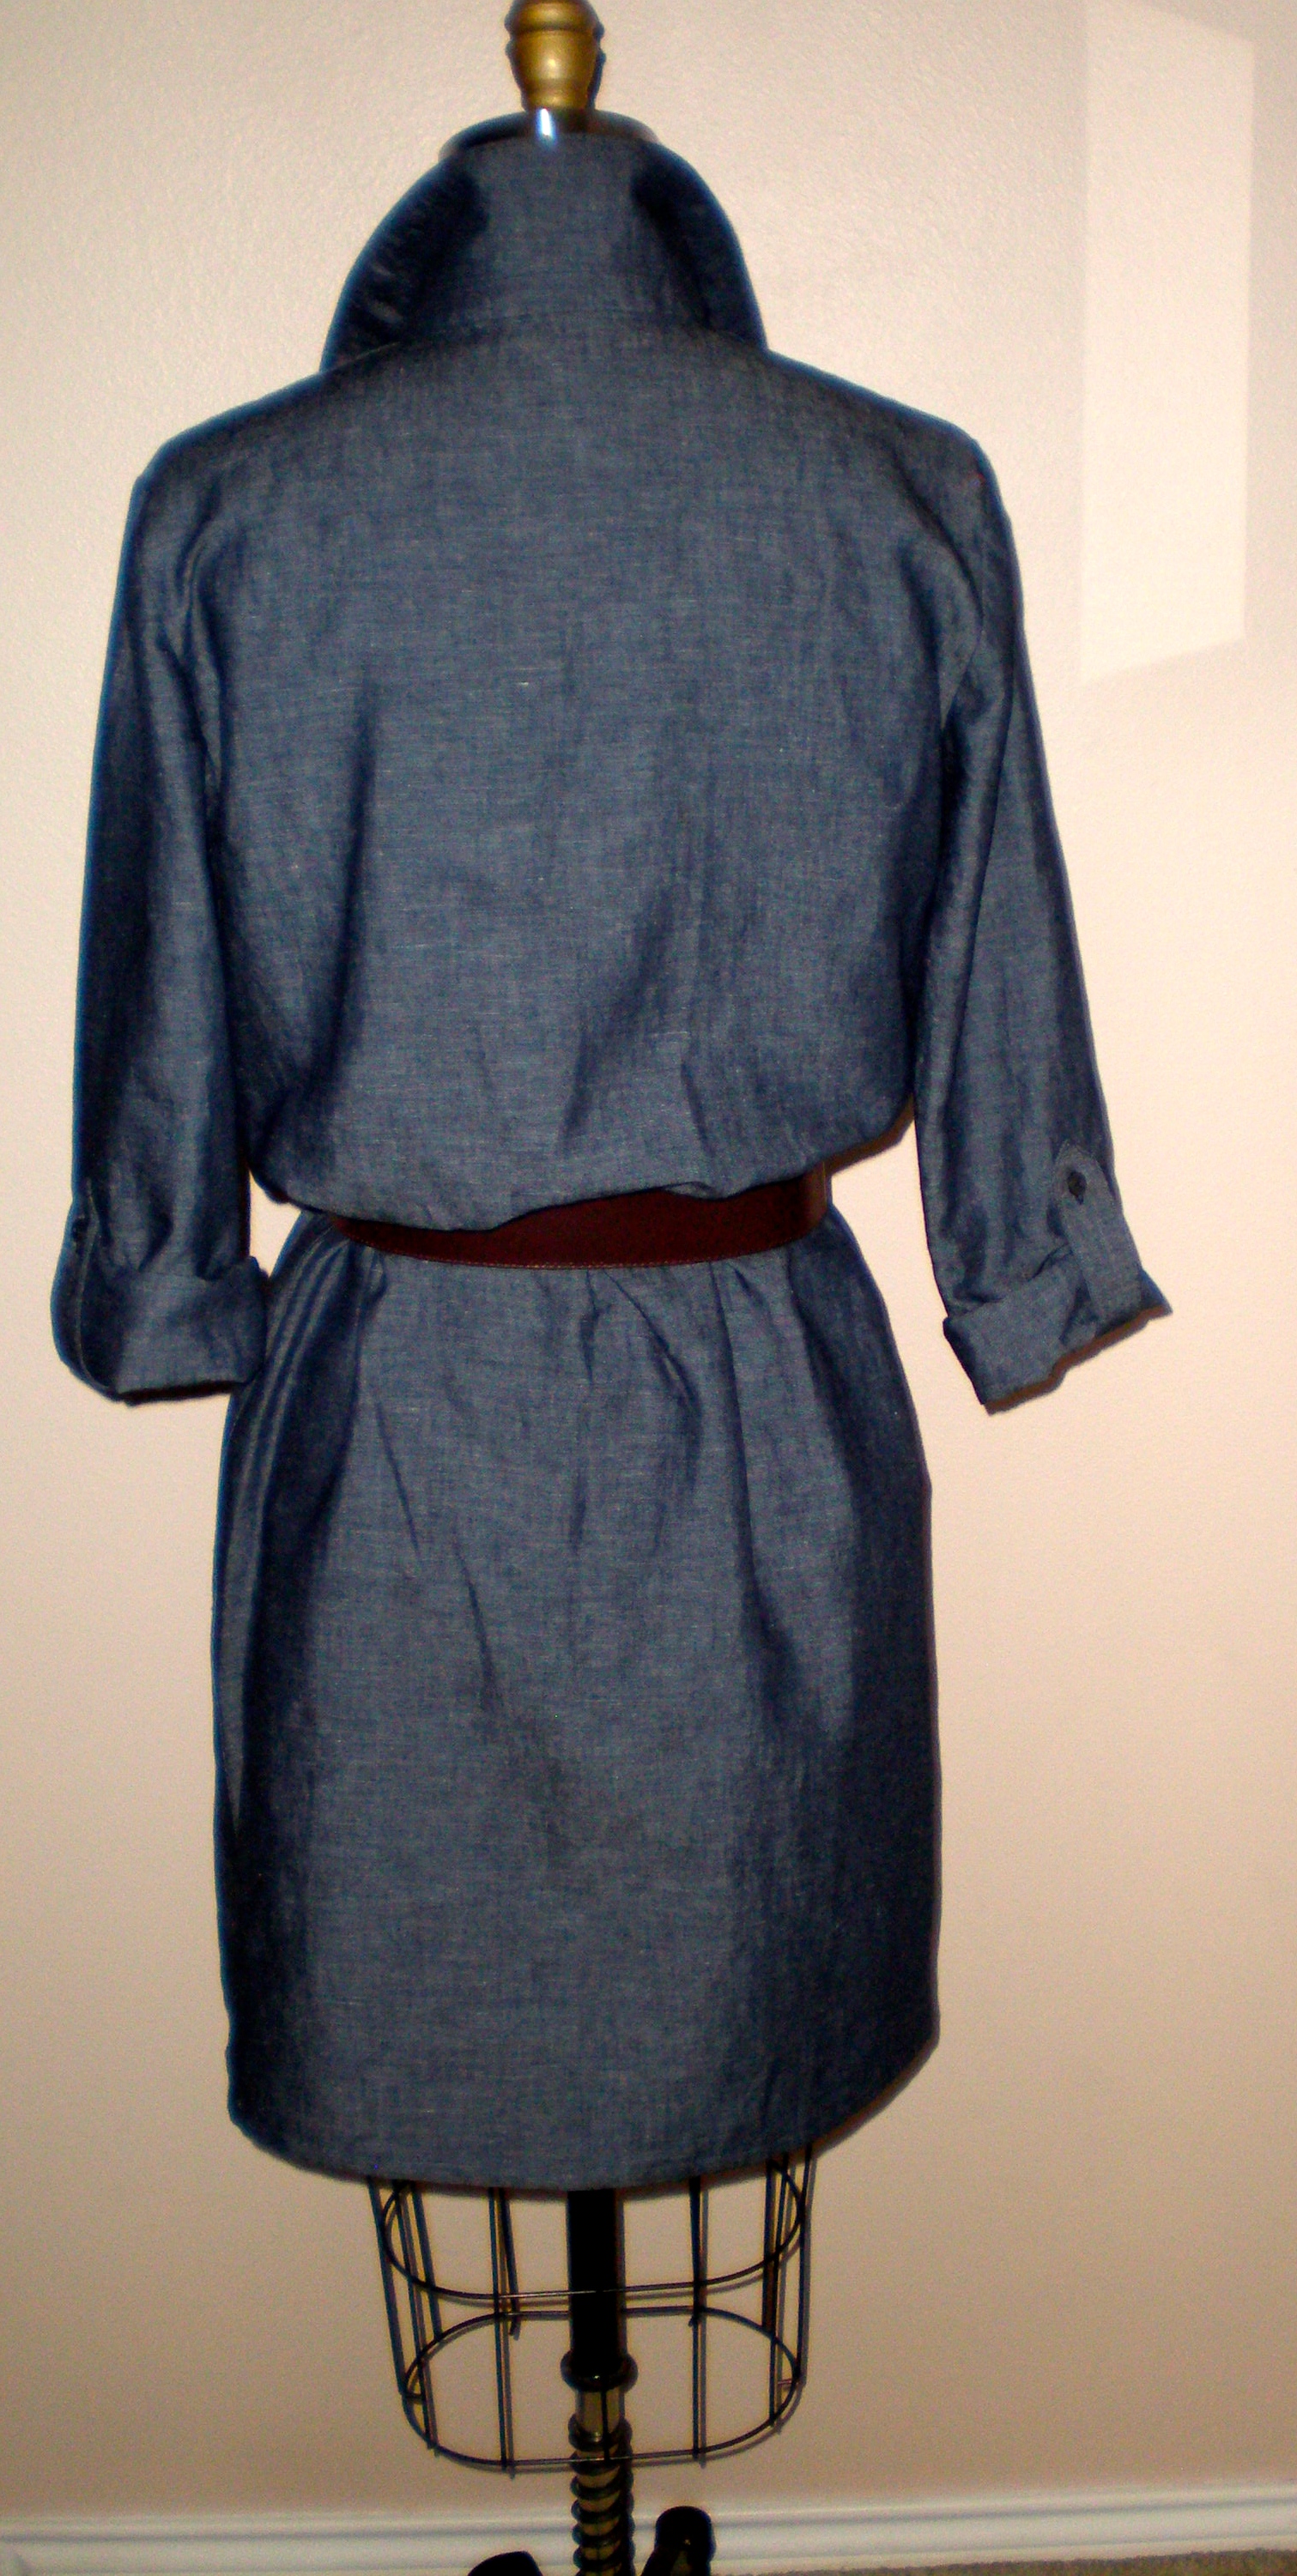
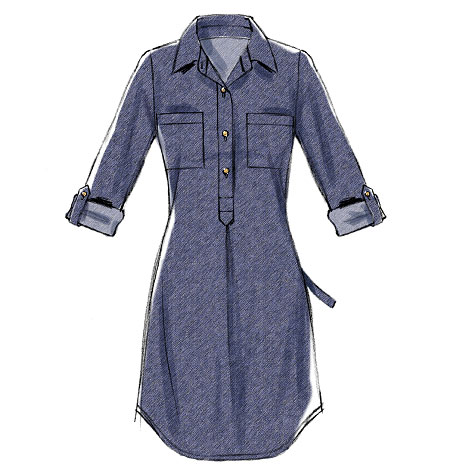
I am excited to have finished this shirtdress made of 100% cotton dark wash chambray so that I can wear it for the Fall and beyond.
Chambray shirtdress with 1/2 front placket and button tabbed sleeves
I really like the ease of wearing denim as well as the comfort of a dress, so this light weight denim a.k.a. chambray is a perfect combination.
back of shirtdress
I plan to wear this dress with a belt, boots & tights, maybe a scarf or fun jewelry, or even flat or strappy sandals for spring.
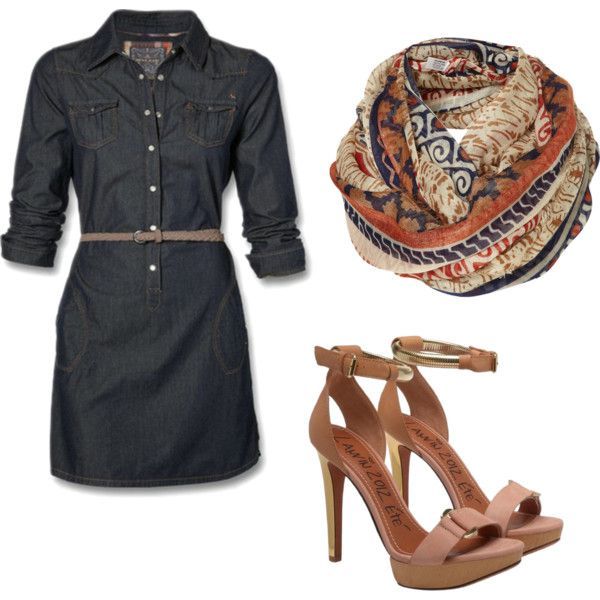
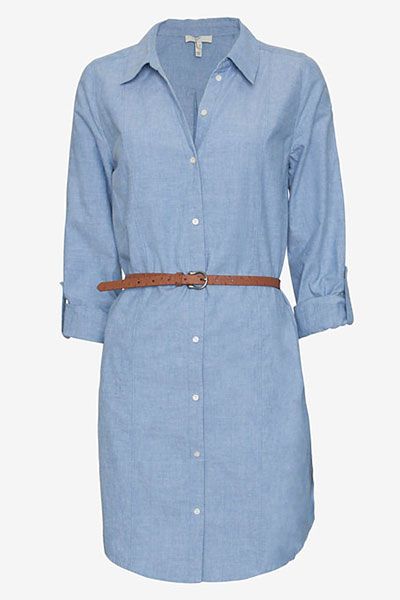
Here are some images that I pinned on my Pinterest board Sew Love-Dresses
I used McCalls 6885 (also labeled as MP345) to make this dress. It was a fairly easy dress to make, it just took time to cut out and mark the pattern carefully, to top stitch most of the seams as straight as I could, and make the major seams into flat felled seams which took time. I could have taken shortcuts and just serged most of the seams, but I didn’t want to do that. Instead, I made the side, shoulder and sleeve seams flat felled seams to prevent fraying and give a nice, finished look, and finished the armhole sleeve using my serger.
The pattern envelope certainly does not indicate that this is a cute, fashionable dress pattern to make by using an ugly floral printed fabric, the shapeless styling and the dorky matching old-lady hat:
Pattern envelope cover
I feel bad for the cute, young model who had to sport this look. Definitely not her best day in front of the camera thanks to this outfit.
Thank goodness the illustration for view D saved the pattern from being a complete frumpy disaster and gave some life and hope for this pattern:
McCalls 6885 view D
Hence, view D is what I went with, accept that I made the hem of the dress straight, as in view C of the pattern, and I chose not to make the matching, attached tie belt as I knew I would want to wear one of my own belts with this dress.
In my new shirtdressBack of dressWorn with a Banana Republic leather belt and scarf and Sorel boots.
I am very pleased with my new casual dress and will wear it often! I might even make this up again in other colors and fabrics.
This top incorporates a few of my favorite things in this world: silk, wine and pretty clothes.
I sewed up this top on Saturday morning into the afternoon to wear out to the fashion show at the tents of FashioNXT in Portland. Here I am with my good friend, Deborah, and also Anne, enjoying the evening of fashion and beauty:
I wanted to wear something that I have made to this event, as I usually do like to do, but ran out of time to make a cool dress or other outfit. Even when I say to myself, “OK, next fashion show, a year from now, I want to wear something really great that I designed and sewed.” But I never seem to have the time to make something really awesome and unique. After all, this annual show features emerging and established fashion designers, including Project Runway winners and contestants.
I had this beautiful red wine colored silk charmeuse yardage in my stash, plus have made this top pattern a few times now, so I knew it would be a fast and easy, yet a beautiful and elegant, project to make.
I used McCalls 6563 pattern, modifying it by using the drape neck top of view D and the bottom and shaped hem of view A or C. I actually lower the back of the hem a tad to add a little extra coverage in the back side. So, side I changed this pattern more than 50%, can I call it my own? I kind of think YES!!!
I need to make more of this pattern, and in multiple sizes, fabrications and colors and prints. SOLD!!! I’d even like to drape this into a halter top version of this cowl neck, OOOHHHH! Pretty 🙂
It took about 4 hours to make, including cutting out on the bias grain, making French seams, hemming the armhole and hem with a narrow hem, and pressing the seams carefully. I skipped hemming the inside of the cowl for the sake of time.
I always love a cowl neck too, so pretty and flattering. Here are some inspiration photos of similar tops I have pinned on my Pinterest board about tops:
So, for a quick and easy project, I am pleased with the results and want to make more of these silk beauties, in as many colors as possible:


 Simplicity