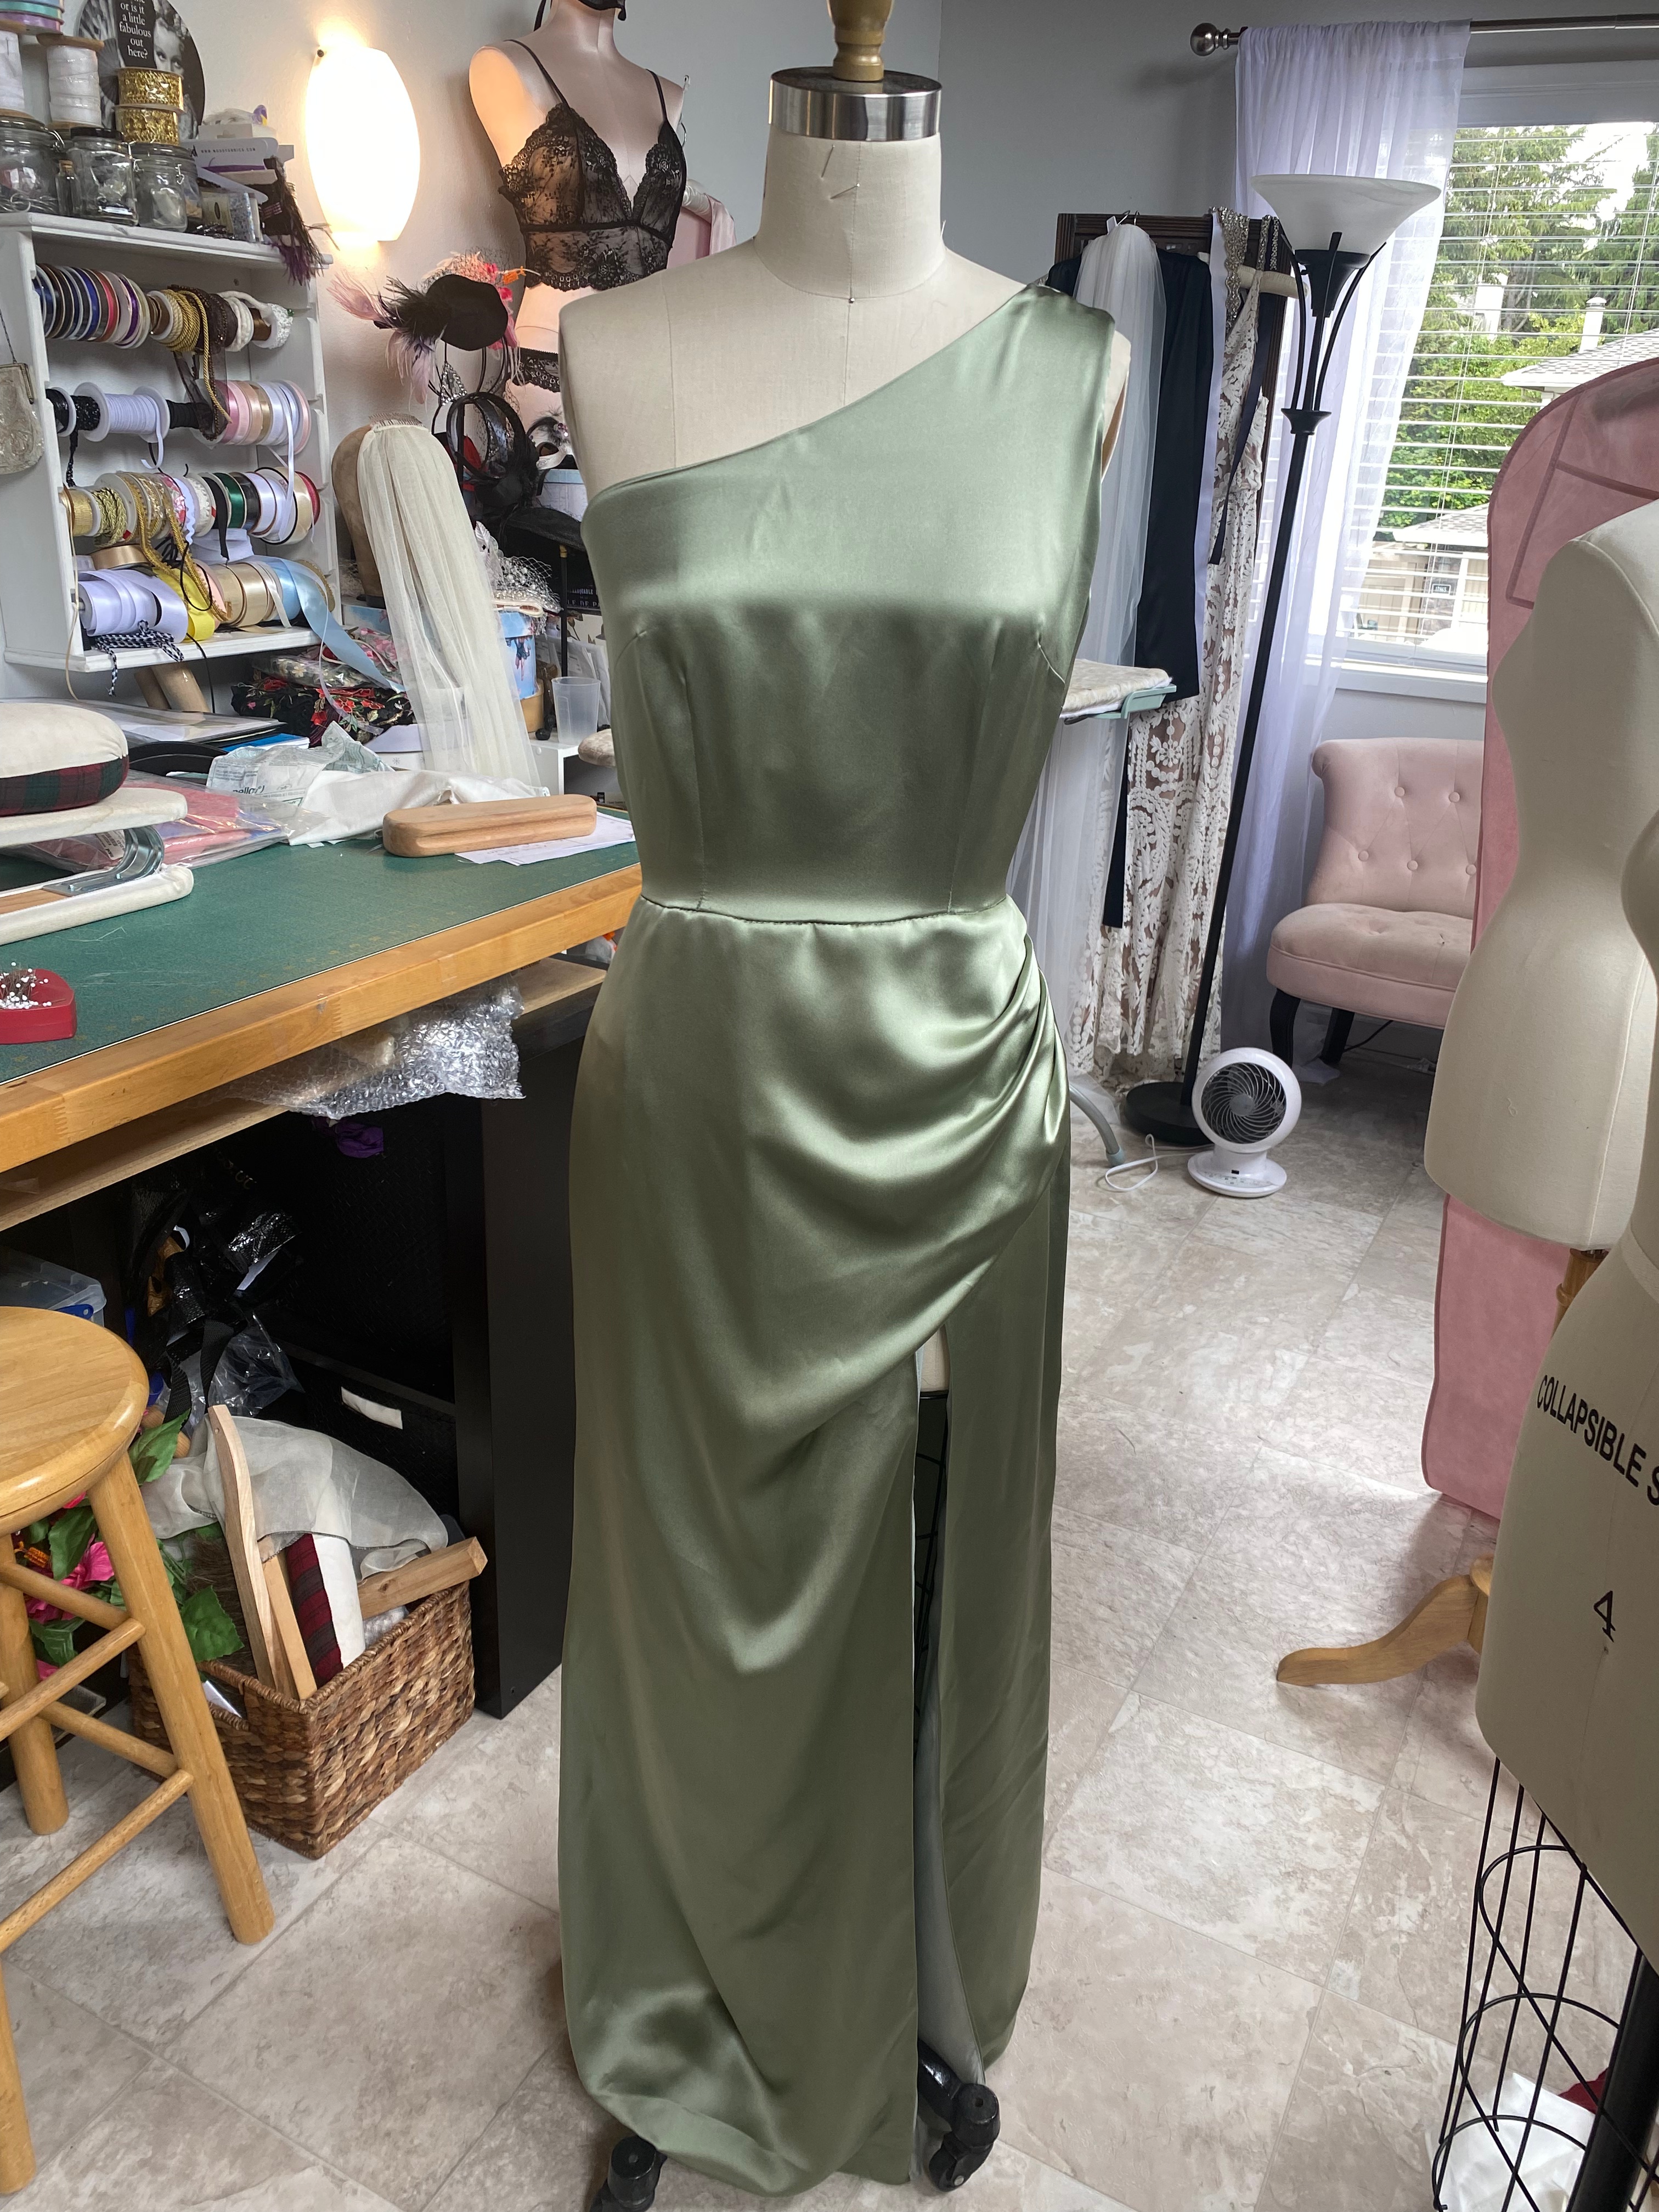
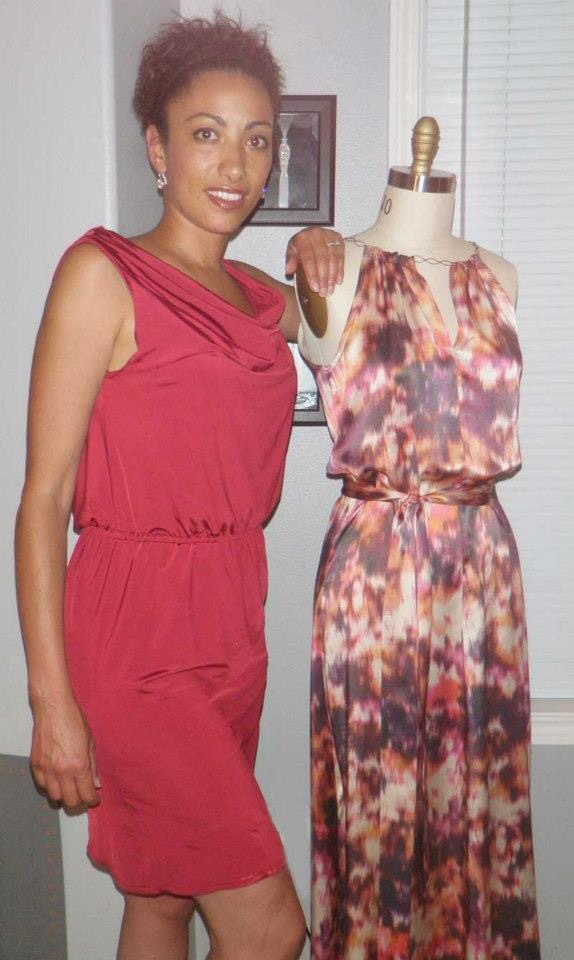
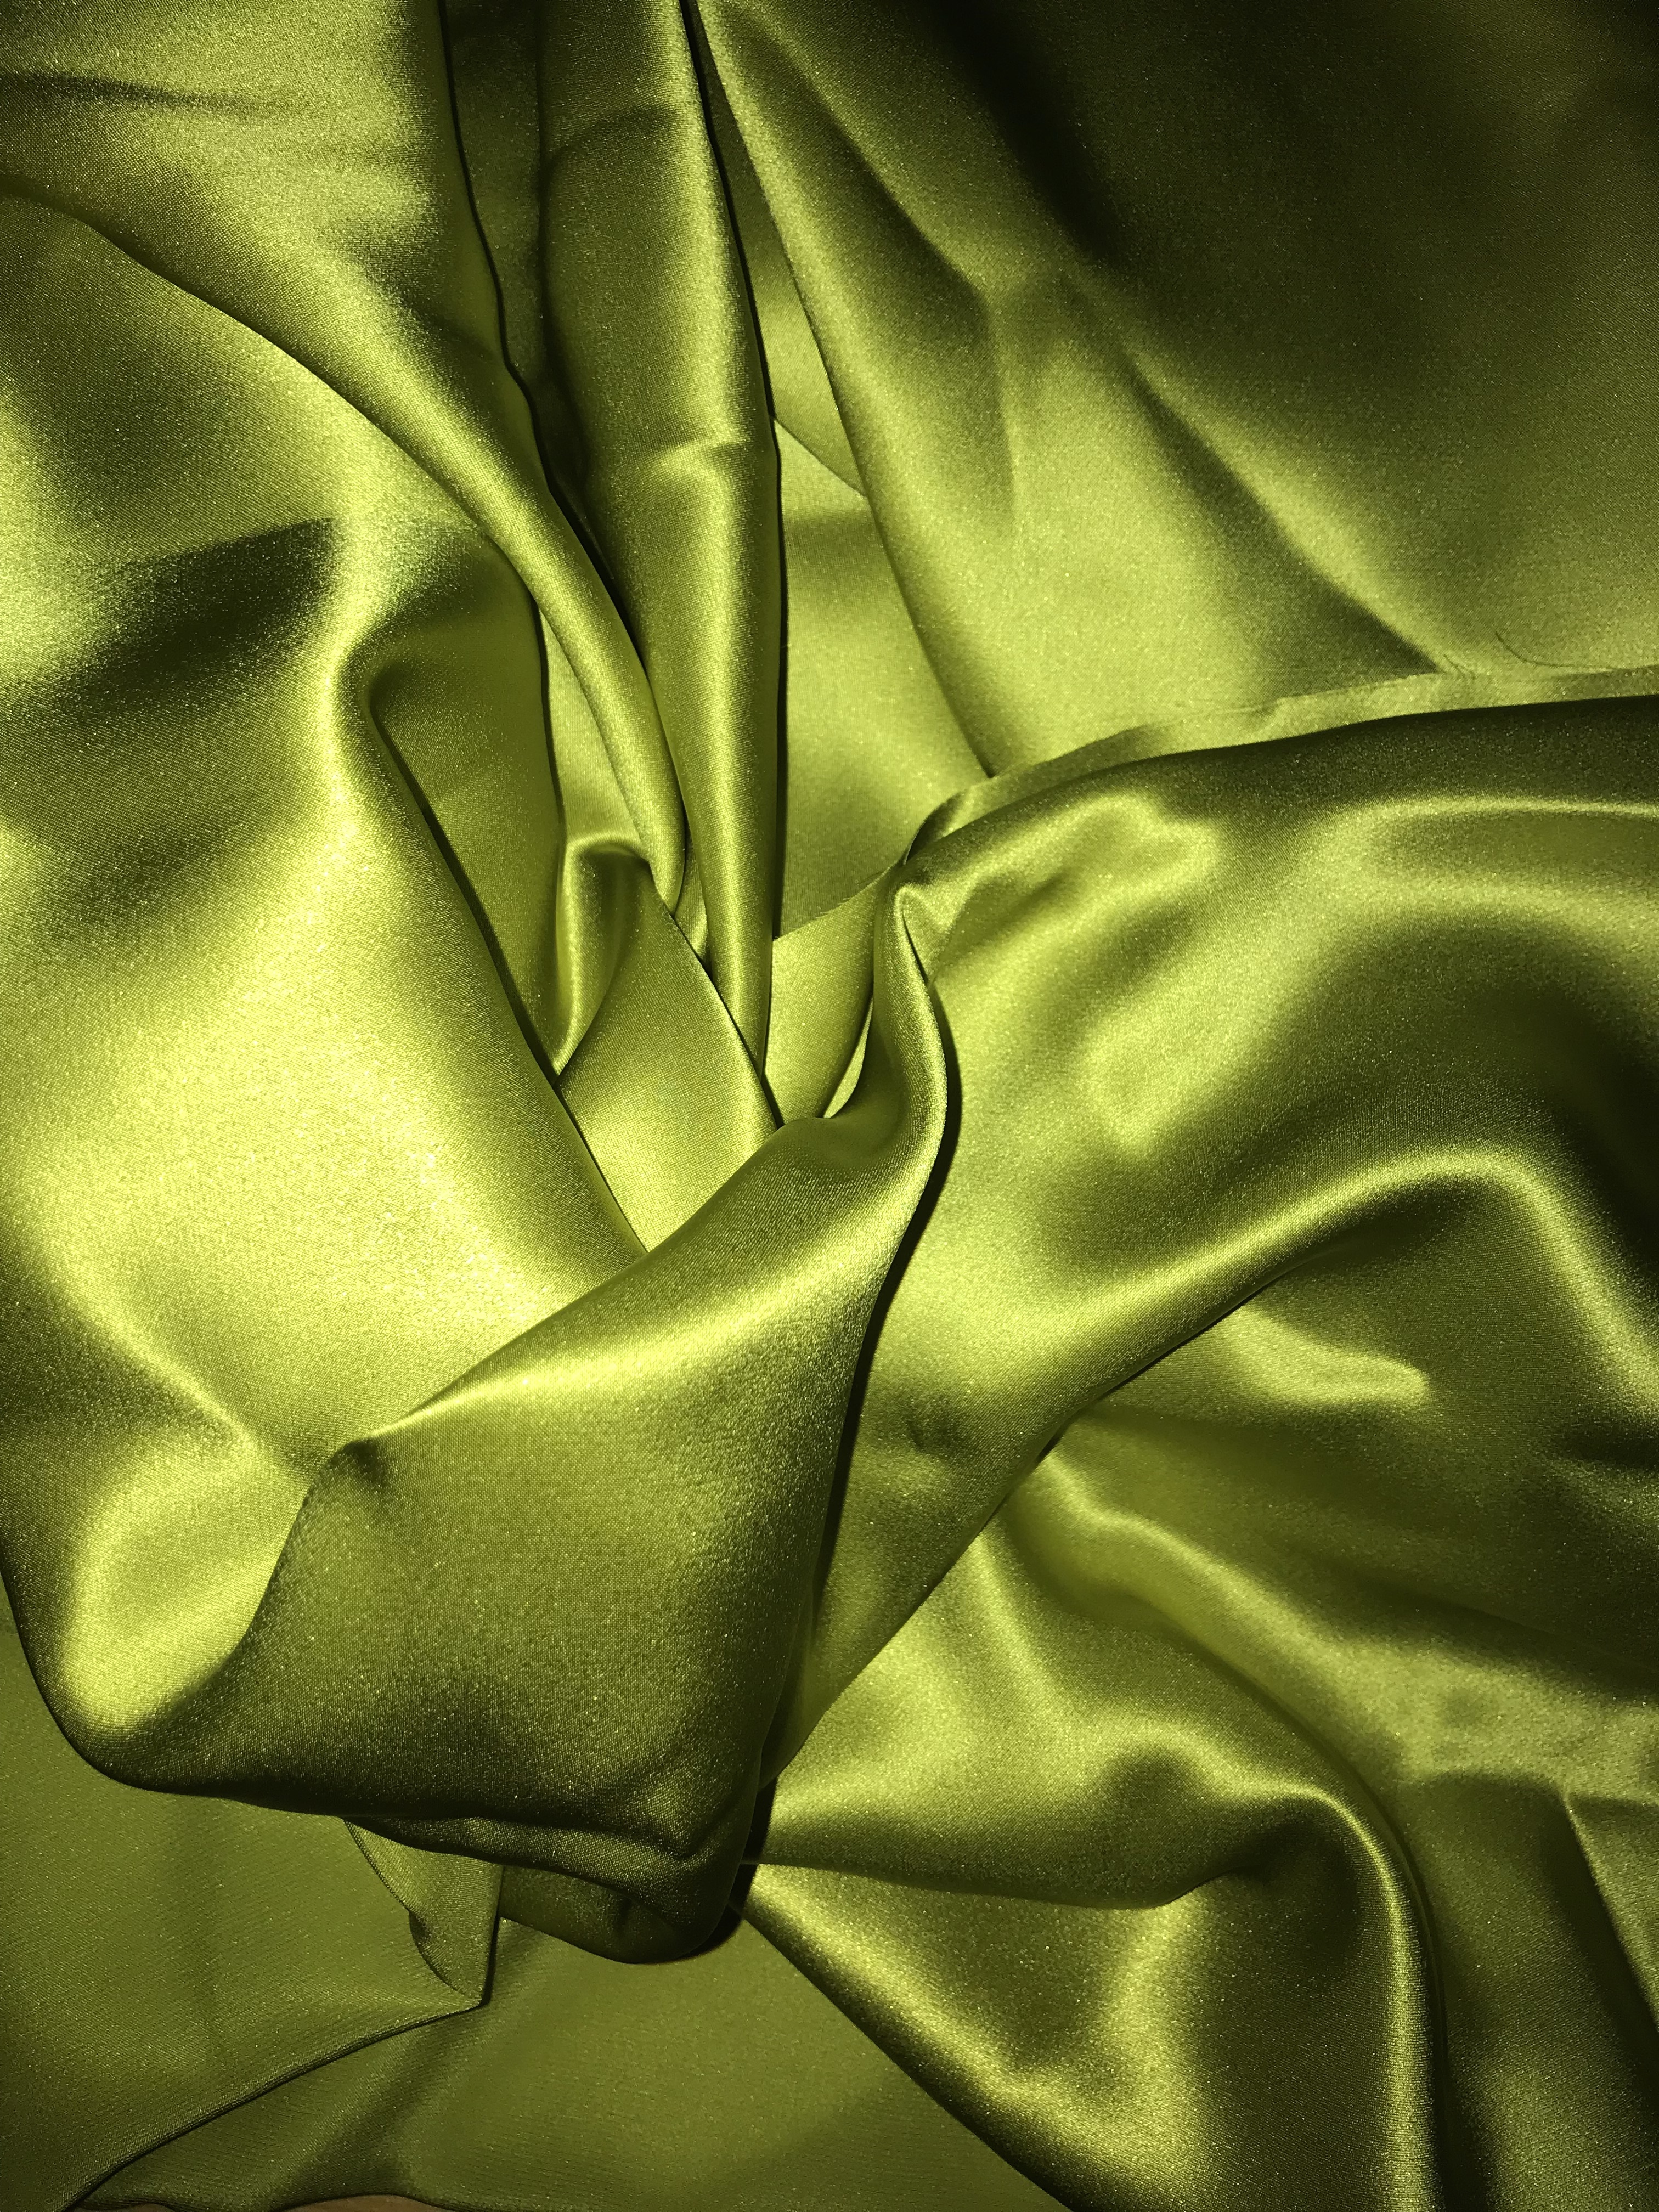
I first discovered Studio of Art Patterns in early 2024 when I was asked to create 2 bridesmaids dresses with a quick turnaround through a referral from a wedding planner. I was delighted to have the gig and got started right away finding a pattern to create the 2 special occasion dresses having the same skirt style with different bodices using a lovely sage green silk charmeuse as the client requested.
I love to spend time looking at all kinds of sewing patterns, especially patterns that have the potential to turn out a beautiful result that looks like it came from a fancy boutique or bespoke design house. I like to collect these type of patterns, even if I won’t use them right away, or ever, just so that I can learn about how to construct and sew the details that make them unique or create those hidden details of a garment that are not immediately apparent.
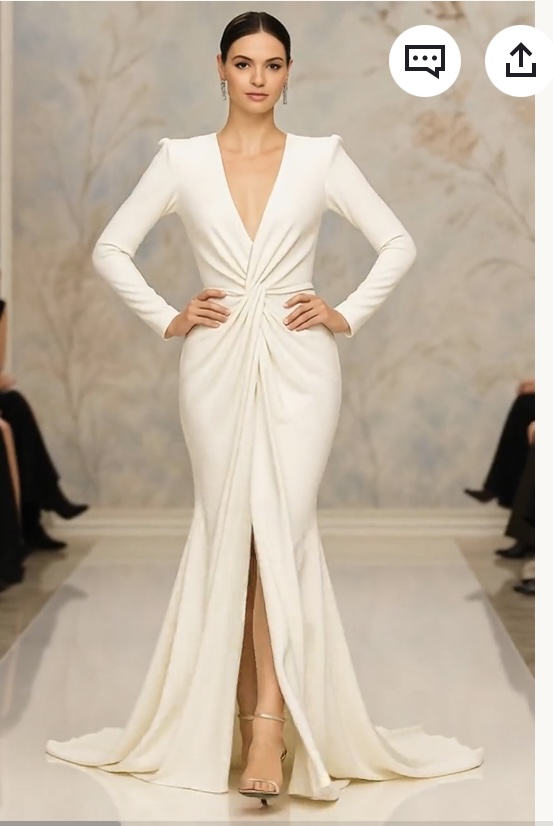
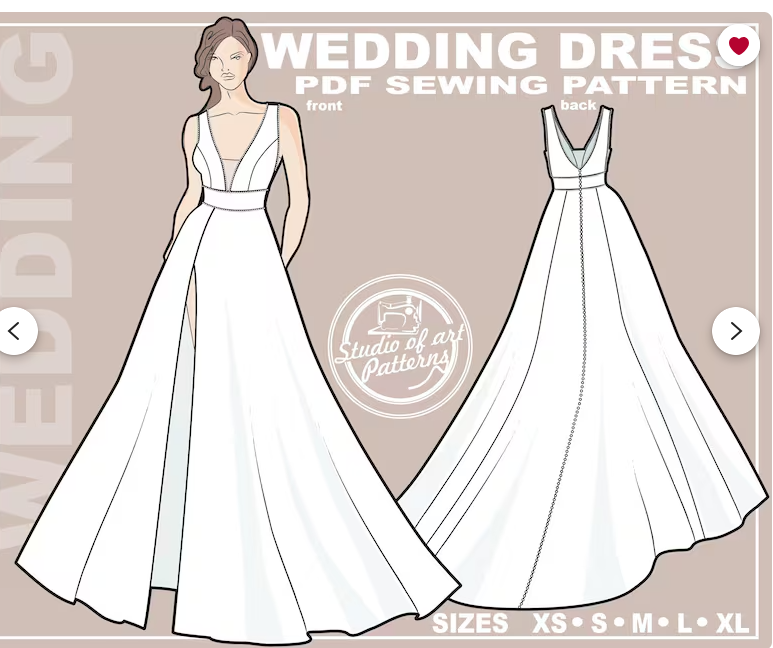
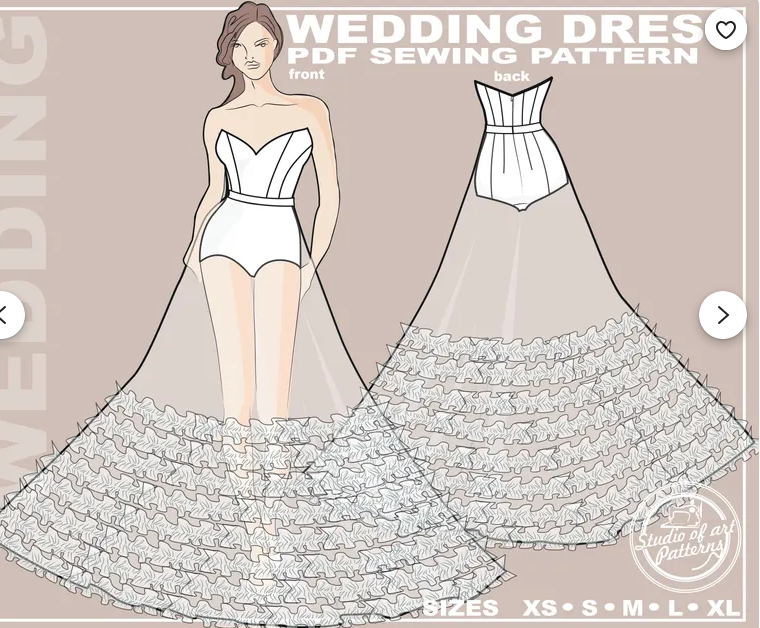
After searching through my own pattern collection of formal dresses, as well as through the usual avenues of obtaining commercial patterns, searching on Etsy I came across this new-to-me pattern company, Studio of Art Patterns. They had a very good selection of formal dress designs to choose from with details and features not found in other commercial patterns for sale. The patterns didn’t have much detail to the Etsy description or the other pertinent information readily available, such as fabric yardage needed to create the design, unless, as I discovered, you purchase and download the pattern. They have, however, added a really cool feature to the pattern images of an AI generated video clip of the dress as it is worn on the runway. Amazing!
AI generated clip of one of the gown designs. SOLD!!!!
Once a pattern is purchased, they send you the PDF pattern and instructions to download and print at home or a copy shop. They include multiple size files and all of the information needed to construct the garment including a detailed size chart, suggested fabrics types including any interfacing, lining or stabilizing fabric yardage and notions needed, pattern cutting layout, and sewing instructions, and a few photos of a finished garment made from the pattern. The sewing instructions are quite sparse, somewhat confusing, and assume that you have a good amount of prior dressmaking experience and ability to construct a dress. In addition, the sewing terms and language are not always clear, there are no photos or illustrations of the construction process, just the step-by step words themselves, so you are somewhat on your own for figuring out the difficult parts, therefore these patterns are not for the beginner sewist by any means. However if you have any questions or need help with the sewing process, they are readily available to help and respond right away which is great.
Studio of Art Patterns, found only on Etsy at https://www.etsy.com/shop/StudioOfArtPatterns, is a small, woman-owned company that creates sewing patterns for the experienced sewist. As I’d love to support and promote this small, yet growing, business, and wanted to know more about them, I reached out to the shop owner, Anastasia, for more information about the company and she gladly replied with this to say:
Studio of Art Patterns – Our Story
Studio of Art Patterns has been creating and sharing sewing patterns on the Etsy platform since 2021, and our shop is only beginning to gain momentum. In this short time, we have published 281 modern patterns, including 125 wedding dress patterns, each offered in five sizes. Even an experienced professional sewist can appreciate the tremendous amount of work our small team has accomplished in such a limited period. Our team is made up of three passionate specialists: • Anastasia – graphic designer, assistant, and shop owner • Angelika – designer • Julia – customer service and marketing specialist Every day, we continue improving our products, but our main goal remains the same: to expand our collection with fresh, high-quality sewing patterns that have no analogues online. Our team carefully selects the most elegant and desirable garment designs and transforms them into detailed, professional patterns to help our customers create stylish and beautifully crafted pieces. At the moment, our patterns are available exclusively on Etsy. However, we are actively growing and working on launching our own website in the near future.
Going back to the bridesmaid dresses, we decided on this pattern, mostly for the draped skirt, and I would make the bodice in two different styles to attach to the same skirt for the ladies:
The dresses turned out satisfactory with the short time frame to complete and the fussy nature if the fabric, so I won’t go into much detail about it, but I wanted to share my moment of discovery of this amazing pattern company that led me here!
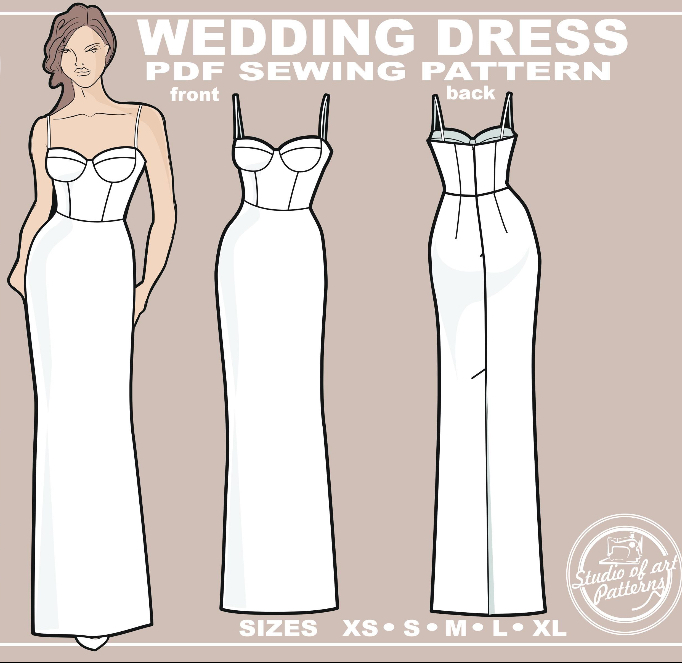
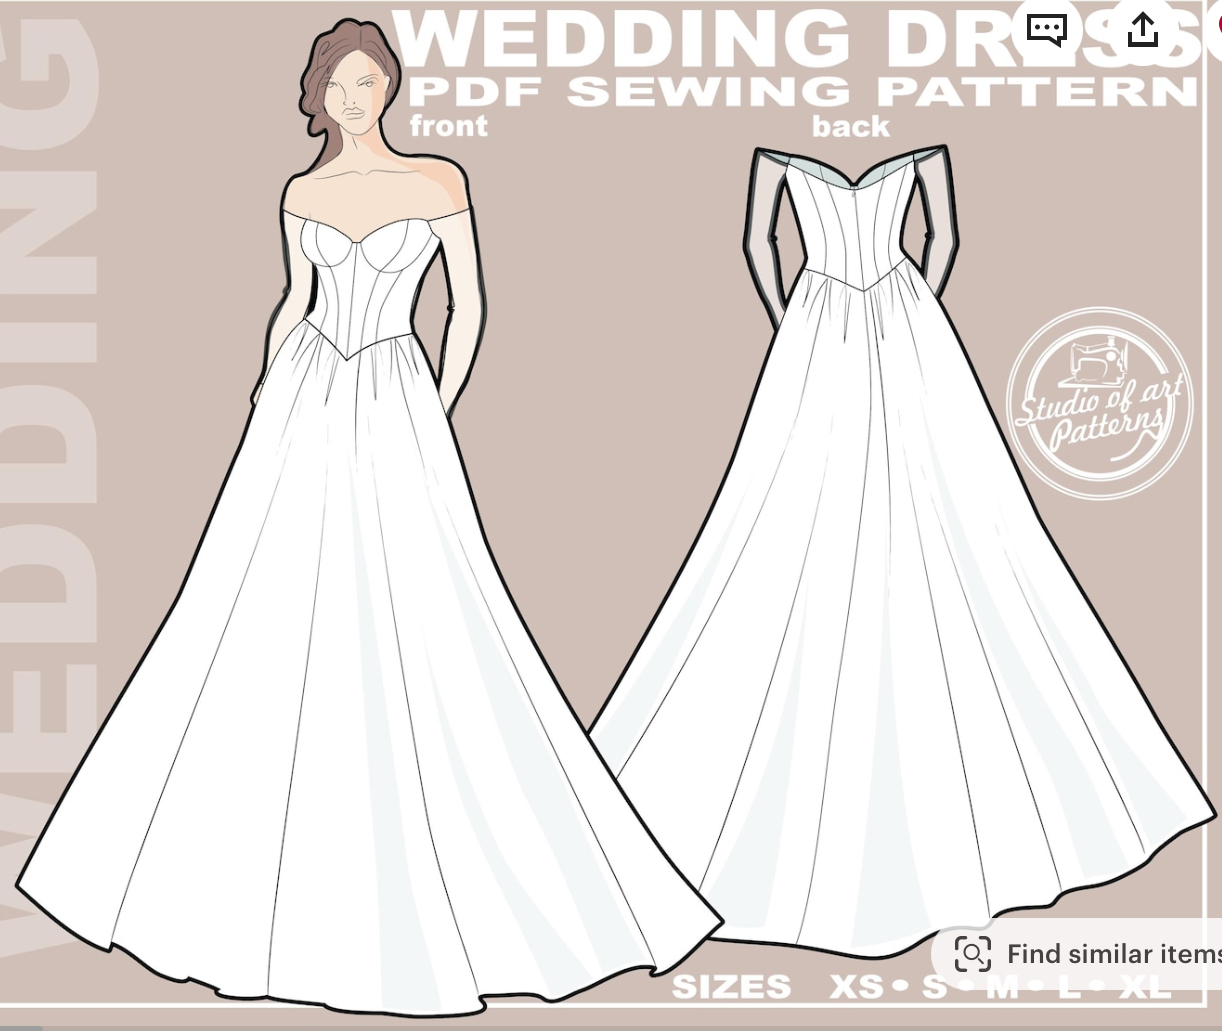
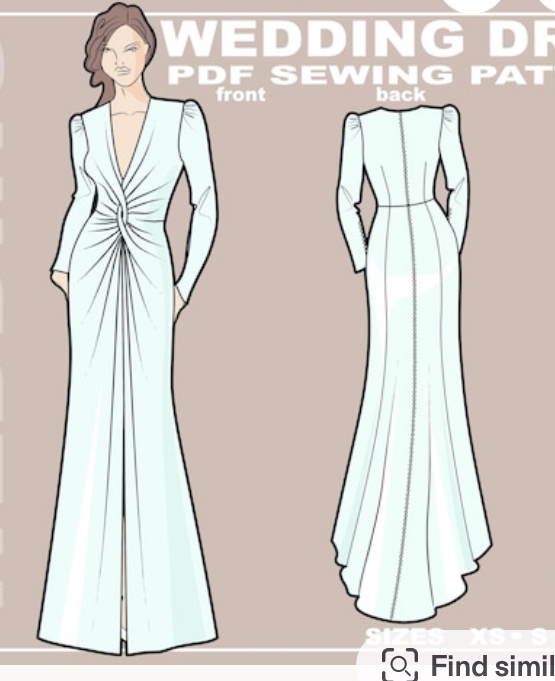
After completing the silk bridesmaid dresses, I went on to purchase and make several more Studio of Art patterns from their Wedding Dress category of designs. I will share the patterns and the creations I made from them, mostly making them just because I wanted to make them and show off the new skills I learned from constructing them:
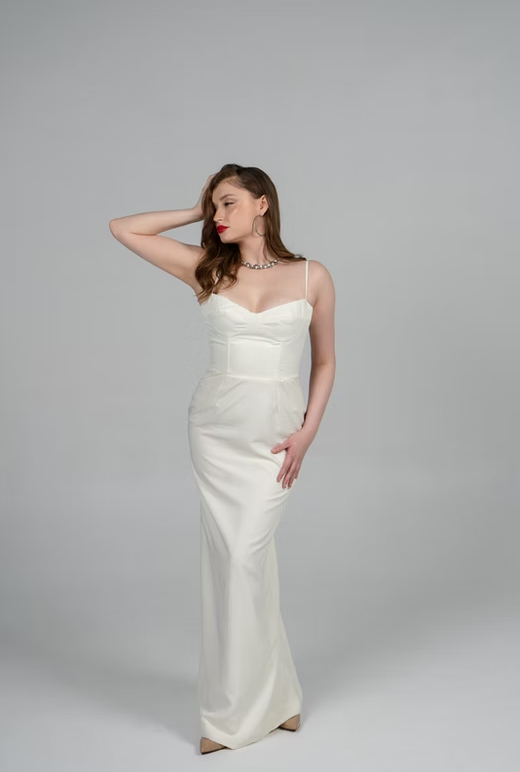
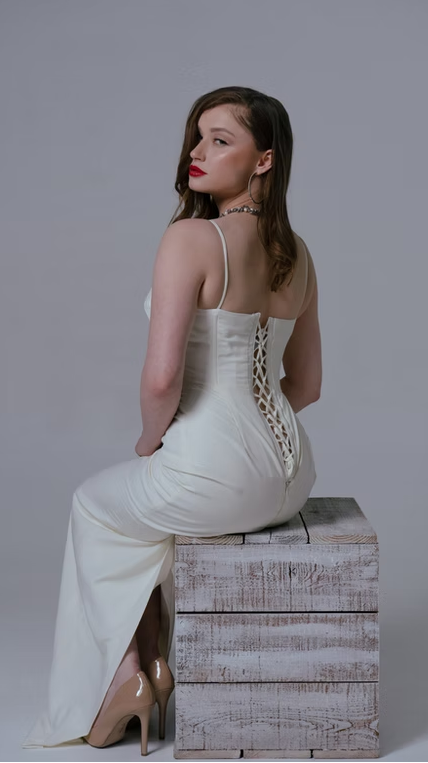
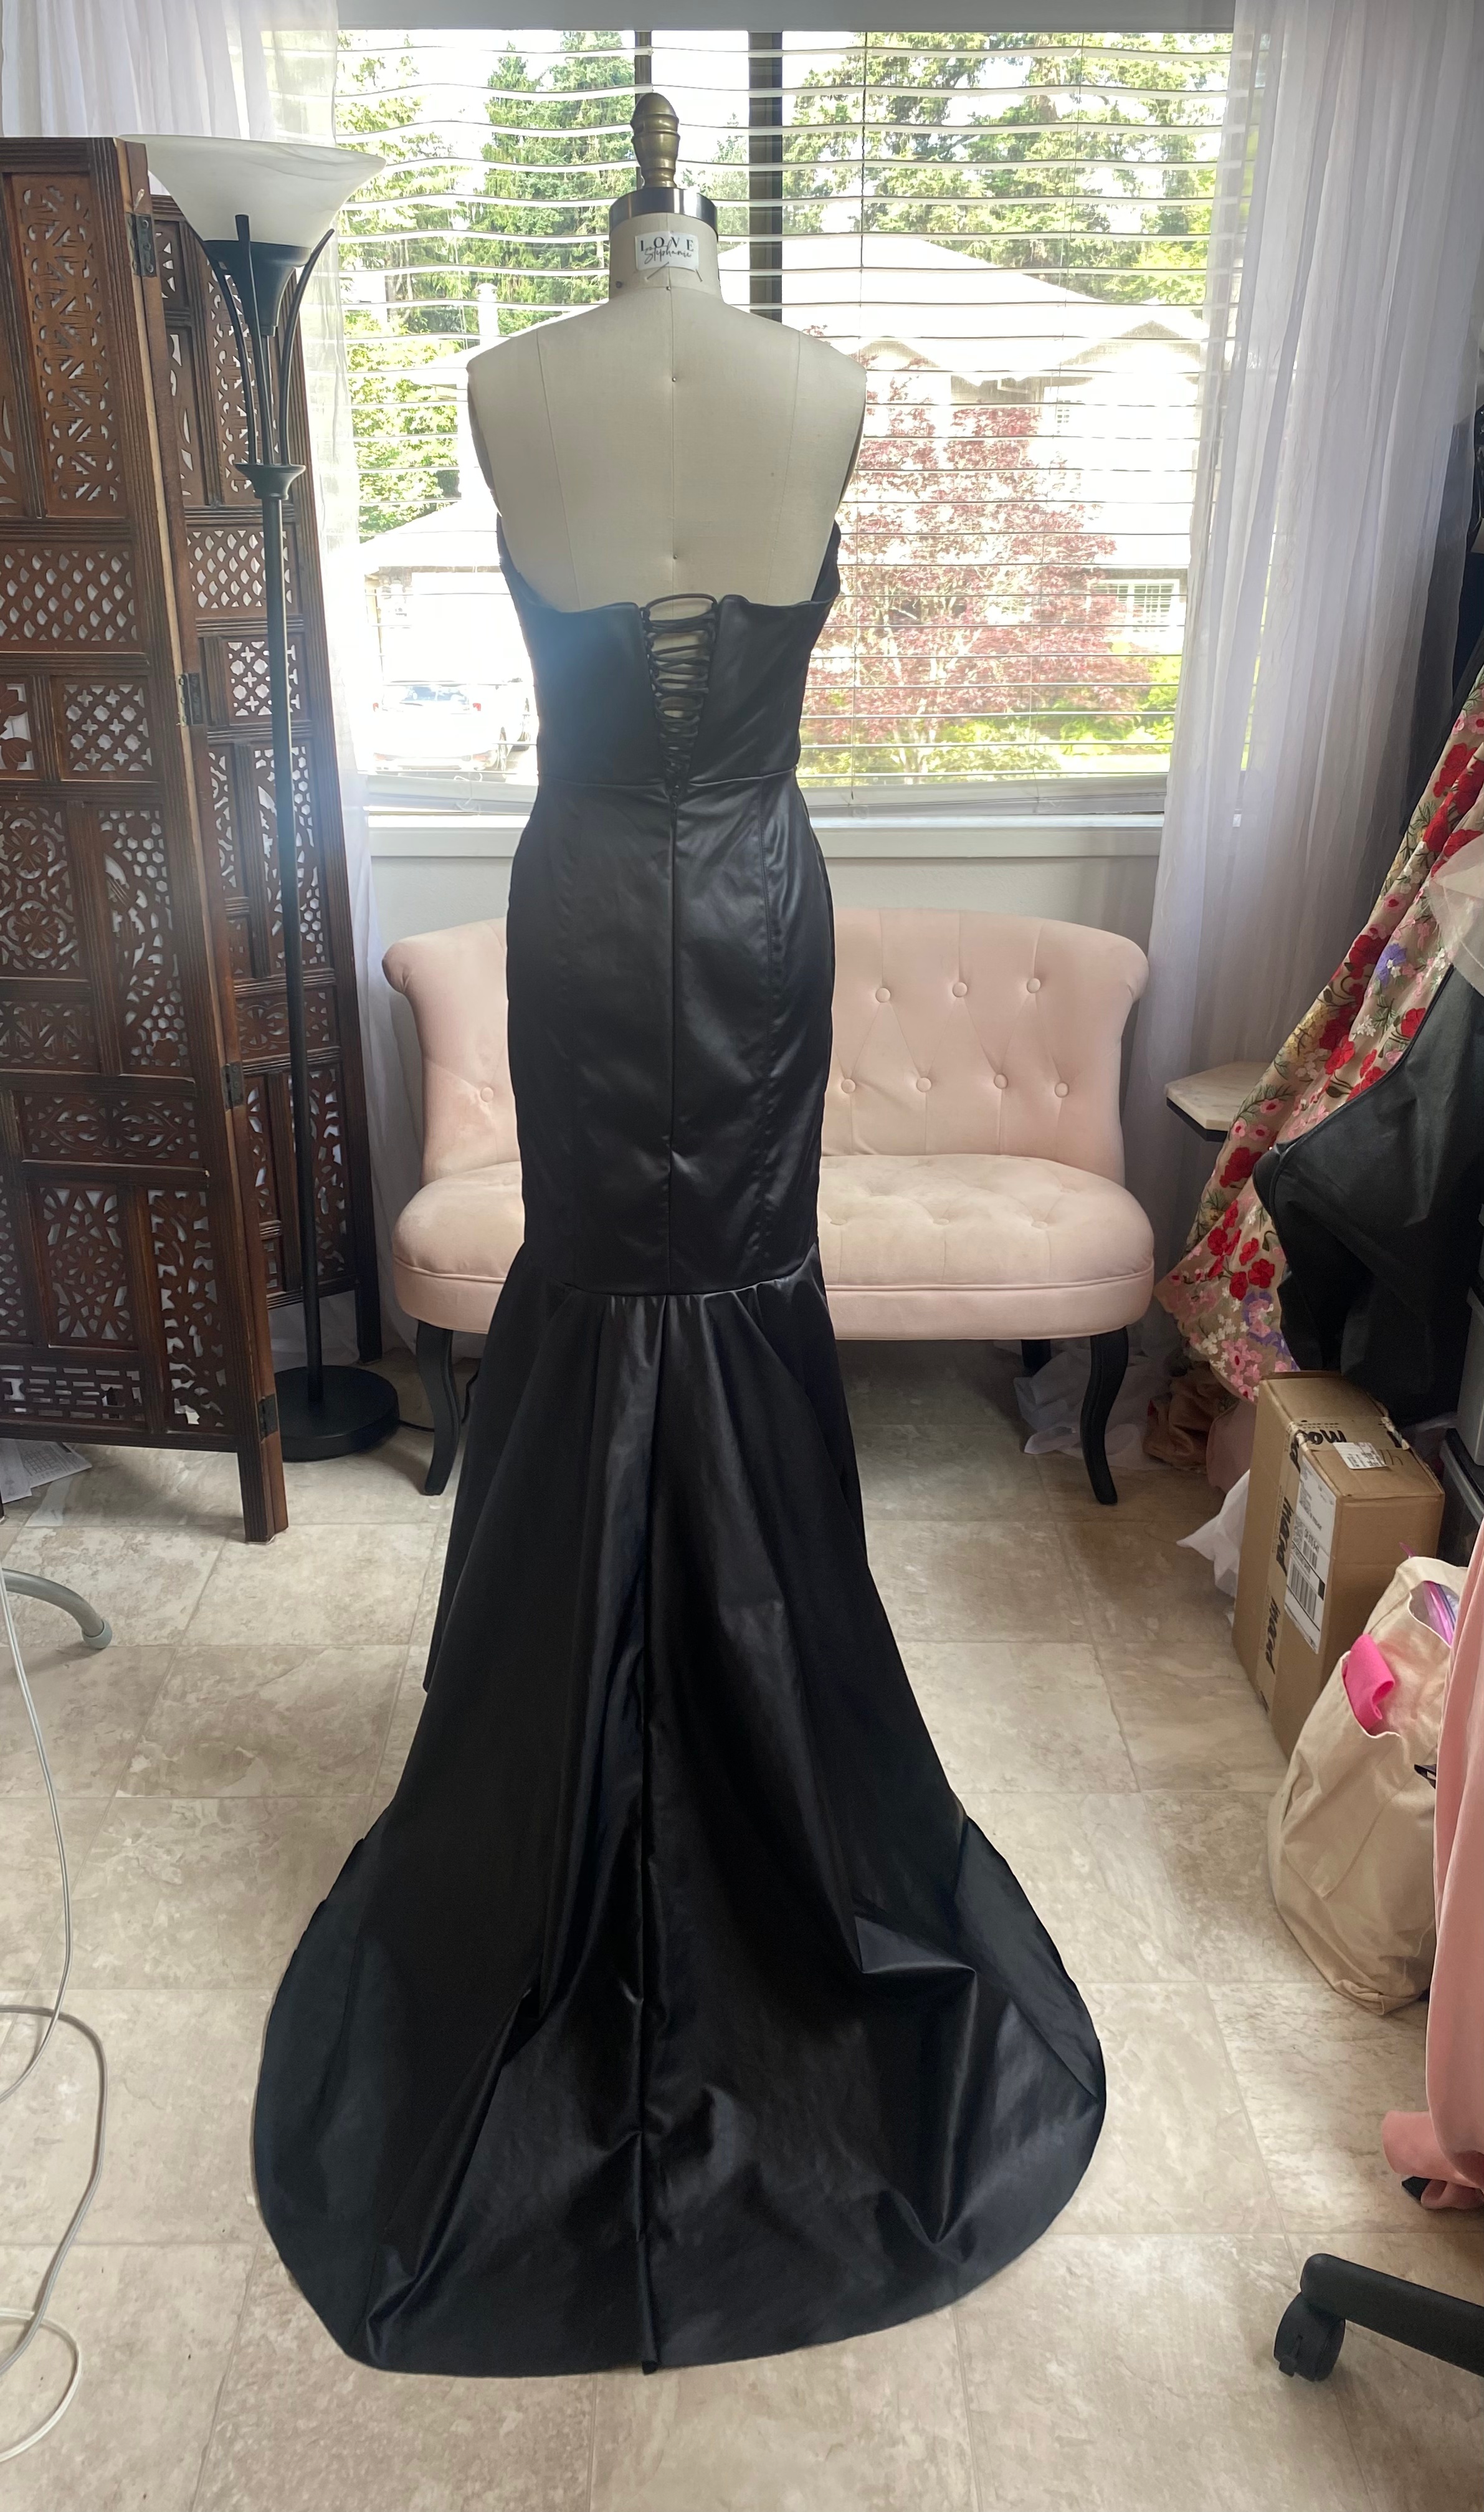
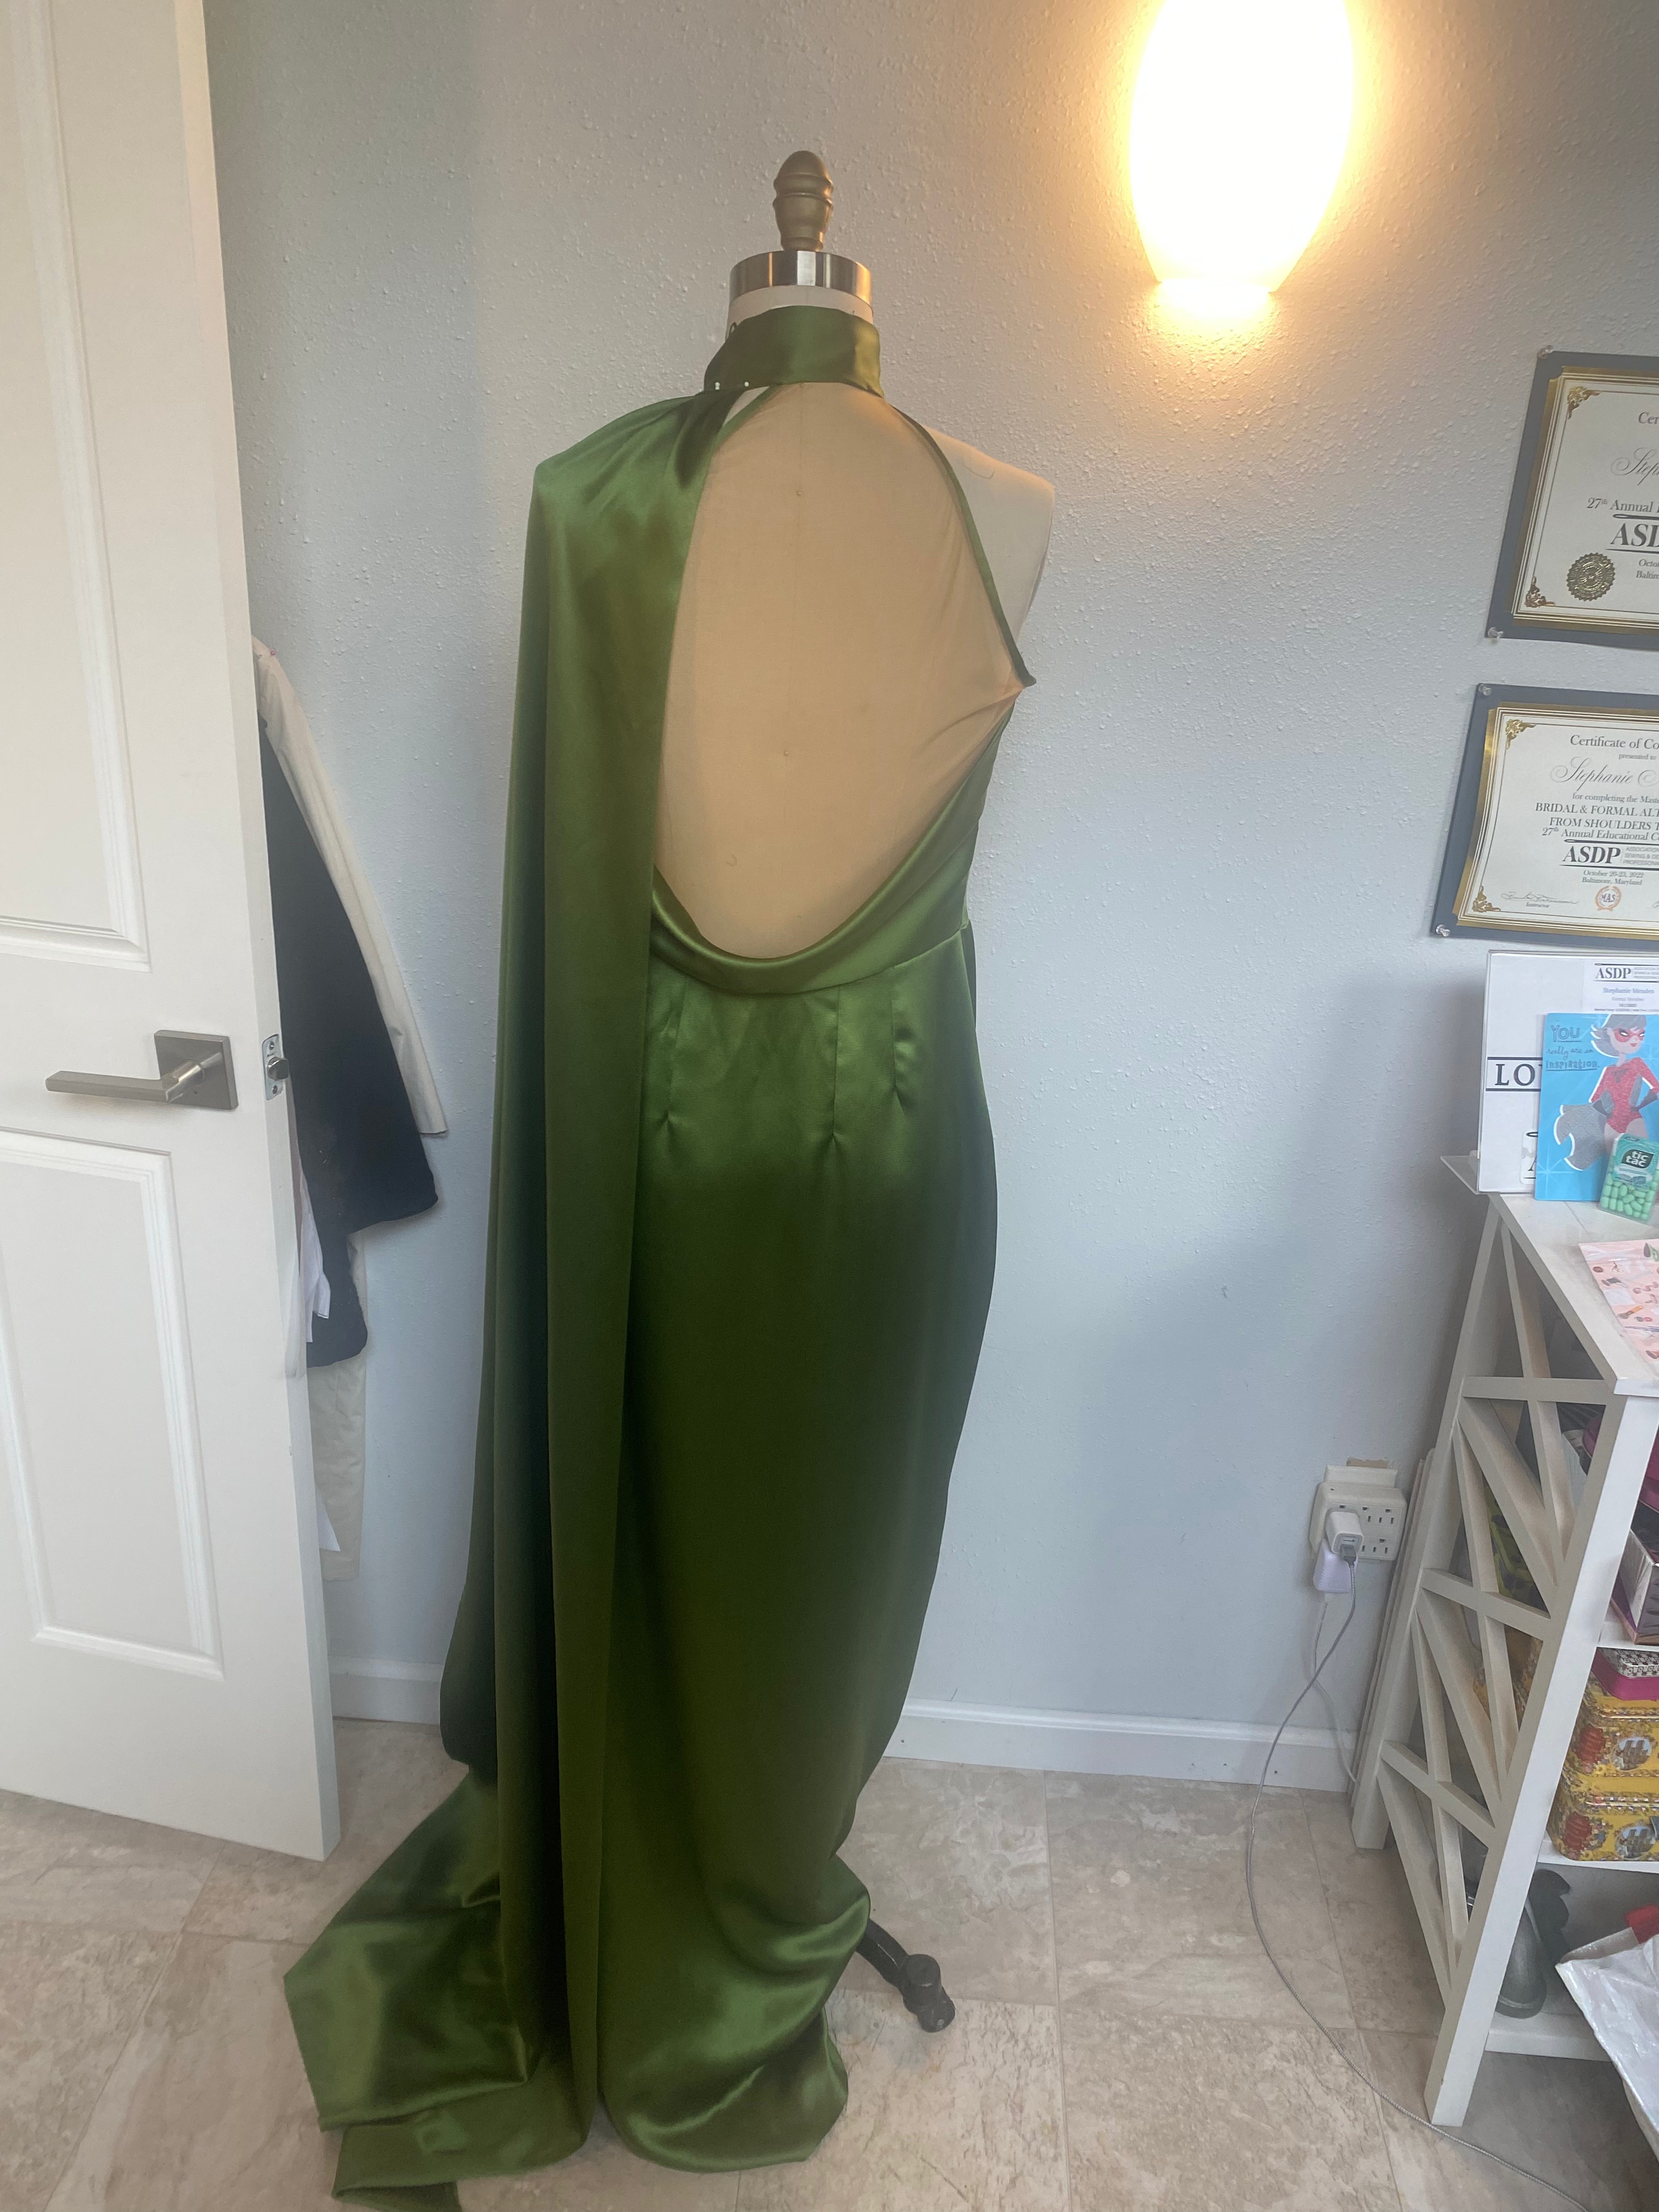
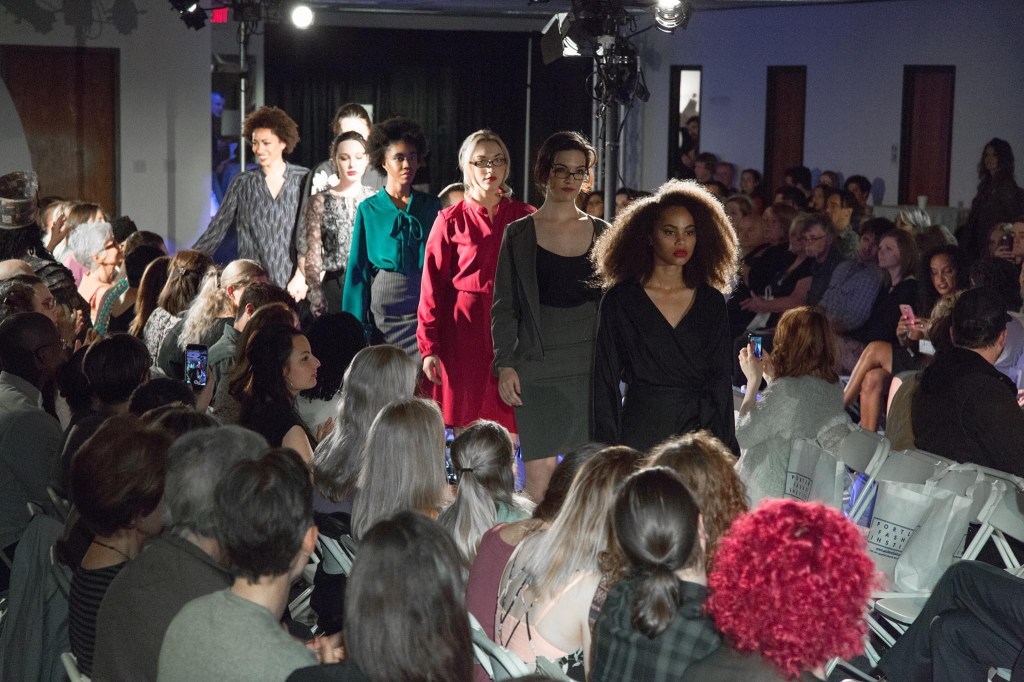
Corset Bodice Slim Skirt Gown Made in ivory satin. Boned bodice with spaghetti straps and slim skirtI added a lace-up corset back to this dress patternI added a trumpet to the bottom of this skirt to this pattern to make a new design out of a sleek black leather-like satinThe lace up corset back allows for an easier fitPlunging neckline gown with skirt overlap opening.Made in a soft peach satin, I love how this gown turned out! The skirt side opening, the mesh side insets in the bodice, and it has pockets!74 self-fabric covered buttons adorn the center back seam into the trainCorset bodice with off shoulder puffy sleeve I made my version eliminating the corset and bra cup seams to keep the integrity of the toile print of the fabric. I also eliminated the bottom part of the sleeve and lengthened the skirt.Draped halter neck bodice gown with shoulder drape and low draped backMade in a stunning green silk satinThe open back with drape was difficult to do, but turned out really wellModeled here by the gorgeous Christine Lewy at my runway show at FashionXT 2025 in Portland, ORI added sleeves, lowered the back and added a little lower back bar to support the low back for this black wedding gown for a client.
I have since went on to purchase several more Studio of Art patterns with the intention of studying the pattern details, mixing and matching the details, and making them up as I get the opportunity. Some I got for a certain detail or technique that I’d like to learn how to do, some I like the entire dress and would make it as is. I have a few already in the works as I get the chance to print out the HUGE pattern pieces and cut them out, purchase the fabrics (each one takes lots of fabric!) and decide on the pattern adjustments I would like to make in order to make them with somewhat of a unique twist, if I can.
Here is my collection of Studio of Art patterns that I have become obsessed with, but have yet to make:
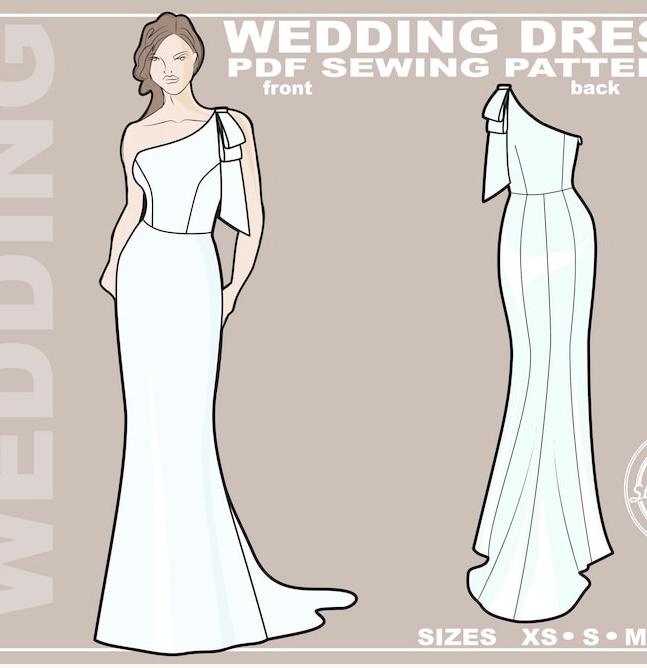
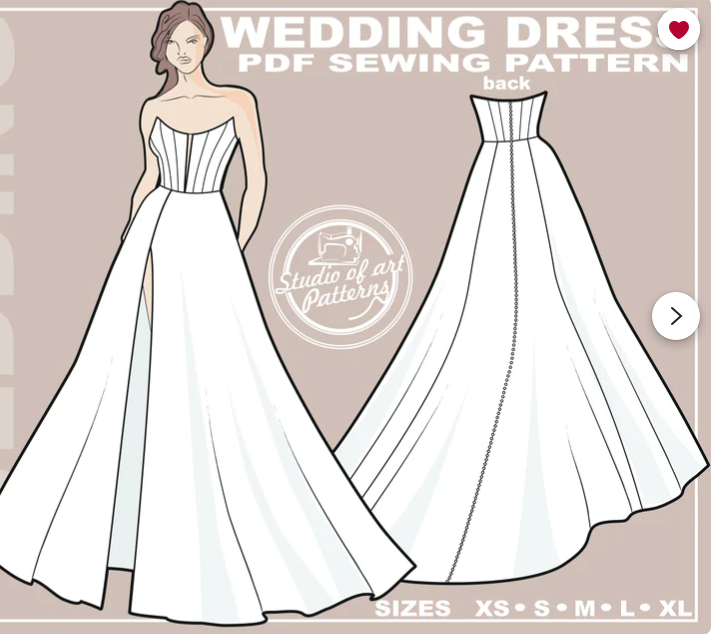
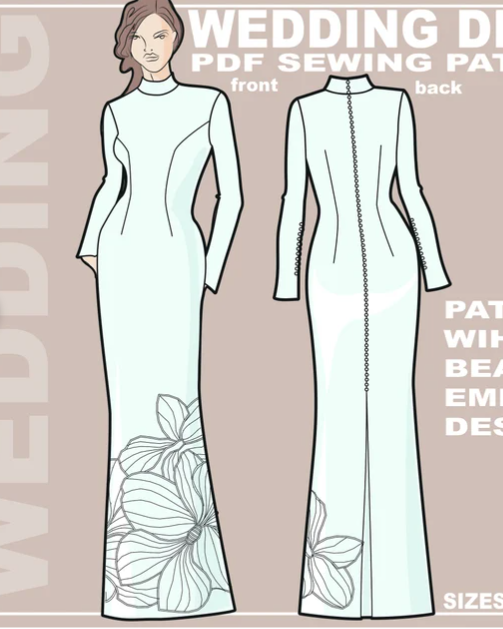
Basque waist ballgown with off shoulder lace sleevesDraped evening gownCorset bodice gown with flouncesOne shoulder gown with draped bowGown with overskirtlace overlay gownCape dressStructured draped gown with trainSeamed corset bodice gown with split skirtScarf and rosette collar gownV-neck gown with trainEvening gown with embroidery detailStrapless bodysuit and ruffled sheer overskirtMermaid strapless gown and ruffled sheer overskirtWrap dress with long bell sleeves
These are just a few of the patterns that Studio of Art patterns offer in their gallery of designs. They also offer more casual looks, athletic and kids patterns, so if you are curious or looking for something different to sew, definitely check them out!
Time to go sew a fabulous Studio of Art pattern and make another dream dress come true!
Making a fashion collection has always been a dream of mine. I did a small collection while in a fashion design program at Portland Fashion Institute (then called Portland Sewing) back in 2015, which was a great experience and a lot of work, however it was not even close to this amount of work, time and organization than this most recent undertaking. Also, when I look at other big designers collections and the unbelievable amount of time, money and effort it must take to do such a show, mine pales in comparison.
None the less, this was one of my biggest undertakings to date. I began by entering as a designer and signing the contract for FashionXT back in March for the show happening in October. Once I signed the contract and paid my submission fee, there was no going back.
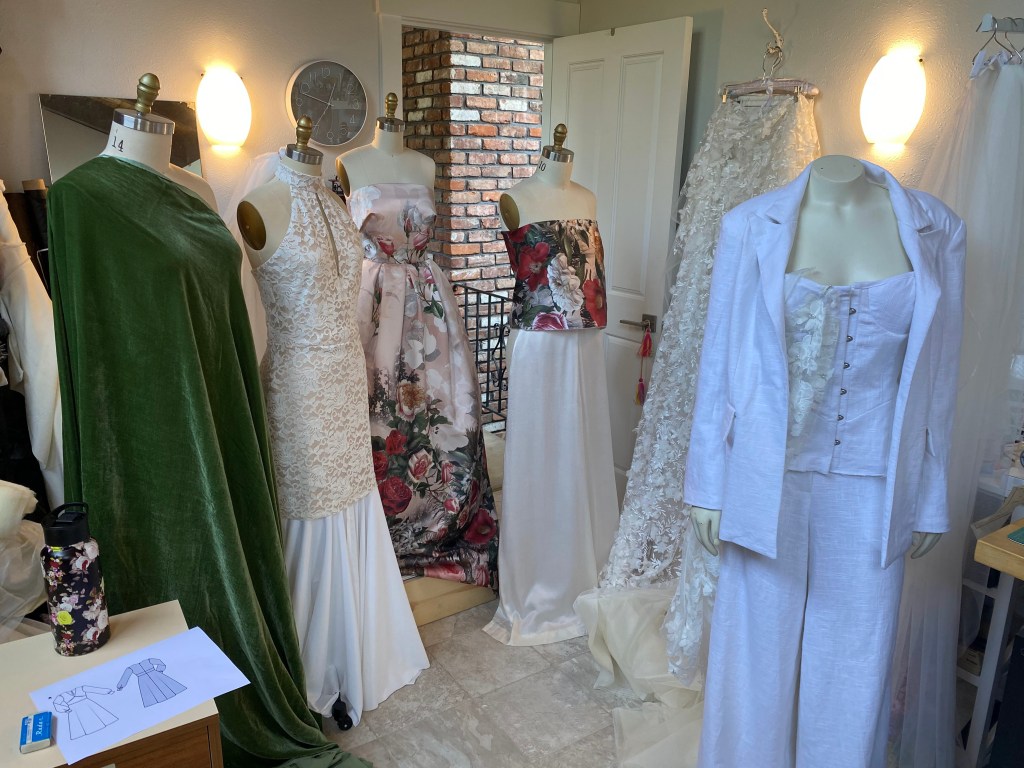
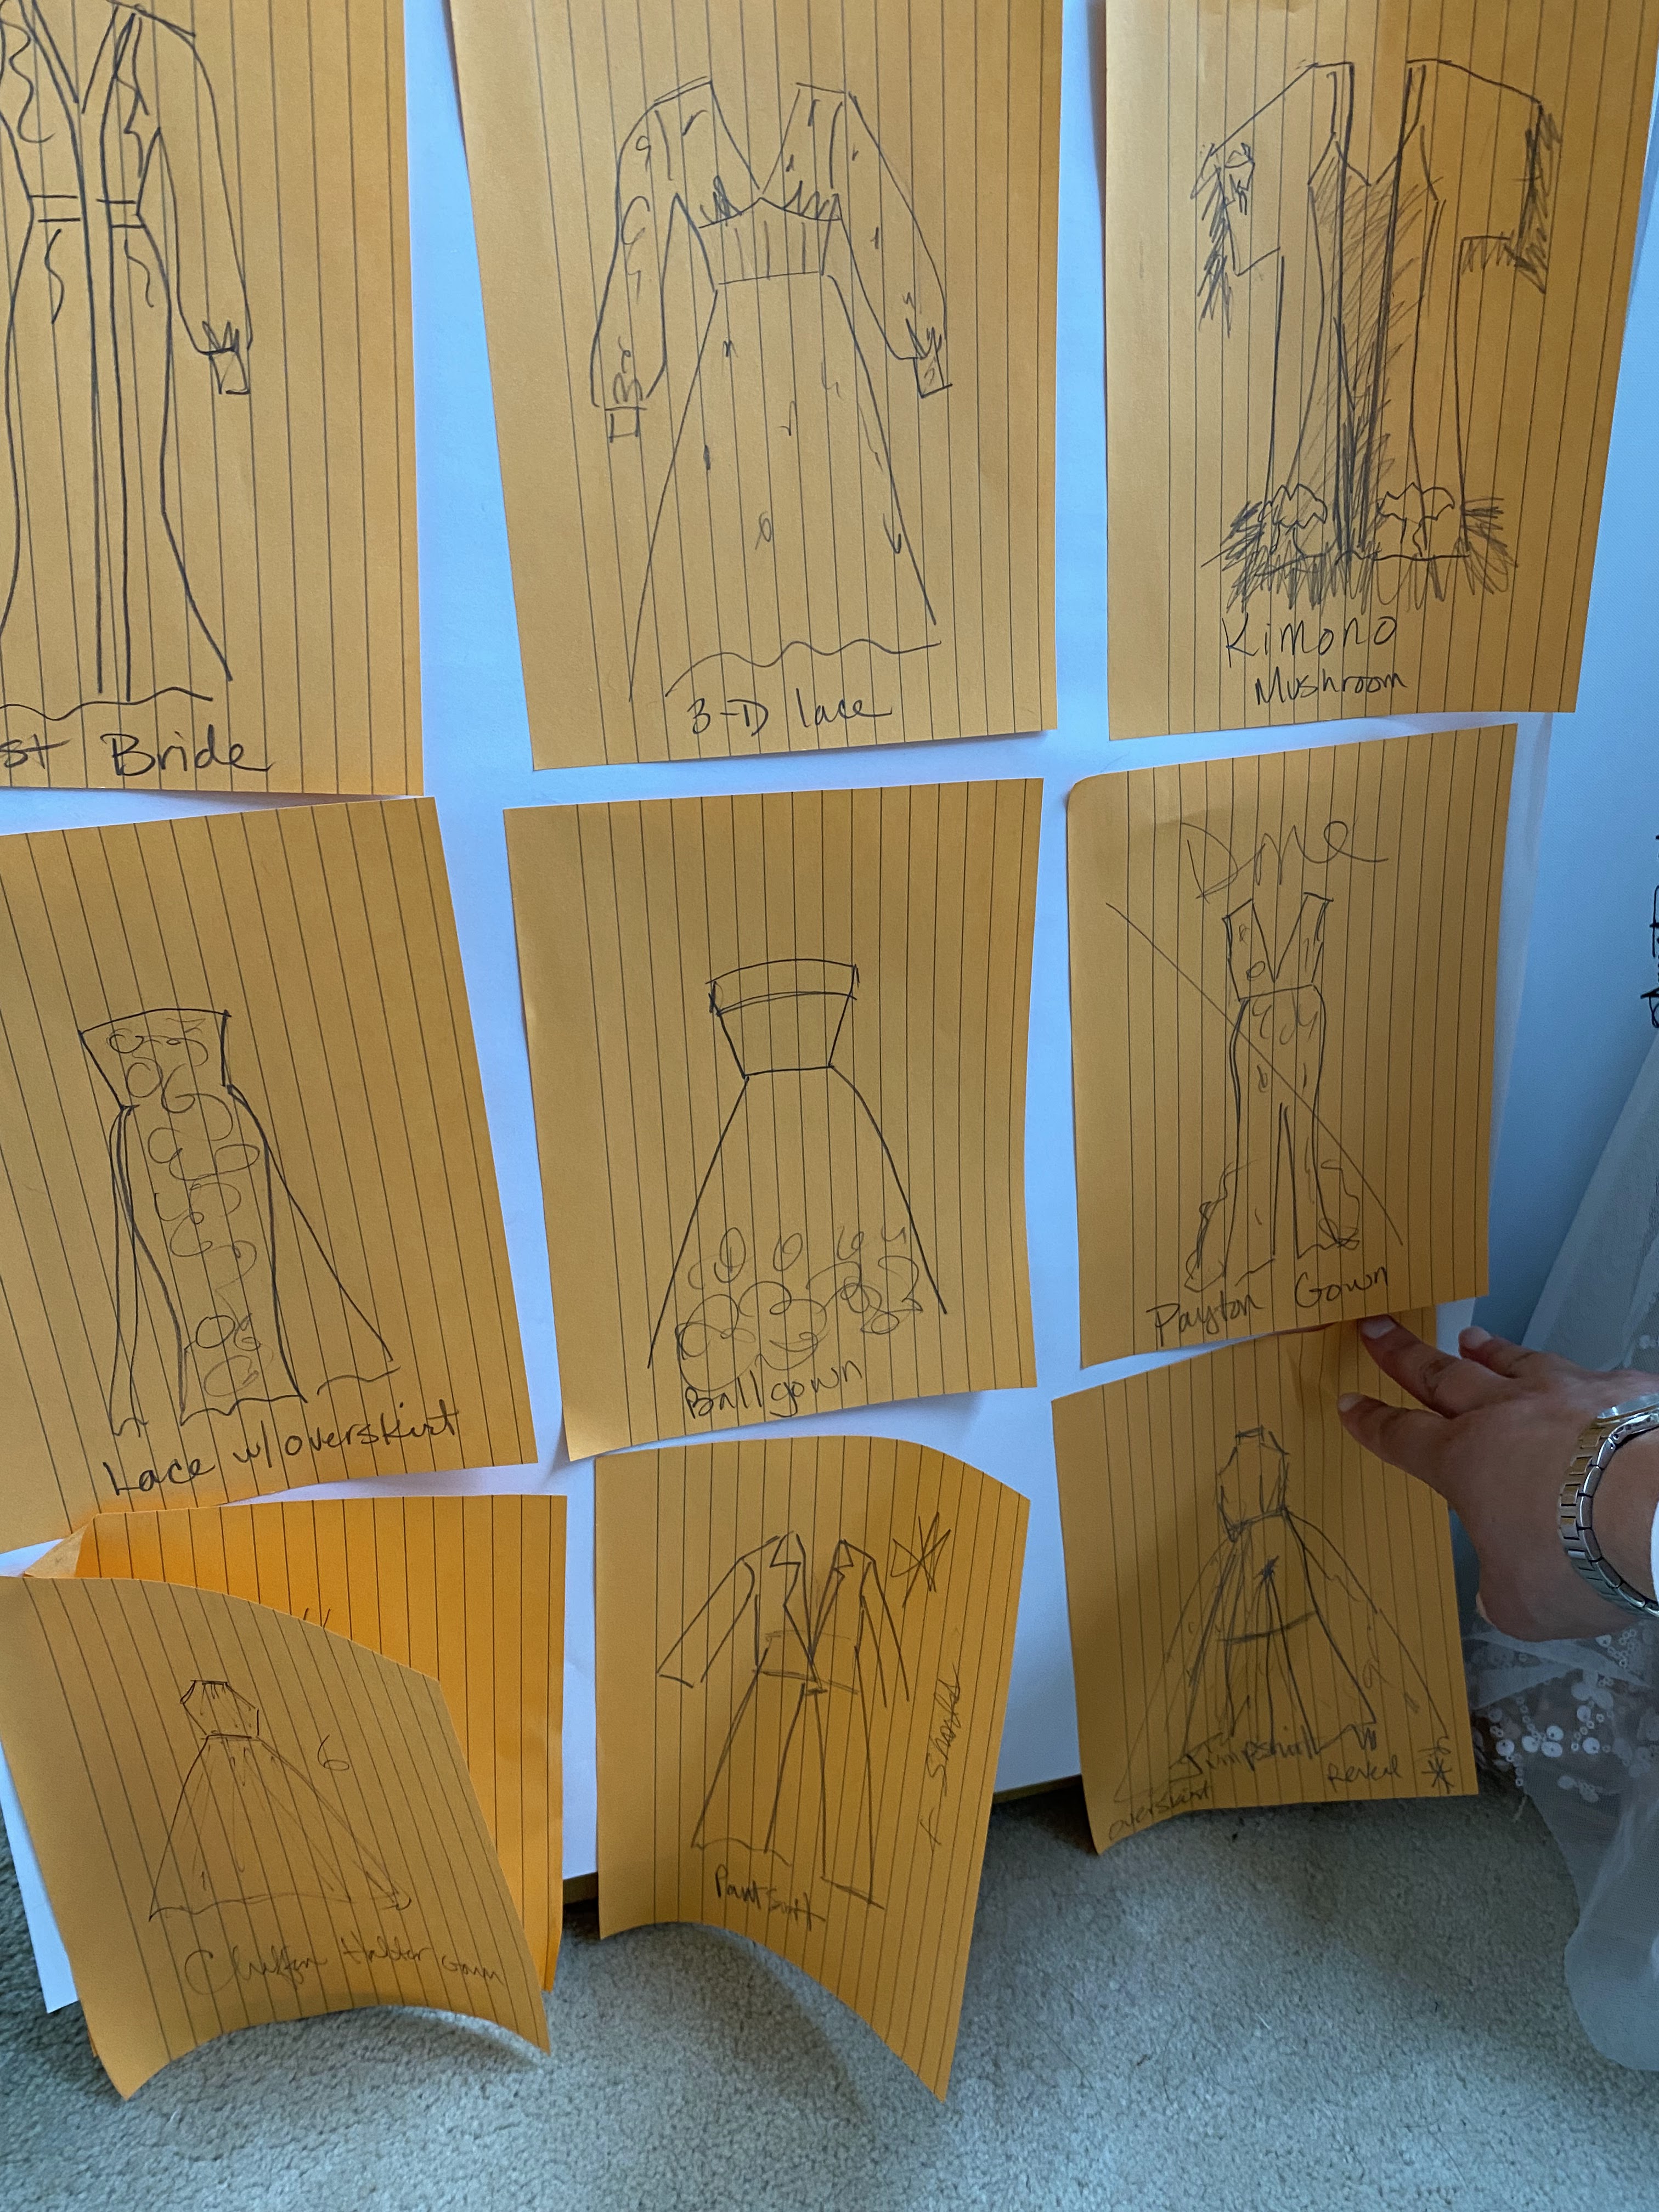
Then the real work began! I asked a few friends if they would be willing to be my little support team, there to bounce ideas off of, help me make decisions, keep on track, and stay motivated. Early on, I held a meeting with them and shared my ideas and concepts for what I was going to make for the collection. I had some wonderful fabrics already, enough yardage of each fabric to make a big dress or a suit, and some style ideas already swimming in my head that I was dying to make up. I came up with a little line plan with simple sketches and brought my fabrics to show & tell over a brunch meeting, no husbands invited!
Giant Post-It Notes come in very handy for conceptualizing!
I sat down with my calendar and made a plan. I figured I had to make about a dress a week in order to meet the deadline of the show, then broke the days of the week into more goals and tasks, all because I know how much of a procrastinator I am, and always underestimate the time needed to make something.
Flash forward to show time, I nailed it in terms of timing! I was done with everything a couple of days before the show, and had the time to do any final sewing tasks, carefully steam out and pack up each dress and the accessories, and have them ready to transport to the show venue. I could relax, enjoy the night before the show, drink some wine, get a good night’s sleep, and really focus on my successes and on the Big Day the next day.
Flash Forward: The gowns are all packed and ready to go!
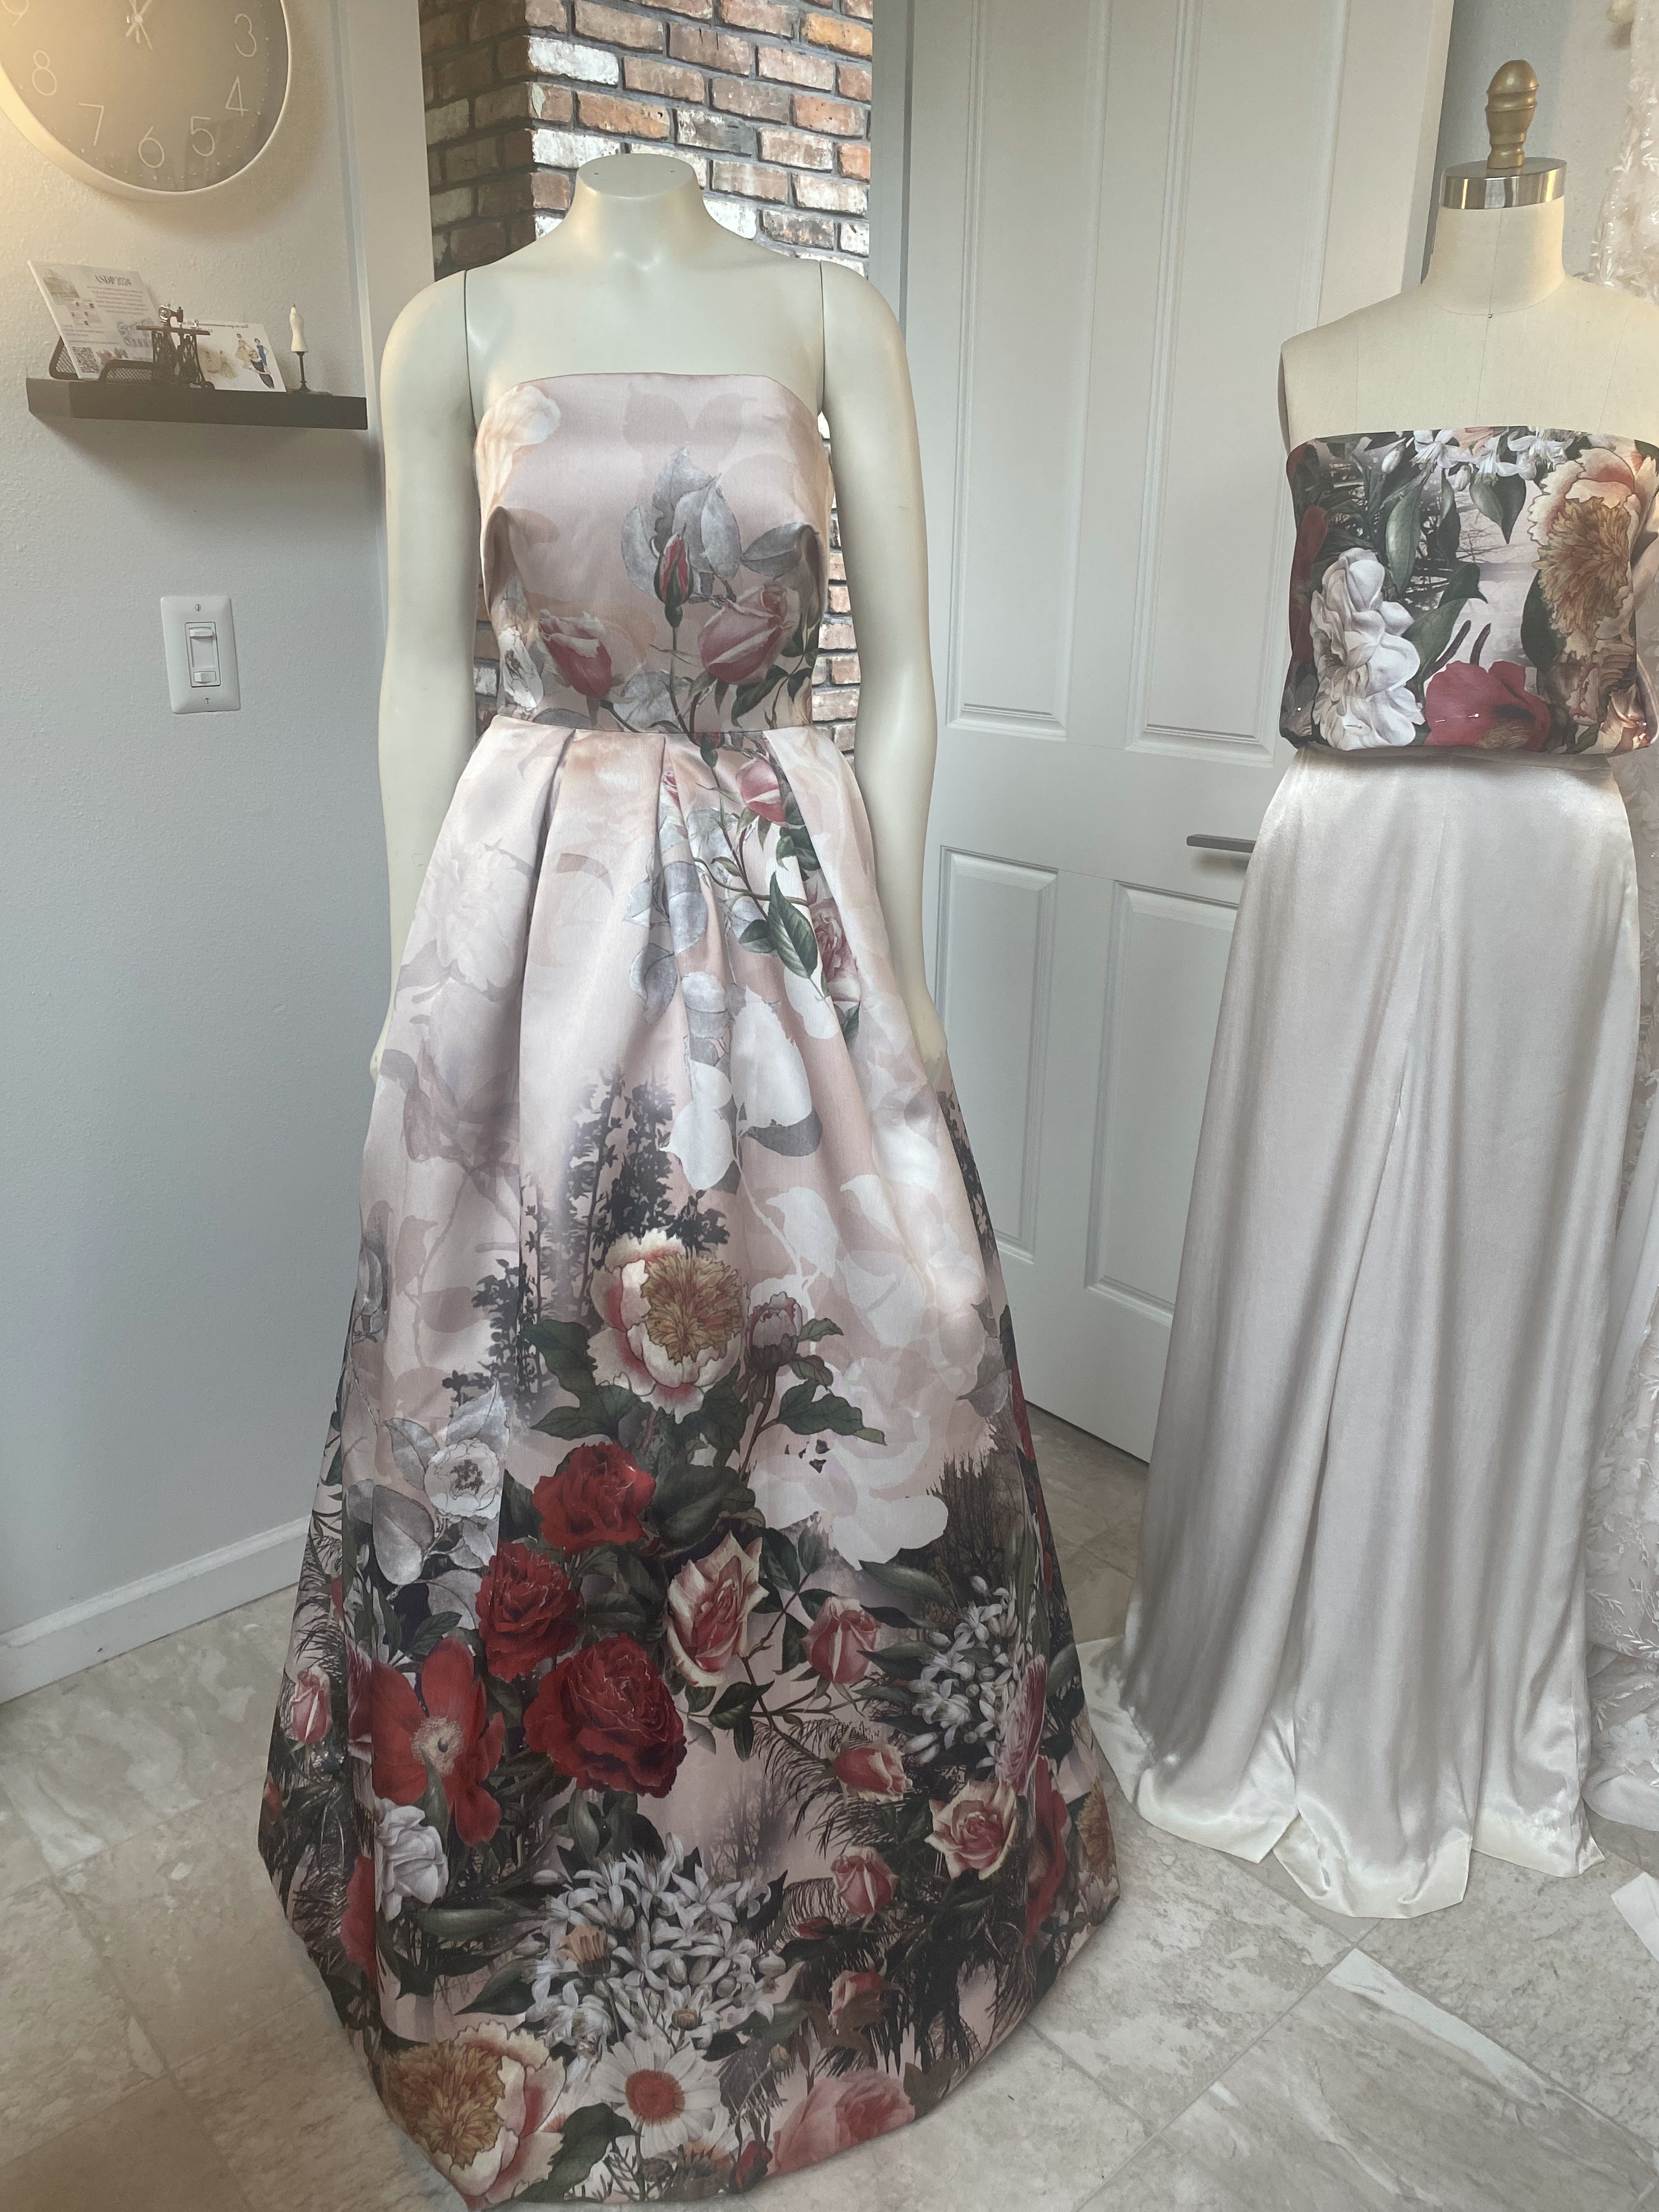
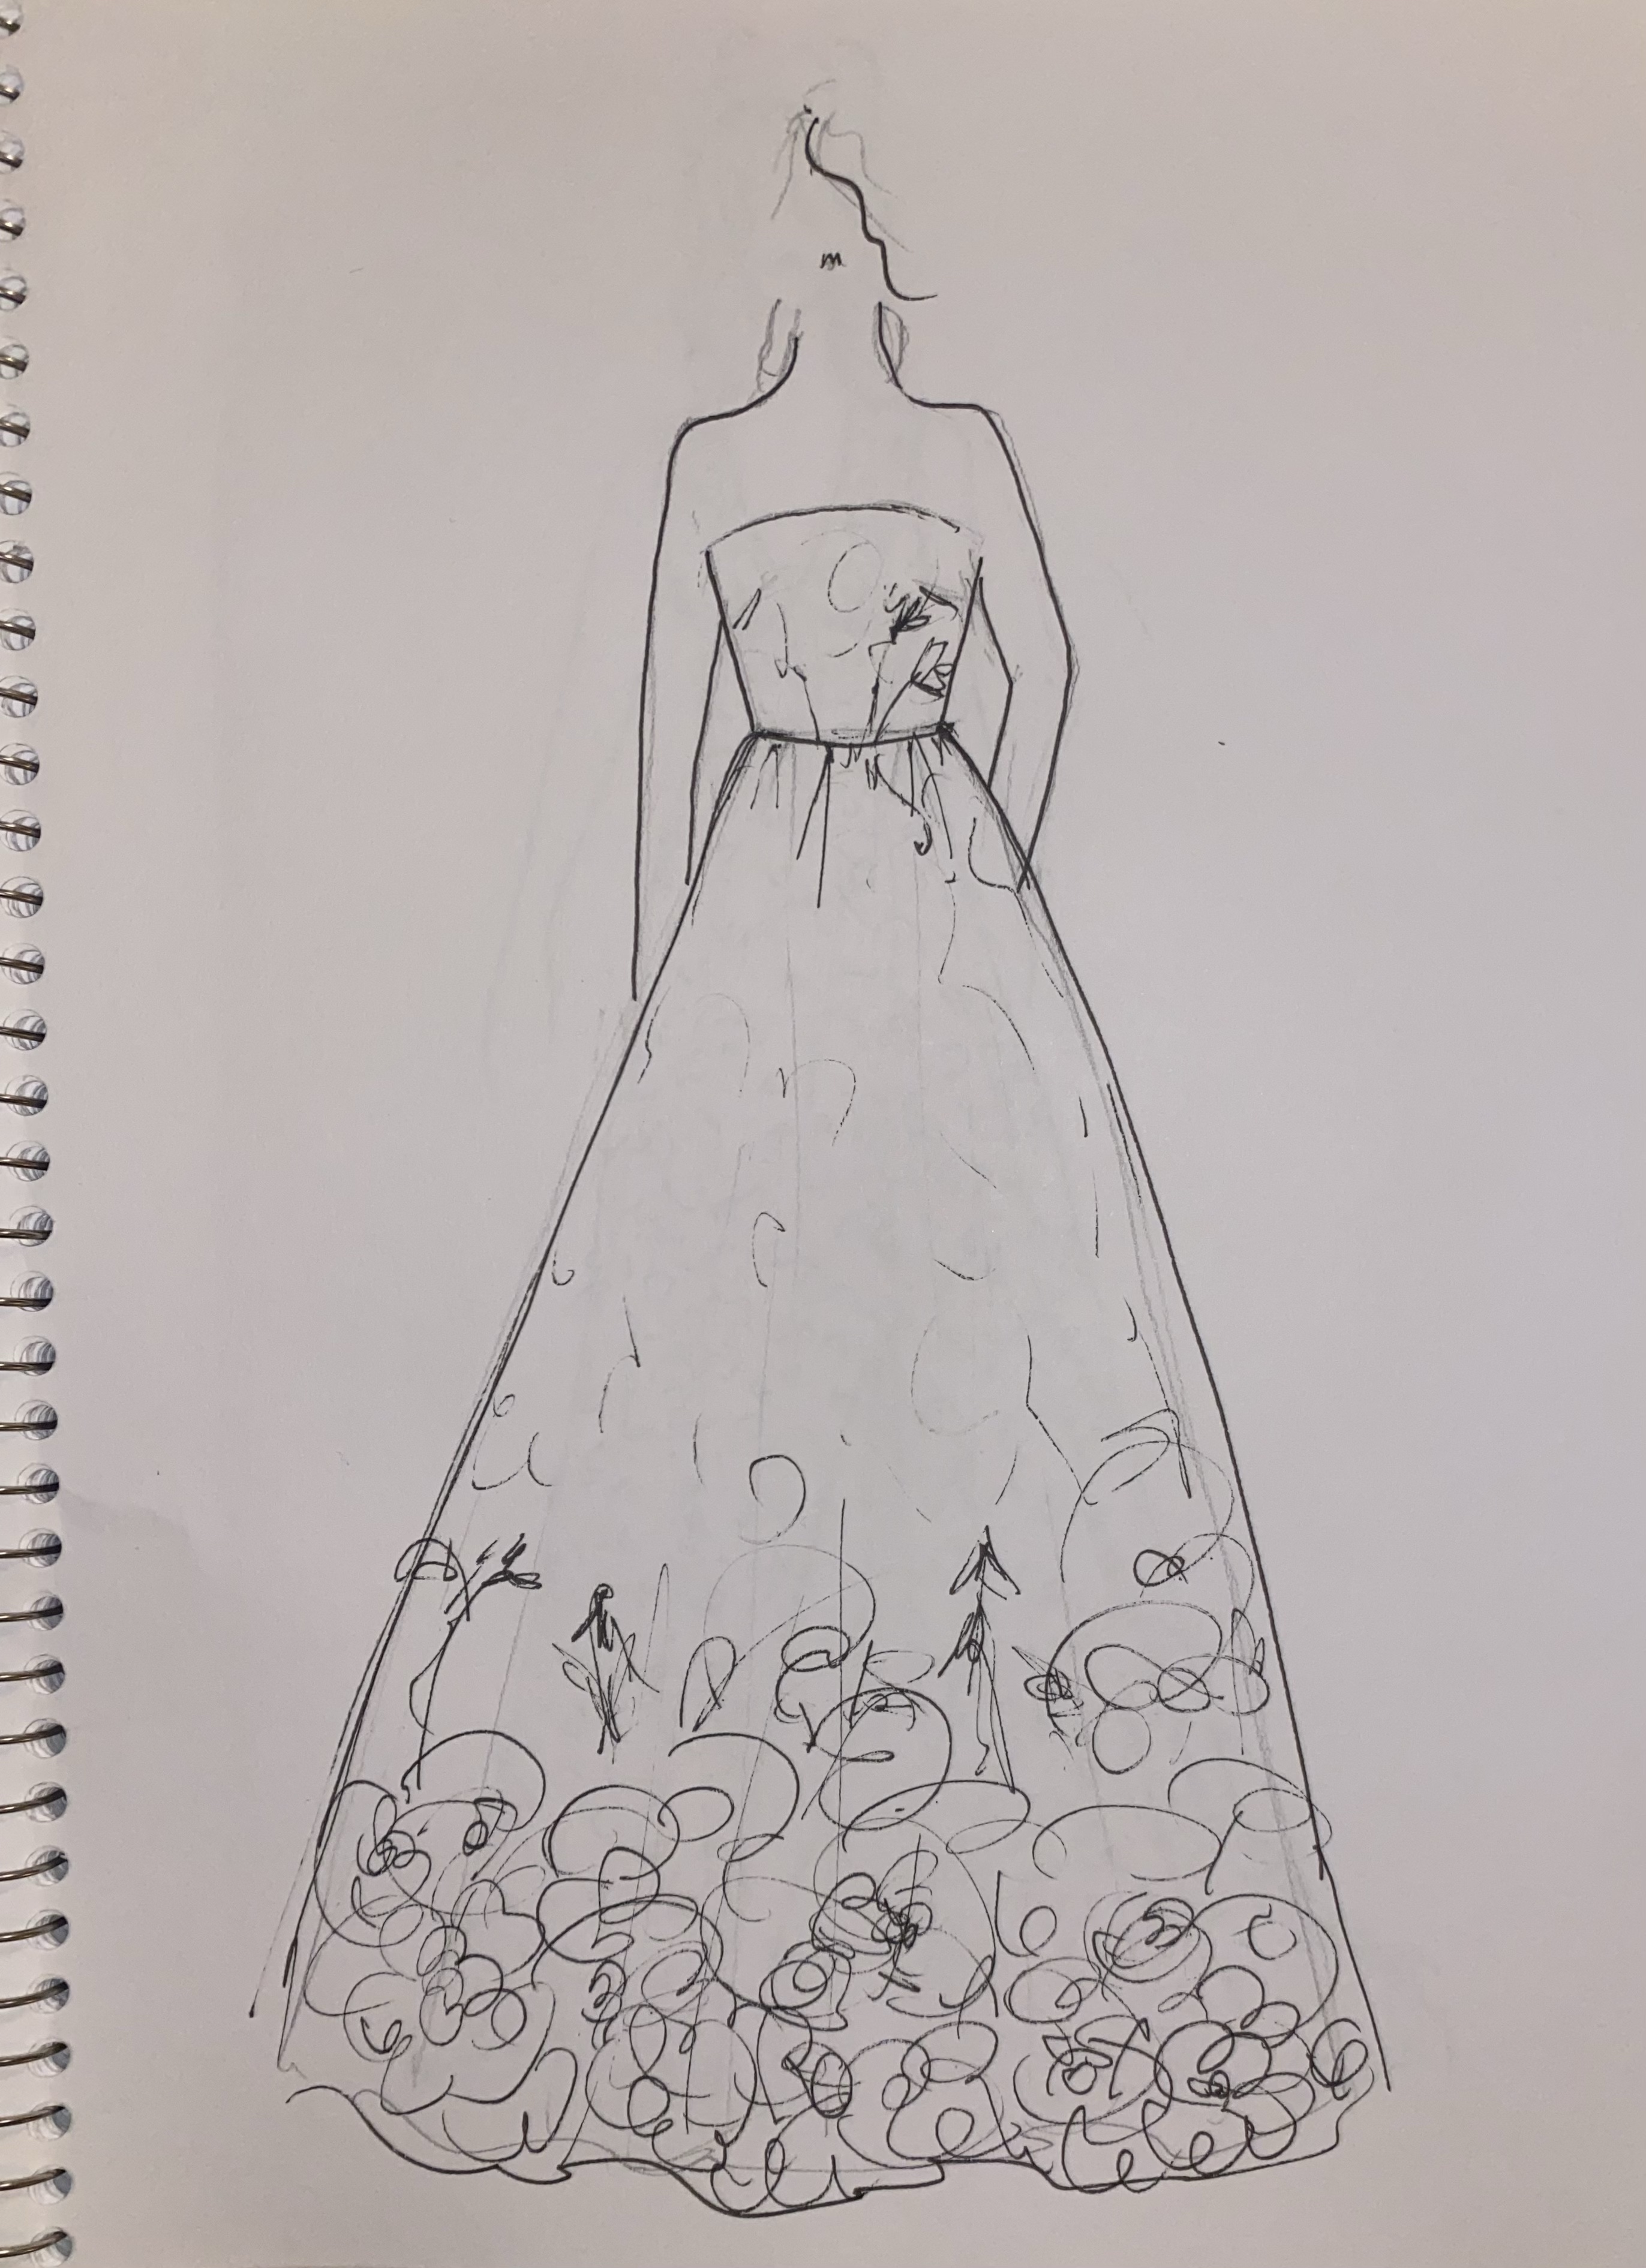
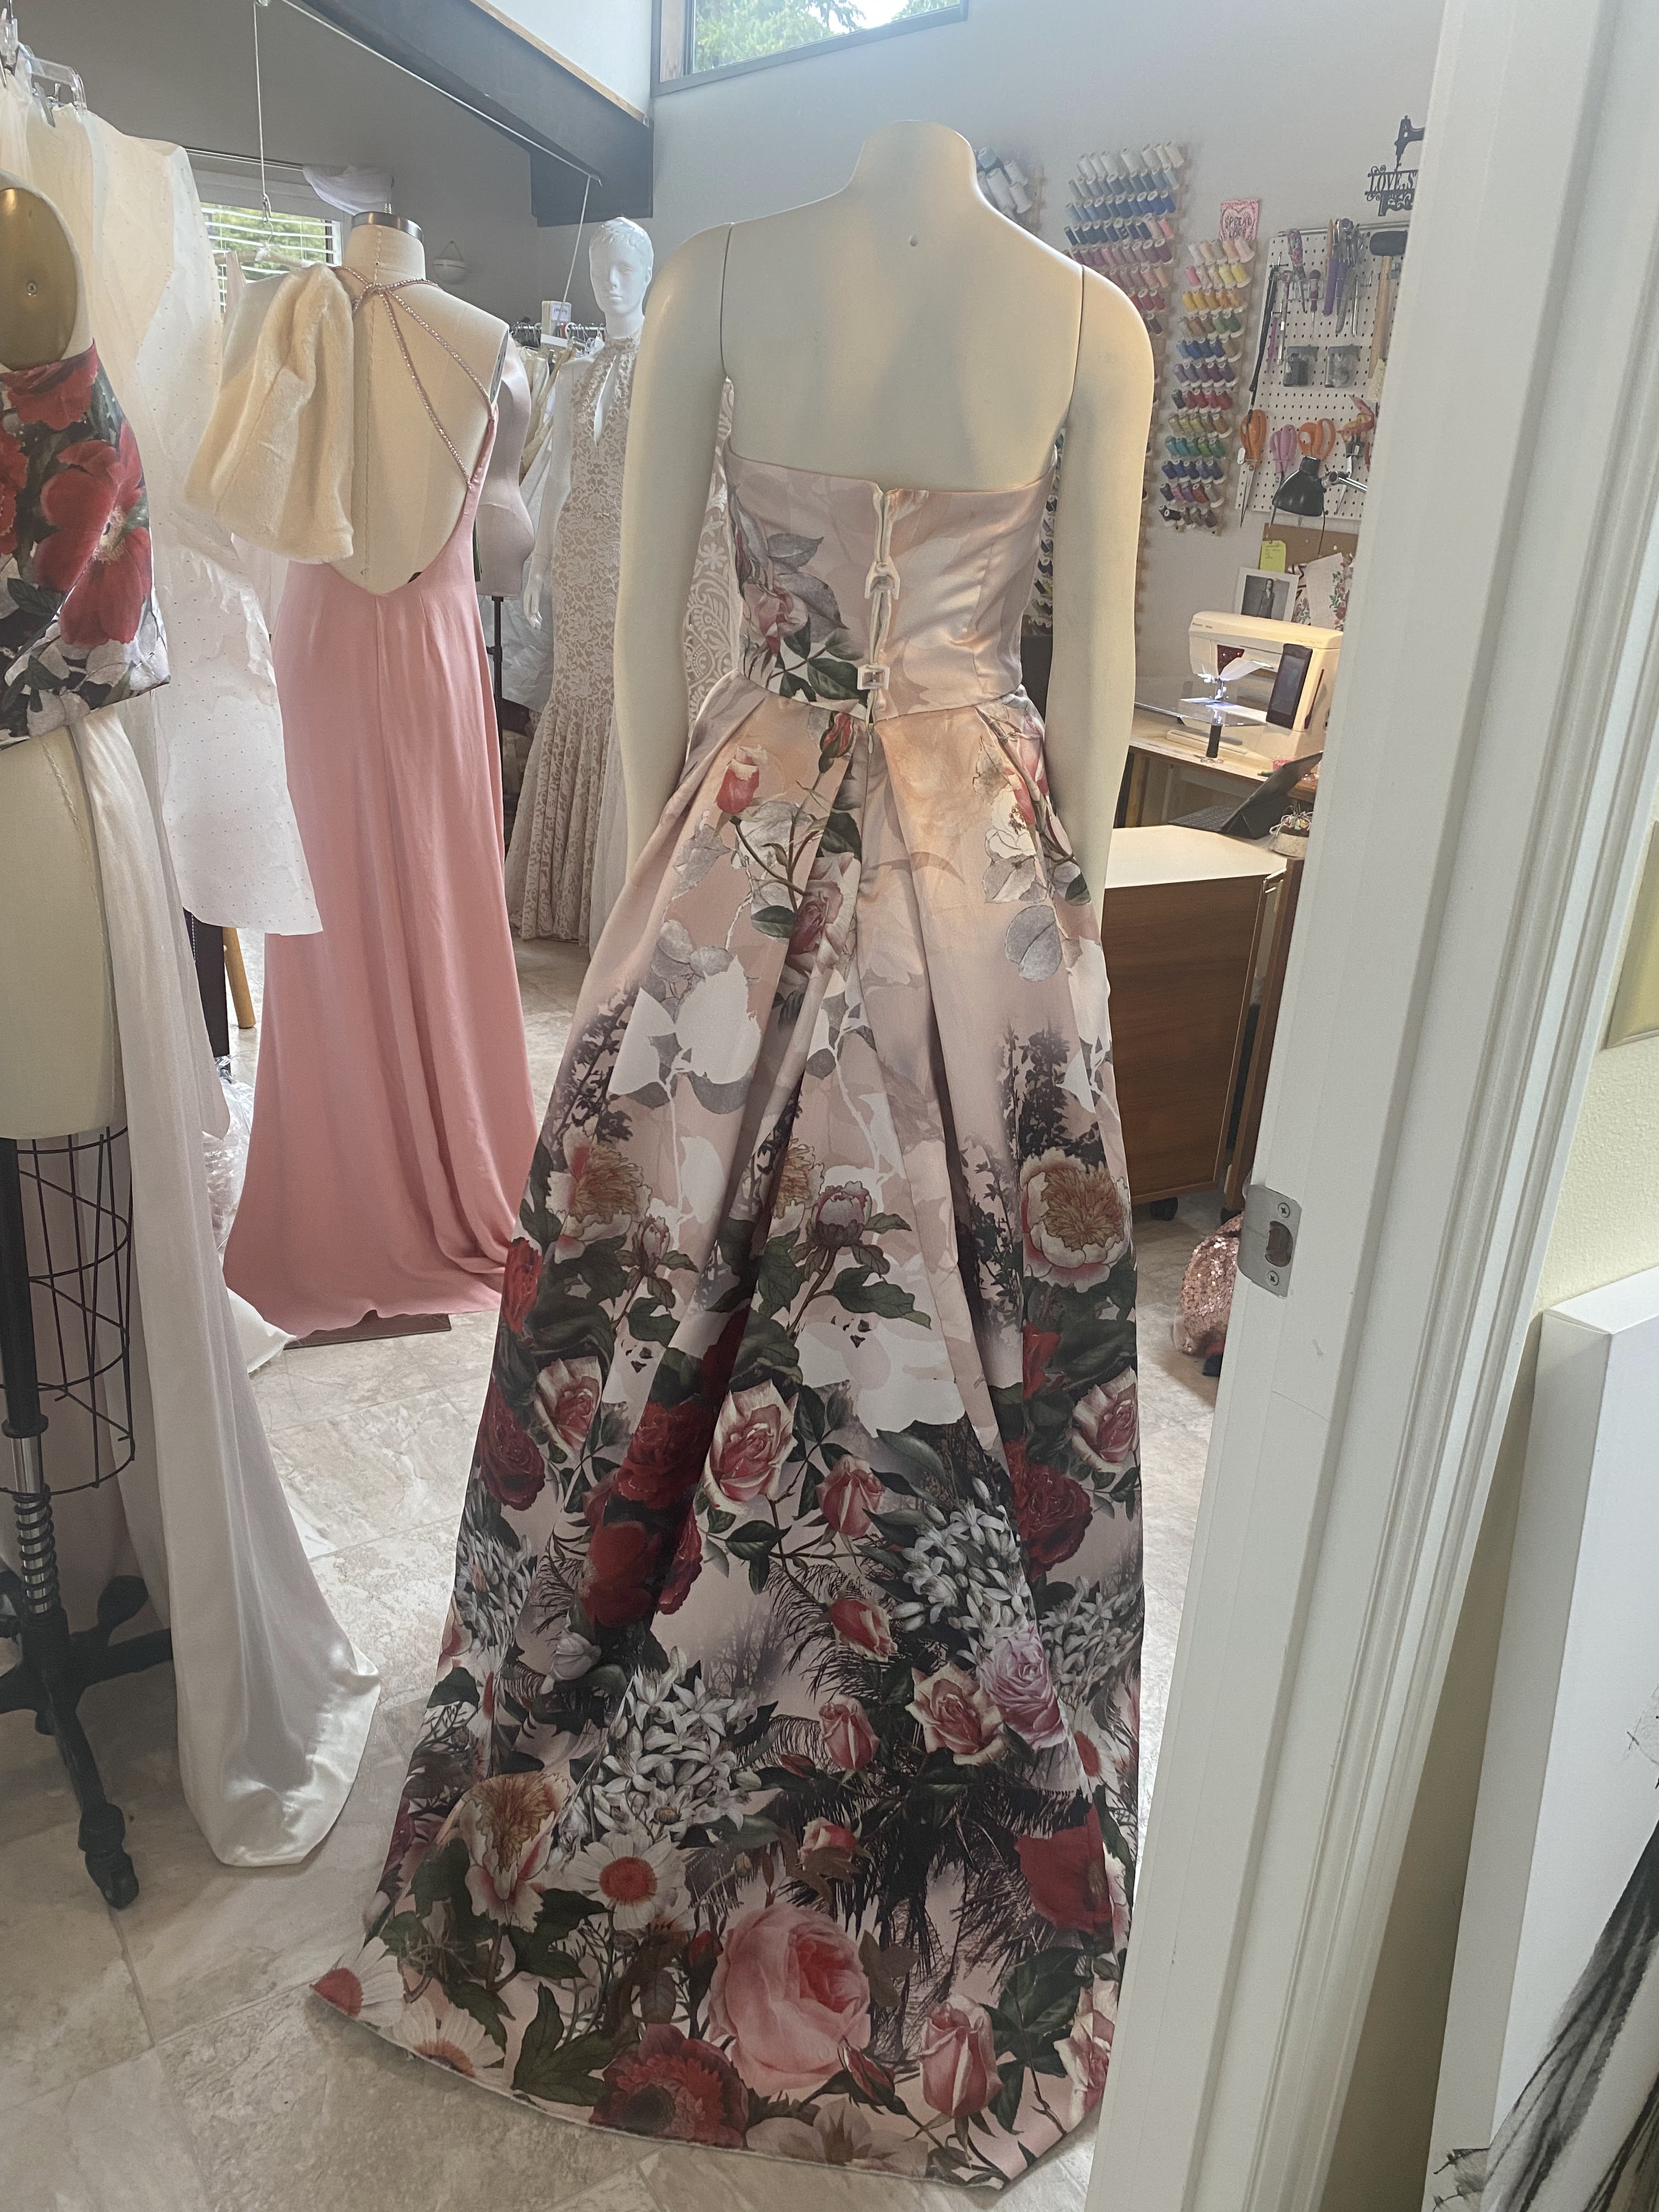
Back to the time being…then began the actual work of editing down to what makes sense, what flows together in a collection, and sticking to a theme. I began to conceptualize the collection with the one fabric that really spoke to me, a floral printed mikado (a type of satin) that I had purchased from Mood Designer Fabrics a few years ago. I just loved the colors and the “growing” effect of the print. I thought it would be a wonderful, big ball gown with a big skirt to show off the fabric. Hence, the Floral Garden Bridal Collection was born!
The floral mikado ballgown! Shown here completed, as well as a strapless top made in the same fabric and a wide leg pant.My fashion sketch for this gown
I made the gown with a strapless bodice, doing a folded side pleat instead of a dart or princess seams to ensure I didn’t have to cut into the fabric and break up the print. I used boning and interfacing inside as a layer to act as support, and also lined in a lovely ivory satin. The skirt was made by draping it on a dress form, creating large pleats and adding a triangular-shaped godet to the back of the skirt so that it formed a wider circle at the hem. I added side seam pockets as well, just for fun and convenience for the wearer. Also, I added a waist stay inside the gown, a belt-like support made using a sturdy piece of ribbon, sewn to the inside of the dress, worn snugly around the wearer’s waist and fastens with a hook & eye. This helps to support the weight of the skirt and helps to keep a strapless dress from falling down. I used a store-bought petticoat under the gown to support the bell shape.
The rest of the collection was all meant to circle back to this ballgown by use of a color pulled out from the print, or a shape from a flower. I made edits to my original line up, taking away a few ideas that didn’t really “go”, and adding a few that made sense to fill in the gaps.
One outfit that didn’t truly tie back to the dress was the white linen pantsuit and corset that I made. I made this outfit as I wanted to create alternatives for the modern bride to choose from, and figured a bride might not want a dress, or the ceremony is happening at the courthouse or she might want it for an event before or after the wedding yet still want to feel special and stand out.
For this outfit, I purchased an entire bolt of white linen from Joann Fabrics and chose to use a few commercial patterns that I have been wanting to make, the kind of patterns that are advanced level of sewing and take quite a lot of tailoring and couture sewing techniques to be successful.
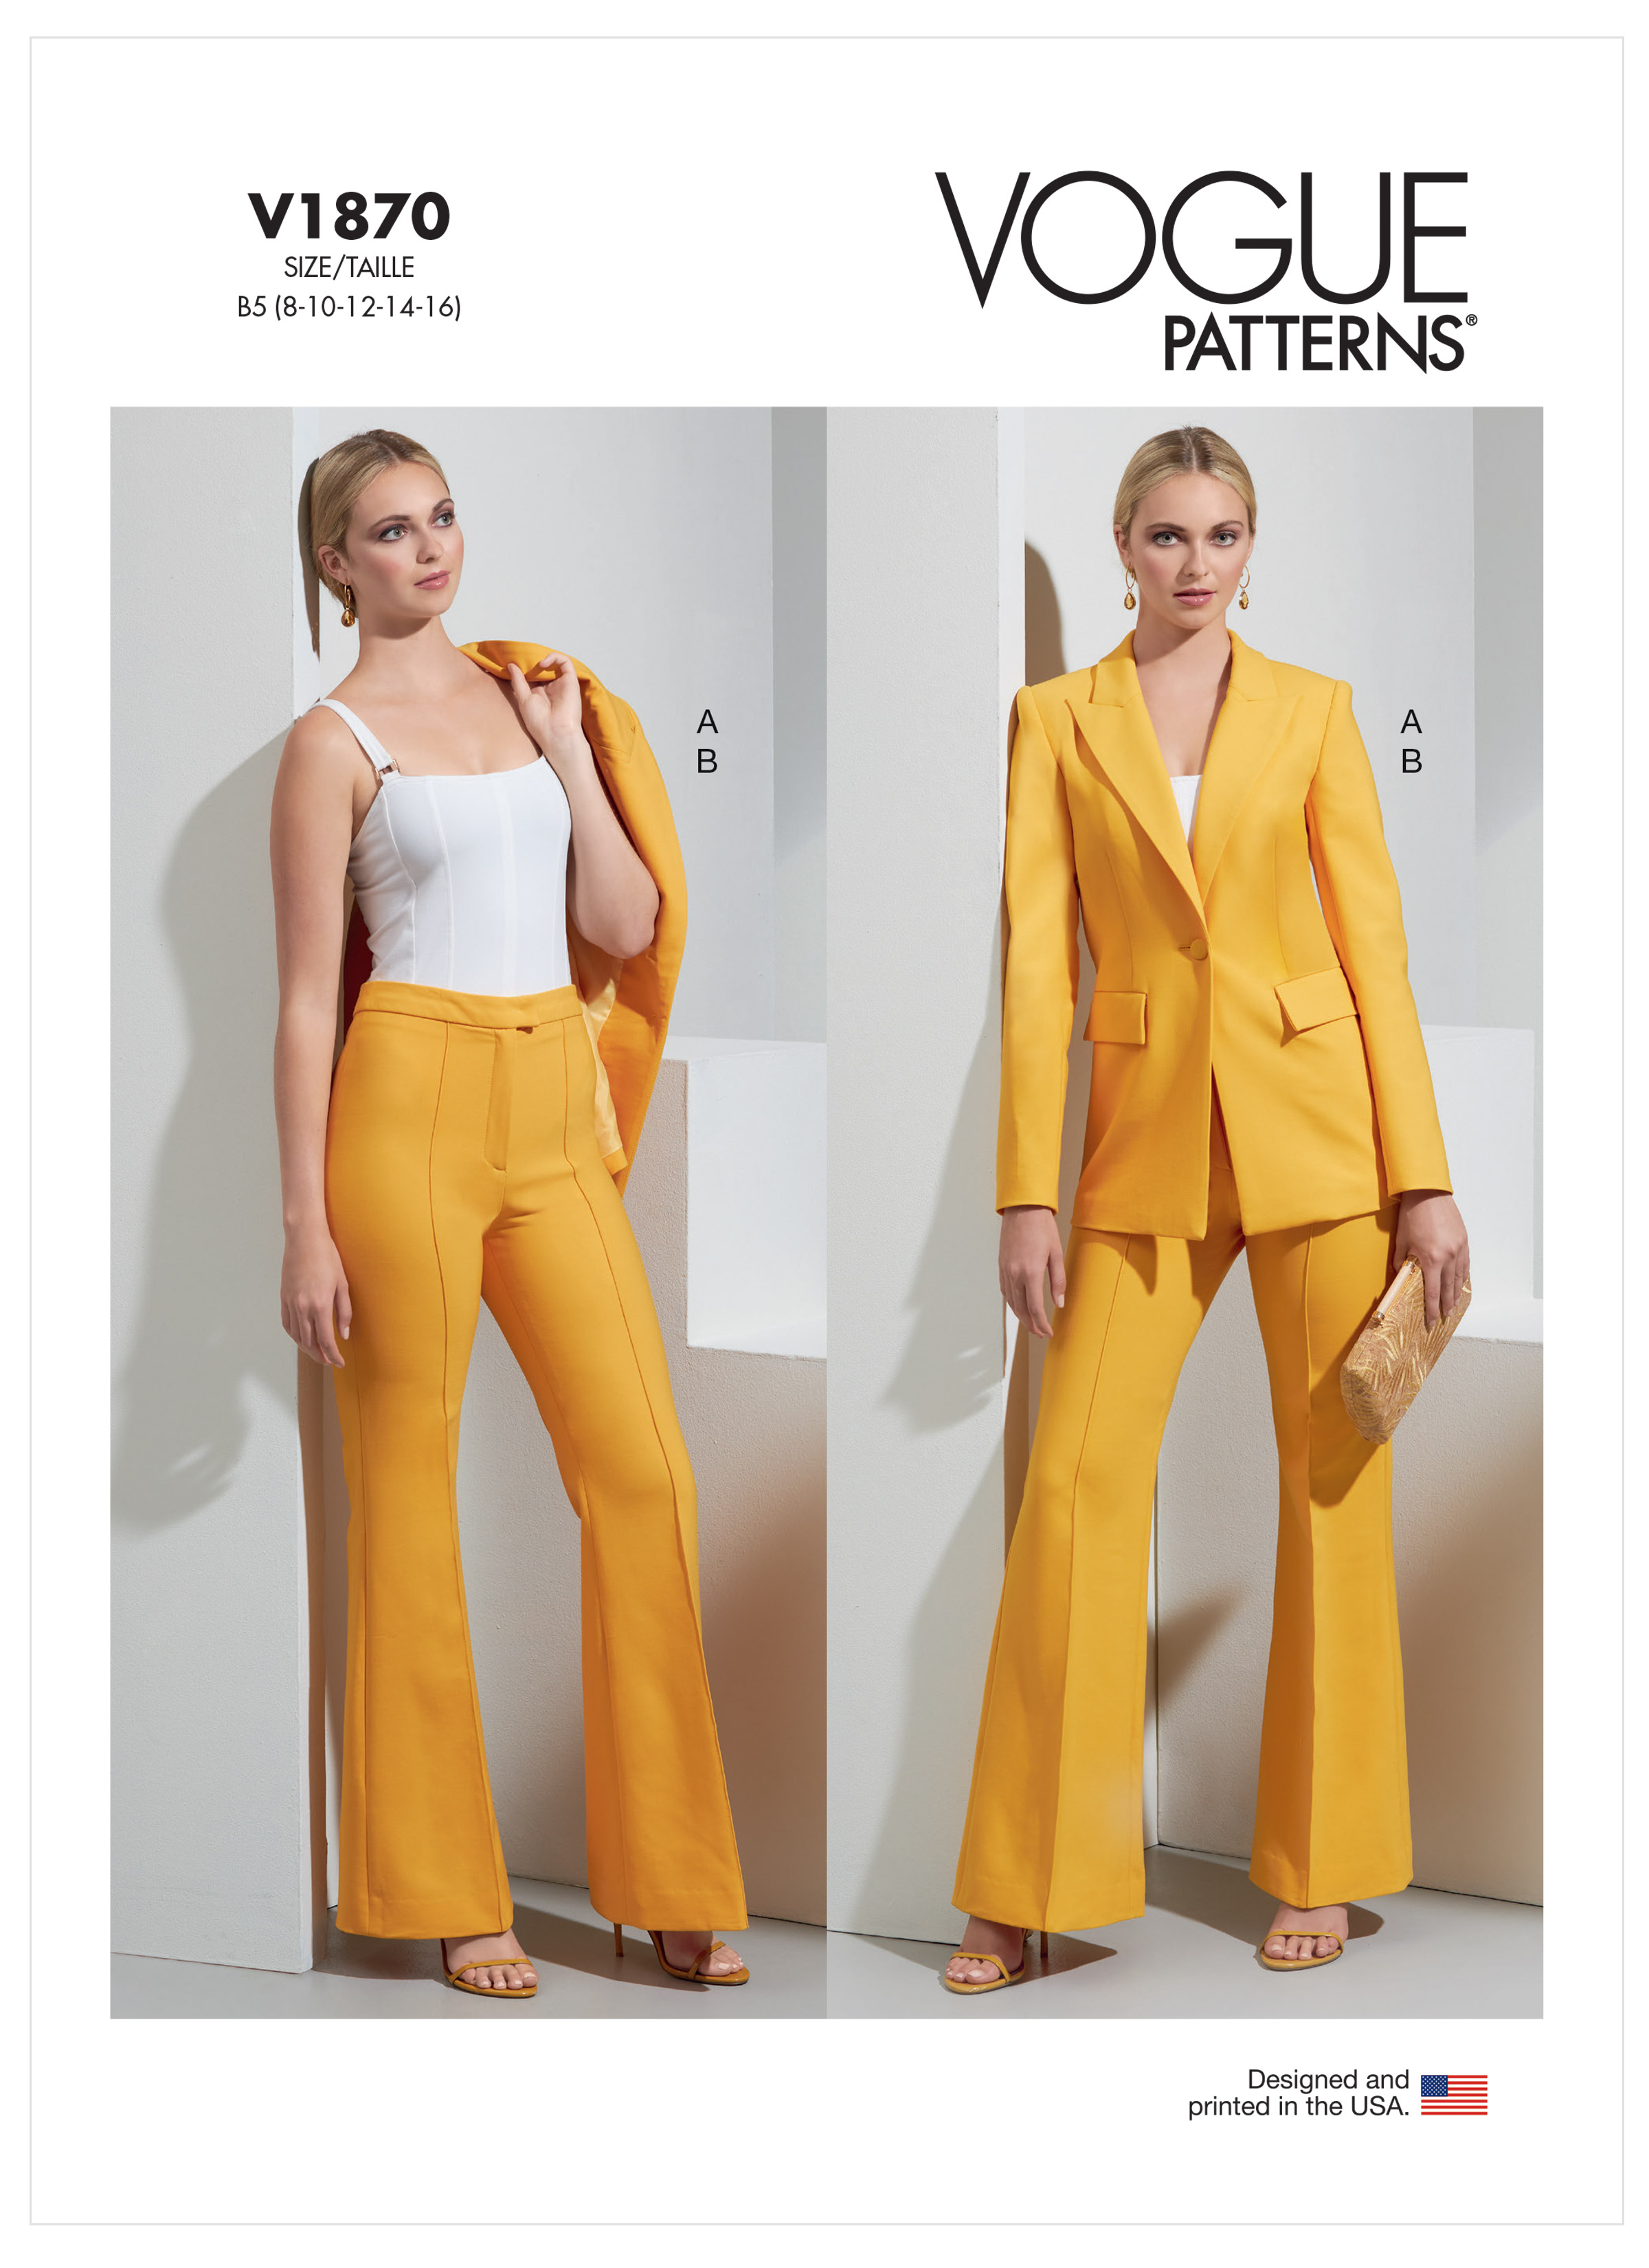
The first pattern I tackled was the blazer jacket using Vogue 1870 view A:
Vogue 1870 Pattern View A
This pattern was a beast to make, but it turned out so sharp and really great looking! It’s fully lined with welt pockets and 2-piece sleeves. I’m pretty sure it is most likely a designer knock-off such as Gucci but I can’t be certain. Either way, I absolutely love it!
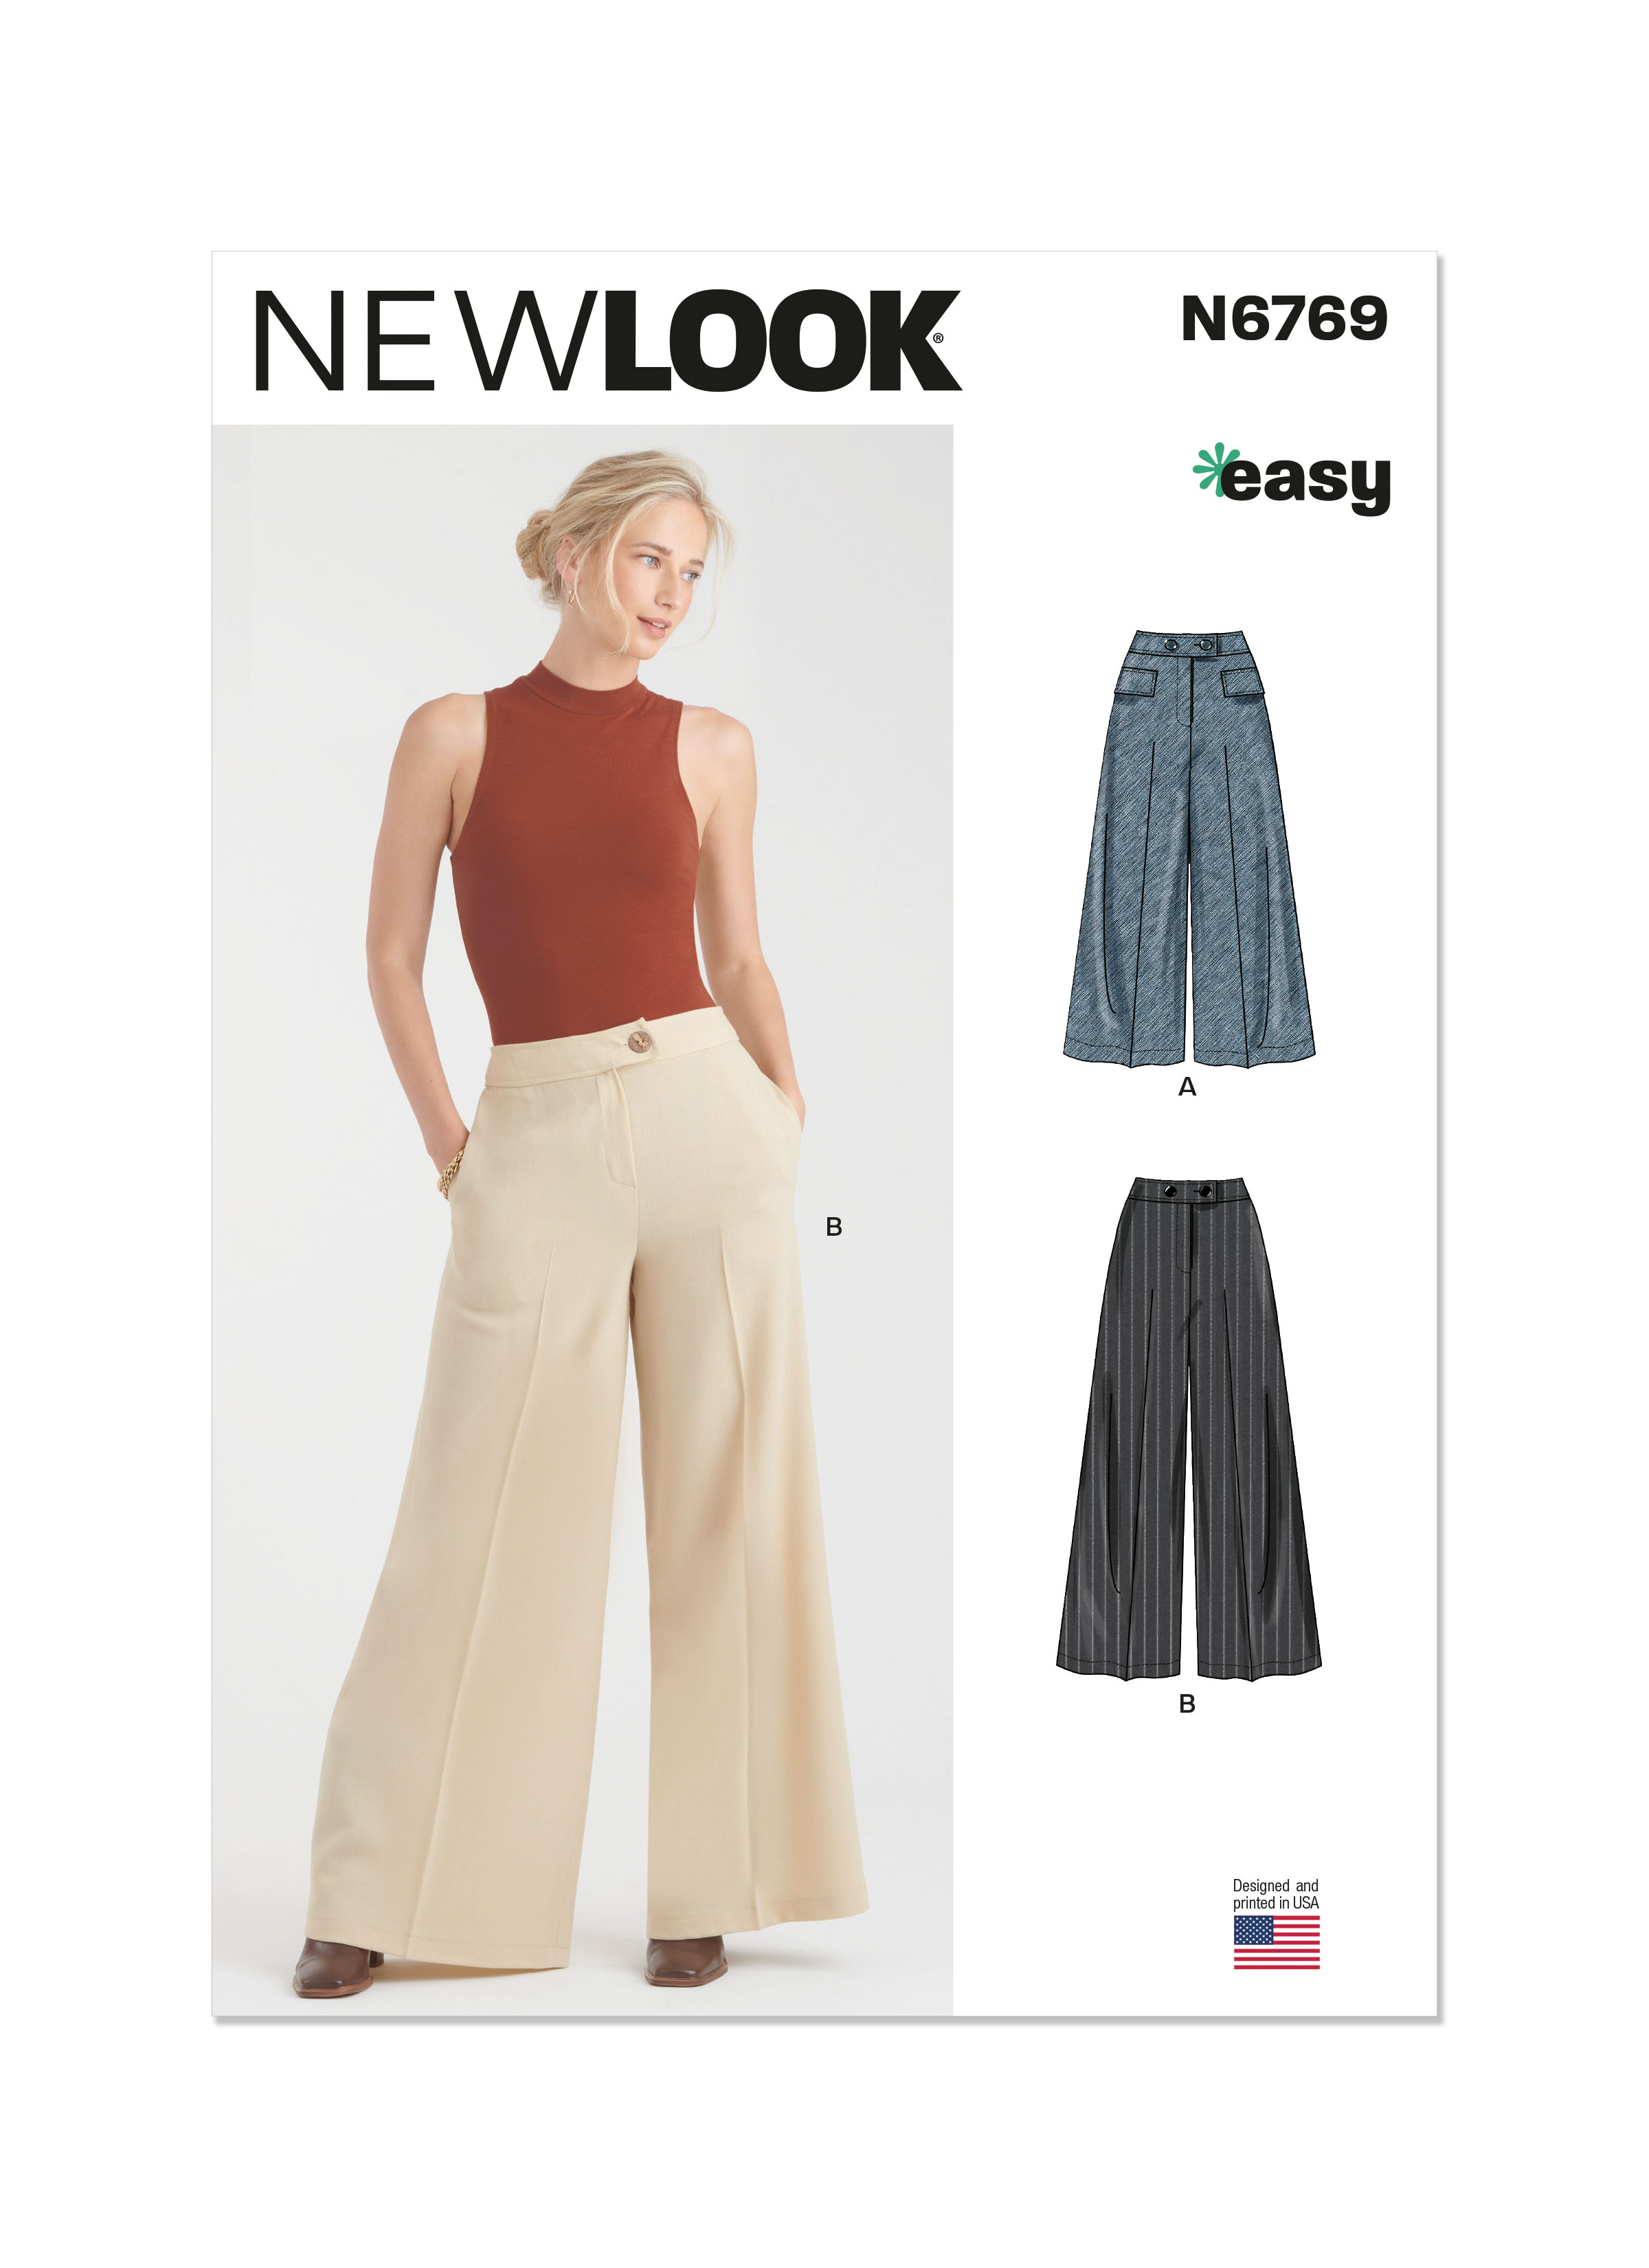
Once the jacket was complete, I went on to make the wide leg trousers. I used New Look 6769 pattern for the pants. Nothing crazy. I was going for simple, tailored and elegant with the wide leg and pockets, plus this pattern was super easy to sew. A nice refresher between to tough ones:
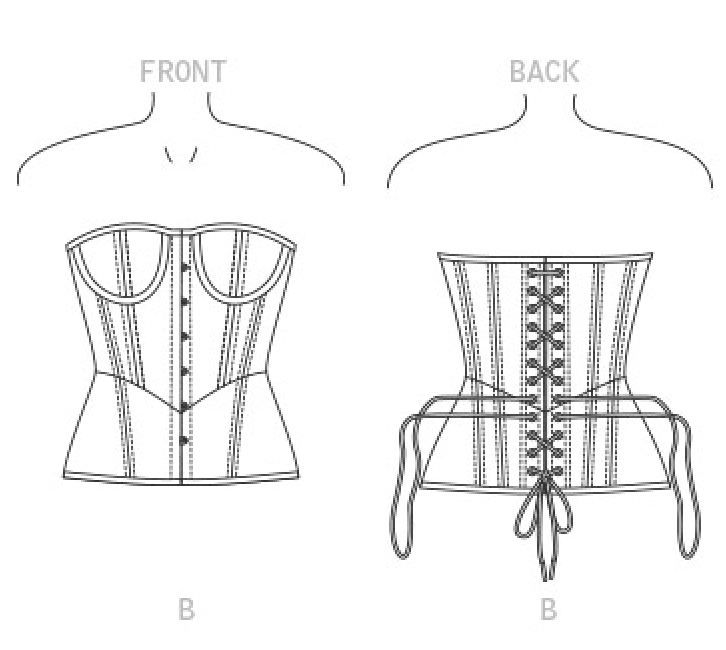
Then came the hard part: the corset. A zillion pattern pieces to keep track and labeled; the linen outer layer, the lining and the interfacing. Plus making the underwire and boning channels, and the bias strip that encased the upper and lower edges of the corset, and adding the front busk. Then there came the rivets! Ugh, lots of rivets. There are many, many corset sewing patterns out there to choose from, however I tortured myself by using an an advanced pattern, again by Vogue.
Vogue 1876 corset line drawingsThe Linen Pantsuit in ProgressThe Linen Corset in ProgressThe lovely interior of the corsetcovered buttons made for the jacketMy sketch for the outfit on the right, minus the blazer.
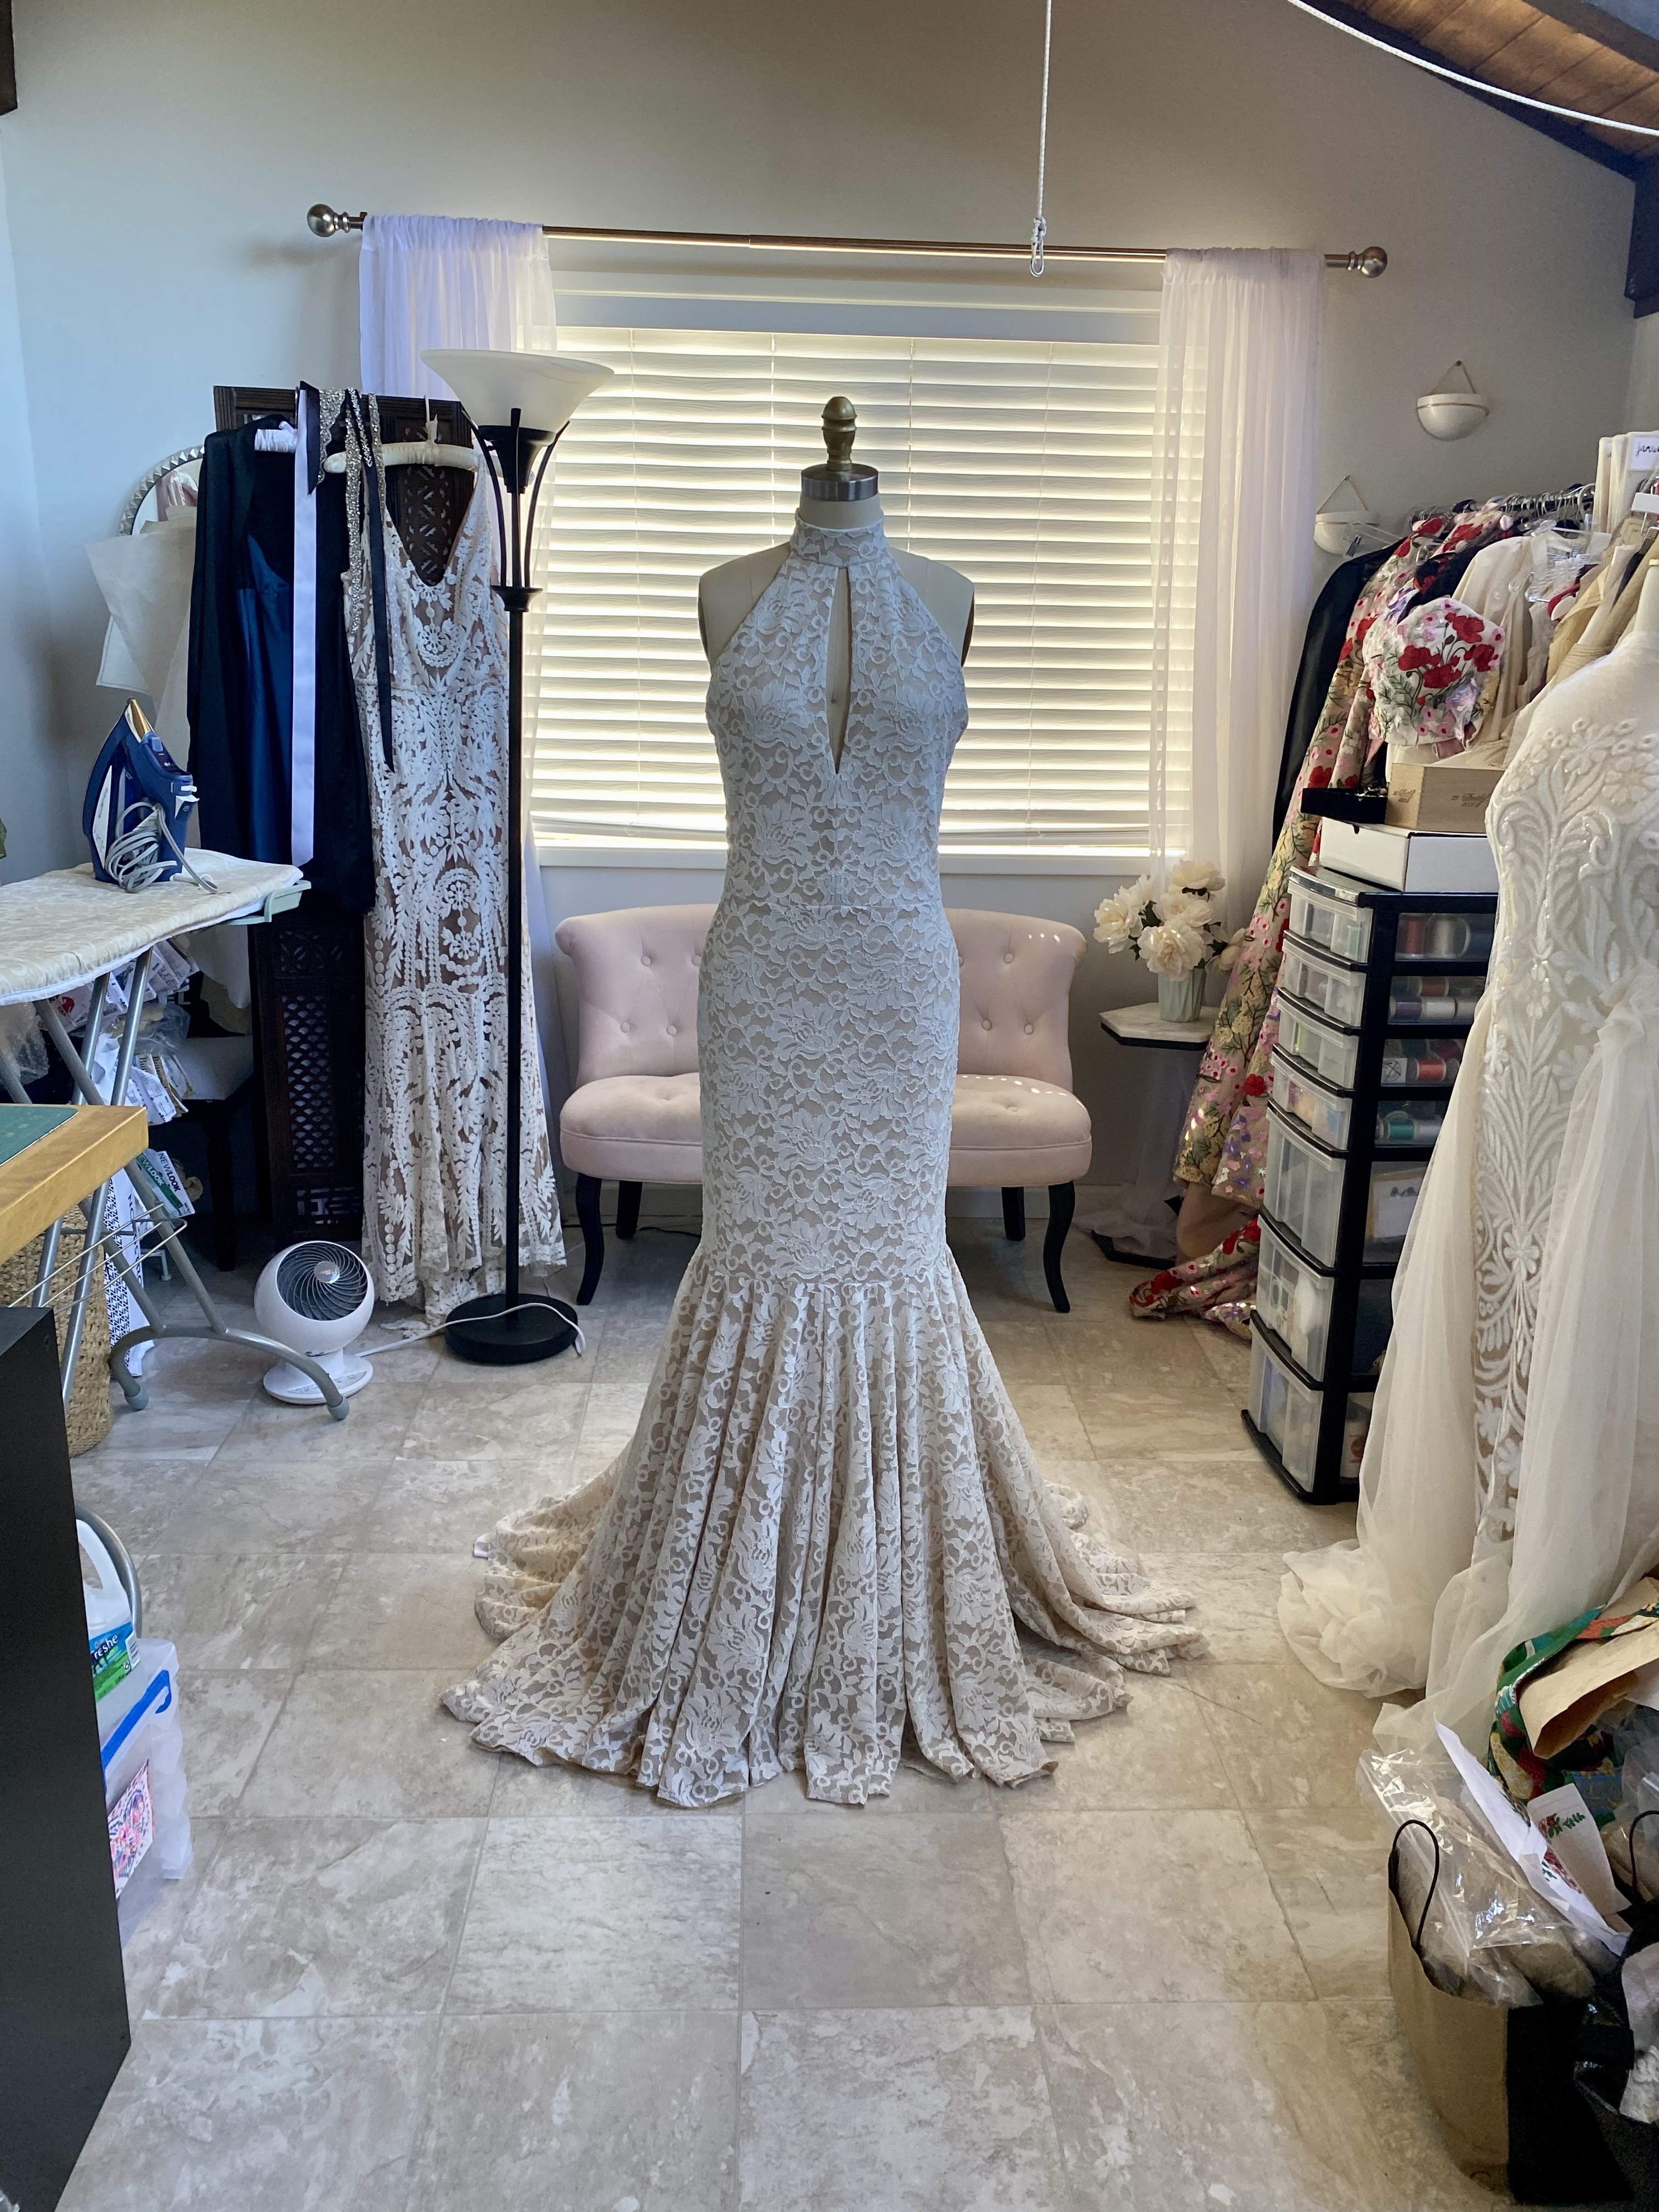
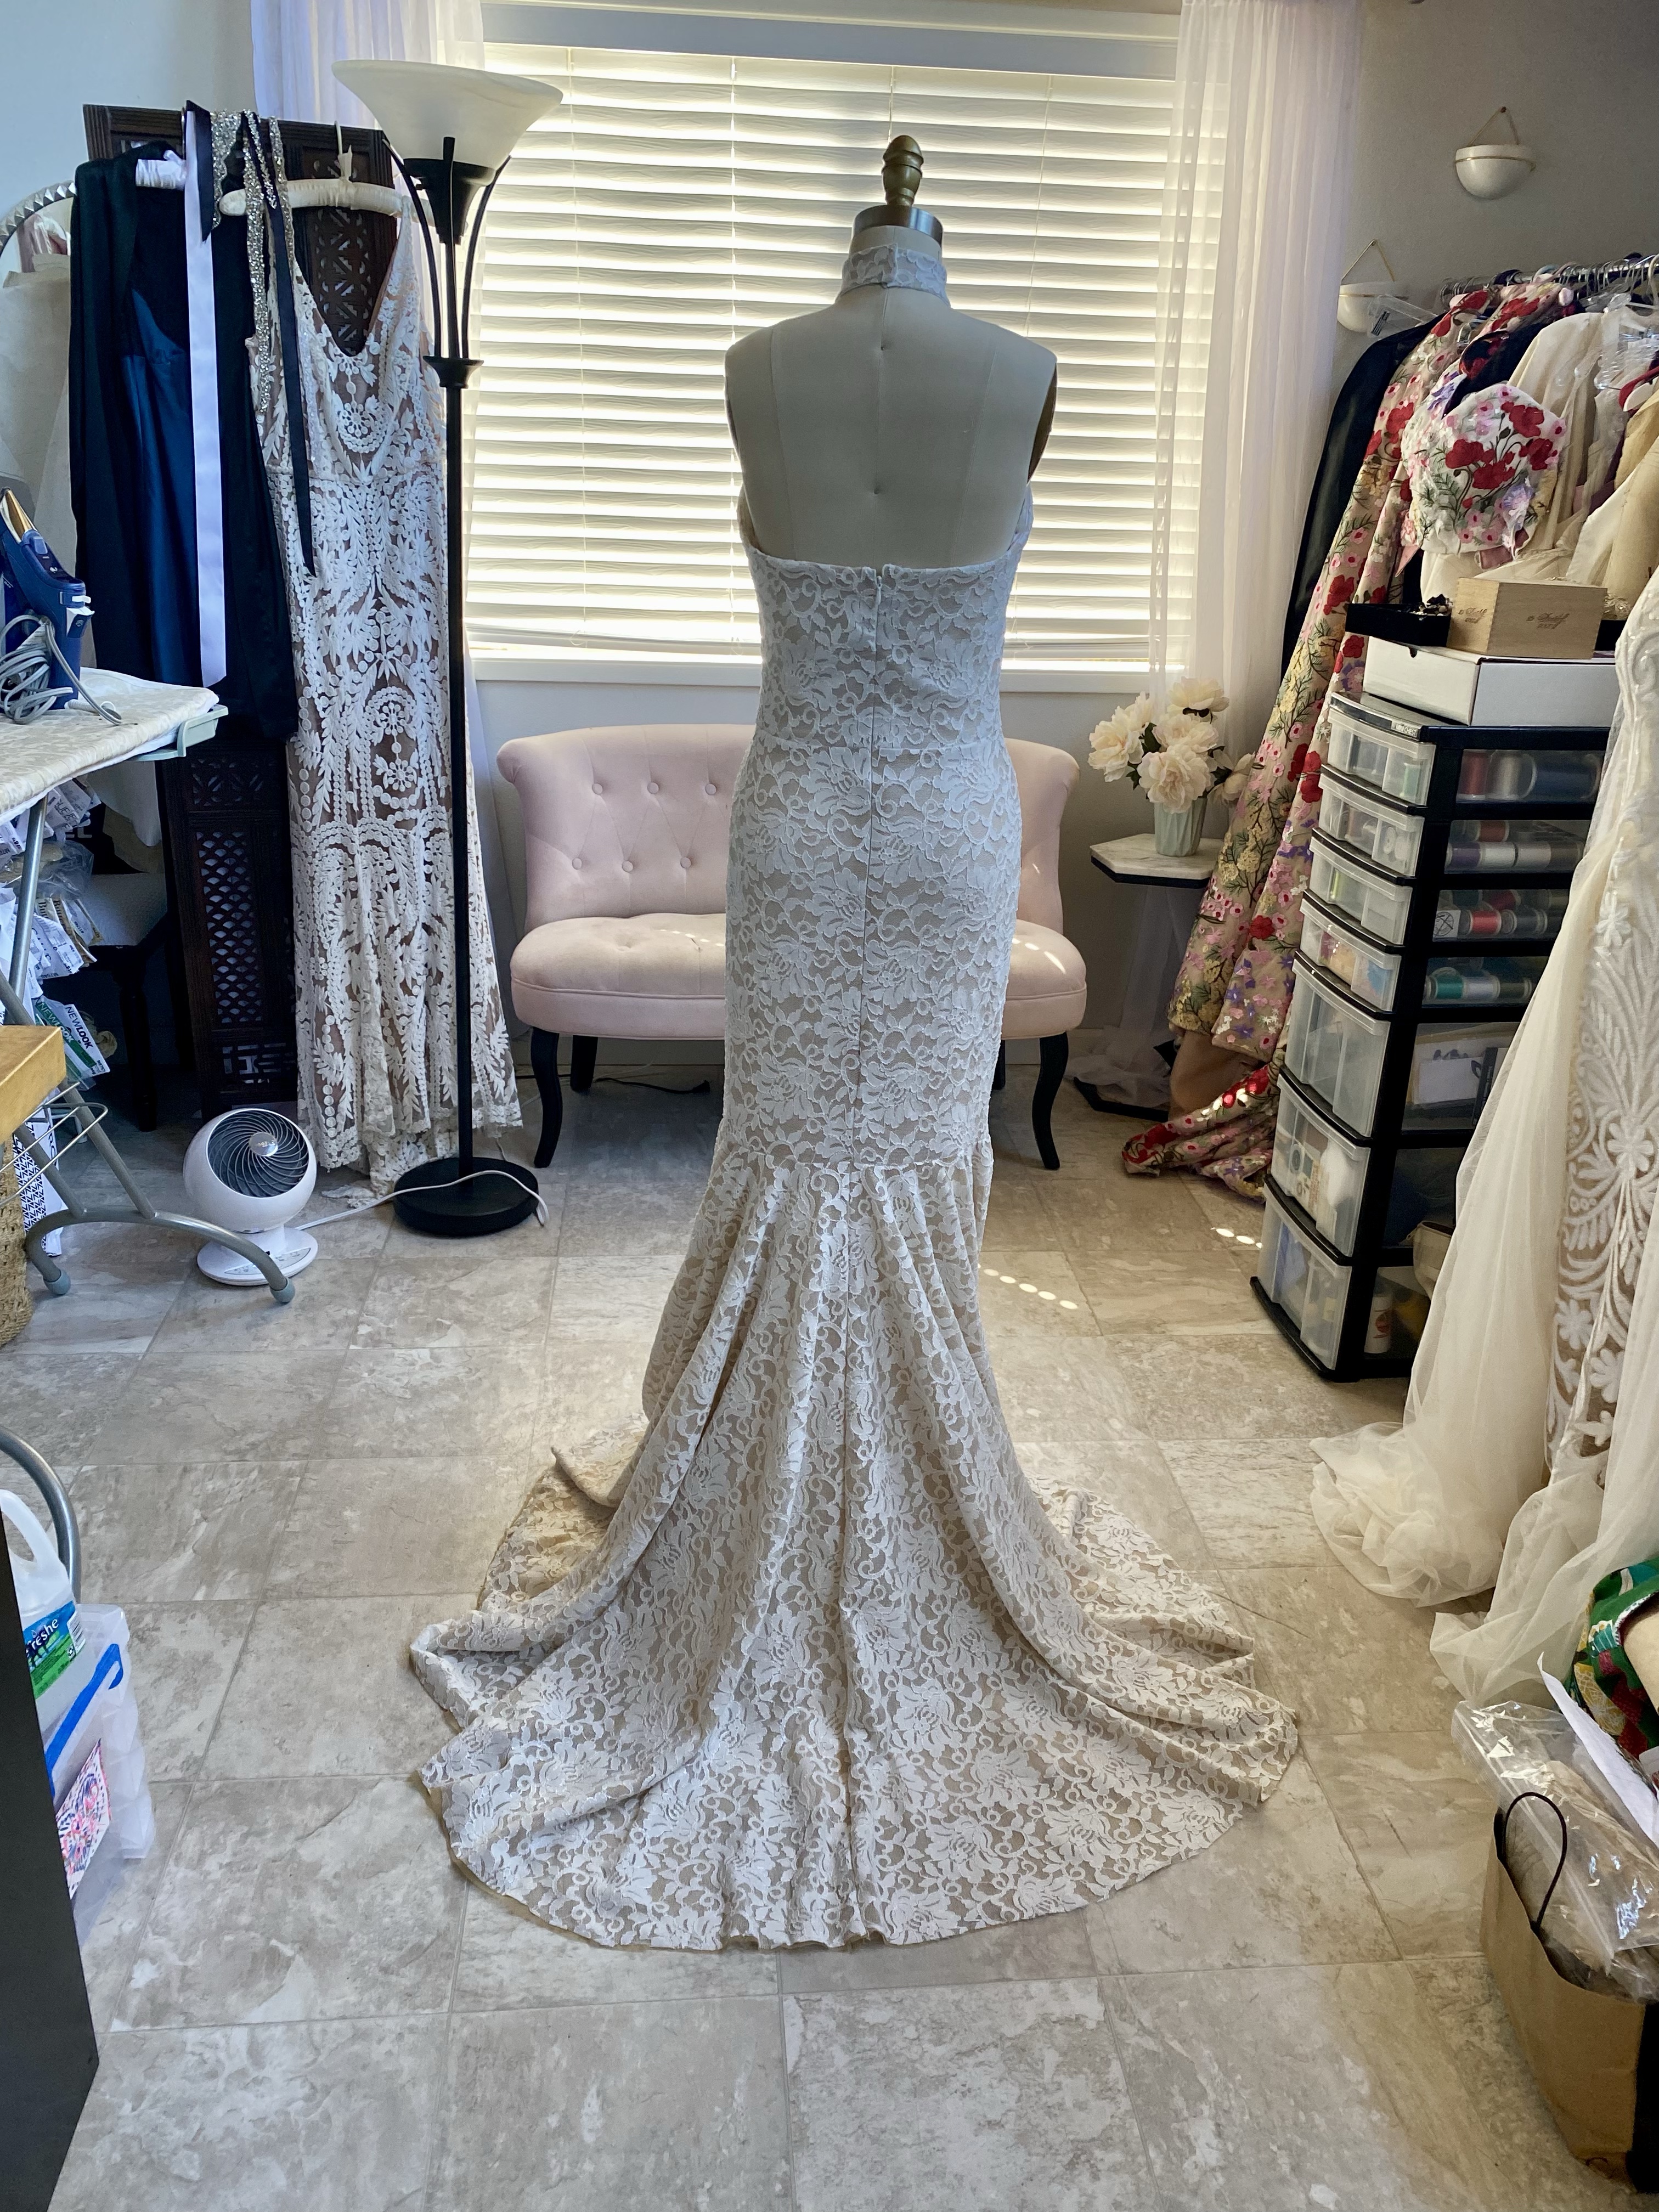
Next in line was the lace mermaid gown! I wanted to make a fitted, sexy dress, all in lace for the collection. I had many yards of this relatively inexpensive stretch lace in my fabric stash that would be perfect for this style. It’s not the highest quality lace, but I had already purchased it and it would do for the collection. It’s 100% polyester, so I decided to throw it in the laundry (gentle cycle) and see what happened. Well, it turned out just fine and softened up the fabric a bit, plus got rid of the slightly “plastic” smell.
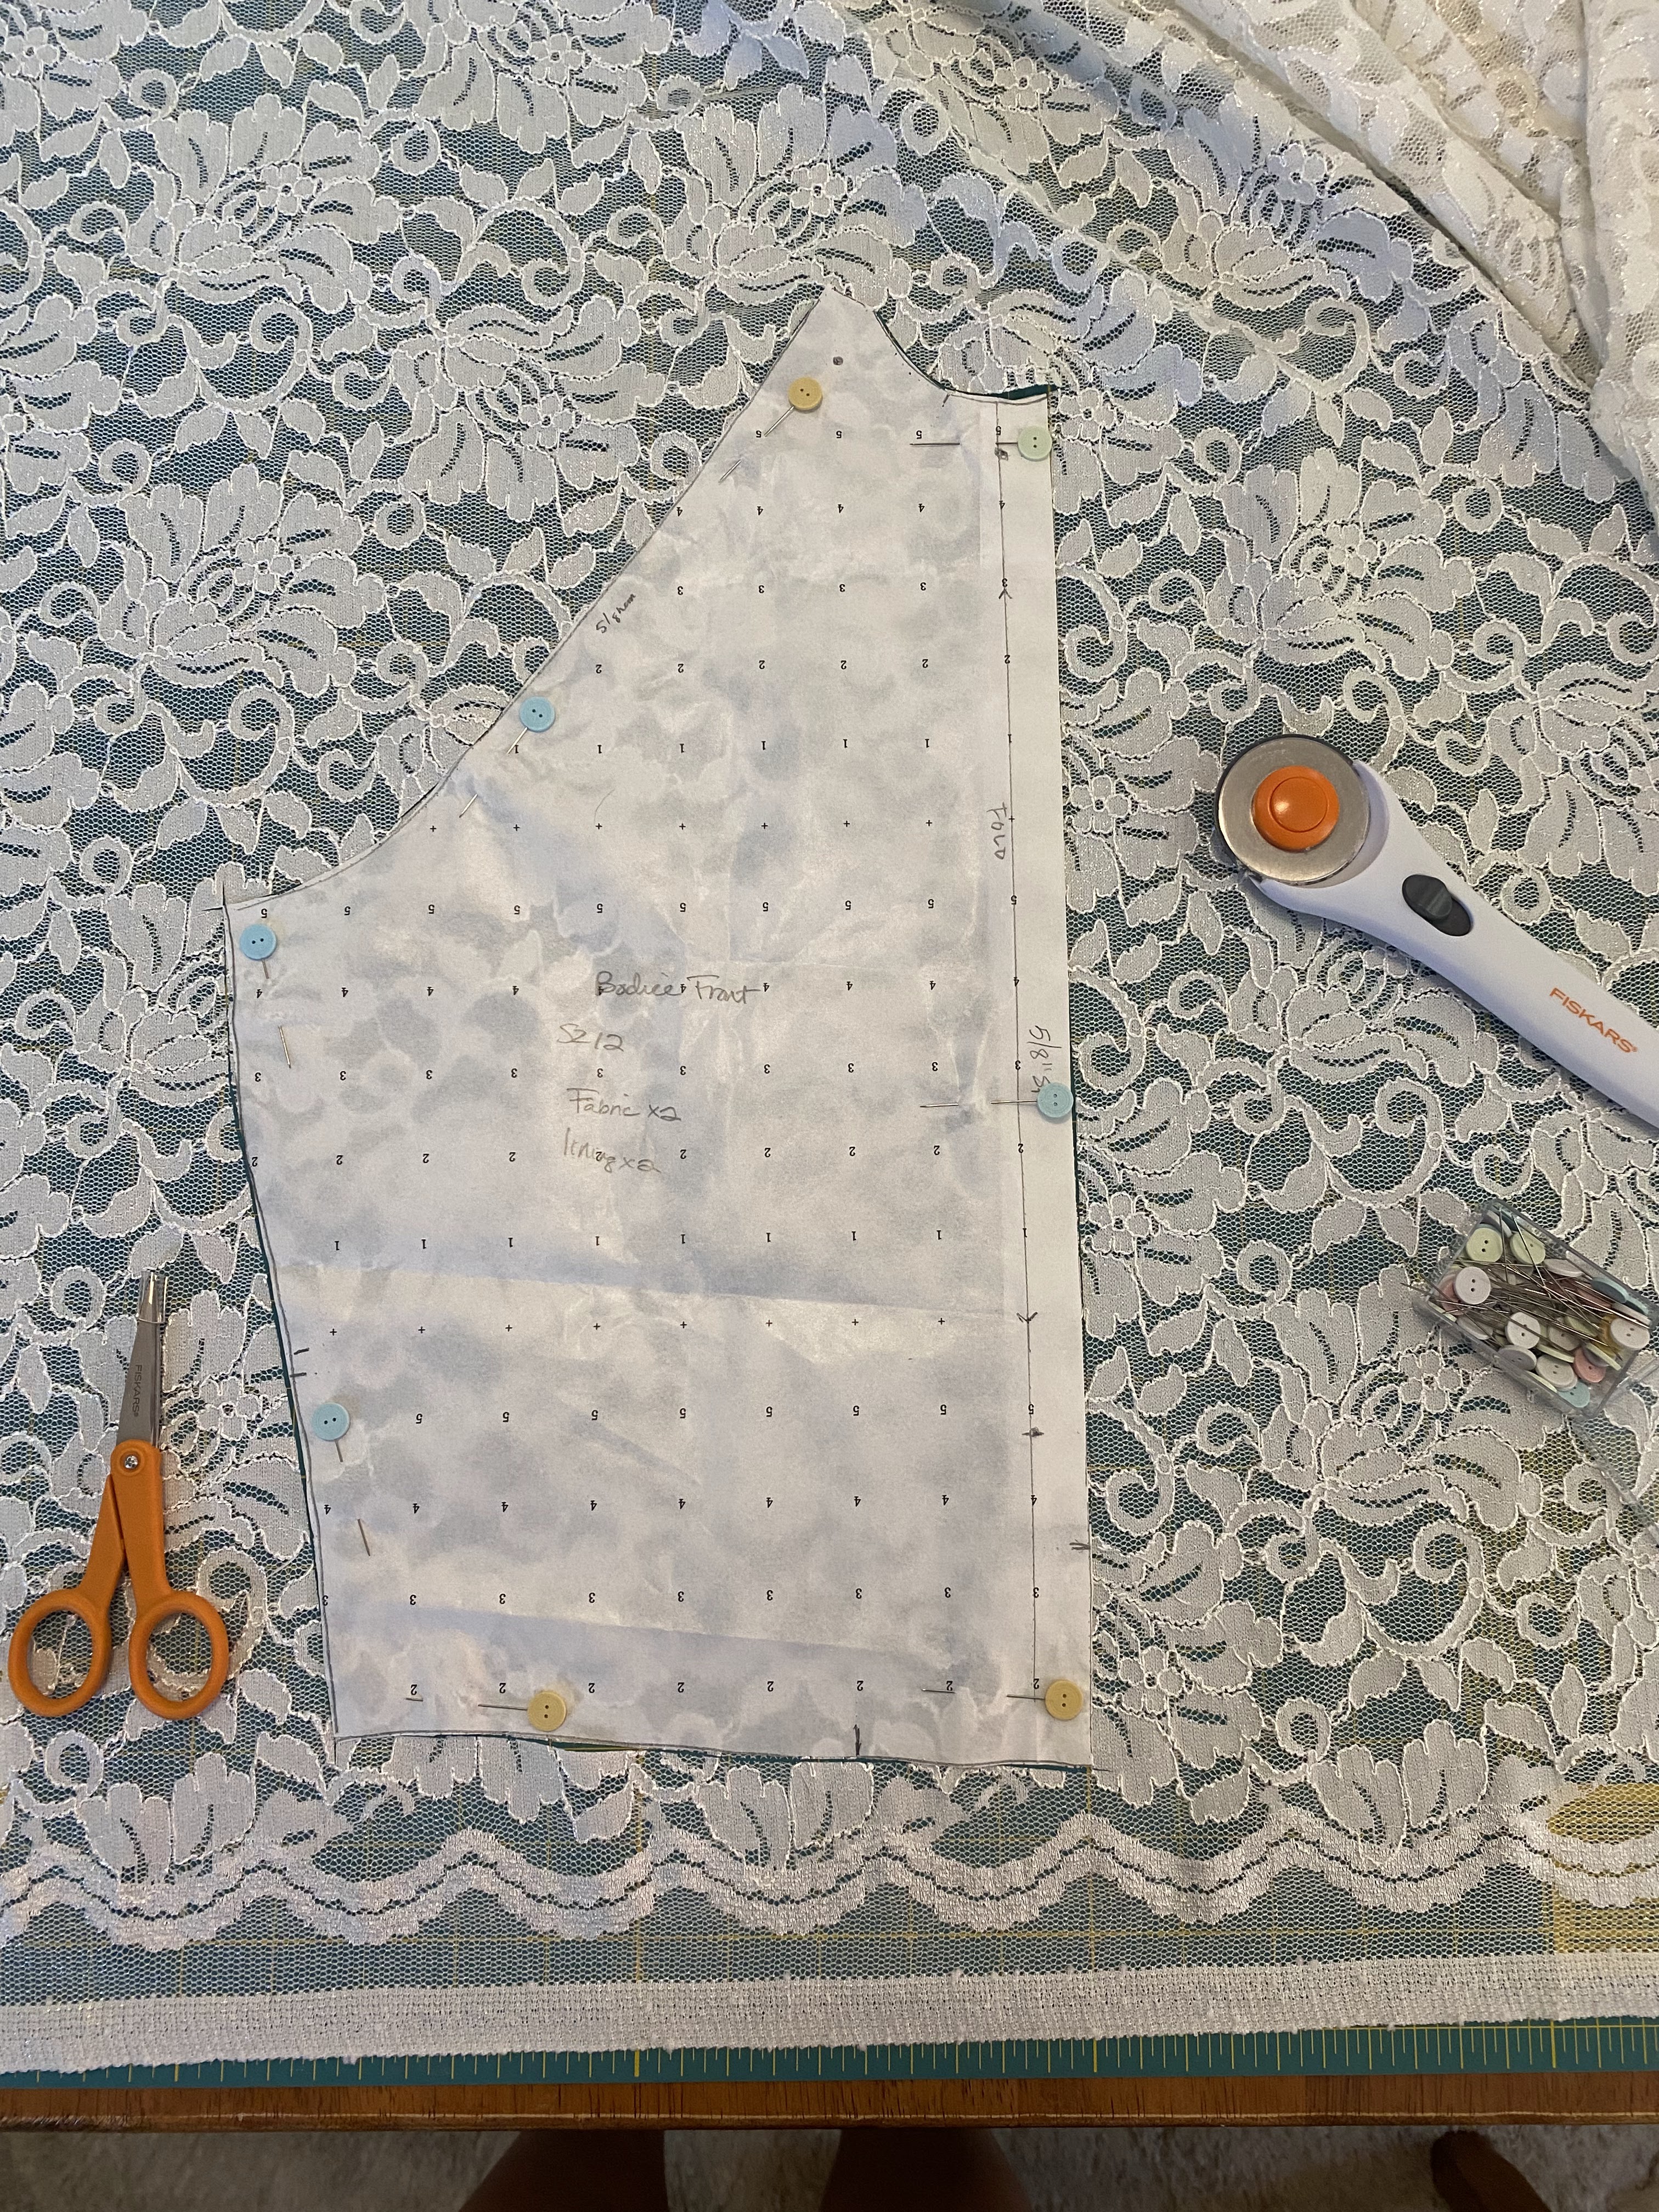
I used this pattern from McCalls 7569 as a base and made many modifications, mostly to the interior construction of the dress and not as much as the style:
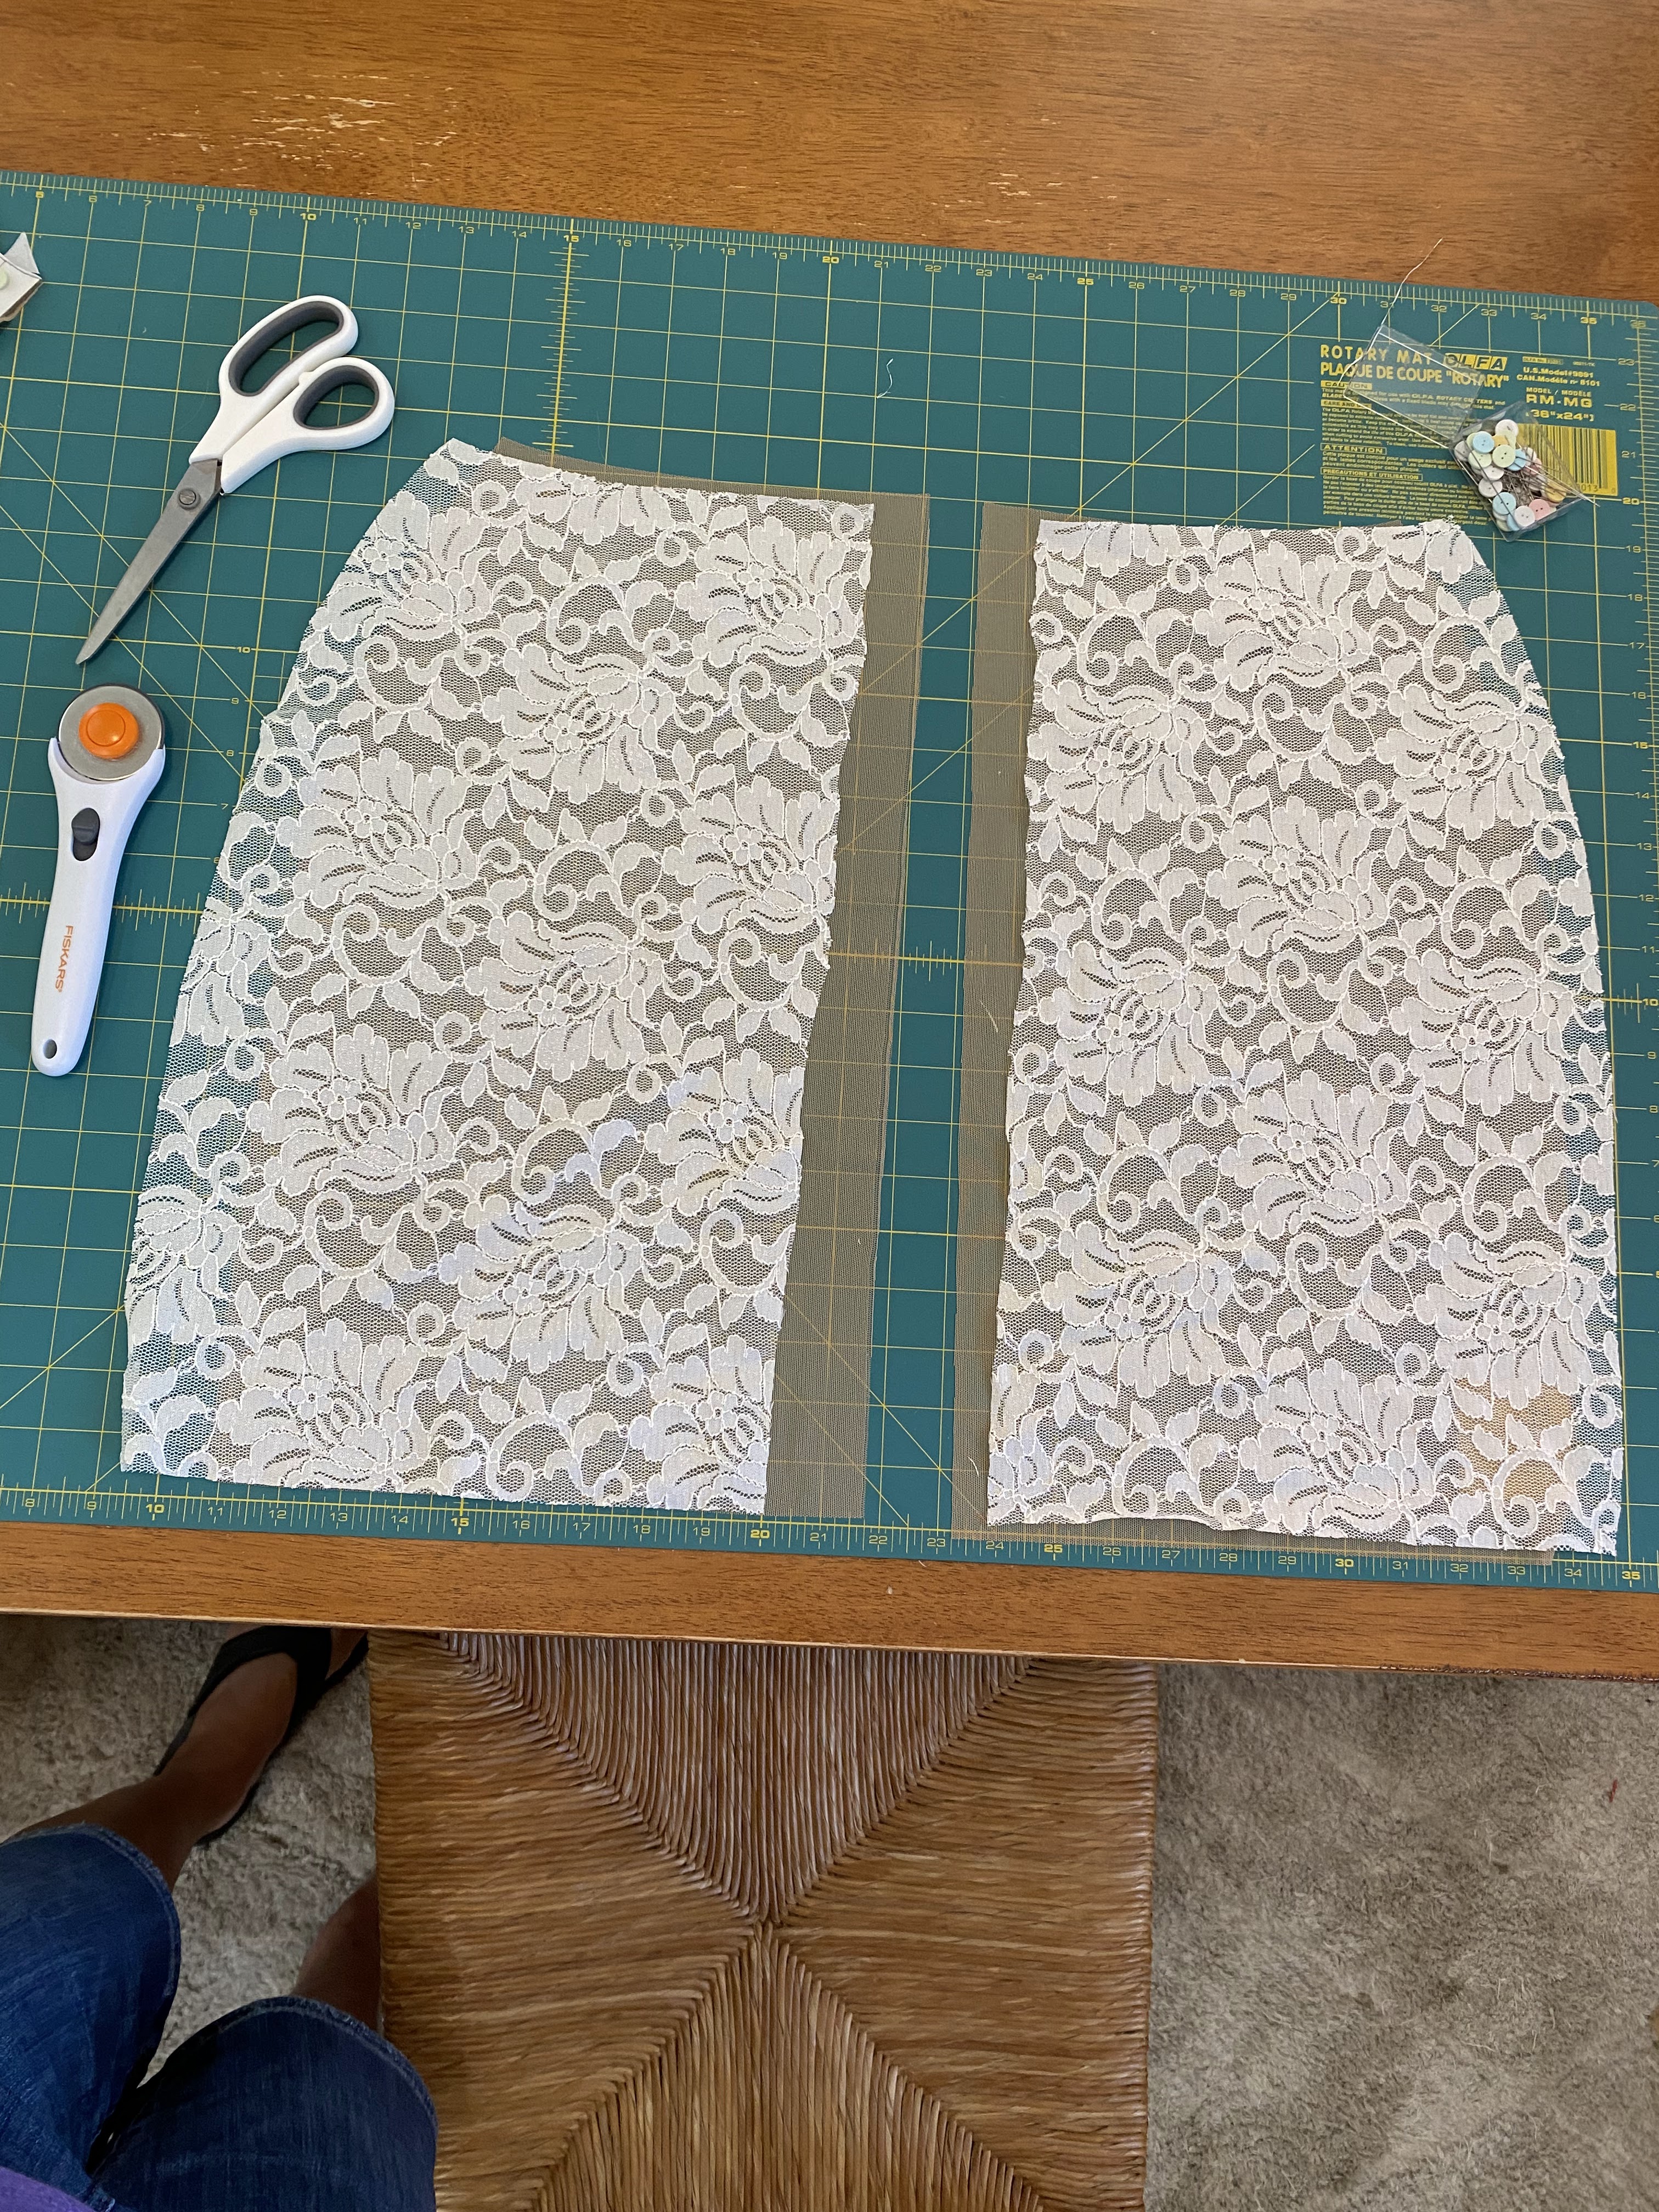
McCalls 7569 line drawingsCutting out the bodice frontTwo of the skirt panels and underliningCutting out part the bottom skirt flounce
I won’t bore you with ALL of the sewing jargon, details and construction modifications I did to make the dress from this pattern, but I will say that I made it MUCH better than the pattern instructed the sewist to do, and it turned out far better than I expected it to!
I called her Lacey
OK, for all you fellow sewing geeks out there, maybe just a quick list of how I made the dress differently from the original pattern:
I added a center back seam so I could put in a zipper
Fully lined and underlined the gown
Raised the center front keyhole neckline 4″ (too much boobage rarely looks good to me)
Added a dart to the back pattern pieces
Raised the skirt higher onto the bodice at the waistline
Added built-in bra cups
The following photos are from the dress nearly complete, yet I later made more changes to the fit once I had the model fitting (stay tuned for part 2 of this post).
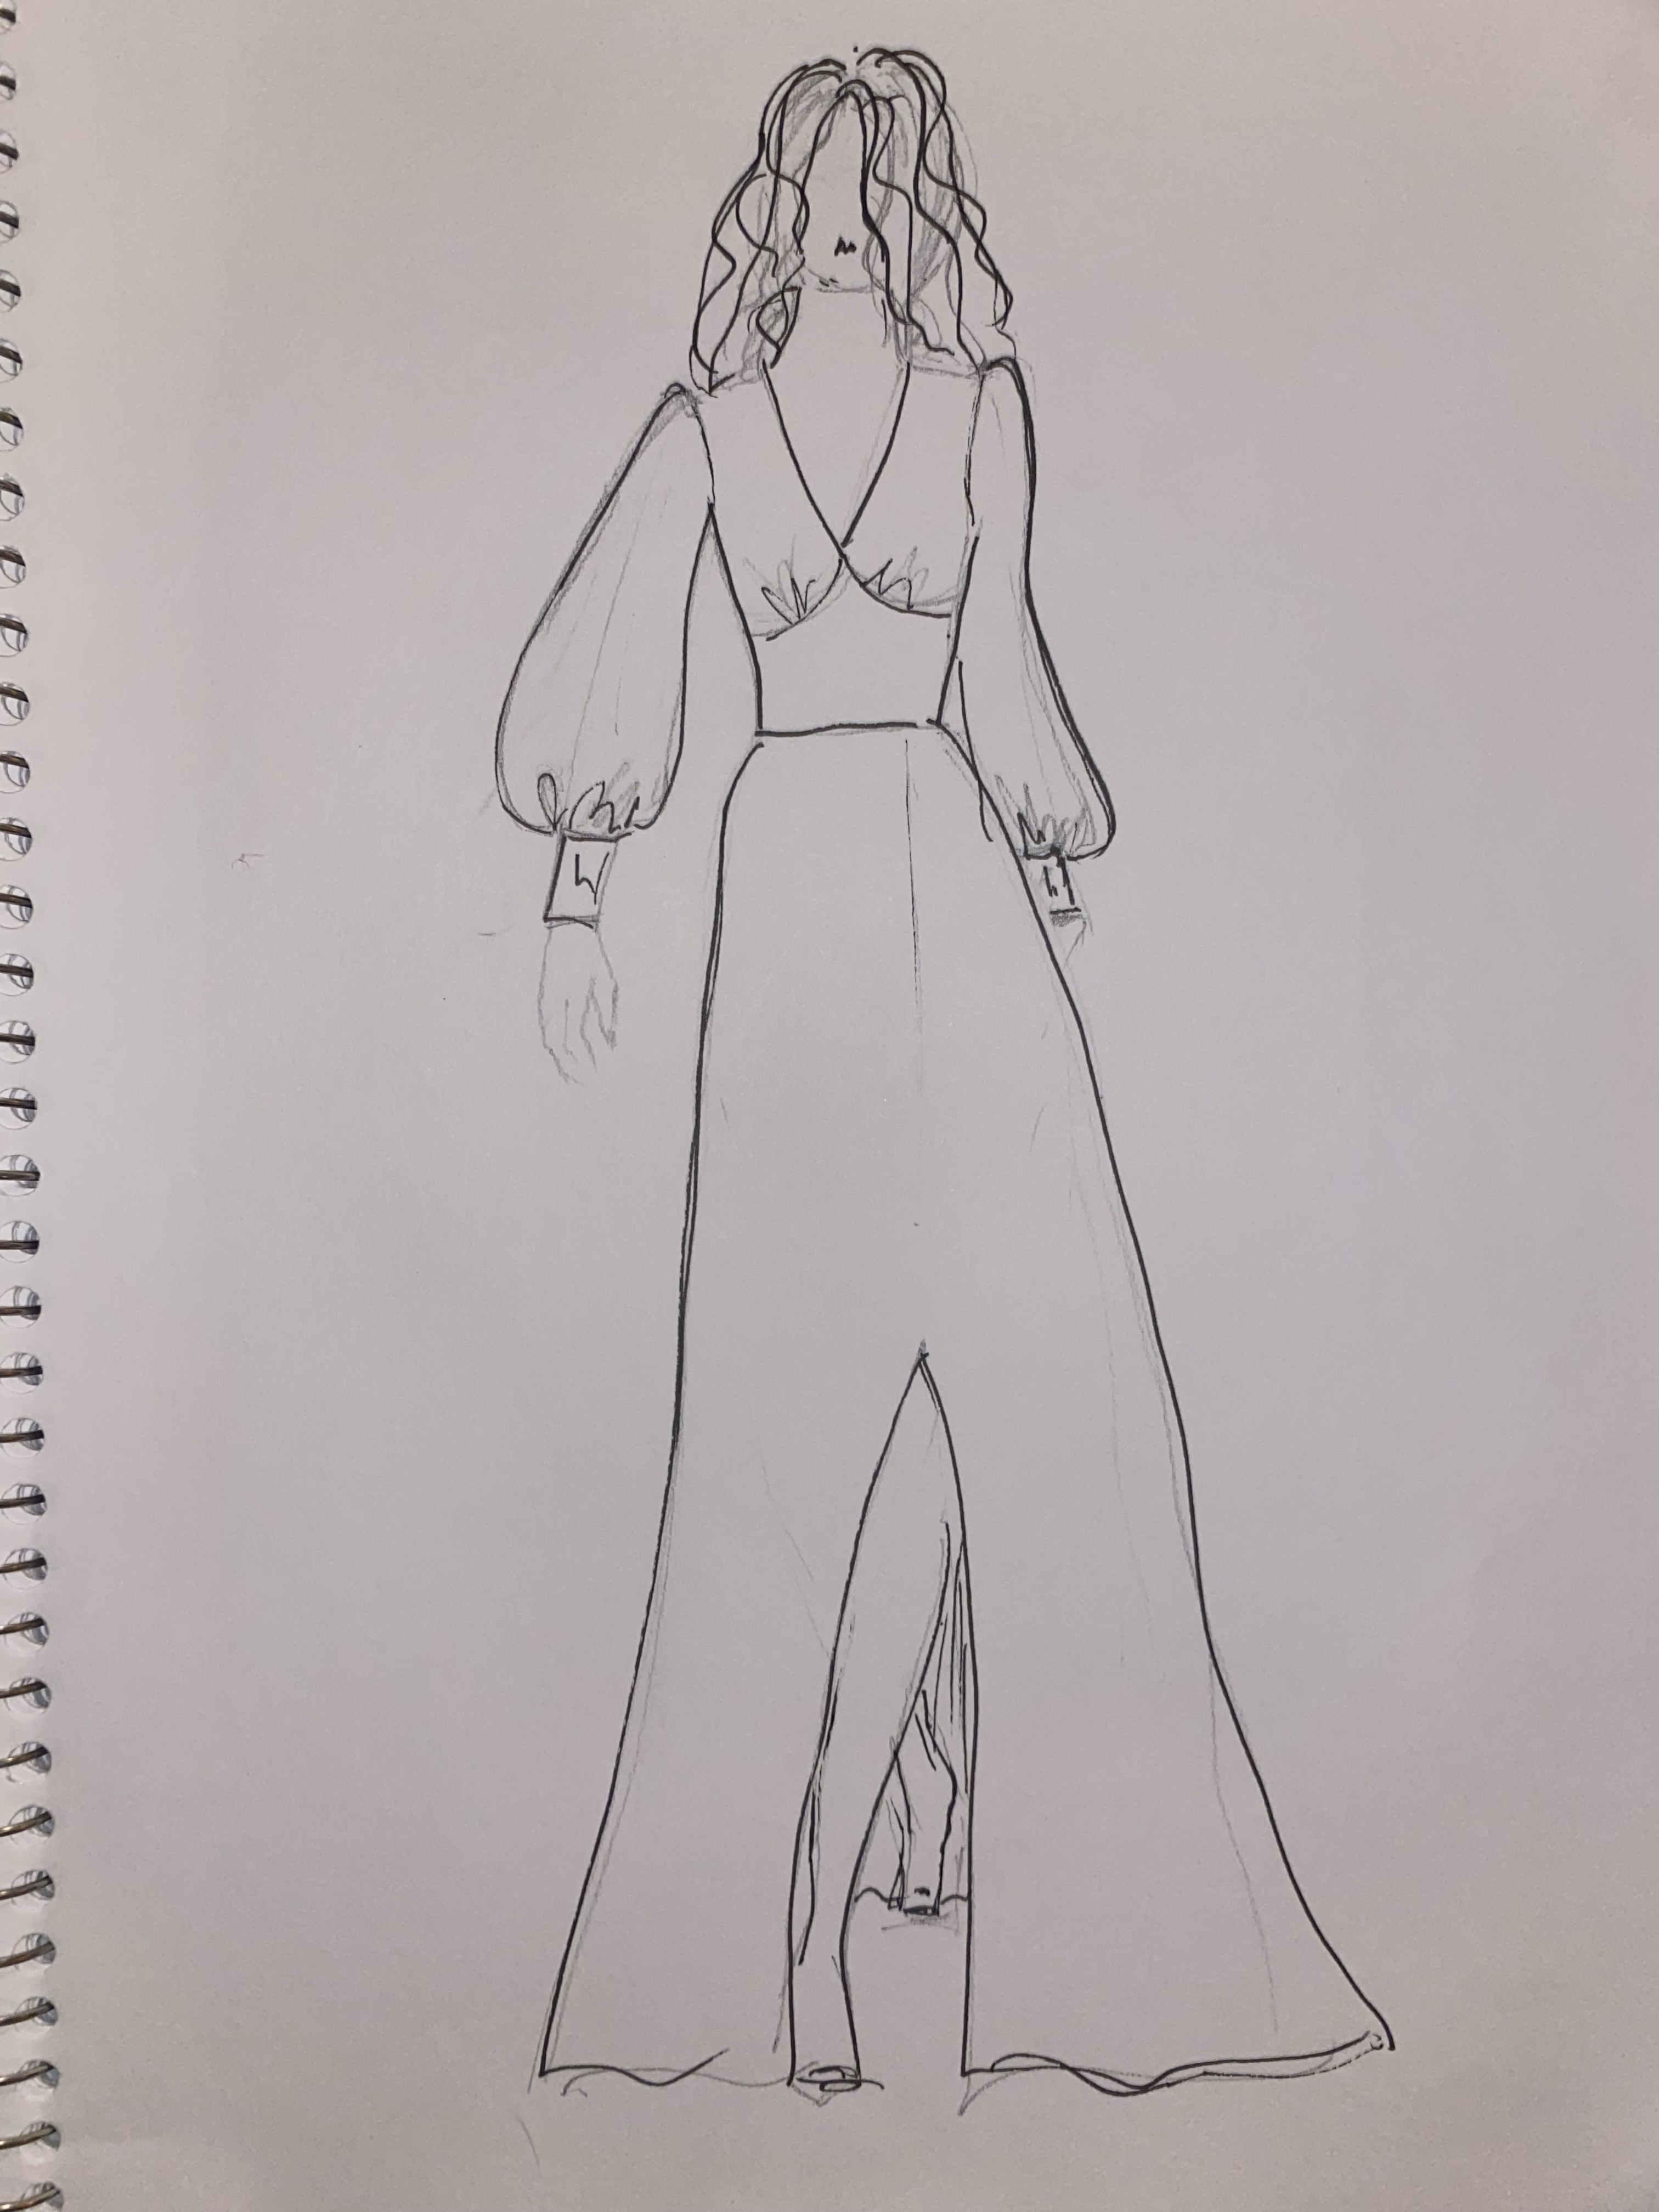
Next up, as I did my best to make these garments and complete them as much as possible before moving on to the next one, is the Flutter gown.
A sketch of my Flutter gown
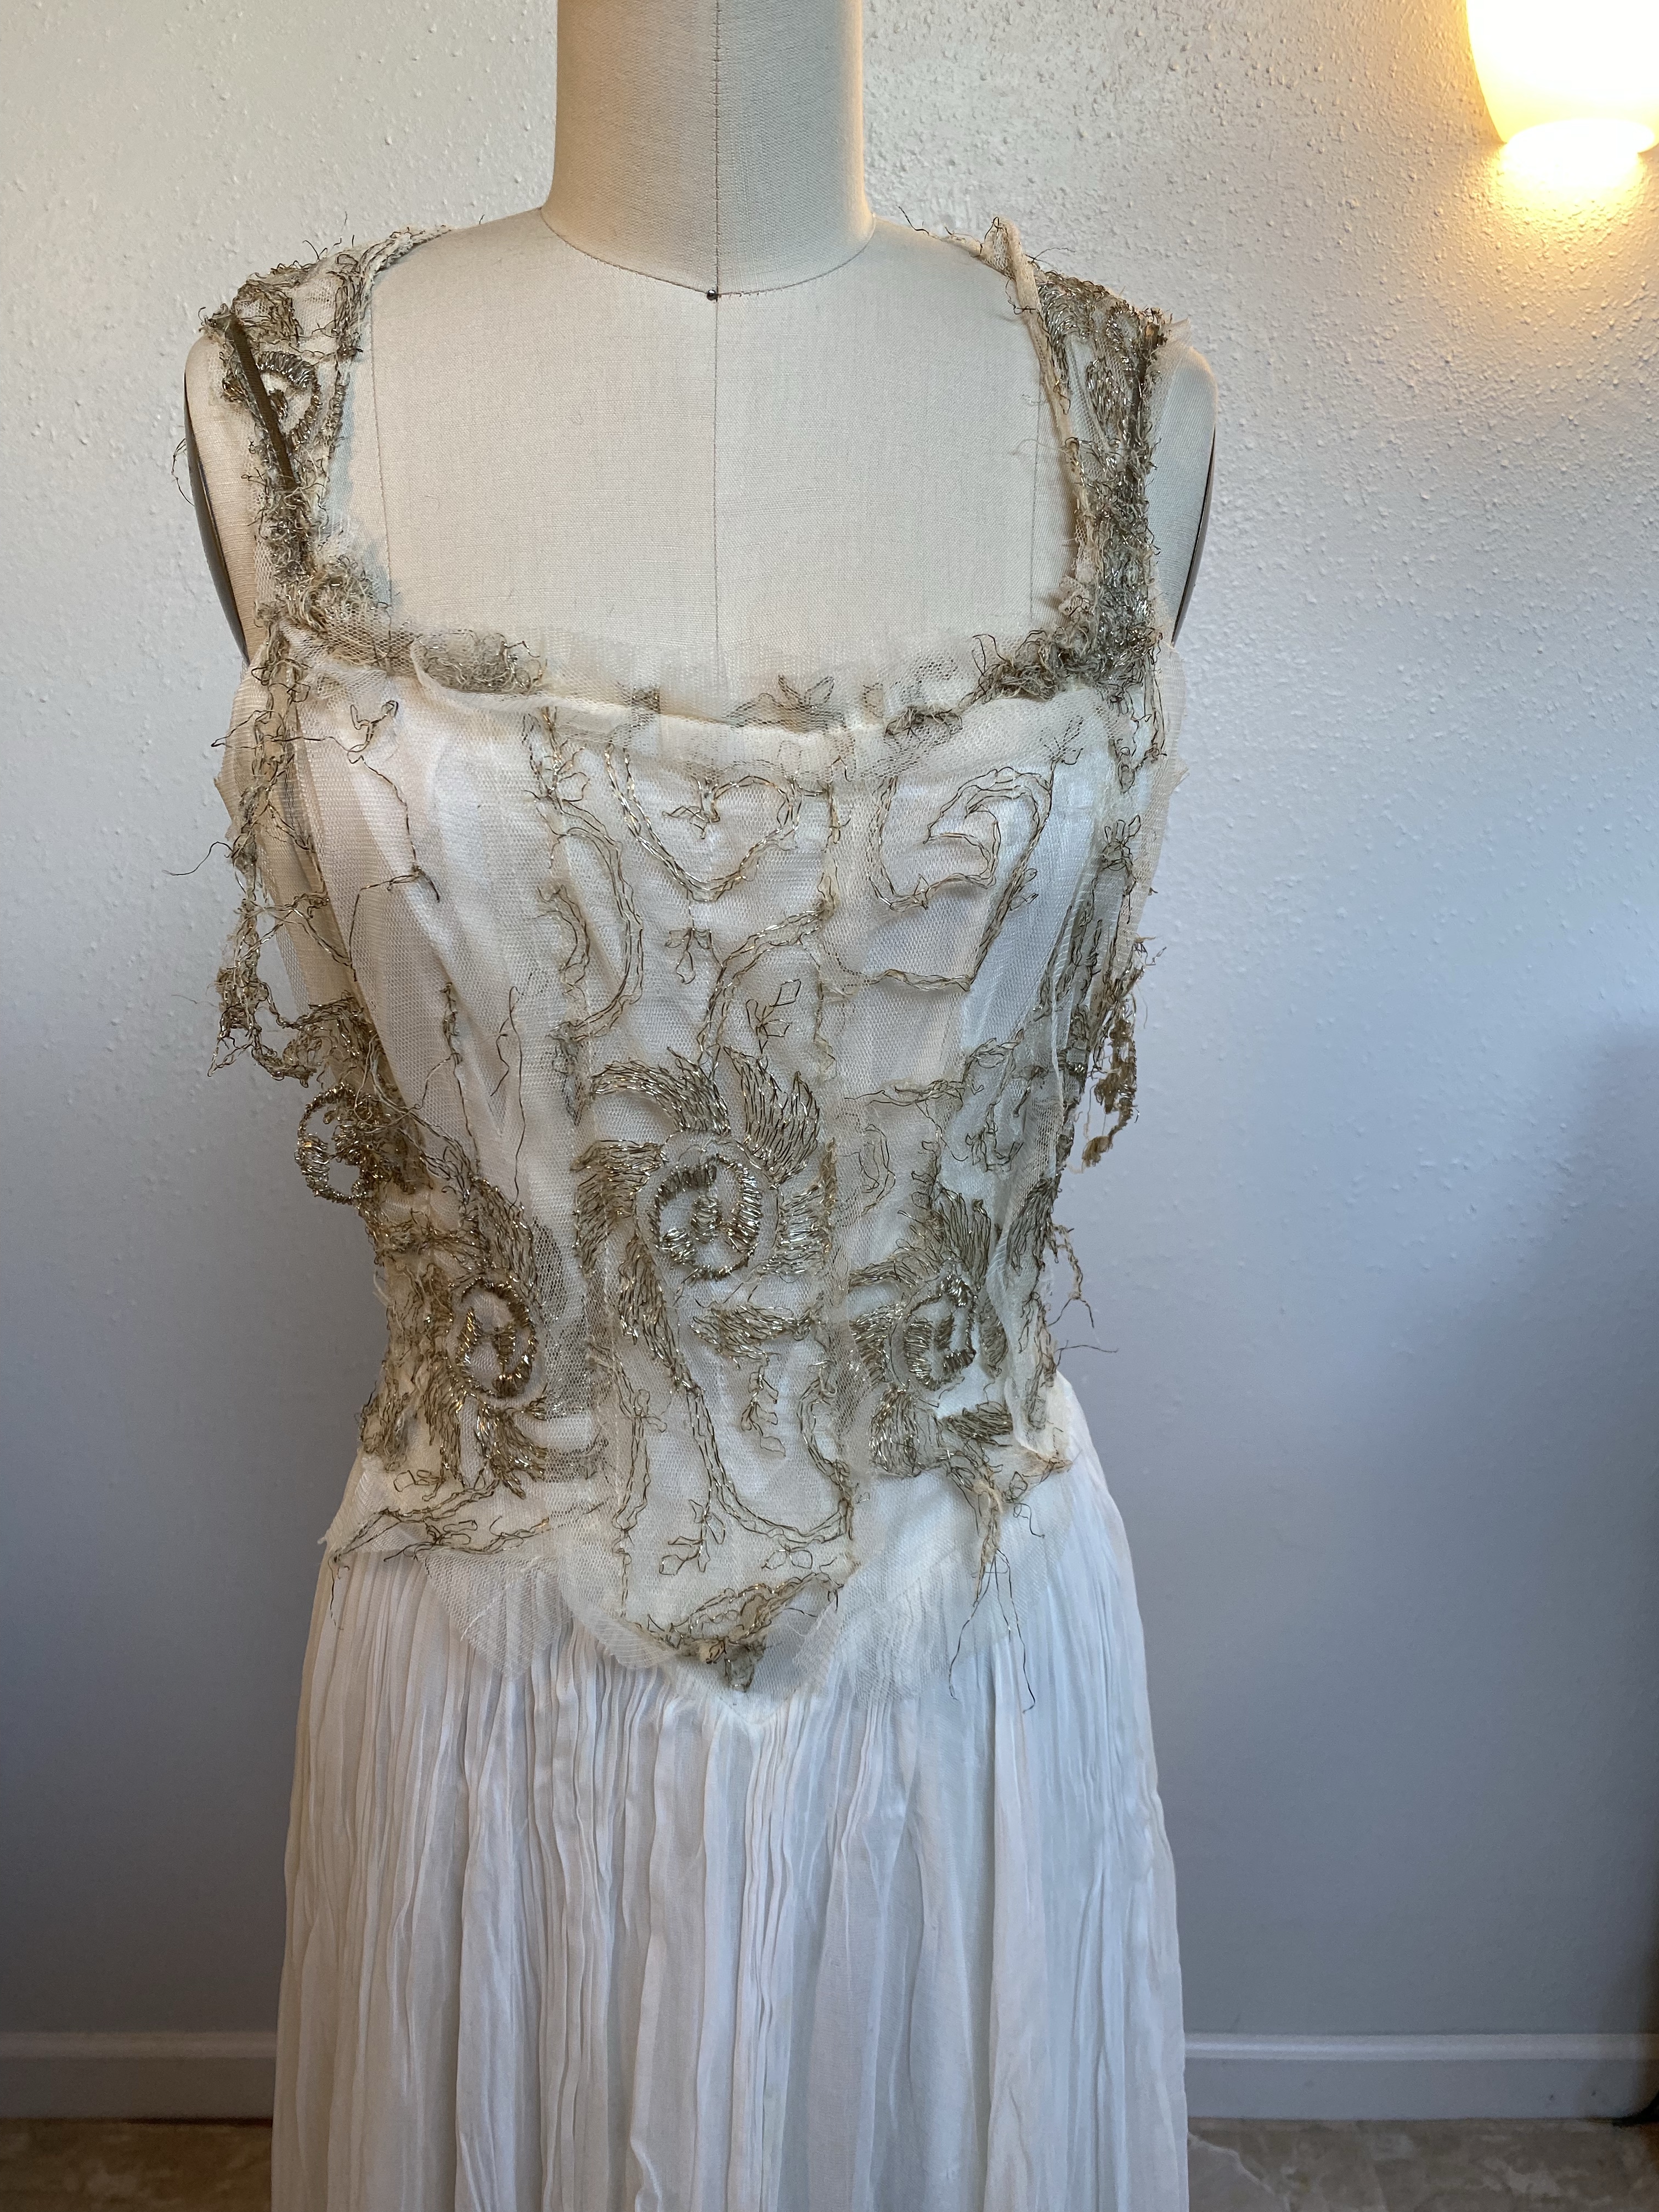
I wanted to create a gown with movement and romance, one that would appear to float on the bride. I had this lovely 3-dimentional mesh lace with sequins and little chiffon petals that looked like butterflies. I bought this fabric on clearance at Joann Fabrics over a year ago and knew I how I wanted to use it.
In order to make the color and shading of the fabric that I had better coordinate with the colors of the collection, essentially going back to the colors of the floral printed mikado, I decided to use a peach toned organza as a backing to the lace, creating a softer tone under the bright white of the lace. You can somewhat see what I am talking about in this photo where I layered the fabrics and draped them on my dressform:
the layer of peach organza fabric creates a softer hue under the white lace
I got to cutting out the 4 layers of this gown: the lace, the peach organza underlining, and 2 layers of a soft chiffon-like poly to be lining. That was a LOT of cutting, especially difficult were the large pattern pieces of the skirt and back of the skirt with a slight train. Keeping track of the pieces was important as they looked alike, especially the skirt front and side front pieces. I used a Burda sewing pattern to begin with, but made so many changes to it that I can’t really call it that pattern anymore.
Underlining each pattern piece with the peach organza was time consuming, but oh so pretty!
I wanted to use the same pattern again for another dress in the collection. I did this for two reasons: one was to create cohesion in the lineup, and the other, to save time. The cohesion helps the eye to recognize the similarity amongst the garments. I made essentially the same dress again, using a completely different fabric and lining. Most people probably would not recognize that the dresses come from the same pattern, but they may notice a familiarity.
3-D Lace Flutter GownVelvet Forest Bride Gown
For the Flutter gown, I ended up adding sleeves, so it looks oven more similar to the Forest Bride gown, but the two fabrics really make them unique.
Flutter 3-D GownForest Bride Velvet Gown
These two gowns were some of my favorites from the collection! I just love how the dress hugs the torso and waist, then gently flows over the rest of the body. The long slit in the skirt allows her to walk easily and exposes the beautiful lining. The sleeves are romantic bell shape (Forest also has a cuff at the end of the sleeve), and protects her from a chilly evening in the garden. I made a point to make these gowns with really nice details including lovely linings, luxurious materials, and matching hair accessories.
Speaking of the amazing headpieces made by my amazing intern Robbyn, there is so much to say, I have to save it for it’s own section. So, stay tuned for more on the wonderful handmade hair accessories and hats later!
The beautiful Stella came next!
Stella the Slip Dress (please excuse the naked mannequin in the back!)
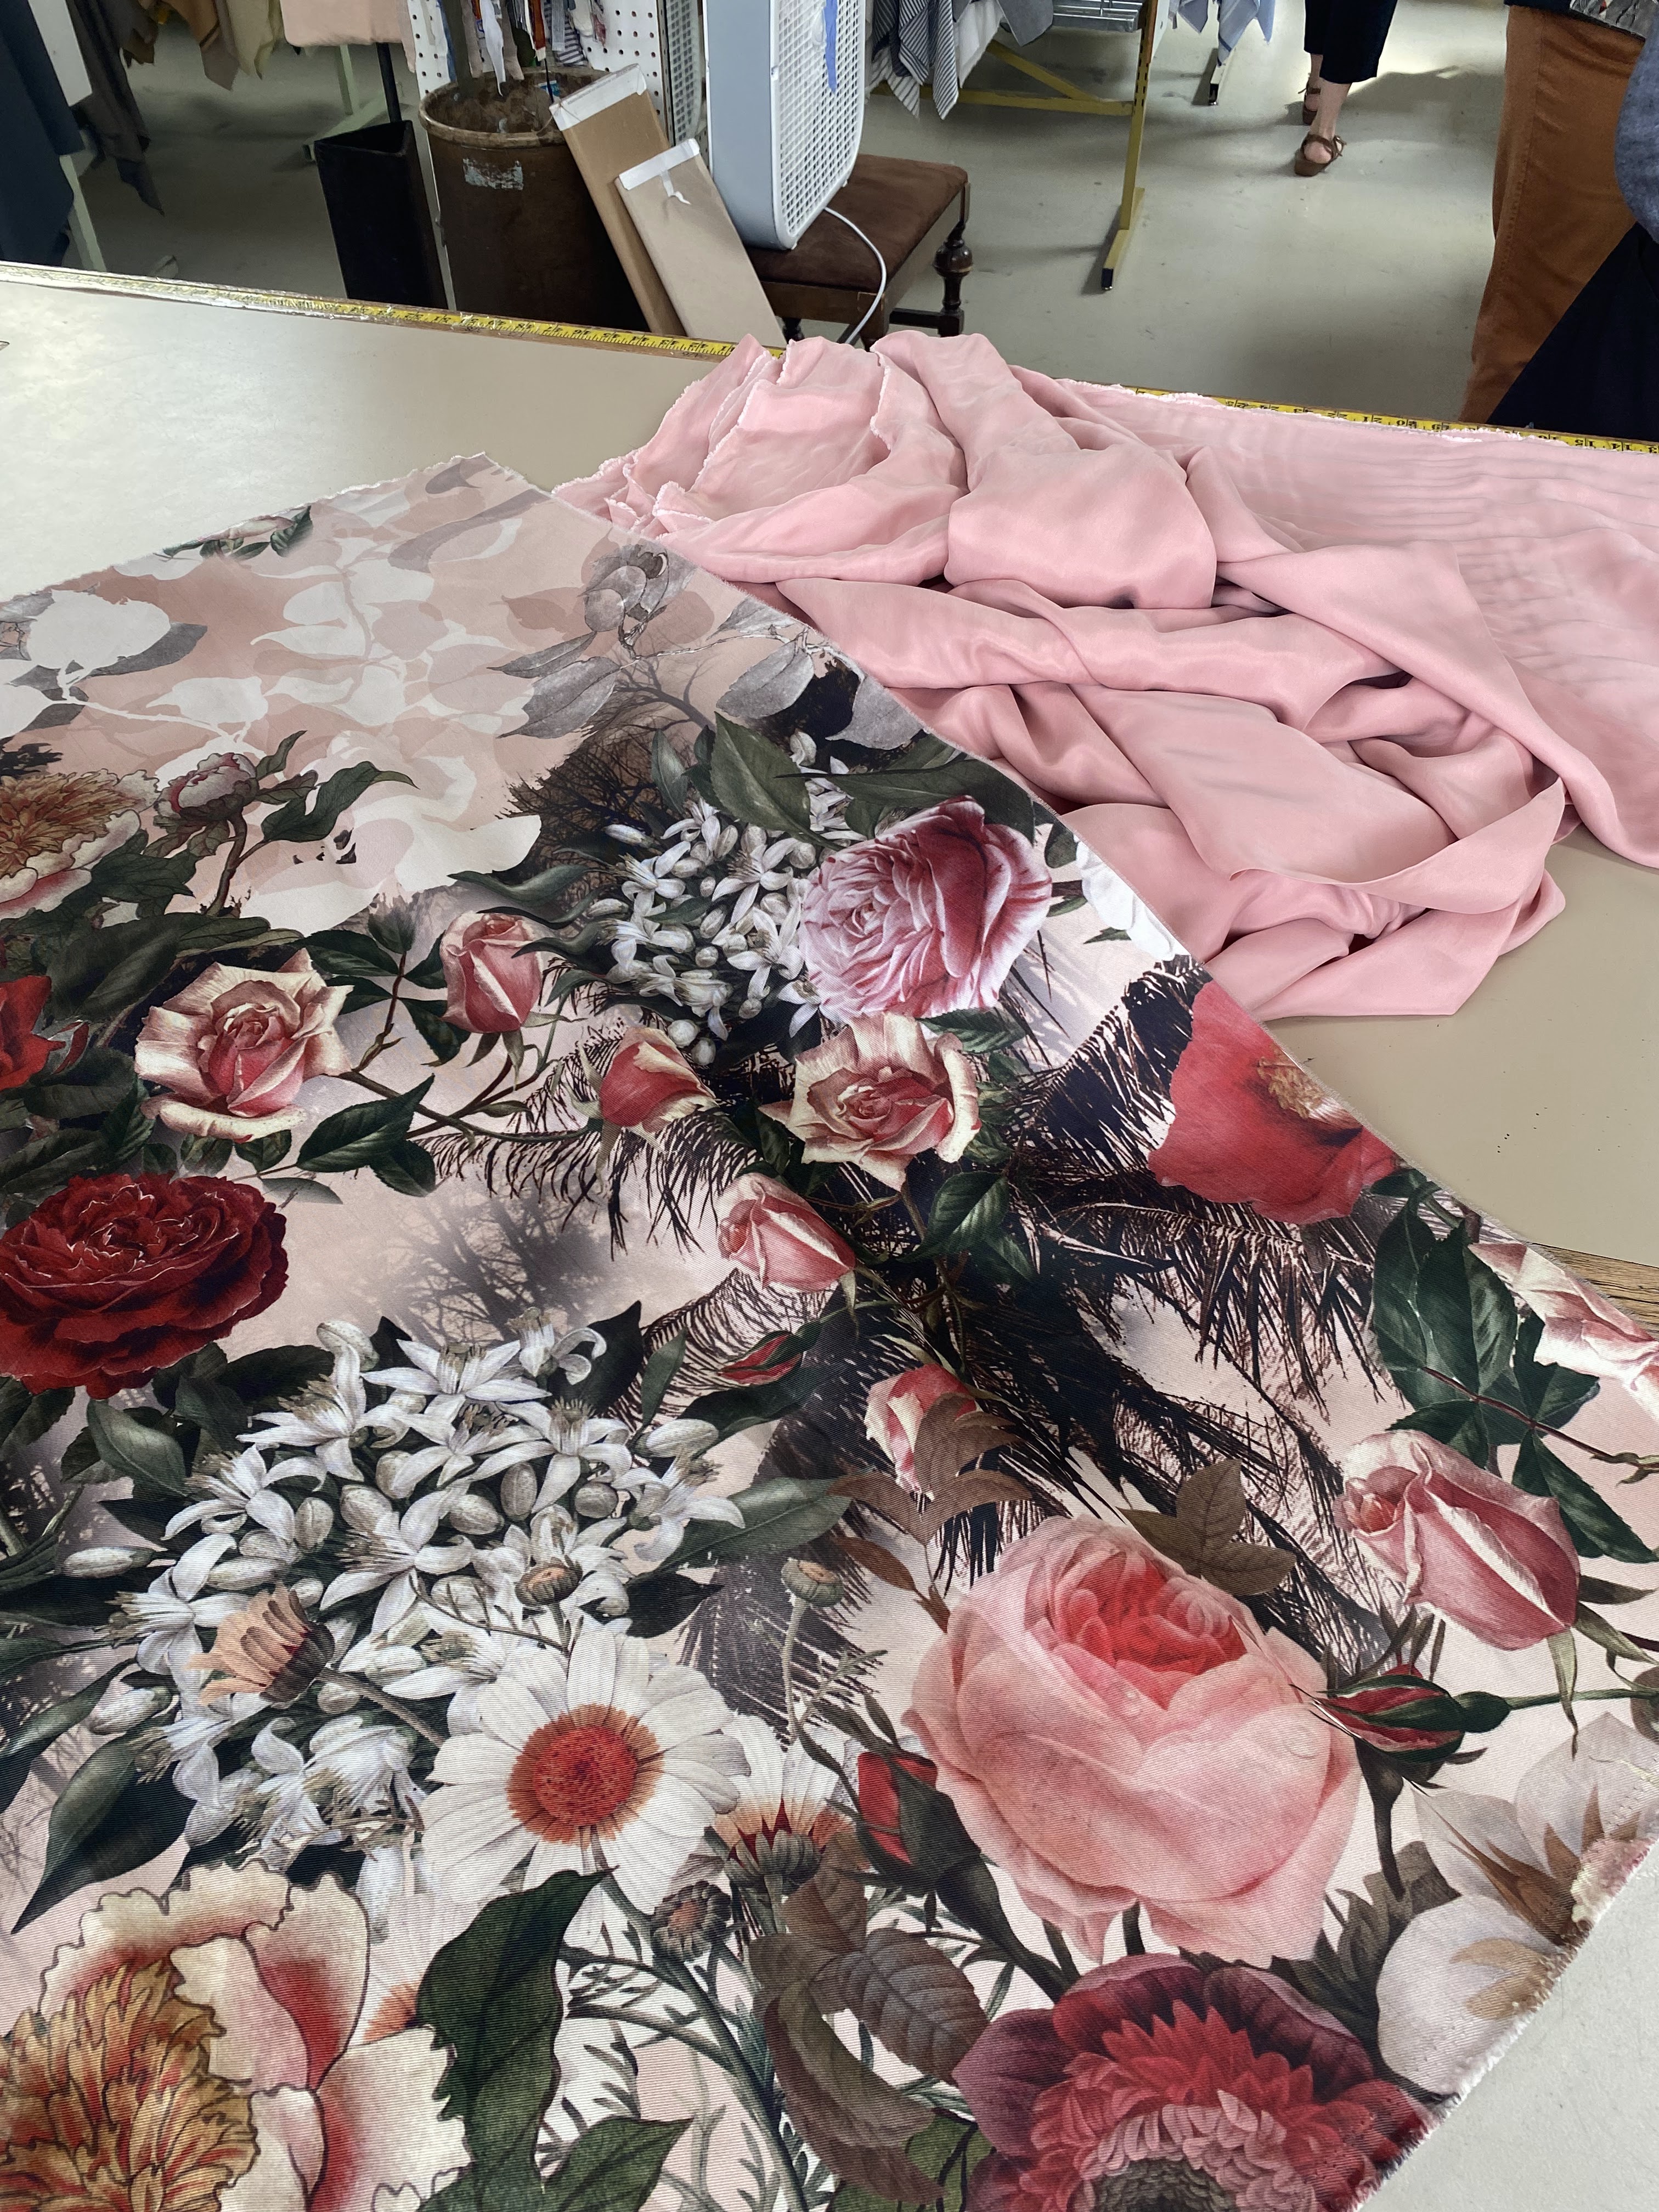
I wanted a sexy slip dress style for the collection, and thought I already have plenty of white dresses, why not have some pink for a pop of color. I brought a large swatch of my floral printed ball gown fabric to the fabric store, pulled out one of the colors from the print, and purchased 6 yards of material plus 5 yards of rhinestone trim for the straps.
picking out fabric for Stella at the fabric store
Pink looks really good on most skin tones, and this fabric is a super soft sand washed rayon that mimics silk in the best way, perfect for a slip dress! I actually would have loved to have a few bridal nightwear lounge slip and robe sets to show, but not enough time for that! Next time!
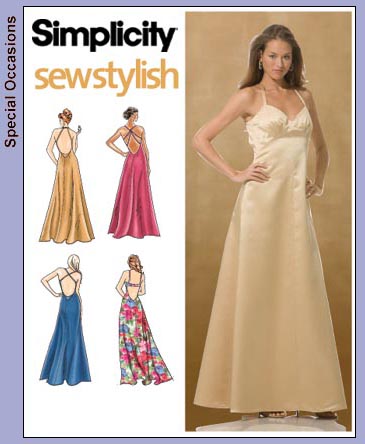
I made this dress using another commercial pattern, this time a Simplicity pattern from the late ’90’s or early 2000’s, which I’ve had in my pattern collection for years (decades perhaps?):
Simplicity 3735
I love the design details of this dress pattern, especially the back with the low cut of it and the beautiful strappy details. So to bring this lovely gown up to what I was looking for to add to the collection I made a few adjustments to the pattern.
I skimmed out the sides of the skirt part of the dress to make it more body hugging (figure flattering) and not the A-line shape that hangs from the waist as the photo suggests.
I lengthened the hemline and added more of a slight train to the back of the dress (who doesn’t like a little train drama, right?).
I fully lined the dress instead of making a facing around the neckline. I hate facings and would rather make it fully lined (fellow dressmakers catch my drift).
The rhinestones! The gorgeous, beautiful rhinestone trim was a pain in the butt to sew on to each strap, but it looks SO pretty! Totally worth the extra 4 hours to hand sew…
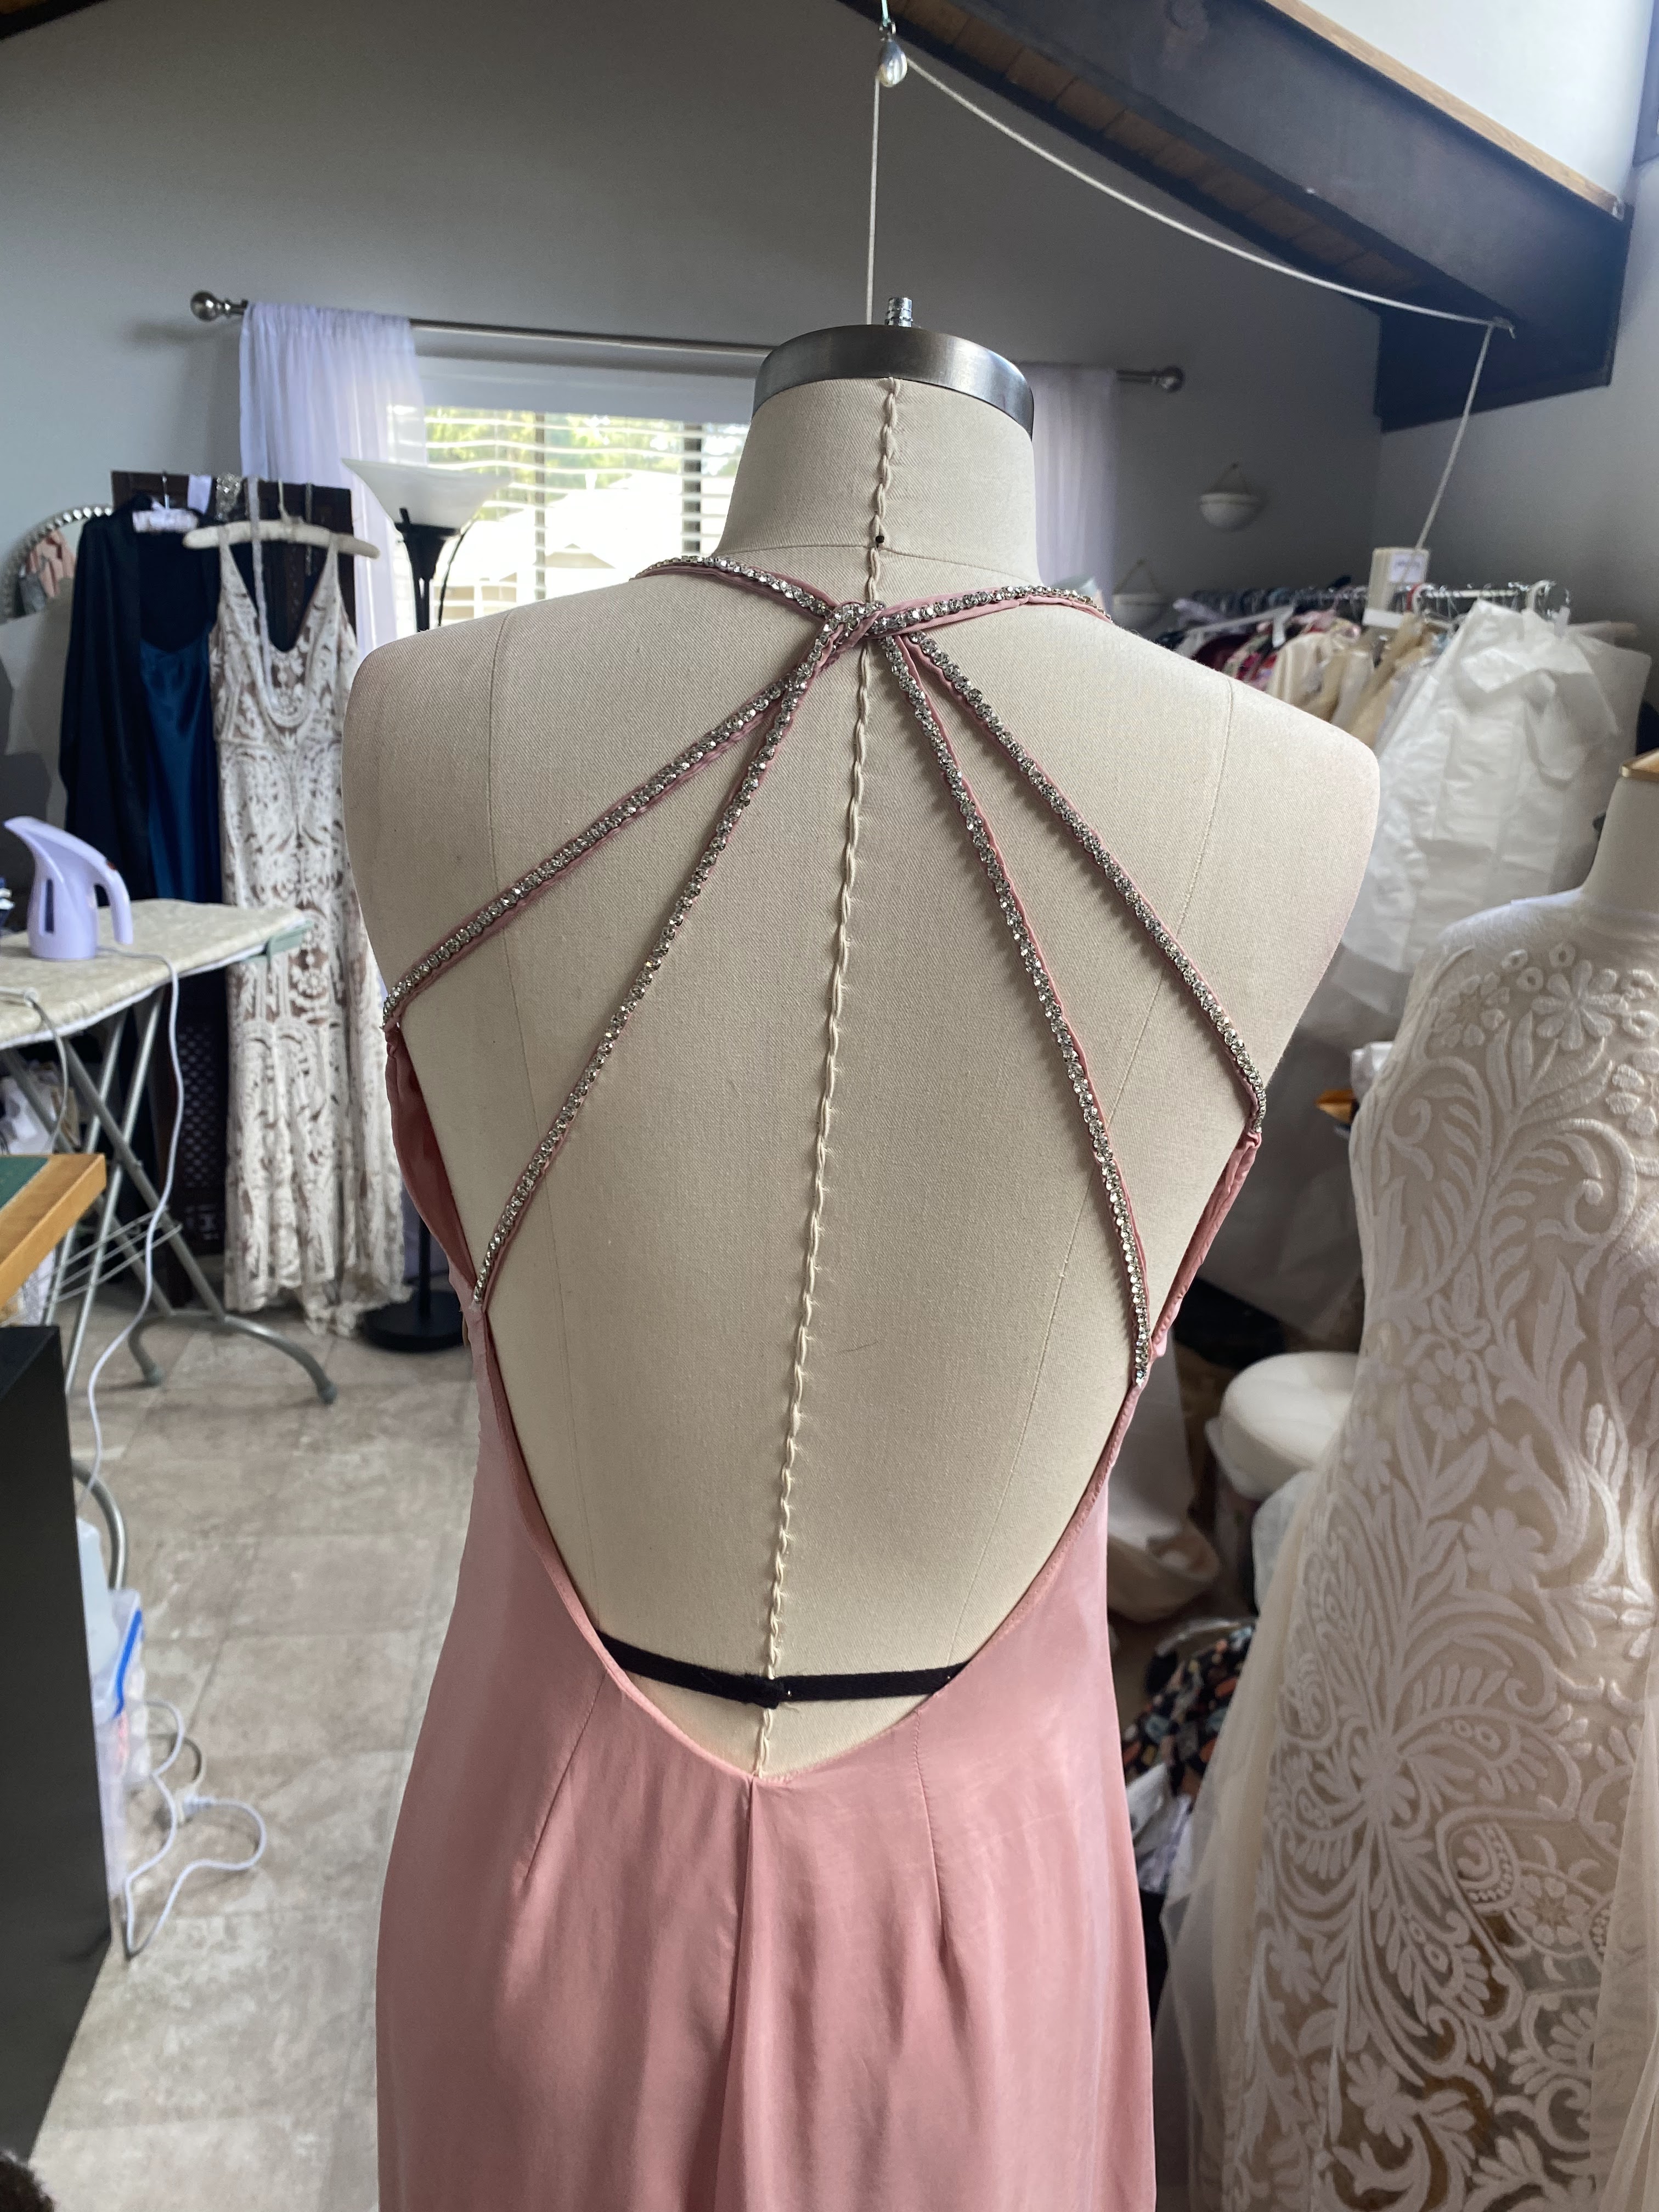
The back of this gown is so lovely!
The low back and strappy rhinestone straps of this gown are “mwah!” chef’s kiss!
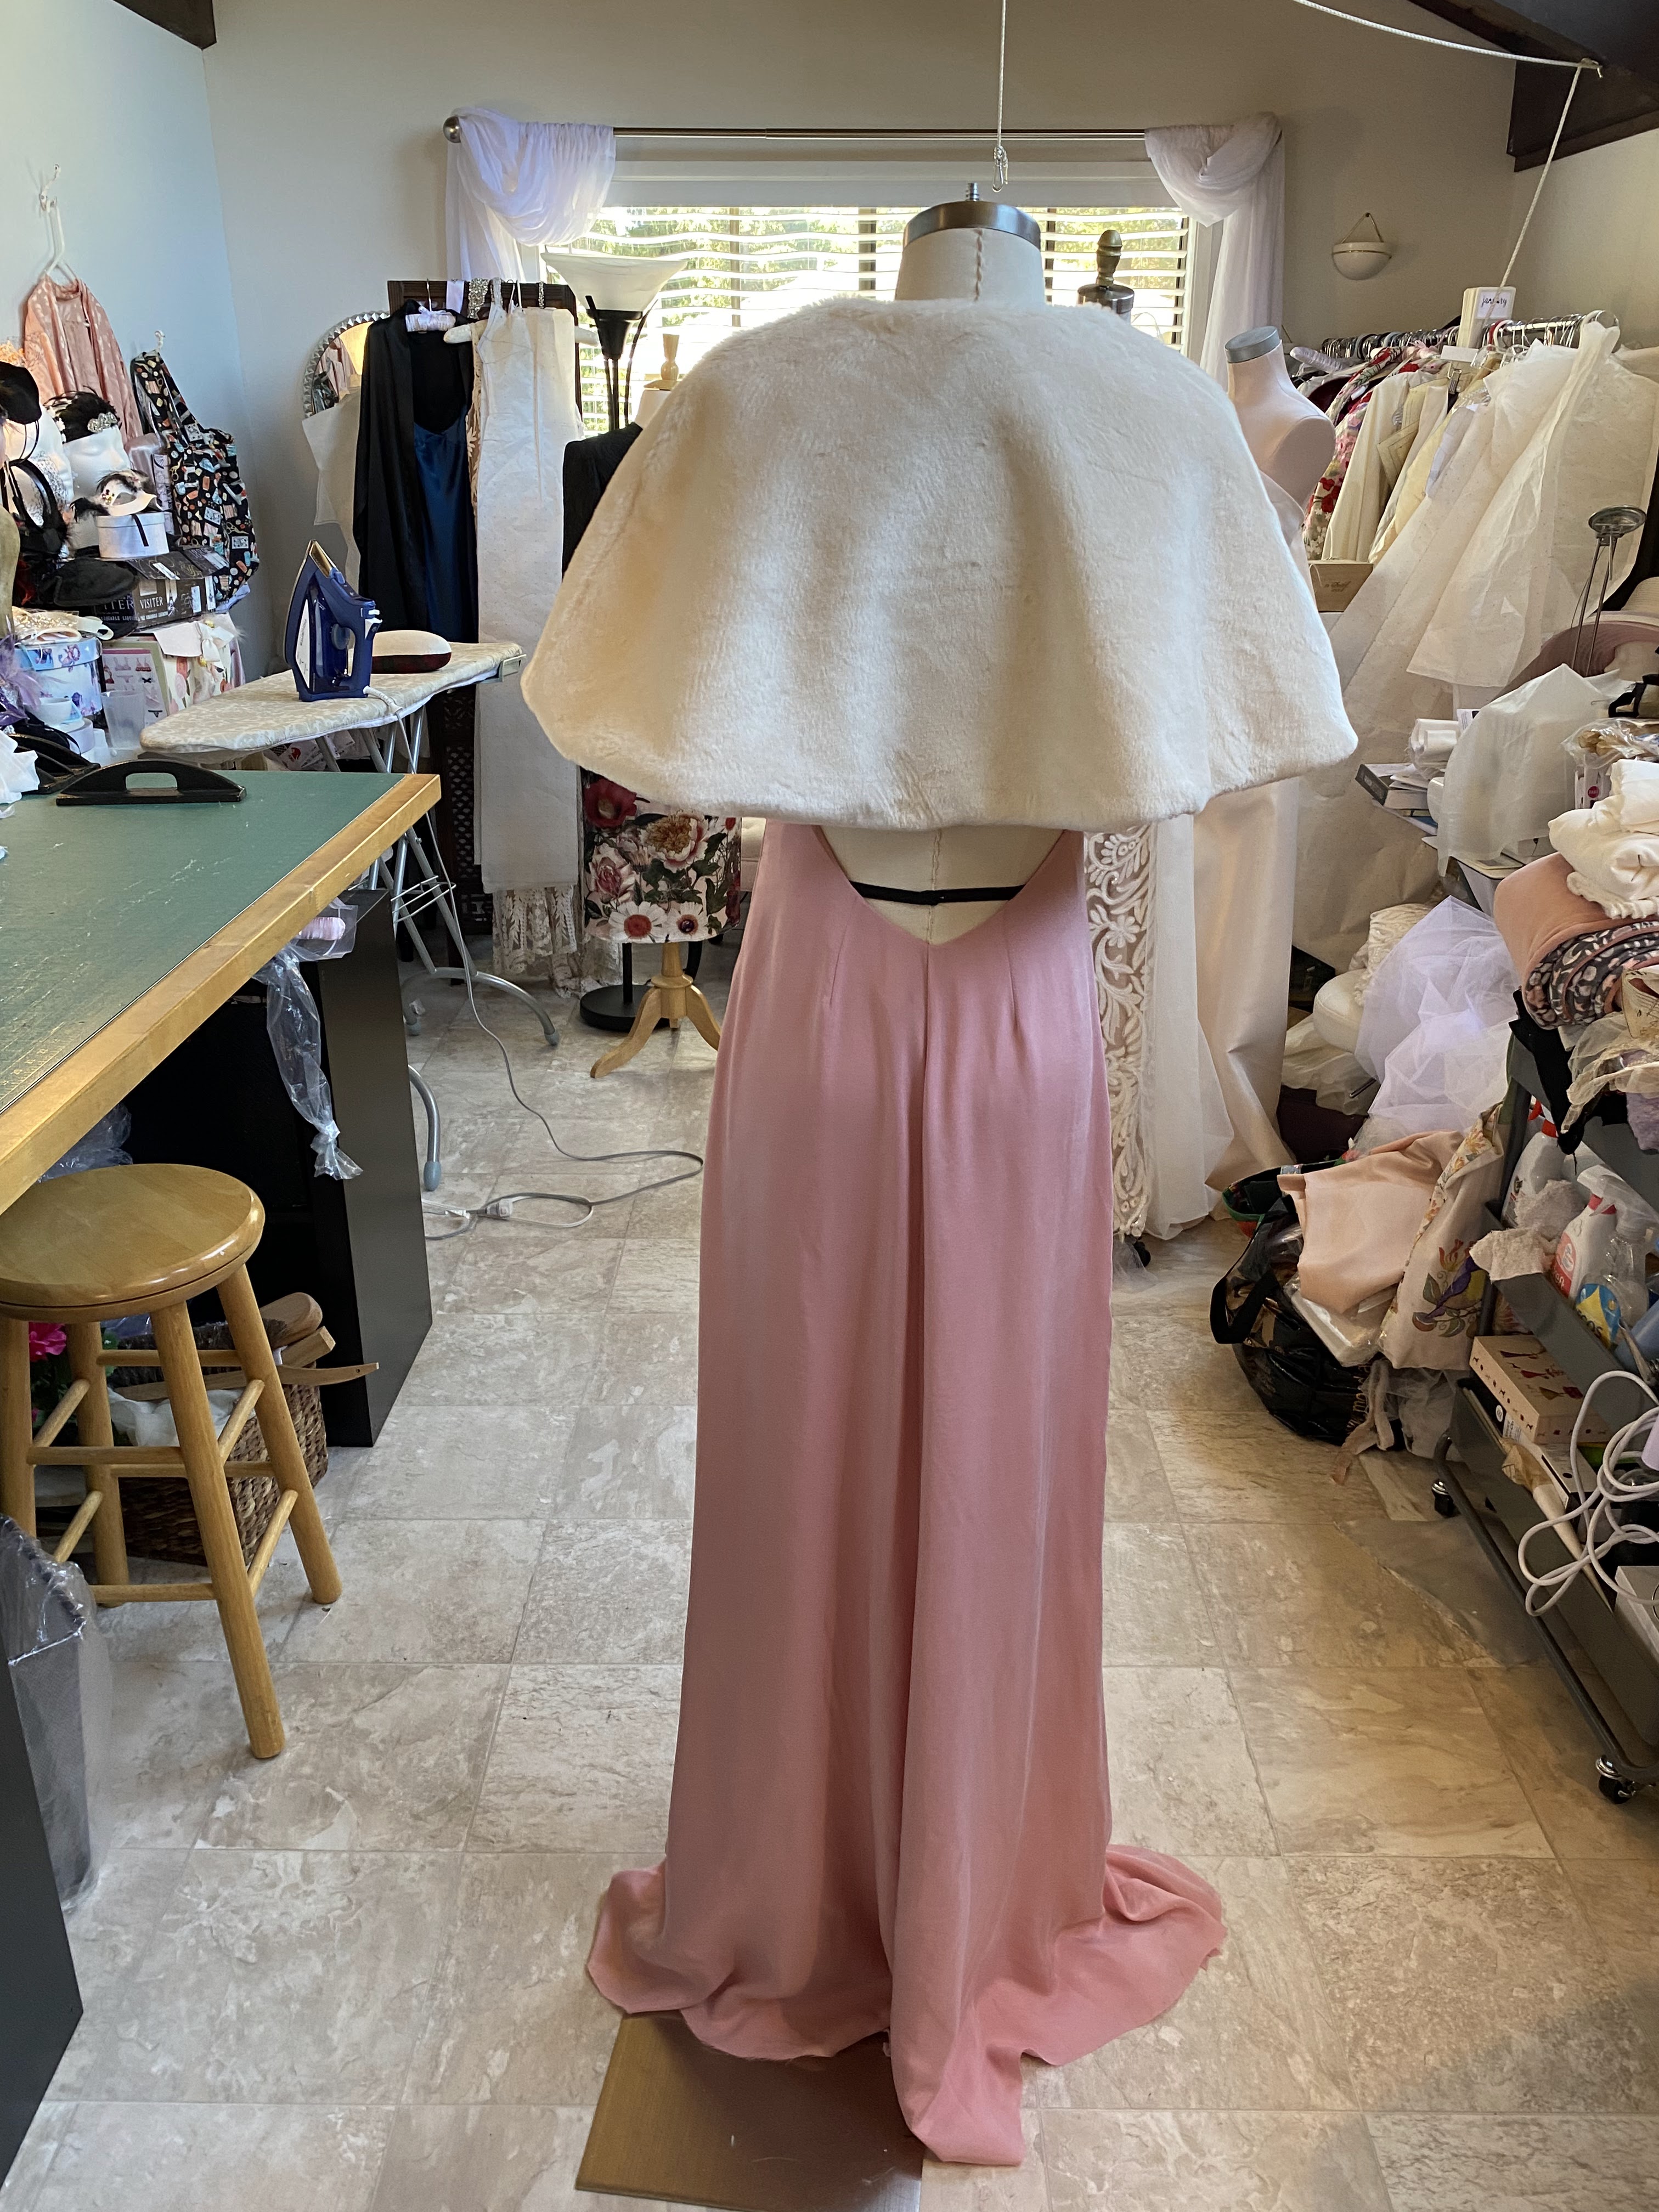
I wanted to include some accessories with the collection, giving the potential wearer options. I opted to make a little faux fur shrug (a cape-like little jacket type of garment) to cover her shoulders in case of a little chill in the air (personally, I hate being cold and always have a jacket or cardigan on hand just in case…):
Once Stella and her shrug were complete, it was time to move on to the next look in the lineup and keep up with the pace of my timeline.
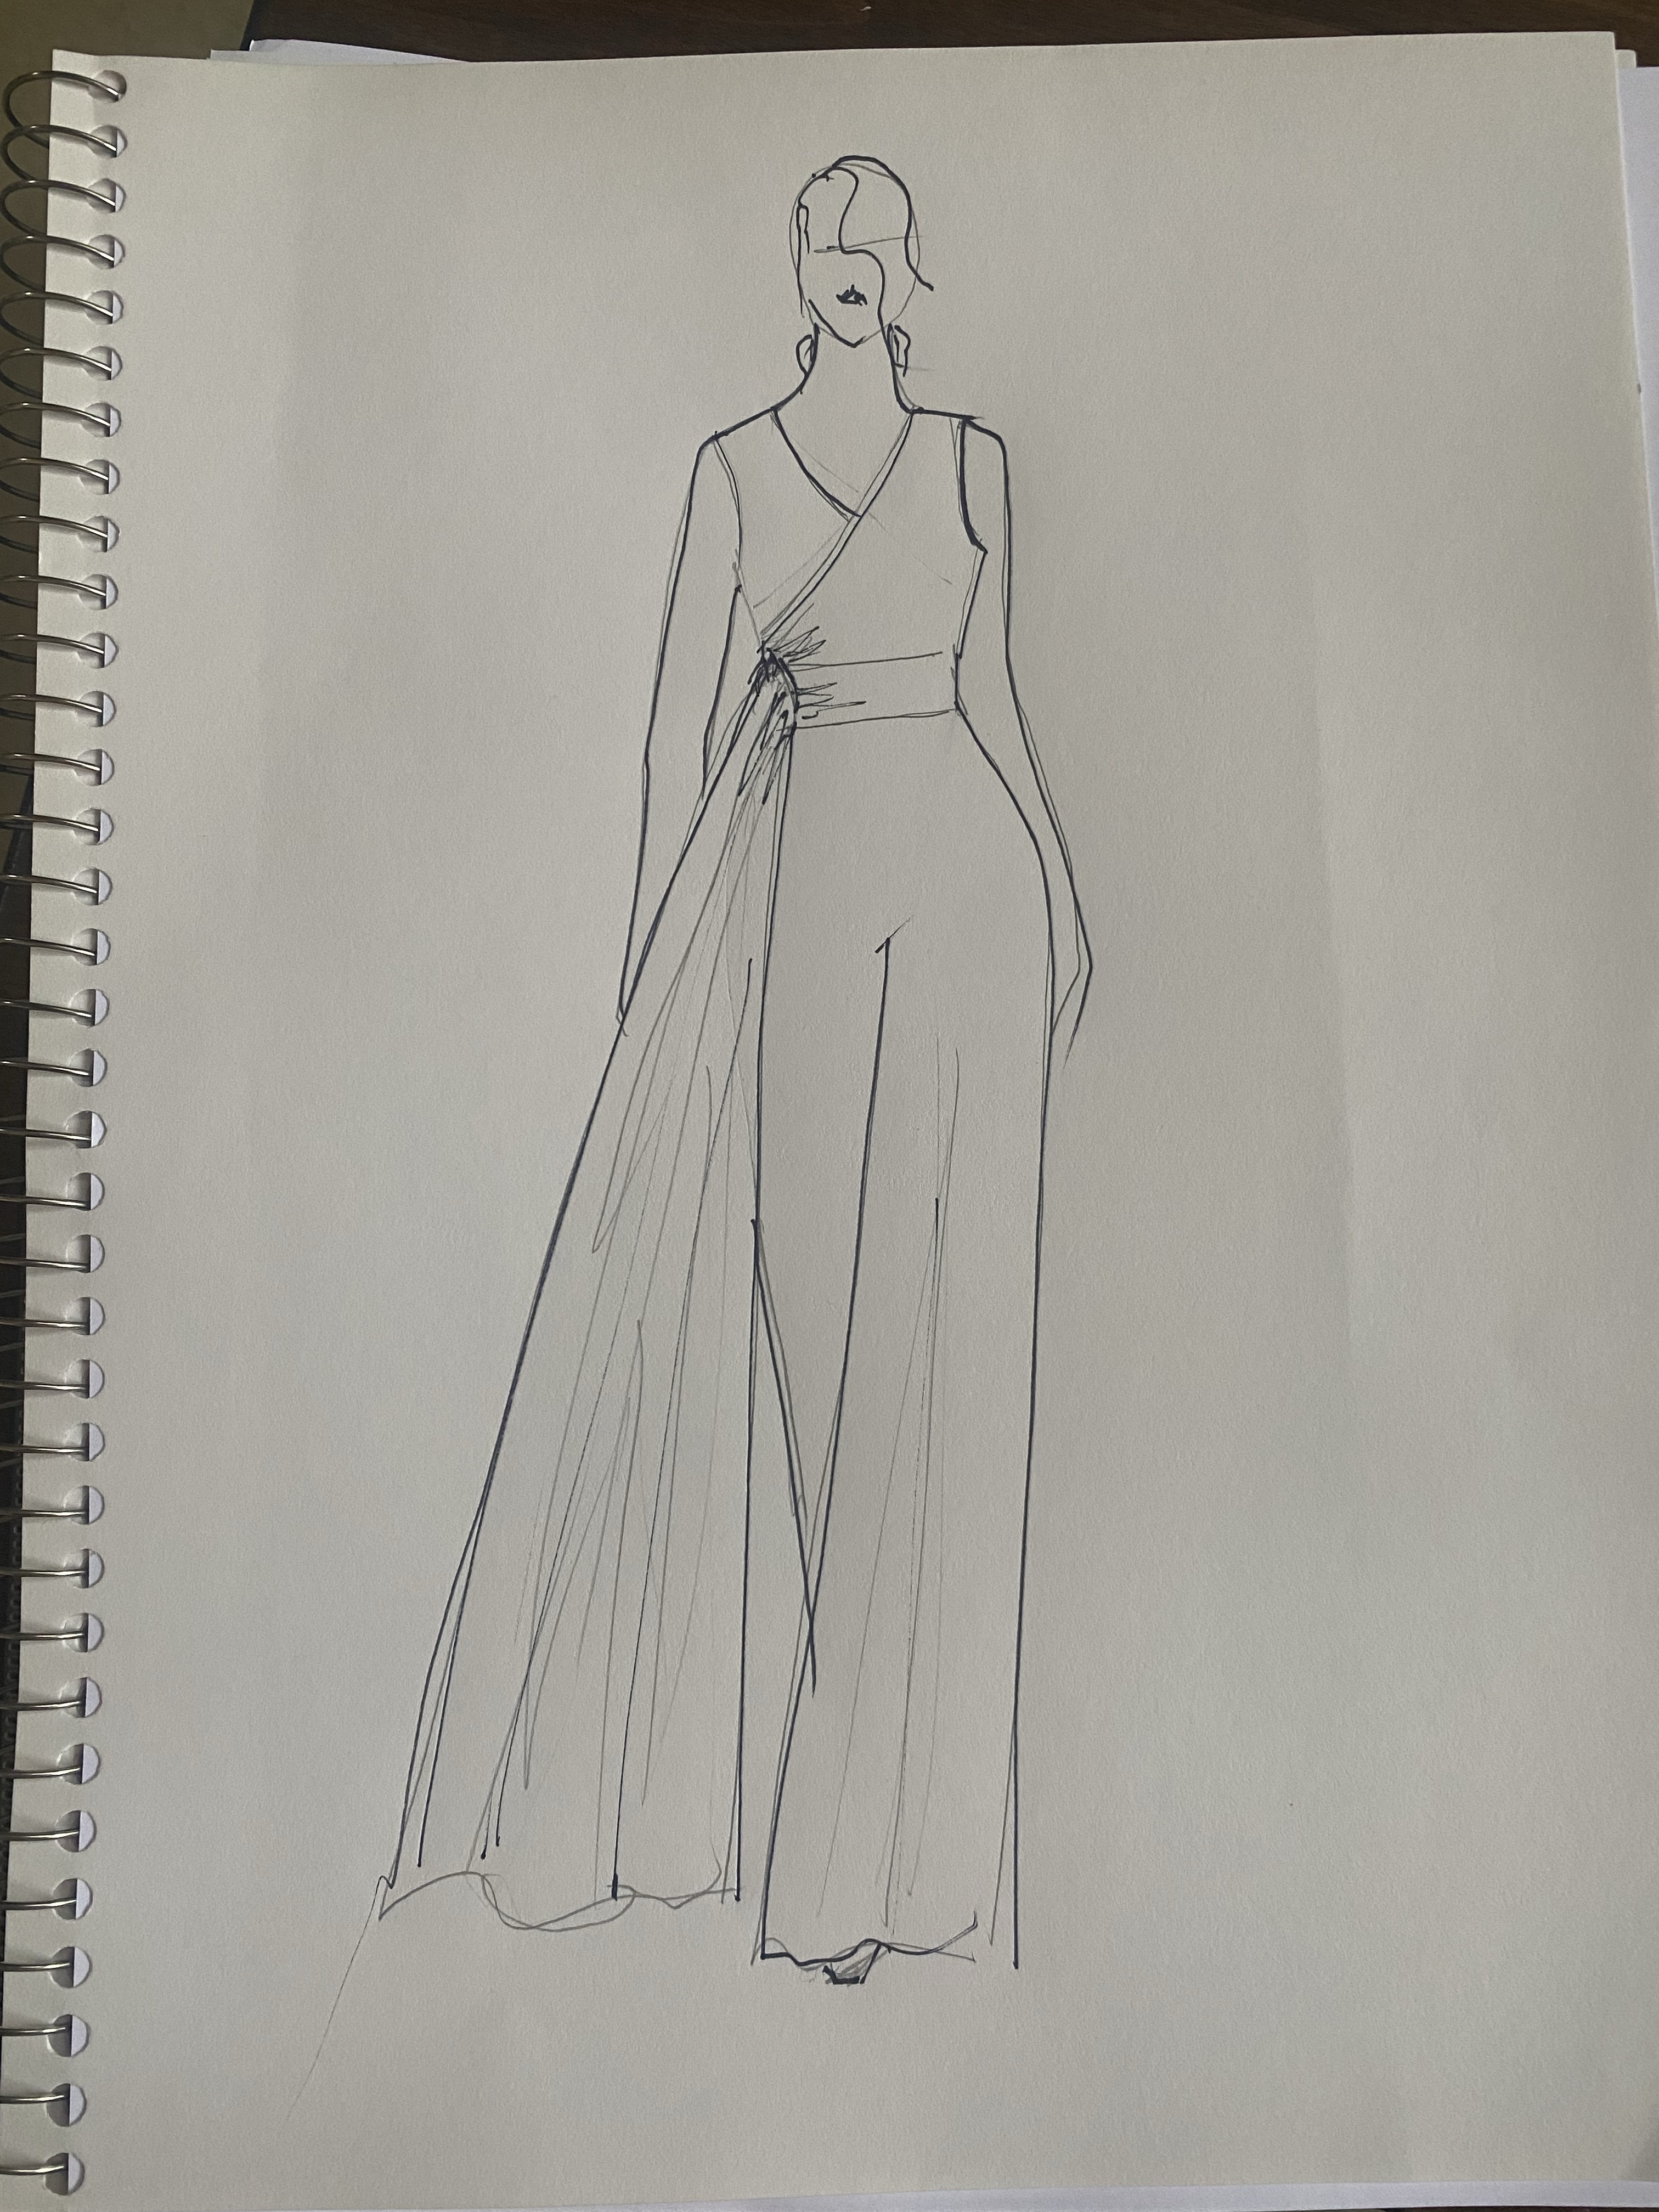
I wanted to have options for a bride, and find that dressy jumpsuits are appealing to many. I wanted to create something romantic and flowy in a lovely swishy fabric.
This illustration is one of many that I did with the vision of a bridal, or dressy, jumpsuit as an option. I love a simple bodice, defined waist, and a wide leg pant. I added a big side sash detail for drama and to act as sort of a train.
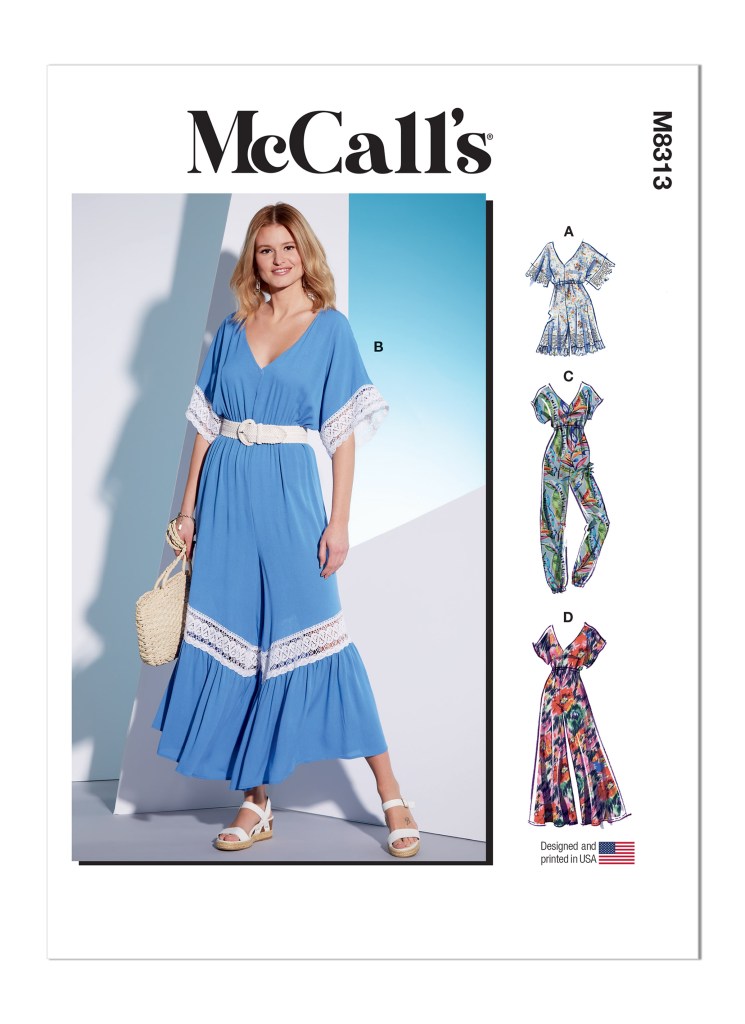
When choosing a pattern for this, I went for one I had in my collection, McCall’s 8313, to create the look:
The pattern envelope really isn’t exciting or inspirational…
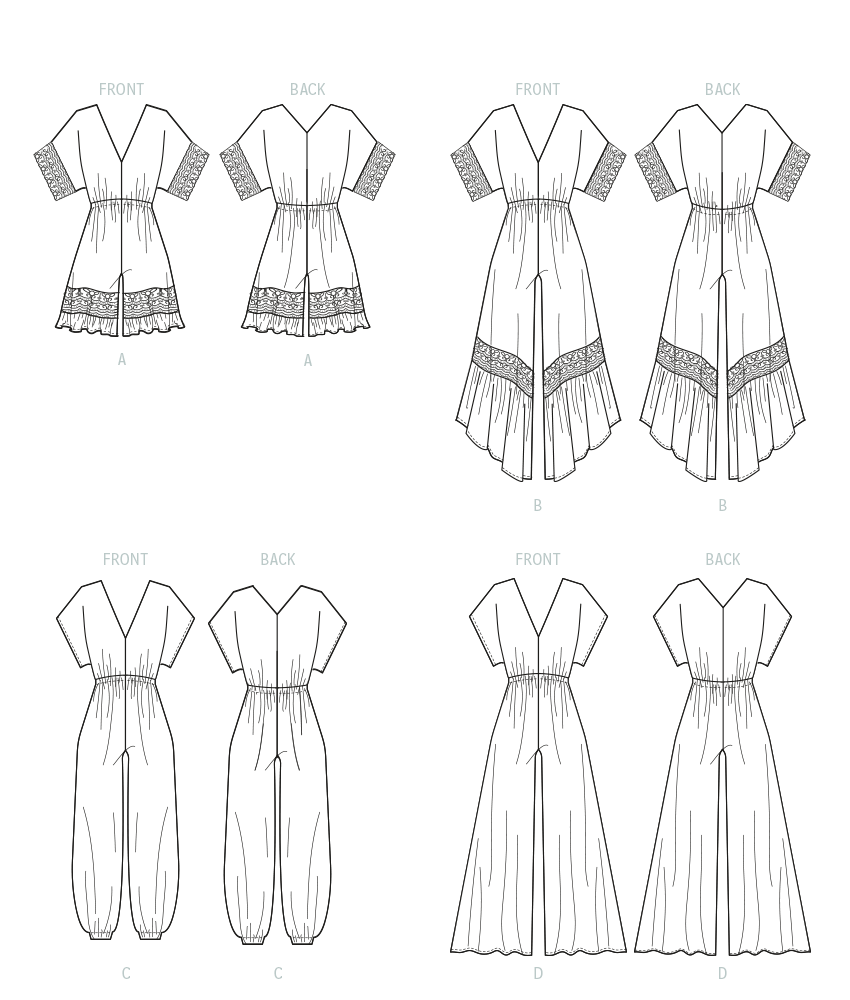
The line drawings are also not the greatest, however view D would work for me
Of course, I made changes to the pattern including cutting the front bodice out on the fold instead of having a center front seam. Also I fully lined the entire jumpsuit to avoid seeing through the garment and to give it a more “luxe” feel. I made a matching sash and slapped on some of my embellished tulle to act as a detachable train.
The jumpsuit conceptualizing process…Kayla rocks it at the model fitting!
As much as I wanted this jumpsuit to be really amazing and create a “wow!” moment, it turned out to be my least favorite in the collection if I’m honest. It just didn’t turn out as well as I wanted it to. Sure, it was fine and worked out for a look, it just wasn’t as refined and elegant as I hoped it would be, but I didn’t have time to start all over with it and make a different one, so it would just have to do. Meh…
The next dress I totally procrastinated on cutting out and making, however was one of my favorite concepts and really lovely fabric choice. I named it Laticia as I felt the fabric reminded me of a lattice feature that you would see as part of the décor in a beautiful garden:
I wanted to have one option in my collection with an overskirt as I love the idea of a transformation in the bridal outfit. She could wear the overskirt for walking down the isle, then remove the overskirt and reveal a lovely sheath dress underneath for the reception. Genius!
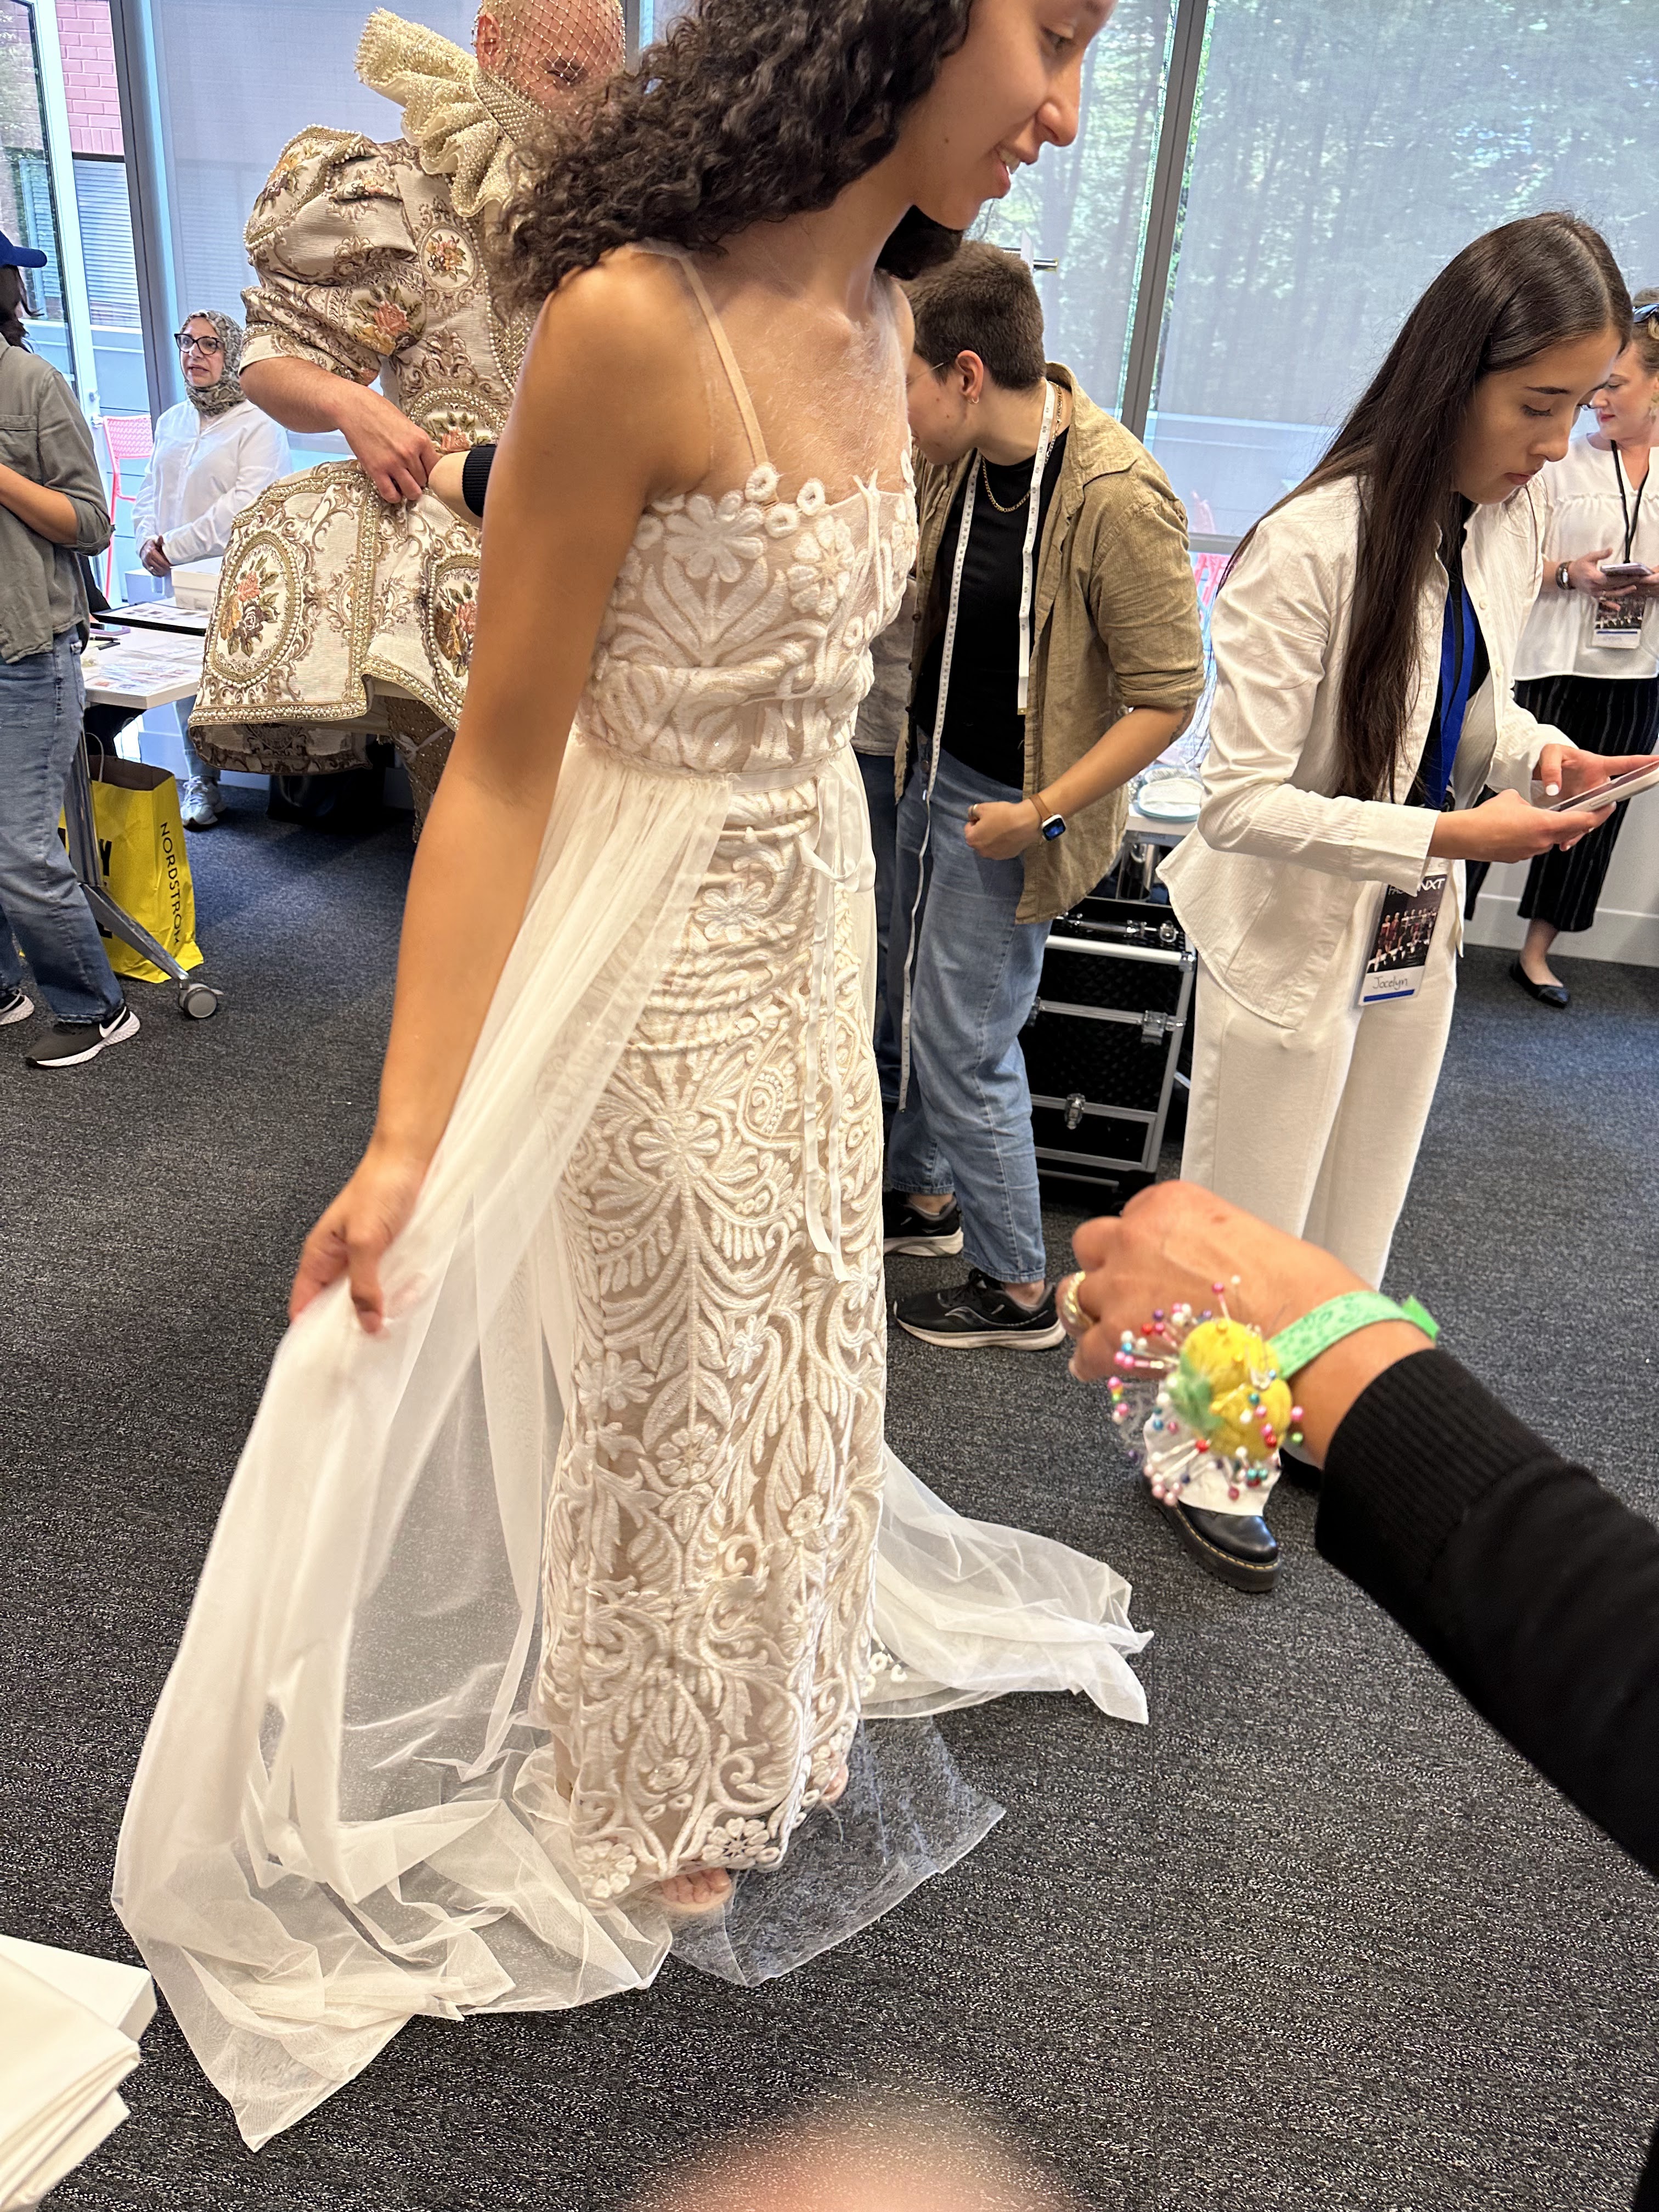
Part of the reason for the procrastination on this dress is I had to take extra care to cut out the fabric, perfectly aligning the motif design of the gorgeous sequin embellished delicate lace mesh:
Cutting out the pattern carefully on the lace
I hade to also add extra panels of the material in order to have the motif go all the way to the bottom of the dress which I sewed on by hand. Then, I made an under dress and lining in a flesh tone that was strapless, so boning and hidden structure were key to keeping it looking refined. The zipper was last and the most annoying part of this dress. It all turned out super pretty, but ugh, a LOT of work! Again, could have been a LOT better in my opinion, but I got it done and managed to squeeze it on to the model Grace at the fitting:
Grace looks FAB in Laticia! She loved it! I just had to make a few adjustments and finish the hem.
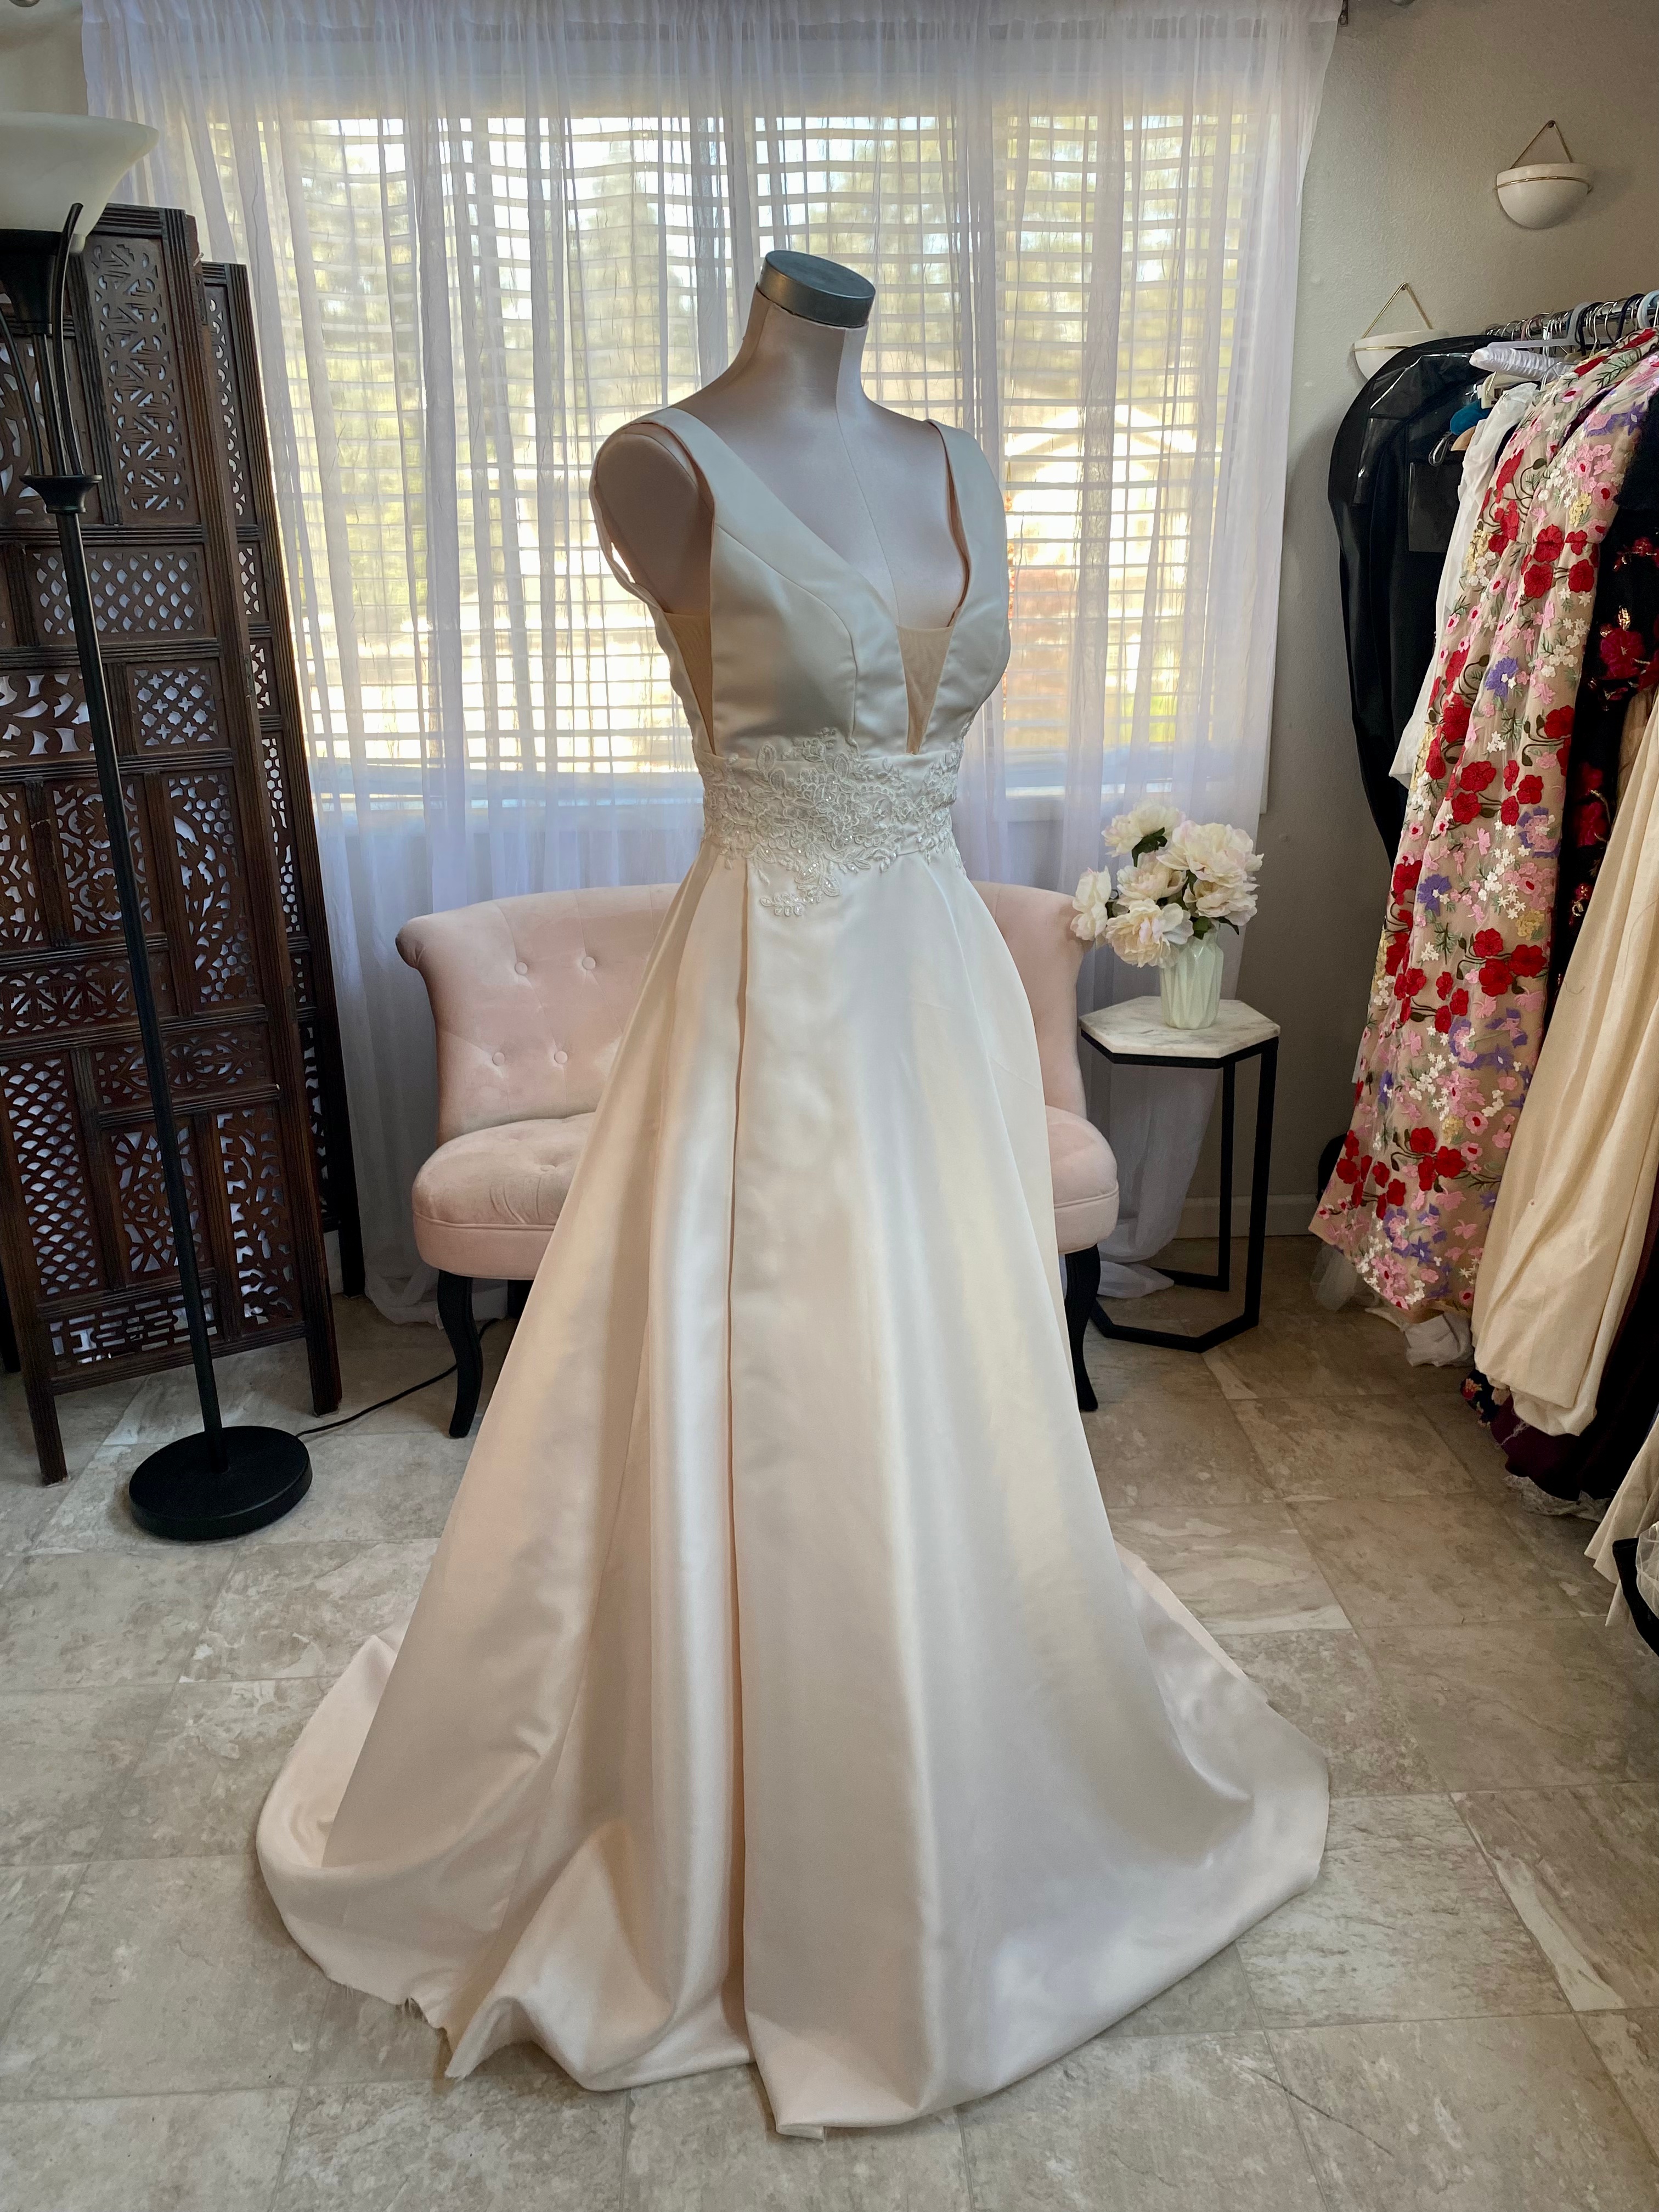
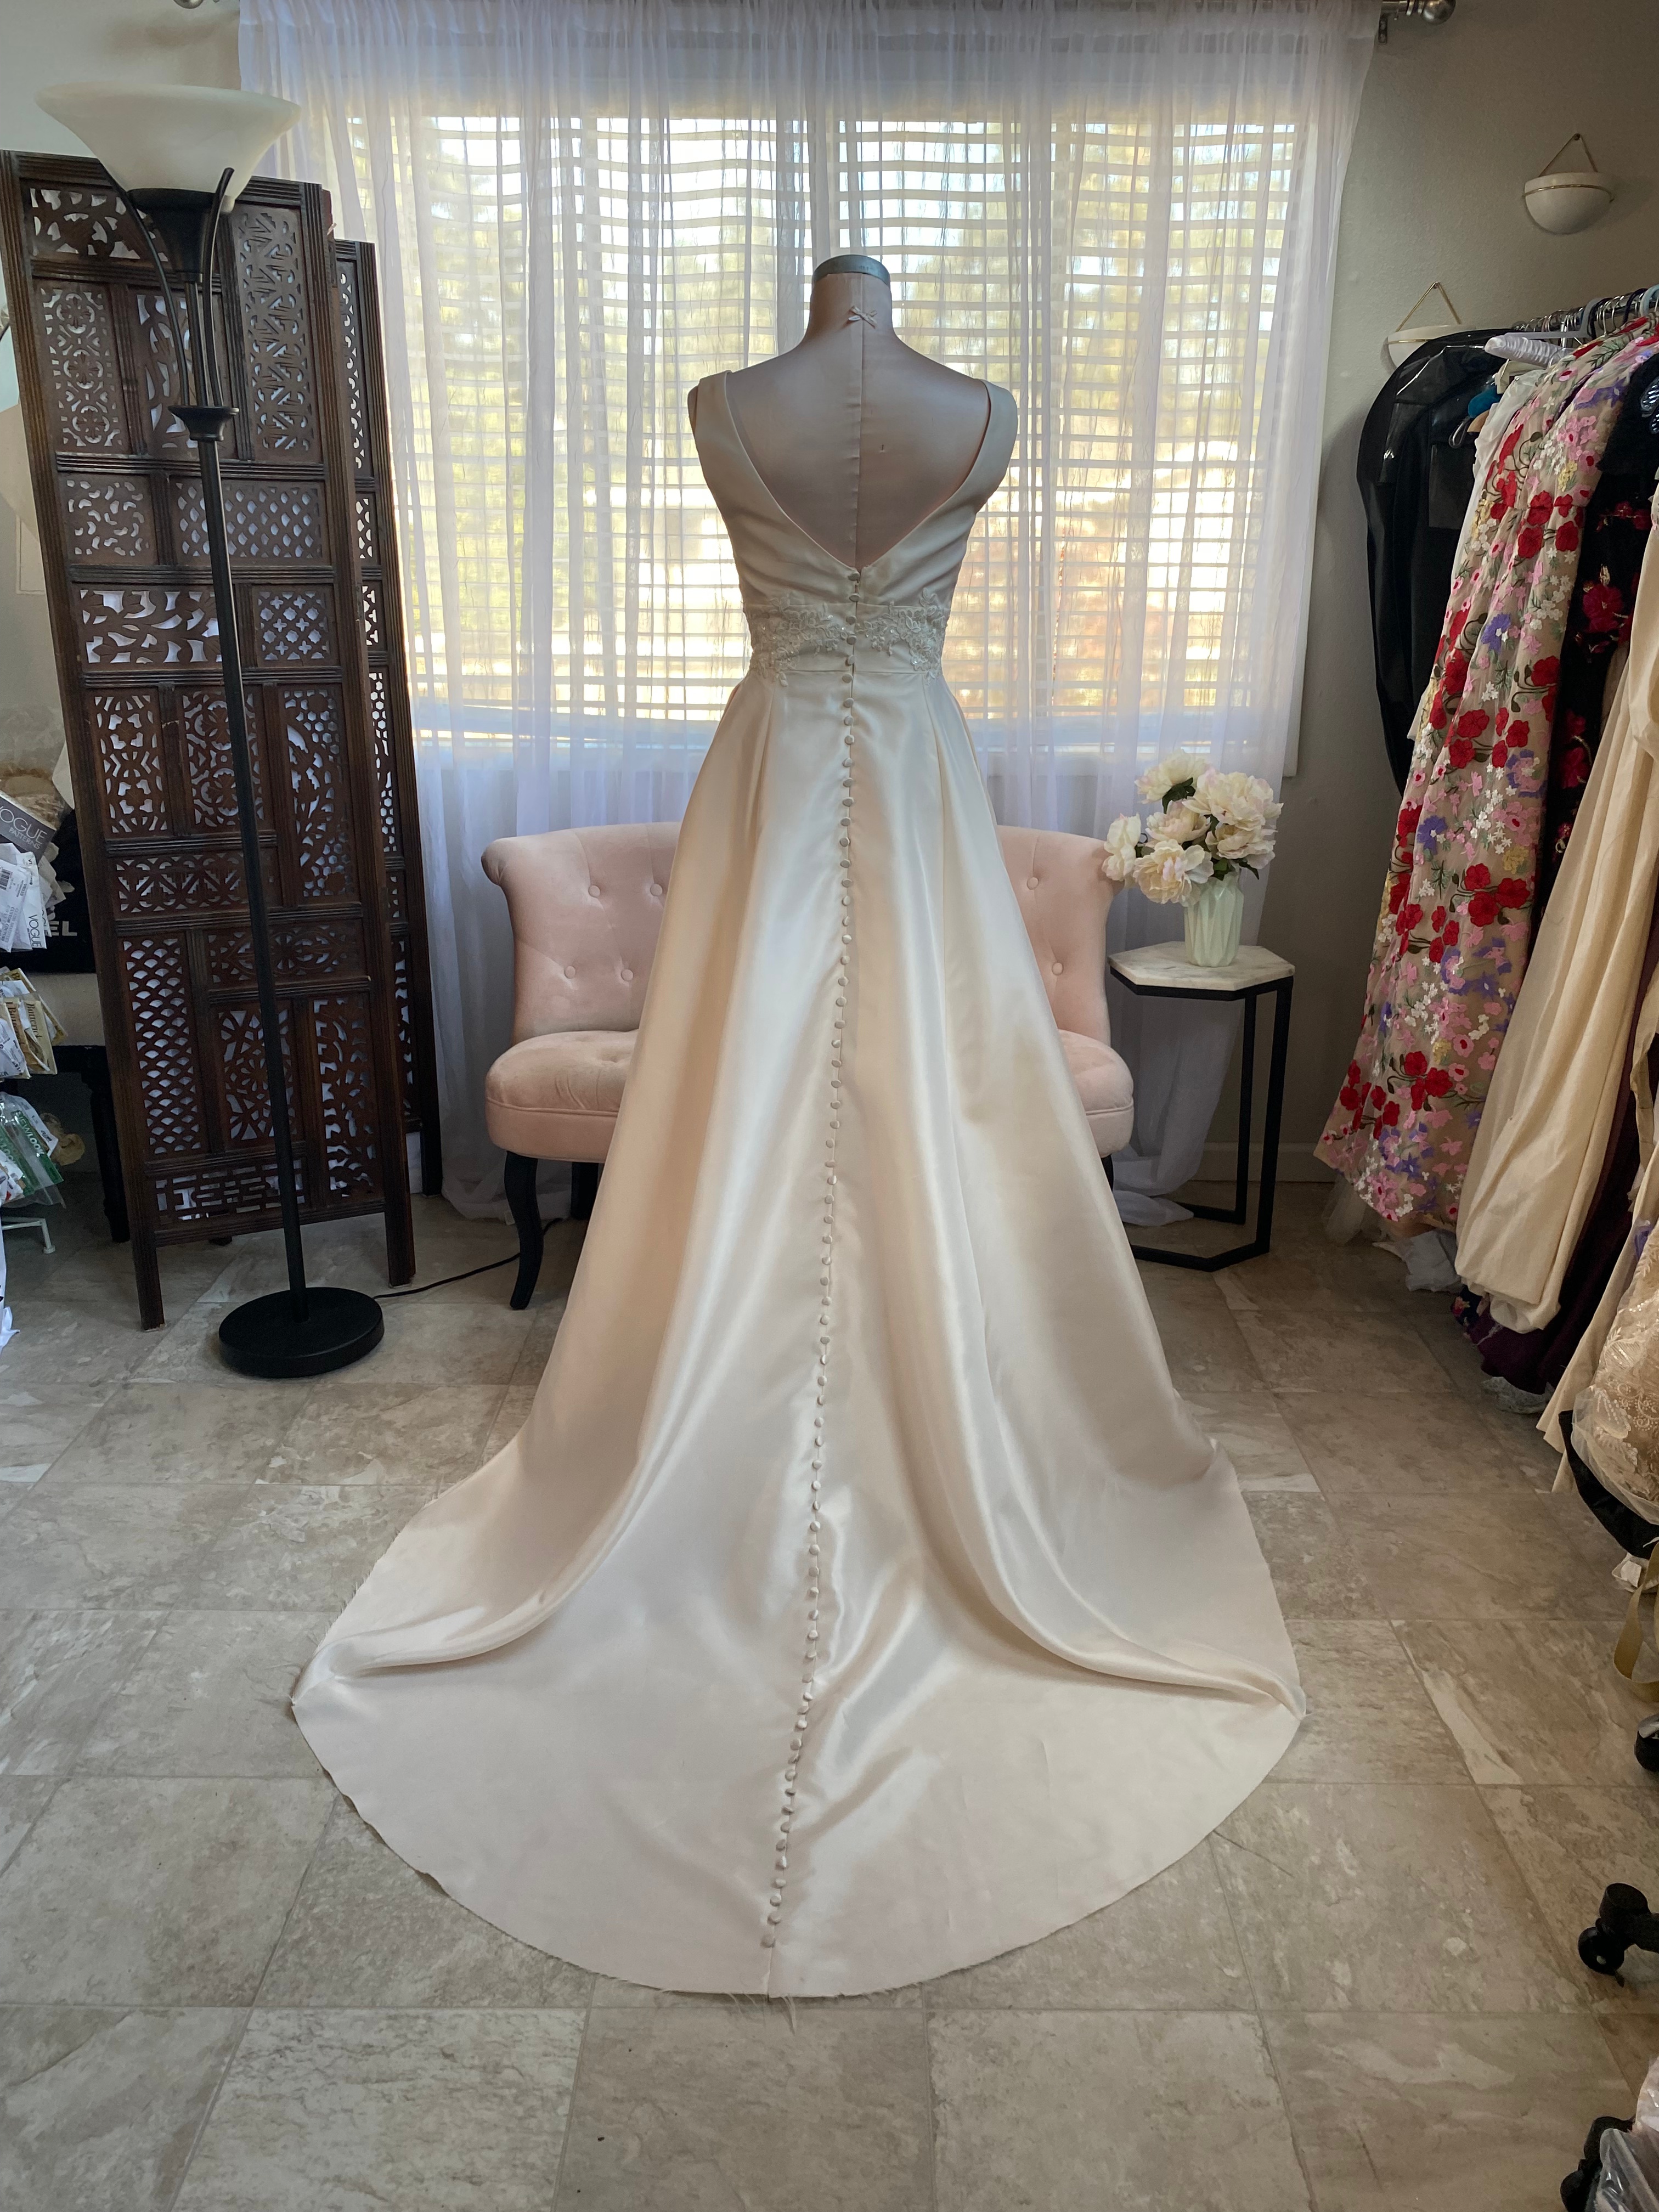
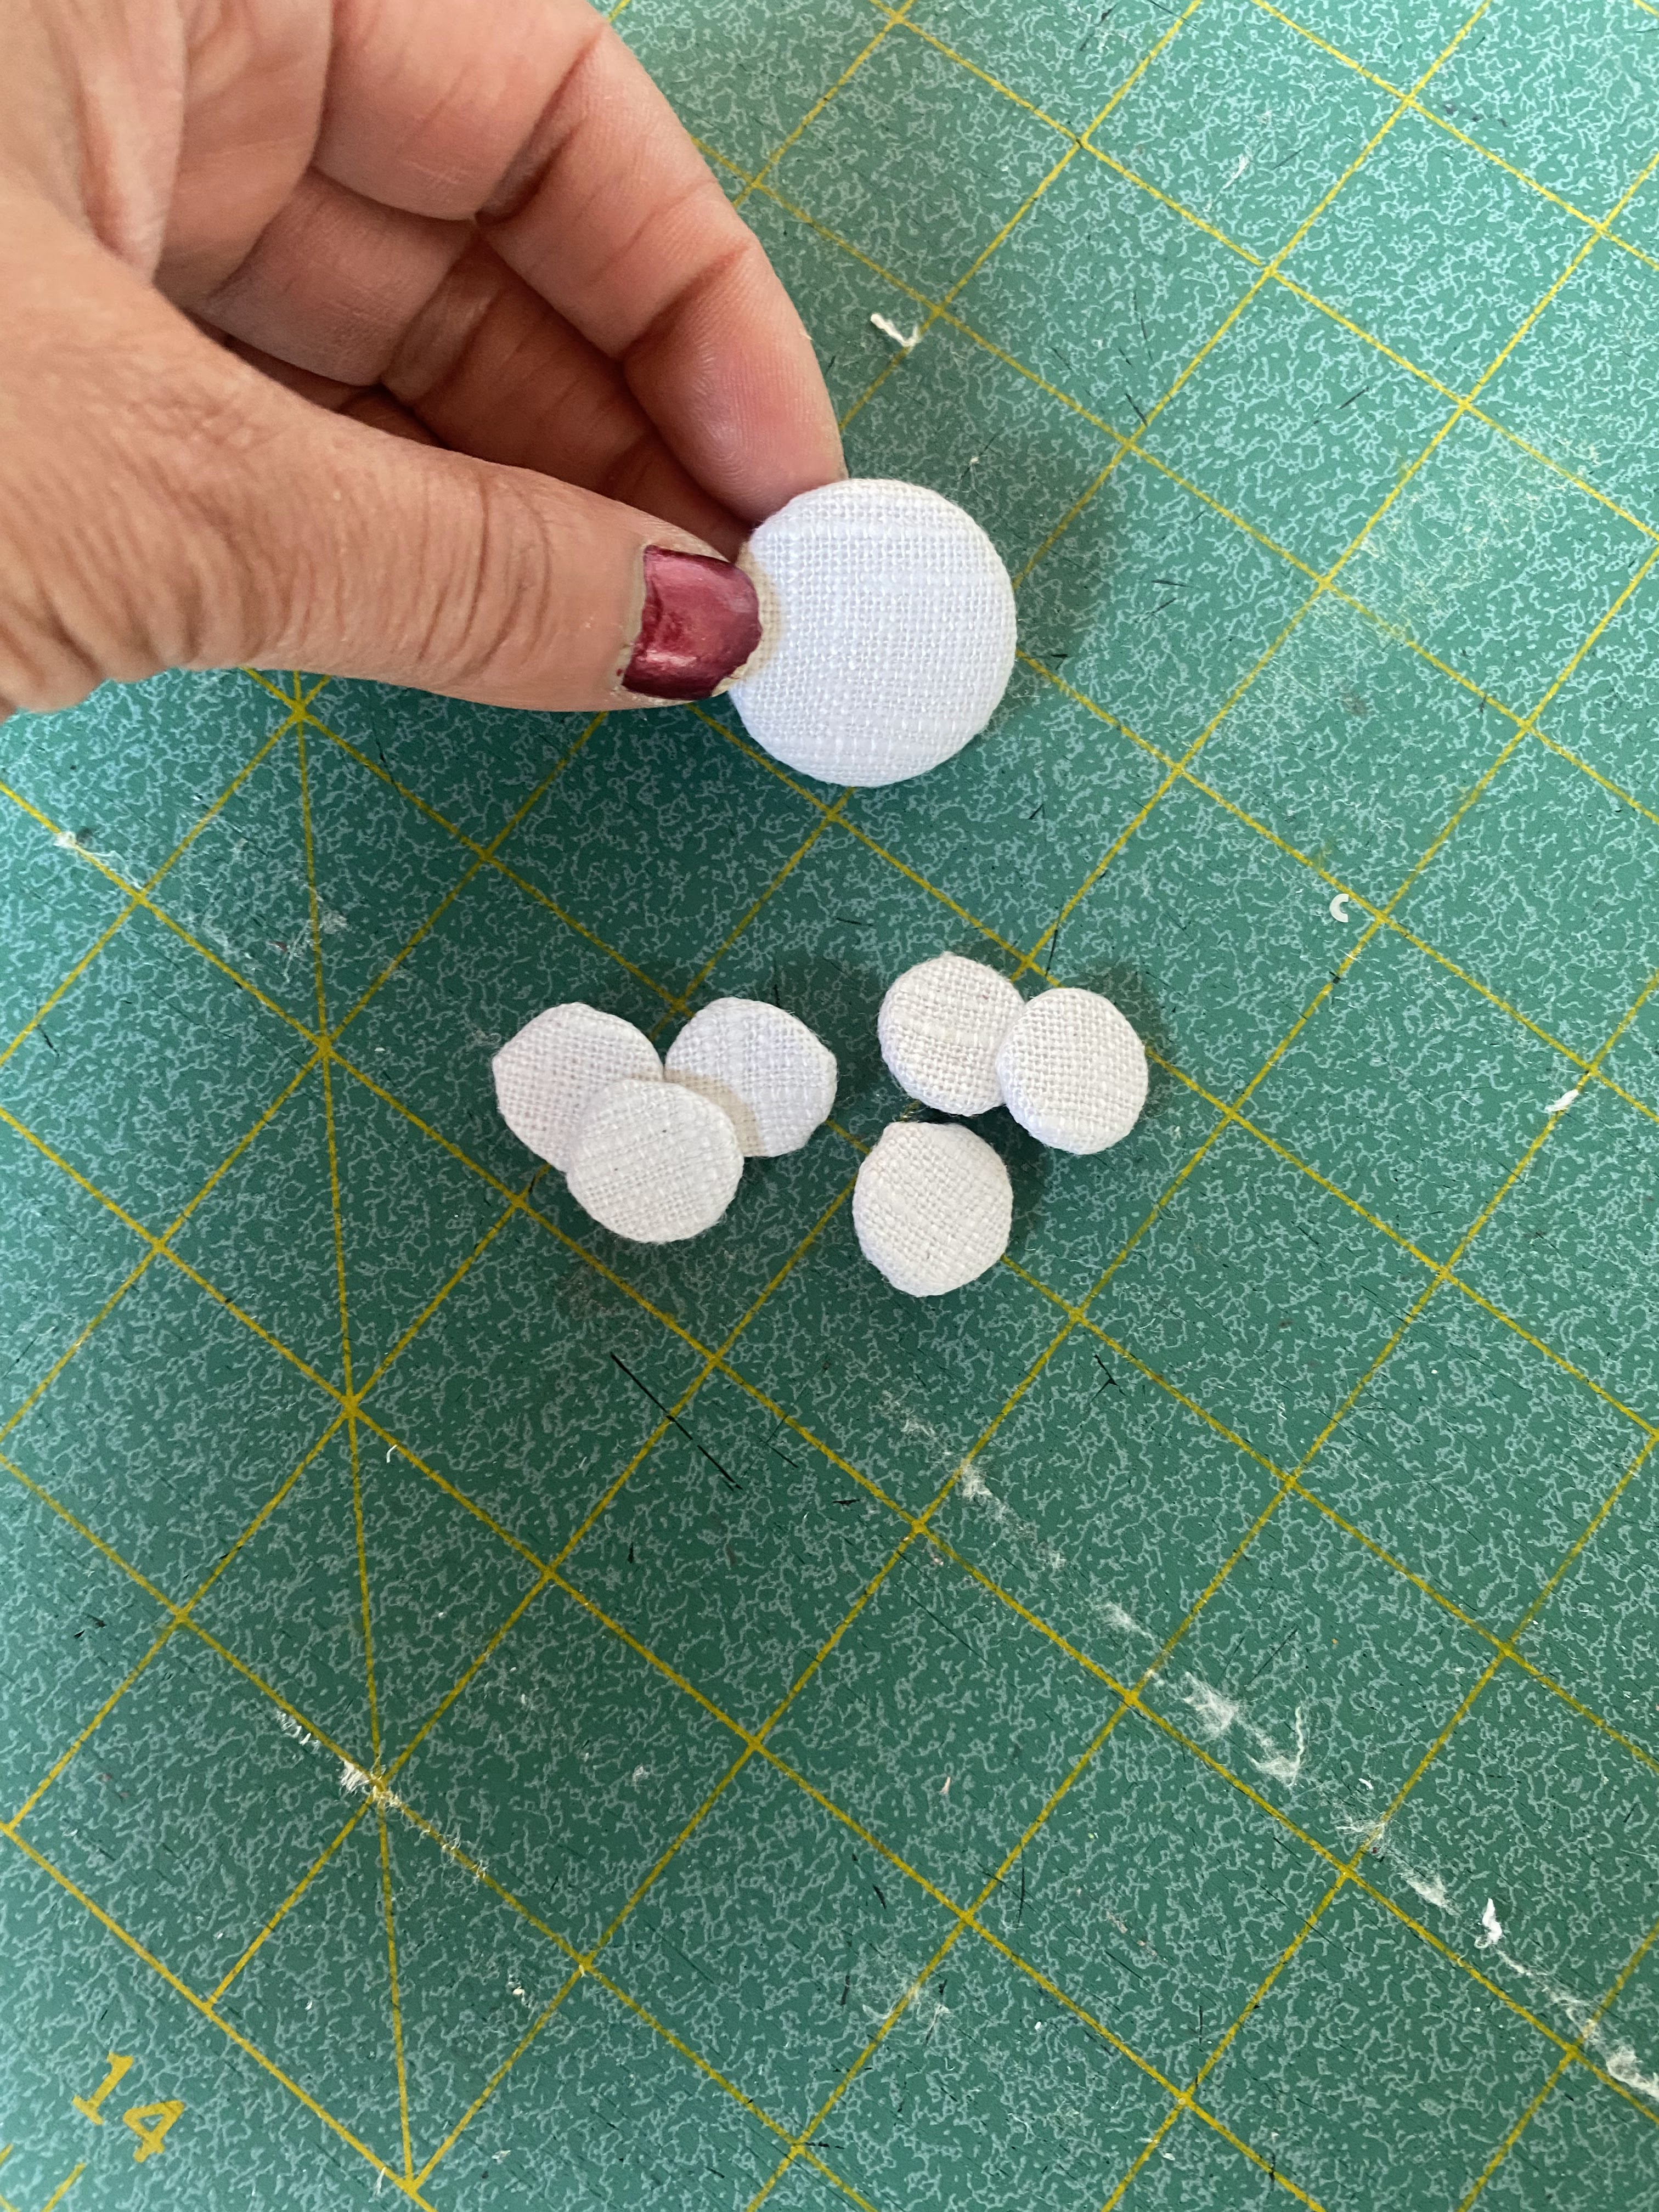
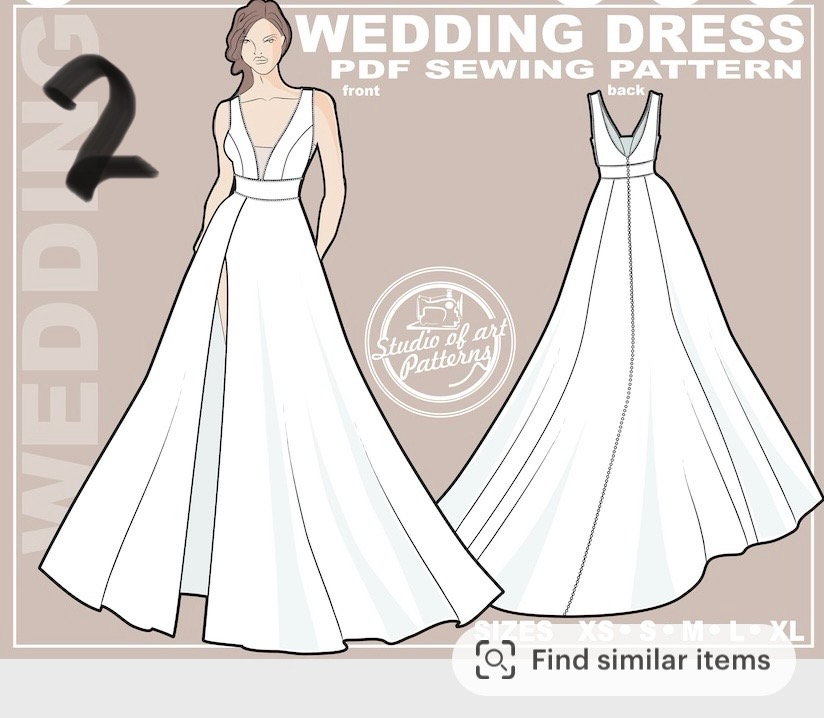
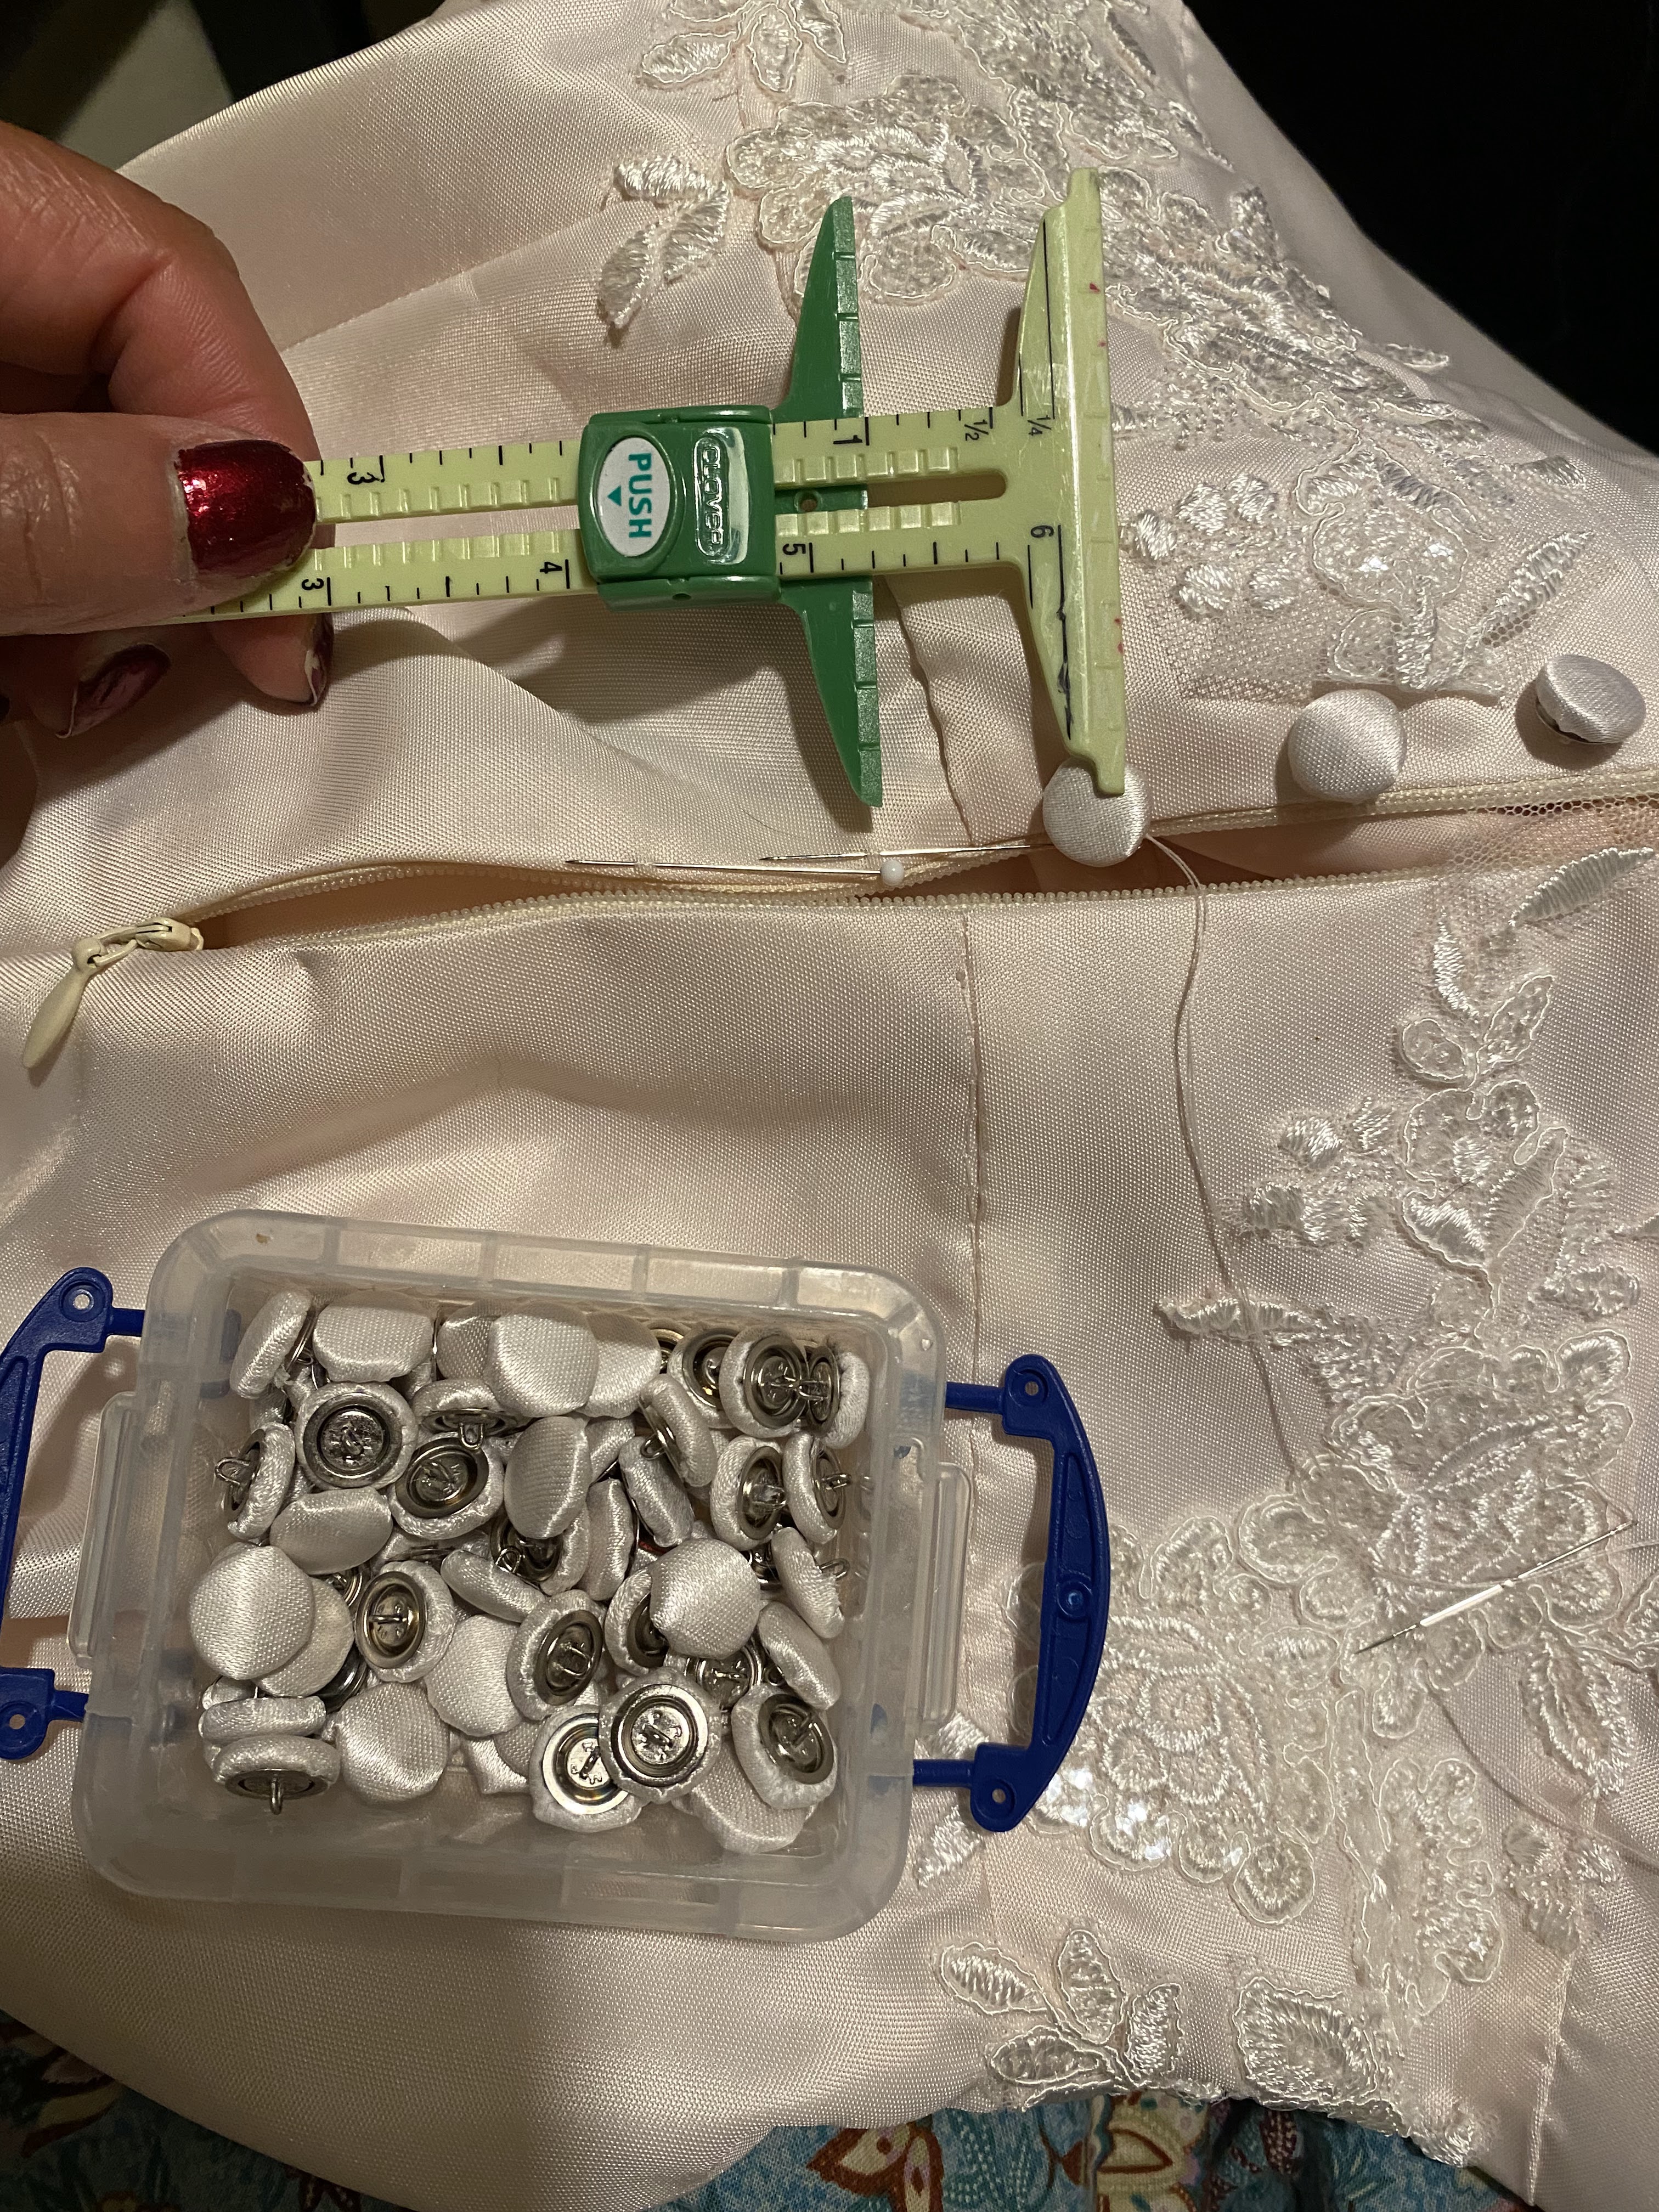
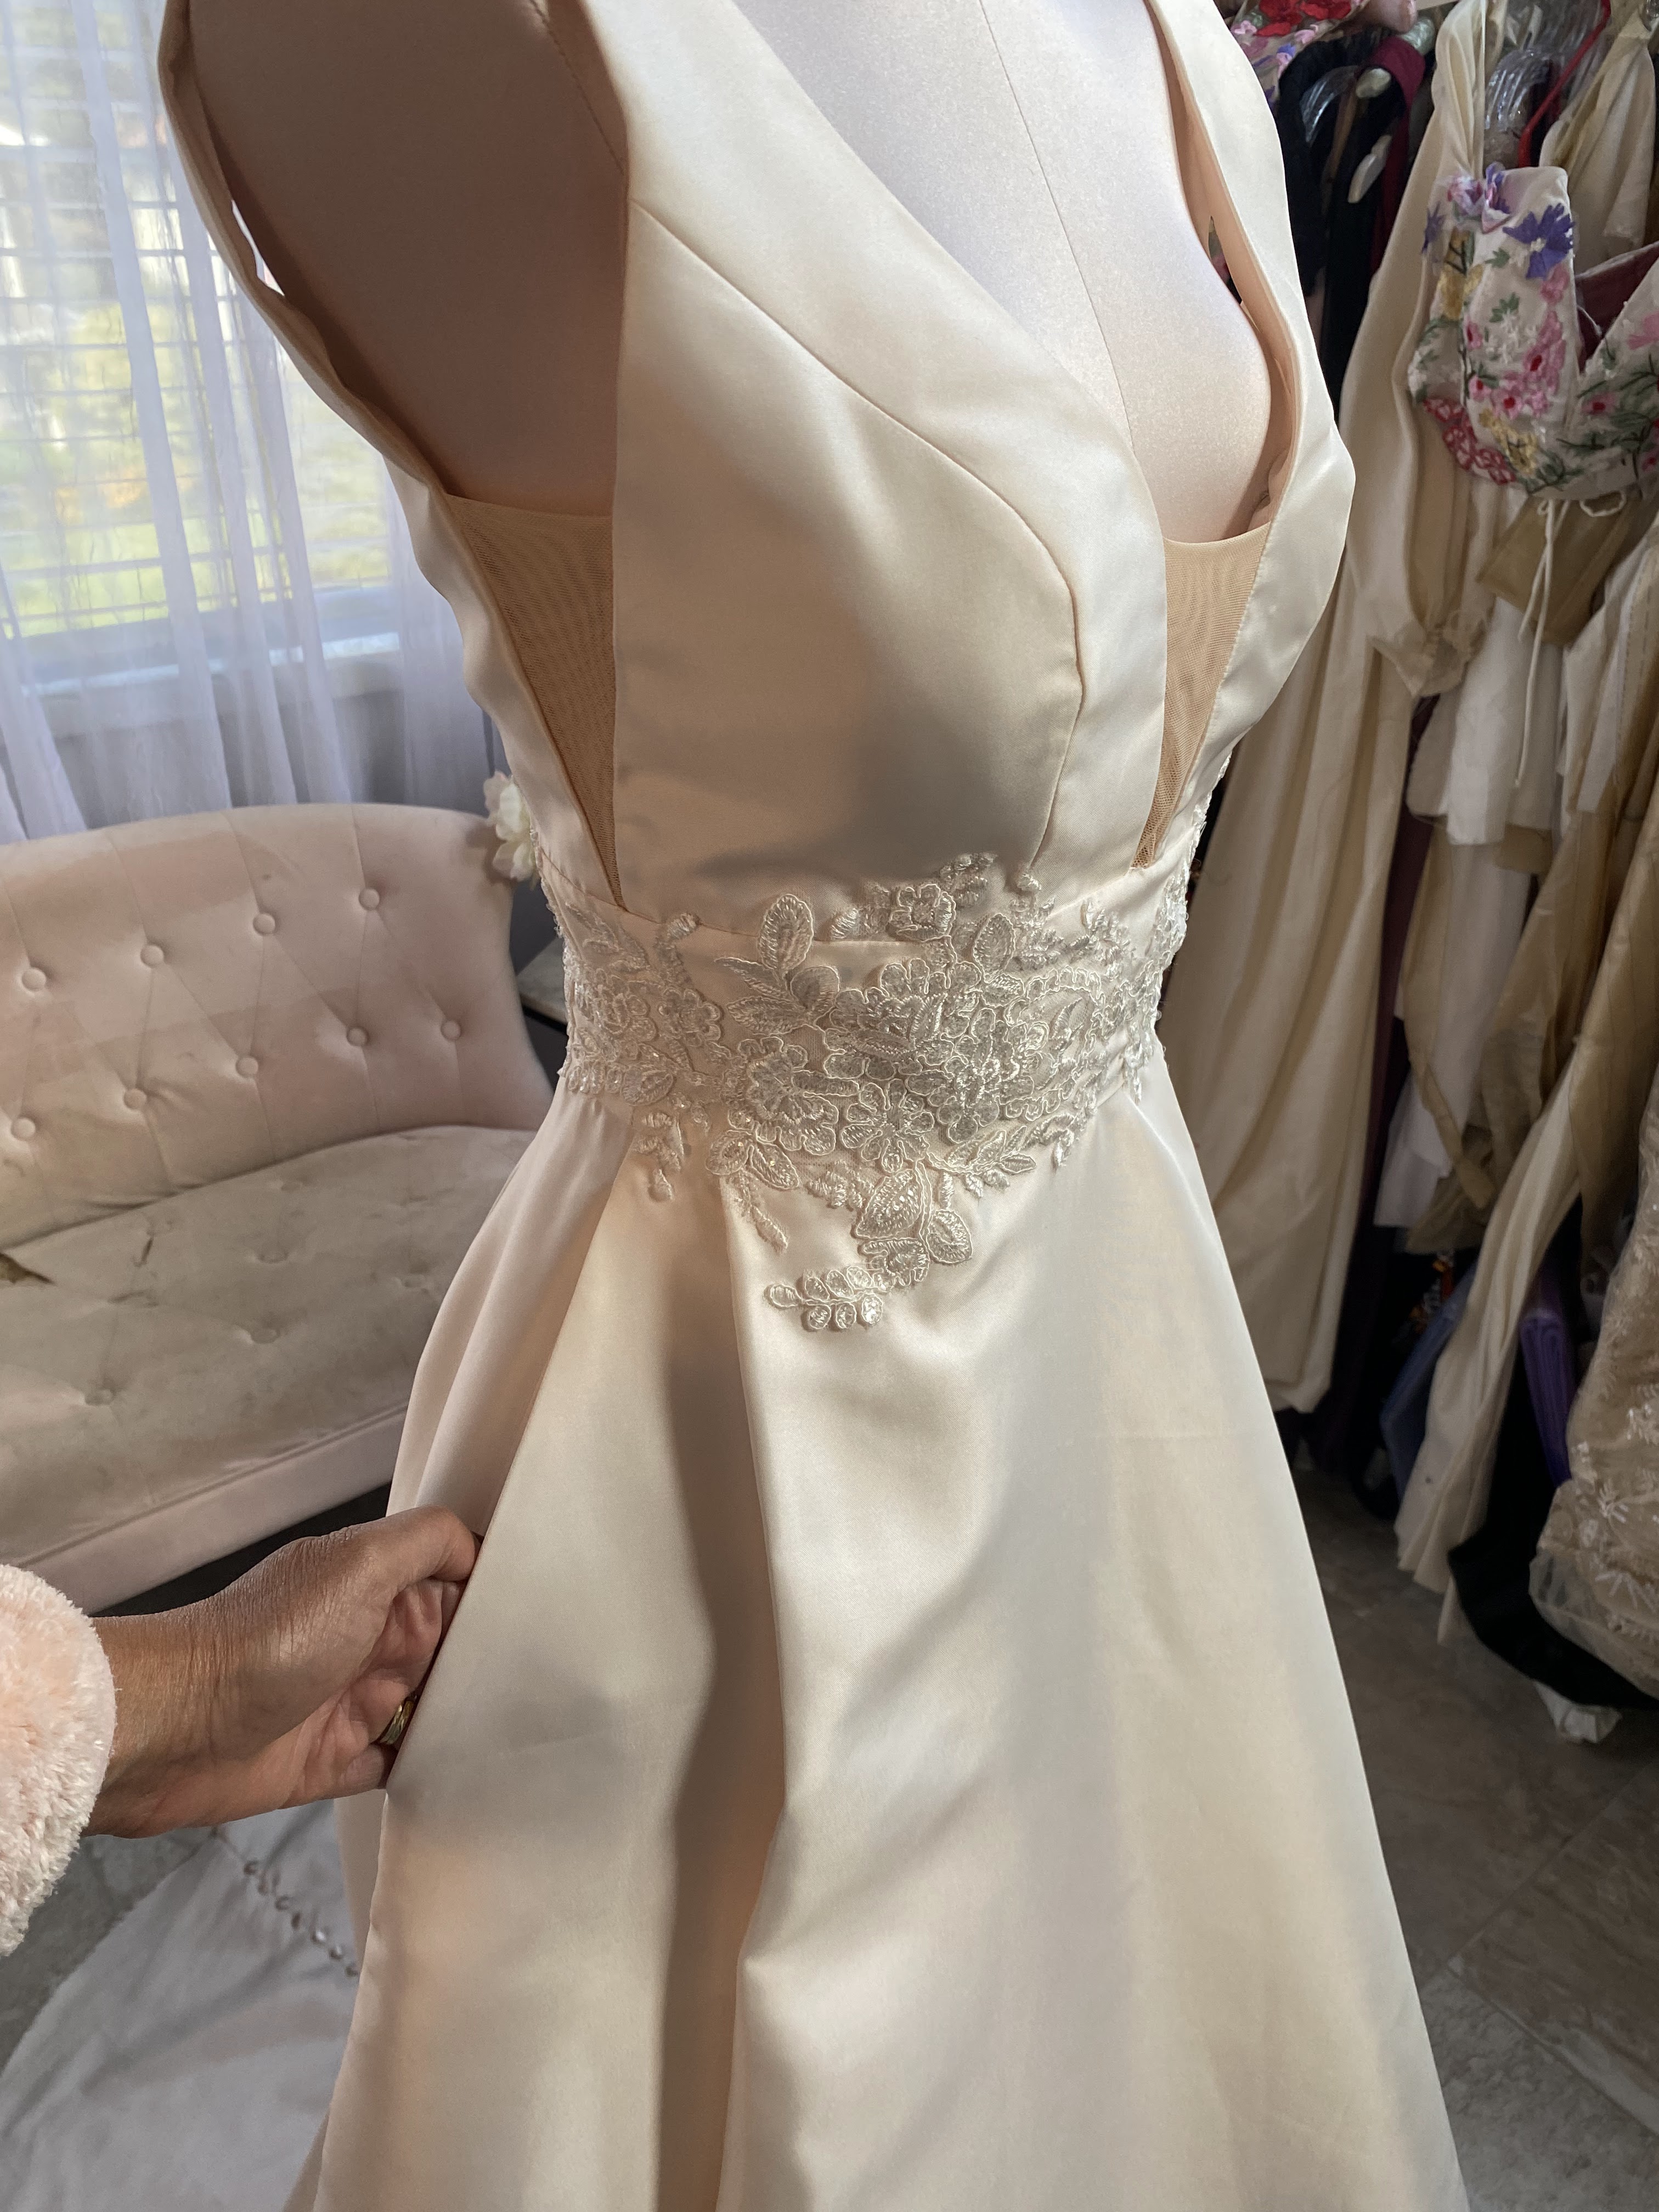
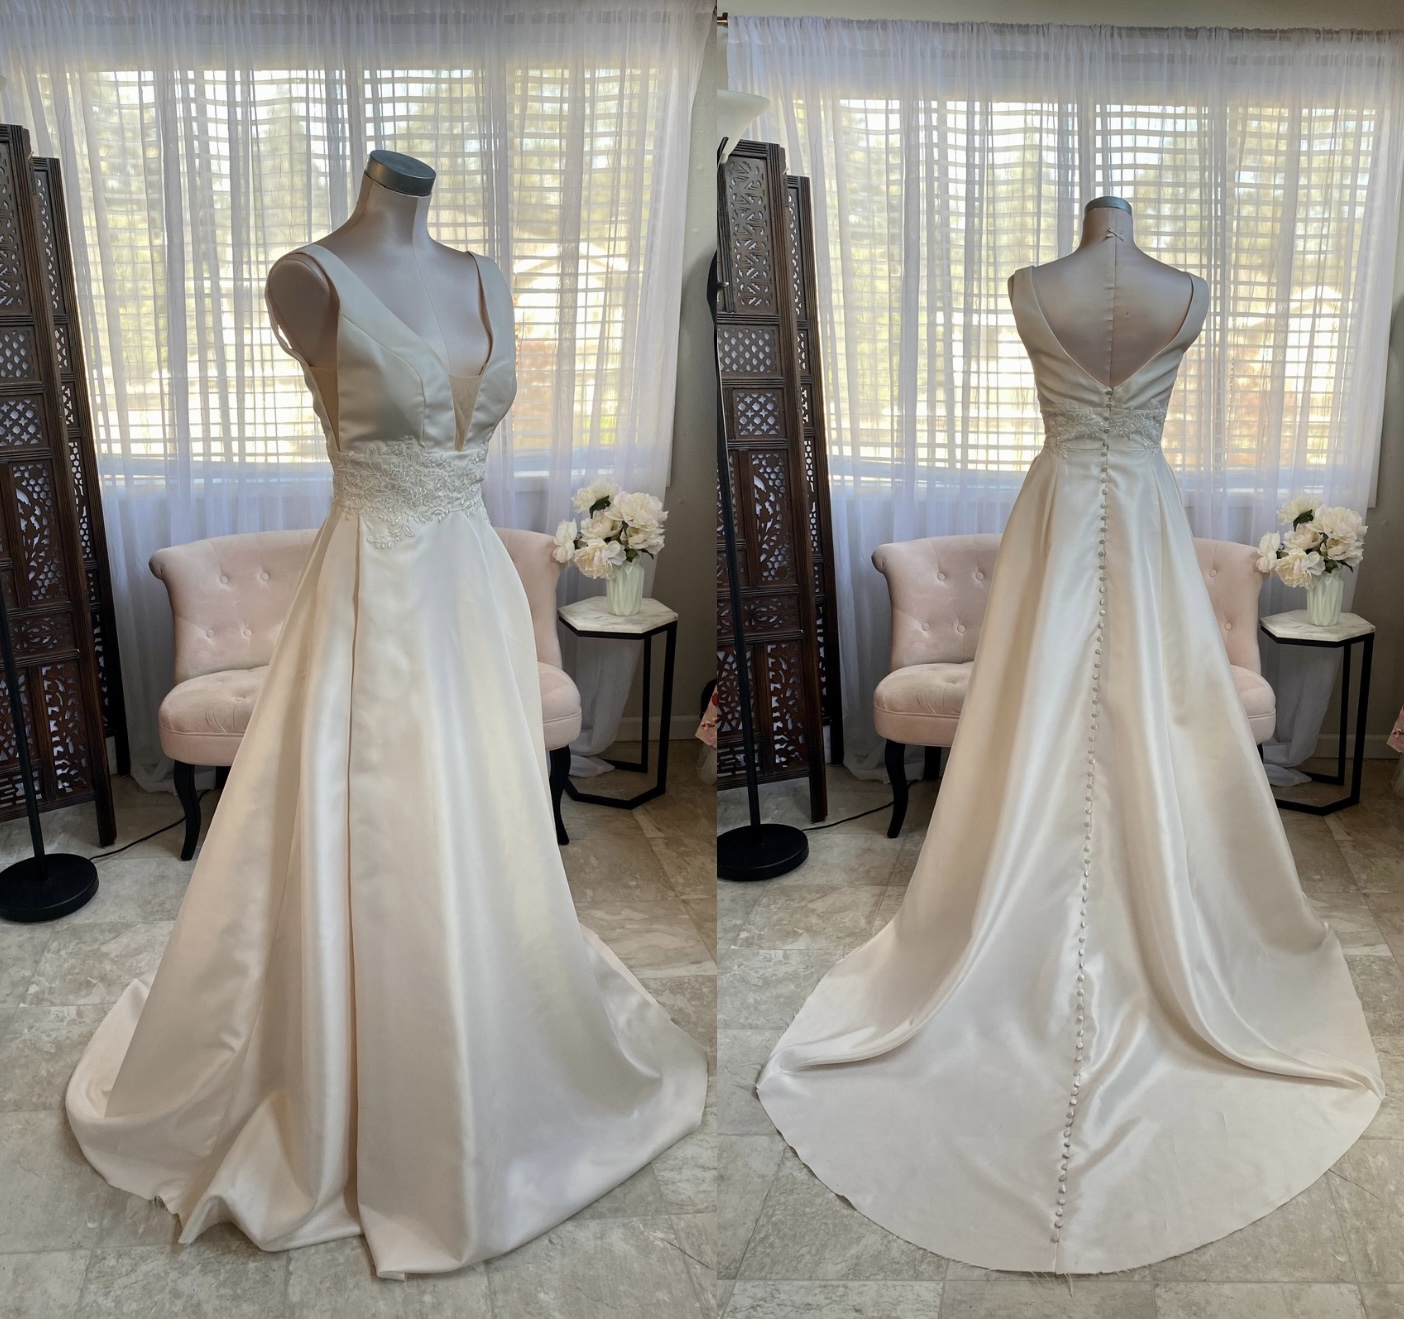
I couldn’t have a bridal collection without the big finale look, so I added a dress to my line up with another ballgown in a very pale peach toned satin. I used a wonderful pattern from Studio of Art Patterns which I found on Etsy. It featured a mesh insert bodice, wide waistband, a gorgeous open slit in the skirt, pockets and a train. I also opted to add little covered buttons, 72 of them to be exact (thank you Robbyn for making all of those little suckers!), all the way down the center back of the gown.
One of many lovely sewing patterns from Studio of Art Patterns on Etsy
This pattern, although gorgeous, was a bear to sew. It’s one for advanced sewists who are experienced with dressmaking and can figure out construction steps without a lot of guidance or direction. The instructions were minimal and the pattern pieces are enormous, so just handling it and keeping the pieces marked and in order are of utmost importance and added to the pain in the assery of it.
Sewing on 72 tiny covered buttons by hand down the center back of the gown, perfectly spaced 1″ apart, took hours…not to mention also sewing on the lace appliques to the waistband, that took days…It has pockets!
As much of a major pain in the ass this gown was to sew, I did really enjoy the process, I learned a few new things, and she turned out quite beautifully. She really is so elegant and dreamy! She reminded my intern Robbyn of delicious wedding cake frosting which I can totally relate to (yumm, cake!)
I named her Sophia! So pretty!
OK, well that wraps up the 9 looks I had walk the runway for my Floral Garden Bride collection! I wanted to share and document my thought process for each look, so this was a long post. It took me a while to collect my thoughts, organize the photos and write this all down, therefore more than a month after the show has passed and I am still not finished!
In Part 2 of this post, I’ll share more about the finishing touches and the day of the runway, so look out for that coming in the near future.
I am no business expert, but I have learned a thing or two about running a small business since I went full time as a entrepreneur nearly two years ago. I have learned that it takes long hours, major sacrifices, dedication, hard work and finding ways to get things done faster, better and more efficiently all while trying to spend less money and earn more.
That’s me: Boss Babe Stephanie showing off some of my work!
I am very proud of my business and what I do. I am a designer seamstress and dressmaker, creating custom garments for ladies focused on special occasion, bridal and tailored apparel and offer bridal alterations. I have managed to grow a client base, hone in on couture and quality sewing techniques, get the word out on what I do, decline work that doesn’t fall into my specialties or timeline (or that I simply don’t want to do), open a little boutique space outside of my home, price my products and services accordingly, earn more money year over year, and become better and more experienced with each job that I take in.
I have paid off all of my debt, paid off my car in full, and have a little chunk of savings in the bank that I would like to invest back into in my business.
I need a plan!
It’s now up to me to work on my business plan and focus in on how to grow my custom sewing & dressmaking business. I need to sit down and figure out the smartest means where I should invest my money, and that starts with a plan. I have read several books and articles on running and growing a small business, now I need to take what I have learned and apply it to my situation.
A quick shot of me and a couple of dresses I made back in 2012
Although I can’t do all of my ideas with the budget that I have, here are some of the specific ones that I have thought about that I can invest in to make my business run smoother, more efficiently, and make a profit:
*new sewing equipment, namely an industrial sewing machine
*take on an intern or part-time contract employee
*hire a professional accountant to handle business finances
*physically (and mentally) declutter & organize
*automate scheduling
*improve website
*invest in and create sellable inventory-manufacture a small collection
*invest in marketing and advertising
*hire a professional photographer
*market and target customer research
*research and development
*foster newness and excitement
*continued education
*travel
*learn from those who are more skilled and experienced than I am
*hold events to attract new clients, thank existing and previous clients
*network
Me and my models walk the runway in my Love, Stephanie designs 2016
Do you have any good advice for growing a business, taking it to the next level with smart investments? Has something worked for you, or held you back from success? I’d love to learn more about it and try to figure out the best ways to take my business to the next level.
Me finishing up gown I made in 2023 for a special lady Michel. She said to me recently “I don’t think I’ve ever felt that gorgeous in a piece of clothing”. Words to live by!
I know I need help and can’t do alone. I also know that there are success stories and big dreams can come true, it just takes hard work, smart decisions and perseverance. And a plan.
This Boss Babe is ready for business!
Meanwhile, I’ll keep on plugging away at my existing client needs, holding up my end of the agreement, while trying to create newness and examples of my potential and sharing with my audience. Soon I will be posting about some lovely projects that I have been working on, but have to hold back the excitement until the client’s special occasion occurs so not to spoil the surprise.
Photo shoot dream project come true of a custom gown I made for lovely Payton. More please!
Life is short, time is limited, and I want to make a difference and impact in this world and in the lives of others. Even just a small part, a little influence, make someone smile and feel beautiful in what they are wearing.
That’s all I want out of this life, at least business-wise. I feel strongly that what you wear says a million words and evokes a thousand emotions. So why not that be me to make that a reality!
Like a beautiful breath of fresh air, Peyton came to my studio via word of mouth and brightened up my life! She is a lovely, fun & fresh young lady with long dark hair and a beautiful warm smile.
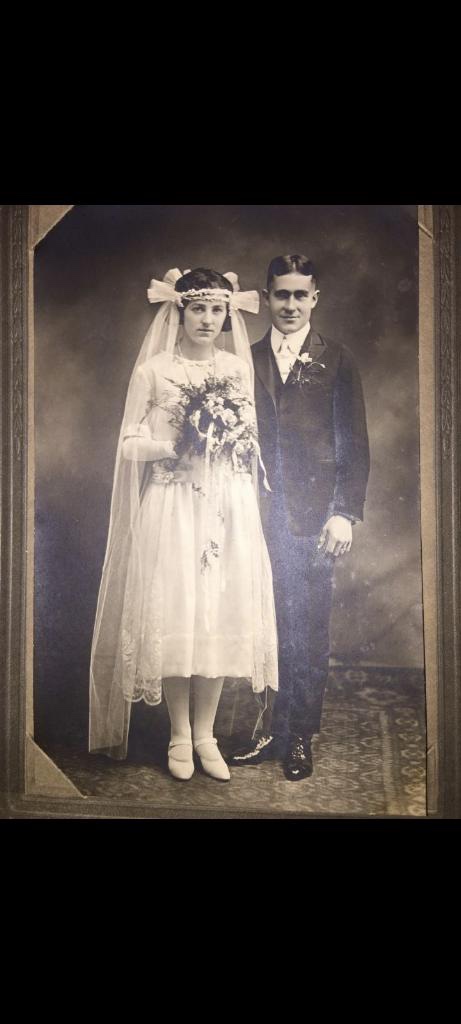
She had with her two dresses: one from her grandmother’s wedding from the 1940’s, and one that belonged to her great-grandmother for her wedding dating back to the 1920’s! There also were a couple of bridal accessories in the garment bag including sheer gloves and a detachable collar with lace edging and covered buttons. She wanted to use the dresses in some way to create a dress for her own wedding. She had been given permission from her family to use the dresses in any way that she wanted, but with the condition that she incorporate parts of the dresses into her own wedding dress.
She sent me some ideas of what she wanted for her dress: Something simple for the top, not fussy, and a tea-length skirt. Just pretty, romantic and comfortable.
The lace from the bodice of her grandmother’s dress was unusable as it was discolored and sadly disintegrating from age. The skirt, however, was in good condition and made of a nice quality silk chiffon and lined in a lightweight silk material.
She trusted me with her heirloom dresses and I got to work deconstructing her grandmother’s dress. We decided that great-grandmother’s dress was far too discolored and not a good shade of white to use, so we left that one in-tact.
I ever so carefully removed the vintage stitches, many of them hand-sewn, separating the bodice from the skirt. Once the skirt was off, I overlocked the very top edge of the skirt to give it stability and keep it together for what was coming next for it. A bath!
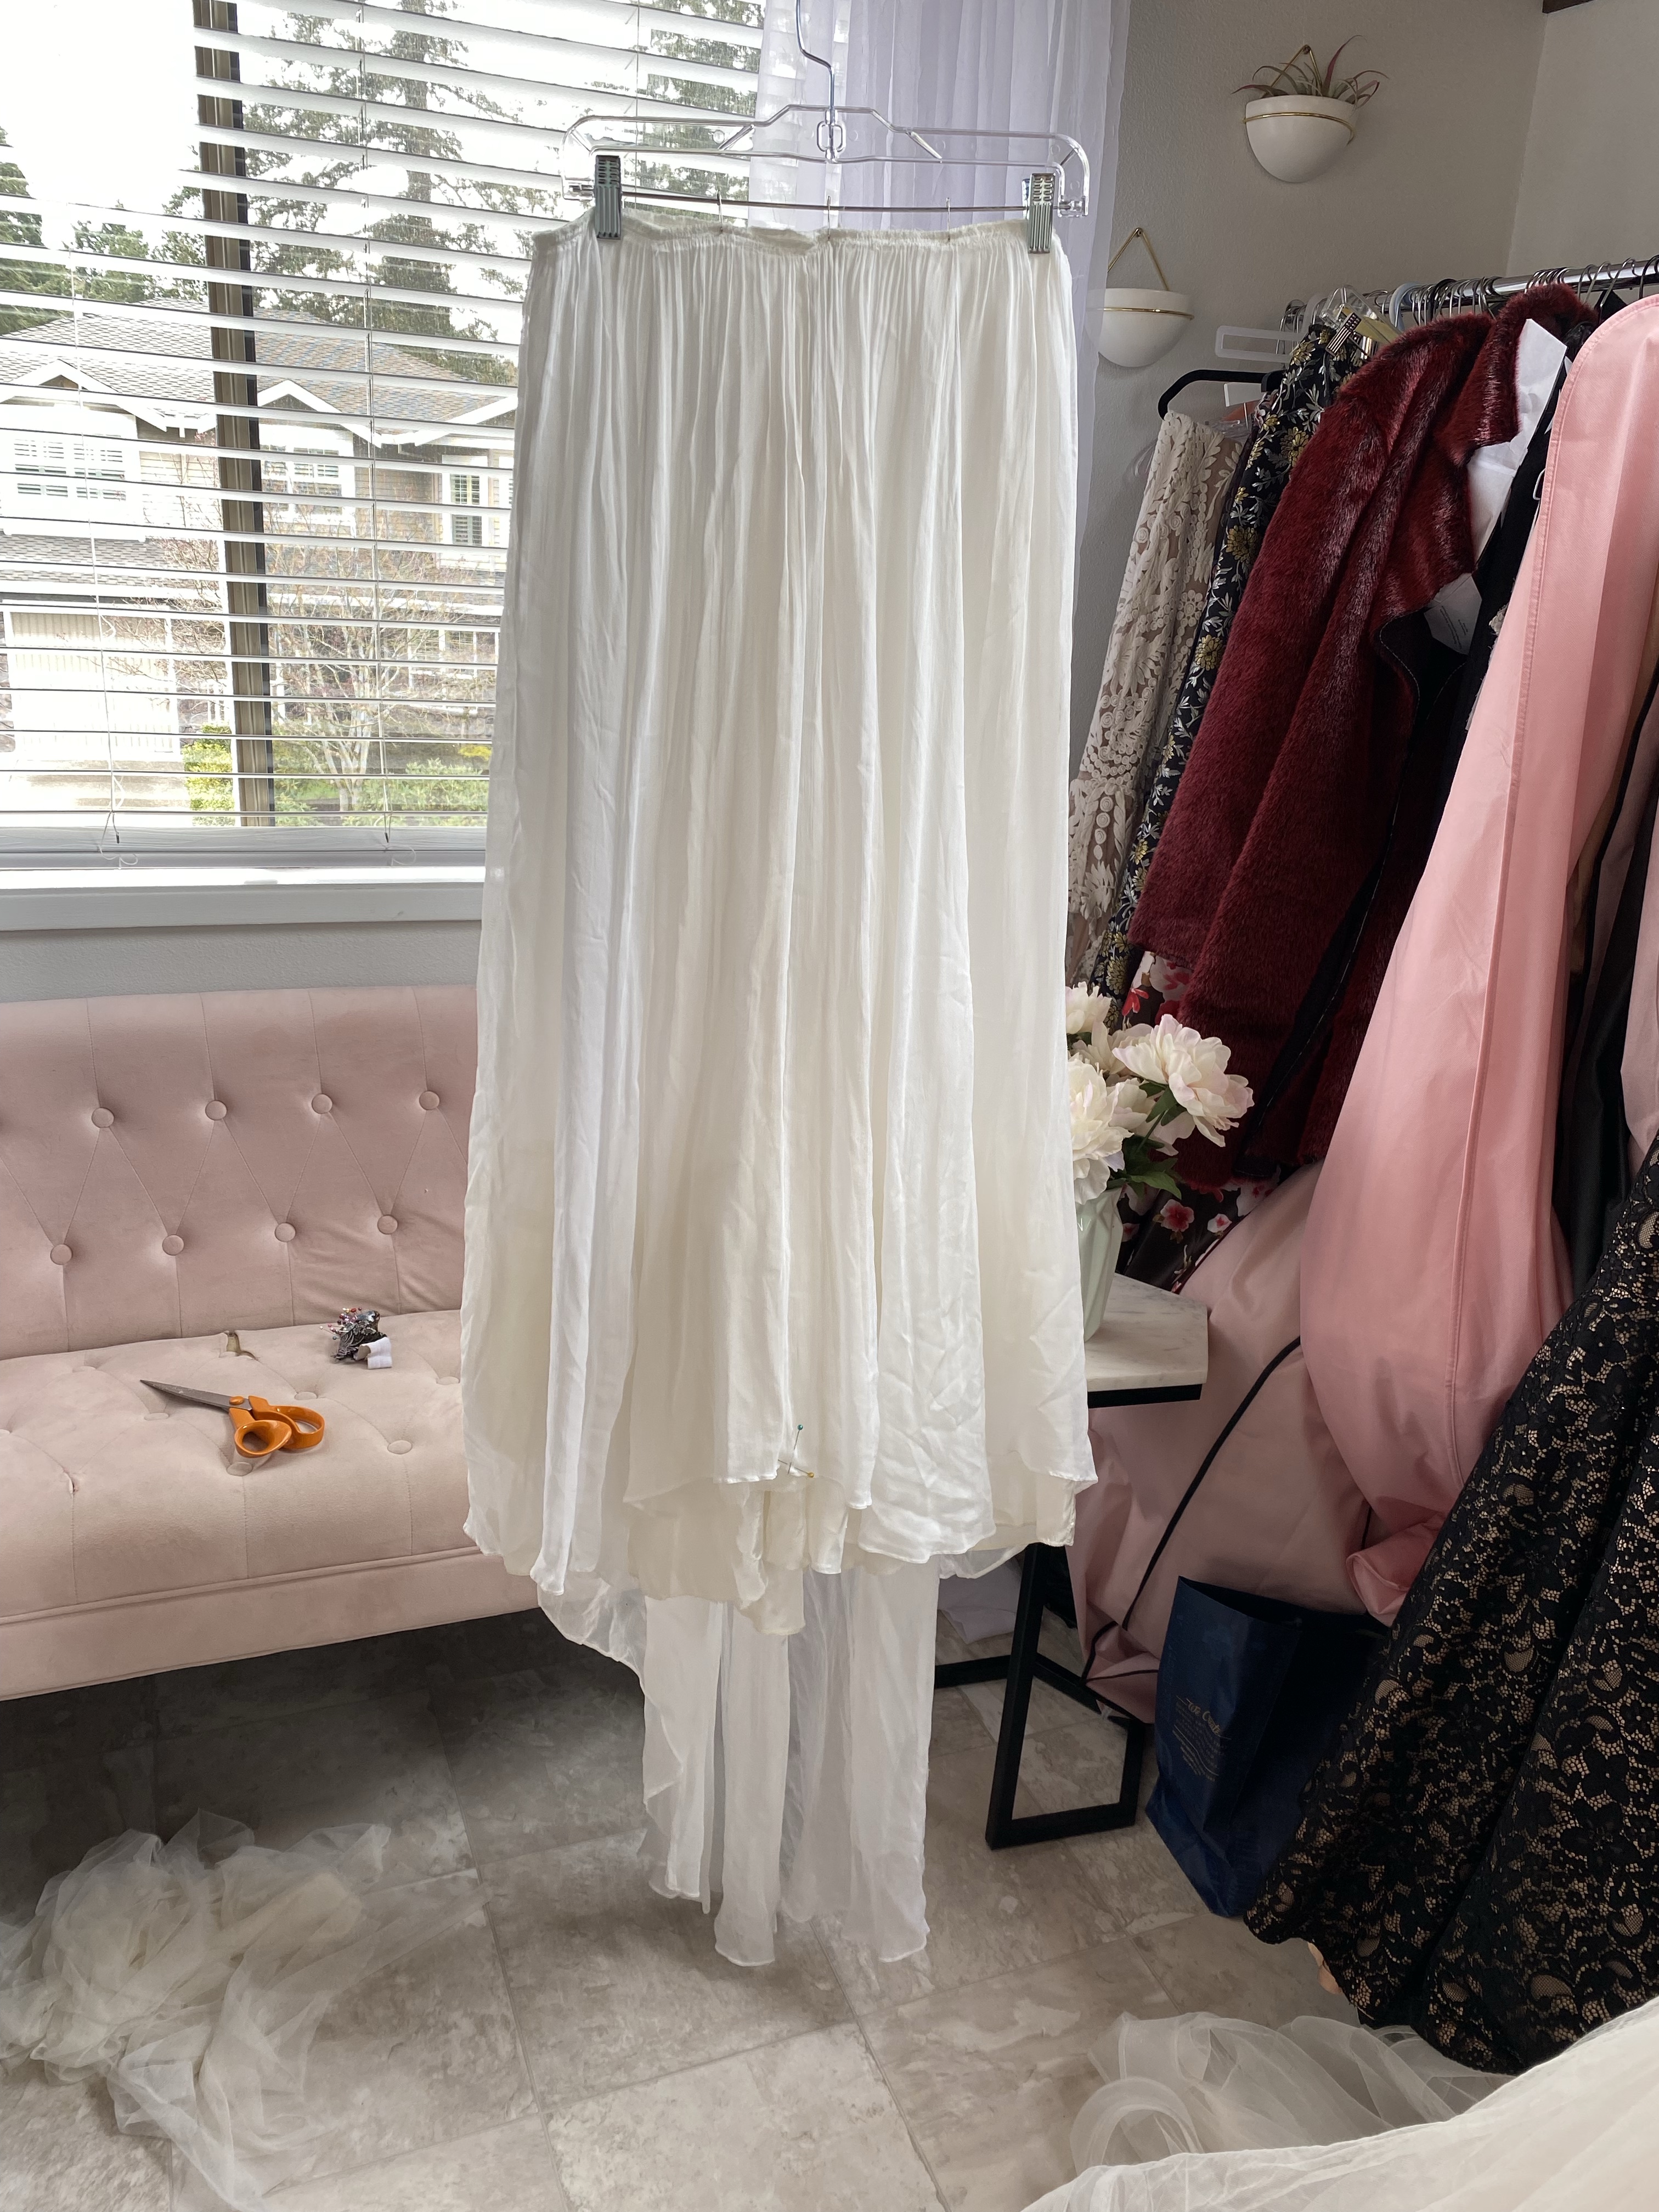
I gently laundered the detached skirt in my clean bathtub in warm water with Woolite and a sprinkle of Oxyclean, gently swishing it in the suds and rinsing it out with warm water. The bath water was pretty dingy after all of these decades! After pressing out the dampness in a clean white towel, I then laid out the skirt to air dry on my drying rack.
Once the skirt was completely dry, I hung it on a skirt hanger and carefully steamed it out with my handy dandy steamer machine. I love that thing! The skirt came out like a dream! It was soft, flowy, fresh and pretty. Best of all, the wrinkles, dingy hue and “old lady” smell magically disappeared! Horray!
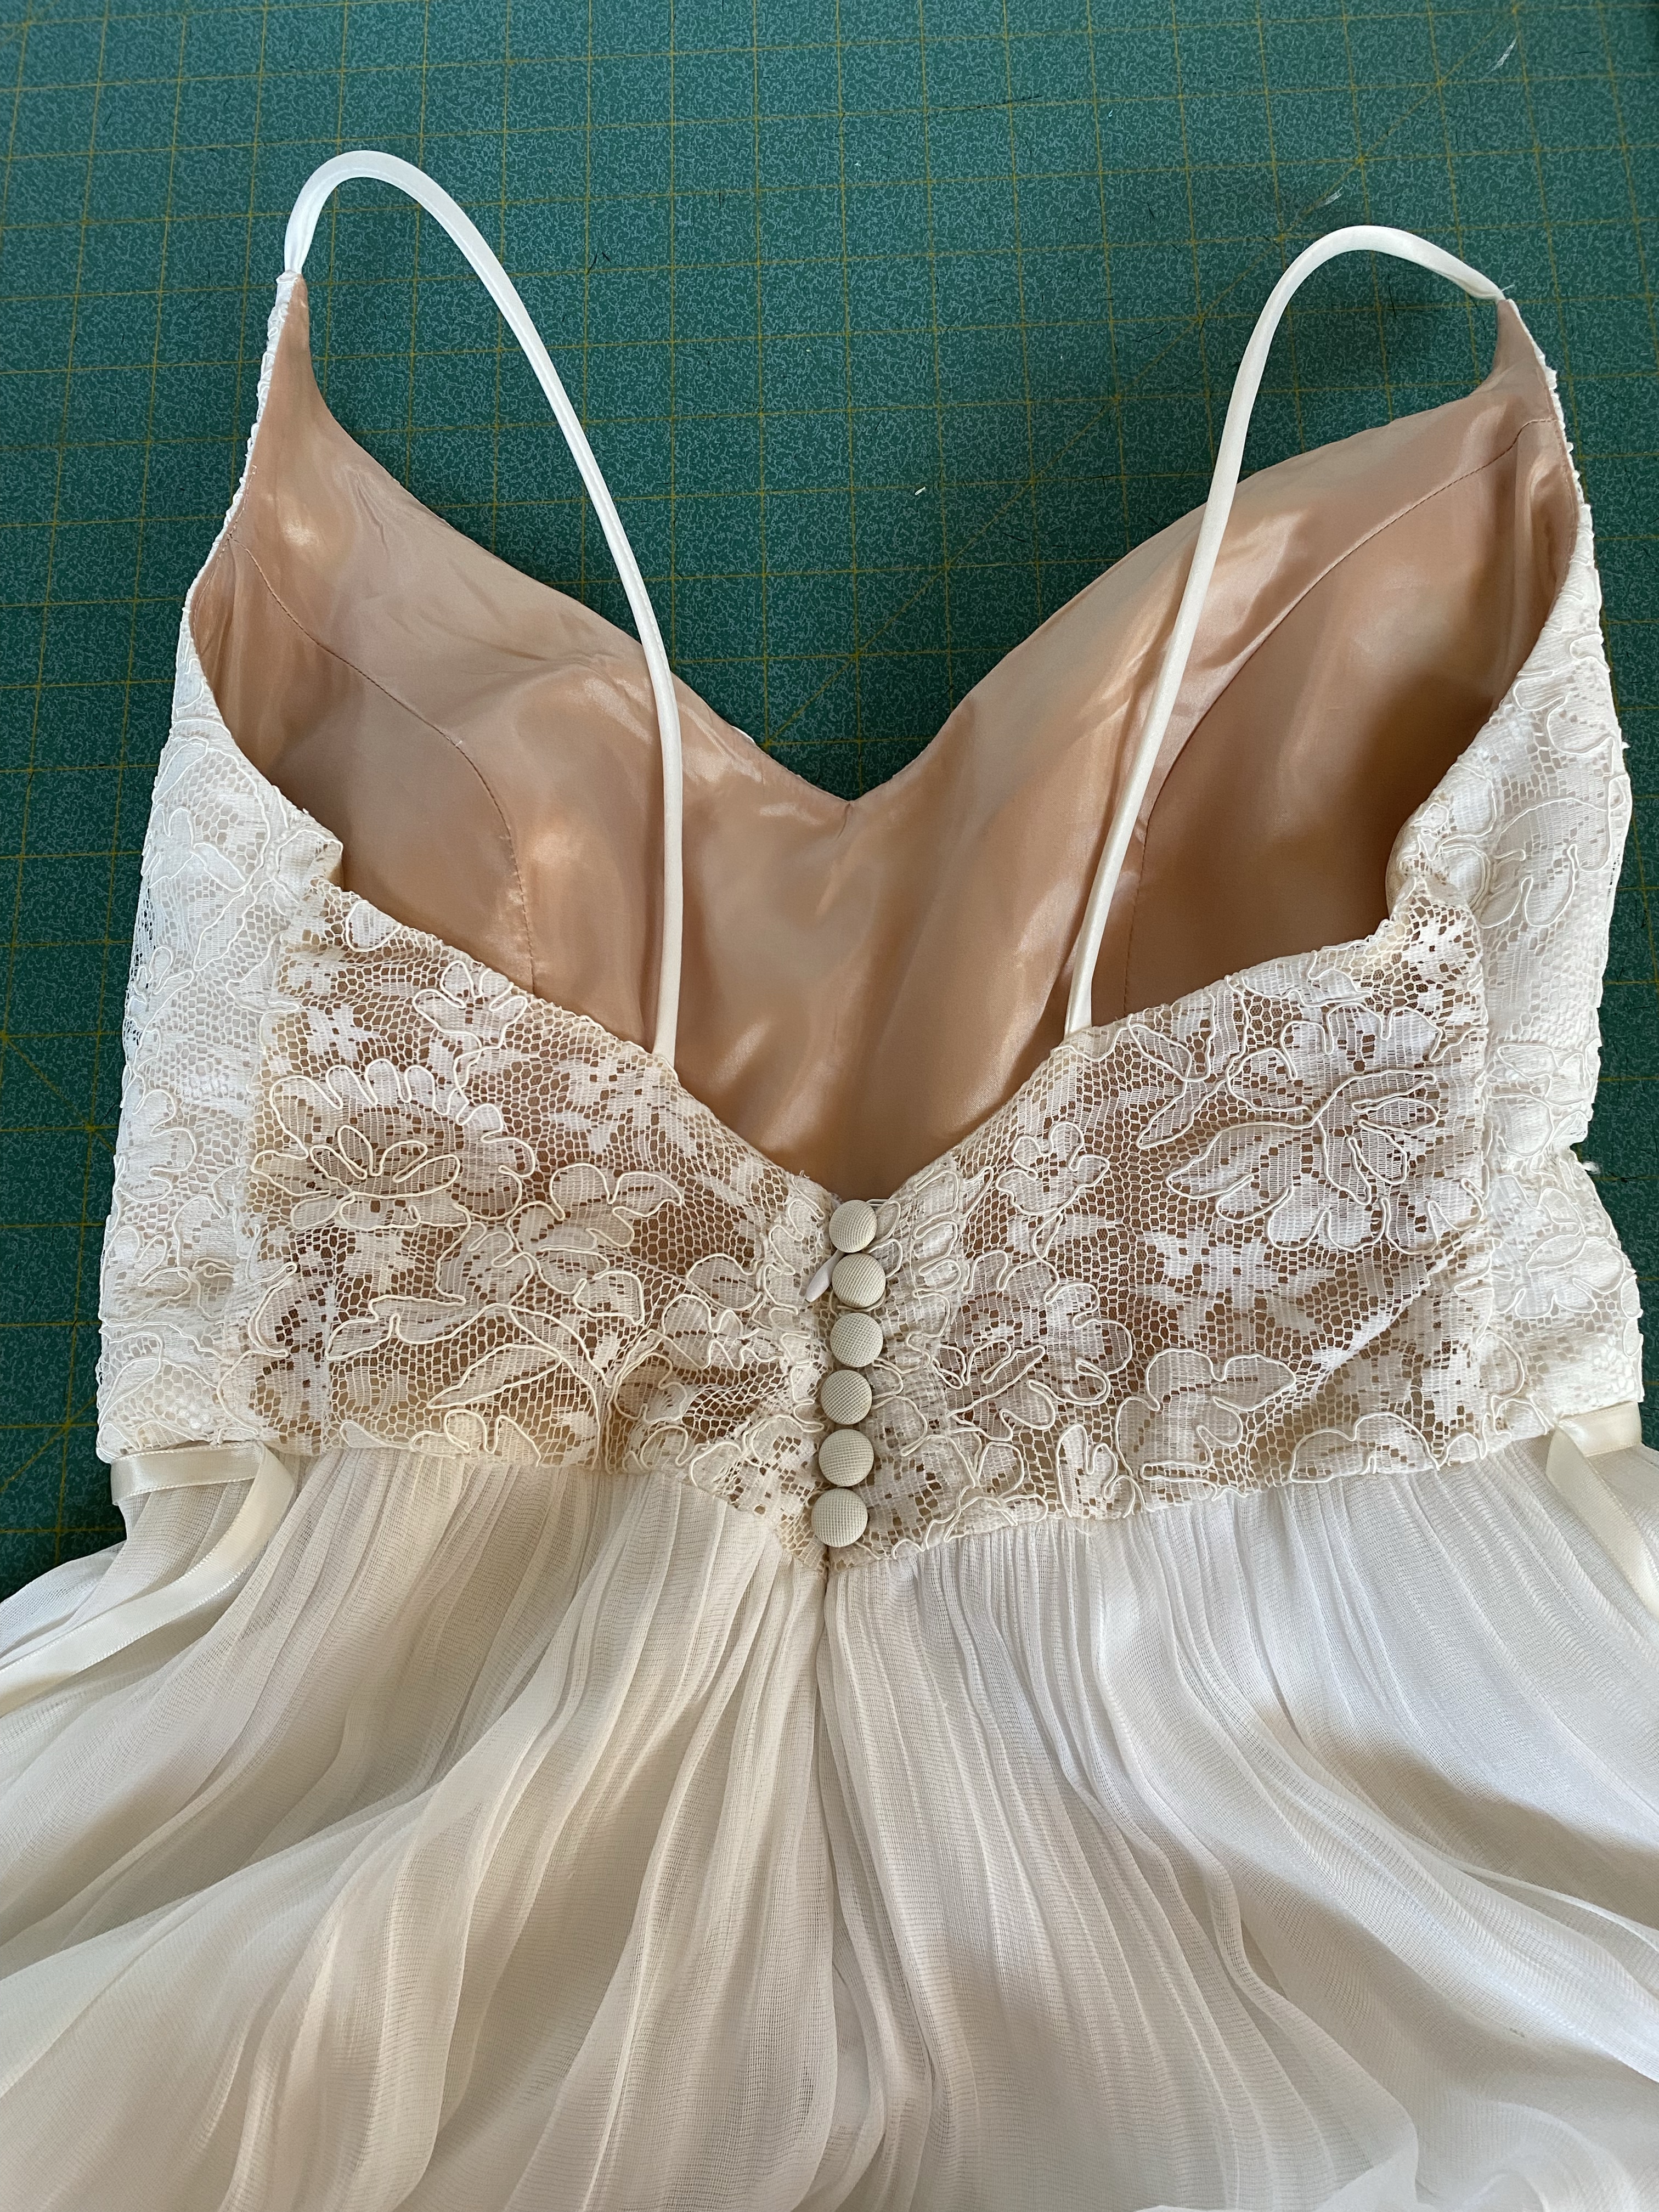
Meanwhile, Peyton had homework to do involving purchasing a new lace material that she wanted for her custom-made bodice to be attached to grandma’s skirt. She found a lovely floral lace fabric and some lining that she delivered to me to be sewn up into a fitted bodice that I had already made a muslin mock up to her liking.
Fitting time! This is always an exciting, and totally nerve-wracking, stage in the dressmaking process. The bodice is mocked up in muslin and pinned to the skirt. So far so good!
After the fitting and approval of the work so far, I got straight into cutting out the bodice in lace and began to construct it.
An attempt at making a hidden seam in the lace.Bra cups sewn into the interior of the bodice
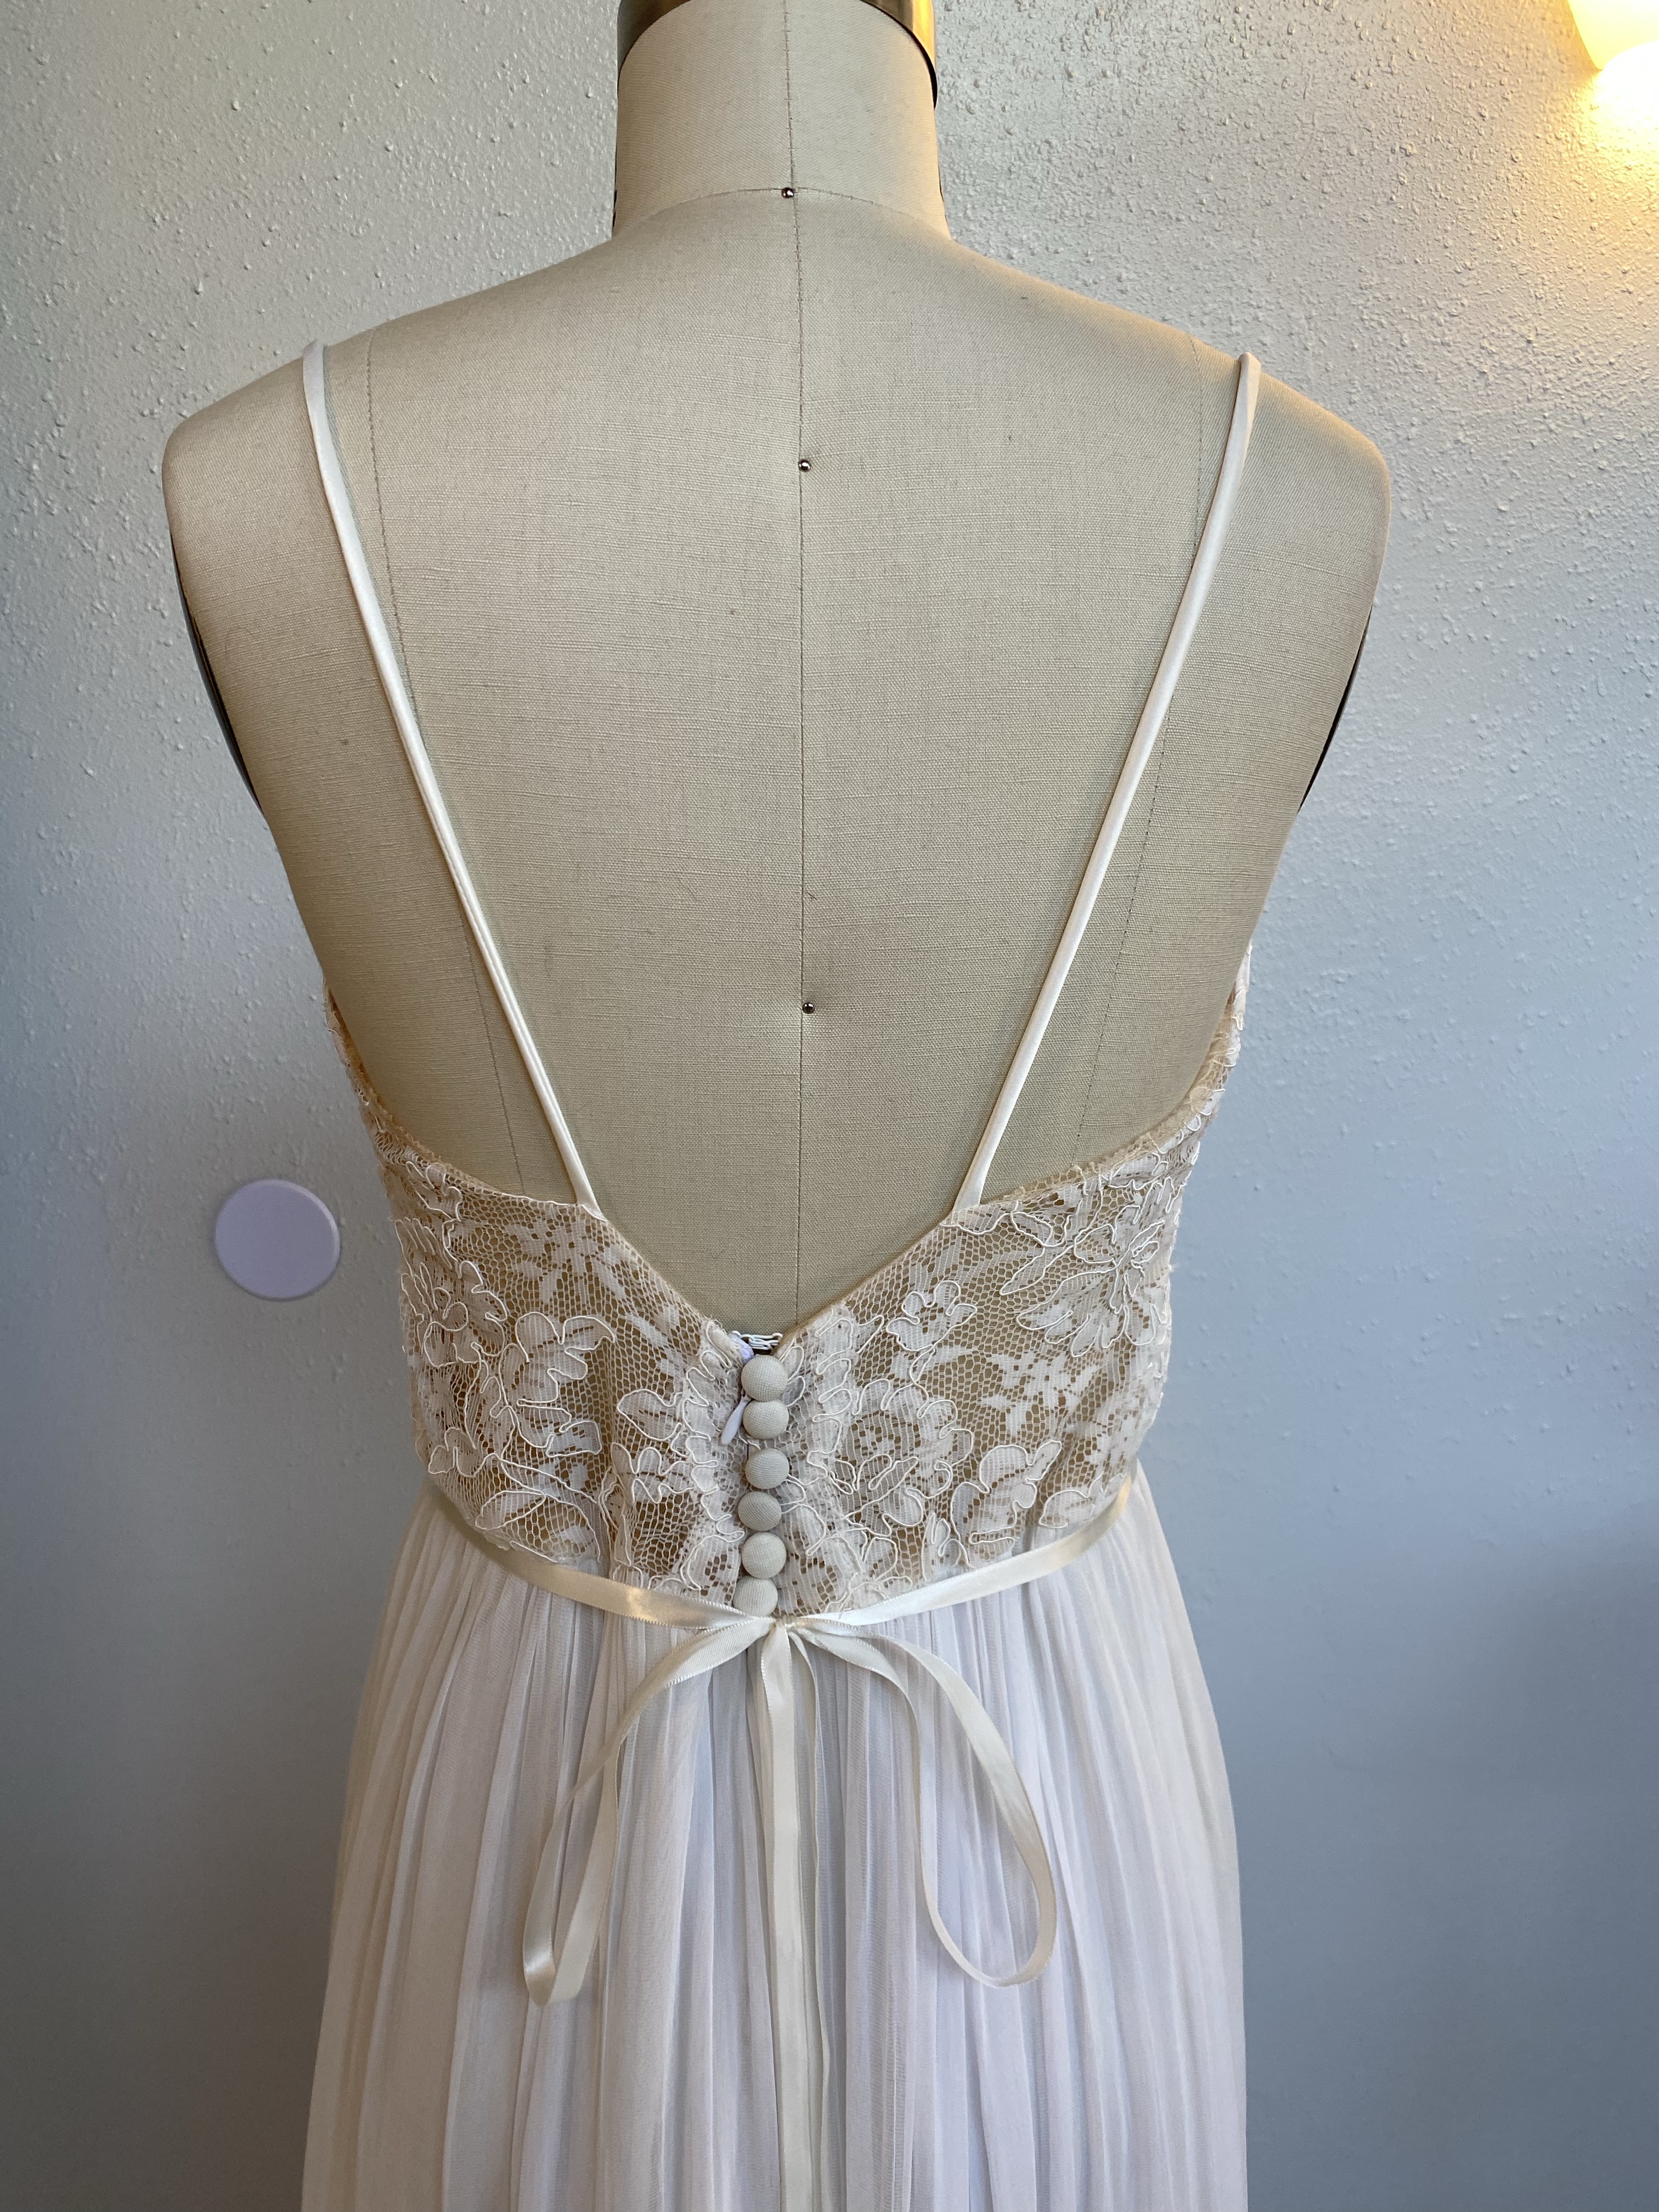
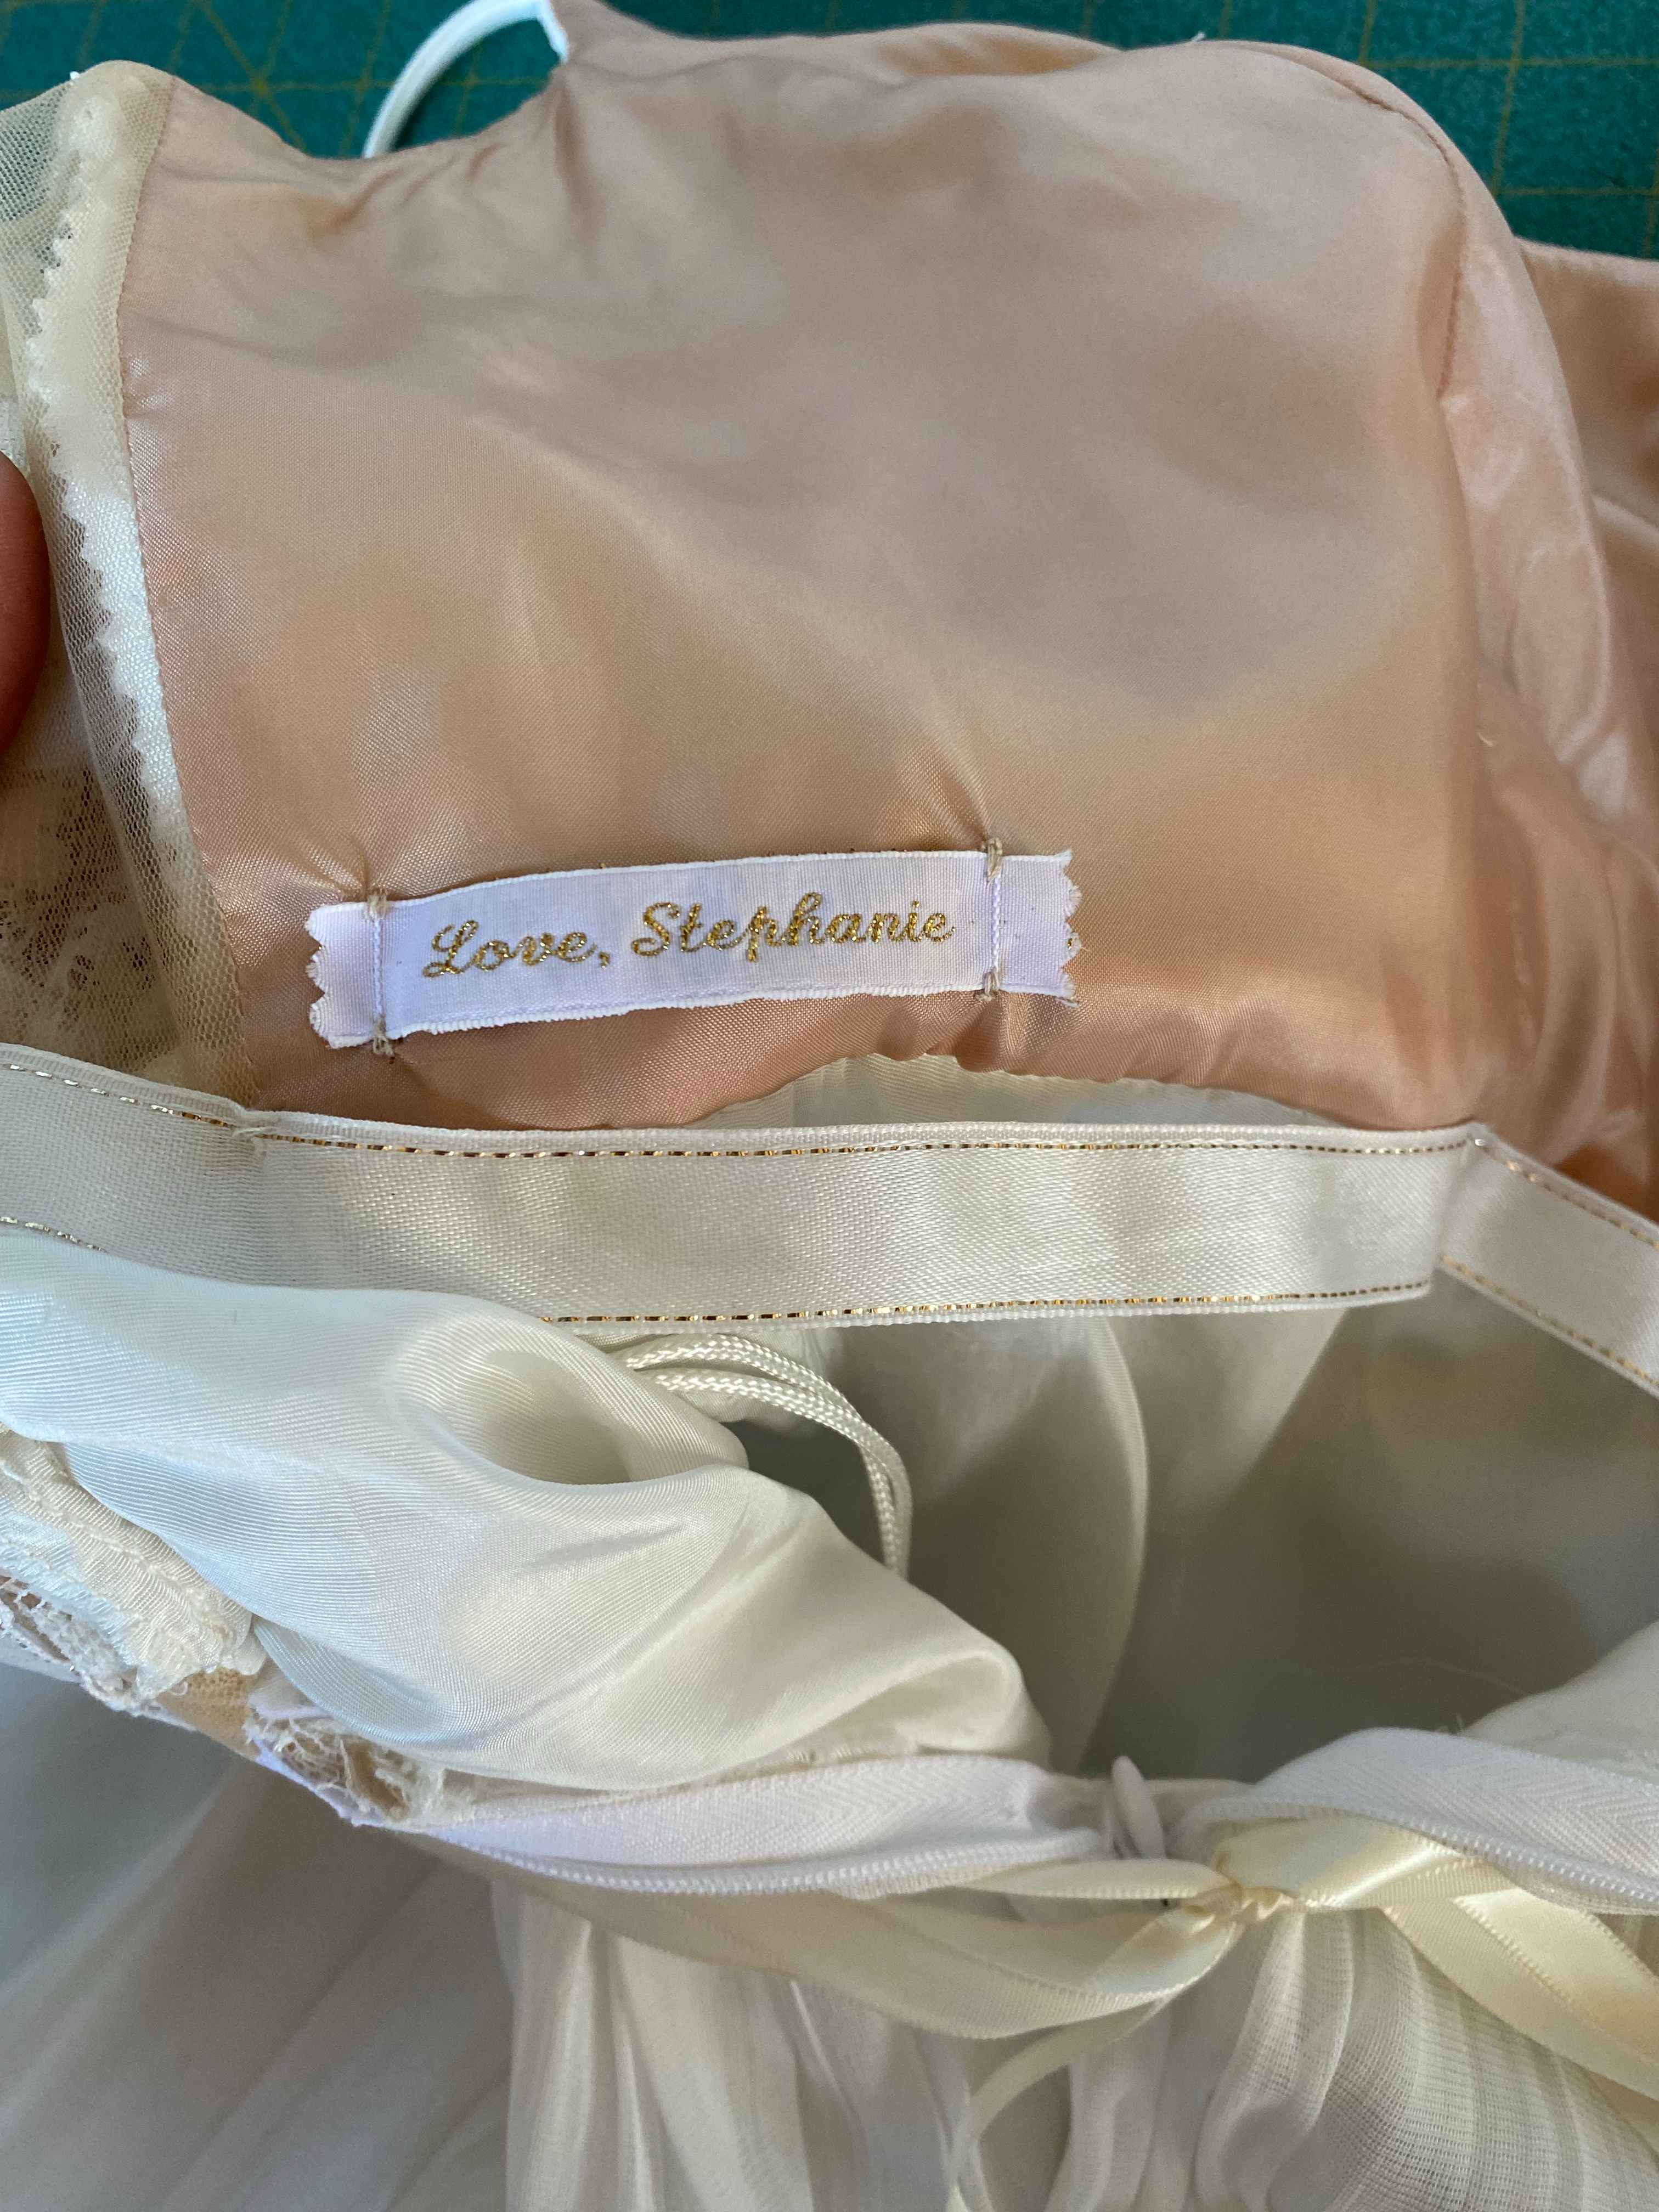
Fast forward to the dress being close to finished, I added the final touches with a new zipper, buttons from grandma’s gloves and a new little ribbon belt. I the share photos with the bride and schedule the last fittings and deadline.
The interior of the dress including a ribbon stay, hanging loops and an old version of my Love, Stephanie label.I love to present my custom-made garments to clients in a garment bag embroidered with a monogrammed initial.
I was just so touched and honored that Peyton came to me to create this special and sentimental wedding dress for her. I loved working with her, her family and loved ones. She is a delightful and beautiful person and I am touched to have been a part of her wedding!
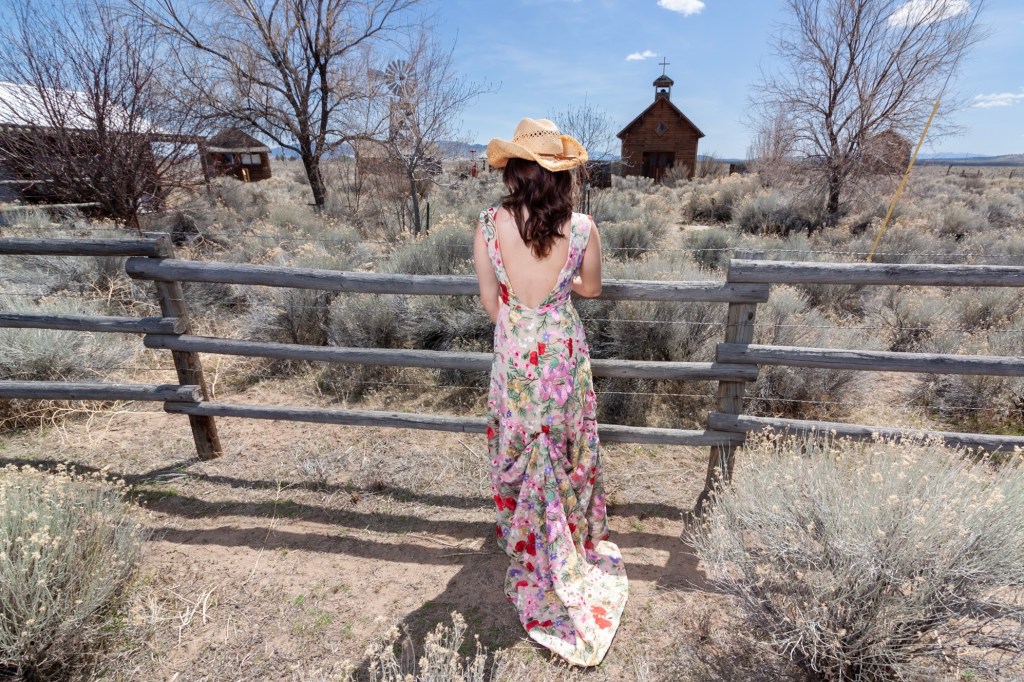
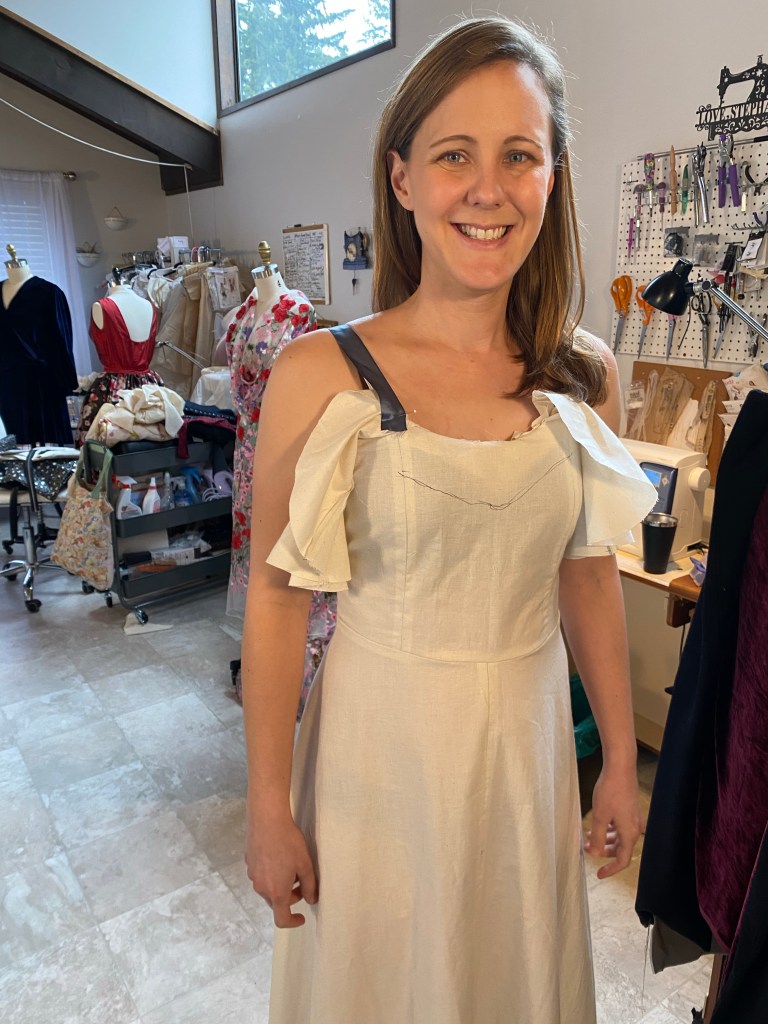
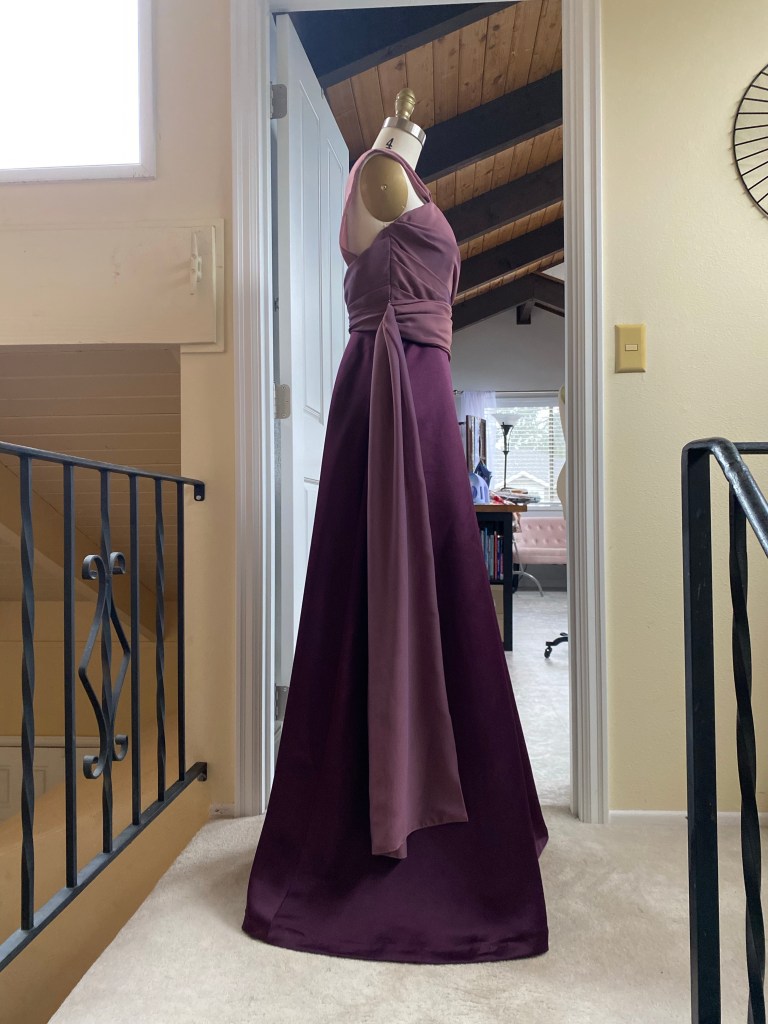
This journey began with a bright eyed beauty, curious to know more about what I might be able to create for her and what the process of creating a custom dress looked like. Laura contacted me, looking for a custom dress to wear to her sister’s wedding event. She wanted a dress with a 1930’s feel, one that had fabric interest with unique design details.
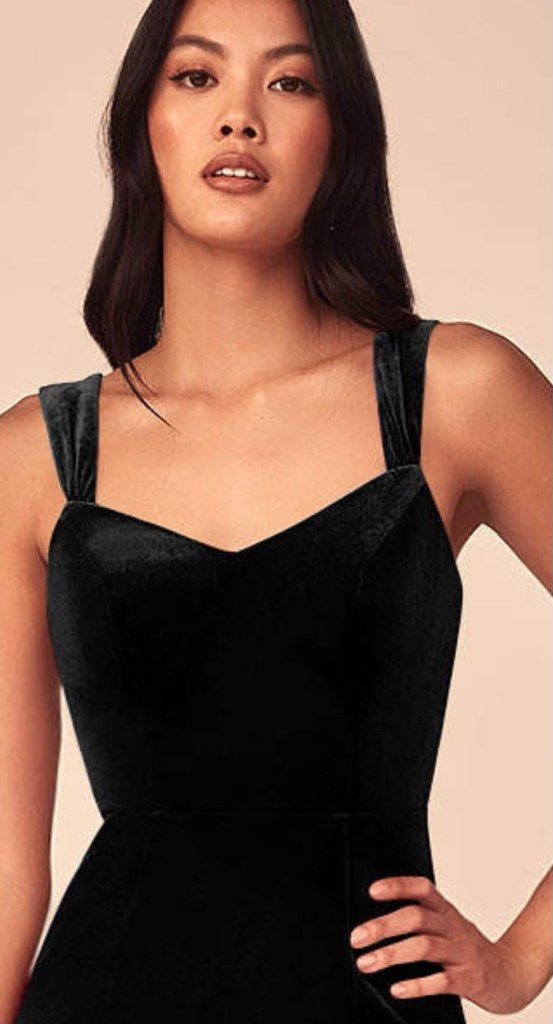
She had seen a dress in a movie that she loved and wanted to get a similar look. She sent me photos of screen shots from the movie, plus some inspiration shared on Pinterest
She loved the rich tones of the fabric combination, and the soft ruffled neckline of this dressShe also loves the straps of this dress
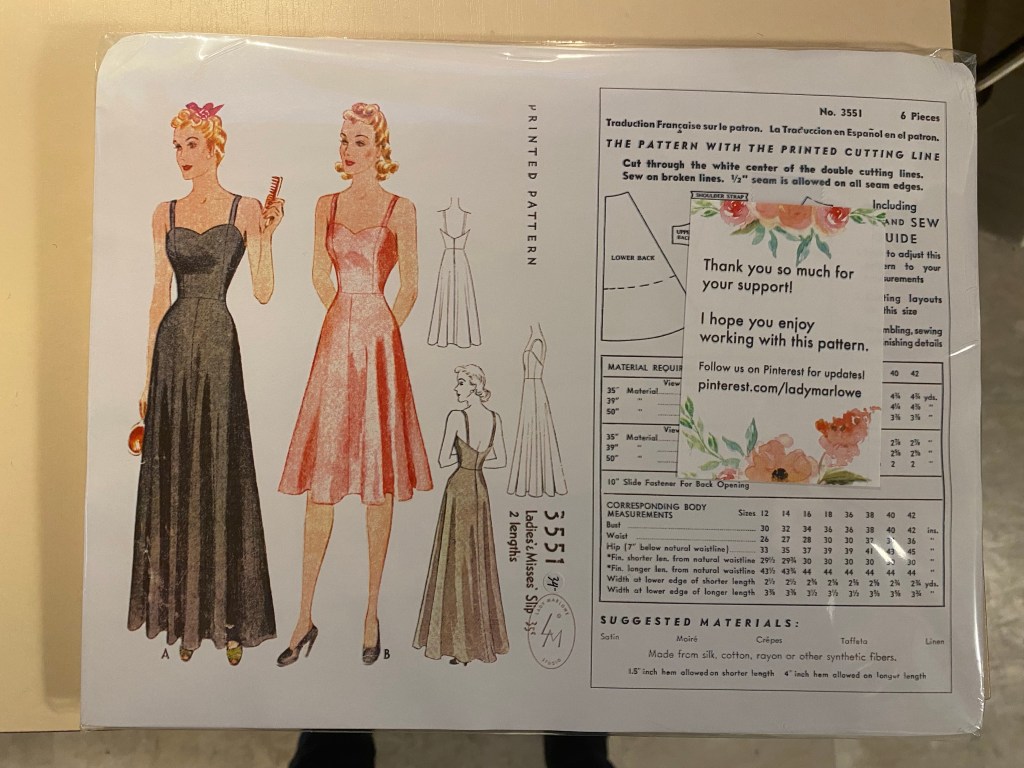
I got to work and found a pattern that was designed in the 1930’s and had the basic shape of the dress style she liked including the sweetheart neckline, the low back and the long, softly shaped skirt
I found this pattern and ordered it from Etsy
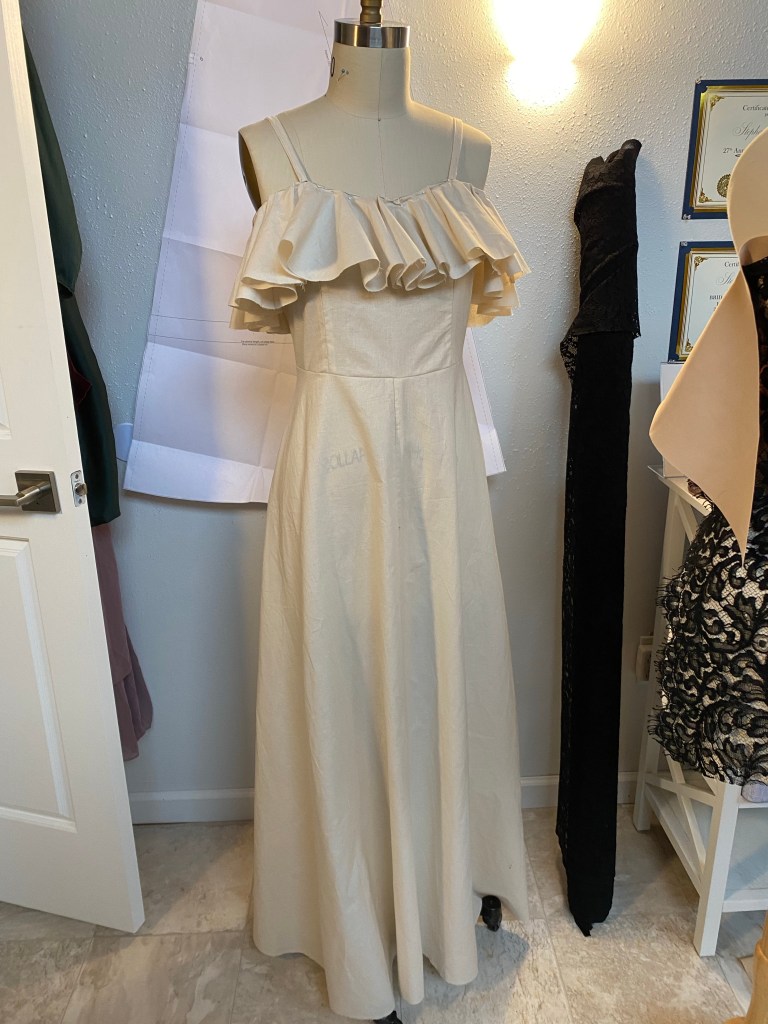
We hit the fabric store shortly after I received the pattern, and I also made a mock up of the dress for her to try on
It was my first time making a ruffle like this at the neckline of a dress. Although we like it, we decided it was a bit too much for her.The fit of the dress was great, but here we are playing with different strap placement and neckline shape
Back to the drawing board!
As the construction of the dress progressed, I kept Laura posted with details of what I was doing and got her input on any options she had.
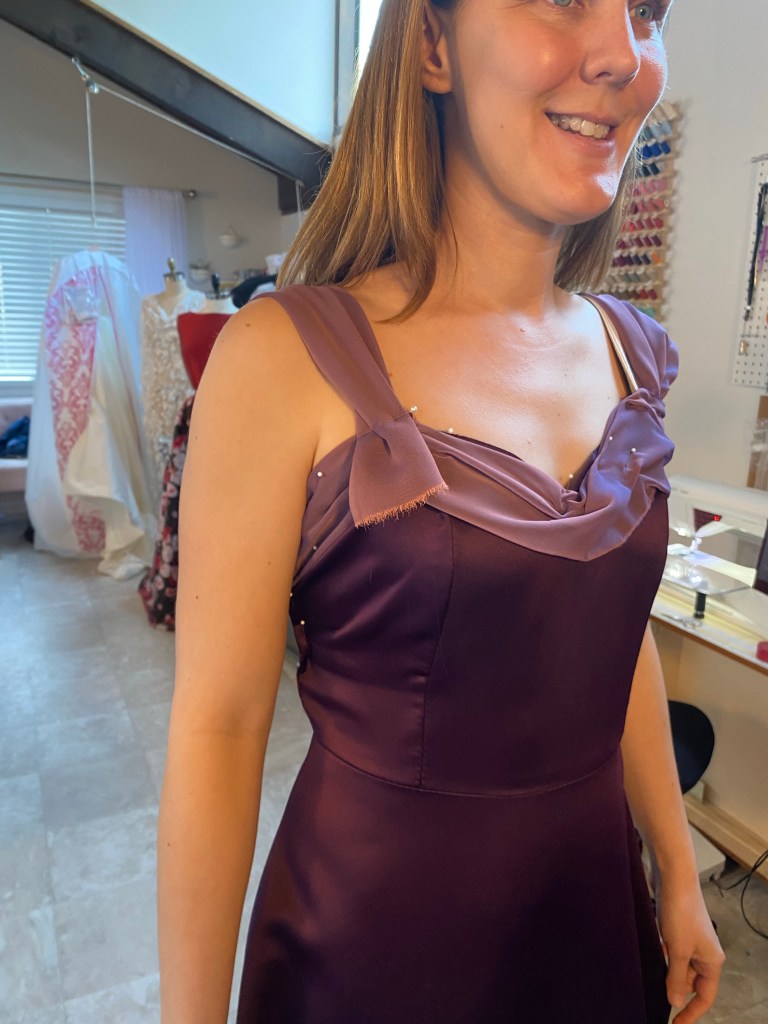
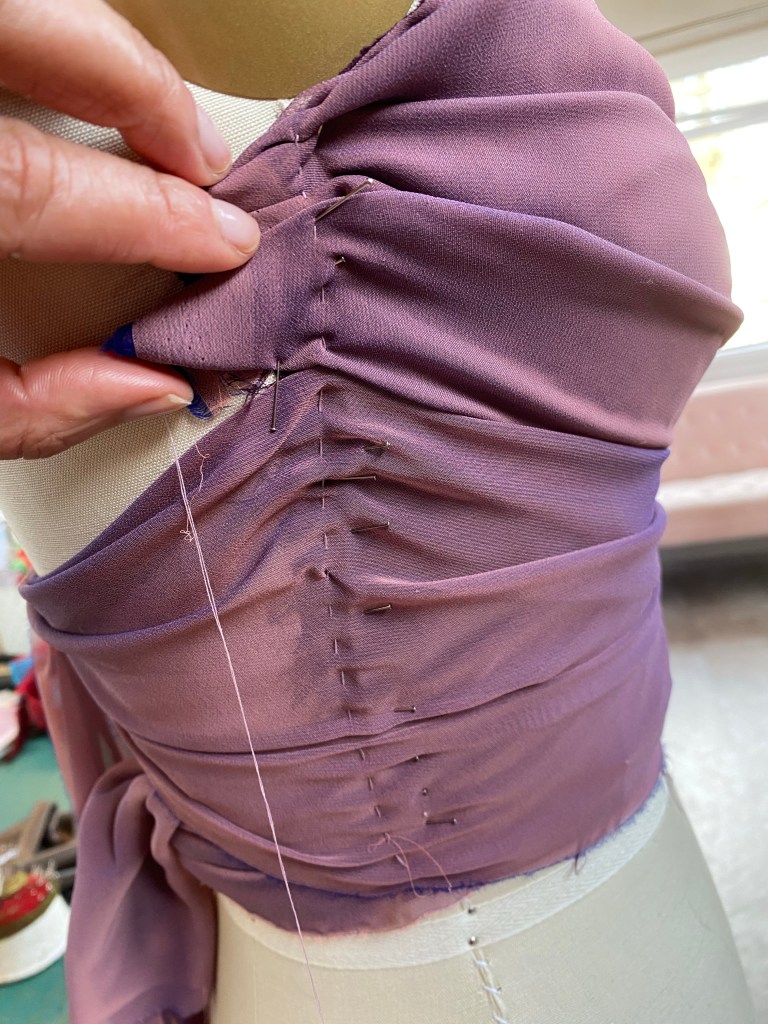
She loves the combination of the drapey lavender chiffon with the deep plus satin. I also thought the colors were beautiful together, just the placement was not as compelling as it could be.
I brought up an idea of draping over the entire top of the dress, allowing both fabrics to have their moment. I presented her with this idea of draping and criss crossing the chiffon over the bodice.
She really like that idea, approved it, so I got going on making it happen!
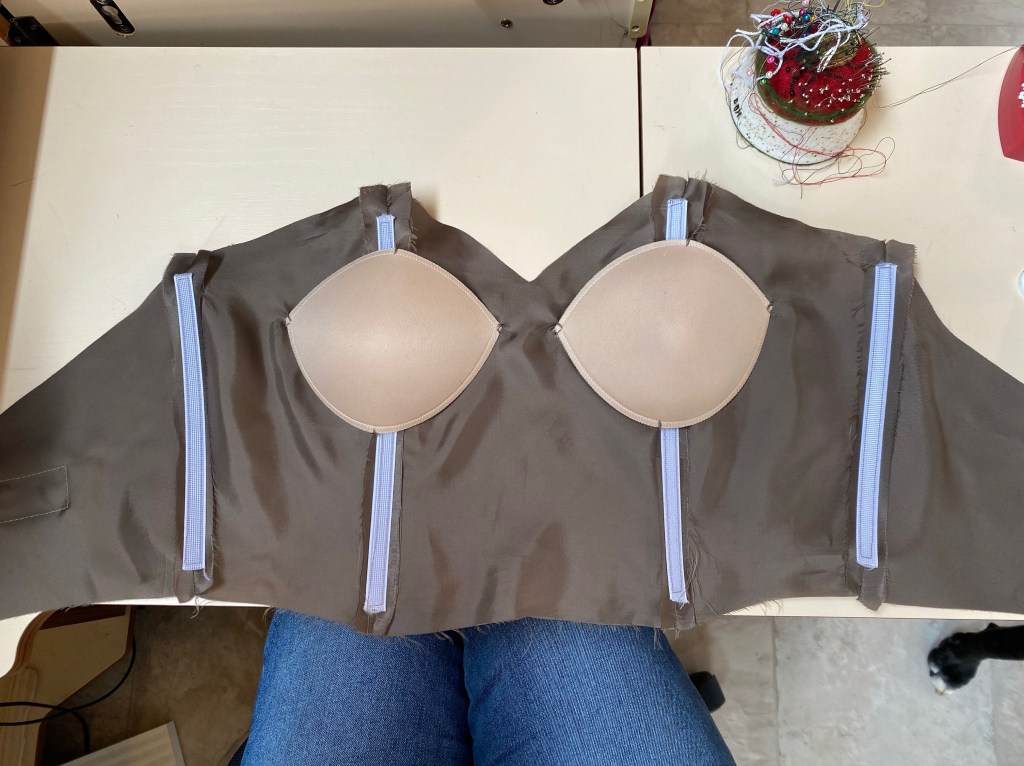
I finished constructing the dress underneath by adding boning and bra cups to the lining of the dress.
The lining turned out beautifully and was a pleasure to look at as she slipped into the dress. That kind of detail makes me happy, and hopefully also the case for the wearer!
The bodice and skirt lining ready to be installed into the dress!Plenty of pining and hand sewing happening on my trusty dressformThe bodice front, sides, and eventual side drape piece, all pleated and basted, ready to be sewn together, then sewn over the main dress bodice.
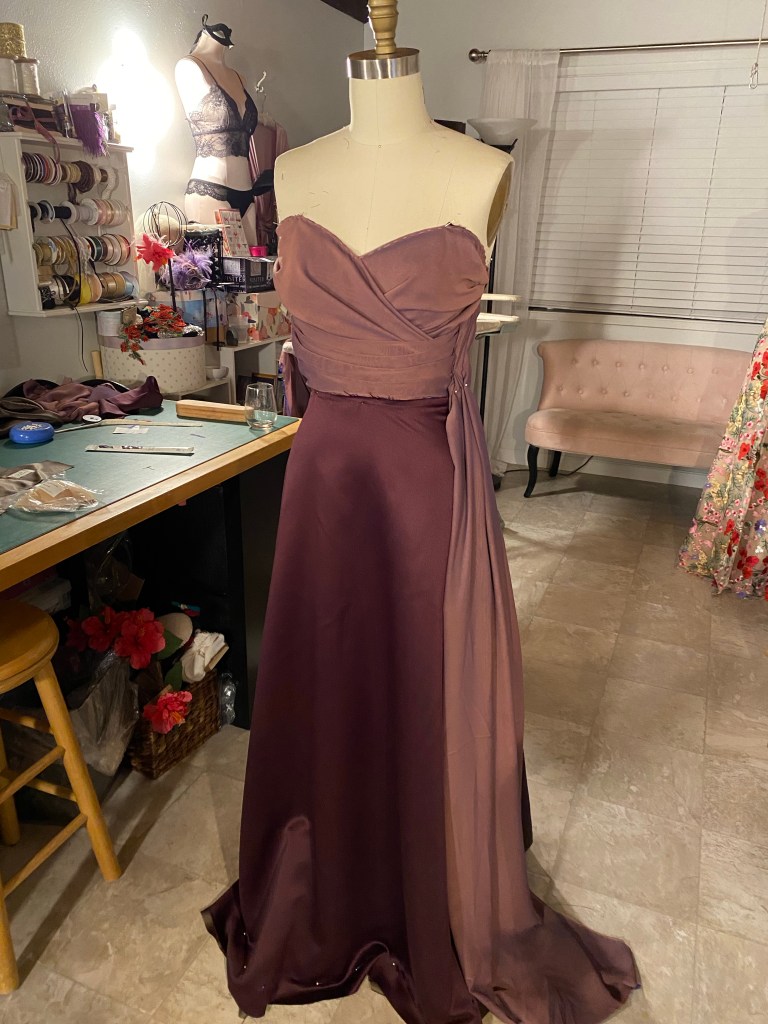
So after quite a bit of trial and error, as this was my first time creating such a dress with the draping detail, I finally finished the gown!
Here are some photos of the versions I sent over to her before finishing up on her final version:
She looks so pretty and elegant, even unfinished!The drape happening in the back would also look so gorgeous! I might need to make this dress again just for fun!
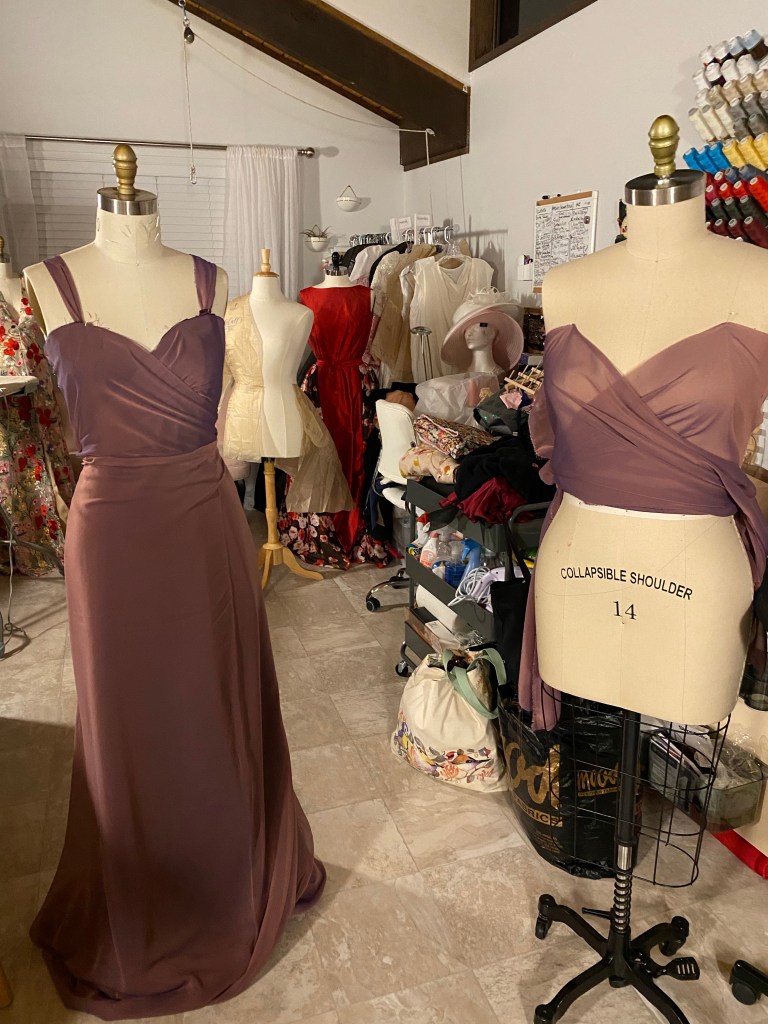
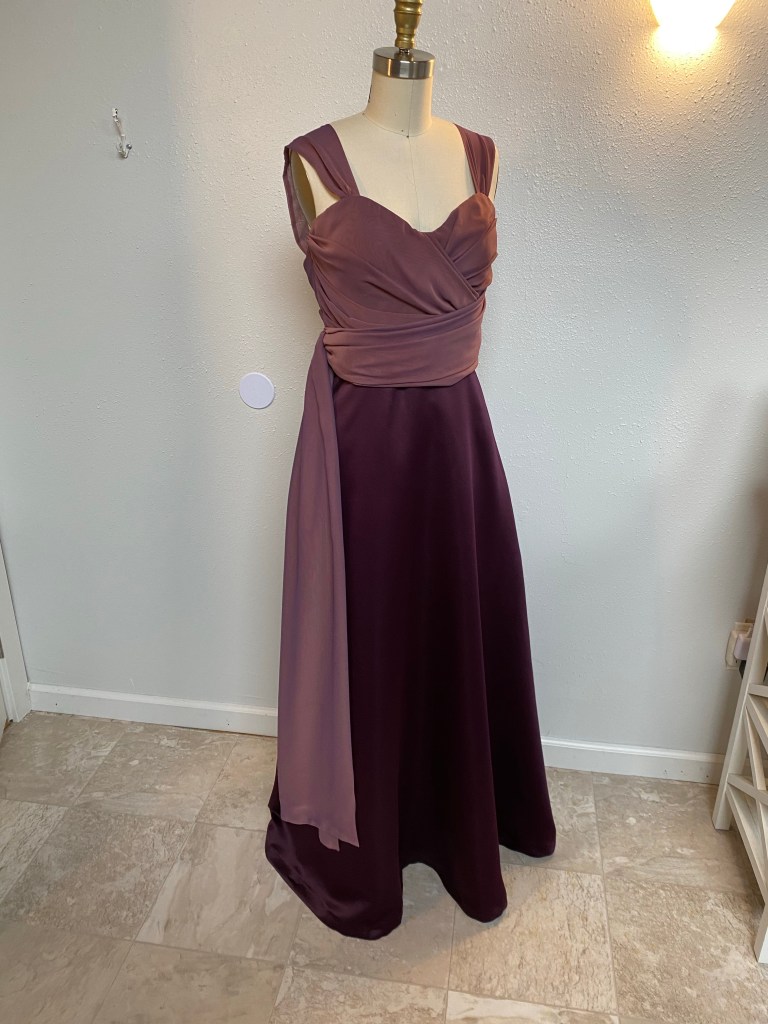
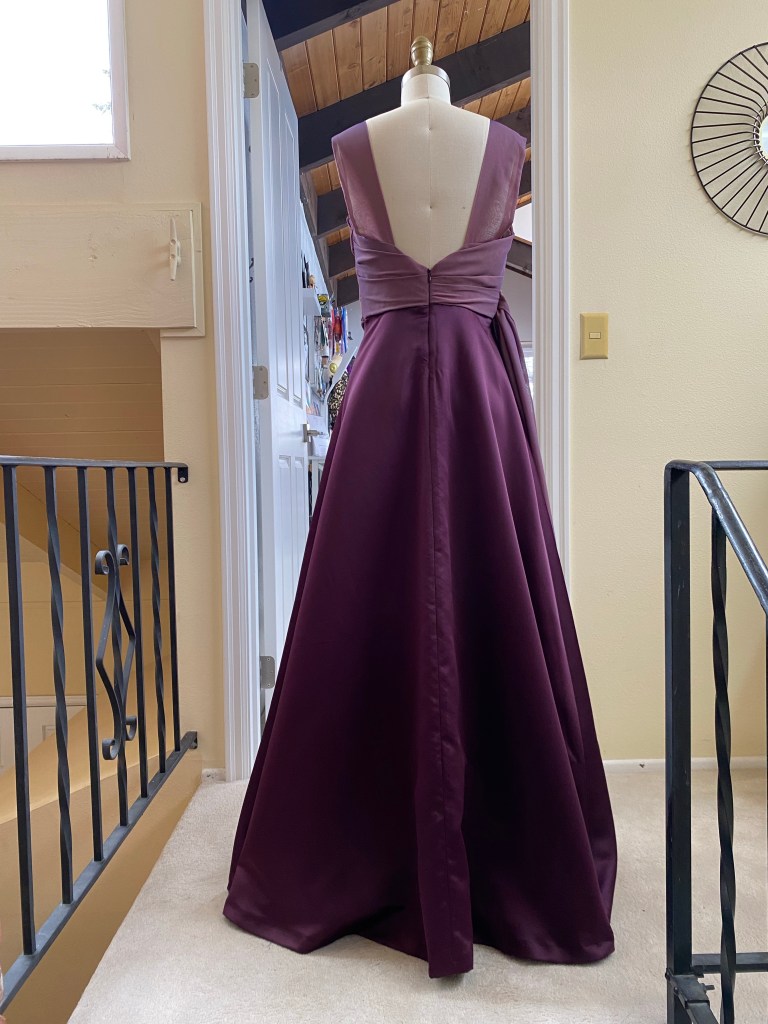
And the finale!
The final gown!
Meanwhile, Portland was hit with a big snowstorm that essentially shut down the city and trapped many people at home. Well, that didn’t stop me! My sweet husband offered to drive me and the finished gown over to Laura’s house and deliver it in person in his SUV that is great in the snow. What a nice guy!
Laura was radiant in her dress as she tried it on in her bedroom! I brought along a small sewing kit and supplies to do any last minute fixes as needed.
Well, it turned out that the dress needed a little more than just a few stitches to make it perfect. So, unfortunately I had to take the dress back home and make some fitting changes to the bodice and straps to make it just right. No problem! OK, one major problem: the dress was meant for her to take along to wear at her sister’s wedding event in California the next day and it wasn’t ready. UGH!!! I was hoping to be able to make the changes that same day and drive the dress back over so she could pack it for her trip. I ran out of time and wasn’t able to make it happen. You have no idea how SO disappointing this was for me, not to mention for her as well. So she left early the next morning for California, all without the dress we worked so hard to make in time for the event. GRR, I was SO upset with myself!
Well, now the dress is complete and altered and ready to go for the next occasion she may have to wear it. All in all, Laura was such a wonderful client to work with and I hope that she’s willing to work with me again on another gorgeous creation, and possibly even teach her some sewing lessons so that she can learn to make her own beautiful and unique clothes!
Lesson learned: time management is KEY to making deadlines and leaving room for error.
The gown turned out so elegant and eye catching! Every angle of the dress has interestWe love the low back! And the drape! So pretty and elegant!
Thank you so much Laura for choosing me to create such a beautiful gown for you! I enjoyed every moment of the process, mishaps and all. Enjoy wearing your dress and may you glow and shine in it as you do so naturally! Love, Stephanie
I was overjoyed to have been contacted by an acquaintance to create a custom wedding gown for her elegant and opulent wedding happening in October of 2019. Dione is a lovely boss-lady who has a bold sense of fashion and an arresting beauty, so of course, I was super excited to have the opportunity to create something unique for her wedding dress!
We started with ideas, concepts and visions of what she wanted for her gown.
She was going for BIG, BOLD and DRAMATIC!
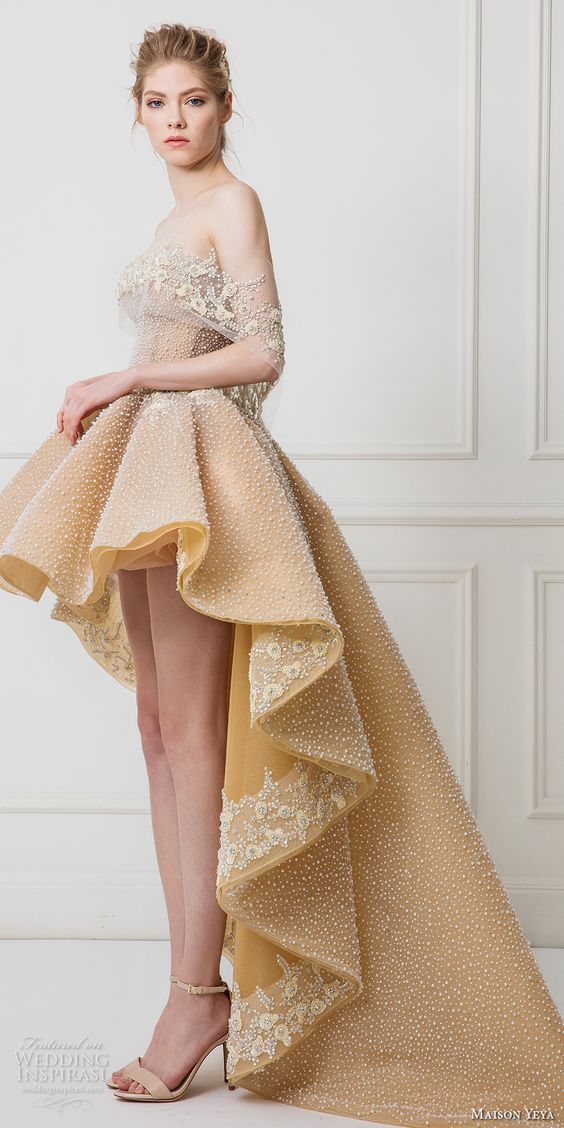
She shared these images with me for her visions of the gown:
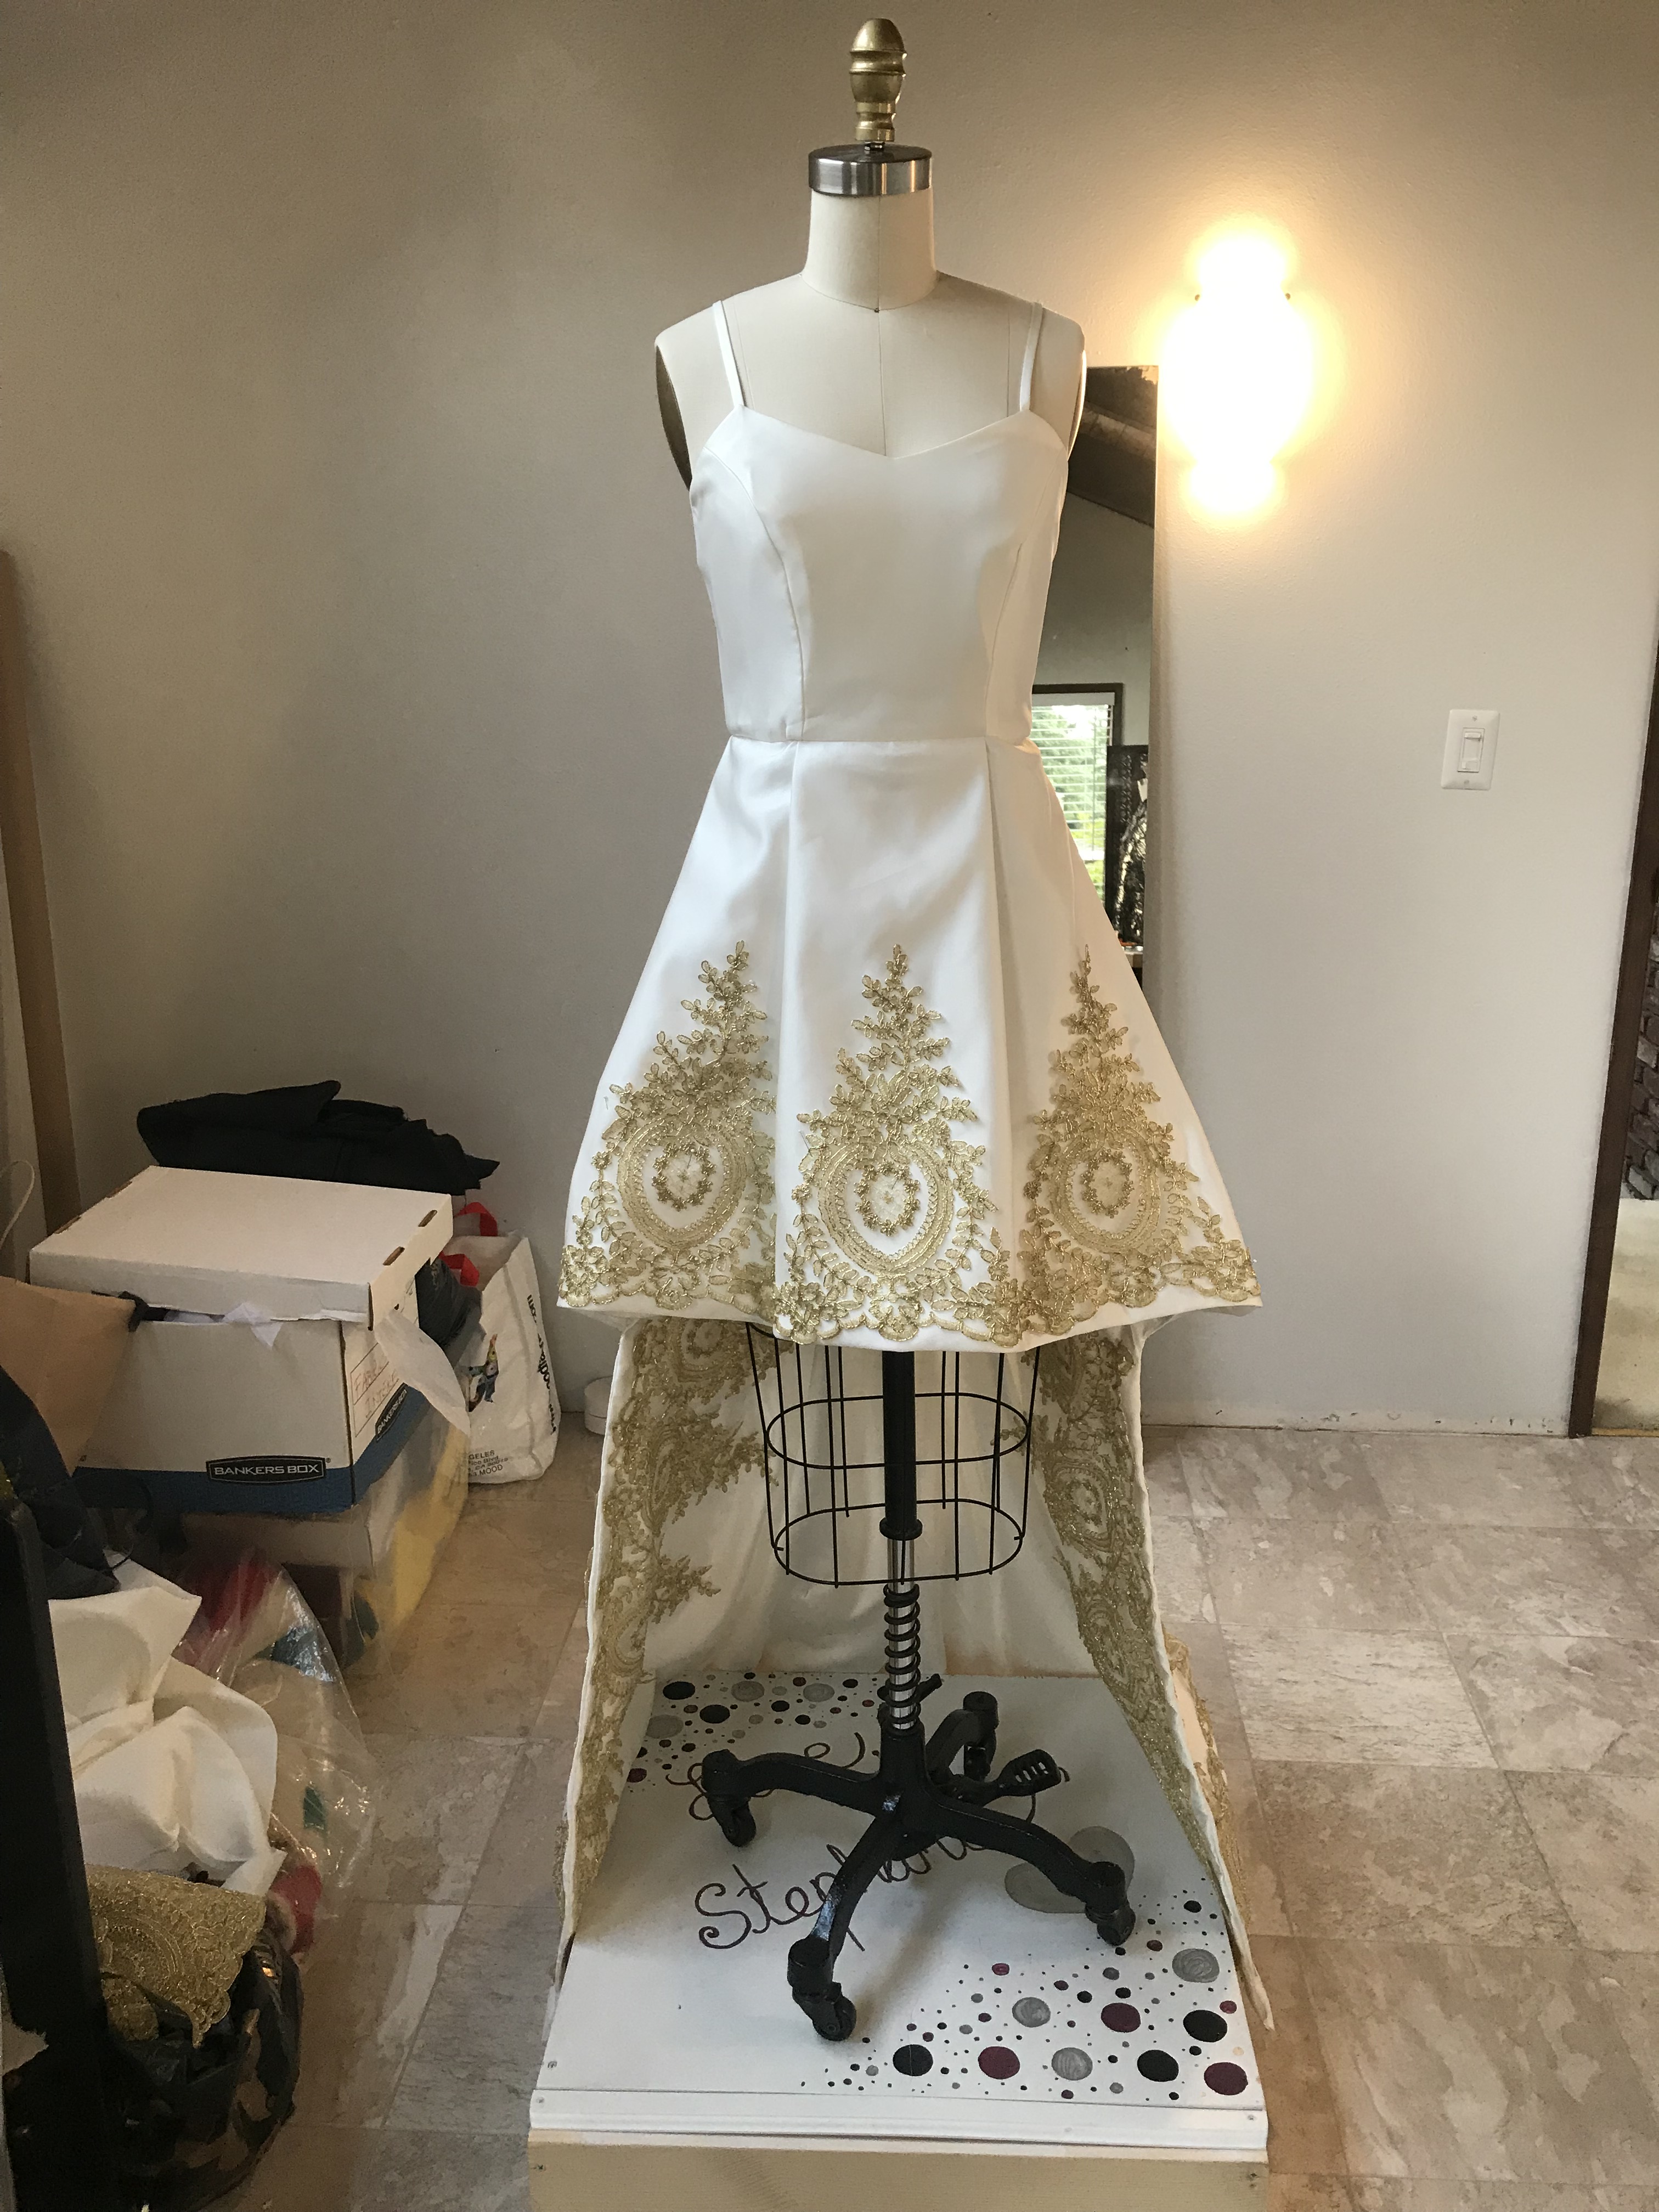
The High/Low hem and embellishments of this dress really caught her eye.She loved the embellishment details of this dress, and the volume of the ballgown
So I got to work right away coming up with concepts that I would be able to create and achieve with the skills that I had.
I made some fashion sketches and shared them with her:
And the fittings began!
I started with this McCalls 7720 sewing pattern for the shape of the bodice, and possibly the skirt too if I could get the fullness:
McCalls 7720 pattern
I ended up just using the bodice of the pattern and draping the skirt.
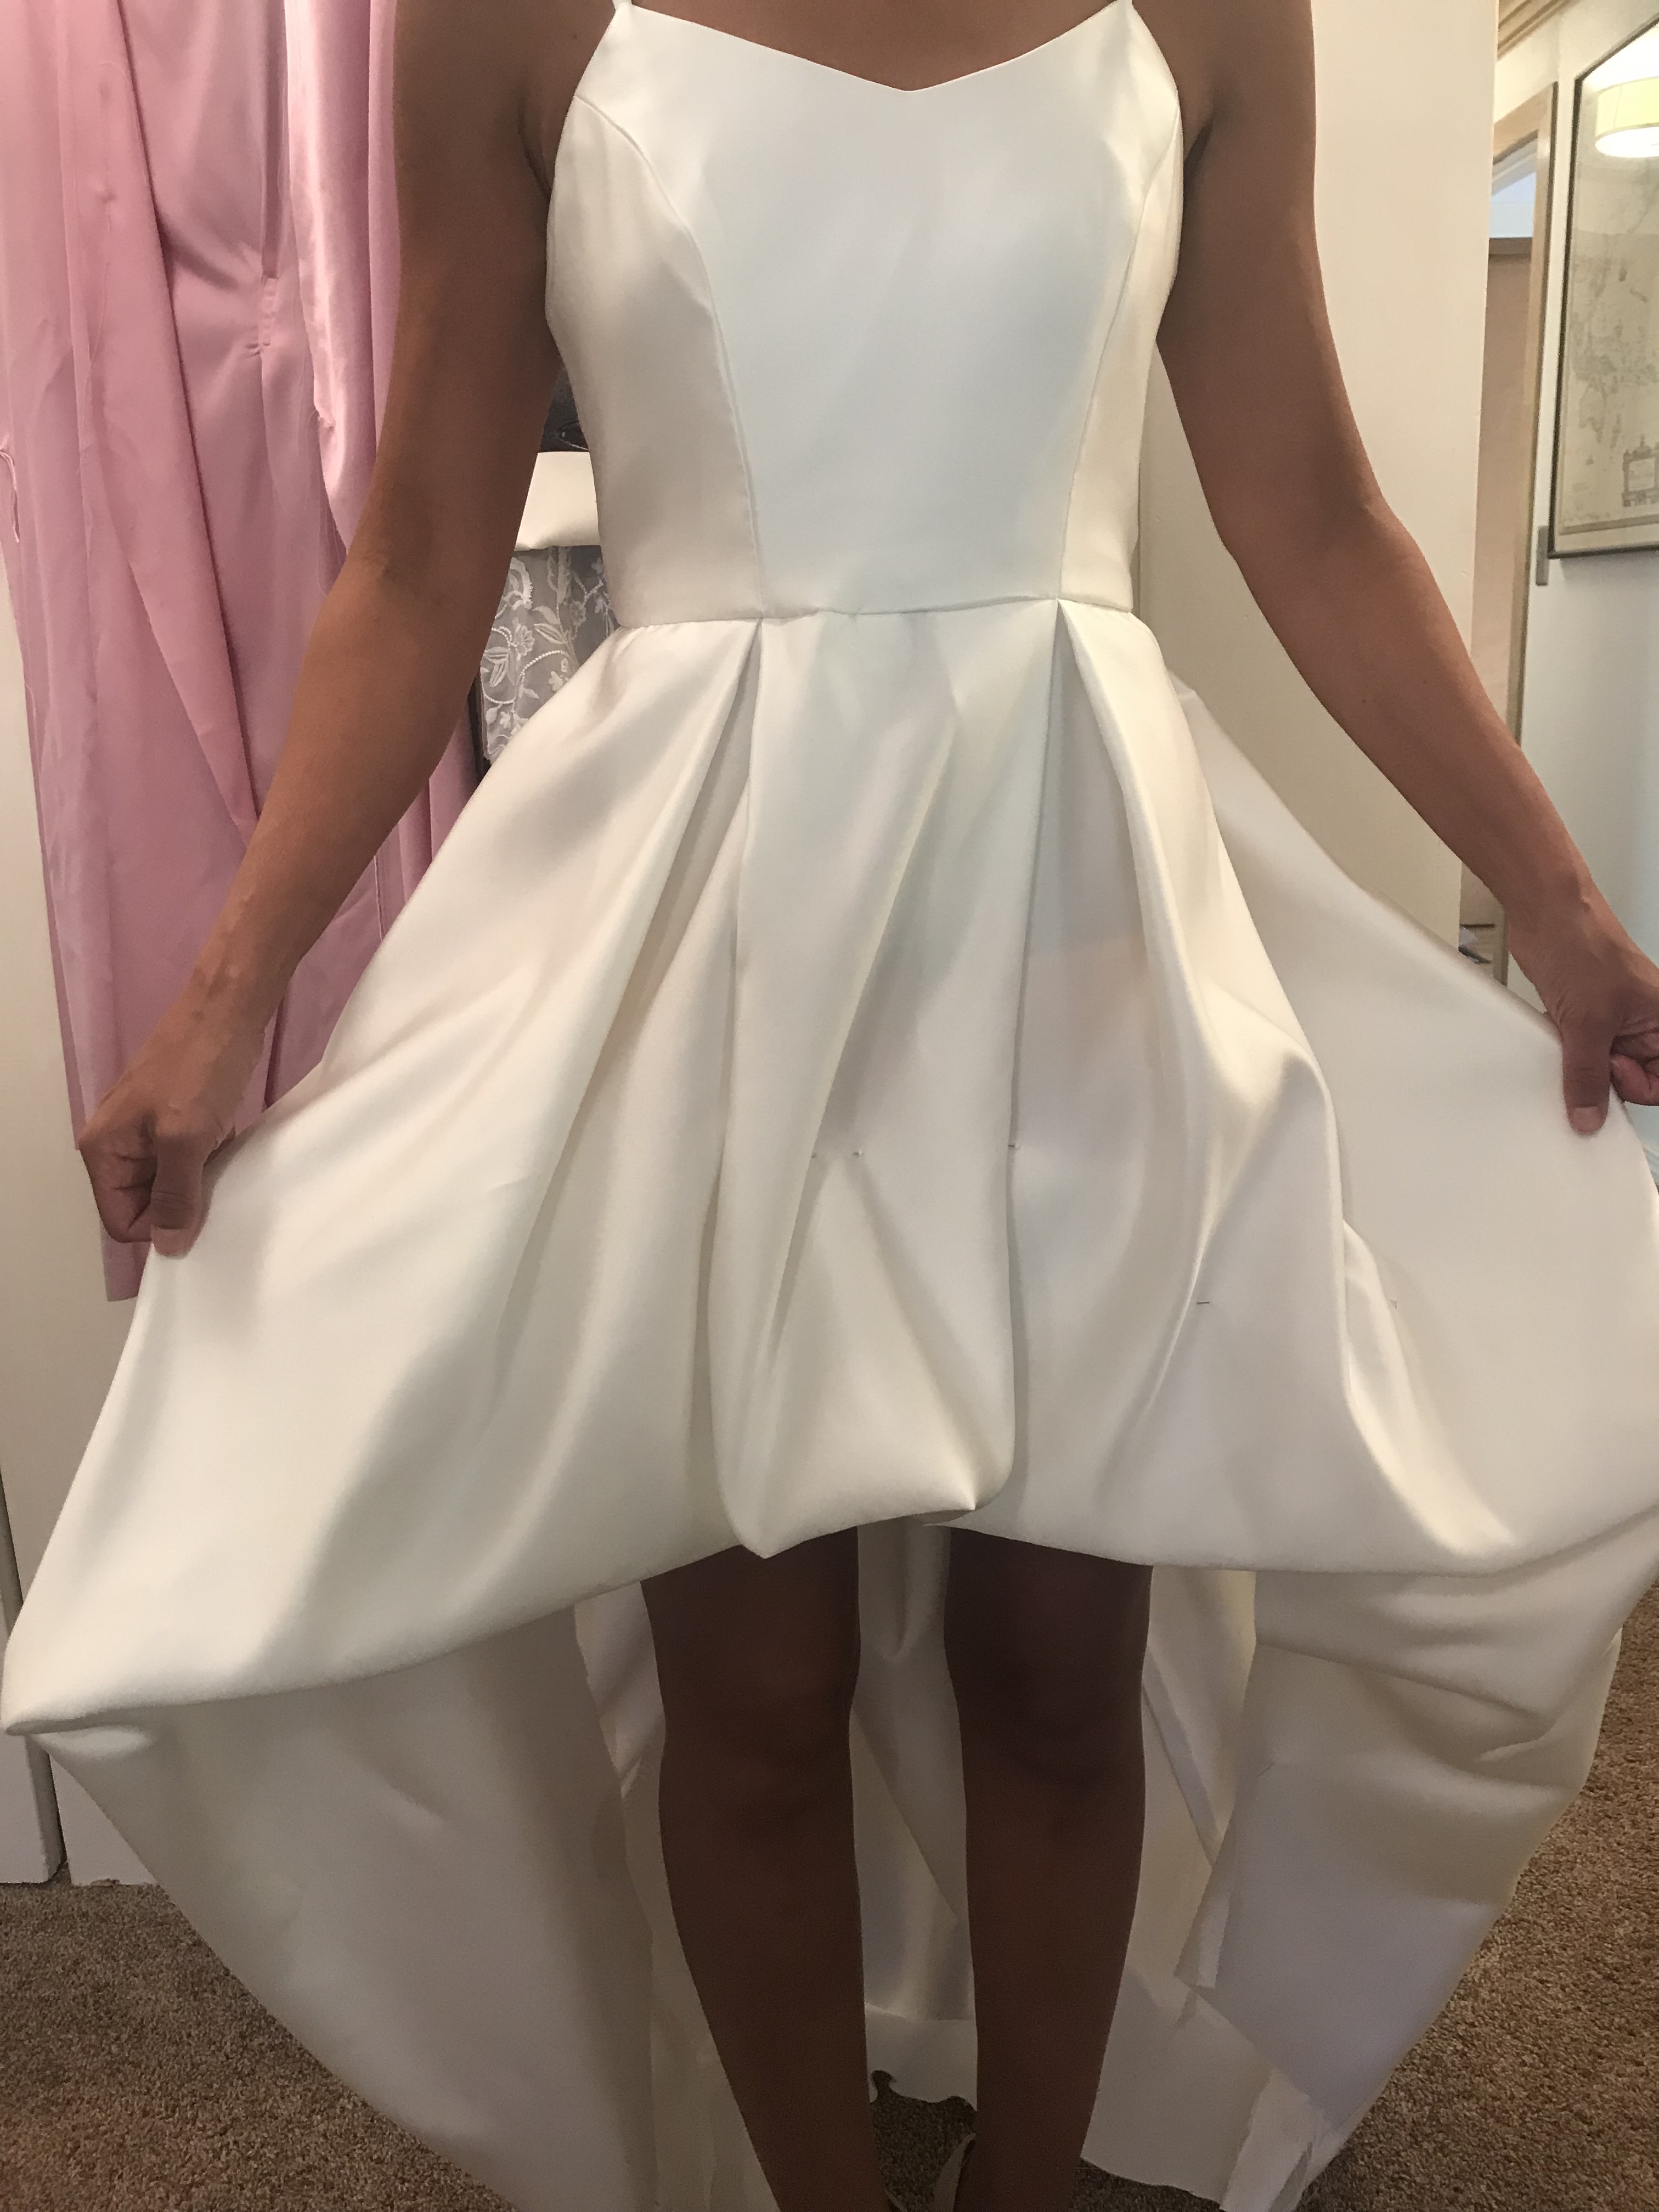
At first, she wanted to have a tulle underskirt to wear for the wedding ceremony, then take off the underskirt to reveal the underside of the hem and her fabulously shapely legs. Here is a raw version of the dress mocked up in muslin with a tulle skirt underneath for fullness:
I perfected the fit of the bodice easily on her slim torso, so that was easy. It was getting the skirt length, fit and drape just right that was the major challenge:
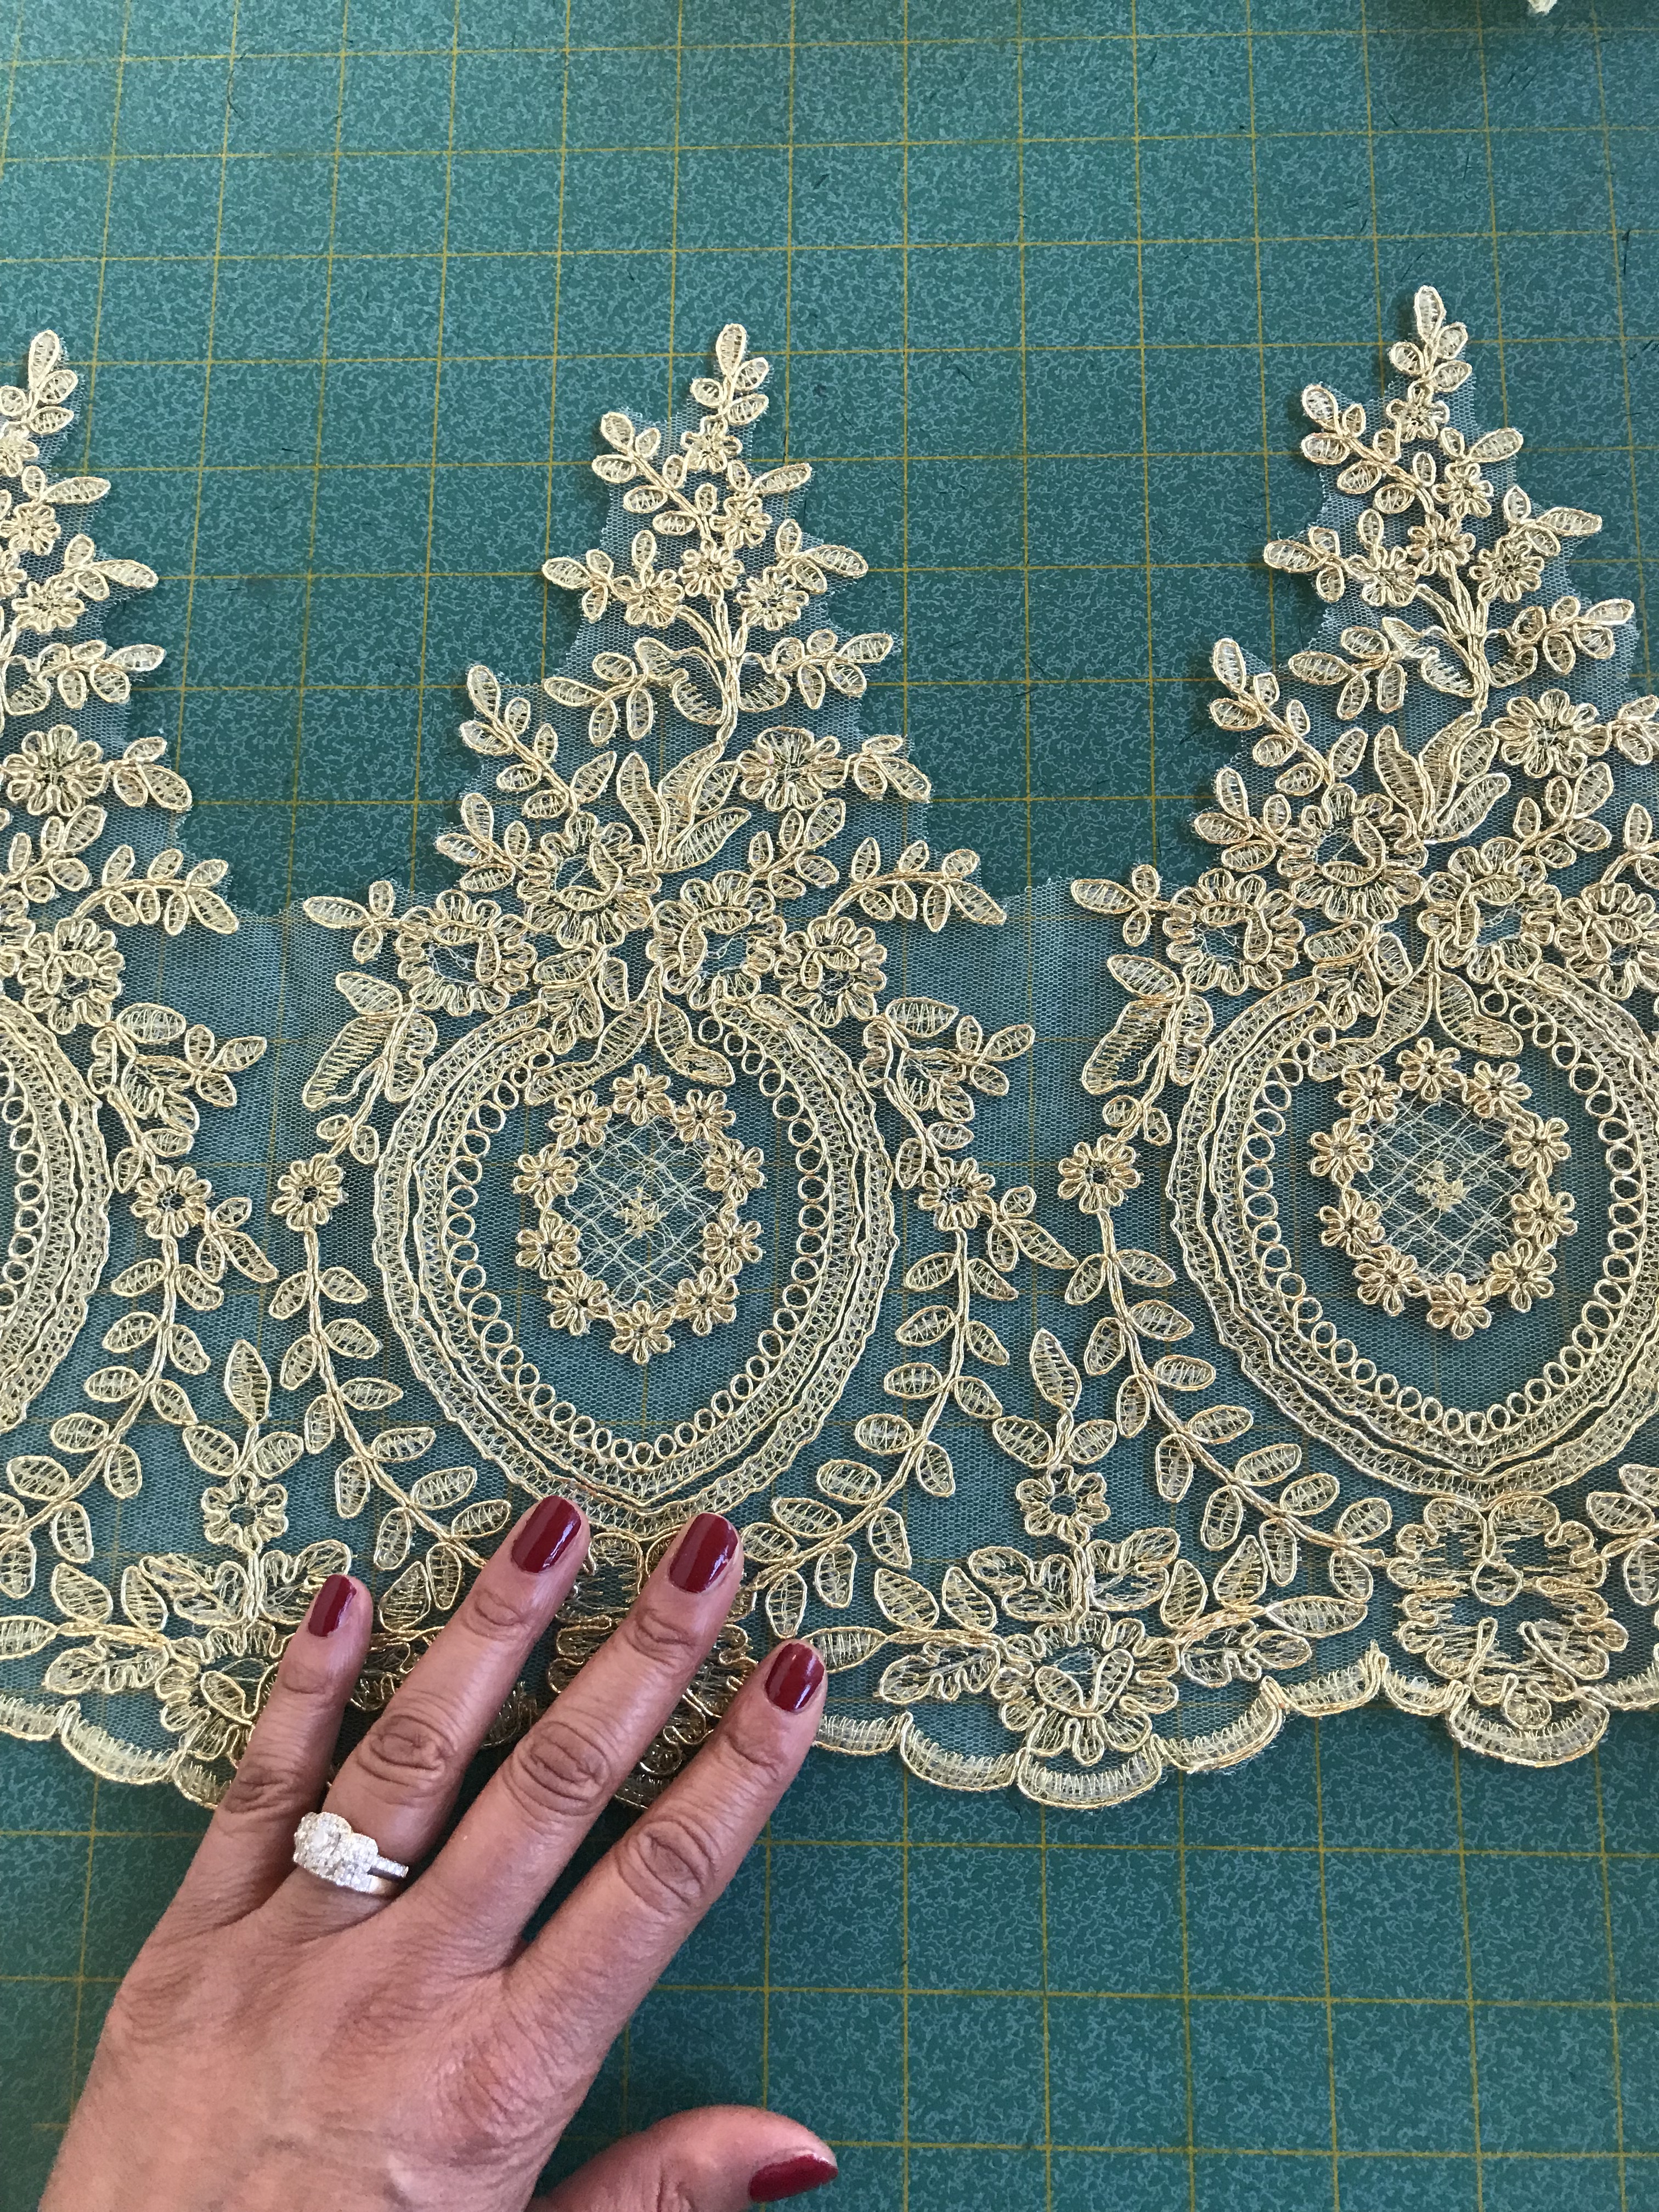
Here she is, in the dress, cut in the satin, pinned up to make the hemline as we wantedPlacing the motifs with the tulle underneathAnd with a couple of the fancy gold trim motif’s pinned to the front.And more trim…
At the next fitting, I had pinned the gold trim all around the skirt and we tried this on for fun (meanwhile, we were moving into a new house, was planning our own wedding, and I was making my own dress, so please excuse the chaos of my sewing room):
Nice, but we weren’t happy with the back length at all so I kinda had to start over.
OK so fast forward, I was starting to admire my work as I worked late into the night up in my new sewing loft. I had a bodice, a skirt, and it was starting to look like a real wedding gown.
Playing with the pleat formation
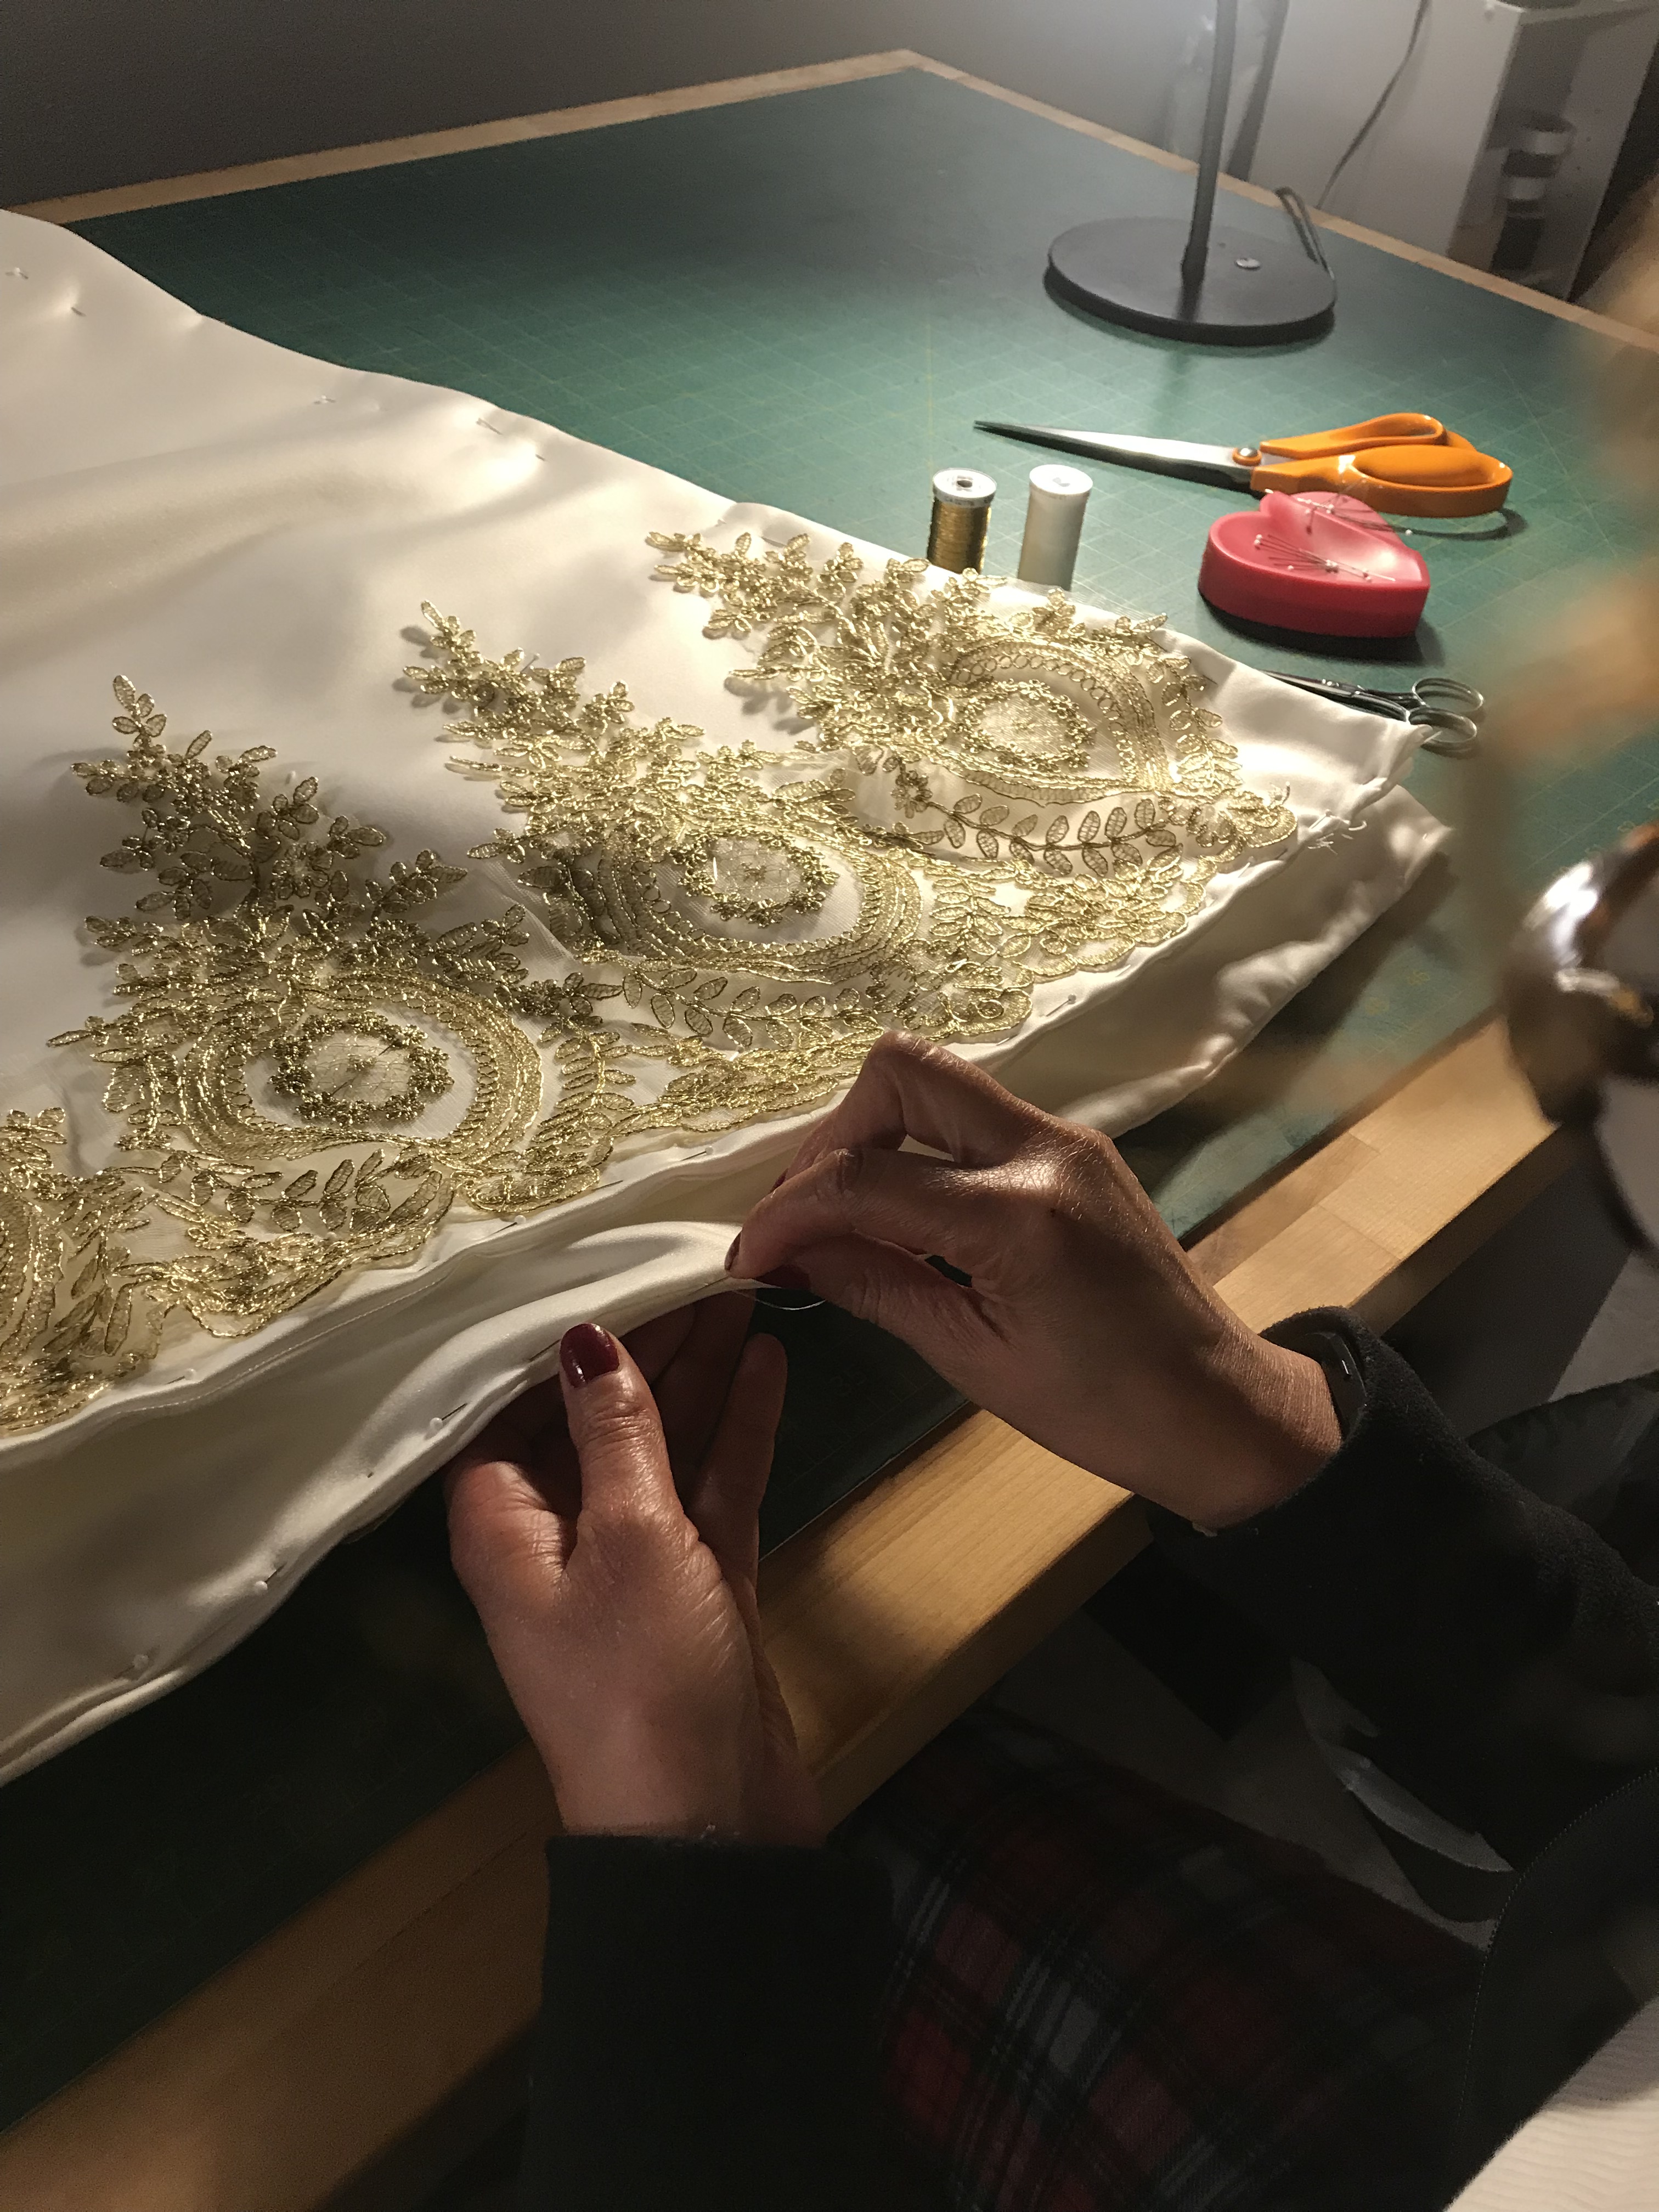
Once we had the shape decided, I started the tedious task of sewing on all of the gold trim on, one motif at a time, with this annoying, yet beautiful, gold metallic thread. I was married by now, so I could put the making of MY dress out of my head and focus on Di’s dress:
Then, it was on to sewing the lining to the outside of the dress, all by hand:
Can’t lie, this was tedious…
Finally, the dress was done and ready for the final fitting! (Again, please excuse the pile of junk shoved in the corner, I was BUSY!)
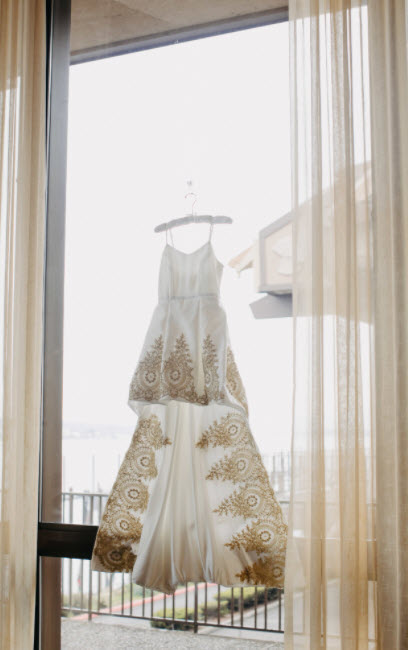
Get ready for chills up your spine….
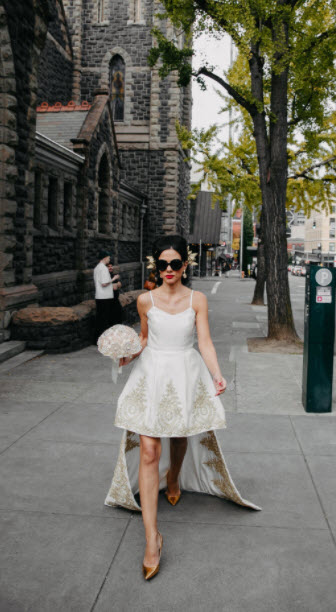
Photo: Dina Chmut PhotographyI can’t…SO HOT!!! Photo: Dina Chmut PhotographySums it all up: BAD-ASS BEAUTY! Photo: Dina Chmut PhotographyWith her handsome groom Howard, LOVE! Photo: Dina Chmut PhotographyThose legs go on for miles! Photo: Dina Chmut PhotographyYESSS!!!! Photo: Dina Chmut Photography
We had a BLAST at the wedding! It was a a huge, black tie event, so of course I had to throw together another dress to wear to it as the official dressmaker to the bride!
I just threw this together in a few days to wear to the wedding, no biggie..Ready to go!We were honored to attend the grand affair!
What an honor it was to create such a special gown for Dione! She was a lot of fun to work with and so great to get to know better. I loved EVERY minute of the process (ok, maybe not the hand sewing part) and am delighted to have had the opportunity.
I was SO honored and excited to have been asked by a friendly acquaintance of mine to custom make his fiance’s wedding gown. We are friends on Facebook and had seen and admired some of the garments that I sew and post on my Love, Stephanie page.
I gleefully met up with the bride-to-be Terri and we started to plan the project right away as we only had three months until the wedding.
She wanted a vintage style look, and had an original idea of 1935’s-era inspired separates of a gown, an over-blouse and a long-line jacket all in silk. It was a beautiful and wonderful look that she showed me, an actual Vogue Pattern that I happened to also have in my pattern library-how about that!
After mulling over this idea for a few days, we decided that this pattern would be a lot of pieces for me to make, take up quite a lot of fabric, and that we really didn’t have enough time to make it all work.
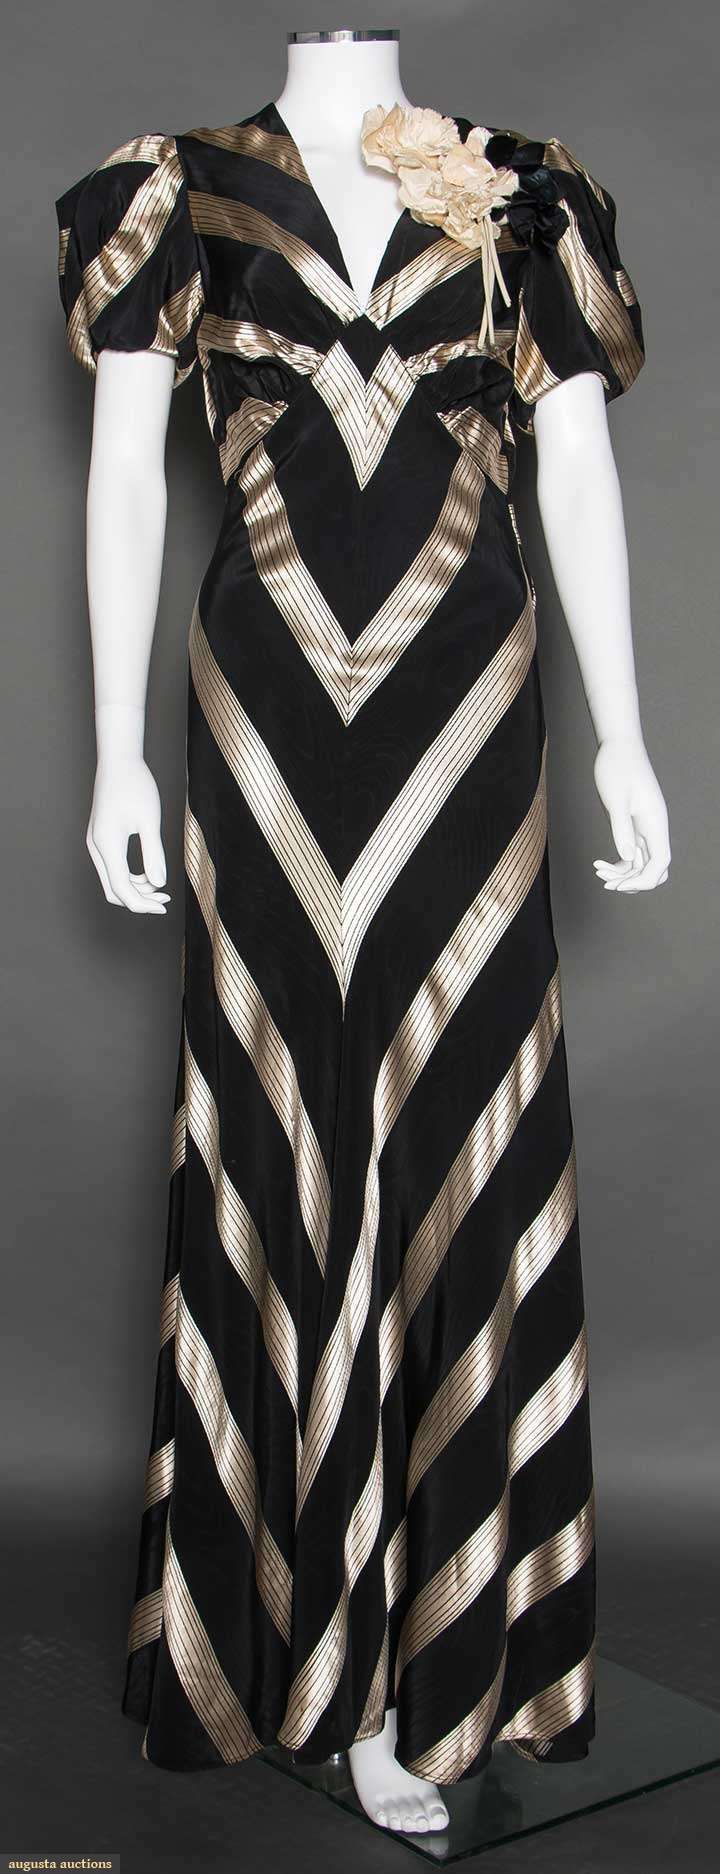
Idea # 2 was the perfect vision! It combined a vintage look, simplicity, and I knew it was absolutely do-able in the time that we had. I just love this look!
Plus, when she said she wanted a solid color, I rejoiced because those chevron stripes meeting perfectly down the center front of this dress in insanely slippery silk charmeuse-yikes!!!
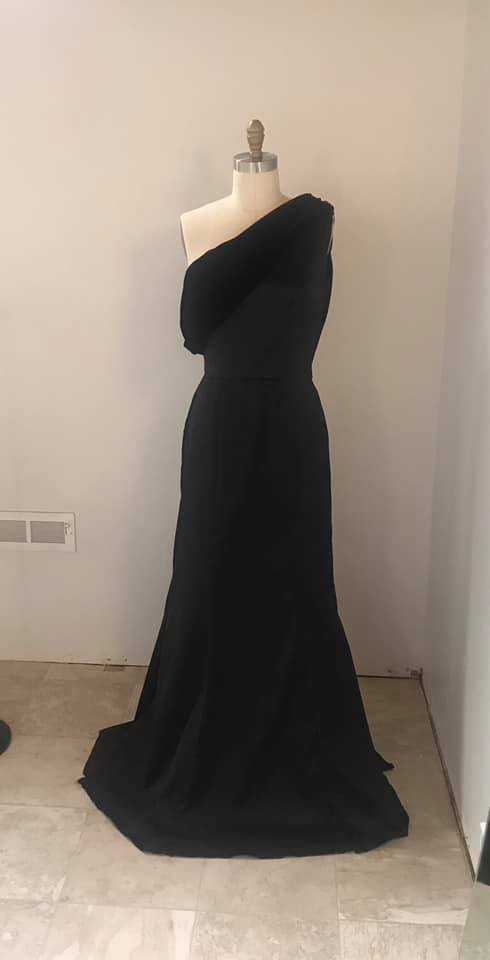
I got started researching a decent sewing pattern to base her dress off of in order to make the whole process a little easier and not have to make a pattern from scratch. I found this Simplicity pattern which is a vintage one, but from 1972:
The dress had the V-Neckline with the center front seam and angled seams under the bust and a floor length semi-flared skirt. I would lower the neckline, turn the bust darts into gathers, and make a new sleeve to resemble design lines of the inspiration gown as closely as I could.
She wanted the dress to be in a beautiful color, one that was vibrant, memorable and looked great on her warm brown skin tone. She ordered this gorgeous and lustrous silk charmeuse in a color called Citronelle from NY Designer Fabrics:
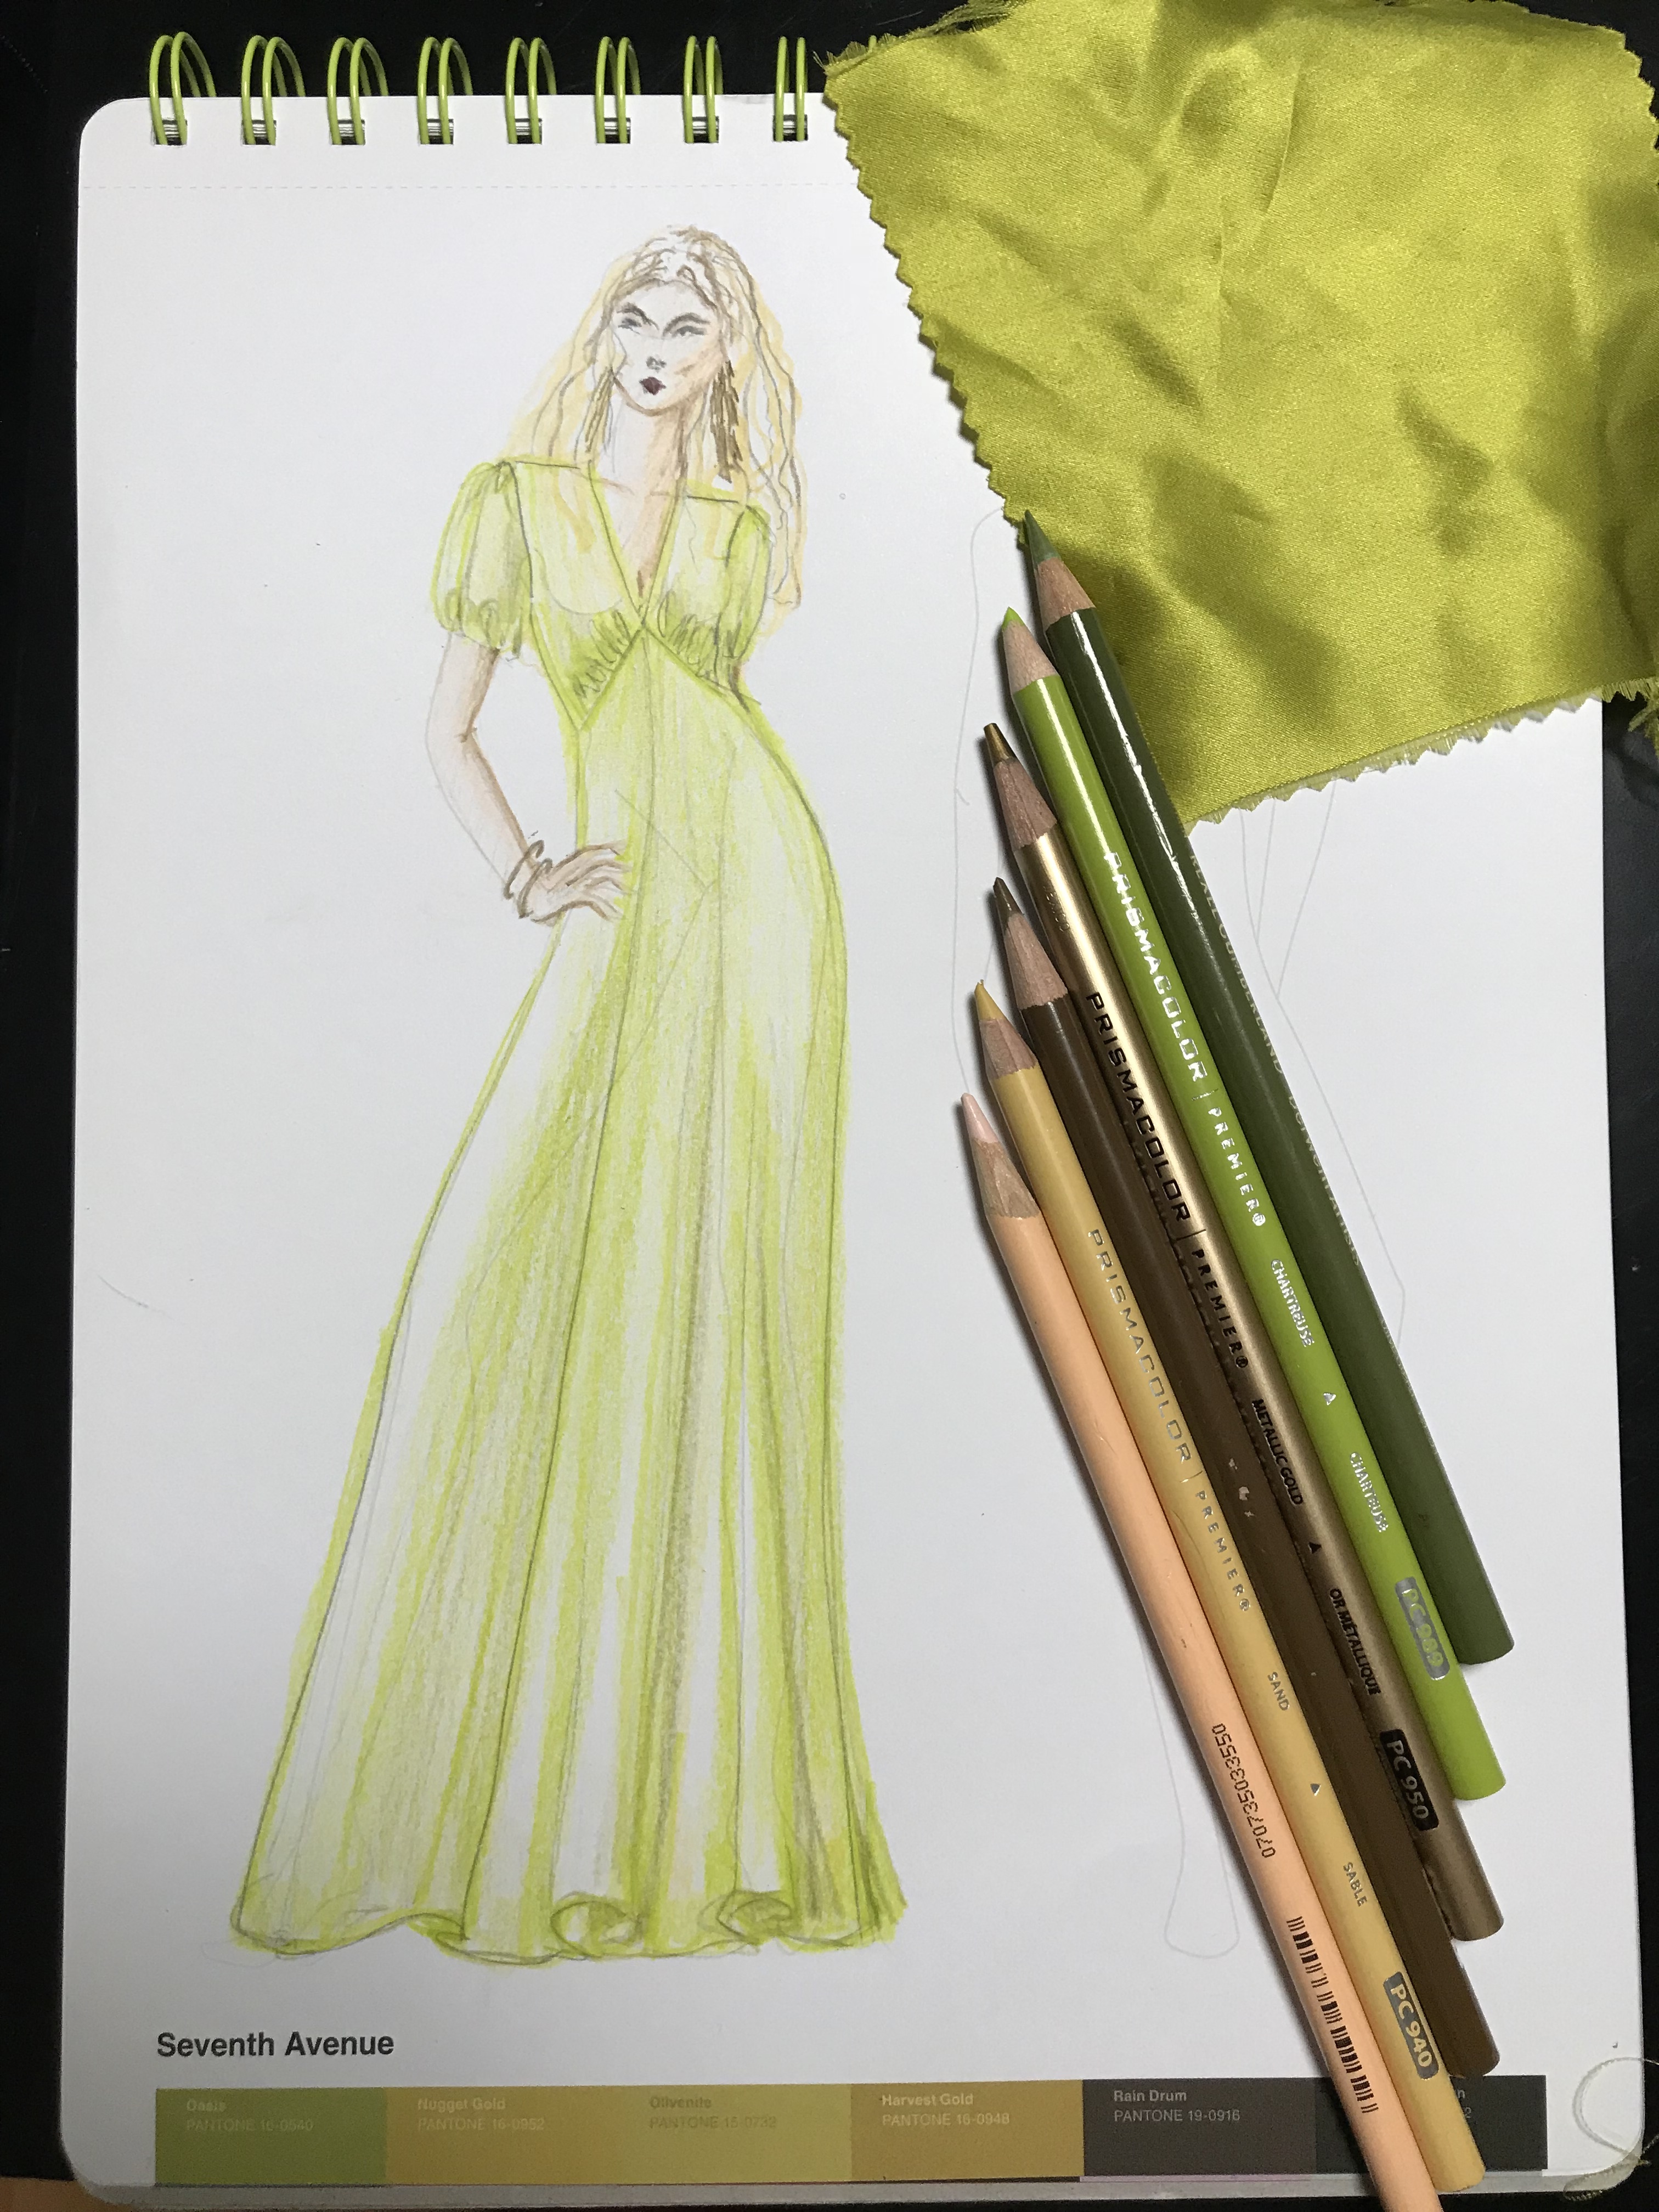
Of course, I took a few minutes to sketch out the vision of the dress, adding to it over the time and finishing it off with the look that she executed for her wedding day:
Meanwhile, I got started modifying the pattern and creating a muslin. I chose to make the first muslin out if an inexpensive polyester satin to mimic the silk, but I really should have made the first mock-up out of actual muslin and saved the satin for mockup # 2, but oh well, they both served their purposes:
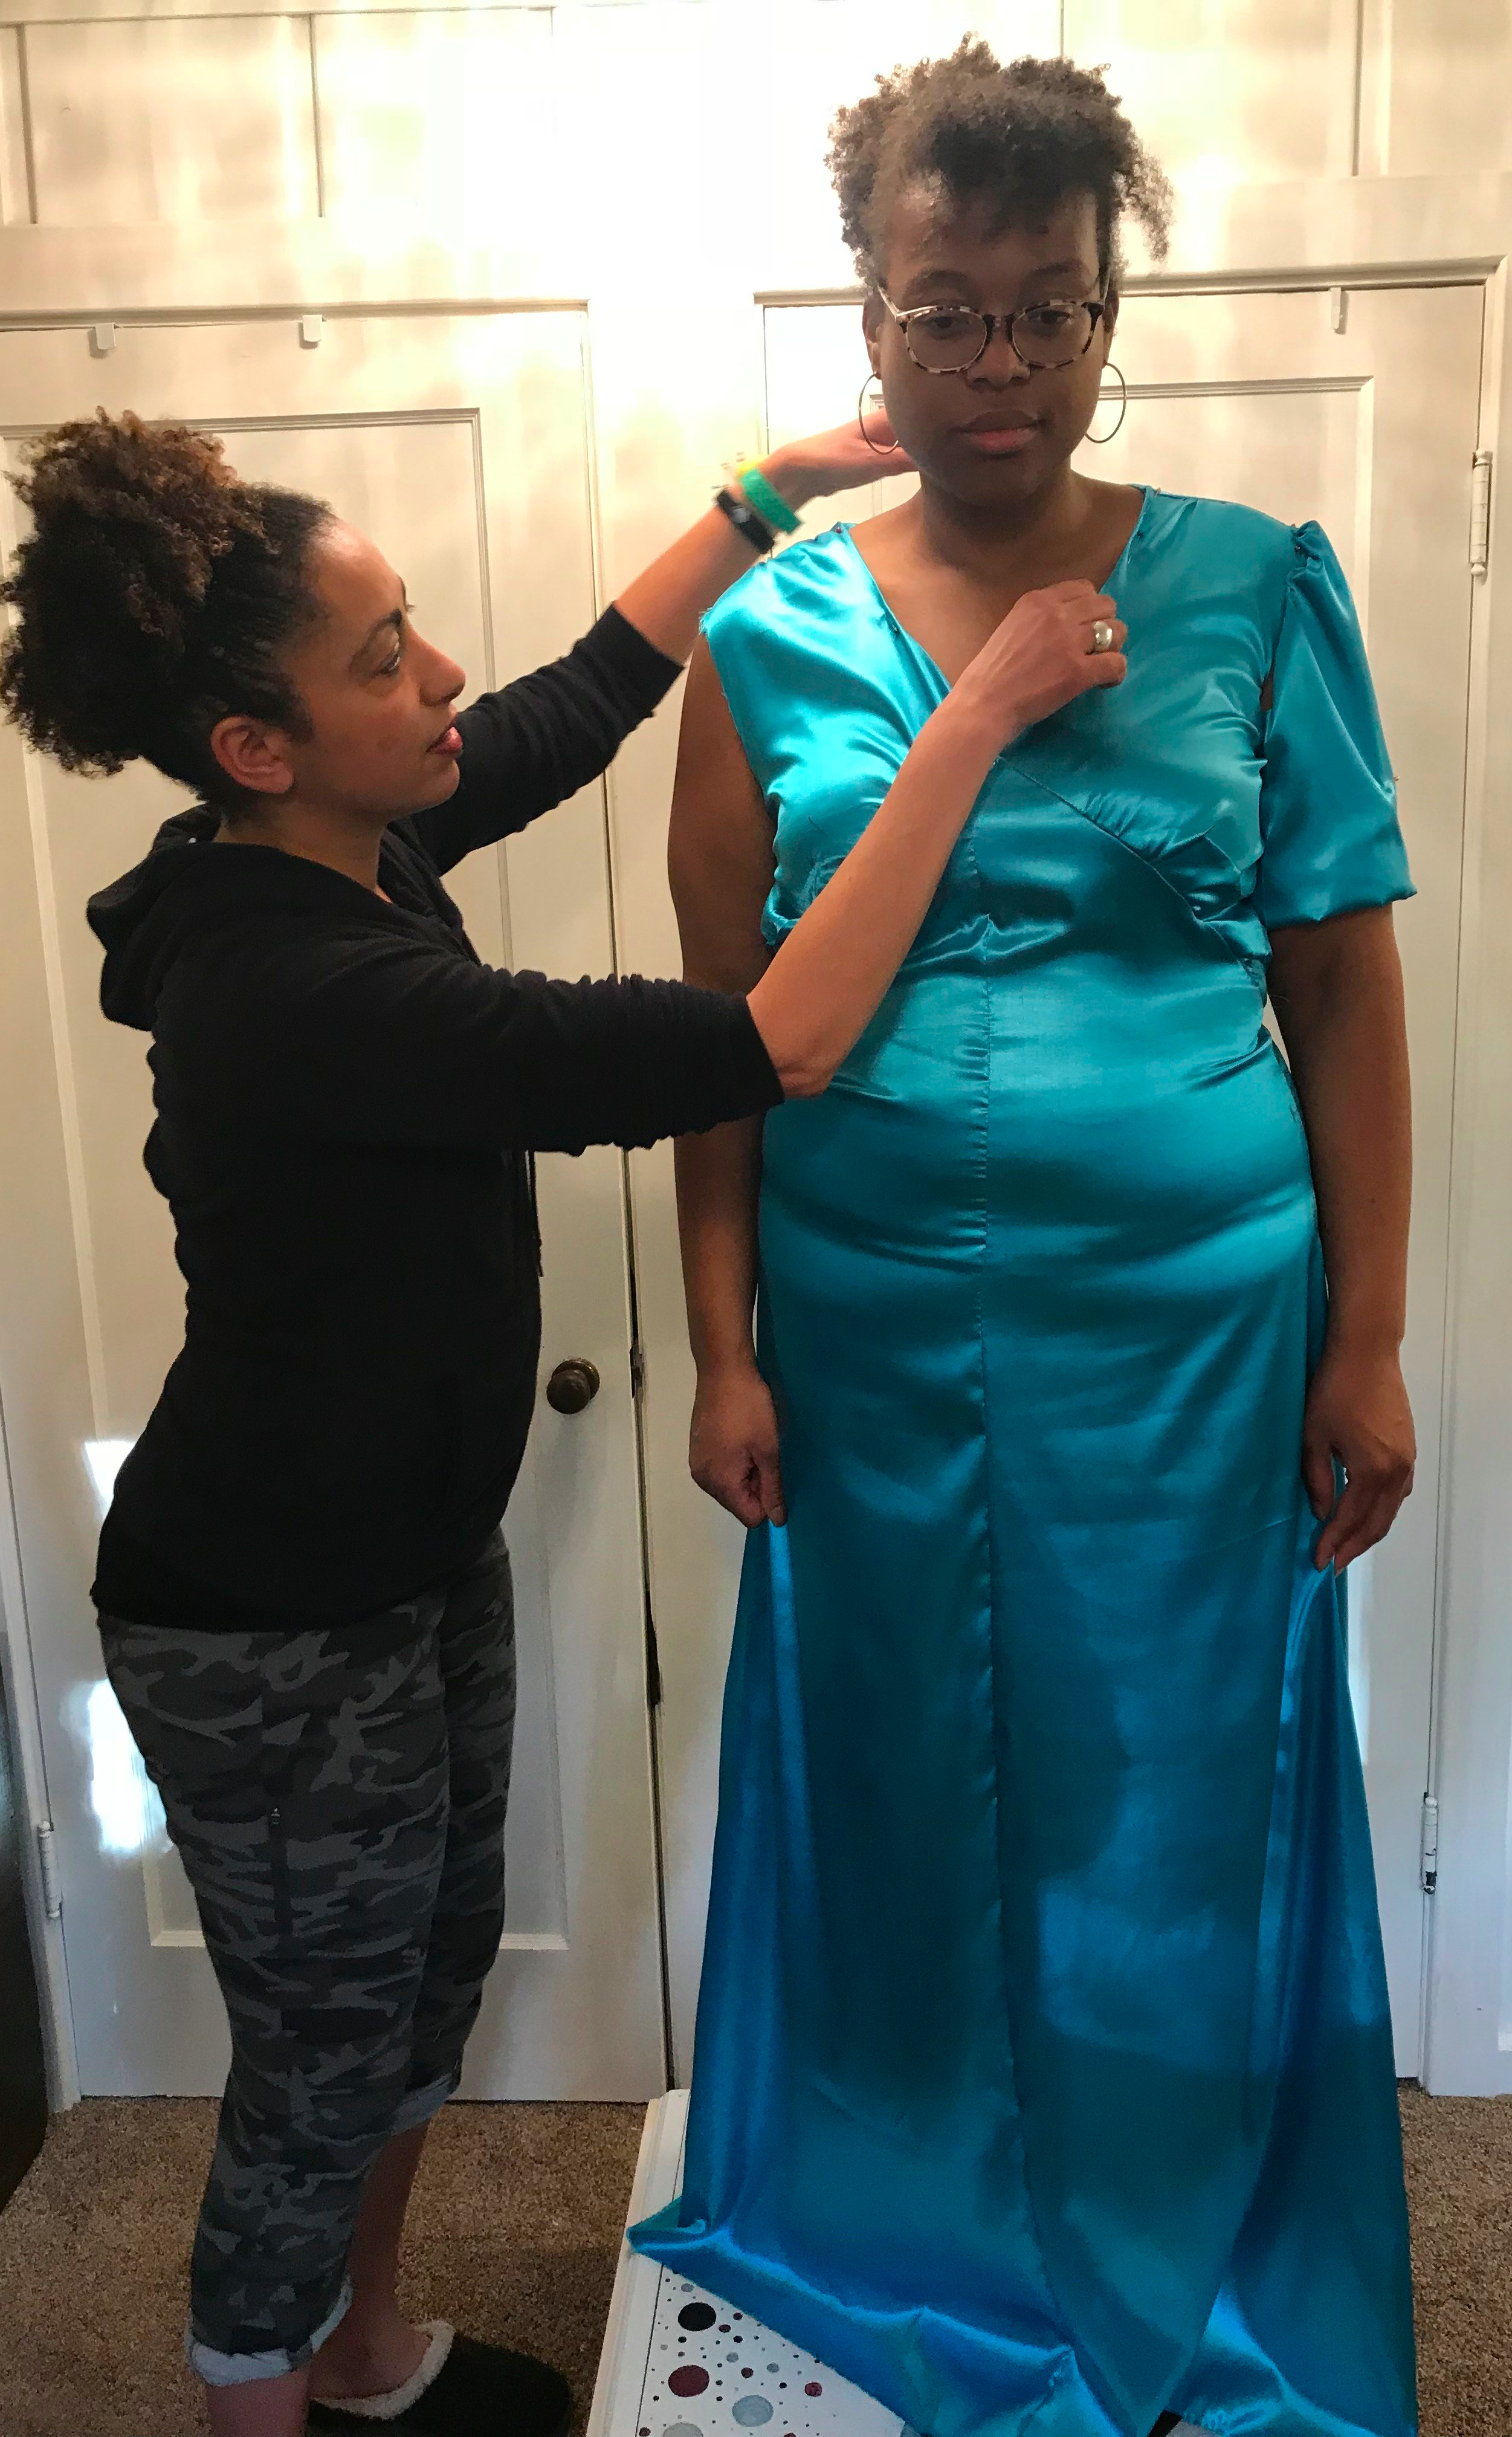
Fitting #1: we worked out a good deal of fitting and design adjustments to the gown.
I added to the sides where she need more room, lowered the neckline, and checked to see if she liked the sleeve.
Then back to flat pattern adjustments and cutting muslin #2:
She was actively loosing weight, so now the dress was TOO big! But, that’s just fine, better to have more to work with than a too-tight fit. We wanted drop the under-bust seam a little more and obviously take in more fabric in the back. Overall, the 2nd fitting went really well, I knew what I needed to do next and it was looking good and she was starting to really get excited about her gown!
We had two more fittings before the final delivery. The next was in the dress sewn up most of the way in the actual silk fabric with the changes from the last fitting, but before the zipper was put in, before the hem was cut and sewn, and with generous seam allowances on the sides and back just in case we needed more room. The last fitting, the dress was done, but she wanted to take in the sides a tad more, and there were a few seam tweakings to perfect the dress.
I added finishing touches to the dress using a beige silk lining for the bodice and sleeves:
As an added little luxe touch, I sewed in satin ribbon hanging loops at the top of the sleeves so that the dress did not just slip off the hanger when stored:
A little satin ribbon sewn into the seam makes a great hanging loop that just falls into the dress invisibly when worn.
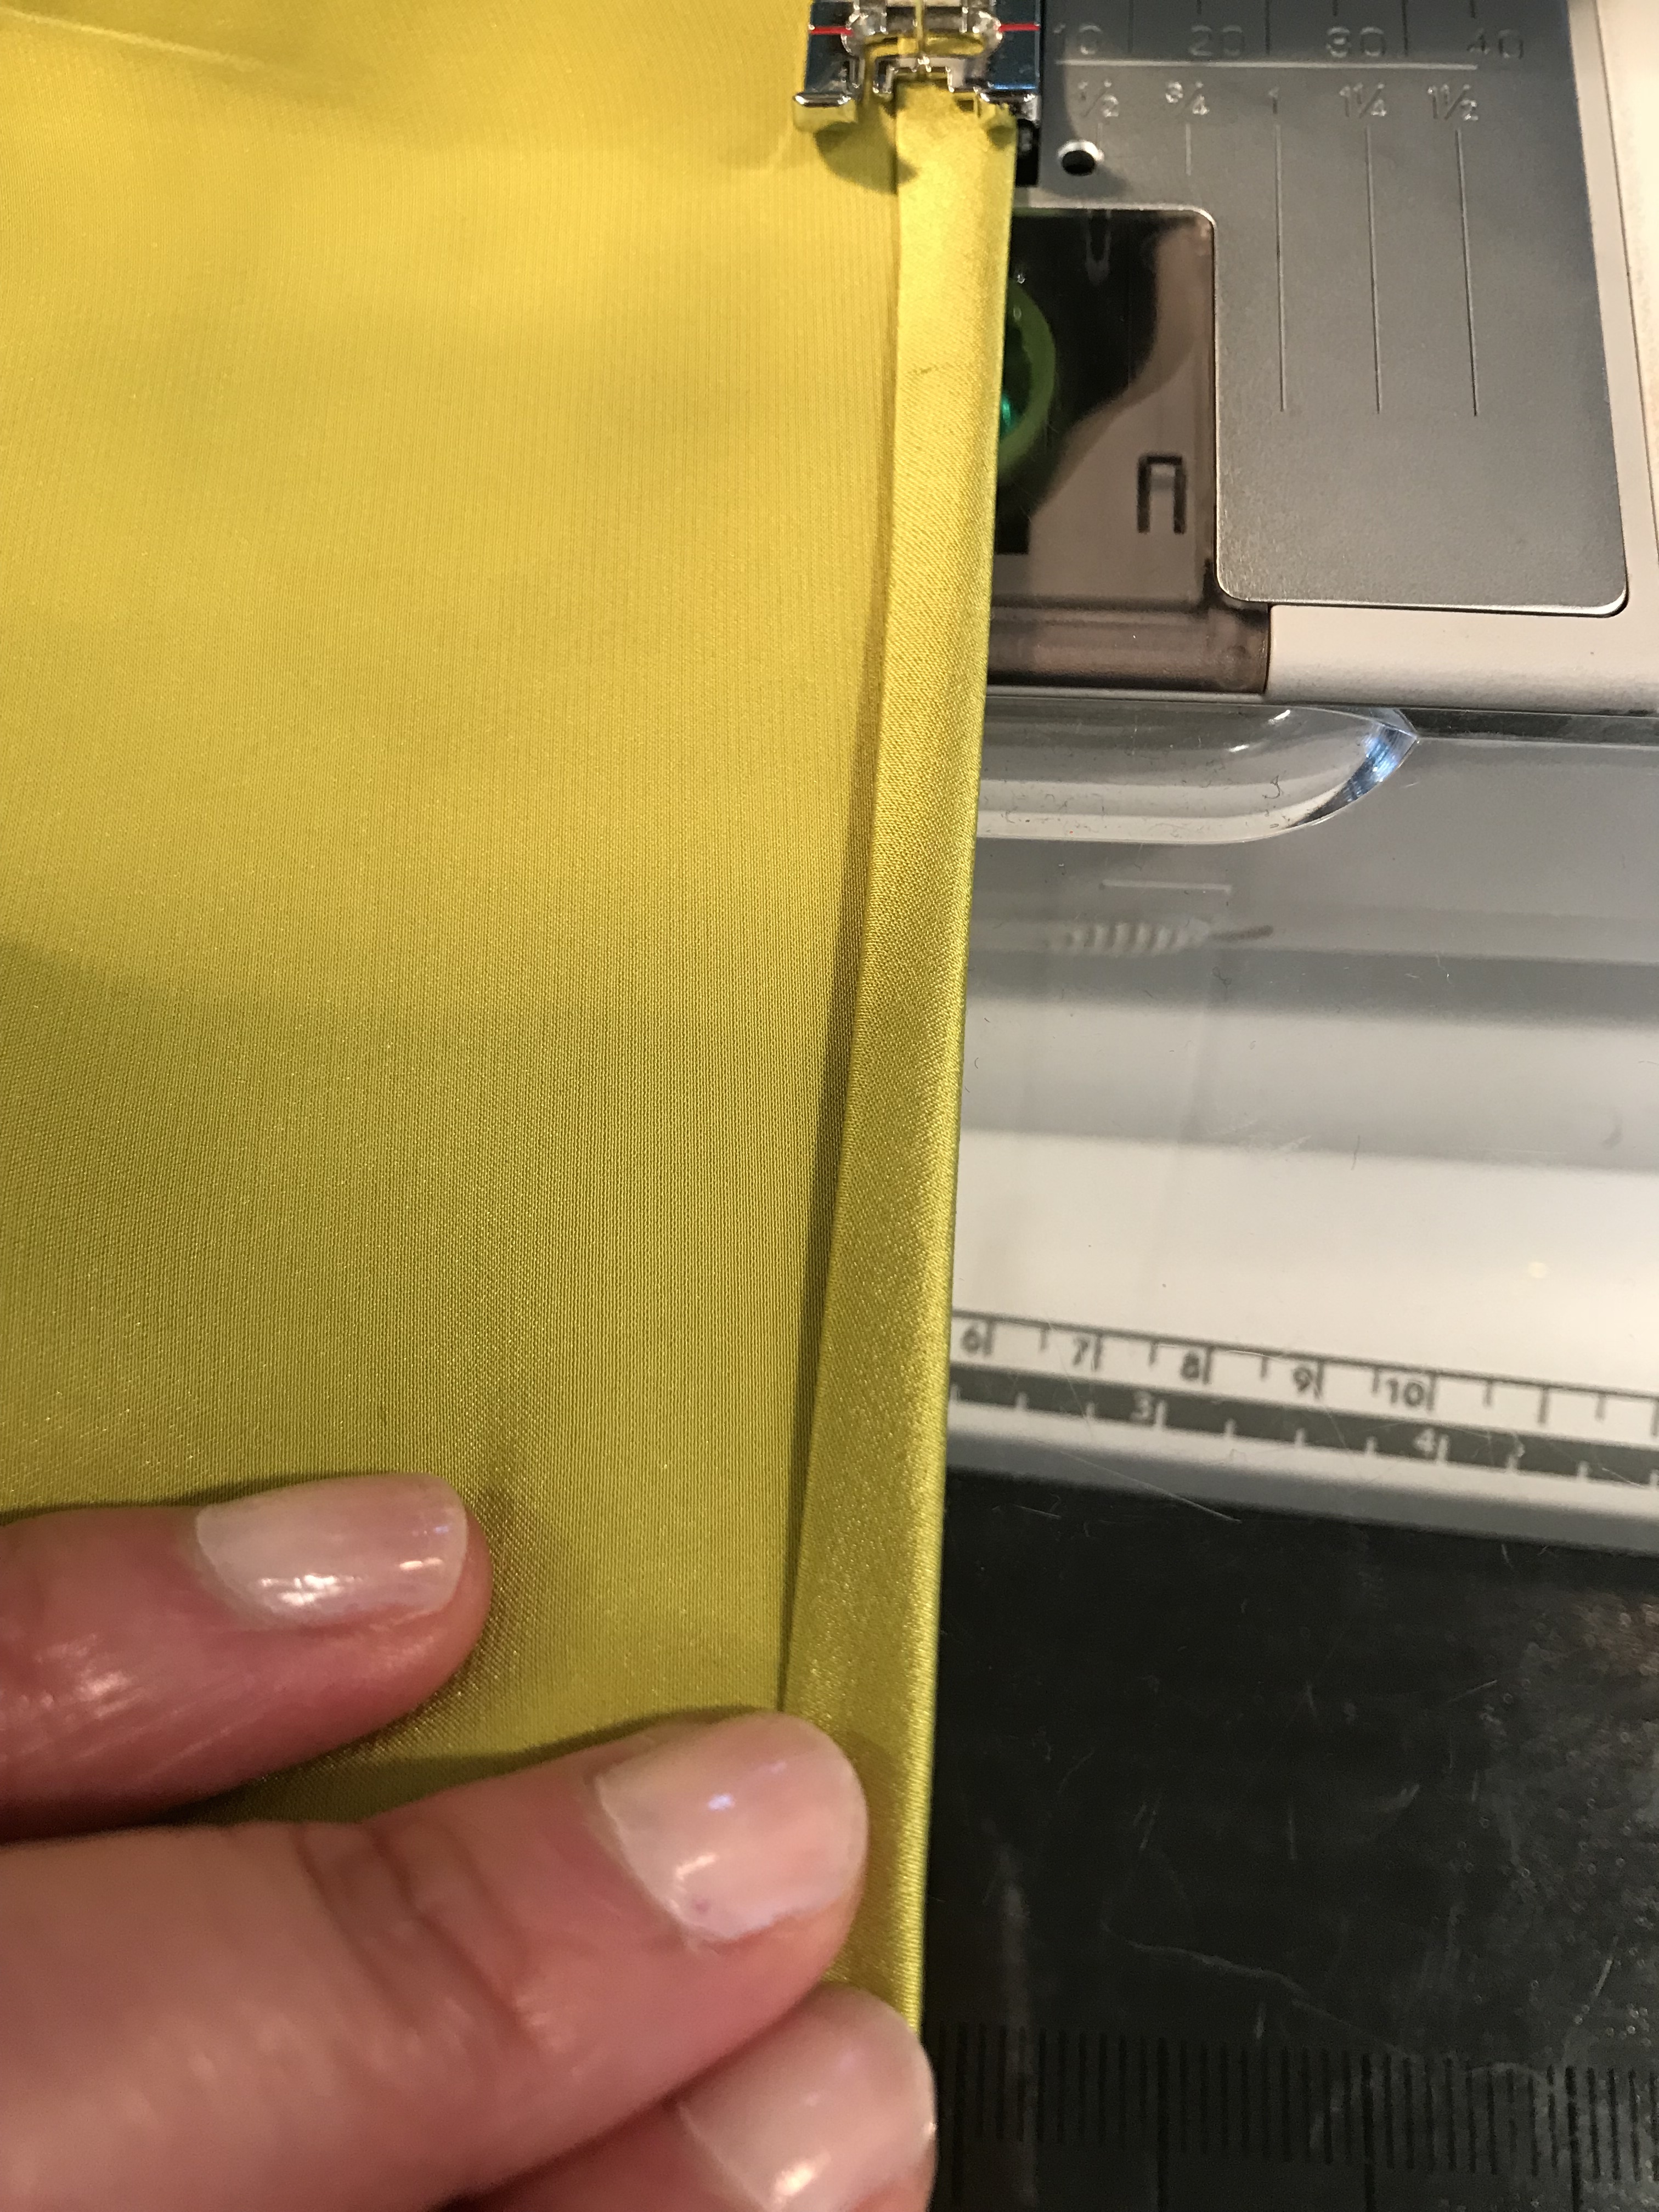
I made a tiny narrow hem to finish off the dress:
Making the narrow hem, almost done!
Here is the dress, all complete, steamed and ready to roll, hanging in my sewing room (not the best hanger-appeal on this dress: it really needs a body and boobs to fill it out to perfection in my opinion):
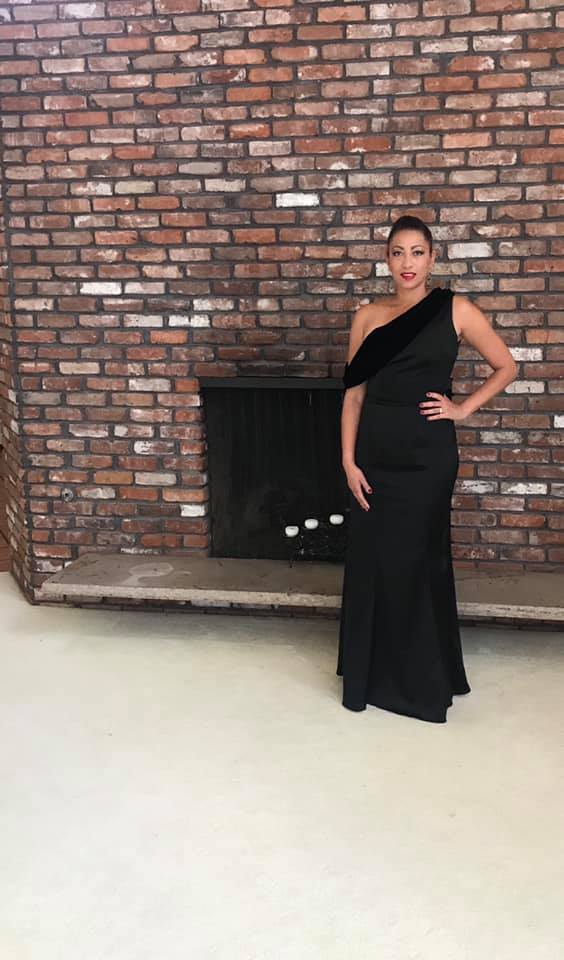
The wedding day was upon us! I was nervous about the dress and hoped and prayed that she was happy and loved her gown. It turned out to be really lovely and it looked so beautiful on her! The silk was just SO lustrous and flowed beautifully as she walked and danced with her new husband.
Success!!
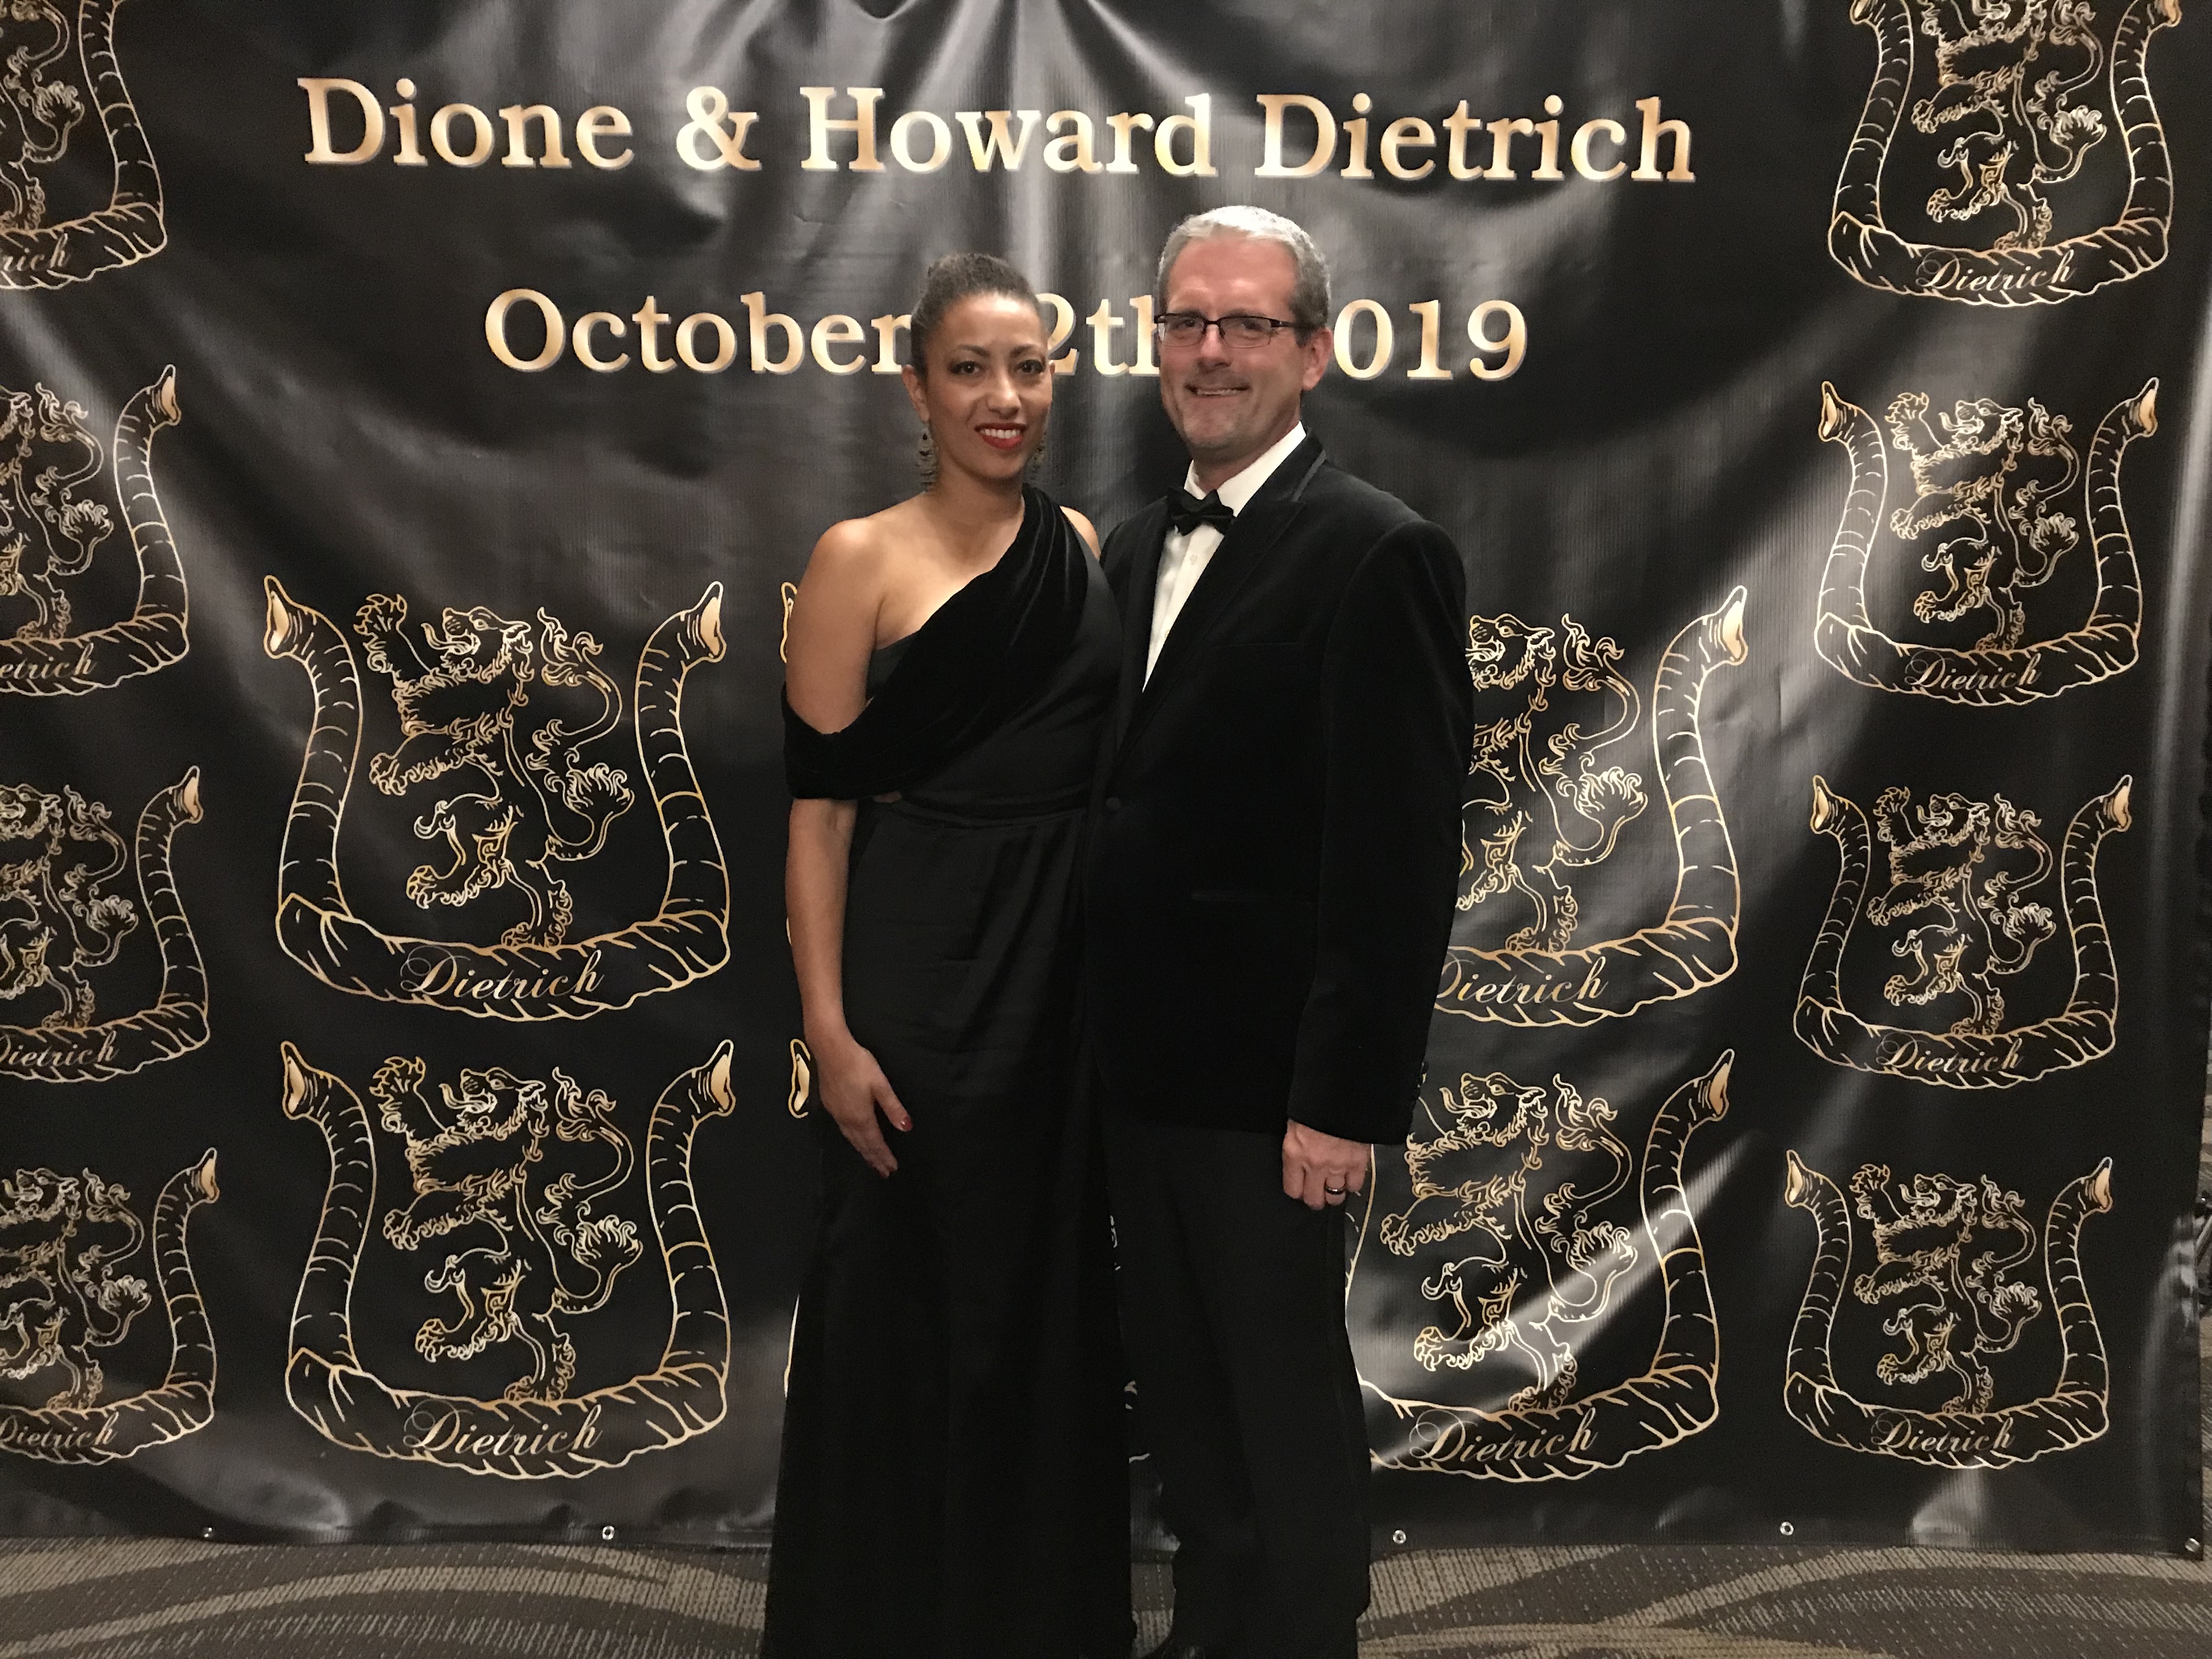
I had the idea to make him a little matching pocket square out of scraps of her dress fabric which she was delighted to give to him during the ceremony. So cute!
I am so in love with their love and simply honored to have such a big part of their wedding ceremony. Thank you Terri and David! Congratulations!!!!
I made up this pattern in my Advanced Pattern making class that I have been taking at Portland Fashion Institute as a part of my first collection for my label Love, Stephanie.
I got about 4 yards of a lovely silk twill-like material that had just the right amount of drape to it without being sheer or flimsy.
I love how easy and free-flowing this jumpsuit looks and feels:
It was a fairly easy design to create. I made a cross bodice top with a back zipper opening, drafted a long sleeve with a wider sleeve hem, made a wide leg palazzo pant, and sewed them together at the waist and added elastic. I then whipped up a simple sash and tied it loosely at the waist Boom! Done!
I have been admiring the whole jumpsuit trend and have been saving up inspiration photos on Pinterest:
fashion blog for professional women new york city street style work wear
Jumpsuit with leather sash
Love it! I can now take what I have made and create different versions of it; narrower leg, sleeveless, halter top, all kinds of fun and fashionable looks. Sew exciting!!
Thanks for stopping by and stay tuned for more custom designs from me!
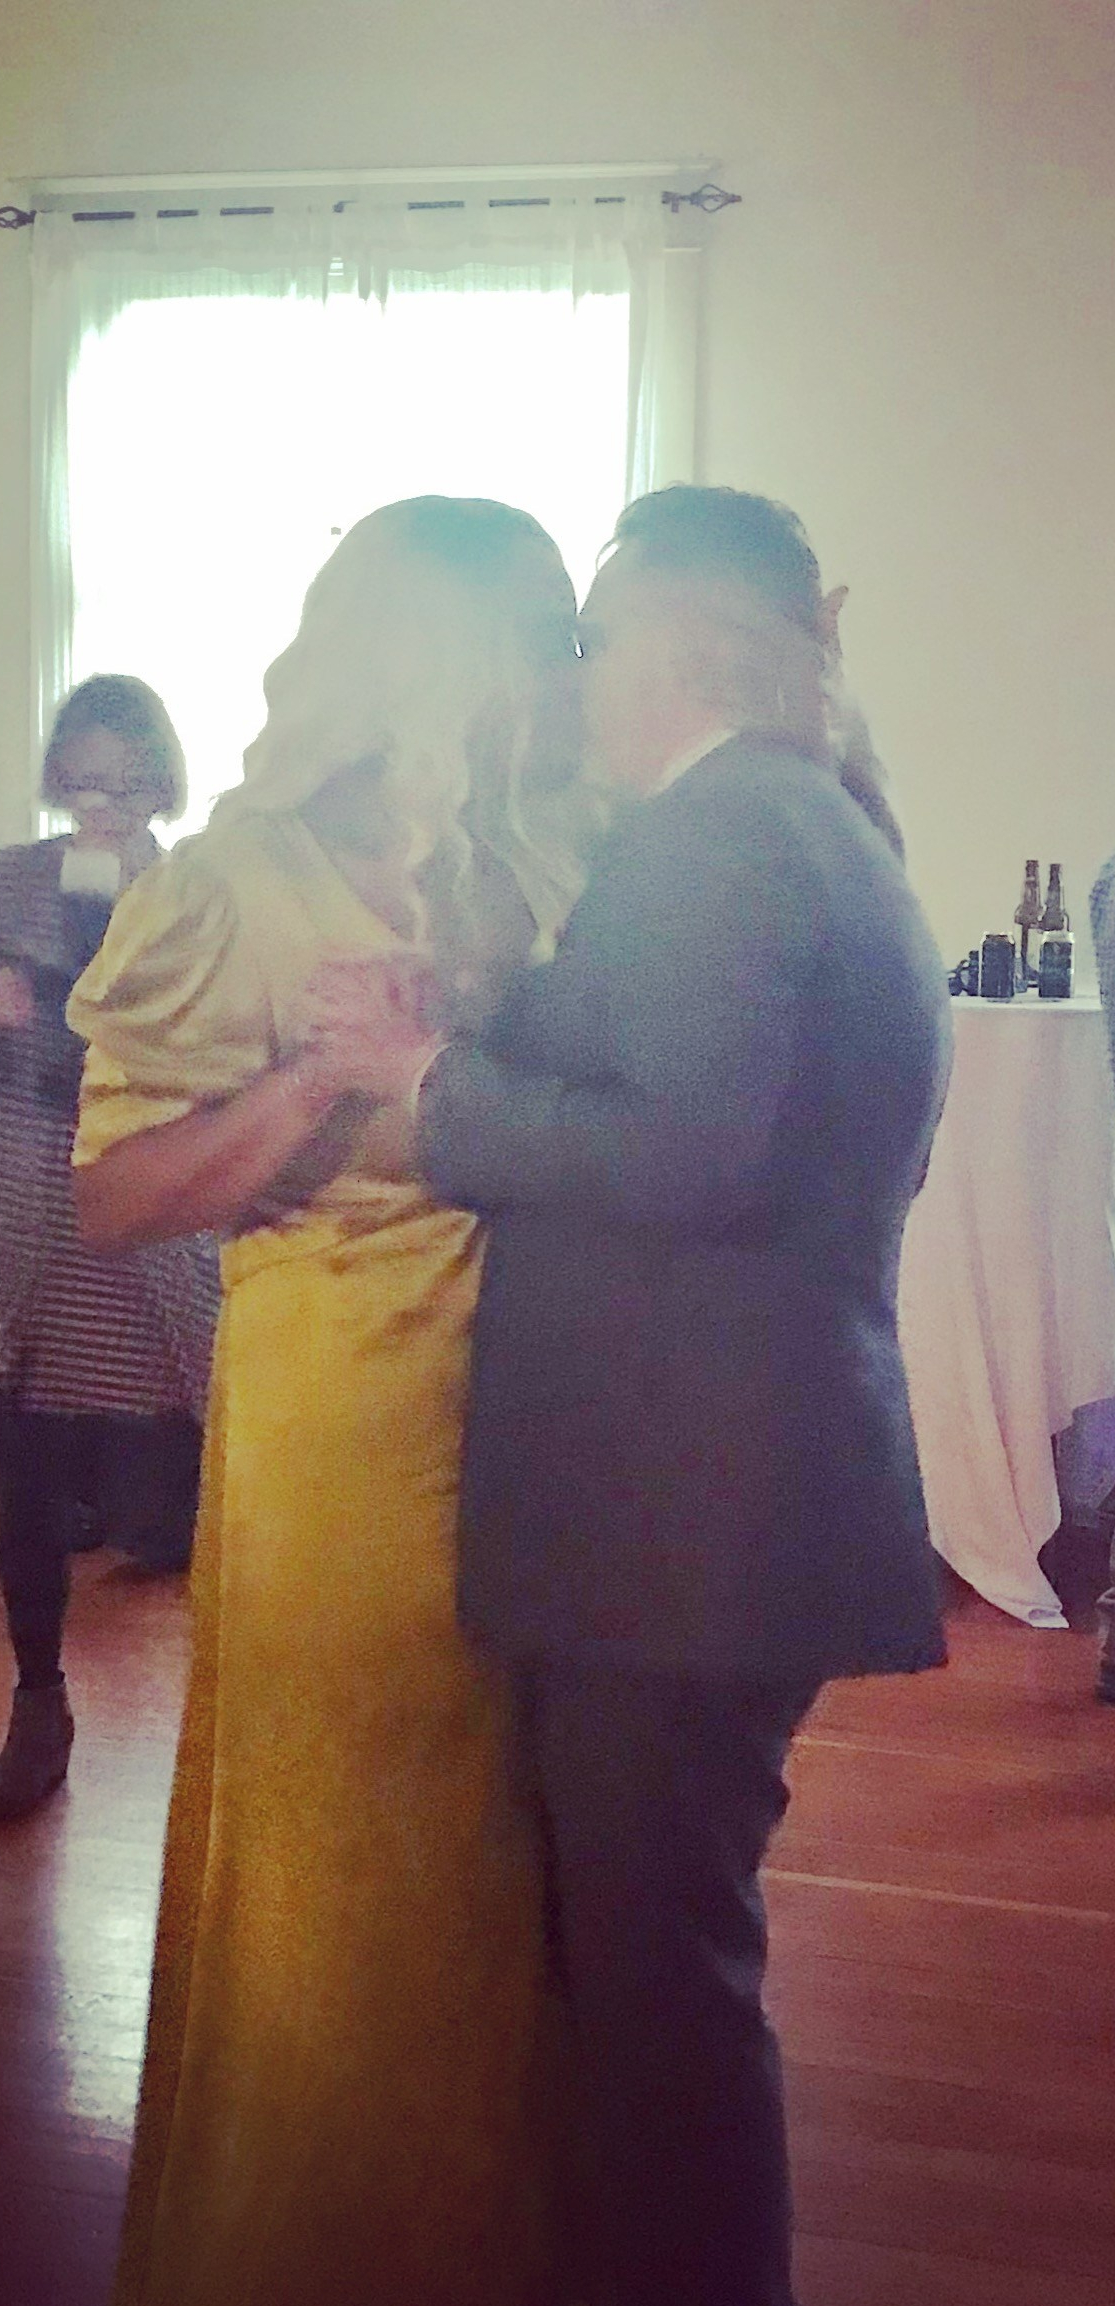
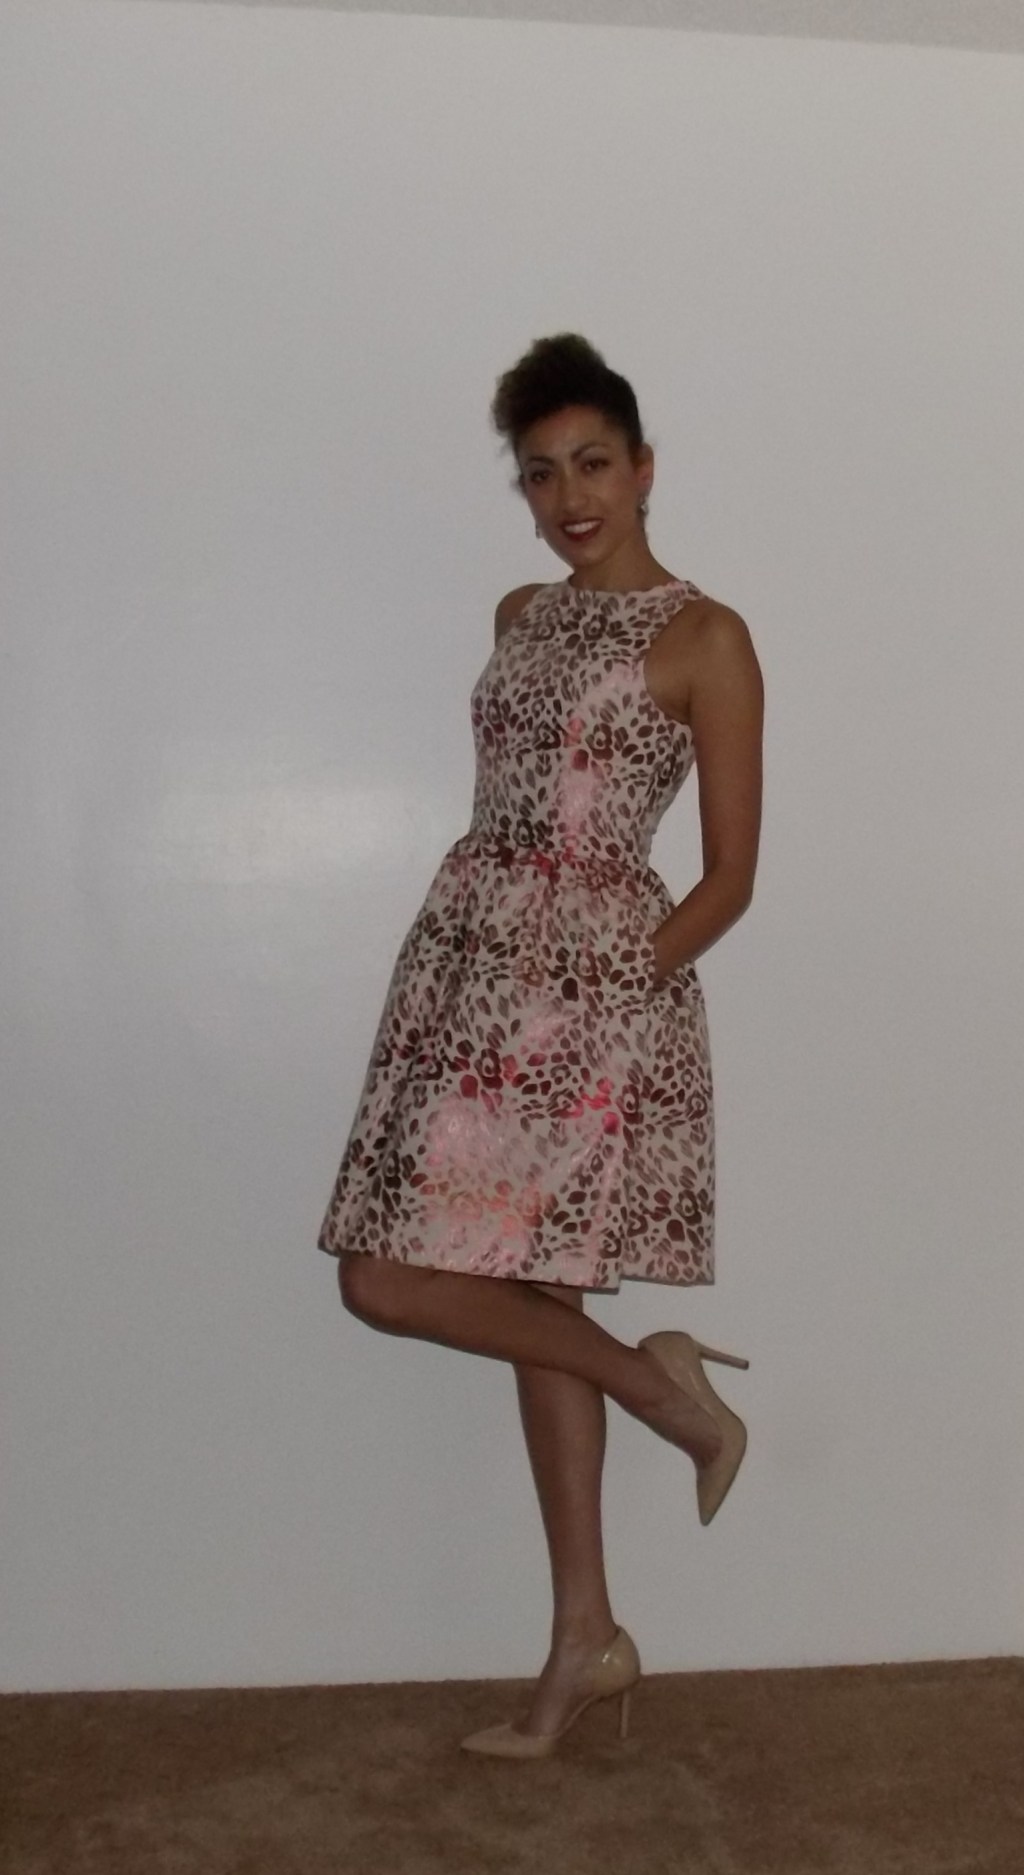
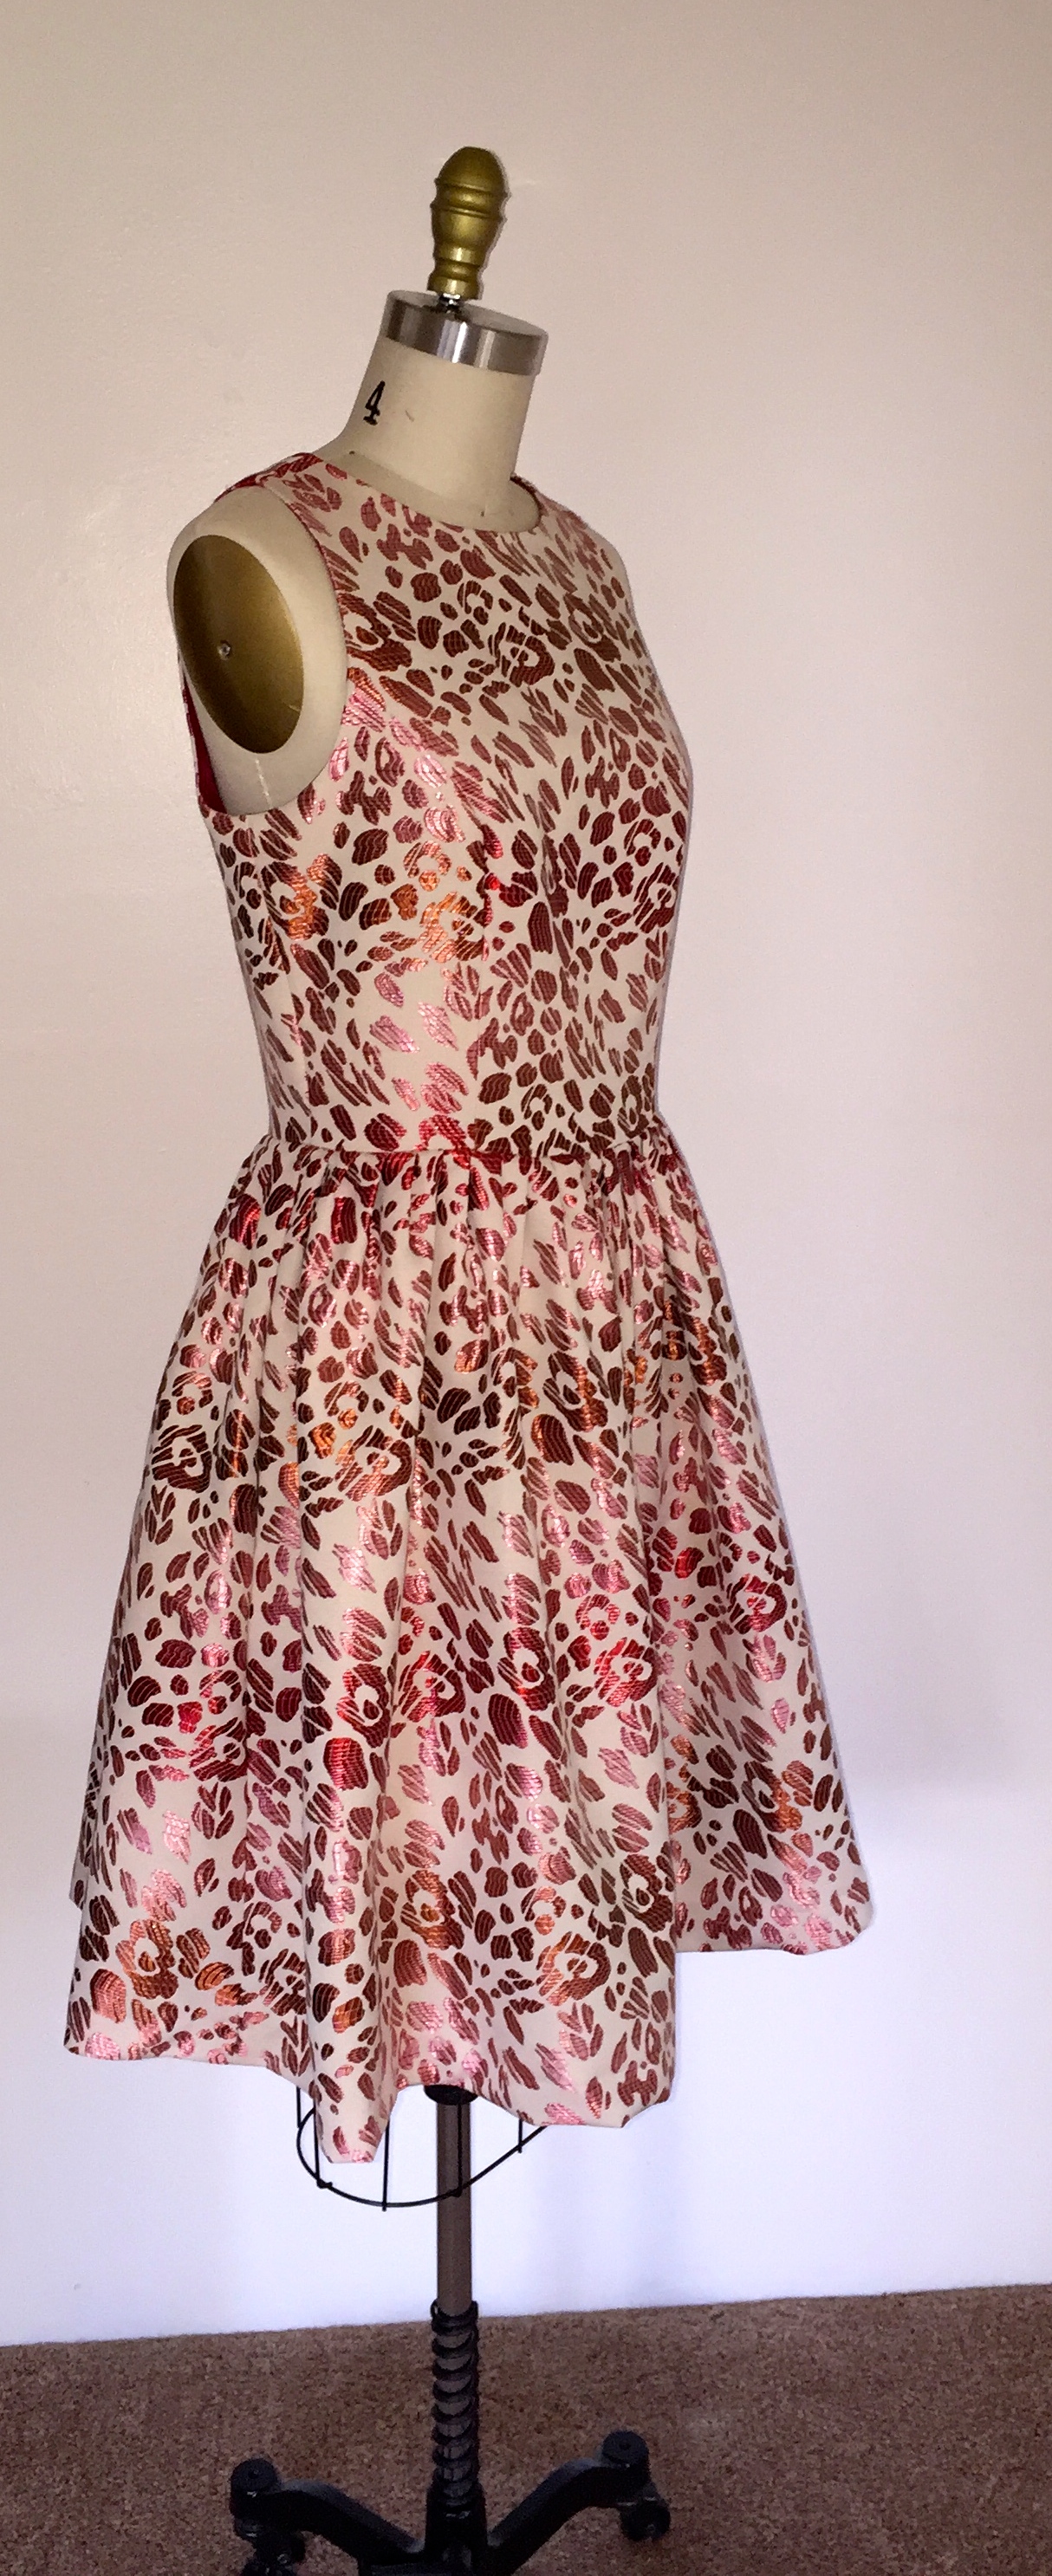
I love this dress! I thought it would be too poofy and make me look bigger than I would like to look, but after wearing it, I was OK with the poof.
Vogue Pattern 1434 by Isaac Mizrahi in animal print brocade
I used Vogue 1434 to make this dress. It’s a Vogue Patterns American Designer pattern designed by Isaac Mizrahi:
V1434 by Isaac Mizrahi Pattern Cover
V1434 Pattern Envelope Back and Line Drawings
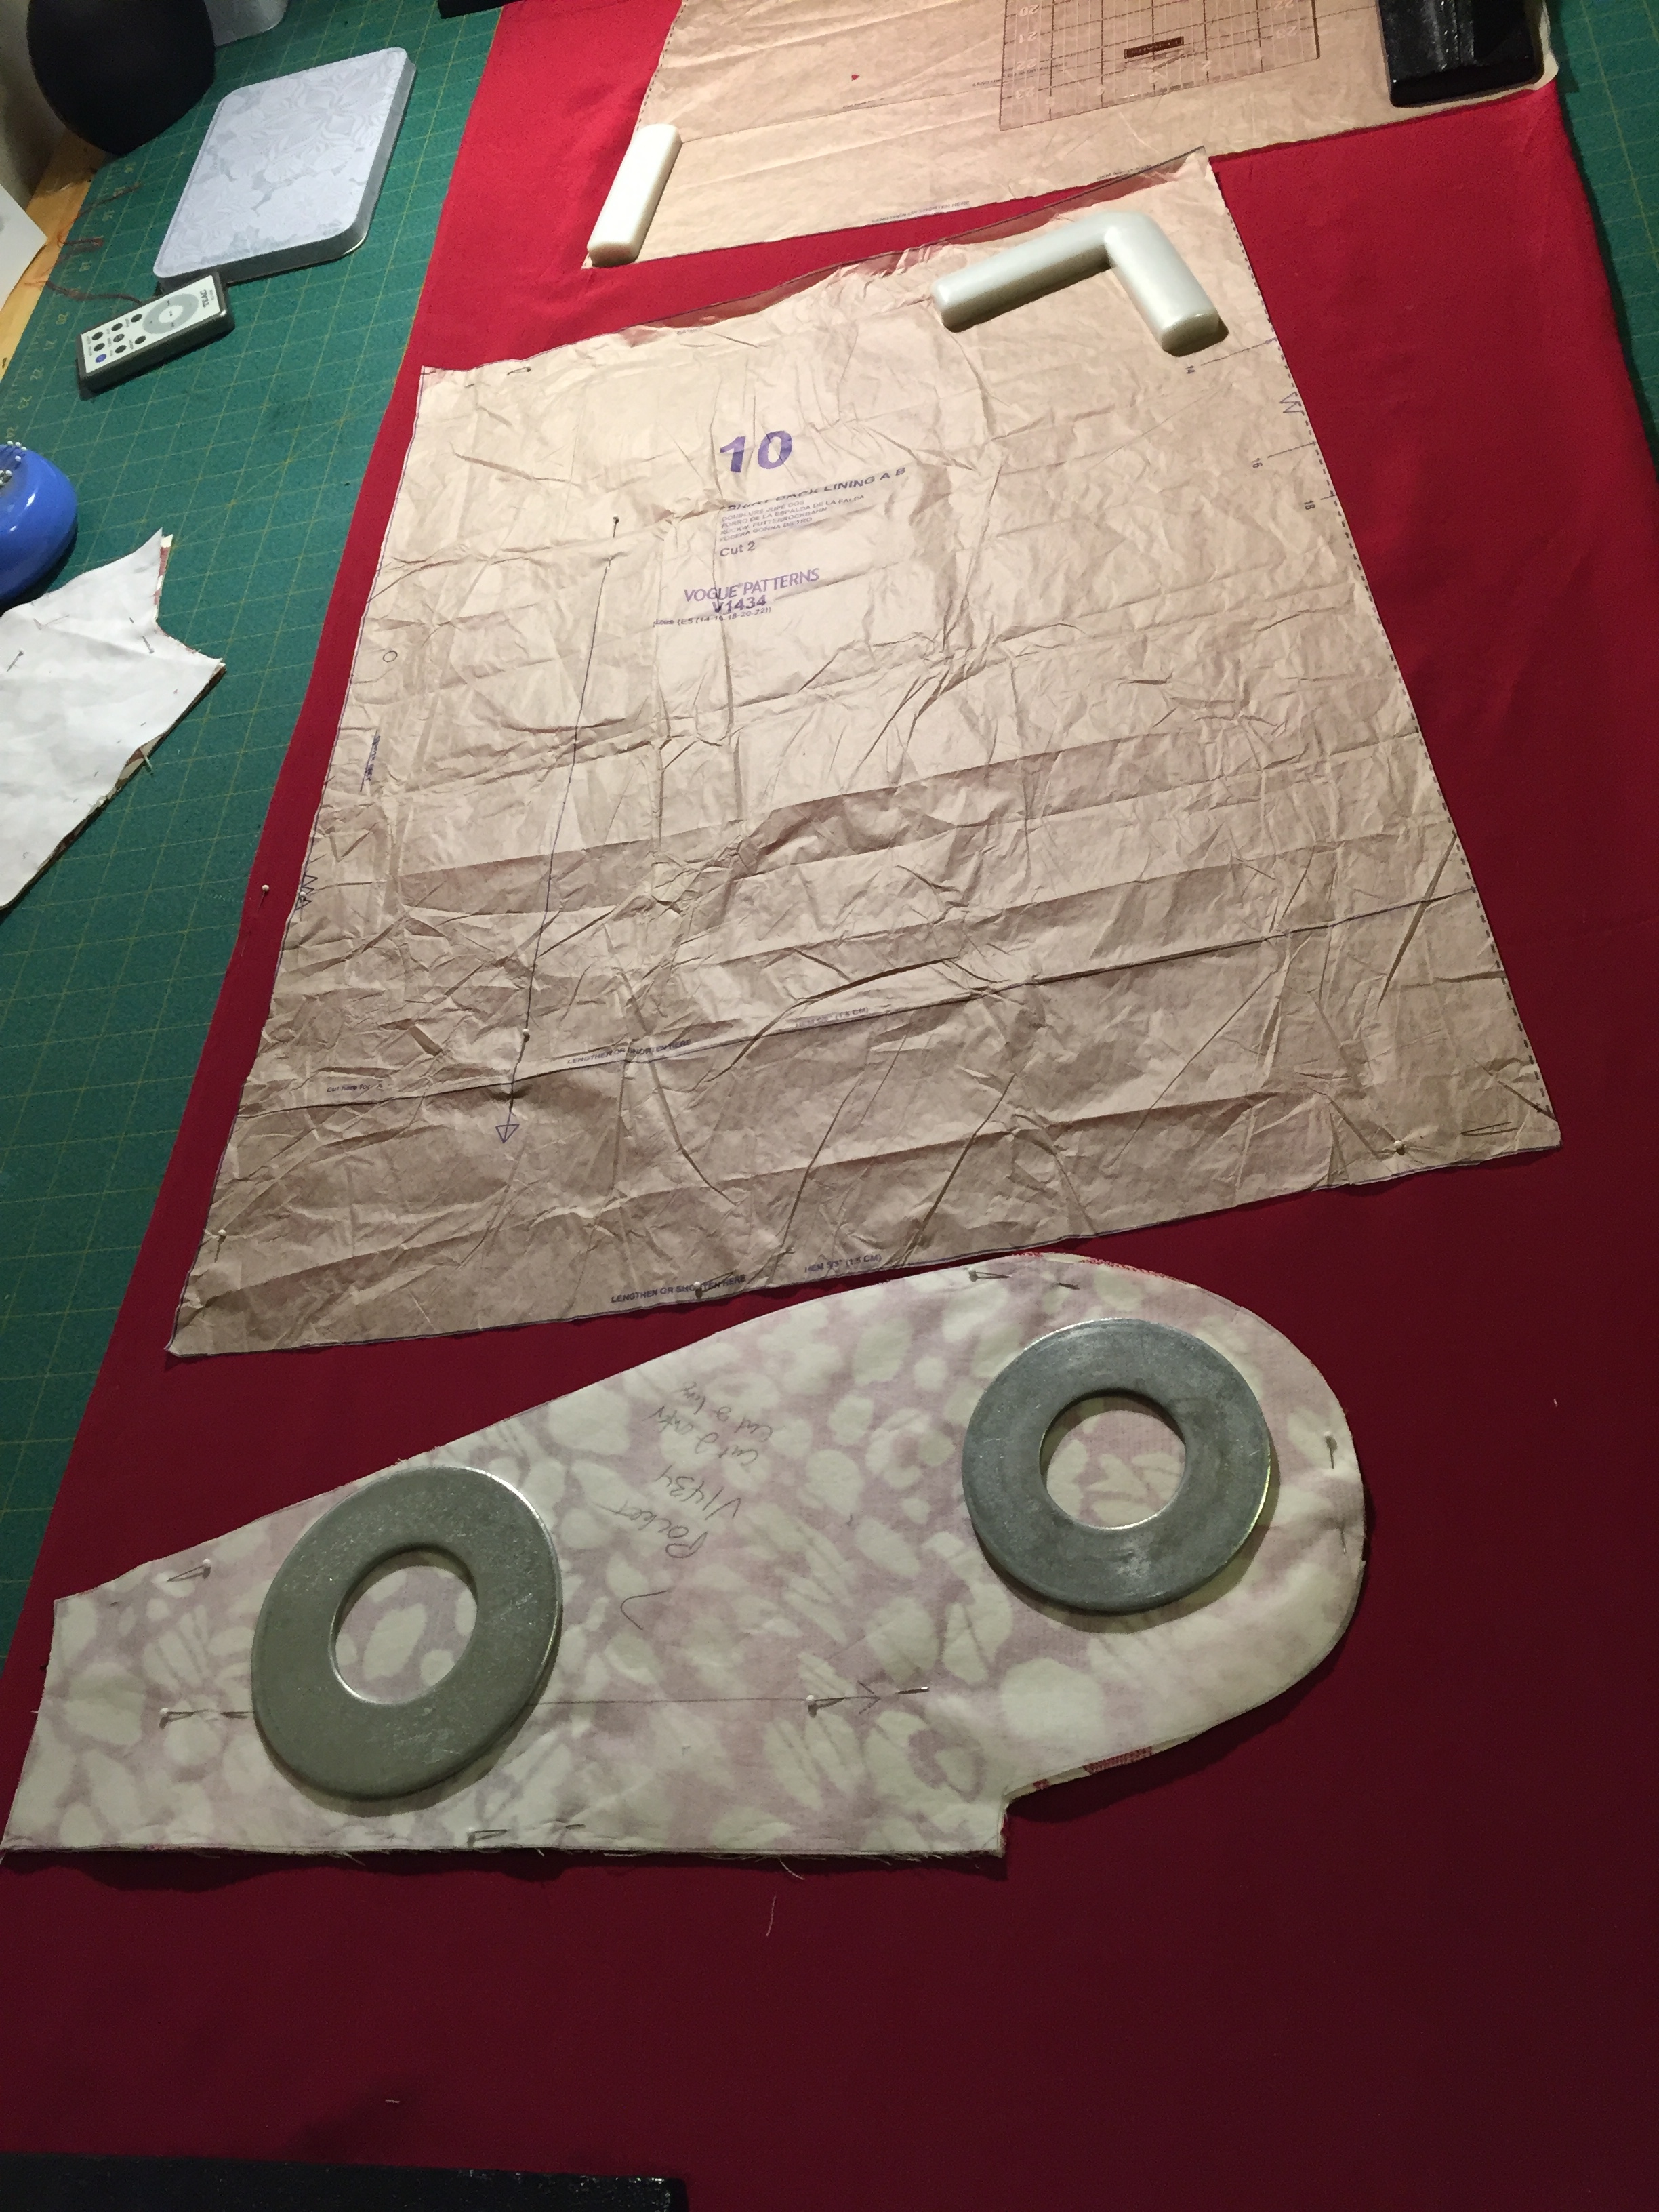
I cut out this dress in a size 14, making a fitting muslin of the bodice first, which took some minor tweaking at the shoulders and bust princess seams, but the fit was pretty great overall. I cut it from a beautiful Italian animal print cotton blend brocade in metallic cream, rose and peach shades from Oscar de la Renta I ordered from Moodfabrics.com:
Oscar de la Renta Cream/Wint/Rose/Peach Animal Italian Cotton Blended Brocade Fabric
Pattern Cutting the Brocade
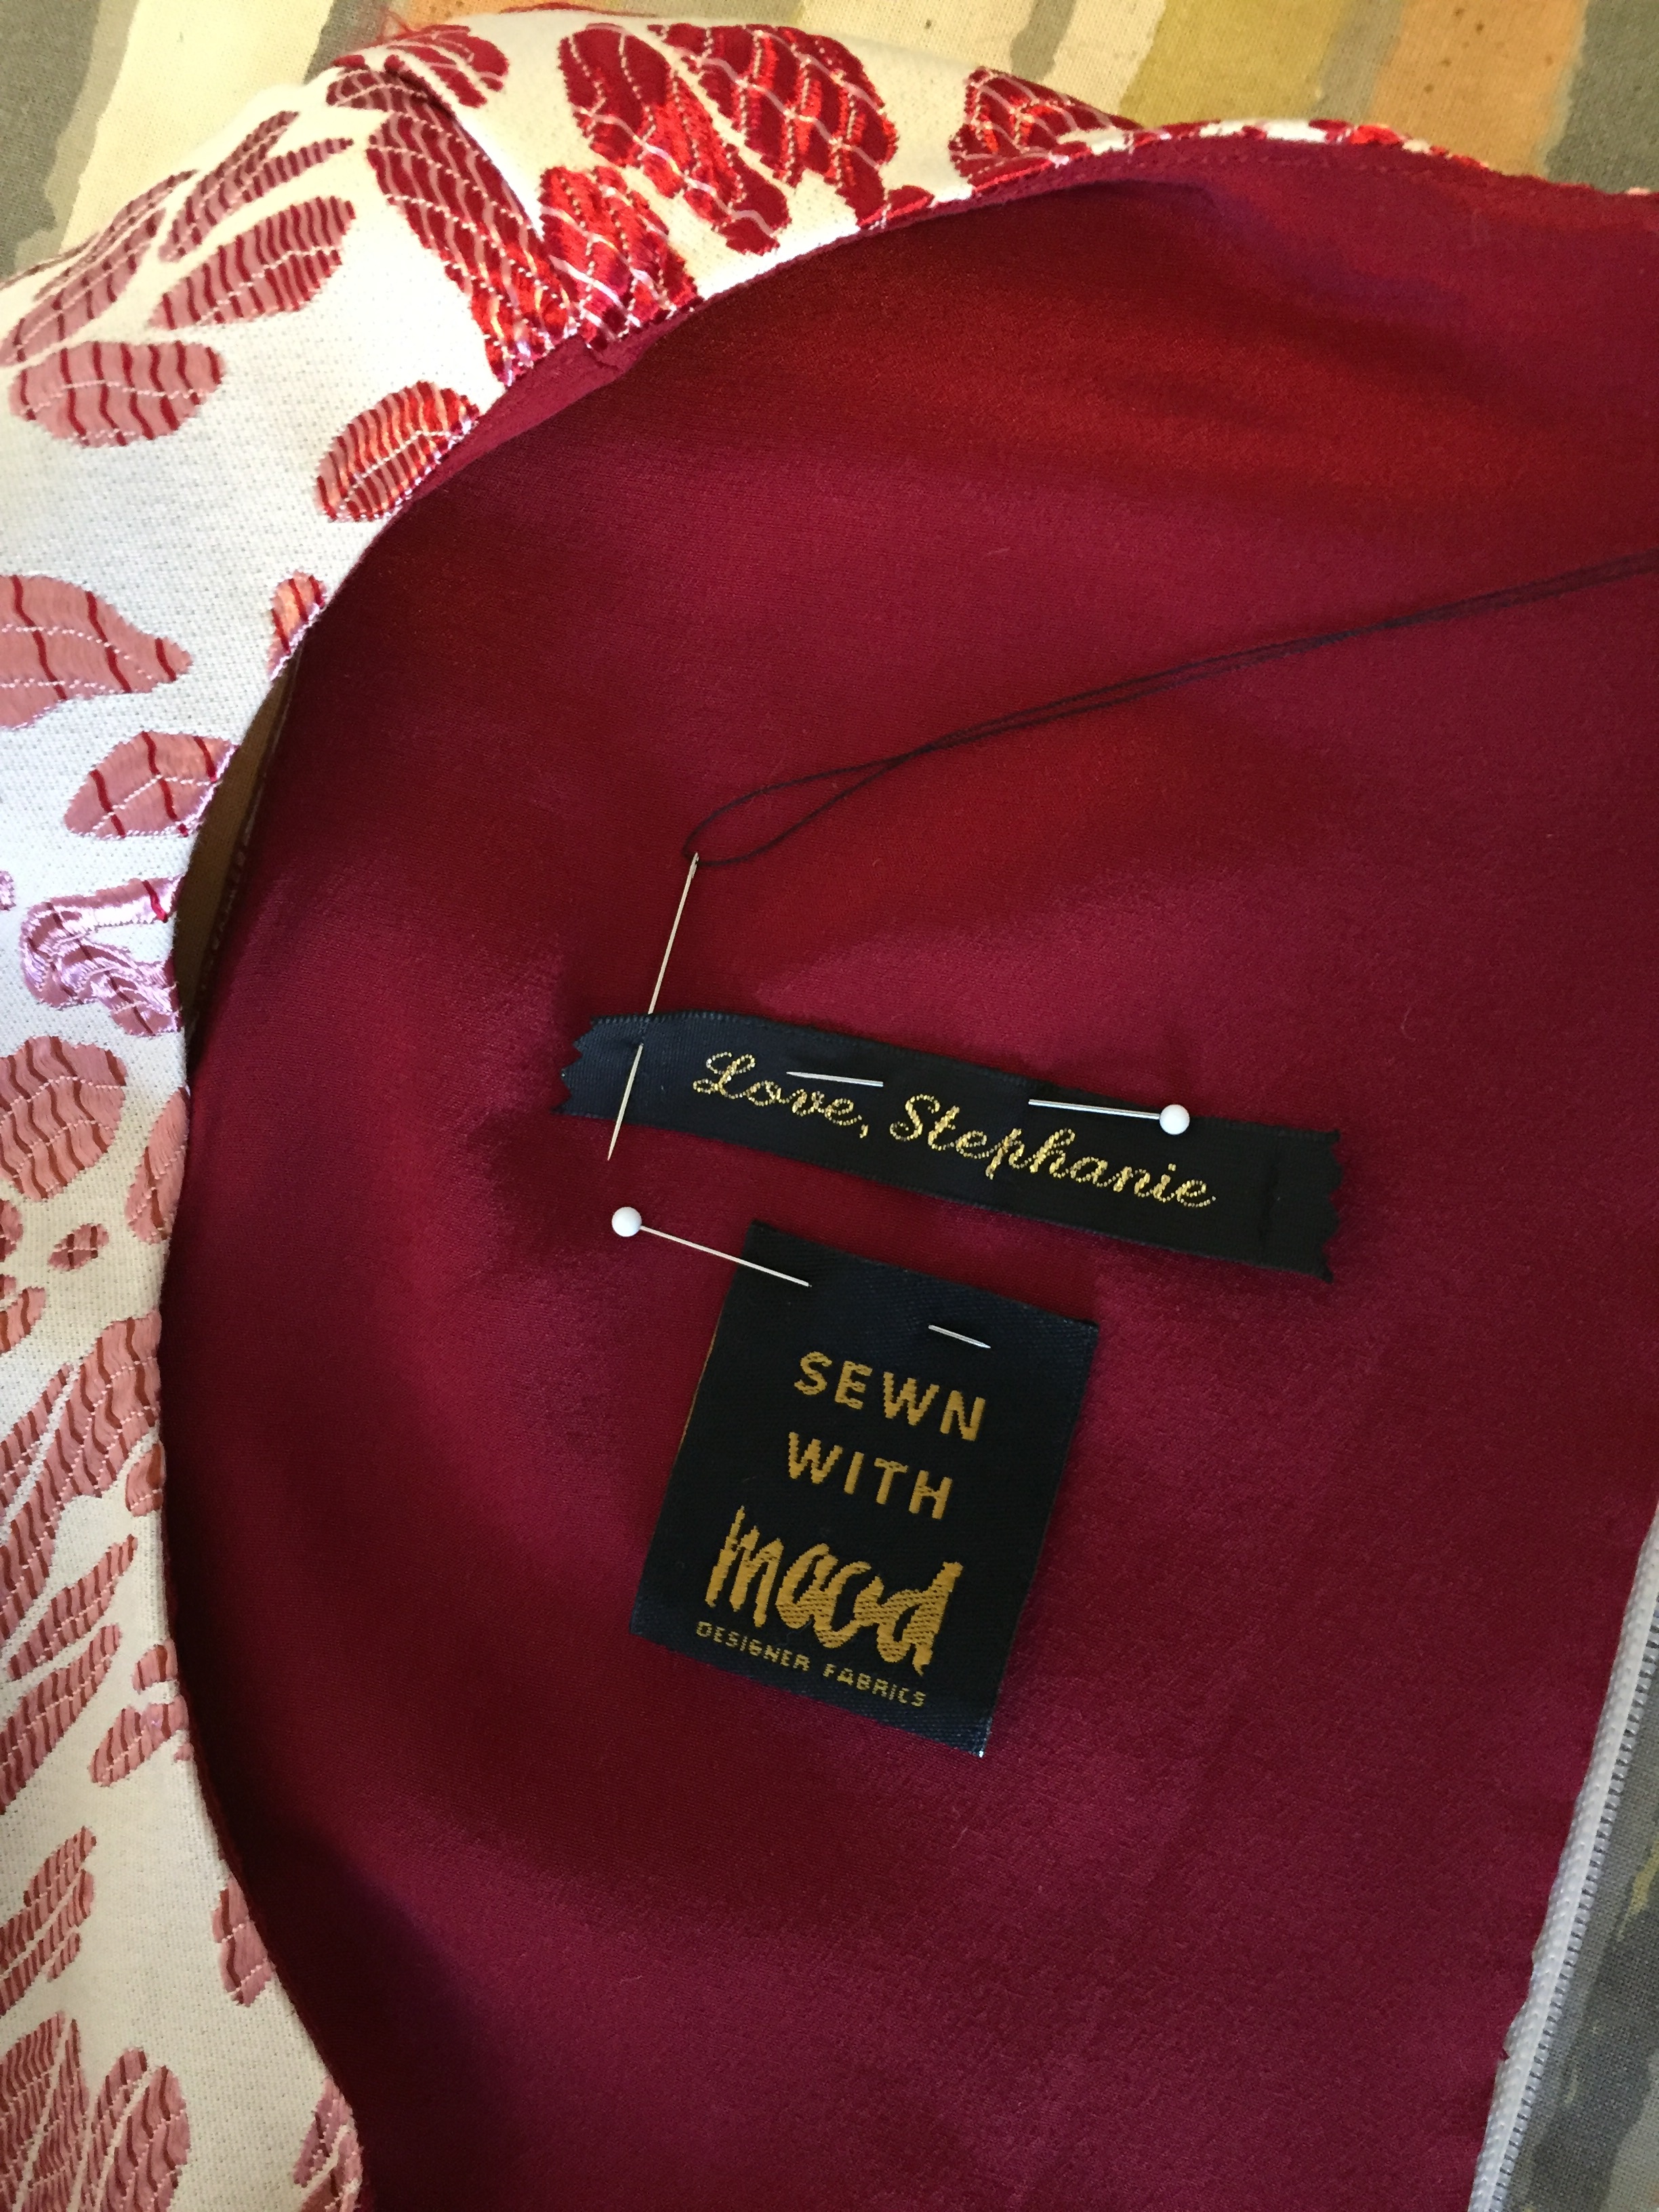
I had a nice red silk crepe de chine fabric in my stash that was just barely enough yardage to fully line the dress:
cranberry red silk crepe de chine for the lining
The dress was fairly easy to construct with a basic princess seam sleeveless bodice and full pleated skirt and deep pockets, lined by the same pattern pieces for the bodice and different patterned pieces for a gathered skirt lining.
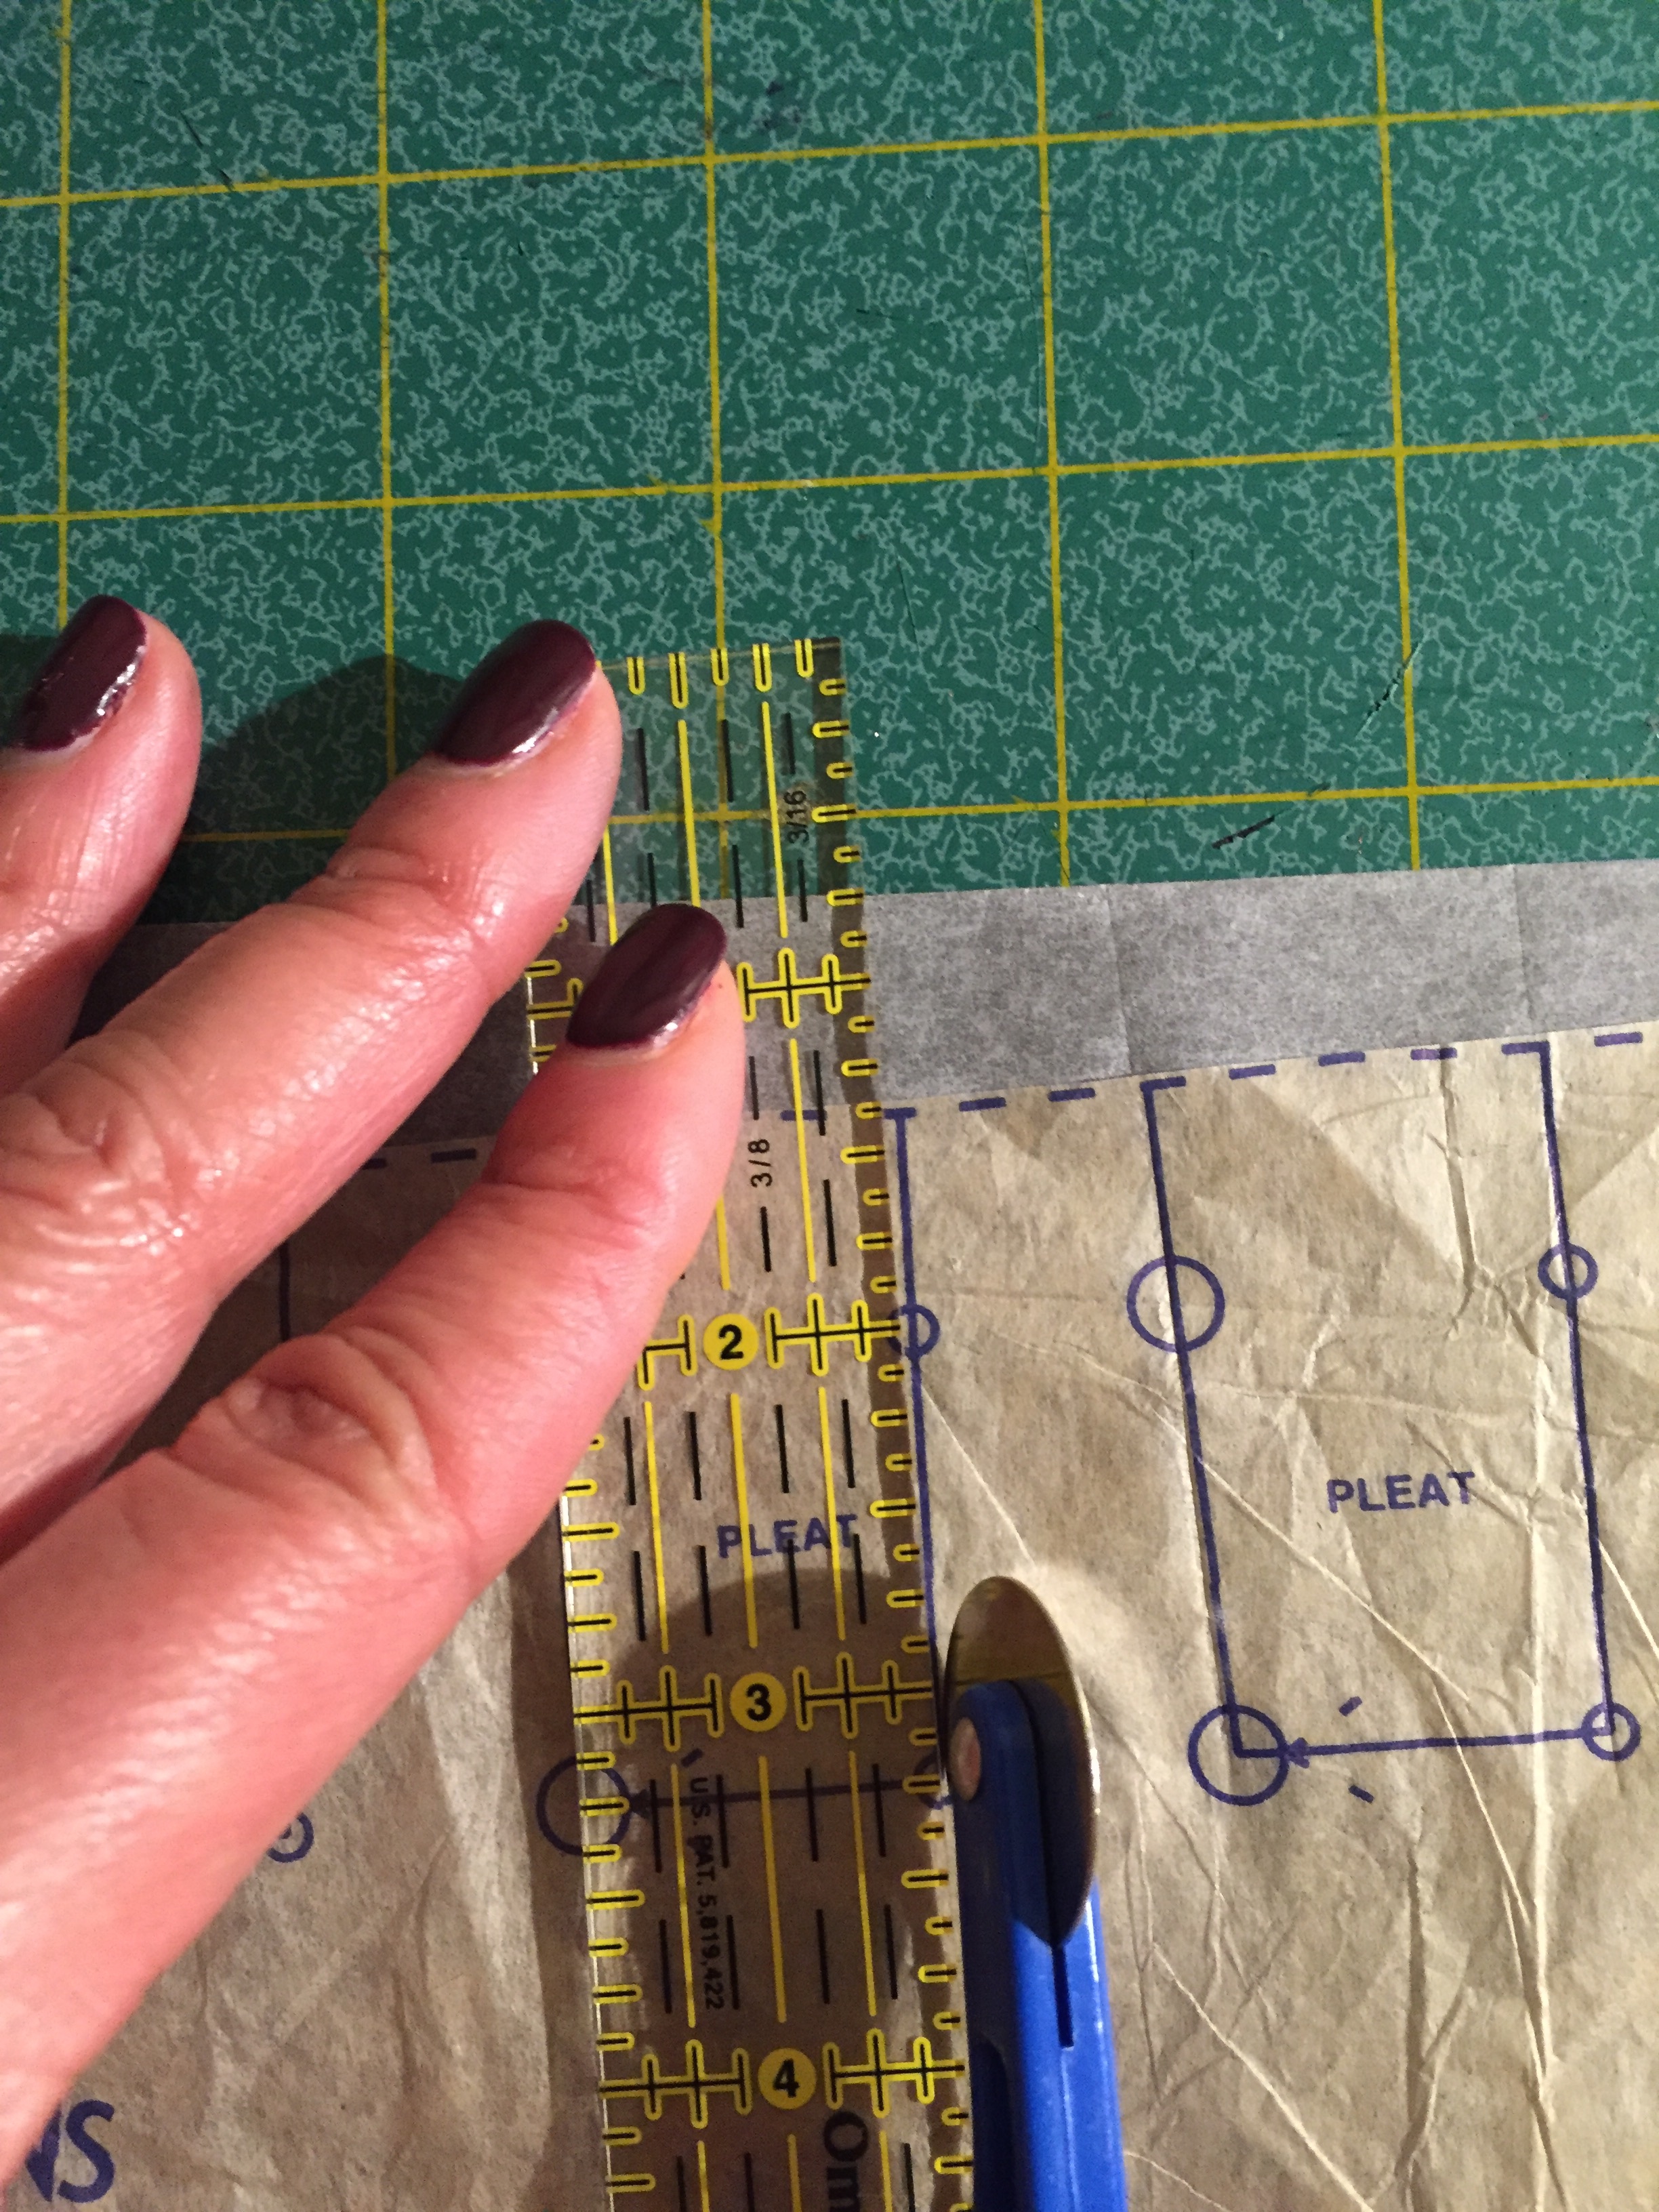
The most time consuming part was making the pleats.
I traced the pleat placement using the handy pleating guide included in the pattern pieces:
Pleat Guide Pattern Piece
I found that this would have been helpful had all my pleat tracing work had actually shown up and stuck to the brocade fabric once it came time to sew them. Instead, I actually held the guide up to my fabric as I pinned each pleat in place, then carefully basted them down:
Pinned and Sewing Pleats
This took the most time and attention, but it was worth the work!
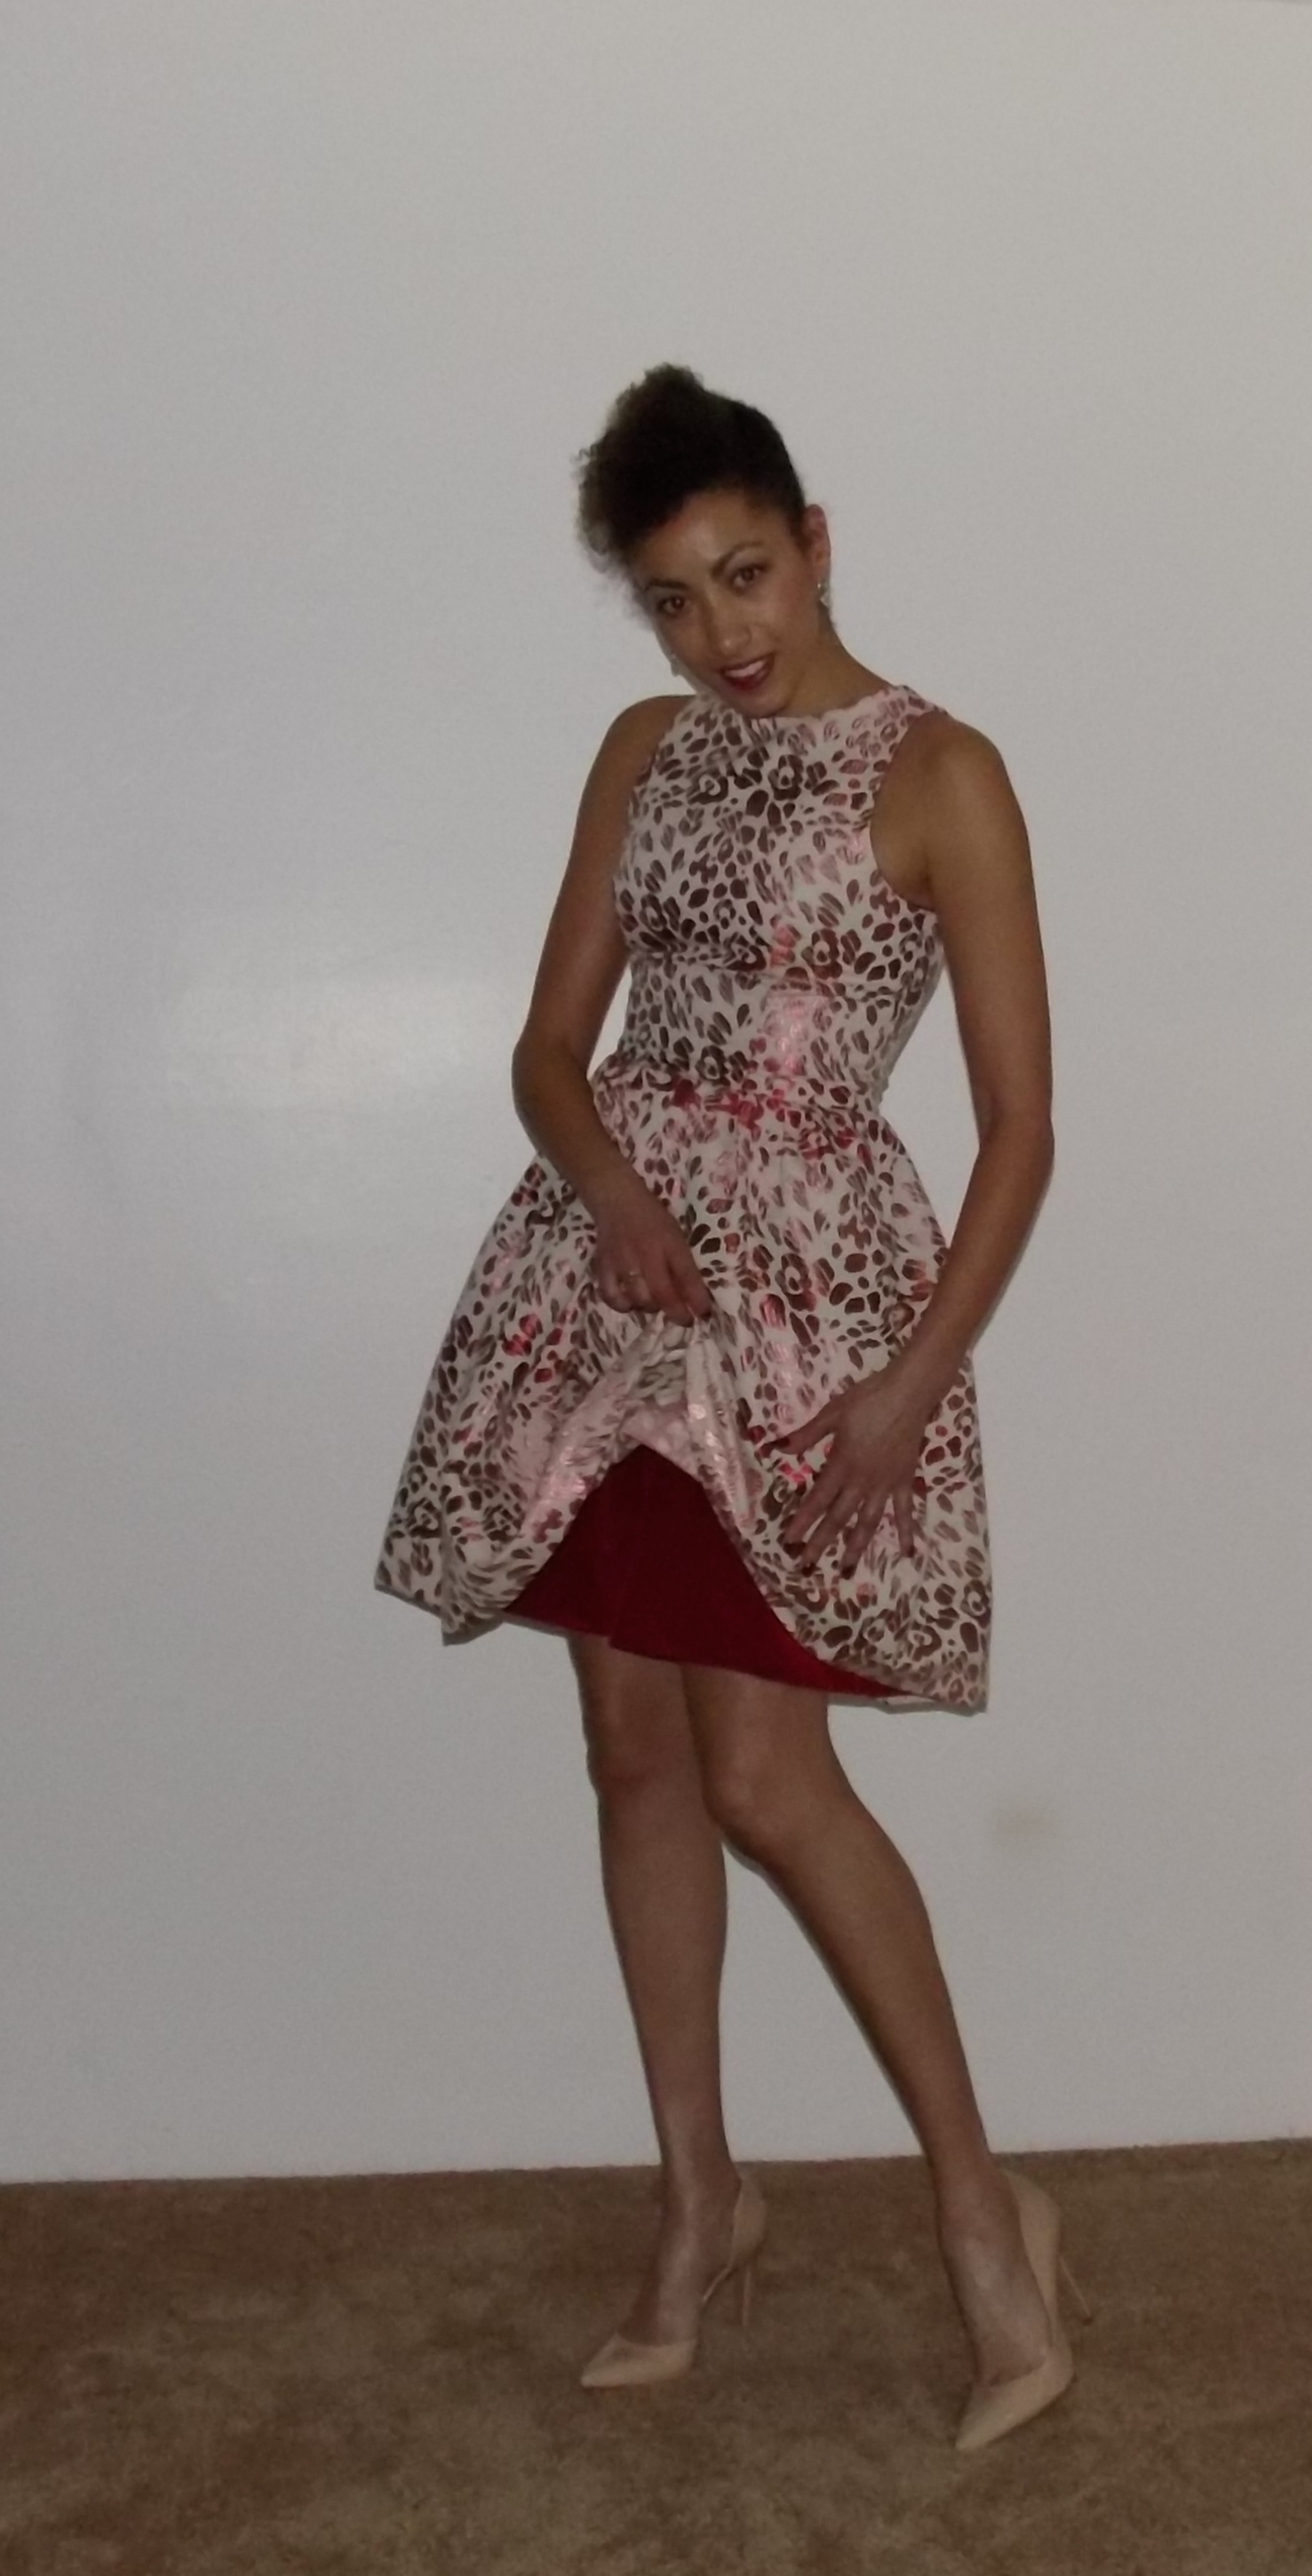
finished dress!
I love how the lining turned out, accept the fact that I didn’t take the time to make French seams on the skirt as the inside of the lining could show my mistake or if anyone looks at it throughly inside and out. Oh well, I might just pink the seam edges so they don’t fray.
Mood Fabrics even sent a little label with the fabric that I sewed into my dress below my Love, Stephanie label. Oh, the little things make all the difference!
Labels Pinned and ready to Hand Sew Into Lining of Bodice
Lining of Bodice with Labels
this dress is fully lined in red silk crepe de chine
This dress was a huge hit at the two little holiday parties I went to Saturday, and I plan to wear it to another party on Sunday! I even met a woman who wants to talk to me about making some custom dresses and apparel for her! Plus, friends of mine have been dying for me to make them something custom, and we have some really great project ideas in the works! So exciting!
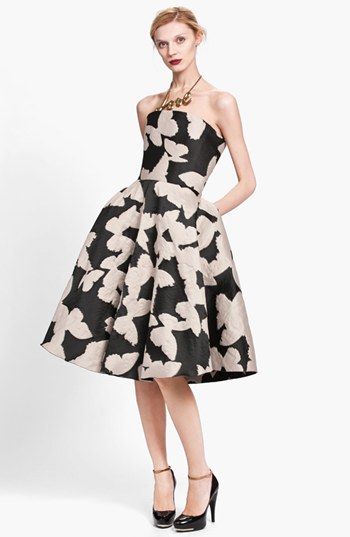
I was going for a dress inspired by these dresses I pinned on Pinterest:
Eliza J dress at Nordstrom
Lanvin Jaquard Dress
It is so very cool to be able to make my own clothes, and then wear them and “sell” my work to others!
The Deep Pockets are Wonderful!
Love My New Dress!
Merry Christmas, Happy Holidays and and Happy New Year to ALL!!! MWAH!!
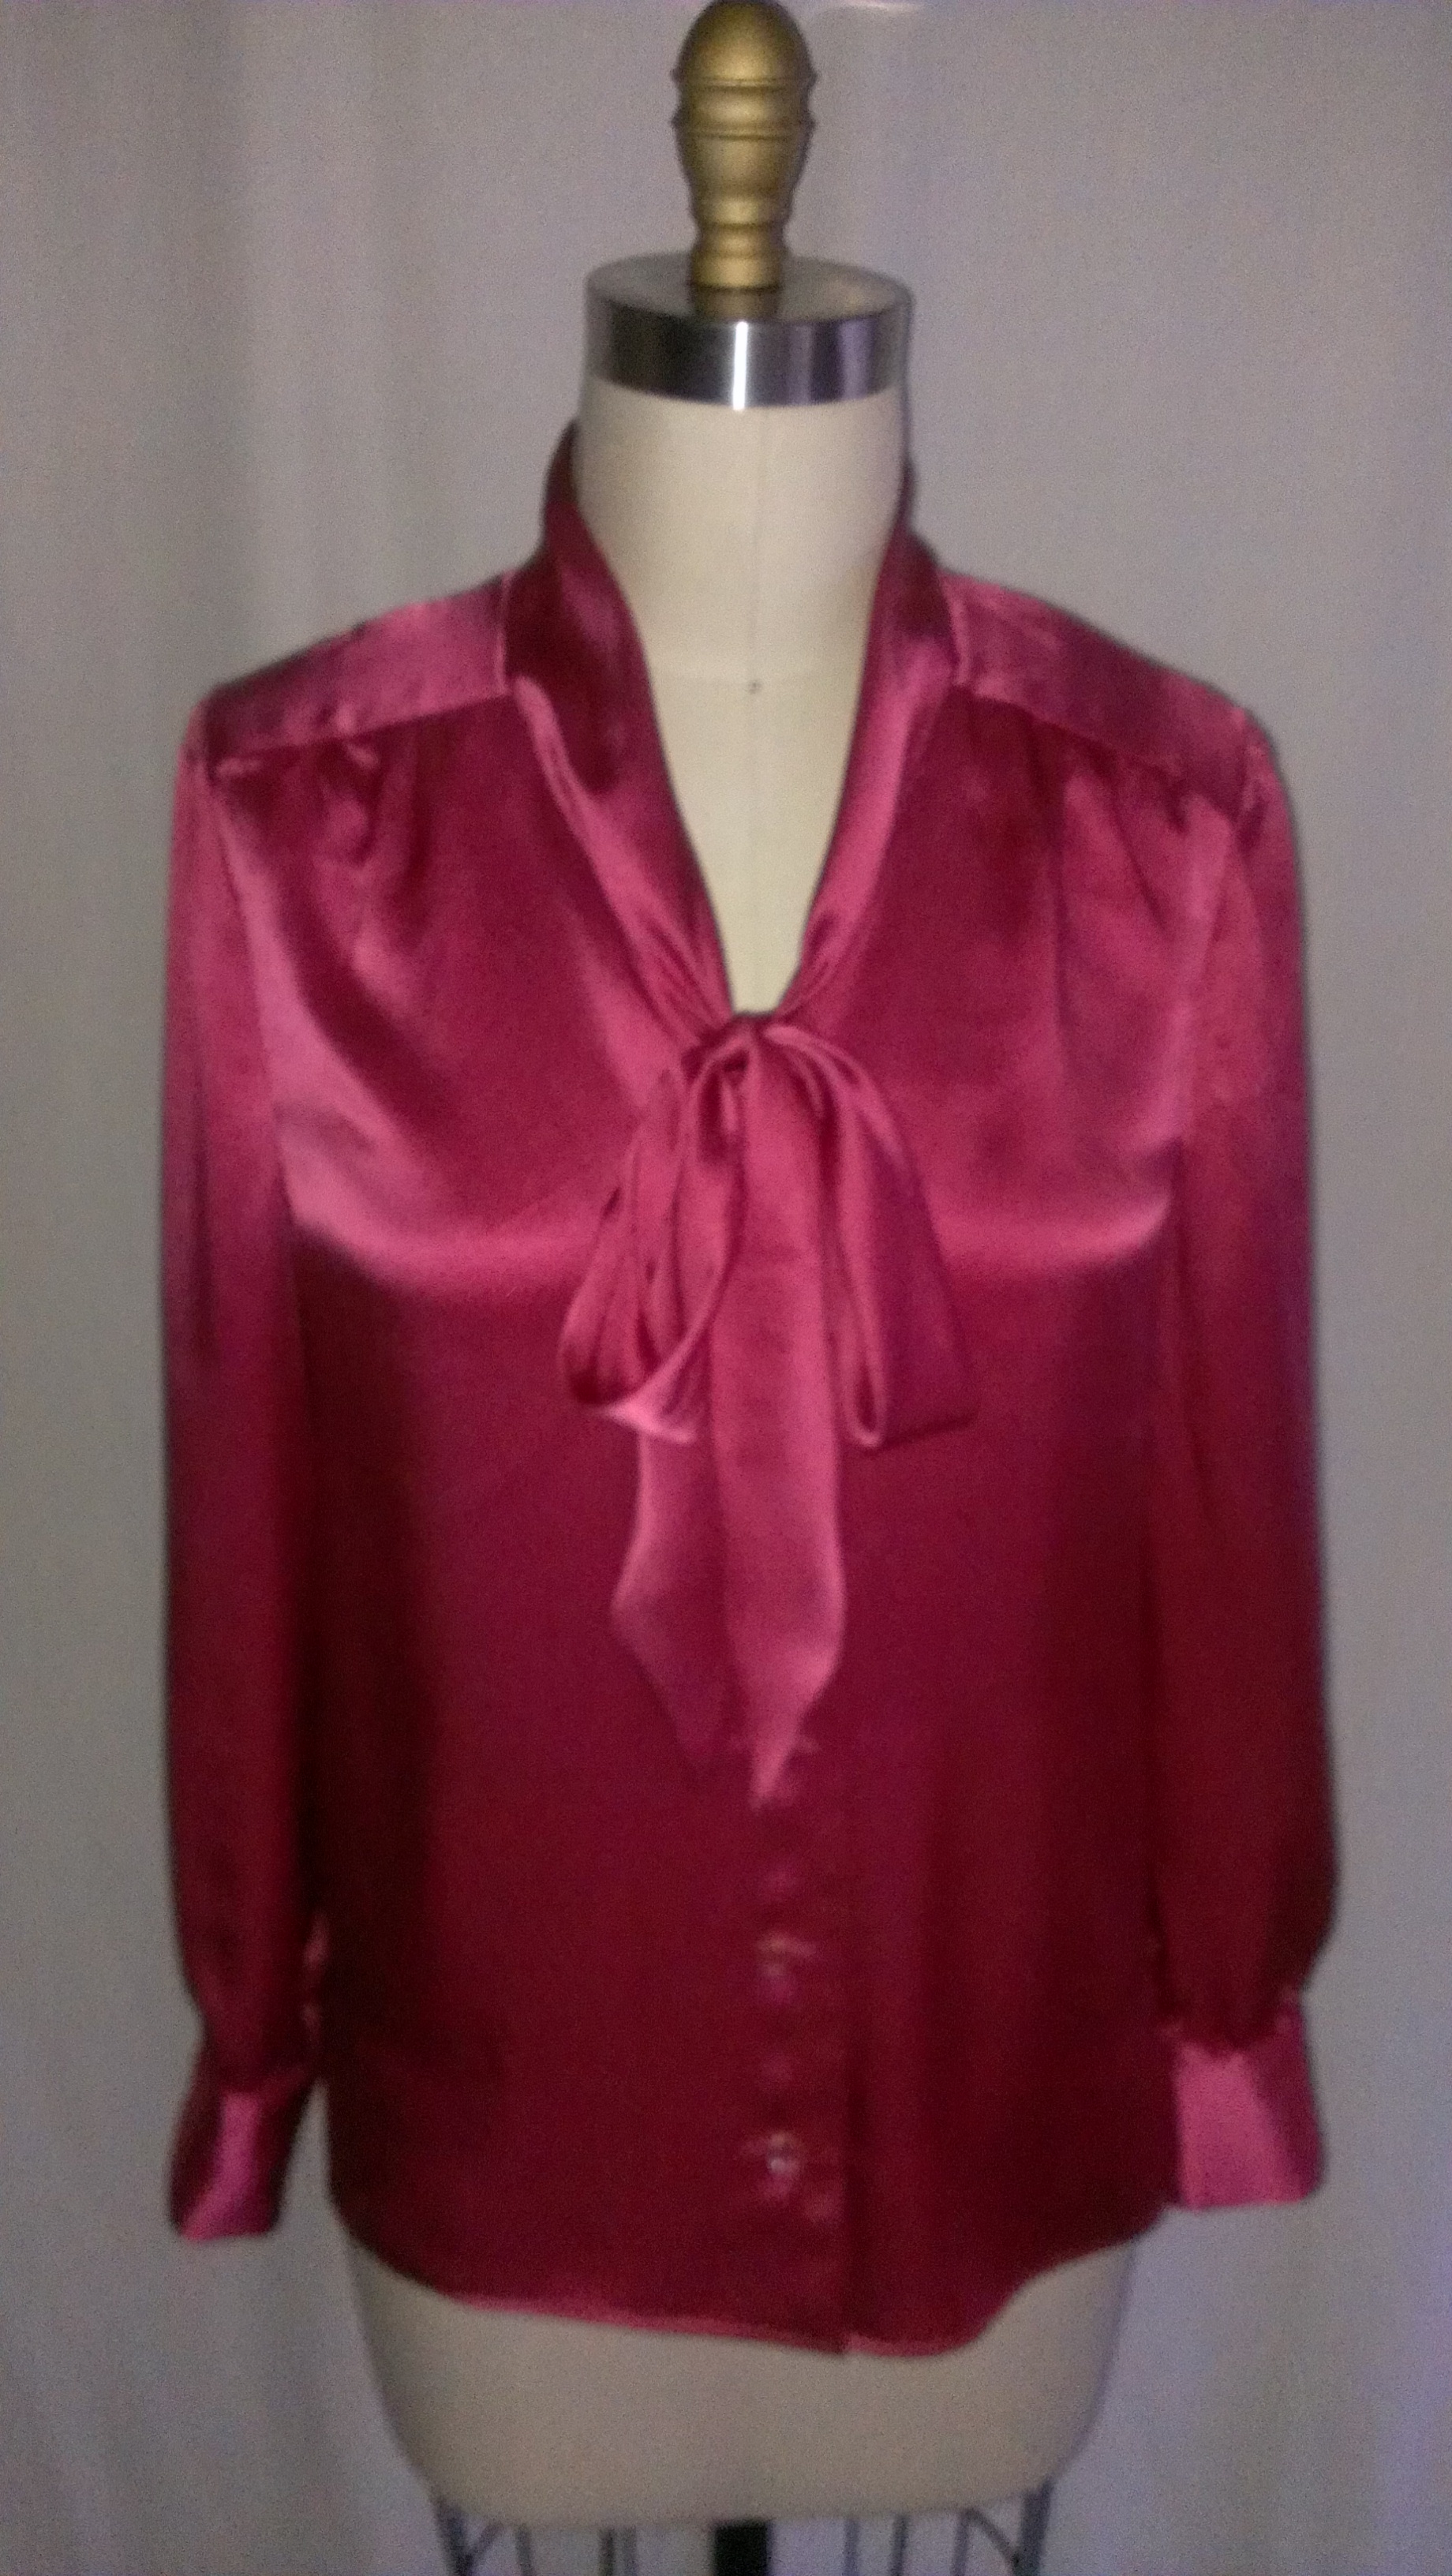
OK, maybe these tie neck or “pussy bow” style tops are old school, maybe they are haute couture. I don’t know for sure. All I know is I love them. And, I know that I will make them over and over again, until I cannot bare to make any more:
This beauty I made for my stunning brunette friend (you know how you are 🙂 ) as a gift. I have had this pinky/coral colored lustrous silk charmeuse for about two years now, keeping Her in mind to make a top for. I finally had her body measurements (I measured them for her on Thanksgiving 2014 before dinner), and figured she would look really nice in a lower cut, tie neck blouse, in a favorite color that she loves, not to mention looks really pretty on her.
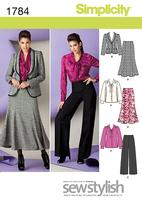
I used Simplicity 1784 pattern, view A, to make this blouse.
Simplicity
I ran out to Button Emporium to find some pretty , unique, and special buttons to use for this top. I found some lovely German Word War II-era pink glass buttons and grabbed up enough, plus extra, to button up this beauty.
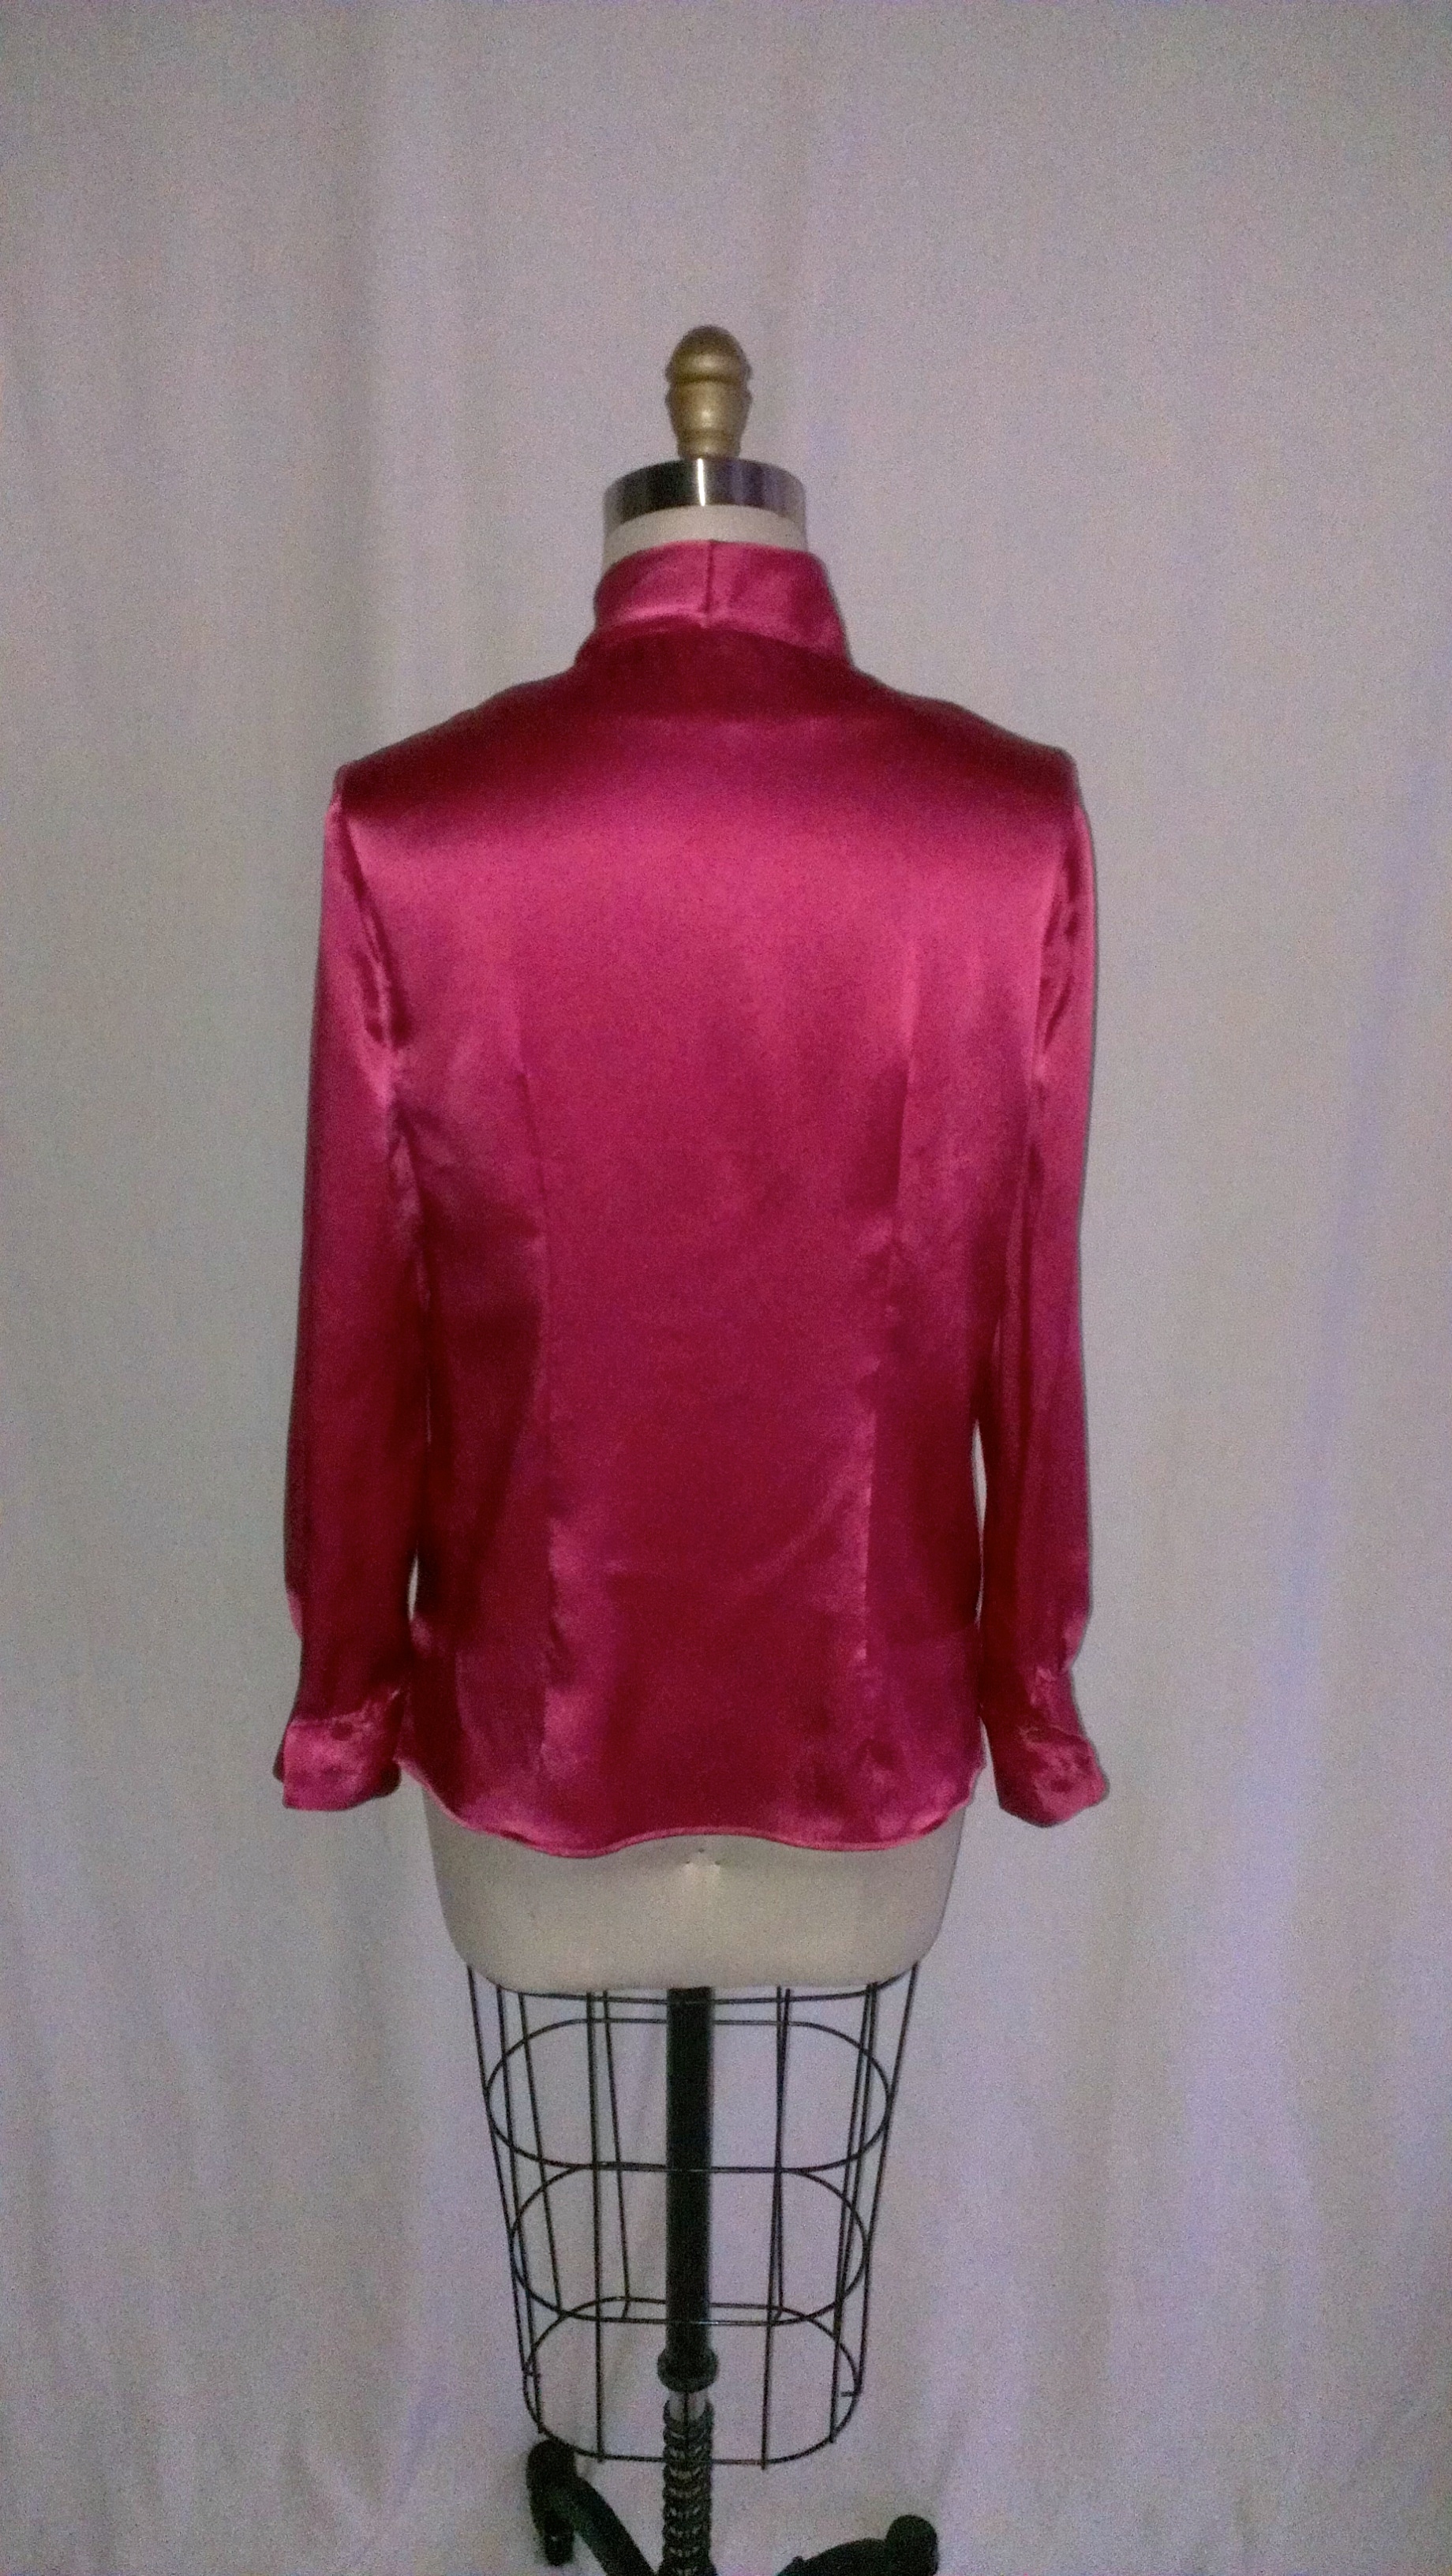
Buttoned barrel sleeve cuff
Front buttons of blouse
I attempted to make this top as nicely as I could. I used French seams for the side, sleeve and armhole sleeves, plus hand stitched the interior of the cuff and neckline seams. Next time I make this top, or any top like this, I will not use fusible interfacing, at least not in the neck facing, because it left the facing a little warpy and stiff, plus it shows a little. I will try a silk organza, or the self material, for any interfacing parts the next time.
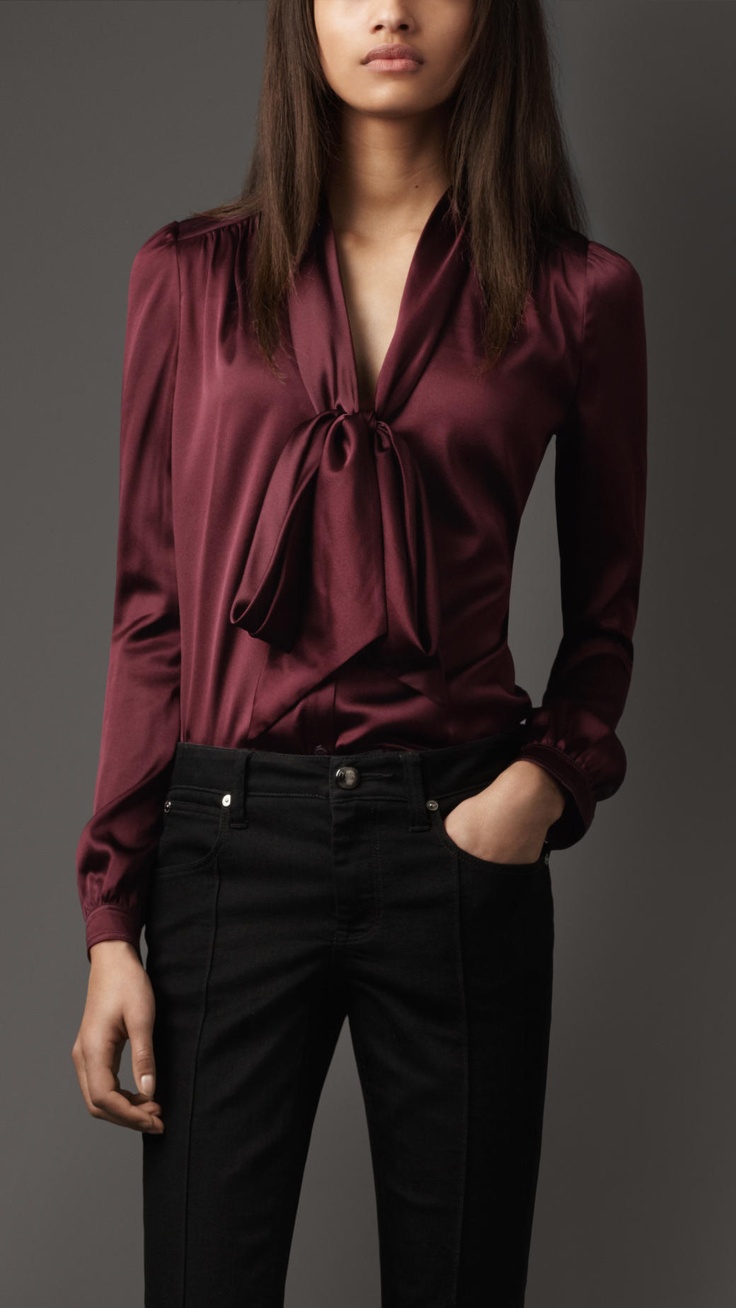
I have seen, and Pinned, several tops and blouses lately, that were an inspiration for this creation:
I hope that She loves and enjoys this top and can wear it for many years to come. Who knows, maybe she will commission me to make her more of these, or similar ones, to add to her wardrobe and wear for the future. I would LOVE to do that! For Her, or anyone else who would like that. And who can afford me too 😉


 Ahh, sweet, sweet love!


 Simplicity


